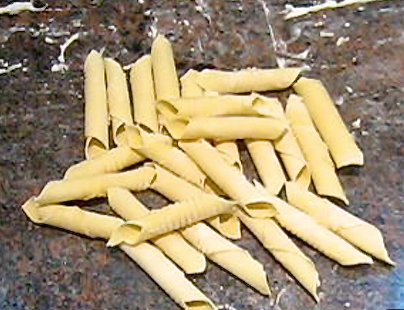
Penne with Vodka-Cream Sauce

Pennette alla Vodka

Penne Vodka Cream 2

Note: This post was inadvertently posted earlier than I had planned. The”Crostata” recipe, which was scheduled for Wednesday, will be delayed until next week. Thanks for your understanding.

*     *     *

I really cannot recall just when I started making this dish. I do know it was around the time I moved here, to my current home, about 13 or 14 years ago. Being that I was tending bar at the time, in retrospect, finding another means of consuming alcohol of any kind doesn’t seem like the best of ideas. Still, regardless of when or why I started making this tomato sauce, it remains a favorite of mine, both for its simplicity and great taste.

Basically, this is nothing more than a tomato sauce laced with cream and vodka. It really is that simple. Over the years, what began as a meatless dish has evolved and I now make it using prosciutto, although I have been known to serve it using ham, pancetta or even shrimp.  You can pretty much use whatever protein you want and about the only thing you cannot skip is the vodka. Do that and all you’ve got is a marinara sauce with some cream added to it — not that there’s anything wrong with that. As for the brand of vodka to use, I opt for a higher quality brand, often “tasting” it first, in my kitchen, just to make sure that I’ve chosen wisely. Higher quality, however, doesn’t mean top shelf and I certainly will not be cooking with the highest quality vodka available. My basic rule of thumb is that if it’s good enough for my martini, it’s good enough for my pasta.

*     *     *

These are a few of my Favorite Things

These are a few of my Favorite Things

*     *     *

Penne with Vodka-Cream Sauce Recipe

Ingredients

  • olive oil
  • 1 tbsp butter
  • 1/4 – 1/3 lb. chopped prosciutto, cooked ham, or pancetta (optional for vegetarians)
  • 1/4 to 1/2 tsp red pepper flakes, (optional)
  • 1 medium onion, chopped
  • 2 cloves garlic, minced
  • 2/3 cup vodka
  • 1 large (28 oz.) can tomatoes, diced or crushed
  • 1/2 cup heavy cream
  • 3 tbsp fresh parsley, chopped
  • 2 tbsp fresh basil, chopped
  • salt & pepper, to taste
  • 1 lb penne pasta
  • reserved pasta water
  • grated pecorino romano cheese

Directions

  1. Heat oil in a large, deep skillet over med-low heat.
  2. Add pork product and slowly render the fat. Do not cook until crisp.
  3. Increase heat to med-high. Add butter, then onion, and sauté until soft, about 5 minutes. If needed, add some olive oil.
  4. Season with salt & pepper, add the garlic, and continue sautéing for another minute
  5. Remove pan from heat, add vodka, stir to combine, return to heat. Have a pan lid nearby to smother the flame should the vodka ignite. Allow to reduce for about 3 minutes.
  6. Add tomatoes, cream, parsley, season with salt and pepper, stir thoroughly, bring to a boil, and reduce to a low simmer.
  7. After sauce has simmered for 20 minutes, begin heating a large pot of salted water in which to cook the penne. Cook the pasta per package directions, cooking until about 2 minutes before al dente.
  8. Reserve a cup of the pasta water, strain the penne, and add the pasta to the tomato sauce.
  9. Continue cooking the combined pasta and sauce until the pasta is done to your liking. Add some of the reserved pasta water to the pan if the pasta becomes dry during this last step of the cooking process.
  10. Just before serving, add the basil, mix well, and garnish the serving platter with grated pecorino romano cheese.
  11. Serve immediately.

*     *     *

Penne Vodka Cream 1

*     *     *

Variations

One needn’t use meat to make this dish and a pound of large shrimp, cut in half, is a worthy substitute. If you do use shrimp, however, add them to the sauce just before you add the pasta. The shrimp only need a couple of minutes to cook, during which the pasta should finish cooking. Remember: no cheese!

*     *     *

Coming soon to a monitor near you … Just not as soon as you thought it would

Crostata Preview

Crostata

*     *     *

Advertisement

Oatmeal Cookies with Two Chocolates, Dried Cherries, and Almonds

Cherry Choc Chip 1

Despite today’s post and a few more on the schedule, I am no baker. I do not bake. It is a classic catch-22. I don’t bake because I make mistakes and I make mistakes because I don’t bake. My experience with today’s recipe is a perfect example.

Although I’ve prepared these cookies a number of times, I’ve made more than my fair share of mistakes. Some weren’t so bad, like grabbing dark brown sugar instead of light or forgetting to add the salt. I wasn’t always so lucky, however, like the time I forgot the baking soda. Those little nuggets were tasty but hardly the cookies I had envisioned. Perhaps the worst, though, was the time I forgot to add the flour. Who forgets flour? You wouldn’t but I sure did. You can rest assured, knowing that I’ll never do that again. Even so, there has to be a better way to learn something without nearly ruining 2 baking sheets.

My lack of baking prowess — a.k.a common sense — aside, these are great cookies that freeze well. That’s important for me because if I don’t stash cookies in my basement freezer as soon as they’ve cooled, they’ll be gone within a day. I’ve absolutely no will power when it comes to freshly baked anything. (Yet another reason I so rarely bake.)

This recipe can easily be modified to suit your own kitchen and preferences. I’ve made these cookies using my food processor, as the original recipe directs, but I’ve also prepared them with my stand mixer. I’ve used dried cranberries instead of the cherries, and omitted the white chocolate altogether, doubling the amount of dark chocolate in its place. And if you like almond flavoring, try using almond extract instead of vanilla. In short, feel free to make whatever substitutions you like, just don’t forget the flour!

*     *     *

Announcing …

It’s time once again for the Honey Man to open shop in Michigan’s Thumb. This means I’ll be closing the Kitchens so that I can make the yearly honey run. Normally, I’d reopen the Kitchens in 2 weeks but not this year. You see, honey won’t be the only precious cargo that I’ll be bringing back to Chicago. I’m very happy to say that I’ll be playing host to a most special Guest and the Kitchens will be closed for the entire visit, known affectionately in these parts as “The Visitation.” Rest assured, the Kitchens will reopen once I’ve returned my Guest to her Michigan home.

*     *     *

Cherry Choc Chip 3*     *     *

Oatmeal Cookies with Two Chocolates and Dried Cherries Recipe

Ingredients

  • 1/2 cup unsalted butter at room temperature
  • 1/2 cup light brown sugar, packed
  • 1/4 cup sugar
  • 1/2 tsp vanilla extract
  • 1 large egg
  • 1/2 tsp baking soda
  • 1/2 tsp salt
  • 3/4 cup AP flour
  • 1 cup old-fashioned oats
  • 2/3 cup dried cherries
  • 1/3 cup semi-sweet chocolate chips
  • 1/3 cup white chocolate chips
  • 1/4 cup slivered almonds, toasted

Directions

  1. Pre-heat oven to 375˚ F (190˚ C). Place 2 oven racks on the top and bottom thirds of the oven.
  2. Cream together the butter, 2 sugars, and vanilla in a food processor
  3. To the processor bowl, add the egg, baking soda, and salt. Process until combined.
  4. Add the flour and again process till combined.
  5. Add the oats and pulse a few times. The object is to mix without pulverizing the oats. Empty the contents of the processor bowl into a large mixing bowl.
  6. Add the almonds, cherries, and both chocolates to the mixing bowl and use a spoon to mix the contents.
  7. Use a large ice cream scoop or tablespoon to create evenly sized cookies. Place scoops of dough on 2 large, parchment-covered baking sheets, about 2 inches apart.
  8. Bake for 6 minutes before turning and switching racks. Bake for another 6 or 7 minutes. Cookies should be lightly browned.
  9. Remove from oven and place cookies on a rack to cool.
  10. Store in an airtight container.

Adapted from a recipe on Epicurious

*     *     *

Cherry Choc Chip 2*     *     *

Notes

Like the fried chicken of 2 weeks ago, these cookies are good for long car rides. Very good.

*     *     *

The Colosseum and Forum of Rome

Just down the street from our flat was the Colosseum, one of the World’s few arena’s older than Wrigley Field. It is usually one of the first and last sights I see when I’m in Rome. As I’ve told my friends — ad nauseam, I’m sure — I’m a tactile person and only when I touch the Colosseum do I truly feel that I am in Rome.

(Click to enlarge any/all photos)

*     *     *

*     *     *

Right outside of the stadium lie the ruins of Ludus Magnus, the best of the gladiator schools. Tunnels once connected it to the “basement” of the Colosseum, which housed everything from wild animals and gladiators to their unfortunate victims. The amphitheater itself is huge with seating estimates that surpass 45,000 people. Yet, it could be vacated in as few as 5 minutes in an emergency. Located around the arena are thick cement posts, of a sort. These were used to support a retractable roof that provided shade from the hot Roman sun, while the arena floor could be flooded to permit mock naval battles to be performed. When not flooded, the stadium floor featured numerous trap doors, allowing for the “introduction” of fierce animals into the arena. Like so much of Rome, history comes alive as you walk around the Colosseum.

*     *     *

Inside the Colosseum    *     *     *

The heart of the ancient city, the Forum, was where Romans came to conduct business, shop, talk politics, and worship. On one side lay the Colosseum, easily the largest amphitheater of its time. On another, atop Palatine Hill, is where the emperors lived, as well as the Republic’s wealthiest citizens. Being slightly elevated, it was believed to be a bit cooler than the surrounding area and it gave the inhabitants the opportunity to literally look down upon the masses milling about the Forum. Following the main path through the Forum, the Via Sacra, you’ll pass the ruins of numerous temples, basilicas, and the Curia, where the Roman Senate met and where Julius Cæsar was assassinated. Speaking of which, you’ll also come across the altar used for Cæsar’s cremation. (The first time I visited the Forum was on March 17th quite a few years ago and red roses were strewn about the altar.)

*     *     *

*     *     *

If you are at all interested in the Roman Empire and find yourself in Rome, you really must see the Colosseum and Forum. Words and photos cannot describe the sensation of walking along the Via Sacra, tracing the steps of people like Julius Cæsar, Tiberius, Augustus, and every Emperor that was to follow them, not to mention countless notables of the ancient civilization. It was, for me, the perfect way to end my holiday and this series.

*     *     *

It’s déjà vu all over again …

Aglio e OlioToday’s blast form the past isn’t at all a seasonal dish, at its core, but you could make it one, if you wanted.  Aglio e Olio is so simple to prepare that it is a “late home from work” dish; a “we spent the night out with friends and need something quick to eat” dish; and/or a “my cupboard is bare and I’m hungry” dish. Aglio e Oilo can be all these things and so much more. You can learn all about it by clicking HERE.

*     *     *

Coming soon to a monitor near you …

Roast Duck Ravioli PreviewRoast Duck Ravioli

*     *     *

A Souvenir from Florence: Fried Sage

Salvia Fritti

Fried Sage 2I’m usually not one to bring home many souvenirs from my trips abroad. There were exceptions, of course, but these days I’m more prone to bring home recipes or ideas for enhancing my own. Last week’s garganelli post was one such souvenir. This past trip was no exception.

Just like here now, Italy was at the end of the Spring pea season when we arrived. Still, though, I was served a number of dishes in which fresh peas were an ingredient. Whereas I cook peas fully whenever I add them to pasta, these were served relatively al dente. The result was a much fresher tasting pea, giving the pasta that Primavera flavor. Since returning home, I’ve been buying fresh peas every week and doing little more than heating them before serving. Try it next time you make pasta with peas and let me know what you think.

*     *     *

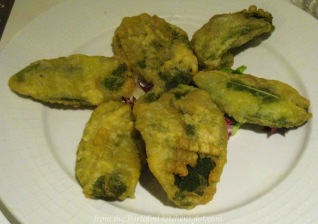
On our first night together in Florence, we went to a nearby restaurant for dinner. The menu offered an antipasto called “Salvia Fritti”. We knew that it was fried sage but that didn’t seem like anything special. After all, we’ve all used fried sage leaves for a garnish. When asked, the waiter explained that the sage leaves were used to enclose anchovies before being dipped in batter and fried. Get outta here! I immediately placed my order, as did my fellow anchovy lover sitting across from me. His wife chose something else; a decision she would soon regret.

This dish was just incredible. It was so good that the next night, when we discovered our preferred restaurant was unexpectedly closed, we high-tailed it over to the previous night’s restaurant to enjoy another round of fried sage.

Salvia Fritti

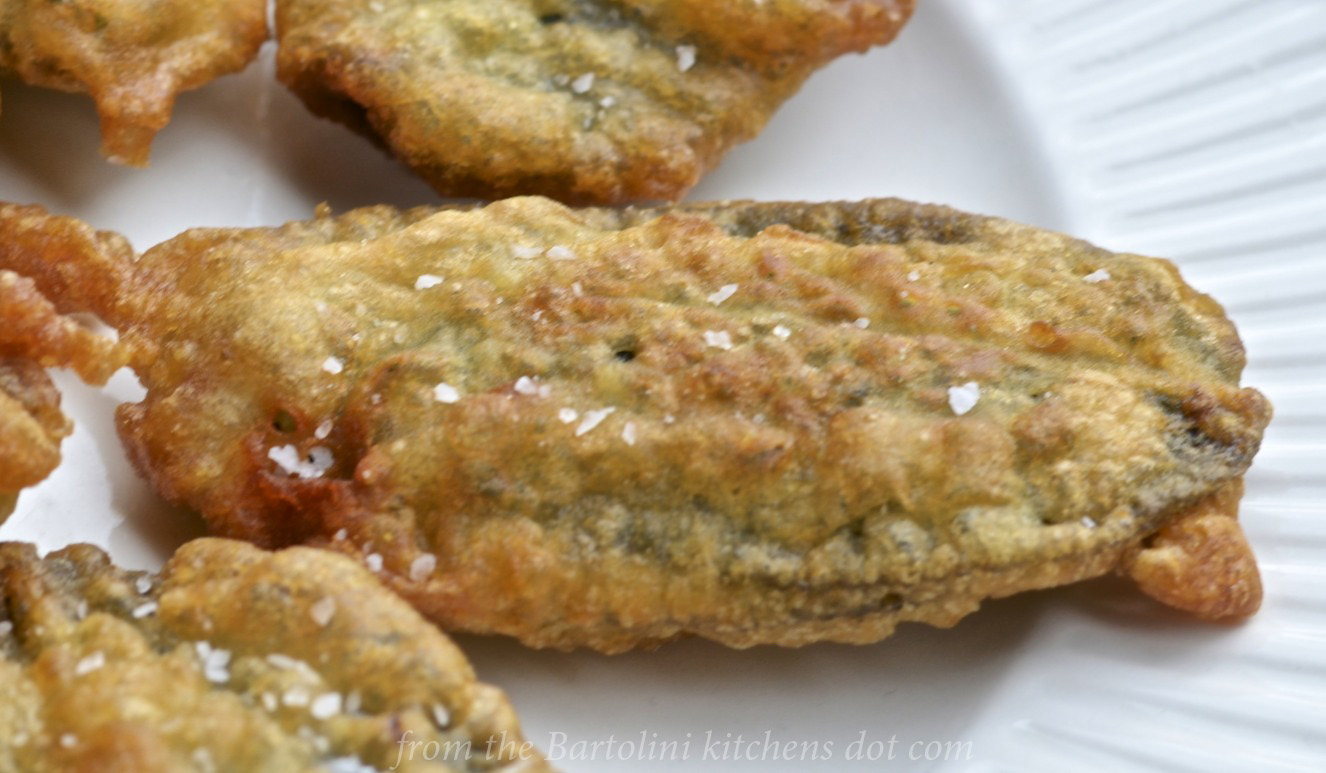
The restaurant version

Happy to get a table and eager to taste these delightful treats, we could hardly wait to place 3 orders for Salvia Fritii. That’s when it happened. Our waiter told us that they had just served the last of the tasty delicacies. The 3 of us gasped so loudly that the restaurant’s other diners must have thought we had just received terrible news. Well, in fact we had. To be sure, we enjoyed our dinner but, all the while, we knew that we wouldn’t be served salvia fritti again during our holiday. That’s when I decided to make them at home. So, I asked the waiter how they were made and, this trip, along with a change in my pea cooking ways, I brought home today’s recipe for fried sage.

*     *     *

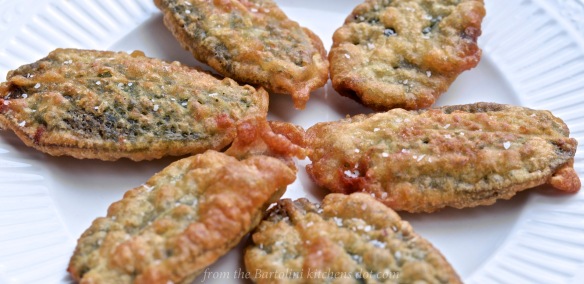
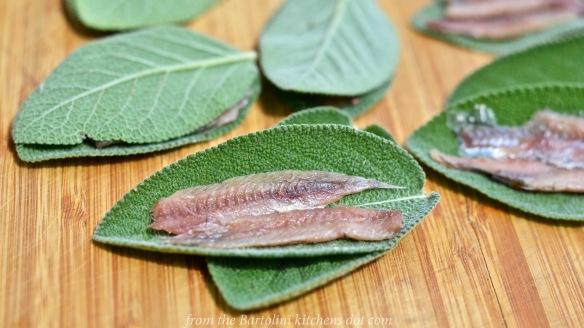
This is such an easy recipe that It’s hardly worth its own post and if it weren’t for the photos I’ll be sharing, I would have combined this dish with another. You see, to make this dish, all you need do is place some anchovies between 2 sage leaves and coat them with batter before deep frying until golden brown. The only thing to consider is the thickness of the batter. As you can see in the photo, we were served sage that was coated with a thick batter. My batter, however, was a bit thinner and, therefore, crisper after frying. The choice is yours. If you’re unsure, start with a thicker batter, fry a couple, sample, and then adjust with more sparkling water, if needed. Don’t worry about the sampling. Just like when cooking bacon, sampling is to be expected.

*     *     *

Fried Sage 1*     *     *

Fried Sage Recipe

Ingredients

  • Large fresh sage leaves
  • anchovies (see Notes)
  • 3/4 cup AP flour
  • 1/4 corn starch (see Notes)
  • 1 tsp salt
  • 1 large egg, slightly beaten
  • sparkling/carbonated water
  • olive oil or a substitute for frying

Directions

  1. Prepare the batter:
    • In a large mixing bowl, whisk together the flour, cornstarch, and salt.
    • Add the egg and then the water, whisking until a smooth batter results.
    • Set aside until needed.
  2. Pre-heat frying oil to 350˚ F (180˚ C).
  3. Pair the sage leaves according to size.
  4. Place anchovy fillet(s) in-between the 2 paired leaves. Use the palm of your hand to press the leaves together.
  5. Dip the sage “packets” into the batter and gently shake off the excess before placing in the hot oil. Repeat for the other packets though be careful not to overcrowd the pan.
  6. Fry until golden brown on both sides, turning each over once in the process.
  7. Remove from hot oil and drain on paper towels. Season lightly with salt. If working in batches, keep warm in a pre-heated 200˚ F (95˚ C) oven.
  8. Serve immediately.

*     *     *

Salted Anchovies
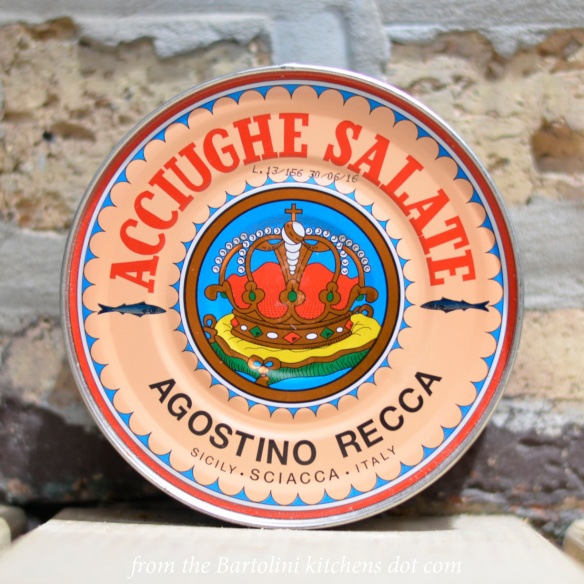
Salt-packed anchovies, anyone?

*     *     *

Notes

Anchovies are the biggest concern for this recipe. If you can find fresh, by all means use them. They will give this dish the best flavor possible. If, like me, you cannot find fresh anchovies — and believe me I’ve tried — your next best option is salt-packed anchovies. Though not the same as fresh, they are a very good second choice. Just be sure to rinse them very well before using. Whether you use fresh or salt-packed anchovies, be sure to clean them, removing the head if necessary, and to check for and remove the spine. If unable to find fresh or salt-packed anchovies, by all means use tins of anchovies packed in olive oil. The bottom line is that you really have to taste anchovies sandwiched between sage leaves, battered, and fried. It’s a simple as that.

You’ll notice I used cornstarch in my batter. I find that it makes things more crisp, Omit it if you disagree.

*     *     *

What if you don’t like sage?

Fried AnchoviesWell, not very long ago, a group of us went to a restaurant owned by a winner of America’s Top Chef. While there, we were served deep-fried anchovies. Can I get a “YUM!”? That dish is recreated here, using the same batter that was used for the sage. Just batter the fillets and fry them. Be sure to make extra, though. The kitchen elves love them and tend to snack on a few during the cooking process.

*     *     *

Now, on to the Republic of San Marino

After a far too brief stay in Bologna, I rented a car and drove to Rimini before turning towards the Apennines and the Republic of San Marino. Founded in 301 CE and only 24 sq mi (64 km2), San Marino lays claim to being the world’s oldest republic. {In comparison, Chicago is 228 sq mi (591 km2).} The city of San Marino is located atop Mount Titan, Monte Titano, offering beautiful views of the surrounding countryside and, to the East, Rimini and the Adriatic Coast. I truly regret losing those photos but feel very lucky that the most valuable ones, those of my family, were saved

San Marino

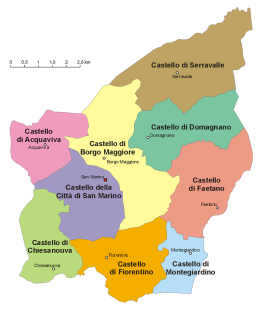
San Marino’s Municipalities,                             I Castelli del San Marino,                             (Source: Wikipedia)

As small as it is, the country is divided into 9 districts called castelli, castles, including the city and capital, San Marino. My Zia lives in the municipality called Domagnono and our family owned a farm in the Castello di Montegiardino. Don’t let what appears to be relatively short distances between the locales fool you. The country sits atop the Apennines and the terrain is hilly, at best. My cousins, and especially my Zia, were fearless behind the wheels of their cars, day or night. I, on the other hand, white knuckled it on the way into — or was it “up to”? — and out of — “down from”? — the Republic. (Have I mentioned my fear of heights?) They all did their best to show me all the country’s sites, as well as those places having special meaning for my family. We even managed to spend an afternoon at the beach, having dinner with my cousin and her family at their beach-front restaurant in the coastal village of Riccione, a suburb of Rimini.

Before I knew it, I was packing up the car and driving to Florence. (Unbeknownst to my family, the flat owners were already calling me for an estimated arrival time.) I did promise them all, however, that I would be returning, hopefully with a sibling or two in tow. Guaranteed, it won’t take another 40 years to do it!

Here, then, are a few of the photos from this leg of the journey. Forgive the poor quality but these are quite literally some of the only photos of the countryside that I have.

(Click to enlarge any/all photos)

*     *     *

*     *     *

The government occupies part of the old fortress atop Monte Titano, and there’s a walk that will take you up along the old wall to the tower, giving you spectacular views of the countryside. Along with the castle, you’ll also find a church and a museum on the mountaintop, while much of the surrounding area is devoted to the tourist trade. At one time, collectors the World-over flocked to San Marino to purchase the Republic’s postage stamps. With the advent of email and social media, however, the stamp market and its tourist industry have fallen on hard times. Looking around town — and ignoring the fantastic views — there’s not much to distinguish this tourist area from dozens around the globe except for one thing: the incline. These photos do not do it justice and I cannot imagine making my way around town when the streets are snow-covered in Winter.

By the way, see those 2 beige awnings in the lower left of the photo on the right? That was once a leather goods shop that my Zia and Zio owned and operated. When they retired, the hotel bought the space and, after some renovations, it now serves as the hotel’s main entrance.

S. Marino Tourist Area*     *     *

During WW2, as the Allies worked their way up the Italian peninsula, the people of the region took refuge in the area’s railroad tunnels that had been dug through the mountains. Here is one such tunnel in which a couple thousand people lived, along with their farm animals for months until the War had moved further North and they could safely return home. Midway through, this tunnel has a large opening, providing the people back then some much-needed fresh air, and today, a beautiful view to Rimini and the Adriatic coast.

Tunnel and View*     *     *

Now for a bit of family history. Towards the end of San Marino’s participation in WW2, an Italian pilot was shot down over my Grandparents’ farm. They gave him shelter in a pit they dug under a large wood pile. (I was taught that it was under a chicken coop.) Using a rope, my Nonna would lower food and drink to him through a hole, at about 1:00 AM every night, until it was safe for him to come out of hiding — well over a month later. This picture shows what was once part of my family’s farmland. In the distance, on the left, is a white building. Before it is where the wood pile once was.

Zio's HideawayI bet you’re wondering what happened to the pilot. After the War, he stayed on at the farm and later married my Dad’s Sister. They eventually immigrated to New York City, where they raised their 3 children.

Next stop: Florence

*     *     *

It’s déjà vu all over again …

couscous 2
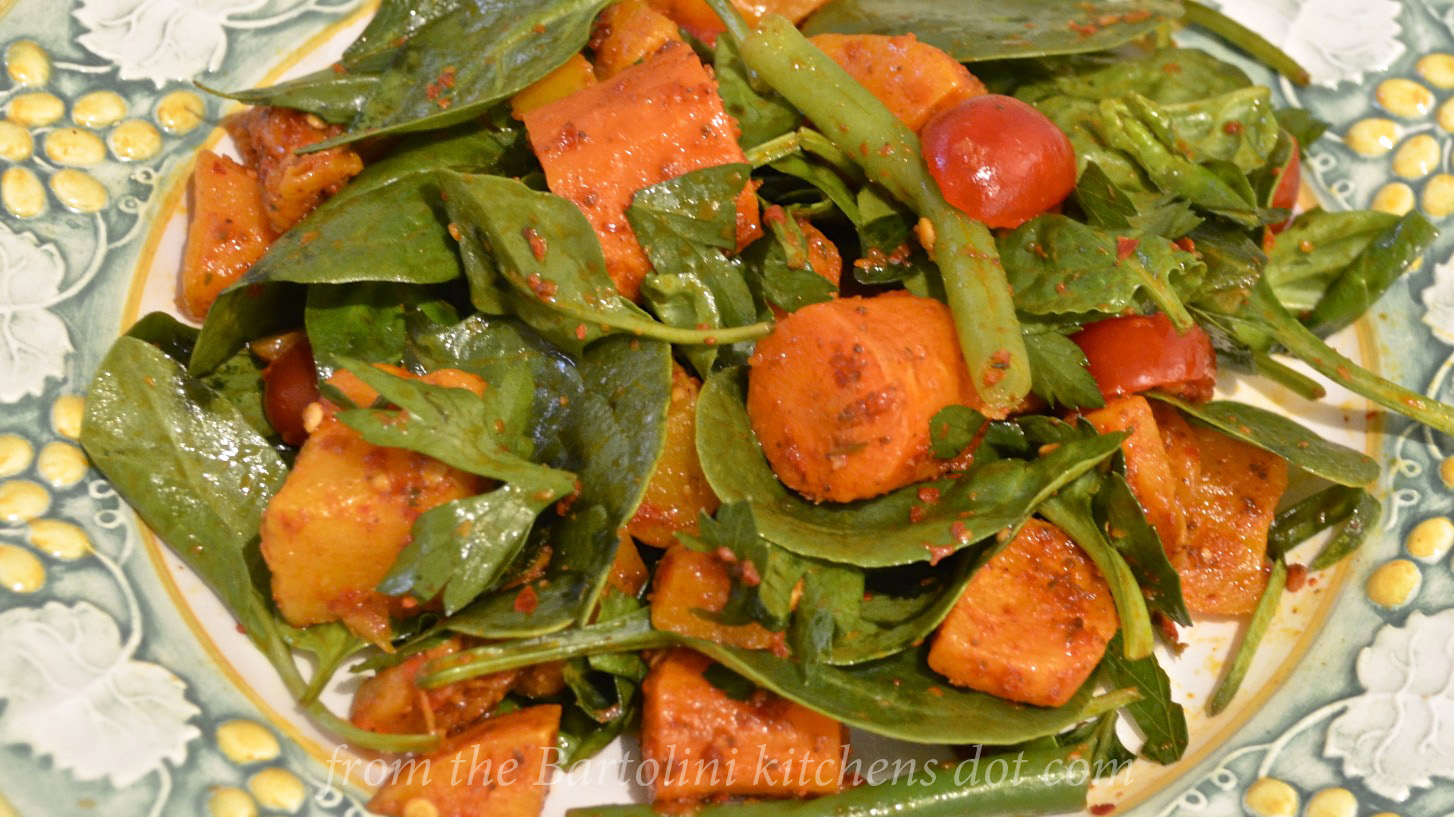
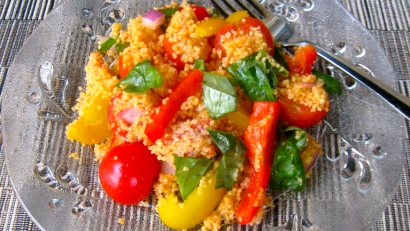
They sure took their time getting here but Summer temperatures have finally arrived. For me that means my stove and oven are used less as the temps rise. Today we’ll look back to a no-cook salad that has couscous as its base. Whether you serve it for a light lunch or tasty side, you won’t be disappointed. You can see the recipe by clicking HERE.

*     *     *

Coming soon to a monitor near you …

Spaghetti alla Chitara
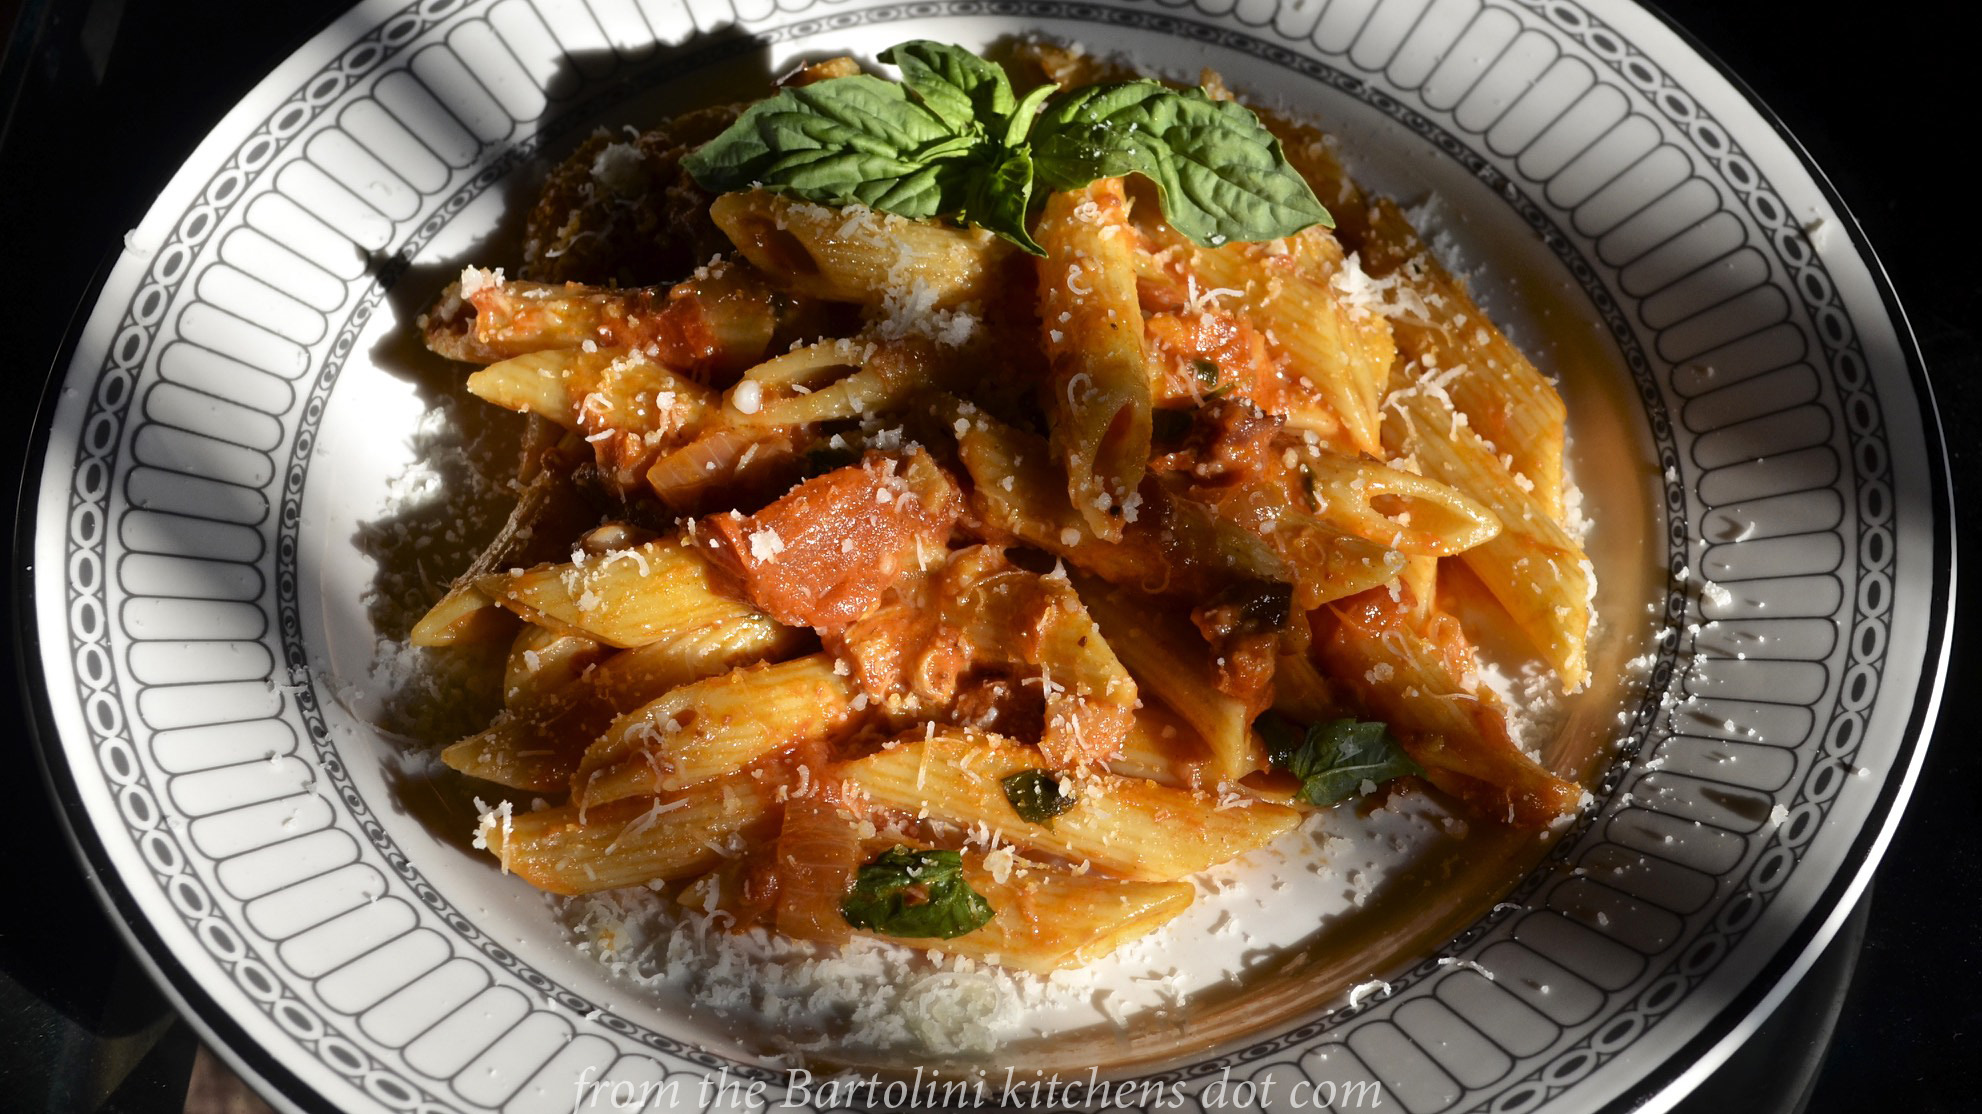
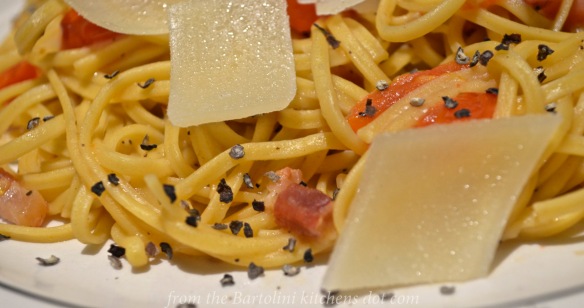
Spaghetti alla Chitarra all’Amatriciana

*     *     *

Homemade Garganelli Pasta

Garganelli Fatti in Casa

The draft of today’s post has been waiting a couple of years to be posted. This is, in fact, the 4th intro that I’ve written for it. Something has come up to prevent its publication every time I’ve penciled it into my schedule. This, though, is definitely its time. You see, I was “introduced” to garganelli while in Rome — twelve years ago with Zia.

Rome was the last stop of our vacanza and I found a restaurant with the same name as that of my family’s surname. Mind you, it’s not like we have the Italian version of “Smith” or “Chang” as a surname —  quite the contrary. Yet, there is a restaurant or trattoria with our name above the door in just about every city in Italy and in many major cities here, across The Pond, as well. Be that as it may, I noticed a dish of penne being delivered to a nearby table and, when the time came, mentioned to our waiter that I would like the same as my primo piatto. He politely pointed out that it was garganelli and not penne. I decided right then and there to learn how to make garganelli once I got home — and get my eyes checked. Not long after, I was back home making garganelli — but the story doesn’t end here.

Last May, upon arrival to our flat in Rome, the owner went out of her way to make us feel at home, describing in detail each of the flat’s amenities. She was especially anxious to show us the terrace. With a view of the Colosseum, the dome of St. Peter’s, and the Vittorio Emmanuel II Monument, it was easy to see why she couldn’t wait to show it to us.

*     *     *

A Flat with a VIew*     *     *

When we returned from the terrace, she presented us with her own guide-book to Rome, paying particular attention to the flat’s locale. When we got to the page with her restaurant recommendations, the first on the list was a restaurant bearing my family’s surname. I thought it a coincidence — until we arrived there later that evening. The route looked so familiar, especially a long flight of stairs along the was very much like the one that had troubled Zia a dozen years before. Any lingering doubts I may have had vanished upon entering the establishment. This was, indeed, the same restaurant in which Zia and I dined and where I “discovered” garganelli. Surely, this was a sign that I should finally publish my garganelli post as soon as I returned to WordPress.

*     *     *

Similar in shape to penne, garganelli are a tubular pasta that come from the Emilia-Romagna area of Italy. With Bologna as its capital, Emilia-Romagna is known for its hearty meat sauces. (Pasta Bolognese, anyone?) Garganelli, like penne, is particularly well-suited for such sauces and its use has spread to other areas of Italy because of that. In fact, Abruzzo, a mountainous province just south of Marche, is known for its lamb ragu and very often garganelli is the pasta of choice. Lamb not your thing? Well, go north a bit and into Tuscany. There you’ll find they make a rich veal ragu and it, too, is used to dress garganelli. Before you start googling, I can save you the keystrokes and send you to  Rufus’ Food and Spirits Guide, for a veal ragu recipe that’s about as authentic as you’ll find anywhere on the web. (Greg, by the way, introduced me the movie, “Big Night“, in which garganelli is handmade in preparation for the film’s climactic feast.)

Whereas it’s quite difficult to create perfect penne by hand, garganelli is very often handmade and has a “flap” where the pasta is joined to create the tube. Just like penne rigate, garganelli traditionally have ridges on each tube’s outer surface; the better to hold on to that rich tomato sauce. Now, you can search the web and you’ll find gadgets made just for putting ridges on your garganelli, but not me. Years ago, much to the amusement of Mom & Zia, I bought a gnocchi board that is used to put ridges on gnocchi. (In my defense, I needed a few more dollars in my order to qualify for free shipping and a gnocchi board was just the ticket.) As you’ll soon see below, and I was quick to point out to Zia, putting ridges on garganelli is yet another (of two) uses for this wonderful kitchen gadget. Now, don’t fret if you haven’t this nifty little gadget taking up space in a junk drawer. You can just as easily use the back of a fork, like you would when making gnocchi, or leave them smooth, like normal penne. No matter. Don’t let the absence of a few ridges cause you to miss out on this great tasting pasta!

*     *     *

How To Make Garganelli

Begin by making a batch of Mom’s Pasta dough. That will give you 1.5 pounds (680 g) of dough. Roll the dough to a thickness of 6 or 7 on a pasta machine, where 1 is the widest setting. Pictures will tell the rest of the tale.

Note: I use a straight edge here because I could neither cut nor draw a straight line if my life depended upon doing so.

Use a straight edge to divide a dough sheet into 2 strips about 2 inches wide

*     *     *

Use the straight edge to cut the strips into 2 inch squares

*     *     *

Place a square on the gnocchi board and moisten the lower corner

*     *     *

Use the dowel, begin with top corner, and roll the square to form a tube

*     *     *

Create ridges by applying pressure while square is rolled to bottom of board

*     *     *

My garganelli have ridges, thanks to my gnocchi board!

*     *     *

A Gaggle of Garganelli

*     *     *

Just One Thing More

Some of you have requested that I post photos from my trip and I’m in the process of getting them all identified and organized. As you may well imagine, I’ve literally dozens of photos shot during my recent holiday and I intend to share some of the more memorable ones. Unfortunately, several dozen were “lost” when I tried to upload them to my iPad and the Cloud. (Ironically, I was uploading the photos to insure I wouldn’t lose them should I encounter a problem with one of my flash memory cards.) As a result, I have only a few pictures of Bologna and San Marino. Luckily, the photos of my family were spared, as they were on another flash card and I discovered the problem before I attempted to “save” them. I guess I’ll just have to go back to Italy so that I can re-shoot those pics.

*     *     *

Bologna proved to be a wonderful start for my holiday. It’s an old city and there are plenty of medieval structures still remaining. At one time, some 180 towers reached for the skies, though only about 20 remain today. Of those, the Two Towers, Due Torri, are the most famous and dominate the city’s skyline. Walking about the city, you can’t help but notice that many of its walkways are covered, with columns forming the street-side “wall”. They’re a photographer’s dream, so long as you don’t botch the memory card upload. (Sigh.)  As capital of Emilia-Romagna, Bologna offers the best foods of the district and, some would say, all of Italy. I certainly found no evidence to the contrary. I really enjoyed my time there and hope to return one day. I’ll be sure to stay longer, though, so that I can more fully explore the city.

*     *     *

(Click to enlarge)

*     *     *

It’s déjà vu all over again …

michigans bountyIt’s tart cherry season once again in my former home state of Michigan. Having a season of barely 3 weeks, now’s the time to head to the orchards and get your share. If you miss out, the best you’ll probably be able to do is to buy them canned or in jars. In the past, I’ve used them to bake pies and muffins, as well as to make jam. Click on each item to see its recipe.

*     *     *

Coming soon to a monitor near you …

Fried Sage PreviewFried Sage

*     *     *


Roasted Vegetable Salad with Harissa

Harissa Veg 1Oh, harissa! How do I love thee?

This is another in the series of recipes dedicated to my new love, the ever so delectable harissa. I told you that I was harissa obsessed and today’s recipe is further proof. Prior to this, I’ve shared recipes for goat and for chicken cooked in harissa. Included in the latter post was a recipe for the spicy sauce. For that recipe, I trimmed away the seeds and ribs from all the chiles and said that I wouldn’t do it again the next time I prepared the sauce. And so I did, finding this batch to be more spicy than its predecessor and, this time, the heat didn’t completely dissipate during cooking. Perfect.

So, armed with a fresh batch of harissa, I went searching for a new use. I didn’t have to go far because the internet is jam-packed with recipes using harissa. I eventually chose a salad with roasted vegetables, which should be popular with our friends to the Far South, where colder temps are taking hold. If you’re in the North, though, don’t let that dissuade you from trying this salad. I found it to be a perfect lunch for a chilly Spring day — and we seem to be having more than our fair share of those.

Aside from using my own harissa sauce, I did make a few changes to the original recipe. In the first place, I halved the quantities. It’s a good salad but there’s only so much one person can eat. The cilantro/coriander was the next thing to go and in its place I used the leaves from a bunch of flat-leaf parsley. Once again, since good fresh tomatoes cannot be found, I used grape tomatoes that I sliced in half. I followed the rest of the recipe and was rewarded with a great salad, one that fits nicely into my plans to go meatless one day a week.

*     *     *

Harissa Veg 4*     *     *

Roast Vegetable Salad with Harissa Recipe

Ingredients

  • 3 tbsp harissa, divided – recipe found HERE
  • olive oil
  • 1lb (450 g) butternut squash, peeled and chopped
  • 1 lb (450 g) carrots, peeled and cut into chunks
  • 5 oz (142 g) green beans, trimmed and halved
  • 5 oz (142 g) fresh baby spinach
  • 1/2 preserved lemon, flesh removed and skin finely chopped
  • 12 cherry or grape tomatoes, halved
  • .5 oz (15 g) fresh parsley leaves – cilantro/coriander leaves may be substituted, if you’re one of those

*     *     *

Harissa Veg 3*     *     *

Directions

  1. Pre-heat oven to 365˚ F (185˚C)
  2. In a small bowl, mix 1 tbsp harissa with 2 tbsp olive oil.
  3. Place squash and carrot chunks in a large bowl and pour harissa-oil mixture over it. Mix to evenly coat the vegetables.
  4. Place on a baking sheet/dish, set on middle rack in oven, and bake until both types of vegetables can be easily pierced — 30 to 45 minutes. Remove and cool.
  5. Meanwhile, blanch green beans in a small pot of boiling water for 2 minutes. Remove and place in an ice water bath until needed.
  6. In a large non-reactive pot, add green beans, spinach, preserved lemons, tomatoes, parsley, and the now-cooled roasted vegetables.
  7. Combine remaining 2 tbsp harissa with 1 tbsp olive oil and use to dress the salad. Add more oil, if needed.
  8. May be serve chilled or at room temperature.

From a recipe published in The Australian Women’s Weekly.

*     *     *

Harissa Veg 2*     *     *

Notes

How much oil you add will depend upon how thick your harissa is. Mine is rather thick, so, I add olive oil to make it easier to coat the vegetables and, later, to dress the salad.

In all, I tried this recipe three ways. One is as you see listed above. In another, I used baby arugula (rocket) in place of the spinach. I found the leaves weren’t strong enough to withstand the harissa dressing and wilted pretty quickly. The 3rd and last time was prepared without spinach and with half the amount of parsley. The result was a dish of roasted vegetables that make a perfect side for a roast. This version is definitely worth making again, perhaps adding additional root vegetables to the mix.

I’ve found that my recipe for harissa yields 2 cups of the sauce, far too much for most recipes. Using an ice cube tray, I freeze the excess, placing the frozen harissa cubes in plastic bags until needed.

*     *     *

It’s déjà vu all over again …

Grandpa's Tuna SaladIt was about a year ago when I shared a favorite salad of my Grandpa, one simply made using canned tuna, anchovies, and sliced onion. I included my updated version, which used seared  tuna over a bed of salad greens. Both are lighter fare and equally tasty. You can see them both and decide which is best for you by clicking HERE.

*     *     *

Coming soon to a monitor near you …

Prosciutto Pizza PreviewPizza

*     *     *

Maltagliati Pasta with Pistachio Pesto

Maltagliati con Pesto al Pistacchio

Maltagliati

Today’s post is one of odds and ends, literally. Sure, there are two “recipes” to be shared but neither is deserving of its own post, both being incredibly easy to prepare. One, in fact, is traditionally nothing more than scraps, giving more proof to the adage that nothing is wasted in an Italian kitchen.

Maltagliati is a pasta of irregular shapes, the name of which is derived from the Italian words for badly cut, male taglio. (Thanks, Francesca, of Almost Italian). It is the end pieces and leftover bits of pasta that result from a day of pasta making. Like snowflakes, no two pieces are alike, each being randomly cut. The fact that there would be enough scraps to prepare a dinner is an indication of the difference between our two countries’ eating habits.

By one estimate, the average per capita consumption of pasta in Italy is 59 pounds per year, while in the US it’s only 19 pounds apiece annually. Yet we have an obesity epidemic. The reality is that a one pound package of pasta will yield 8 servings in most Italian kitchens. They will serve one such serving with most evening meals, the primo piatto. Here, we’ll get 5, 4, or even 3 mega-servings from a single pound. That serving is often the main course, with the addition of a salad, bread, and possibly a dessert.

Most of our pasta is manufactured and store-bought. Up until recent times, the vast majority of pasta served in Italian homes was made by hand. If you make enough pasta so that everyone in your household is going to eat 59 pounds of pasta per year, you are bound to have a lot of scraps to deal with. Those scraps can become maltagliati and will be served in any number of ways, usually determined by the amount at hand.

Very often, they’re served with beans, taking the place of the ditalini used in last week’s Pasta e Fagioli recipe. If you’ve plenty, they can be served with a hearty meat sauce, as was served to Zia and me one evening in Rome, where I first heard of this pasta. Here, I’ve chosen to serve them with a new version of pesto, simply because I needed a pasta narrative to accompany the recipe for today’s pesto. It would have been an incredibly short post, otherwise.

*     *     *

Yes, that’s the first, lonely crocus to bloom in my front garden. Spring is finally taking hold and 1st Bloomwith the new season comes an offer from my blogging friend, Mary, of Love – The Secret Ingredient. She is creating surprise boxes that will contain various gourmet items, small kitchen products, and recipes which will use the enclosed items. A box will be delivered every season and you can purchase them separately or all four at once. The part that caught my attention is that Mary will donate 10% of the annual profits to Feed The Children, an organization dedicated to providing hope and eliminating hunger. You can learn all about Mary’s Secret Ingredients by clicking HERE.

Note: Although I’ve ordered and paid for a surprise box, I have not received any form of compensation for mentioning Mary’s offer. I saw this as an opportunity to help a fellow blogger and worthwhile charity at the same time.

.*     *     *

Freshly Made Maltagliati*     *     *

How to Make Maltagliati Pasta

  • If you make a full recipe of Mom’s Pasta Dough, you will have about 1.5 pound (680 g) of pasta dough. That will make quite a bit of pasta, so, you may wish to halve the recipe or cut it into 3rds or 4ths. For this post, I cut the pasta recipe in half.
  • Take a portion of the dough and run it through the pasta machine rollers until it is as thin as you like. My rollers start at 1, the thickest setting, and I continue to roll the dough, up to and including the 6 setting. You may like your pasta thinner. If so, continue to advance the setting as you roll the dough.
  • Lay the dough strip out flat on your work surface, dust lightly with flour, and allow to rest for a few minutes.
  • Pastry WheelsUse a straight-edged pastry cutter to divide the strip into 3 equal strips. No need to worry about it being a perfect straight line. Just do the best you can. Do not separate them but leave them as-is.
  • Now, take your pastry cutter and beginning in the upper left corner, make a series of diagonal cuts, approximately parallel to each other. Once done, starting in the upper right corner, make diagonal cuts going the other way, repeatedly,  You will end up with a collection of triangles and trapezoids, no two exactly alike — not to mention a better appreciation of your Geometry teacher who predicted that “one day this ‘stuff’ will be useful.”
  • Place them in a single layer on a wax paper covered baking sheet that’s been lightly dusted with flour or corn meal.
  • Repeat until all the dough strips have been cut. If you like, use a fluted-edged pastry wheel to cut the pasta, as well as the straight-edged. This will further the illusion of this being a pasta dinner made from scraps. (see Notes)
  • To cook, bring a large pot of heavily salted water to boil, add the maltagliati, stir, and allow to cook for a few minutes. Being freshly made, they should be fully cooked within minutes. Taste one when all have risen to the top of the pot of boiling water.
  • Drain and dress with pesto, recipe to follow. (See Notes)

*     *     *

Maltagliati 2*     *     *

Notes

Not everyone has time to make pasta, even when the process is as easy as this. Should that be the case, take some store-bought lasagna noodles and snap them. Just don’t get carried away, for it is easier to dine on larger pieces than tiny ones.

Being flat, maltagliati have a tendency to stick together once drained, so, you must work fast. Once the pasta has been drained, quickly give it a light coating of olive oil before dressing it with the pesto. If using a red sauce, there’s no need for the olive oil but you still must quickly add it to the drained noodles.

*     *     *

So, now that you’ve got a scrappy little pasta at your disposal, it’s time to dress it.

I certainly won’t pretend to speak for everyone but I will say that by this time of year, I’m desperate for any kind of Summer dish. Pesto for me is one such dish. In Summer, I can get a wedding-sized bouquet of basil for a couple of dollars at the farmers market. This time of year, I’m lucky to get a few stems for the same price. Today’s pesto recipe gives me my Summer fix without breaking the bank, for not only does it use half the basil, it substitutes pistachio nuts for the über expensive pine nuts, pignoli. (Just last month, I saw a 4 oz package (113 g) of imported organic Italian pine nuts with a price of $12.99. That’s $52.00 a pound!!!)

Whether you’ve made pesto before, you shouldn’t have any problems preparing this recipe.

 *     *     *

Pistachio Pesto*     *     *

Pistachio Pesto Recipe

Ingredients

yield: 1 cup pesto

  • 1.4 oz (40 g) fresh basil leaves (See Notes)
  • 1.1 oz (30 g) fresh, flat leaf parsley leaves
  • .5 oz (15 g) roasted, unsalted pistachio nuts
  • 3 cloves garlic, roughly chopped
  • 1/3 cup grated Pecorino Romano cheese – Parmigiano Reggiano may be substituted
  • 3 oz (79 ml) extra virgin olive oil – more or less to taste
  • salt & pepper to taste

Directions

  1. Place everything but the olive oil, salt, and pepper in the bowl of a food processor.
  2. Let it process until a thick paste is formed.
  3. While the processor is still running, add the olive oil in a slow, steady stream until the pesto reaches the consistency you prefer.
  4. Taste and season with salt and pepper, as required. Pulse the processor to blend the seasonings with the pesto.
  5. Your pesto is ready for use.

*     *     *

Notes

The reason for the odd amounts of basil and parsley is because of how both were purchased. I bought a 2 oz package of basil that, once the stems were removed, actually weighed 1.4 oz. Similarly, I bought a bunch of parsley that, once cleaned, weighed 1.1 oz.

Traditionally, pesto is made using a mortar and pestle rather than a food processor. I do not own a mortar large enough to do this, so, I use a food processor. The fact that it is so much easier this way has nothing to do with it.

I used my pesto recipe as the basis for today’s version. You can use your own pesto recipe, just be sure to replace 25 to 50% of the basil with parsley and, of course, use pistachio nuts instead of pine nuts.

Refrigerate unused pesto in an airtight container, after topping with a thin coat of olive oil. Use it or freeze it within a few days.

If I’m going to freeze this or any pesto, I do not add cheese to it while it’s being made. I’ve found that the cheese doesn’t thaw well and the pesto’s consistency suffers. Instead, I’ll add the cheese to the pasta when the pesto is added.

If you have frozen pesto containing cheese, mix it with a bit of hot pasta water before using it to dress the pasta. The hot water will help make the pesto more smooth and easier to evenly coat the pasta.

*     *     *

It’s déjà vu all over again …

Insalata With lawns going green and last Fall’s bulbs breaking the ground’s surface, it can only mean one thing. It’s dandelion picking season! What you may consider a blight on your lawn, a Bartolini sees as a crisp salad. Click HERE to see the lengths traveled by my Dad to enlist our help picking the greens for our Sunday night dinner.

*     *     *

Coming soon to a monitor near you …

Lamb Shank PreviewLamb Shanks

*     *     *

Gluten-Free Chocolate Torte

Flourless Chocolate Torte 3I’ve made no secret of my inability to bake. I have burned sheet after sheet of misshapen cookies and pulled countless cakes from the oven that failed to rise. A few years ago, after yet another bundt cake that had somehow been Super Glued to the pan, I threw both pan and cake into the trash — a very liberating experience.

Then there was the Fall that I was going to teach myself to bake my favorite cake, the Black Forest Cake. Yum, right? The first attempt quite literally made me sick. I couldn’t get that thing to the trash quick enough. The next week brought another attempt. That “cake” was better — it wasn’t life-threatening — but was certainly nothing to be proud of. The third cake proved I was on the right track, though it was in no way good enough to share with anyone. I hit pay-dirt with my 4th and, what would prove to be, my last attempt. That cake was a delight. Good thing, too, because that was 6 years ago and it was the last Black Forest Cake that I’ve tasted. Oh, I’ve been tempted to have a piece but, when I am, there’s a rumble down under that convinces me that now is not the time.

*     *     *

Perhaps it was my success with this torte that gave me the mistaken opinion that I could bake, leading me to the Black Forest Cake debacle. I first saw Jamie Oliver prepare the torte when he was known as The Naked Chef, so, this recipe has been around for some time. I’ve made it a number of times since without any problems whatsoever — not counting a misguided attempt to make it as a bundt cake with that accursed pan. Never mind that. Believe me. If I can bake this torte anyone can.

Now, a word about the recipe before proceeding. If you go searching for it on the web, you’ll find it titled a number of ways. Jamie Oliver’s: “Chocolate Torte”; “Flour-less Chocolate Torte”; and, “Two Nut Chocolate Torte”, are the most popular. Bear in mind that this recipe was demonstrated in an episode that aired in 2000, some time before most of us were aware of gluten-related issues. In fact, I’ve even see the recipe called “Flour-less” yet you’re instructed to grease and flour the pan before filling it with cake batter. Not to worry. This torte is gluten-free, hence the name change, and I coat the pan with powdered cocoa, not flour.

*     *     *

Chocolate Torte X

As Jamie intended

*     *     *

Gluten-Free Chocolate Torte Recipe

Ingredients

  • 5 1/2 oz (155 g) shelled and peeled almonds
  • 5 1/2 oz (155 g) shelled walnuts, finely ground
  • 11 oz (310 g) semi-sweet chocolate (separated – 2/3 & 1/3)
  • 1 heaped teaspoon unsweetened cocoa powder
  • 9 oz (255 g) butter
  • 3 1/2 oz (100 g) sugar
  • 6 large free-range eggs, separated
  • butter
  • cocoa powder
  • salt
  • powdered sugar

Directions

  1. Pre-heat the oven to 375˚ F (190˚ C). Use butter to grease the bottom of an 8 to 10 inch spring-form pan before lining the bottom with a piece of parchment paper. Butter the paper and sides of the pan. Use cocoa powder to coat the greased pan.
  2. Place the almonds into a food processor and grind them until finely ground.
  3. Add the walnuts and continue processing until all are finely ground. (See Notes)
  4. Add a pinch of salt and 2/3 of the chocolate and process for 30 seconds. Remove the nut-chocolate mixture to a large mixing bowl.
  5. Add the butter and sugar to the food processor and run until the mixture is a pale yellow and fluffy.
  6. Add the egg yolks, one by one, and process until well-blended.
  7. Add the egg mixture to the bowl with the chocolate mixture and stir until well-combined.
  8. Add the egg whites to a mixing bowl with a pinch of salt.  Using a whisk, hand mixer, or stand mixer, beat the eggs until stiff peaks form. (See Notes)
  9. Take 1/3 of the beaten egg whites and fold them into the bowl with the eggs and chocolate. Once blended, add the remaining 2/3 of the egg whites and fold into the batter. Do not over mix. (See Notes)
  10. Pour the batter into the prepared pan.
  11. Place the remaining chocolate chunks into the top of the torte’s batter. Press them slightly into the batter, though no need to cover them with batter.
  12. Bake on the center rack of a pre-heated oven for about an hour. After 55 minutes, use a knife to check to see if the torte is finished. Place the knife into the center, wait a few seconds, and remove. The blade should be relatively clean.
  13. Once cooled, remove from pan, invert to remove the paper, and place on a cake platter. Dust with powdered sugar.
  14. Serve as-is or with a dollop of whipped cream or crème fraîche.

This is a recipe from Jamie Oliver, The Naked Chef

*     *     *

Oven Ready

Ready for the oven

*     *     *

Notes

Be sure to keep an eye on your nuts when using the food processor or you may end up with almond-walnut butter.

To remove the almond skins: Add raw, shelled almonds to a small sauce pan filled with boiling water. Remove from the water after 3 minutes, placing the blanched nuts into an ice water bath. Strain and wipe dry. Squeeze each almond between your thumb and index finger to easily remove the skin.

This is how I beat egg whites:

  • Bring eggs to room temperature before separating. Be sure no yolk remains in the whites.
  • Place the whites in a mixing bowl. Whether whisking by hand or using a mixer, begin slowly at first. After about 30 seconds, continue beating at medium speed.
  • Once the eggs begin to color, beat at a higher rate until beaten to the recipe’s needs.

The beaten egg whites provide lift for this torte. If they aren’t folded into the batter correctly, the torte will not rise. Here’s a quick video demonstrating the proper technique for folding egg whites into batter.

*     *     *

*     *     *

For the chocoholics among us

Make a simple ganache.

  1. Place 8 oz (225 g) of chocolate pieces in a heat-resistant bowl – use whatever type of chocolate you prefer
  2. Heat 10 oz (300 ml) of heavy cream to the point of boiling.
  3. Pour the heated cream over the chocolate and let sit for a couple of minutes before stirring until smooth. As it cools, the ganache will thicken.
  4. If you prefer your ganache to be flavored, once the ganache is fully mixed, add 2 or more tbsp of:
      * Framboise for raspberry flavoring;
      * Grand Marnier or Cointreau for orange;
      * Amaretto for almond; or
      * Kahlúa for coffee.
  5. Either pour the ganache over the entire cake or each piece as it is served.

I usually make half the amount listed here and store the remainder in a sealed container in the fridge. I’ve no idea how long it will last because kitchen elves snack on it until it’s gone, usually within 48 hours — within 72 hours when Girl Scout cookies are atop the counter.

*     *     *

Chocolate Chocolate Torte

As John wanted

*     *     *

It’s déjà vu all over again …

Carnivale ends today in Italy, as it does round the World. In the days leading up to Ash fiocchetti1Wednesday, the beginning of Lent, celebrations of all kinds take place, each with its own particular sweets and confections. In New Orleans, it’s King Cake. In Chicago, it’s fried donuts called Paczkis. In the Bartolini kitchens, it was fiocchetti, which we called angel wings. These fried dough crisps, in one form or another, are made throughout Italy this time of year and go by a number of names. You can learn how to make them just by clicking HERE.

*     *     *

Coming soon to a monitor near you …

Pork Tenderloin - Plums 1

Pork Tenderloin with Plum Sauce

*     *     *

Roasted Mackerel with Potatoes and Tomatoes

Scombro Arrostito con Patate e Pomodori

Mackerel ServedI’m back and the Kitchens are open! Thank you all for the birthday and well-wishes. I had a wonderful birthday and, though there’s more to come, I’ll leave that reveal for a later date. As for my much neglected projects, though not all are done, I’ve made good progress and am very pleased.

Some of you may be interested to learn that I’ve added a “Translation” page to the blog. You can find it listed above, between the “Home” and “Welcome” pages, or, if you’re on my blog’s homepage, there’s a translate button on the right. Click on either link and you’ll go to a page that will offer you a translation of my blog in your choice of 52 languages. Note that less than perfect results my be returned, especially when colloquialisms and slang are encountered, as is the case with most universal-type translators. Considering that I am barely fluent in English, I’ve no way of knowing whether an individual translator is working properly. Should you find that a particular language isn’t translated clearly, please let me know and, if need be, I’ll remove that translator from the list.

*     *     *

Today’s recipe is another that resulted from a walk around the Italian market. My walk started at the fish counter, as it always does, where the monger pointed out his “very fresh” mackerel. That’s code for “buy it” and I did without a second thought. While he cleaned my fish, I walked over to the produce area and bought some potatoes and tomatoes. A few minutes later, having grabbed some olive salad and herbs, my dinner for that night was all set. Unfortunately, I still had a full shopping list to buy but a fresh mackerel is one impulse buy that I don’t mind purchasing.

This dish couldn’t be easier to prepare. Stick some potatoes on a baking sheet, roast them for a spell, add some vegetables, put the fish on top, and bake until done. In the meantime, prepare a salad, slice some bread, and open a bottle of wine — if you haven’t already. Not many dinners are easier to prepare than this one.

*     *     *

Raw Mackerel*     *     *

Roasted Mackerel with Potatoes and Tomatoes Recipe

Ingredients

  • 1.5 lbs (680 g) mackerel, cleaned and scaled
  • 1.5 lbs (680 g) new potatoes, halved or quartered for uniform size
  • olive oil
  • 1 red onion, cut into eighths
  • 1 lb (455 g) cherry tomatoes
  • 6 oz (170 g) olive salad (misc olives, carrots, celery, peperoncini), roughly chopped
  • 1 sprig of fresh rosemary
  • 2 to 3 sprigs of fresh thyme
  • salt & pepper, to taste

*     *     *

M - Veggies 2*     *     *

Directions

  1. Pre-heat oven to 450˚ F (230˚ C).
  2. Place potatoes and onions in a large bowl, sprinkle with olive oil, and gently mix till evenly coated.
  3. Place on baking sheet, season with salt & pepper, and roast on center rack in pre-heated oven for 20 minutes.
  4. Meanwhile place tomatoes and olive salad into same bowl used for potatoes and onions. Drizzle with a little more olive oil and season with salt & pepper.
  5. Place rosemary and thyme into the fish’s cavity.
  6. After 20 minutes, reduce oven to 375˚ F (190˚ C). Remove potatoes from oven, stir, and add tomatoes & olive salad to the tray. Place mackerel on top of vegetables, drizzle with olive oil, season with salt & pepper, and place in oven.
  7. Roast until fish is cooked, 20 to 30 minutes depending upon the thickness of the fish. When done, fish flesh should flake and be opaque when cut.

*     *     *

Baked Mackerel *     *     *

Notes

I had originally intended to use lain olives in this recipe but that marinated olive salad looked too good to pass up. You may prefer to use just the olives or, for that matter, neither option.

I like my tomatoes to be a little firm when served. If you like them cooked more fully, add them to the roasting pan earlier.

I’ve prepared this dish using one, two, or three dressed mackerel. Although the preparation is the same, cooking times may vary and will usually be a few minutes less for the smaller fish.

*     *     *

It’s déjà vu all over again …

Nonna2

Mine wasn’t the only birthday celebrated at the end of last month. My Cousin shared her birthday, the 26th, with our dear Nonna. Although we all have wonderful memories of her, one of my most favorite involves her in the kitchen — imagine that! — preparing me something very special. The dish was tripe, trippa, and you can learn how to prepare and serve it, as well as a little bit about this dear woman, by clicking HERE.

*     *     *

Coming soon to a monitor near you …

Quail PreviewStewed Quail

Two Cellos and a Cherry to Toast the New Year

Arancello, Liquore della Ciliegia, e Limoncello

Arancello, Liquore della Ciliegia, e Limoncello

Almost everyone lucky enough to visit Italy will, at some point, sample Limoncello. This lemon-flavored liqueur is often served after dinner as an aid to digestion, un digestivo, and, when properly made, Limoncello will have a strong lemony flavor without being bitter or sour like freshly squeezed lemon juice. Though many believe that the lemons that grow in and around Sorrento produce the best Limoncello, these lemons are not available here in the States. So, with no other options available, I’ve aways used “regular” organic lemons to make my Limoncello. This all changed, however, last year.

For the first time ever, Meyer lemons were available in virtually every grocery store I entered. I’d never seen so many. Having read that Meyers were as close to the famed Sorrento lemons as one can get here, I decided to use them to make my Limoncello. Remarkably, at the very same time that I was collecting the Meyer lemons, the grocer was putting out blood oranges. Suddenly, I was buying blood oranges, too, having decided that very moment to make orange-flavored liqueur, Arancello, as well. With an eye towards this Christmas, I thought I’d,also, make lime-flavored liqueur and give all three as gifts. Since I only had 2 jumbo jars and both were already filled with zest and grain alcohol, I put off buying the limes until I’d emptied one of them.

Once I got home, I checked my recipe for Limoncello, calculated how much Everclear (grain alcohol) I’d need for all 3 “celli”, and headed to my neighborhood liquor store. Want to have some fun? Go into a liquor store and buy about 1.5 gallons (5.25L) of grain alcohol. No need to answer when the clerk asks, “Will there be anything else?” A look will suffice.

My “celli” recipes are similar to those that are available on the internet. One thing that I do differently from most is that I use a micro-plane to remove the zest from the citrus. Though most recipes say to use a peeler to remove the peel, being careful not to collect any pith (the white stuff), I find it quite difficult to do. The problem is that the more pith you collect, the more bitter the liqueur. By using a micro-plane, I keep the amount of pith — and bitterness — to a minimum and I’m done in half the time it would take me to “peel” the zest. Once you get passed the zest collection step, you’ll find the rest of the recipes to be straight-forward and you should have no trouble following them.

*     *     *

On behalf of Zia and the rest of the Bartolini Clan, I’d like to wish you all a New Year filled with Peace and Joy.

Happy New Year!

*     *     *

Due Limoncelli

Due Limoncelli

*     *     *

“Celli” Liqueur Recipes

Limoncello IngredientsLimoncello Start

  • zest of 25 Meyer lemons, scrubbed clean
  • 1800 ml Everclear (See Notes)
  • 7 c (1660 ml) spring water
  • 5.5 c sugar

*     *     *

Arancello IngredientsArancello Start

  • zest of 14 blood oranges, scrubbed clean
  • 5.5 c (1300 ml) Everclear (See Notes)
  • 5 c (950 ml) spring water
  • 4 c sugar

*     *     *

Directions

  1. Place all ingredients in a large jar, cover tightly, and place in a cool, dark place. Shake contents occasionally — i.e., once per week.
  2. After 45 days, pour contents through a sieve to remove the zest. Cover tightly and return to a cool, dark place.
  3. After 2 weeks, filter the liqueur one more time through cheesecloth, or, for a very clear liqueur, through a hand strainer containing 2 coffee filters.
  4. Liqueur may be stored in a serving container, gift bottles, or back in the same jar, once rinsed. (See Notes)

*     *     *

With 2 jugs of citrus zest flavoring the Everclear, I was looking forward to making lime-cello in the near future — and then I saw Siobhan’s post describing how to make cherry liqueur on her wonderful blog Garden Correspondent. (Do pay her a visit for a charming look at family life and gardening in Turkey.) Not long after, while returning from a visit with Zia, I stopped at a cherry orchard to buy tart cherries, some of which were destined for this liqueur. Lime-cello would have to wait.

*     *     *

Cherry Liqueur Served

Liquore della Ciliegia

*     *     *

Tart Cherry Liqueur Recipe

Ingredients

  • 1670 g (59 oz) tart cherries
  • 835 g (29 oz) sugar
  • 417 ml (14 oz) Everclear (See Notes)
  • 417 ml (14 oz) spring water
  • 18 whole cloves
  • 7 cinnamon sticks

Directions

  1. In a large jug with a lid, begin with a layer of sugar and then cherries, repeating both layers until the cherries are used up. Top off the jug’s contents with the remaining sugar.
  2. Seal the container and leave in a sunny location for 1 month.
  3. After one month, give the cherry mixture a good stir and add the spices wrapped and tied in cheese cloth. Re-seal the container and set it aside for another month.
  4. After a month, strain and reserve both liquid and cherries. Use a spoon to press as much liquid out of cherries as possible. Save cherries for another use. (See Notes)
  5. Add the liquor to the reserved cherry juice. Set aside in cool, dark place for 2 weeks.
  6. After 2 weeks, strain the liquid through cheese cloth or, for a very clear liqueur, through a hand strainer containing 2 coffee filters.
  7. Like Limoncello, your tart cherry liqueur will continue to mellow as it sits.

With thanks to Siobhan, Garden Correspondent, for the recipe.

*     *     *

*     *     *

Variations

Although I used blood oranges and Meyer lemons to create my “celli”, you can use regular oranges and lemons just as easily. Do try to use organic fruit when available.

As was mentioned, I had intended to make a 3rd “cello”, lime-flavored, but decided to make the cherry liqueur instead. Now that the gifts have been given and the large jars emptied, I may yet give lime-cello a try. Besides, I have to do something with that half-bottle of Everclear.

So, you’ve made a batch of Arancello and are wondering what else can be done with it other than drinking it straight from the bottle. Coincidentally, earlier today a cocktail recipe using Arancello was posted on a fantastic blog, Feeding My 3 Sons. Not only does this blog feature great recipes, each is reviewed by 3 of the toughest critics in all of WordPress.

*     *     *

2 Cellos and a Cherry

Arancello, Liquore della Ciliegia, e Limoncello

*     *     *

Notes

Most of our citrus fruit is “protected” after picking with a light coat of wax. Be sure to use a brush under running water to remove this coating before attempting to zest the fruit.

Everclear is grain alcohol and is very potent. (75.5% alcohol, 151 proof) It is dangerous to drink it “straight” out of the bottle. In the recipes above, it is diluted using spring water, bringing the alcoholic content into more acceptable levels. If you feel it is still too strong, simply add more water.

If you cannot find Everclear or do not wish to use it, vodka can easily be substituted. When you do, there’s no need to add any spring water at all, though you can if you wish to dilute the liqueur.

It is advisable that the liqueurs be filtered a second time before being chilled for serving. This will remove the tiniest of particles thus ensuring your liqueurs will be clear when served.

You will find that all 3 liqueurs will mellow as time passes. For best results, they should, also, be stored in your freezer for at least 1 week before being served. Patience is a virtue and you’ll be well-rewarded the longer you wait.

Though you should discard the citrus zest once it is strained out of the liqueurs, you may wish to save the cherries. Though not suited for children, you may think of a few desserts in which to use them. Personally, I place them in jars that I then fill with vodka and store in the fridge. A couple of weeks later I enjoy them as-is or as a garnish in vodka martinis. Just be sure to warn your guests if there are pits in the cherries. Of course, after a few of them, no one will care.

*     *     *

An announcement

In January, I am going to celebrate a milestone birthday, the big SIX OH! Though I’ve nothing special planned as yet, there are a couple of projects, here at home, that I have neglected, using this blog as an excuse for procrastinating. Well, I’ve no intention of starting the next decade with these tasks still waiting to be completed and, as a result, the Kitchens will be closed for the month of January, reopening on February 5th. Thank you all for your ongoing support and encouragement. See you in February!

*     *     *

It’s déjà vu all over again …

To complete my review of Bartolini holiday dishes, today’s look back will feature our cappelletti Cappelletti in Brodorecipe. Served for lunch on New Year’s Day, these stuffed pasta are traditionally shaped like the brimmed hats once worn by priests. Unable to produce enough hat-shaped pasta to serve our family, Mom’s cappelletti were shaped like small ravioli, raviolini. No matter their shape, cappelletti are usually served in broth, brodo, and are a delicious dish to serve on the First Day of the Year. You can check out my family’s recipe for cappelletti simply by clicking HERE.

*     *     *

Linguine with Seafood in Parchment

Linguine ai Frutti di Mare al Cartoccio

Linquine ai Frutti di Mare al Cartocci - 1

Yes, everyone, it’s Christmas Eve and, as many of you who’ve been with me for at least one Christmas already know, it’s a night of great anticipation and luscious seafood for many of us Italians. In fact, more than a few households will celebrate tonight with the Feast of the Seven Fishes. In the past, I shared a rather tongue-in-cheek story of the origins of this Feast but, instead of sending you there, I thought I’d reprint it for you here. What’s this? You already know the tale? Well, just skip the paragraph that follows and head straight to the video. That should keep you occupied until the others catch up. So, here is one version of how the Feast of the Seven Fishes came about …

Prior to the changes brought by Vatican Council II in the 1960′s, Christmas Eve was a “fast & abstain” day, meaning only 1 main meal could be consumed and no meat was to be eaten all day. For most Catholics around the World, it was a day of contemplation and that one meal was nothing special. With Christmas coming within hours, all eyes — and appetites — were focused on the big day — and dinner — soon to come. Not so the Italians.  If tomorrow’s a big holiday and today you can only have one meal, why not make that meal special? And so they did. Can’t have any meat? No problem. With Italy being both peninsula and island, fish was very often more readily available than many meat products. And so it became a seafood banquet. Wait a minute! The Church may frown upon so grand a celebration on the eve of the birth of the Christ Child. Again, no problem. They made a point of serving seven fish, each one representing one of the Seven Sacraments of the Christian Faith. In one masterstroke, their seafood feast became an Act of Faith. What priest, bishop, or even Pope would dare interfere with these devout Catholics as they used the day’s only meal to commemorate the Seven Sacraments? (The fact that the clergy themselves were probably dining on an even more spectacular seafood supper didn’t hurt “the cause” either.) And so the Feast of the Seven Fishes was born and survives to this day wherever Italians call home.

*     *     *

*     *     *

OK then. Is everybody here? Let’s continue …

I first saw this dish prepared almost 20 years ago. An Italian chef, Nick Stellino, hosted a cooking show on PBS. That one episode not only showed me how to cook seafood pasta, Pasta dei Frutti di Mare, but it introduced me to the wonders of using parchment paper to envelope a dish. Since then, although I’ve made this dish a few times, I’ve made seafood pasta often and baked fish and/or vegetables in parchment or foil even more frequently.

*     *     *

Now, this one dish will give you 5 of the 7 fish needed for your feast. Please resist the urge to go for broke and add 2 more fish to the pot. All that will do is muddle the flavors or, worse yet depending on the seafood chosen, completely overpower the others. If you’re looking for suggestions, how about oysters on a half-shell, a nice octopus salad, a small salad with seared tuna, or a bit of baccalà salad. (A serving of baccalà in some fashion being the overwhelming choice of many Italian families.) Still not happy? Then do what I once did. Late one Christmas Eve afternoon, I was among the horde in a grocery store when I realized I was 2 fish shy of the required 7 for my own little feast. Not willing to spend any more time in the store while I weighed options, I went to the sushi counter and picked up a spicy tuna roll, before heading to the deli section to get a jar of pickled herring.  Fish are fish, after all.

*     *     *

Speaking for my Zia and the rest of the Bartolini Clan,

We wish you a very Merry Christmas!

*     *     *

Frutti di Mare - Crudo

*     *     *

Linguine with Seafood in Parchment Recipe

yield: 3 servings (See Notes)

Ingredients

  • 1/2 lb (225 g) fresh linguine, spaghetti, or tagliatelle — dried pasta may be substituted
  • 4 tbsp olive oil, divided
  • 1 small onion, finely chopped
  • 1/4 tsp red pepper flakes
  • 4 garlic cloves, minced or grated, divided
  • 4 tbsp chopped parsley, divided
  • 2 tbsp basil, chopped
  • 1 small can (14.5 oz; 400 g) diced tomatoes
  • 1/2 c white wine, divided
  • 1/2 cup clam juice or shrimp stock (see Notes)
  • 1 tsp dried marjoram (2 tsp if fresh)
  • 6 mussels, (see Notes)
  • 6 cherry-stone or manila clams, (see Notes)
  • 6 scallops, cut in half (see Notes)
  • 9 shrimp (see Notes)
  • 3 calamari (see Notes)
  • salt and pepper, to taste
  • chopped parsley and basil for garnish

*     *     *

(Click any photo to enlarge)

*     *     *

Directions

  1. At least 30 minutes before you are to begin preparing the sauce, place the clams in a bowl filled with cold water. Change the water at least once and be sure to brush the clam shells before cooking them.
  2. Prepare a simple tomato sauce:
    1. Place 2 tbsp olive oil in a small sauce pan over med-heat. Once hot, add the onion, the red pepper flakes, season with salt & pepper, and sauté until translucent, about 5 minutes.
    2. Add 2 cloves of garlic and 2 tbsp of parsley, stir, and continue to sauté for another minute or so.
    3. Add 1/4 c wine, the tomatoes, 1 tbsp basil, season with marjoram, salt & pepper, and bring to a boil before lowering heat to a simmer.
    4. Allow to simmer until sauce has deepened in color and thickened, about 30 to 40 minutes. Taste for seasoning and adjust, if necessary.
    5. Put aside 1/2 cup for the recipe and reserve the rest for another day.
  3. Pre-heat oven to 375˚ F (190˚ C).
  4. In a large pot of salted boiling water, cook the pasta until 2 minutes before the package indicates it will be al dente. (See Notes)
  5. In a large, deep fry pan with a lid, add remaining olive oil over med-high heat. Add remaining oil, garlic, and parsley to the pan and sauté until fragrant, about a minute or so. Add the clams and mussels, cover the pan, and sauté for 2 minutes.
  6. Add the squid, shrimp, scallops, clam juice, tomato sauce, and the remaining basil and wine to the pan. Cover, increase the heat to high, and boil the ingredients for about 2 more minutes.
  7. Using a slotted spoon, remove the seafood from the pan, and place in a covered bowl. Reduce the sauce by half,
  8. By now, the pasta should be drained. Add it to the boiling sauce, stir to evenly coat, and sauté for a minute.
  9. Add the reserved seafood to the pan, mix, and heat till warmed throughout. At this point, discard any shellfish that have yet to open.
  10. Meanwhile, take a large piece of parchment paper — or aluminum foil — fold in half and place on a large serving platter.
  11. When the seafood and pasta are ready, place them along the fold of the parchment paper. Garnish with parsley and basil. Working quickly, use interlocking folds to join the top and bottom halves of the parchment paper. (See Notes)
  12. Alternately:
    1. Use separate sheets of folded parchment paper, one per serving.
    2. Split the pasta and seafood evenly among the sheets. Garnish with parsley and basil. Fold each, as indicated in Step 11 above.
  13. Place the parchment packet(s) on a baking sheet and place in the middle of a pre-heated oven.
  14. Bake for 5 minutes and remove to a large serving platter or individual plates. Do not pierce the parchment until at the table.
  15. Serve immediately and watch as your dinner guests open their parchment presents and get a whiff of that steam. This is why you go through the trouble of putting seafood pasta in parchment.
  16. Do not serve with grated cheese for it will overpower rather than enhance most of the dish’s seafood components.

Inspired by Nick Stellino, “Cucina Amore”, Pasta al Cartoccio di Mare

*     *     *

Linquine ai Frutti di Mare al Cartocci - 2

*     *     *

Notes

To store the fresh seafood

If you are to prepare this on Christmas Eve, the last place you want to be that afternoon is standing in line at the fishmonger. Fresh seafood will easily keep in your fridge for 24 hours if treated properly. I would not recommend storing beyond 24 hours.

  • Remove the clams and mussels from their packaging and place in a colander. Cover with damp — not sopping wet — paper towels. Place the colander in a bowl in which some ice as been set. Do not use so much ice that it will immerse any of the colander’s contents when it melts or the mollusks may drown. Place the bowl with colander into your refrigerator until needed.
  • Leave the shrimp, squid, and mussels in their packaging and store in the coldest part of your refrigerator. Do not freeze.

To prepare the seafood:

  • The Clams: At least 30 minutes before they are to be used in the recipe, place in a bowl of cold water and soak. (Some believe adding a couple tbsp of corn meal to the water will cause the clams to eliminate any sediment.) Change the water at least once before the clams are needed. Just before use, scrub clean the shells with a small brush. Discard any that are open and that won’t close on their own power.
  • The Mussels: Before use, remove the beard (a thread mass on one side) and use a brush to clean the shells. Discard any that are open and that won’t close on their own power.
  • The Shrimp: remove the shell including the tail section, if desired. Save the shells to be used to make shrimp stock. Use a sharp paring knife to slit the top of each shrimp. This will reveal a dark-colored vein that should be removed.
  • The Scallops: these may be sold with a muscle attached to one side. It is about an inch long and /14 inch wide. This should be removed as it is tough and unpalatable.
  • The Squid: Use a sharp knife to cut each tube, creating rings that are a half-inch wide. If using the tentacles, cut them in half or quarters.

*     *     *

Homemade Linguine Cut Two Ways

*     *     *

You may find it easier to enclose your seafood in aluminum foil rather than parchment paper. The choice is yours to make.

Do not forget — as I did — to add a garnish of parsley and basil to each packet just before you seal them. Their presence adds to the aroma upon tearing the parchment.

Timing is everything with this dish. The seafood cannot be kept waiting for the pasta to be cooked lest it become tough and rubbery. If you feel that you cannot properly time the dishes together, go ahead and cook the pasta so that it finishes within a few minutes of starting the sauce. Pasta should be cooked about 2 minutes shy of al dente, as indicated on the package’s instructions. Drain the pasta, return it to the now-empty pot, coat very lightly with olive oil, and cover until needed.

You needn’t be an origami expert to fold and seal the parchment packets. That’s why the gods gave us staplers and don’t be afraid to use one.

As written, this recipe will give you 3 nice servings. If you wish, it will yield 4 primo piatto-sized servings, though you may want to adjust the amounts of seafood used.

The keen-eyed among you may have noticed that there seemed to be more seafood in the photos than was required by the recipe. You’d be correct. I usually buy a couple extra clams and mussels to account for any that may be spoiled and must be discarded. Not knowing that I had already done so, the fishmonger added a couple more, for the same reason. When I joked that the scallops looked “bad”, he agreed and added another 2 scallops to their previously weighed container. He then added 2 shrimp and another squid to their respective containers. This is how you earn life-long customers.

If you like, you can skip the parchment packets altogether and use this recipe to prepare a very good frutti di mare pasta. To do so, follow the recipe but cook the pasta for another minute before draining. Place the drained pasta into the sauce, as before, but cook it for only a minute before adding the seafood. Stir to combine, heat everything through, and serve immediately. Garnish with chopped parsley and basil.

This dish does not make good leftovers. None of the seafood will re-heat well at all. Try to prepare just enough to ensure your dinner guests are satisfied without having anything left on the serving platter.

As you may have noticed, I used a pastry brush to lightly coat the sealed parchment before placing it in the oven. There was no discernible effect to the parchment paper by doing this. Perhaps it’s because the oven temp was relatively low and the packet was in the oven so briefly. Whatever the reason, I won’t do it again for this recipe and excluded it from the recipe’s directions.

*     *     *

It’s déjà vu all over again …

Zuppa Inglese - 1No series looking back at my family’s traditional Christmas dishes would be complete without including our recipe for Zuppa Inglesi. This highly anticipated dessert consisted of lady fingers that were “lightly flavored” with alcohol before being covered in lemon-flavored custard. There’s even an alcohol-free version so that no one seated at the table need go without. You can take a look at the recipe for this family favorite just by clicking HERE.

*     *     *

Coming New Year’s Eve to a monitor near you …

Two Cellos and a Cherry

Booze

*     *     *