Happy St. Joseph’s Feast Day!!!!

I know. I know. I was supposed to share my cousin’s meatball recipe and I had every intention of doing so — and then I looked at the calendar. Forgive me, Giuseppe, but I forgot your feast day.

*     *     *

*     *     *

For those not familiar, some believe that St. Joseph’s intervention brought drought relief to Sicily during the Middle Ages, thus preventing widespread famine. In appreciation, the faithful vowed to prepare a large banquet in his honor and to forever commemorate his Feast Day. Over the years, St. Joseph was named the Patron Saint of towns and villages throughout Sicily and the Italian peninsula, and his Feast Day became Fathers Day in Italy.Today, March 19th, is cause for celebration with parades on both sides of the Atlantic That feast has evolved into the current day St. Joseph’s Table tradition in which the faithful bring a variety of foods and sweets to their parish churches. This is one potluck you don’t want to miss!  Any money collected during the celebrations is donated to the area’s needy.

Still interested? Here’s a more thorough description of the St. Joseph’s Table.

I’m sure you will understand if I postpone the meatball post one last time. After all, I’ve a virtual platter to prepare!

*     *     *

You can’t have a proper celebration without  music. As one of the many kids attending any number of weddings, we all sat mesmerized as our parents circled the dance floor again and again, each pass a little faster, as this music’s tempo increased.  Chicken dance? Ha! Hope your toes are in tapping condition.

*     *     *

*     *     *

Now, I must admit to initially drawing a blank when I attempted to think of recipes worthy of this illustrious Saint. The Bartolini recipe file is pretty much depleted of all dishes once served on festive occasions. What to do? What to do?

And then, an epiphany! (Considering the Saint, an epiphany sounds about right.) A number of years ago, my good friend, formerly known as my “Traveling Companion”, attended a family gathering and today’s dish, Cannoli Cream and Chips, was served. I could not believe my ears as he described the dish. Why hadn’t I thought of this?

*     *     *

Home-made chips

*     *     *

Not very much later, I was invited to join him when he next visited his family. Before going further, let me talk about that family. When I first visited, walking over the threshold was like walking back in Time to the Bartolini family gatherings in the old two-flat. A welcoming cocktail and friendly conversation to be followed by a wonderful dinner with, of course, a platter of pasta the table centerpiece. His family welcomed me as one of their own and that evening remains a very special memory for me.

A few months after he described the wondrous confection, I was again invited to join him when he visited these good people. It was warmer this visit and we all gathered in what I believe was the sunroom. There, in the center of the table, was what I now consider the Holy Grail of Nibbles: a bowl of cannoli cream surrounded by chips made from broken cannoli tubes. Yes, you read that correctly, cannoli cream and chips!!!!  In my mind, “chips and dip” would never mean the same thing again.

Since that fateful day, I’ve learned that our dear hostess found this wonderful appetizer at one of the area’s groceries. Once I heard that, I went shopping and, yes, I, too, found them. In fact, they can be found in this store’s pastry department for just about any holiday. To be honest, I’ve never bought them. Where’s the fun in that? I’ve got time and a Kitchen Aid stand mixer. Let me at it!

I’m about to share recipes for both the cannoli cream and the chips. Truth be told, recipes aren’t the focus of this posting. It’s the way they’re served. So, if you’ve a favorite cannoli cream recipe, by all means use it. The same is true for the tubes. This post is about serving an old favorite in a new way.

*     *     *

Broken store-bought cannoli tubes

*     *     *

Cannoli Cream and Chips Recipe

Ingredients

for the cream (see Notes)

  • 1/2 cup heavy cream
  • 2 cups (17.5 oz, 500 g) ricotta, well-drained (see Notes)
  • 1/2 cup powdered/confectioners sugar
  • 1/2 tsp vanilla
  • 1/4 tsp cinnamon
  • 3 oz (84 g) semi-sweet chocolate – chips, chopped, or grated
  • chopped pistachios and/or grated chocolate, for garnish (optional)

for the chips

  • 2 cups all-purpose flour
  • 1 tbsp sugar
  • pinch salt
  • 2 tbsp butter, chilled and cut into pieced
  • 1/4 dry white wine
  • 1 egg, slightly beaten
  • powdered/confectioners sugar, optional

Directions

*     *     *

for the cream (see Notes)

  1. Whip the cream until stiff peaks form. Set aside.
  2. In another bowl, whisk the ricotta until smooth.
  3. Slowly add the sugar while continuing to whisk.
  4. Add the vanilla and cinnamon and whisk until well blended.
  5. Add the chocolate and carefully stir.
  6. Gently fold the whipped cream into the ricotta mixture. Cover and refrigerate for at least 1 hour before serving.
  7. Cannoli cream should be kept refrigerated and used within 2 days.

*     *     *

for the chips (see Notes)

  1. Before beginning, consider buying cannoli shells from the nearest Italian bakery. Once home, break the shells into pieces and serve. No muss, no fuss, and no panful of oil to discard. However, if you must …
  2. Sift together the flour, sugar, and salt.
  3. Add the pieces of butter and combine with the flour using your hands until the mixture resembles gravel.
  4. It’s not too late to change your mind and buy some cannoli shells.
  5. Add the egg and mix well.
  6. Add the wine, a teaspoon at a time, and knead to create the dough.
  7. Once a smooth dough is achieved, flatten it, wrap in plastic and refrigerate for no less than 15 minutes.
  8. When chilled, take a section of the dough, and roll until smooth and about the thickness of pasta. (See Notes)
  9. Use a pastry cutter to cut the dough into chip-sized pieces.
  10. Place oil for frying into a frypan to about a depth of 1/2 inch (1.25 cm).
  11. Preheat oil to 360˚ F (180˚ C)
  12. Place several pieces of dough into the hot oil and fry until golden. Flip to cook the other side. The chips should take no more than 3 minutes to completely fry. (See Notes)
  13. Use a slotted spoon to remove the chips and drain on paper towels.
  14. Cooled chips should be stored in an airtight container where they will keep for about one week.
  15. To serve, place on a platter within reach of the cannoli cream, and sprinkle with powdered sugar, if desired.

*     *     *

*     *     *

Notes

This is the time to make your own ricotta. It’s easy to do and the reward is a cheese that is far superior to any that you might find at your local grocery. Click HERE to see how I make my ricotta.

If you like, citrus zest and/or chopped candied fruit can be added to the cream for Sicilian-style cannoli cream.

For chocolate cannoli cream, add 3 to 4 teaspoons unsweetened cocoa powder to the ricotta in place of, or in addition to, the cinnamon.

If you are rolling pin-challenged like I am, grab your pasta machine and let the machine do the work for you.

A warning for all March Madness fans. Do not attempt to fry these chips when a local underdog (Loyola) makes its first appearance at the Big Dance in over 30 years. Worse, if the team is tied going into the closing minutes, turn off the stove and go watch the game. Well, a picture really is worth a thousand words.

ETA: Loyola played again on Saturday night and won!!! They now advance to the next round, the Sweet 16, and will play again on Thursday. Go Ramblers!

*     *     *

It’s déjà vu all over again  

Baked Calamari 5

This is a holiday so why not take another look at one of the Bartolini all-time favorite dishes, Zia’s Baked Calamari?. It’s a family classic and one that’s sure to bring a smile to any Bartolini whenever it’s mentioned. You can read all about it HERE.

*     *     *

Coming soon to a monitor near you …

                                                    Marinella’s Meatballs                                                   (The lengths some will go to get one of those meatballs!)

*     *     *

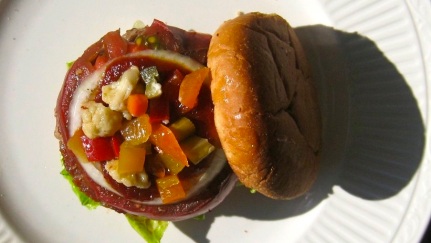
End of the Harvest Hot Pepper Relish (GF)

hot-pepper-relish-5

This was not the best year for my garden. You already know about my zucchini troubles but those were only the beginning. My tomato plants, as well as those of my neighbors, just didn’t do well. Yes, I harvested cherry tomatoes but nowhere near as many as I have in prior years. The San Marzano tomatoes were no bigger than 1/4 of their normal size, while the Brandywine didn’t even bloom until mid-August.  I gladly yanked them out of the ground during the 1st week of October.

On the other hand, my eggplants did far better than I ever imagined and I have trays of eggplant lasagna in my freezer to prove it. I picked the last of the eggplant on about Halloween and sadly cleared those plants from the bed.

Left standing were the chile/pepper plants. They, too, produced a great deal right up until the morning of November 11th, when everything was picked from that raised bed but I held off pulling them because there were still peppers ripening. That morning, I took stock of this season’s pickled pepper inventory. There would be no more pepper pickling this year. Great! Now, what?

Well, I did what most of us do under similar circumstances. I called upon Mr. Google. First, I checked to see whether green peppers would be as hot as fully ripened red peppers. I was swamped with every reply imaginable. Yes, green peppers are just as hot. No, they’re much more mild. They’re the same but red — no, make that green — are sweeter. The only response I didn’t see was that young peppers were inedible or, worse yet, poisonous. So, I went searching for a recipe.

I chose today’s recipe because it was so simple to prepare and, best of all, I already had all the ingredients. There would be no mad dash to the grocery today! So, here’s the relish recipe that I followed. To prepare the peppers, all I did was remove the top of each, leaving the seeds and ribs intact. I did nothing to limit the heat of the relish. The result? One spicy relish but not so hot to ruin your palate midway through the meal. Perfect.

*     *     *

hot-pepper-relish-1

*     *     *

Hot Pepper Relish

Ingredients

  • 3.5 lbs (1600 g) mix of cayennes, jalapeños, and cherry bomb peppers, tops trimmed and roughly chopped
  • 2 cups cider vinegar
  • 1 cup white vinegar
  • 2 tbsp light brown sugar
  • 1 tbsp granulated sugar
  • 1.5 tsp pickling salt
  • 3/4 tsp black peppercorns
  • 3/8 tsp yellow mustard seed
  • 3/8 tsp celery seed
  • 1 clove garlic, smashed

*     *     *

hot-pepper-relish-3

*     *     *

Directions

  1. Use a food processor to finely chop the peppers. (A knife may be used to dice them.)
  2. Add the remaining ingredients into a saucepan and bring to a boil before simmering for a few minutes. Lower heat to keep liquid warm.
  3. Fill clean, sterile jars with the chopped chile mixture.
  4. Remove the garlic before adding the hot liquid to each jar, filling to 1/2 inch (1.25 cm) from the top.
    • If you like, strain the liquid before using to fill the jars
  5. Seal each jar until “finger tight”. (See Notes).
  6. Place in a boiling water bath for 15 minutes. Start the timer after the water returns to the boil.
  7. Remove from the bath and place atop a clean kitchen towel away from drafts. Do not disturb for 24 hours.
  8. Store on a shelf in a cool, dark place. Use within 1 year. (See Notes)

Based on the recipe, “Hellish” Hot Pepper Relish, by BKLaRue.

*     *     *

hot-pepper-relish-6

*     *     *

Notes

When dealing Large quantities of peppers and chiles, be sure to wear rubber gloves and do not touch your face as long as you’re wearing them. If you choose not to wear gloves and absent-mindedly rub an eye, I guarantee you’ll wear them next time.

This recipe resulted in 4 pints of relish but can be easily adjusted to suit the amount of peppers on-hand. Just be sure to maintain the relative amounts of the vinegars, sugars, and salt. The rest of the spices can be changed to suit your own tastes.

When preserving in jars, it is very important to seal the jars but not too tightly. “Finger tight” means to fully tighten the jar and then loosen it just a bit to allow for the contents to expand during processing in the hot water bath. Failure to do this may result in shattered jars. (Been there.)

Relish that has been properly preserved will last up to a year on a dark, cool shelf. Refrigerate after opening, however, and use within a few weeks.

You needn’t preserve the relish. If you prefer, it can be prepared as described and then refrigerated rather than being further processed in hot water. Be aware that relish stored in the fridge will remain good for a few weeks and not a year like its preserved counterparts. On the plus side, relish stored in the fridge will retain its vibrant colors and crispness.

  • Hot Pepper Quick RelishOur weather was most unseasonably warm when I wrote this post so I did not pull my pepper/chile plants right away. In fact, they remained until after the first killing frost during the early morning hours of November 20th. As a result, I had another batch of peppers to pick from which I made 2 half-pints of relish, though neither was processed and preserved. Call them a “Quick Relish.”, if you like but, whatever the name, è finito!

If you find that a jar has not sealed properly during processing, just store it in the fridge and use as you would a jar that you’ve opened.

For information regarding canning/preserving, please refer to the USDA Principles of Home Canning guide.

For information on preserving virtually any/all vegetables, fruit, and berries, be sure to check out the Pick Your Own website.

*     *     *

It’s déjà vu all over again …

honey-mustard-deja-vu


A few weeks ago, when I shared our recipe for Olio Santo, that post’s look back took you to our recipe for tomato ketchup. Well, with today’s recipe a relish, why not take a look back at one of the honey mustard recipes that I shared a couple of years ago? It’s a great little recipe and if you prepare gift baskets for the upcoming holidays, these 3 condiments make perfect additions to accompany the Olio Santo. You can see how we make honey mustard by clicking HERE.

*     *     *

Coming soon to a monitor near you …

red-snapper-preview

Dad’s Red Snapper

*     *     *

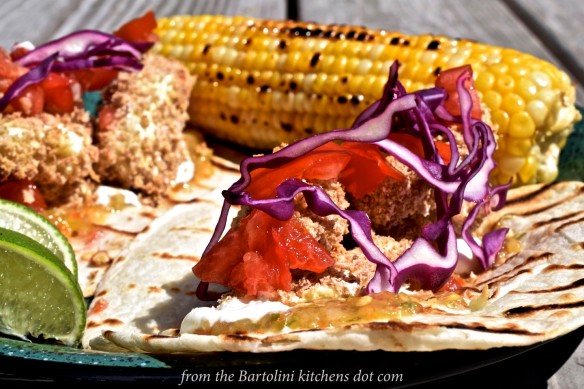
Fish Tacos with Roasted Tomatillo Salsa

Yes, you read the post’s title correctly. Today I’m sharing a recipe for fish tacos. As I’ve said on several of your blogs, I rarely make tacos. I don’t think it worth the effort just to make 2 or 3 tacos for my dinner. I still feel that way but at the time this post was written, my chile plants were producing at a rate that rivaled my eggplant crop.. If only my tomato plants had been so competitive.

*     *     *

Fried Fish Tacos - 1

This Fish is Fried

*     *     *

Well, it was far too humid to try to dry the peppers and without a dehydrator, I was loath to turn on the oven, no matter how low the temperature would be set.. So, I cooked some, pickled others, and added a few to the cherry bomb peppers that I was preserving. But the chiles kept coming and Lucy can only eat so many. Thanks to a couple blogging friends, I decided to make tomatillo salsa. (That recipe follows this one.)

Well, the salsa did make a dent — albeit a small one — in the chile inventory but what to do with it? I was stumbling around the grocery, trying to figure out what to prepare when I saw that there was a sale on pollock. That’s all I needed to make up my mind. Fish tacos would be on the night’s menu.

Since my tomatillo salsa was rather smooth, I felt that the taco needed something more crispy than shredded lettuce. That’s why the shredded cabbage was included but you should use whichever you prefer. The same is true for the tortillas. As much as I like corn tortillas, I bought flour because I felt that corn tortillas would just about disintegrate by the time I was done snapping photos. Oh, to be a better — read faster — photographer. And, by the way, hats off to those who would make their own tortillas for a dinner for one.

To prepare the fish for breading, the fillets were cut into strips about 3 inches (8 cm) long. Seasoned corn starch was used to coat the strips, just as was done when soft shell crabs were prepared several weeks ago. Once coated, the strips were dipped in a mixture of eggs, milk, and Sriracha. From there, they were coated in Panko bread crumbs and reserved. Easy peasy.

A note about the ingredients. Few amounts are listed because they will depend upon the number of tacos to be prepared and your own taste preferences. More cornstarch and breadcrumbs will be needed if you’re feeding 4, for example, than if you are preparing tacos for 1.

Lastly, for those avoiding fried foods, I’ve included instructions for baking the fish, as well as for frying.

*     *     *

Fish Tacos - Baked 1

Tacos with Baked Fish

*     *     *

Fish Taco Recipe

Ingredients

  • Fish fillets cut into strips (see Notes)
  • corn starch seasoned with paprika, ground chipotle, cumin, salt, and pepper, to taste
  • 2 eggs, beaten
  • 2 tbsp milk
  • 2 tbsp Sriracha sauce, more or less to taste
  • Panko bread crumbs
  • tortillas
  • roasted tomatillo salsa – recipe follows
  • shredded cabbage
  • diced tomato (optional)
  • sour cream (optional)
  • diced red onion (optional)
  • limes, quartered

Directions

  1. Set up a breading station:
    • In the first dish, place corn starch seasoned with paprika, ground chipotle, cumin, salt & pepper to taste.
    • In the second, combine and beat the eggs, milk, and Sriracha.
    • In the 3rd dish, add enough Panko breadcrumbs to coat the pieces of fish.
  2. To fry:
    • Add enough oil to the pan for a depth of 1/2 inch (1.5 cm).
    • Heat over med-high heat to 360˚ (180˚C).
    • Place breaded strips into the hot oil and fry until golden brown, about 2 minutes per side.
    • Remove from oil, place on paper towels, season with salt immediately.
  3. To bake:
    • Pre-heat oven to 400˚ F (200˚ C)
    • Place breaded strips on to a rack placed atop a baking sheet.
    • Bake until golden brown, about 10 to 12 minutes, turning them over midway through the bake.
    • Remove to a platter and season with salt.
  4. To assemble the tacos:
    • Over med-high heat, warm the tortillas on a grill pan, cast iron fry pan, skillet, or barbecue grill until heated through.
    • Create a taco using a tortilla, pieces of fish, a couple tbsp of salsa, some shredded cabbage, and a squeeze of lime.
      • Sour cream, onions, and tomatoes may be added, according to personal tastes.
  5. Garnish with lime quarters and serve.

*     *     *

Fried Fish Tacos - 2

More Fried Fish Tacos

*     *     *

Notes

Although I used pollock here, feel free to use any white fish. Cod, hake, or tilapia come to mind, although mahi mahi, halibut, or even tuna would be very good, too. You may want to adjust the seasoning depending upon the fish you’ve selected.

Roast Chicken Tacos 2Fish not your thing? Tacos are a great way to re-purpose leftover roast chicken. Use a fork to pull apart the chicken meat and warm it quickly in a frypan with a little butter. Once heated, use it to build your taco with a bit of tomatillo salsa and whatever other fixins you like: shredded cabbage/lettuce, sour cream, diced onion, diced tomato, fresh cilantro, and/or a bit of shredded cheese would work just fine.

Roast Chicken with Tomatillo SalsaDid I say roast chicken leftovers? Well, first you have to roast that bird. Do it however you wish. Mine was spatchcocked and seasoned with plenty of herbs, lemon juice, and olive oil before roasting. Be sure to have the salsa nearby so that you can generously spoon some atop the chicken once served.

*     *     *

Roasted Tomatillo Salsa Recipe

I have 2 blogging buddies to thank for this post, Kathryn of Another Foodie Blogger and MJ of MJ’s Kitchen. Had it not been for Kathryn, I never would have bought tomatillos, and MJ is the Queen of Chiles. Now, this salsa and serving suggestions may not be exact duplicates of their recipes — shower them with all the praise and I’ll shoulder any blame — but I was certainly inspired by them. If you’re looking for some inspiration, by all means check out these 2 wonderful blogs.

Ingredients

  • 6 tomatillos, husked and washed (see Notes)
  • 4 cayenne chilies, tops trimmed (see Notes)
  • 1 chile de agua, top trimmed
  • 2 to 3 cloves garlic
  • small sweet onion or half of a large, cut in half
  • olive oil
  • cilantro, to taste
  • lime juice, to taste
  • salt & pepper, to taste

Directions

  1. Pre-heat oven to 400˚F (205˚C).
  2. Place tomatillos, all the chilies, garlic, and onion into a large bowl, drizzle with olive oil, and spread on a baking sheet in an even layer. Roast for 30 minutes.
  3. Once cooled, place all the roasted ingredients into a food processor, along with cilantro and the juice of 1 lime.
  4. Pulse the ingredients several times until the salsa is the consistency you prefer. Midway through, taste and season with salt and pepper. Add more cilantro or lime juice, if needed.
  5. Refrigerate until needed.

*     *     *

fried-fish-tacos-3

One More Fried

*     *     *

Notes

After removing their paper coverings, be sure to rinse the tomatillos very well to remove their somewhat sticky coating.

Until this point, I hadn’t tasted any of my home-grown chiles, all having been pickled and preserved. Now that I’ve tasted this salsa, I will only add 2 cayenne peppers in the future. For my tastes,  4 of these cayenne are a bit much. (Please pass the milk.)

*     *     *

It’s déjà vu all over again …

Crostini Look Back

With the holidays fast approaching, it’s never too early to start working on the menu for the holiday feast(s). It wouldn’t be much of a celebratory meal if there aren’t any appetizers, and crostini/bruschette are tasty ones to whip up. You can see a couple of suggestions by clicking HERE.

*     *     *

Coming soon to a monitor near you …

Sweet Potatoes au Gratin Preview

Sweet Potatoes au Gratin

*     *     *

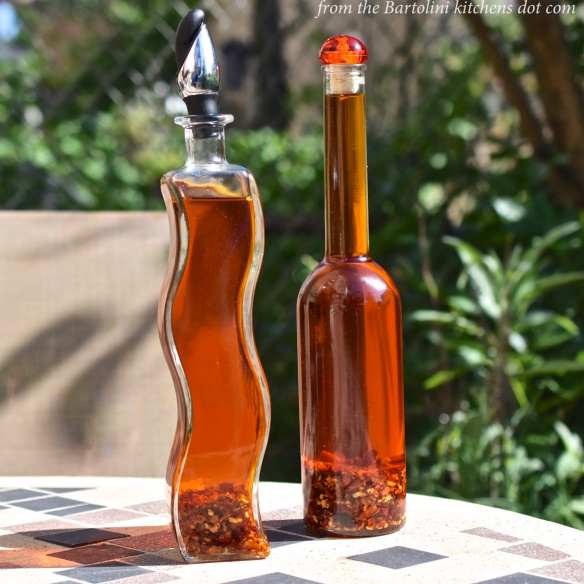
Olio Santo – The Spicy Peperoncini Oil of Italy

Olio Santo 2

My last post was so recipe-laden that I thought it best to go easy with this one …

I was introduced to Olio Santo during my first visit to San Marino a little over 2 years ago. My cousin Maurizio offered to drizzle a bit of it on my linguine alla vongole, a dish Zia had prepared for me after I mentioned it was a favorite. I thoroughly enjoyed the oil and was told that Zia made it and that it was very easy to do. After a brief explanation, I knew that I’d be making it once I got home. I have ever since.

Red peperoncini are grown throughout Southern Italy but primarily in Calabria and Basilicata, the toe and instep of the Italian boot. Come August, you can often see the peperoncini hanging in large bunches, drying in the hot Mediterranean sun. Across the south, their name often contains a reference to the devil – i.e., diavolett, diabulillu, diavulicchuirefers, etc. With that naming convention, it makes perfect sense that an oil made with them should be called holy or sacred. Olio Santo does, in fact, translate to Holy Oil. Yes, perfect sense.

Trying to find the origin of Olio Santo was not such an easy task. It seems that everyone from Calabria to Abruzzo (the region to the south of Le Marche), claims to be the origin of this spicy condiment. I’m not about to take sides. For me, Zia Pina is the creator of Olio Santo. You see, in Zia Pina I trust.

Zia uses dried red peperoncini from Calabria to make her Olio Santo. She grinds/chops the peperoncini, places them in a bottle, fills it with good quality olive oil, and caps it before setting the bottle in the sun for 3 days. After sunbathing, the bottle is stored in a cool, dark place for at least a week. Feel free to use it after that. (See Notes) It really is that simple and the recipe I’m about to share adds quantities to the ingredients just mentioned.

Although Zia uses Calabrese peperoncini, you may not be able to source them. For some time, I had a devil of a time finding them and eventually turned to Amazon. Of course, you needn’t go to such lengths but can easily use the more readily available chilies from this side of the Atlantic. I’ve used dried Chile do Arbol with a dash of red pepper flakes when peperoncini aren’t available. The preparations taste the same and affect the same area of the palate. I honestly doubt whether anyone would notice a difference.

Once made, use it as a finishing oil for just about any pasta dish to add a little zip to the plate. I’ve used it as a base for spaghetti aglio e olio, as well as a dipping oil for some crusty Italian bread. You may want to add a bit of grated Parmigiano Reggiano to that plate, too. Remember the pinzimonio? A dash of Olio Santo to the dipping sauce will bring a bit of heat to your veggies. Make a batch of this flavorful oil and I think you’ll be surprised to see just how many uses you’ll find for it. And we’ll have Zia Pina to thank.

*     *     *

*     *     *
Olio Santo Recipe

Ingredients

  • 4 oz dried Calabrese peperoncini
  • 1 quart (1 l) good quality extra virgin olive oil

Directions

  1. Place the dried peperoncini into a food processor and pulse until thoroughly chopped.
    1. Alternately: use a sharp knife to chop the dried peperoncini. Wear gloves to limit the risk of a burning eye.
  2. Place the chopped peperoncini into a clean & dry glass container with a tight-fitting lid.
  3. Add the olive oil, stir to combine, and place the lid on the jar.
  4. Once sealed, place the container into a sunny spot, where it will remain for 3 days.
  5. Once “cured”, place the jar into a cool, dark place for at least 1 week. (See Notes)
  6. Place the Olio Santo into bottles more suitable for serving. You can include some of the peperoncini bits in each jar, if you prefer. (See Notes)
  7. Olio Santo will keep for months, although it never lasts that long.

*     *     *

Olio Santo 3

*     *     *

Notes 

I stir the peperoncini in the oil several times while it sits both in the sun and in the dark. Not only will this ensure that all trapped air bubbles are released, I think it gives all the chopped peperoncini equal access to the oil.

I always include some chopped peperoncini in each serving bottle I fill from a batch of Olio Santo.  If you don’t wish to do so, just pass the oil through a mesh strainer as your fill the bottle.

Using a small ladle, I remove any bits and seeds that may float to the surface of my Olio Santo. If allowed to remain, they may block the bottle’s pourer, only to release at a most inopportune time.

Your Olio Santo will keep for 6 months, even longer if you continue to refill it with oil after you fill the serving bottle(s). Once soaked, however, I never allow the chopped peperoncini to be exposed to the air. When the level of oil in the bottle drops that low, either add more oil or toss that batch’s remnants. It’s easy enough to make a fresh batch.

Some prefer to keep the Olio Santo in the fridge. If you choose to do that, keep in mind that the olive oil will thicken considerably when cold. You can get around this by substituting a neutral-tasting vegetable oil for an equal amount of the olive oil, or, by removing the serving bottle from the fridge about 30 minutes before it’s needed.

There are other ways to prepare Olio Santo. Some use chopped, fresh peperoncini, while some recipes steep the peperoncini in heated — not boiling — oil. Never having tried any of them, I cannot say much more about them. I can say, however, that I’m sticking with Zia Pina.

*     *     *

It’s déjà vu all over again …

Ketchup Look Back

One good condiment deserves another, eh? A few years ago I made my first batch of ketchup and haven’t bought a bottle since. It’s good enough to have earned a permanent spot in my Christmas gift baskets, too. Better still, it’s not just for fried potatoes or burgers, as I’ll prove in a soon-to-be shared meatloaf recipe. Take this LINK to see the recipe and then you’ll have no excuse for not being prepared to make a killer meatloaf in a few weeks.

*     *     *

Coming soon to a monitor near you …

zucchini-blossoms-pasta-preview

Pasta with Zucchini Blossoms & Cream

*     *     *

Ground Cherry Jam

Ground Cherries

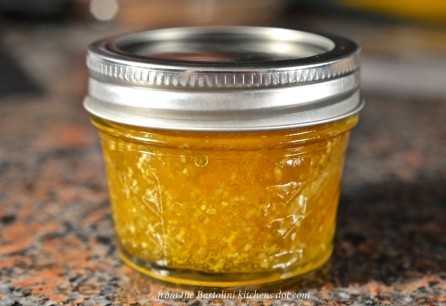
This is the recipe I referenced when I shared the recipe for  Ground Cherry Salsa … AKA Cape Gooseberry Salsa … AKA Husk Cherry Salsa … AKA Peruvian Cherry Salsa … AKA Salsa di Alkekengi … AKA Those-Little-Orange-Thingies-in-the-Paper-Lanterns Salsa. Whatever you call them, the fruit have a unique blend of pineapple and tomato flavors and makes a tasty jam that couldn’t be easier to prepare.

The cherries are husked, rinsed, and placed in a pot with sugar, along with whatever pectin you prefer. I added a little lemon and rosemary just to see how it would taste. In the end, 3 quarts of ground cherries produced 6 small jelly jars (3 half-pints). At $5.00 a quart, this isn’t the cheapest jam to make. Remember, too, that husked ground cherries are considerably less in volume than those still wearing husks. I wish these were the only problems.

I chose to use pectin because it yields more jam than if I relied on the fruit’s natural gelling properties. It can also be made in 1 day whereas jamming without pectin is a 2 day affair. Using pectin, however, resulted in a jam that was a bit too thick for my tastes. This is why I hate discovering a new item at the end of our growing season. I’ll have to wait until next year before I can make more of this jam. Whether I use pectin, I’ll use at least 4 quarts of ground cherries. Either way, I’ll have a tasty jam that’s hopefully easier to spread. While I’m at it, I’d also like to bake a pie with this fruit. (Thanks, Gretchen. Do take a few minutes to check out her fantastic blog, where every recipe is critiqued by 3 very discerning foodies.)

Hmm … Maybe I can get some sort of discount if I buy ground cherries by the crate.

*     *     *

Ground Cherry Jam 3

*     *     *

Ground Cherry Jam Recipe

Ingredients

  • 3 1/2 cups ground cherries, husked & rinsed
  • 1/4 cup lemon juice
  • 1/2 cup water
  • 1 box pectin
  • 2 rosemary sprigs
  • 3 cups sugar
  • pinch of salt

Directions

  1. Place the ground cherries, lemon juice, water, pectin, and rosemary into a heavy bottomed pot over med-high heat. (See Notes)
  2. After they’ve softened a bit, use a potato masher or wooden spoon to mash the cherries to the consistency you prefer.
  3. Bring the mixture to a rolling boil (see Notes).  Add salt and sugar. Stir well.
  4. When the jam returns to a rolling boil, continue heating for 1 minute and then take off the heat. Remove the rosemary sprigs.
  5. Place hot jam immediately into clean, sterile jars, cap, and place in a boiling water bath for 10 minutes.
  6. Remove from bath, set on a clean kitchen towel away from drafts, and do not disturb for 24 hours to allow the tops to properly seal.
  7. Once sealed, store in a cool, dark place. (See Notes)

*     *     *

Ground Cherry Jam 2

*     *     *

Notes

Directions may vary slightly depending upon the pectin being used. Be sure to follow the directions on your pectin’s packaging,

A rolling boil is one which continues even while the pot’s contents are stirred.

In the event that a jar does not seal properly, the jam is still good but must be refrigerated and used within a couple of weeks, You can also place the jar in the freezer. I’ve enjoyed jam that has been frozen for several months.

*     *     *

A scheduling change

It’s no secret that we’re coming to the end of the Bartolini recipe file. I do have a few more recipes, along with a few from Dad’s family, to share but certainly not enough to continue publishing a weekly recipe. So, although I’ll continue to post on Wednesdays, it just won’t be every Wednesday.

Did you hear that? It was a sigh of relief from Zia who just now learned that, after 5 years, I won’t be asking if she has another recipe for me or if she remembers the time when …

(Psst. I’ll still post, just not as often.)

*     *     *

It’s déjà vu all over again …

Figs 1

Since today’s post featured a rather unusual jam, I thought we’d continue down that road and take you back to my Fig Jam with Balsamic and Black Pepper recipe. This is a delicious jam and it pairs very well with pork roasts.  You can read all about it HERE.

 *     *     *

Coming soon to a monitor near you …

Grilled clams 2

Grilled Clams

 *     *     *

A Quick Pickle

Pickle 1

 *     *     *

Several weeks ago, while walking around the farmers market, a bin of pickling cucumbers caught my eye. I bought some and on the way back to my car bought the rest of this recipe’s ingredients — well, almost. The three cherry bomb peppers came from my garden. They turned out to be the only cherry peppers that I’d harvest until well into autumn. My tomato plants, taking full advantage of their new flower bed and soil, grew to monstrous proportions, overcrowding everything else in the process.

I have served this pickle atop every kind of sandwich imaginable, not to mention burgers, dogs, and wursts, too. I’ve also served it alongside a variety of grilled meats. For my tastes, a little something acidic on the plate is often a welcome accompaniment.

If you prepare this recipe, the ingredients aren’t nearly as important as the pickling liquid. You can change the spices to suit your own tastes but If you’re going to make a smaller batch, just keep the amounts of vinegar, sugar, and water proportional to what I’ve listed. It couldn’t be easier and, since this isn’t being canned, you needn’t worry about whether the solution is acidic enough. So long as you use sterile jars & lids and clean utensils, it should last several weeks in your fridge.

 *     *     *

pickle with BLTC

 *     *     *

A Fresh Pickle Recipe

Ingredients

Pickling liquid

  • 2 cups water
  • 2 cups apple cider vinegar
  • 2 cups white vinegar
  • 1 cup sugar
  • ¼ cup pickling salt – If substituting kosher salt, add an additional tbsp
  • ½ tbsp coriander seed
  • ½ tbsp yellow mustard seed
  • ½ tsp turmeric
  • ½ tsp celery seed

Vegetables

  • pickling cucumbers – about 3 lbs
  • 1 small red onion
  • 4 hot green peppers
  • 4 sweet Melrose peppers
  • 3 cherry bomb peppers
  • 1 bunch of radishes
  • garlic

*     *     *

Pickle Ingredients

*     *     *

Directions

  1. Place all of the pickling ingredients into a sauce pan and heat over a medium heat.
  2. Continue to simmer for 5 minutes after the salt and sugar have dissolved.
  3. Set aside.
  4. Meanwhile, slice the remaining ingredients.
  5. Once cooled, combine the pickling liquid with the sliced vegetables, stir, fill jars, and cover.
  6. Refrigerate for a few hours or overnight before serving.
  7. Will keep in your fridge for several weeks, at least. Just be sure to use fresh, clean utensils when serving.

*     *     *

Notes

For my tastes, this recipe is a little heavy on the cucumber. Next time I’ll cut the amount of cucumber and increase the other ingredients, especially the radishes. I’ll probably cut the turmeric, as well. As the pickle sat in the fridge, the turmeric gave everything the same hue, eliminating any color variation among all the ingredients save the cherry bomb peppers. The first photo was taken a few hours after I made the pickle. The second was taken one week later.

*     *     *

It’s déjà vu all over again …

Mt. Burger

I know, I know, Every year I bring you back to this recipe for giardiniera — and with good reason. Next to the blueberry cheesecake ice cream recipe, this condiment is the most requested and savored by my taste testers. It really is that good. Best of all, it can made anytime because its ingredients are readily available year-round. You can learn all about it by clicking here HERE.  

*     *     *

Coming soon to a monitor near you …

Ground Cherry Jam Preview

Ground Cherry Jam

 *     *     *

Ground Cherry Salsa

If you’re fortunate enough to have a rather large farmers market nearby, you’re likely to come across some relatively rare fruits and vegetables not found in your corner grocery. For me, ground cherries would fall into that category. Also called husk tomatoes, these little fruit will remind you of small sungold cherry tomatoes, except that they wear a thin paper husk, much like their distant cousins, tomatillos. It is their flavor, however, that sets them apart. Oddly enough, they taste like a combination of pineapple and tomato. It is an even mix with neither flavor so strong as to be dominant.

*     *     *

Ground Cherries 1

*     *     *

I had seen these beauties for years at my farmers market and even asked the vendors about them. Why it took me so long to purchase them is anyone’s guess. I’m just glad that I finally did.

Once husked and rinsed, they can be used to make a salsa, like today’s recipe, or cooked to make jam (that recipe is forthcoming). They can also be placed in a single layer on baking sheets and placed in a freezer. Once frozen, they can be packed and kept in the freezer until ready for use. (See Notes) I’ve seen recipes for pies but most combine the fruit with berries and I fear that the additions would overpower these cherries. The fact is that I’m fascinated by the mix of pineapple and tomato flavors and don’t care to do anything to them that might eliminate that contrast.

Like any salsa, the ingredients can vary depending upon your personal preference. For today’s recipe, the cherry tomatoes came from my garden and I shopped for the rest of the ingredients in my fridge’s vegetable crisper. I had planned to use a bit of cucumber but, failing to find one, I used celery instead. Where most would use cilantro, I used parsley. I “borrowed” one of Lucy’s green jalapeños and used red onion simply for its color. As you can see, this salsa is a very colorful one.

*     *     *

Ground Cherry Salsa

*     *     *

Ground Cherry Salsa Recipe

Ingredients

  • about 2 doz ground cherries, hulled & rinsed with some halved
  • about 1 doz cherry tomatoes, halved
  • 1 jalapeños, diced
  • 2 tbs red onion, diced
  • 2 tbs celery, diced
  • 2 tbs fresh parsley, chopped — cilantro may be substituted
  • juice of 1/2 fresh lime, more to taste
  • salt and pepper to taste

Directions

  1. Place the ground cherries, cherry tomatoes, jalapeño, onion, and parsley into a bowl. Gently stir to combine.
  2. Add the lime juice and season lightly with salt and pepper.
  3. Taste to see if additional lime juice, salt, or pepper are needed.
  4. Serve.

*     *     *

Salsa Served

Served with grilled monkfish

*     *     *

Notes

Hulk cherries are an American fruit that are available from mid-July to the first frost. When fully ripe, they range in color from yellow to orange. Green husk cherries should be avoided because they may cause stomach upset.

From experience, I’ve noticed that ground cherries, once frozen and thawed, are more soft than when fresh. They are fine when used to make jam but you may not want to use them in today’s salsa recipe. I think they would be fine, however, in a salsa used for dipping chips.

The ingredient amounts can be adjusted depending upon how the salsa is served. Since I used this to accompany a fish entrée, I made a relatively small amount.

*     *     *

A scheduling change …

I will be leaving early next week to ferry a very important visitor from her manse in Michigan to my humble Chicago home. As a result, the kitchens will be closed for the next 2 weeks so that I may tend to her every whim whilst she’s here.

*     *     *

It’s déjà vu all over again …

Borlotti/Cranberry Beans

With temperatures falling, it’s time to start cooking comfort foods. One of our favorites and one that I make for Zia every year is Pasta and Beans Soup, Pasta e Fagioli. Easy to make, this soup is the very definition of comfort. Best of all, if you’re as lucky as I was just last weekend, you can still find fresh Borlotti/cranberry beans at your local farmers market. The recipe for this traditional Italian dish can be found by clicking HERE.

*     *     *

Coming soon to a monitor near you …

Pickle Preview

A Summer Pickle (Served with Grilled Pork Chops)

*     *     *

Honey? Mustard!

The year’s last visit with Zia went very well, though I doubt I’ll ever drive North again when there’s a Polar Vortex rolling South. Once there, we cooked up a storm and 4 of those dishes will make their way on to this blog over the next few weeks. My Cousin, also, came up for a few days and he and Max were off roaming the countryside. With deer season just starting, however, the sound of distant rifle fire kept them both closer to home than normal. I do think he minded more than the dog. Max just wants to be at my Cousin’s side, no matter where that happens to be. Me jealous? Nah! It’s good to “pass the baton” every now and again, giving Zia and me time to make our pasta in peace.

*     *     *

Honey Mustard 3

*     *     *

With November now behind us, Christmas will be here before we know it. Today’s recipe is a perennial favorite of my Christmas gift baskets. (They’re bags actually because I can never find gift baskets.) But I’m getting ahead of myself.

Some 3 years ago, I began making ketchup following a recipe on Tanya’s fantastic blog, Chica Andaluza. About the same time, I made Guinness-based whole grain mustard from a recipe I found on Mandy’s wonderful blog, The Complete Cookbook. I honestly cannot recall which came first, the Chica or the keg, but that Christmas my friends and family got a jar of each in their “baskets” — well, almost.

I’ve friends and family members who follow gluten and alcohol-free diets. A mustard made with Guinness just wouldn’t do and so began my experiments with making honey mustard. Today’s recipe is the latest incarnation and is easy to prepare. It’s easily modified if you’d prefer it more or less spicy (see Notes), or, if there’s a particular flavoring you’d wish to include. Before we get to the recipe, however, there are a few things you need to know.

Though there are over 3 dozen types of mustard seeds, yellow and black/brown seeds are most readily available in these parts. Of the 2, yellow mustard seeds have the more mild flavoring. Keep this in mind when you prepare mustard at home. The hotter the mustard, the more brown/black seeds you’ll need to add to the mix. No matter which type of mustard seed you use, though, all will become milder if exposed to heat. That’s why today’s recipe is not processed in a boiling water bath for canning purposes. Just remember to keep it cold if you want it hot. Be advised, too, that this recipe also relies on oil as an ingredient. Canning when oil is being used is, at best, a risky endeavor. Be sure to check with a far more authoritative source than this blog before attempting to preserve this recipe’s mustard.

Because this mustard is not processed, it must be kept refrigerated at all times. Be sure, also, to use jars, lids, and utensils that have been cleaned and, when possible, sterilized before use. The object is to reduce as much as possible the risk of contamination. Do so and your mustard will last for 6 months in your fridge. In fact, I just finished the last of a batch I made for Christmas last year.

Mustard seeds are surprisingly tough little devils. Soaking them before use softens their husks, making them easier to grind. A couple of years ago, in my rush to get the gift baskets made, I ruined my food processor and then broke a part on my blender when I tried to grind mustard seeds that weren’t fully soaked. A word to the wise …

Though I prefer my mustard to be on the grainy side, you can make your mustard as smooth as you like. Be sure to keep an eye on your blender or food processor, however, if you’re making super-smooth mustard. Some models may overheat (see above) and you should give it a rest if the machine’s body feels too warm to the touch.

Lastly, once prepared, stick your mustard in the fridge and forget about it for at least 2 weeks before using, though I wait a full month. This is to allow the flavors to blend and the mustard to mellow. Taste it beforehand and you’re sure to be surprised by its bitterness.

*     *     *

Honey Mustard 2*     *     *

Honey Mustard Recipe

yield: approx 7¾ cups (1830 ml)

Ingredients

  • 200 g black mustard seeds
  • 250 g yellow mustard seeds
  • 1 cup cider vinegar
  • 1 cup tarragon vinegar — leaves, if any, removed (See Notes)
  • 3/4 to 1 cup honey
  • 6 cloves garlic – roughly chopped
  • 1/3 cup kosher salt
  • 1/4 cup grated ginger
  • 1/8 tsp ground cloves
  • 15 tbsp olive oil

Directions

  1. Place mustard seeds and vinegar into a large container, cover, and set aside at least 8 hours or overnight — the longer the better. If need be, add more vinegar or water by the quarter cupful, to make sure none of the seeds remain dry.
  2. Place the now-soaked seeds, along with all the remaining ingredients, into the bowl of a food processor or blender.
  3. Process/grind the ingredients until fully combined and the mustard is the consistency you prefer. Remember to check the machine’s housing for signs of over-heating.
  4. When ground to your liking, place the mustard in clean, sterilized jars and refrigerate at least 2 weeks before using.

*     *     *

Honey Mustard 1*     *     *

Notes

This recipe will yield a relatively mild mustard. For a spicier condiment, go to a well-stocked Asian market and look for Chinese mustard seeds. These are a little bit darker and smaller than our “normal” yellow seeds but do they ever pack a punch and will definitely add some heat to your condiment.

If it’s too late to add more brown/black or Chinese mustard seeds, you can make your mustard spicier by adding red pepper flakes, cayenne pepper powder, or your preferred hot sauce.

Avoid using fresh herbs and/or fresh chilies when making this mustard. They could be a source for contamination and the mustard’s shelf-life could be affected.

If you cannot find tarragon vinegar, feel free to substitute whatever type of vinegar you prefer, flavored or not.

You can use this mustard to easily make a mustard dipping sauce. Just add a few tbsp of mustard to about twice as much mayo — more or less to taste — and stir well. Season with salt, add as much honey as you prefer, and, if you like your dipping sauce spicy, add a touch of cayenne pepper or hot sauce. Refrigerate until ready for use.

*     *     *

It’s déjà vu all over again …

Baccalà PreviewThose who have followed this blog for some time know that many Italians follow the custom of serving seafood for their primary meal on Christmas Eve. To that end. I’ve shared a number of seafood recipes that family members have served for that special meal. Today’s look back features a recipe that was prepared every year “Upstairs”, in Zia’s home. Stewed in a rich tomato sauce, the aroma of salted cod, baccalà, being served was sure to draw me to their table like a moth to a flame. You can learn all about the preparation of baccalà simply by clicking HERE.

 *     *     *

Coming soon to a monitor near you …

Agnolotti del Plin Preview Agnolotti del Plin 

*     *     *

Oatmeal Cookies with Two Chocolates, Dried Cherries, and Almonds

Cherry Choc Chip 1

Despite today’s post and a few more on the schedule, I am no baker. I do not bake. It is a classic catch-22. I don’t bake because I make mistakes and I make mistakes because I don’t bake. My experience with today’s recipe is a perfect example.

Although I’ve prepared these cookies a number of times, I’ve made more than my fair share of mistakes. Some weren’t so bad, like grabbing dark brown sugar instead of light or forgetting to add the salt. I wasn’t always so lucky, however, like the time I forgot the baking soda. Those little nuggets were tasty but hardly the cookies I had envisioned. Perhaps the worst, though, was the time I forgot to add the flour. Who forgets flour? You wouldn’t but I sure did. You can rest assured, knowing that I’ll never do that again. Even so, there has to be a better way to learn something without nearly ruining 2 baking sheets.

My lack of baking prowess — a.k.a common sense — aside, these are great cookies that freeze well. That’s important for me because if I don’t stash cookies in my basement freezer as soon as they’ve cooled, they’ll be gone within a day. I’ve absolutely no will power when it comes to freshly baked anything. (Yet another reason I so rarely bake.)

This recipe can easily be modified to suit your own kitchen and preferences. I’ve made these cookies using my food processor, as the original recipe directs, but I’ve also prepared them with my stand mixer. I’ve used dried cranberries instead of the cherries, and omitted the white chocolate altogether, doubling the amount of dark chocolate in its place. And if you like almond flavoring, try using almond extract instead of vanilla. In short, feel free to make whatever substitutions you like, just don’t forget the flour!

*     *     *

Announcing …

It’s time once again for the Honey Man to open shop in Michigan’s Thumb. This means I’ll be closing the Kitchens so that I can make the yearly honey run. Normally, I’d reopen the Kitchens in 2 weeks but not this year. You see, honey won’t be the only precious cargo that I’ll be bringing back to Chicago. I’m very happy to say that I’ll be playing host to a most special Guest and the Kitchens will be closed for the entire visit, known affectionately in these parts as “The Visitation.” Rest assured, the Kitchens will reopen once I’ve returned my Guest to her Michigan home.

*     *     *

Cherry Choc Chip 3*     *     *

Oatmeal Cookies with Two Chocolates and Dried Cherries Recipe

Ingredients

  • 1/2 cup unsalted butter at room temperature
  • 1/2 cup light brown sugar, packed
  • 1/4 cup sugar
  • 1/2 tsp vanilla extract
  • 1 large egg
  • 1/2 tsp baking soda
  • 1/2 tsp salt
  • 3/4 cup AP flour
  • 1 cup old-fashioned oats
  • 2/3 cup dried cherries
  • 1/3 cup semi-sweet chocolate chips
  • 1/3 cup white chocolate chips
  • 1/4 cup slivered almonds, toasted

Directions

  1. Pre-heat oven to 375˚ F (190˚ C). Place 2 oven racks on the top and bottom thirds of the oven.
  2. Cream together the butter, 2 sugars, and vanilla in a food processor
  3. To the processor bowl, add the egg, baking soda, and salt. Process until combined.
  4. Add the flour and again process till combined.
  5. Add the oats and pulse a few times. The object is to mix without pulverizing the oats. Empty the contents of the processor bowl into a large mixing bowl.
  6. Add the almonds, cherries, and both chocolates to the mixing bowl and use a spoon to mix the contents.
  7. Use a large ice cream scoop or tablespoon to create evenly sized cookies. Place scoops of dough on 2 large, parchment-covered baking sheets, about 2 inches apart.
  8. Bake for 6 minutes before turning and switching racks. Bake for another 6 or 7 minutes. Cookies should be lightly browned.
  9. Remove from oven and place cookies on a rack to cool.
  10. Store in an airtight container.

Adapted from a recipe on Epicurious

*     *     *

Cherry Choc Chip 2*     *     *

Notes

Like the fried chicken of 2 weeks ago, these cookies are good for long car rides. Very good.

*     *     *

The Colosseum and Forum of Rome

Just down the street from our flat was the Colosseum, one of the World’s few arena’s older than Wrigley Field. It is usually one of the first and last sights I see when I’m in Rome. As I’ve told my friends — ad nauseam, I’m sure — I’m a tactile person and only when I touch the Colosseum do I truly feel that I am in Rome.

(Click to enlarge any/all photos)

*     *     *

*     *     *

Right outside of the stadium lie the ruins of Ludus Magnus, the best of the gladiator schools. Tunnels once connected it to the “basement” of the Colosseum, which housed everything from wild animals and gladiators to their unfortunate victims. The amphitheater itself is huge with seating estimates that surpass 45,000 people. Yet, it could be vacated in as few as 5 minutes in an emergency. Located around the arena are thick cement posts, of a sort. These were used to support a retractable roof that provided shade from the hot Roman sun, while the arena floor could be flooded to permit mock naval battles to be performed. When not flooded, the stadium floor featured numerous trap doors, allowing for the “introduction” of fierce animals into the arena. Like so much of Rome, history comes alive as you walk around the Colosseum.

*     *     *

Inside the Colosseum    *     *     *

The heart of the ancient city, the Forum, was where Romans came to conduct business, shop, talk politics, and worship. On one side lay the Colosseum, easily the largest amphitheater of its time. On another, atop Palatine Hill, is where the emperors lived, as well as the Republic’s wealthiest citizens. Being slightly elevated, it was believed to be a bit cooler than the surrounding area and it gave the inhabitants the opportunity to literally look down upon the masses milling about the Forum. Following the main path through the Forum, the Via Sacra, you’ll pass the ruins of numerous temples, basilicas, and the Curia, where the Roman Senate met and where Julius Cæsar was assassinated. Speaking of which, you’ll also come across the altar used for Cæsar’s cremation. (The first time I visited the Forum was on March 17th quite a few years ago and red roses were strewn about the altar.)

*     *     *

*     *     *

If you are at all interested in the Roman Empire and find yourself in Rome, you really must see the Colosseum and Forum. Words and photos cannot describe the sensation of walking along the Via Sacra, tracing the steps of people like Julius Cæsar, Tiberius, Augustus, and every Emperor that was to follow them, not to mention countless notables of the ancient civilization. It was, for me, the perfect way to end my holiday and this series.

*     *     *

It’s déjà vu all over again …

Aglio e OlioToday’s blast form the past isn’t at all a seasonal dish, at its core, but you could make it one, if you wanted.  Aglio e Olio is so simple to prepare that it is a “late home from work” dish; a “we spent the night out with friends and need something quick to eat” dish; and/or a “my cupboard is bare and I’m hungry” dish. Aglio e Oilo can be all these things and so much more. You can learn all about it by clicking HERE.

*     *     *

Coming soon to a monitor near you …

Roast Duck Ravioli PreviewRoast Duck Ravioli

*     *     *

Maltagliati Pasta with Pistachio Pesto

Maltagliati con Pesto al Pistacchio

Maltagliati

Today’s post is one of odds and ends, literally. Sure, there are two “recipes” to be shared but neither is deserving of its own post, both being incredibly easy to prepare. One, in fact, is traditionally nothing more than scraps, giving more proof to the adage that nothing is wasted in an Italian kitchen.

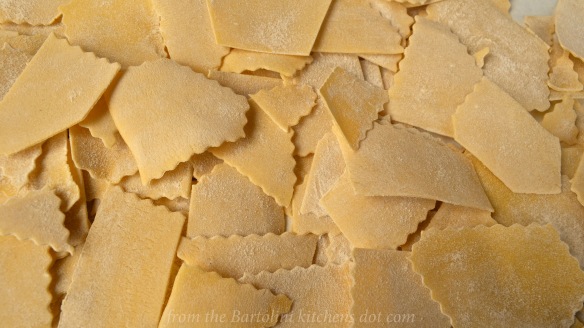
Maltagliati is a pasta of irregular shapes, the name of which is derived from the Italian words for badly cut, male taglio. (Thanks, Francesca, of Almost Italian). It is the end pieces and leftover bits of pasta that result from a day of pasta making. Like snowflakes, no two pieces are alike, each being randomly cut. The fact that there would be enough scraps to prepare a dinner is an indication of the difference between our two countries’ eating habits.

By one estimate, the average per capita consumption of pasta in Italy is 59 pounds per year, while in the US it’s only 19 pounds apiece annually. Yet we have an obesity epidemic. The reality is that a one pound package of pasta will yield 8 servings in most Italian kitchens. They will serve one such serving with most evening meals, the primo piatto. Here, we’ll get 5, 4, or even 3 mega-servings from a single pound. That serving is often the main course, with the addition of a salad, bread, and possibly a dessert.

Most of our pasta is manufactured and store-bought. Up until recent times, the vast majority of pasta served in Italian homes was made by hand. If you make enough pasta so that everyone in your household is going to eat 59 pounds of pasta per year, you are bound to have a lot of scraps to deal with. Those scraps can become maltagliati and will be served in any number of ways, usually determined by the amount at hand.

Very often, they’re served with beans, taking the place of the ditalini used in last week’s Pasta e Fagioli recipe. If you’ve plenty, they can be served with a hearty meat sauce, as was served to Zia and me one evening in Rome, where I first heard of this pasta. Here, I’ve chosen to serve them with a new version of pesto, simply because I needed a pasta narrative to accompany the recipe for today’s pesto. It would have been an incredibly short post, otherwise.

*     *     *

Yes, that’s the first, lonely crocus to bloom in my front garden. Spring is finally taking hold and 1st Bloomwith the new season comes an offer from my blogging friend, Mary, of Love – The Secret Ingredient. She is creating surprise boxes that will contain various gourmet items, small kitchen products, and recipes which will use the enclosed items. A box will be delivered every season and you can purchase them separately or all four at once. The part that caught my attention is that Mary will donate 10% of the annual profits to Feed The Children, an organization dedicated to providing hope and eliminating hunger. You can learn all about Mary’s Secret Ingredients by clicking HERE.

Note: Although I’ve ordered and paid for a surprise box, I have not received any form of compensation for mentioning Mary’s offer. I saw this as an opportunity to help a fellow blogger and worthwhile charity at the same time.

.*     *     *

Freshly Made Maltagliati*     *     *

How to Make Maltagliati Pasta

  • If you make a full recipe of Mom’s Pasta Dough, you will have about 1.5 pound (680 g) of pasta dough. That will make quite a bit of pasta, so, you may wish to halve the recipe or cut it into 3rds or 4ths. For this post, I cut the pasta recipe in half.
  • Take a portion of the dough and run it through the pasta machine rollers until it is as thin as you like. My rollers start at 1, the thickest setting, and I continue to roll the dough, up to and including the 6 setting. You may like your pasta thinner. If so, continue to advance the setting as you roll the dough.
  • Lay the dough strip out flat on your work surface, dust lightly with flour, and allow to rest for a few minutes.
  • Pastry WheelsUse a straight-edged pastry cutter to divide the strip into 3 equal strips. No need to worry about it being a perfect straight line. Just do the best you can. Do not separate them but leave them as-is.
  • Now, take your pastry cutter and beginning in the upper left corner, make a series of diagonal cuts, approximately parallel to each other. Once done, starting in the upper right corner, make diagonal cuts going the other way, repeatedly,  You will end up with a collection of triangles and trapezoids, no two exactly alike — not to mention a better appreciation of your Geometry teacher who predicted that “one day this ‘stuff’ will be useful.”
  • Place them in a single layer on a wax paper covered baking sheet that’s been lightly dusted with flour or corn meal.
  • Repeat until all the dough strips have been cut. If you like, use a fluted-edged pastry wheel to cut the pasta, as well as the straight-edged. This will further the illusion of this being a pasta dinner made from scraps. (see Notes)
  • To cook, bring a large pot of heavily salted water to boil, add the maltagliati, stir, and allow to cook for a few minutes. Being freshly made, they should be fully cooked within minutes. Taste one when all have risen to the top of the pot of boiling water.
  • Drain and dress with pesto, recipe to follow. (See Notes)

*     *     *

Maltagliati 2*     *     *

Notes

Not everyone has time to make pasta, even when the process is as easy as this. Should that be the case, take some store-bought lasagna noodles and snap them. Just don’t get carried away, for it is easier to dine on larger pieces than tiny ones.

Being flat, maltagliati have a tendency to stick together once drained, so, you must work fast. Once the pasta has been drained, quickly give it a light coating of olive oil before dressing it with the pesto. If using a red sauce, there’s no need for the olive oil but you still must quickly add it to the drained noodles.

*     *     *

So, now that you’ve got a scrappy little pasta at your disposal, it’s time to dress it.

I certainly won’t pretend to speak for everyone but I will say that by this time of year, I’m desperate for any kind of Summer dish. Pesto for me is one such dish. In Summer, I can get a wedding-sized bouquet of basil for a couple of dollars at the farmers market. This time of year, I’m lucky to get a few stems for the same price. Today’s pesto recipe gives me my Summer fix without breaking the bank, for not only does it use half the basil, it substitutes pistachio nuts for the über expensive pine nuts, pignoli. (Just last month, I saw a 4 oz package (113 g) of imported organic Italian pine nuts with a price of $12.99. That’s $52.00 a pound!!!)

Whether you’ve made pesto before, you shouldn’t have any problems preparing this recipe.

 *     *     *

Pistachio Pesto*     *     *

Pistachio Pesto Recipe

Ingredients

yield: 1 cup pesto

  • 1.4 oz (40 g) fresh basil leaves (See Notes)
  • 1.1 oz (30 g) fresh, flat leaf parsley leaves
  • .5 oz (15 g) roasted, unsalted pistachio nuts
  • 3 cloves garlic, roughly chopped
  • 1/3 cup grated Pecorino Romano cheese – Parmigiano Reggiano may be substituted
  • 3 oz (79 ml) extra virgin olive oil – more or less to taste
  • salt & pepper to taste

Directions

  1. Place everything but the olive oil, salt, and pepper in the bowl of a food processor.
  2. Let it process until a thick paste is formed.
  3. While the processor is still running, add the olive oil in a slow, steady stream until the pesto reaches the consistency you prefer.
  4. Taste and season with salt and pepper, as required. Pulse the processor to blend the seasonings with the pesto.
  5. Your pesto is ready for use.

*     *     *

Notes

The reason for the odd amounts of basil and parsley is because of how both were purchased. I bought a 2 oz package of basil that, once the stems were removed, actually weighed 1.4 oz. Similarly, I bought a bunch of parsley that, once cleaned, weighed 1.1 oz.

Traditionally, pesto is made using a mortar and pestle rather than a food processor. I do not own a mortar large enough to do this, so, I use a food processor. The fact that it is so much easier this way has nothing to do with it.

I used my pesto recipe as the basis for today’s version. You can use your own pesto recipe, just be sure to replace 25 to 50% of the basil with parsley and, of course, use pistachio nuts instead of pine nuts.

Refrigerate unused pesto in an airtight container, after topping with a thin coat of olive oil. Use it or freeze it within a few days.

If I’m going to freeze this or any pesto, I do not add cheese to it while it’s being made. I’ve found that the cheese doesn’t thaw well and the pesto’s consistency suffers. Instead, I’ll add the cheese to the pasta when the pesto is added.

If you have frozen pesto containing cheese, mix it with a bit of hot pasta water before using it to dress the pasta. The hot water will help make the pesto more smooth and easier to evenly coat the pasta.

*     *     *

It’s déjà vu all over again …

Insalata With lawns going green and last Fall’s bulbs breaking the ground’s surface, it can only mean one thing. It’s dandelion picking season! What you may consider a blight on your lawn, a Bartolini sees as a crisp salad. Click HERE to see the lengths traveled by my Dad to enlist our help picking the greens for our Sunday night dinner.

*     *     *

Coming soon to a monitor near you …

Lamb Shank PreviewLamb Shanks

*     *     *