If it’s Mid-Summer, it’s Time for Pinzimonio!

Pinzimonio 2

I remember this dish every year — but around Thanksgiving, long after the gardens have withered and the farmers markets have closed for the season. Sure, you can make this dish anytime but it’s best when the vegetables are freshly picked. So, what is pinzimonio?

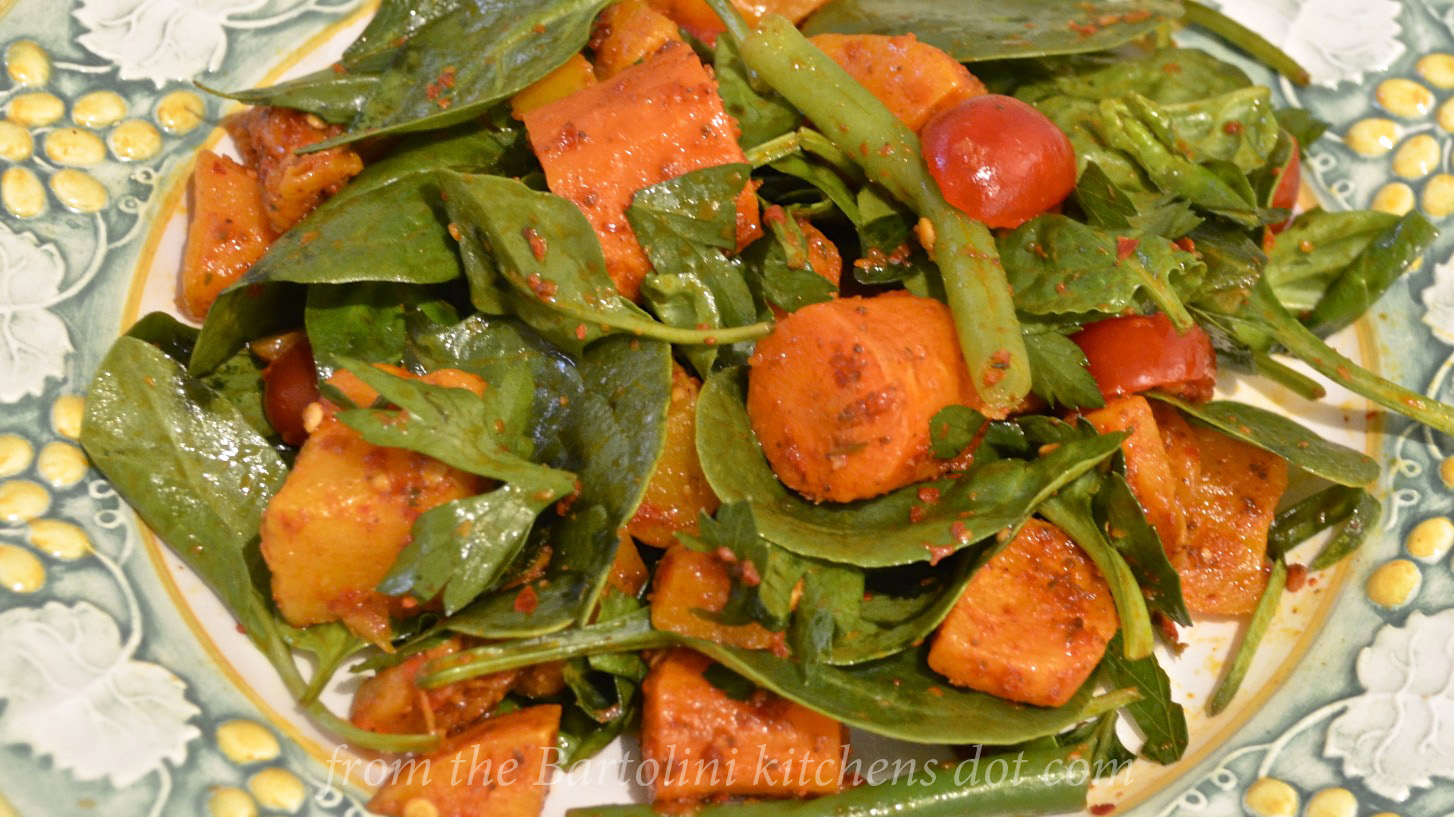
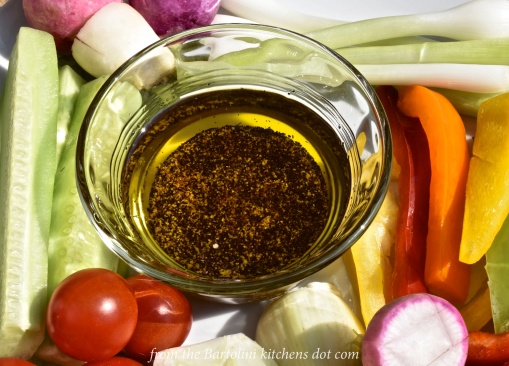
It’s a variety of fresh vegetables served raw with a side dressing of olive oil and vinegar that’s seasoned simply with salt and pepper. (Yes, that’s crudités but I hesitate to bring a third language into the discussion.)  It’s easy enough to prepare and a great way to take advantage of summer’s bounty.

*     *     *

Pinzimonio 1

*     *     *

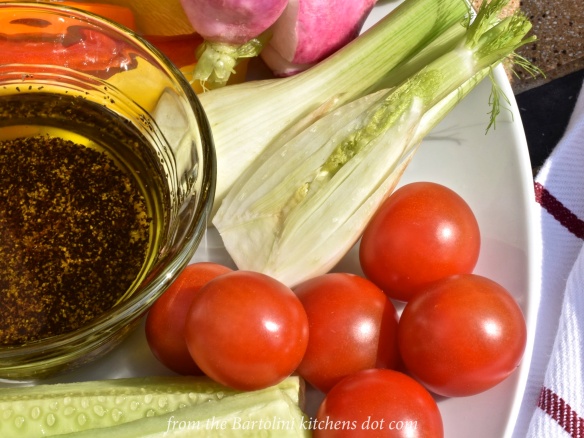
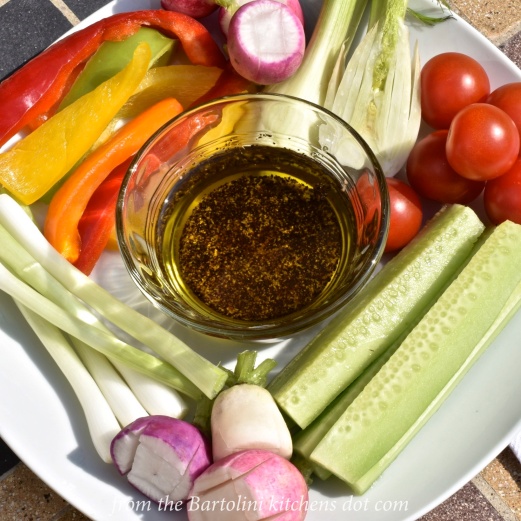
When I was a boy, Mom would serve pinzimonio just about every Sunday starting in July, when the first of our garden’s crop ripened. As we gathered for dinner, there would be a platter of cut, raw vegetables in the center of the table waiting for us. You might find bell peppers, fennel, celery, carrots, radishes, cucumbers, and scallions, along with whatever caught Dad’s eye when he took Sis & I to the grocery that morning. Rounding out the antipasti/insalati, she’d also serve a platter of freshly picked, sliced tomatoes (See Déjà Vu).  But wait! There’s more.

At each of our places at the table, Mom would have a ramekin with our own dipping sauce which she would cater to our age and preference. All contained oil and red wine vinegar but those for Sis and I, being the youngest, contained just a touch of salt & pepper. My brother, being so very much older (this is one way to see if my siblings read the blog), was allowed more salt and pepper in his dipping sauce. Mom, having a life-long aversion to pepper, gave herself barely a few pepper flakes with the salt in her ramekin. Dad had no such issues and you could see a thick layer of salt with another of pepper covering the bottom of his little dish. Each of us helped ourselves to whatever we wanted on the platter and dipped it into our own ramekins. No need to pass this or that and, best of all, we could double, triple, or even quadruple dip without so much as a raised eyebrow from Mom.

*     *     *

Pinzimonio 3

*     *     *

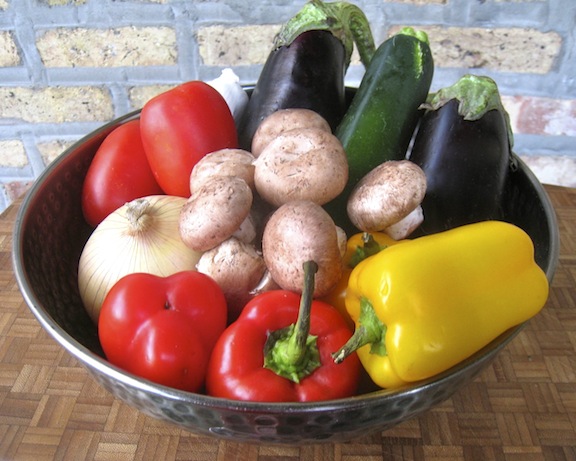
Now, as for a recipe, well, I’ve pretty much explained the dish already. Gather together any fresh vegetable that you would serve dressed with an oil and vinegar dressing. Clean and trim each in such a way to accommodate their serving and arrange them on a platter. Next, place oil, vinegar, salt and pepper in ramekins or small dishes, one per place setting. Although Mom always used red wine vinegar, I’ve used balsamic and loved it.

No matter the vinegar used, you’ll find that pinzimonio is a great way to take advantage of the bounty of summer, while adding more vegetables to your diet. Not only that but if, like me, you have meatless days, pinzimonio makes a great lunch or dinner, especially when summer’s heat renders the stove off-limits.

*     *     *

It’s déjà vu all over again …

Tomato Antipasti - Deja Vu

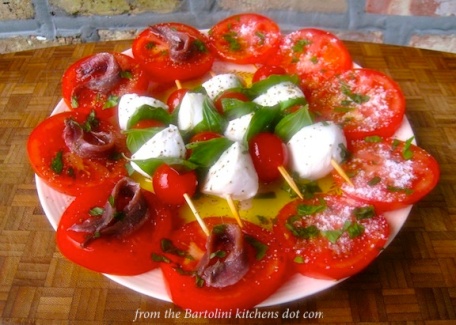
I could hardly write about pinzimonio without offering you the link to Mom’s Tomato Antipasti. This time of year, both dishes were usually served side-by-side, much to the delight of all seated at that table. Best of all, it’s an easy dish to prepare and, like pinzimonio, no stove is required. Here’s the LINK to one of my family’s favorite summertime antipasti.

*     *     *

Coming soon to a monitor near you …

Squash with Seafood Preview

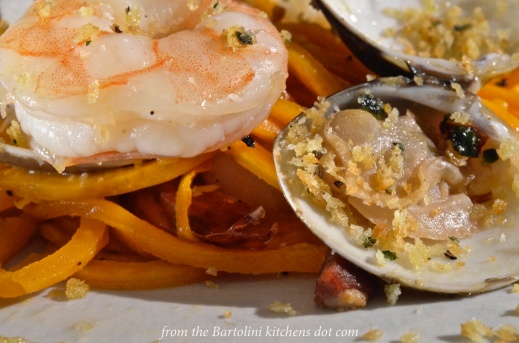
Butternut Squash “Noodles” with Seafood

*     *     *

Our Italian Holiday

This being such a short post, I thought I’d take advantage of the opportunity and share a bit of our holiday last spring.

Bologna

My trip began in Bologna, a wonderful town with an incredible history. It is home to the world’s oldest continuously operating university and the center of what many believe to be the heart of Italian cuisine. With my nephew arriving the next day, I had barely enough time to check into my room, take a walk, break my camera, have a great dinner, and get lost on my way back to the hotel. Yes, you read that correctly. My camera was out of commission for the entire trip. Let me apologize now for the quality of the pics to follow. Truth be told, I hadn’t planned on posting many because most would be very similar to those posted 2 years ago. Even so, it would have been nice to have had a good camera with me.

Many of Bologna’s walks are covered and the “pavement” is marble. The city is meant for the casual promenade. Besides several churches and the university, there are a number of sites to see: the Two Towers, the Piazza Maggiore (site of my camera’s untimely demise), the statue of Neptune, and of course, my prosciutto store, La Prosciutteria. How I love that place!!!  Here are a few photos. Click on any one to see a full description.

*     *     *

*     *     *

That day ended with one of the best restaurant meals that I was served.

*     *     *

*     *     *

The Republic of San Marino

My nephew’s plane arrived on time and soon we were on our way to San Marino, where Zia Pina greeted us with open arms, Waiting with her was her grand-daughter & husband, and the newest member of our the family, the soon to be one-year-old Viola. Zia is a wonderful cook and the highlight was when she served cappelletti for the entire family. This just so happens to by my nephew’s favorite dish and one he hasn’t enjoyed since his Grandma, my Mom, passed away 14 years ago. The following day, she took us both for a tour of the city of San Marino, and the seat of the republic’s government atop Mt. Titano. The next day, Sunday, we attended a mass that Zia had arranged to honor our family’s departed. Afterward, we re-assembled at a restaurant In Riccione, on the Adriatic shore, for a fantastic seafood feast. I would go back there in a heartbeat! Here are just a few of those photos.

*     *     *

*     *     *

Venice

Before leaving San Marino, my nephew and I “kidnapped” a young cousin for a day trip to Venice and Murano Island. It was a chilly day with showers, so, we timed our lunch and a caffè for the worst spells — or so we tried. Although we knew it was the Italian Liberation Day holiday, we didn’t know that it was also St. Mark’s feast day, he being the Patron Saint of Venice. We learned of our oversight upon setting foot upon St. Mark’s Square. Even so, we had to keep moving and, after a water taxi ride to Murano Island for a bit of souvenir shopping, we ended our day with a fine supper. Then it was a dash across Venice for a train ride back to Rimini where a cousin would take us to Zia’s. (I won’t mention that our arrival was delayed because we missed our train and, consequently, were stowaways on the next.) Thankfully, our “chauffeur” was very kind and waited patiently for our eventual arrival. These next photos are by committee. Oddly enough, each of our phones, ran out of power as we traversed Venice. Mine was the first to go, only to miraculously revive — its vibrating giving me quite a start — on the train as we approached the station in Rimini.

*     *     *

Don’t let the blue skies fool you. We were drenched by the time we reached the piazza and there wasn’t a soul seated in any of the cafés that encircle it.

*     *     *

Rome

The next morning, my nephew and I boarded a train bound for Rome, with Zia and 2 cousins accompanying us. What fun! Our flat was about 100 yards from the Pantheon and once we settled in, we were off for a little sightseeing around the Piazza Navona. That night, we enjoyed a fine dinner in celebration of my nephew’s graduation and, as we soon learned, my cousin’s wedding anniversary. The next morning, we walked to the Vatican to meet another cousin and her husband. Unable to get into the Vatican because the Pope was awaiting a diplomat, we took taxis to the Colosseum, stopping along the way for lunch. Well, by the time we made it to the Colosseum, it was far too crowded with tourists to enter. We headed back to the flat, said our goodbyes, and our cousins headed to the train station for their ride back to San Marino. Alone now, with only 2 days left, we planned the rest of our stay. We would spend one morning revisiting the Colosseum, with the Vatican occupying the second. The afternoons would be spent seeing everything on his “must see” list, as well as a couple of sites that I tossed into the mix. Of course, a fantastic meal would end each day.
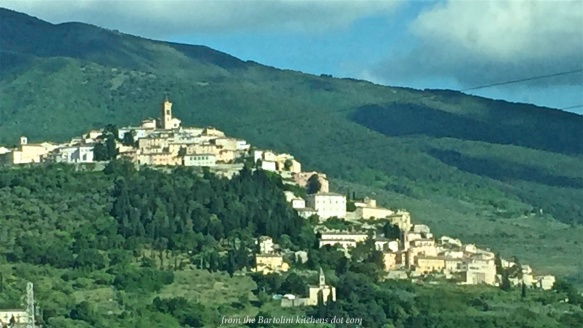
*     *     *

*     *     *

Corinaldo

In what seemed like the blink of an eye, it was time for us to part company. My nephew returned home but a few weeks earlier I had decided to extend my holiday. I wanted to take a few days to visit Corinaldo, the Bartolini ancestral home. So, as my nephew boarded a plane, I caught a train to Ancona, where I rented a car for the drive to Corinaldo. It’s a quaint little village nestled in rolling hills. The very center of the town is totally encircled by walls that were built during the 1300s. Unlike similar towns in Italy, these walls have been maintained and are in excellent condition. There is but one entrance and one exit, the knowledge of which might have saved me the hour I spent circling the area, not to mention one ill-fated attempt of entering through the exit. (Ah! The joys of travel.) Once situated, my flat was quite nice with a terrace facing west and I was anxious to watch the sun set over the Italian countryside. Well, that was the plan but the clouds had made previous reservations, apparently, and I never did see a sunset. No worries. I still enjoyed my time there, walking from one end of the village to the other — make that “carefully walking”. It rained intermittently and the cobblestone streets are quite narrow. I rushed for a doorway or hugged a wall whenever I heard a car approach. Luckily, that didn’t happen very often. There is no rush hour in downtown Corinaldo. There is, however, a great little restaurant on The Stairs and they served me my final meal in my Grandparents’ hometown.

*     *     *

Terrace view

The terrace view

*     *     *

*     *     *

Fiumicino

I left the next morning taking a route to Ancona that would allow me to travel along the Adriatic coast for a spell. To get to the coast, I travelled along narrow roads that carried me over the hills, through the beautiful Marche countryside. I dropped off the car and made my way to the train station. With an early morning flight, my destination would be Fiumicino, a small town about 30 km outside of Rome and home to the city’s international airport. Lucky for me, there was a wonderful restaurant just down the street from my hotel. My holiday ended with one last fantastic meal, albeit a filling one.

*     *     *

Along the way to Fiumincino during the last train ride.

Along the way to Fiumincino during the last train ride.

*     *     *

*     *     *

One thing more

Unbeknownst to me, I spent my holiday walking with a stress fracture of my left ankle. It had bothered me before I left but I made a variety of excuses about it. In fact, even upon coming home, the excuses continued. Finally, about a week later, I decided to have it checked and I was given this fancy boot to wear for the next 4 weeks. WIth the boot now gone, I am happy to say that things are back to normal, whatever that means.

*     *     *

Stress Fracture

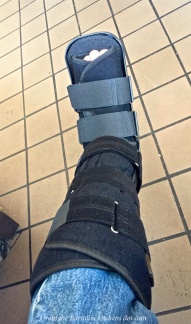
You won’t find this at Ferragamo’s.

*     *     *

Our holiday was memorable in so many ways, and during the course of which, my now-adult nephew and I became re-acquainted. We were treated royally, with our family members freeing up their schedules so that they could spend as much time with us as possible. I’ve read that when we put to paper an objective, the odds of accomplishing it increase by 40%. With that in mind, I do not know how or when but I will be returning to San Marino. I must. I’ve promised to kidnap another cousin for a day trip somewhere.

*     *     *

Advertisement

Roasted Vegetable Salad with Harissa

Harissa Veg 1Oh, harissa! How do I love thee?

This is another in the series of recipes dedicated to my new love, the ever so delectable harissa. I told you that I was harissa obsessed and today’s recipe is further proof. Prior to this, I’ve shared recipes for goat and for chicken cooked in harissa. Included in the latter post was a recipe for the spicy sauce. For that recipe, I trimmed away the seeds and ribs from all the chiles and said that I wouldn’t do it again the next time I prepared the sauce. And so I did, finding this batch to be more spicy than its predecessor and, this time, the heat didn’t completely dissipate during cooking. Perfect.

So, armed with a fresh batch of harissa, I went searching for a new use. I didn’t have to go far because the internet is jam-packed with recipes using harissa. I eventually chose a salad with roasted vegetables, which should be popular with our friends to the Far South, where colder temps are taking hold. If you’re in the North, though, don’t let that dissuade you from trying this salad. I found it to be a perfect lunch for a chilly Spring day — and we seem to be having more than our fair share of those.

Aside from using my own harissa sauce, I did make a few changes to the original recipe. In the first place, I halved the quantities. It’s a good salad but there’s only so much one person can eat. The cilantro/coriander was the next thing to go and in its place I used the leaves from a bunch of flat-leaf parsley. Once again, since good fresh tomatoes cannot be found, I used grape tomatoes that I sliced in half. I followed the rest of the recipe and was rewarded with a great salad, one that fits nicely into my plans to go meatless one day a week.

*     *     *

Harissa Veg 4*     *     *

Roast Vegetable Salad with Harissa Recipe

Ingredients

  • 3 tbsp harissa, divided – recipe found HERE
  • olive oil
  • 1lb (450 g) butternut squash, peeled and chopped
  • 1 lb (450 g) carrots, peeled and cut into chunks
  • 5 oz (142 g) green beans, trimmed and halved
  • 5 oz (142 g) fresh baby spinach
  • 1/2 preserved lemon, flesh removed and skin finely chopped
  • 12 cherry or grape tomatoes, halved
  • .5 oz (15 g) fresh parsley leaves – cilantro/coriander leaves may be substituted, if you’re one of those

*     *     *

Harissa Veg 3*     *     *

Directions

  1. Pre-heat oven to 365˚ F (185˚C)
  2. In a small bowl, mix 1 tbsp harissa with 2 tbsp olive oil.
  3. Place squash and carrot chunks in a large bowl and pour harissa-oil mixture over it. Mix to evenly coat the vegetables.
  4. Place on a baking sheet/dish, set on middle rack in oven, and bake until both types of vegetables can be easily pierced — 30 to 45 minutes. Remove and cool.
  5. Meanwhile, blanch green beans in a small pot of boiling water for 2 minutes. Remove and place in an ice water bath until needed.
  6. In a large non-reactive pot, add green beans, spinach, preserved lemons, tomatoes, parsley, and the now-cooled roasted vegetables.
  7. Combine remaining 2 tbsp harissa with 1 tbsp olive oil and use to dress the salad. Add more oil, if needed.
  8. May be serve chilled or at room temperature.

From a recipe published in The Australian Women’s Weekly.

*     *     *

Harissa Veg 2*     *     *

Notes

How much oil you add will depend upon how thick your harissa is. Mine is rather thick, so, I add olive oil to make it easier to coat the vegetables and, later, to dress the salad.

In all, I tried this recipe three ways. One is as you see listed above. In another, I used baby arugula (rocket) in place of the spinach. I found the leaves weren’t strong enough to withstand the harissa dressing and wilted pretty quickly. The 3rd and last time was prepared without spinach and with half the amount of parsley. The result was a dish of roasted vegetables that make a perfect side for a roast. This version is definitely worth making again, perhaps adding additional root vegetables to the mix.

I’ve found that my recipe for harissa yields 2 cups of the sauce, far too much for most recipes. Using an ice cube tray, I freeze the excess, placing the frozen harissa cubes in plastic bags until needed.

*     *     *

It’s déjà vu all over again …

Grandpa's Tuna SaladIt was about a year ago when I shared a favorite salad of my Grandpa, one simply made using canned tuna, anchovies, and sliced onion. I included my updated version, which used seared  tuna over a bed of salad greens. Both are lighter fare and equally tasty. You can see them both and decide which is best for you by clicking HERE.

*     *     *

Coming soon to a monitor near you …

Prosciutto Pizza PreviewPizza

*     *     *

Giardiniera – the Chicago Way

With farmers’ markets fully stocked and bustling, this is the time to start preserving fruits and vegetables. One such method is canning and that’s about all I have to say about it. There’s freezing and, within the next few weeks, my basement freezer will be packed with quarts of diced, peeled plum tomatoes. And then there’s pickling, a common preservation method that I’m using more and more. In Italy, pickling is sometimes called sotto acetti, under vinegar, and pickled vegetables often take the form of giardiniera. Mild by Chicago standards, theirs usually gets its heat, if at all, from the peppers and pepper flakes for which CalabriaBasilicata are well-known. The Italians will often serve giardiniera as one of many antipasti or among the insalati. The recipe is pretty much the same in the States, except we tend to use “local” chilis to bring heat to the mix. A few jalapeños or serranos will often do the trick. Here in Chicago, we up the ante, adding more chilis and skipping a few of the ingredients. The result is more condiment than antipasto and it’s a staple of most “reputable” sandwich shops. In fact, in some circles, it’s almost sacrilege to order an Italian beef sandwich without a healthy scoop of giardiniera to top it off — but that’s not all. Good giardiniera makes a great topping for any sandwich, as well as for burgers, hot dogs, and brats, while a healthy sprinkling of it can elevate even the most lackluster of pizzas.

Today’s recipe is based upon one that I found in an area newspaper some years ago. Unfortunately, I destroyed the clipping, along with many others, when I transferred my recipes to a Mac-based recipe file three years ago. (Writing a blog wasn’t even a remote possibility at the time.) Nevertheless, it’s a great recipe that anyone, Chicagoan or not, will enjoy. There’s a freshness about it that you just won’t find bottled on a supermarket shelf. The recipe itself is pretty straight-forward and, if you’ve ever pickled anything, you probably already have all of the spices required and, this time of the year, you can get the rest of the ingredients with one trip to a farmers’ market. I’ve seen versions that include mushrooms, broccoli, olives, etc., but they are more salad-like than condiment, in this Chicagoan’s opinion.  Many recipes, too, rely solely upon olive oil and white vinegar for the pickling. I prefer to lighten the solution by replacing half of the olive oil with vegetable oil and to sweeten it by replacing half of the white vinegar with apple cider vinegar. As always, the choice is yours.

*     *     *

*     *     *

In reality, the hardest part of this recipe is to determine an acceptable level of heat. After all, one person’s idea of mildly spicy is another’s 5 alarm fire. The original recipe, like I’ve posted below, calls for 8 whole jalapeños. That’s the Chicago Way and it’s too hot for me. I’ve learned through experimentation that 4 whole jalapeños, along with 4 that have been seeded and “de-ribbed,” deliver just the right amount of heat for my palate. You, however, may prefer it hotter, so, follow the recipe and use 8 whole jalapeños. If that still doesn’t do it for you, switch out some or all of the jalapeños for serranos. On the other side of the coin, some may want their giardiniera mild, with very little heat, if any. By removing the jalapeños’ ribs and seeds, you’ll get a mild giardiniera that includes the flavor of jalapeños but none of the heat. And if that’s not mild enough, drop the red pepper flakes. The point is, you can make the giardiniera as hot, or mild, as you like. With a little experimentation, I’m sure you’ll find the right combination of chilis and pepper flakes to create the perfect giardiniera.

*     *     *

Chicago Giardiniera Recipe

Ingredients

  • 8 jalapeños, chopped (for more heat, serranos may be substituted)
  • 1/2 large cauliflower, cut into florets
  • 2 carrots, diced
  • 2 celery stalks, diced
  • 1 green bell pepper, diced
  • 1 red bell pepper, diced
  • 2 sweet banana peppers, diced
  • 1 sweet onion, diced
  • 1/2 cup kosher salt
  • 3 cloves garlic, minced
  • 2 1/2 tsp dried oregano
  • 1 tsp red pepper flakes
  • 1/2 tsp celery seeds
  • black pepper, to taste
  • 1/2 cup cider vinegar
  • 1/2 cup white vinegar
  • 1/2 cup extra virgin olive oil
  • 1/2 cup vegetable/canola oil

Directions

  1. Combine vegetables and salt. Add enough water to cover, stir, cover, and refrigerate for at least 12 hours.
  2. Strain vegetables from brine, rinse well, and set aside.
  3. In a large glass bowl, add garlic and remaining seasonings.
  4. To that bowl, add the vinegars and stir until well-mixed. Whisk the solution while adding the oils.
  5. Add the reserved, brined vegetables into the bowl and gently mix until well-coated.
  6. At this point, the giardiniera may be left, covered, in the bowl or transferred to clean jars. Either way, it must be refrigerated for 48 hours before serving.
  7. Because this giardiniera isn’t canned, it must be stored in the refrigerator, where it will keep for a few weeks.

*     *     *

Giardiniera-topped Mount Burger

*     *     *

Variations

I’ve already listed a number of variations and I’m sure you can dream up more. I’ve found that some vegetables, however, do not respond particularly well to the brining and pickling processes. Broccoli is one such under-performer, in my opinion.

Notes

Be aware that there is a range of heat for each kind of chili. A very hot jalapeño, for example, can equal a weak serrano. There is no way to insure that the heat of the batch of giardiniera you make today will equal the one you made 3 weeks ago. You can limit your risk, however, by always purchasing your peppers from the same grocer, vegetable stand, or farmers’ market vendor. Hopefully, that will offer some consistency. Still, as I learned this morning, peppers can be mislabeled. Those “sweet banana peppers” may turn out to be hot Hungarian yellow wax peppers. Two completely different peppers – and I’ve a burning eye to prove it.

Not everyone lives here in Chicago nor can they buy airfare every time they want an Italian beef sandwich. Well, you shouldn’t have to go without just because of distance. Thanks to a great food & sports blog, sports-glutton.com, you can make your own Italian beef to go along with this giardiniera. It’s a little bit o’ Chi-town wherever you happen to be.

Speaking of pickling, be sure to check out my recipe for Refrigerator Bread and Butter Pickles.

*     *     *

Grandma’s Stuffed Vegetables

August was a good month for the Bartolini Clan at the old two-flat. Grandpa’s garden was in high-gear, easily producing enough tomatoes for all of both families’ needs. (Be sure to check out Mom’s Tomato Antipasti.) As the years passed, the garden grew and so did the selection of produce. Lettuce, swiss chard, eggplants, peppers, and, of course, grapes, all made their way onto our dinner tables in August, if not before. To augment his own “crops,” Grandpa and I made a weekly trip to Detroit’s Eastern Market every Saturday morning, where he would walk the aisles, haggling each farmer/vendor over the price of whatever it was that he wanted to buy. By the end of our “tour,” we’d return to the car with everything from fruits & vegetables to chickens (dead or alive) and, one memorable Saturday each year, a hog’s head to be made into head cheese. (You’ve not lived until you’ve walked around a crowded farmers’ market, carrying a hog’s head on your shoulder, stopping occasionally while your Grandfather haggled with some farmer over what amounted to 50 cents, if that.) Sunday was my Dad’s turn. Starting when we were very young, Sis & I accompanied him and our favorite stop was the bread bakery. While Dad chatted with his baker friend, we munched on bread straight from the oven. Along the way we might visit with friends or family, stop at an Italian market or 2, and then head to the grocery for whatever he hadn’t found at the previous stops. We’d return home, laden with all kinds of goodies, just in time for Sunday brunch.  That night, both families often dined together in a large, screen-enclosed room, “the patio,” which Grandpa had built adjacent to the garage. It easily accommodated the 12 of us and very often a few guests more.

*     *     *

Grandmas stuffed veggies 1

*     *     *

In retrospect, these dinners went off like a well-oiled machine. While Dad, Uncle, and Grandpa worked the grill and their beverages, Mom and Zia handled the rest, from setting the table to making sure that the “trouble-makers” among us 6 kids sat at separate ends of the long table. (One memorable response, walkie talkies, though well-played was extremely short-lived.) Aside from the grilled entrées, the meal itself featured side dishes made from the garden’s vegetables, as well as those that Dad and Grandpa had just purchased. Family favorites, that both women were quite capable of preparing, were tomatoes, eggplant, and onions that were halved, topped with a bread crumb mixture, and baked. Both Mom and Zia spoke of Grandma preparing vegetables in this way, which is similar to recipes for tomatoes Provençal. With Mom & Grandma’s birthday having been on the 15th, and Uncle’s birthday the 12th, I thought this would be the perfect time to share this family recipe.

Now comes the hard part. I have seen these vegetables prepared countless times, most recently a few weeks ago while visiting Zia. I have prepared them myself dozens of times, the most recent being last night. Never have I measured any of the ingredients nor have I seen them measured. Mom would get so exasperated with me as I asked her, repeatedly, what the measurements were for some dish, often this one. Now, far too late, I understand. More important than how much of this or that is the look and feel of the finished mixture. She and Zia use this breading mixture in a number of dishes. It’s consistency varies depending upon the dish and how it is cooked. When used with Grandpa’s  barbecued shrimp, it is very moist, almost dripping. Here, the vegetables are cooked at a much lower temperature than on a grill and, so, the breading isn’t as moist. Even so, you may prefer your topping to be more/less firm when served and the amount of oil used will determine that. Because of all this, I’m only posting guidelines and not a recipe. Use them as a base, adjusting where necessary to suit your own tastes.

*     *     *

Grandma’s Stuffed Vegetables

Select fully ripened tomatoes, small to medium-sized onions, and baby or small eggplants. If you use large, thick eggplants, they will require pre-roasting, as do the onions. Better to seek out relatively thin eggplants of about 4 – 6 inches in length.

For the stuffing, you will need about 2 – 3 tbsp of bread crumbs per vegetable half; about 1 tsp of freshly chopped parsley per vegetable; 1 – 2  garlic cloves, minced, depending upon the number of vegetables used; salt & pepper, to taste; and enough extra virgin olive oil to fully moisten the mixture. It should not be sopping or dripping wet.

Pre-heat oven to 400*. Remove a thin slice off of the top & bottom of each onion. This will allow them to “sit” without rolling while roasting. Halve each onion, score the cut side with a sharp knife, and brush lightly with olive oil. Season with salt & pepper and roast in the oven for 20 minutes.

Meanwhile, create the bread topping. Combine bread crumbs, parsley, garlic, salt & pepper, and olive oil. Halve the tomatoes and gently squeeze each half to remove some liquid and the seeds.  Add the liquid and “tomato caviar” to the bread crumb mixture. Halve the eggplants, lengthwise, and use a knife to score the cut side a few times. Use a pastry brush to coat the cut sides of the eggplants & tomatoes with olive oil and then season with salt & pepper. By now the onions should be about ready to be removed from the oven. Place all the halved vegetables on a lightly oiled baking sheet or dish and season with salt & pepper. Reset the oven temperature to 350*

Cover the top of each vegetable half with the bread crumb mixture. When finished, drizzle lightly with olive oil and bake in a 350* oven for 40 – 45 minutes. Serve immediately.

Variations

These are the 3 vegetable that Grandma, and later Mom and Zia, used. I’ve, also, prepared zucchini and summer squash this way, treating them as I would eggplant.

*     *     *

Grandmas stuffed veggies 2

*     *     *

Notes

Left-overs can be easily re-heated in the microwave. Better still, with 2 slices of Italian bread, one of the tomato or eggplant halves makes a great sandwich. Grandma served these sandwiches to her girls for lunch and they, in turn, served them to us.

*     *     *

Mom’s Caponata

The origins of caponata may be found in Sicily but today it is served throughout Italy, in one form or another. Yet, as varied as the final dishes might be, 5 ingredients form the basis of virtually all renditions: eggplant, tomato, onion, garlic, and olive oil, with eggplant being the star of the dish. Beyond these 5, the additional components depend as much upon the individual cook as it does the region of Italy. There’s no better example of this than Mom’s recipe and the one that Zia, her sister, follows. Both included some bell pepper and mushrooms but Mom, also, added zucchini; Zia rarely, if ever, does. The difference here is minimal but, then again, their kitchens were only separated by less than 20 vertical feet. Imagine the differences when there’s hundreds of miles separating the kitchens. In fact, I’ve seen caponata recipes that include, among other things, olives, pine nuts (pignoli), fennel, capers, currants, celery, and even seafood. Seafood seems a bit much to me and I pretty much follow Mom’s recipe. Still, more important than which recipe to follow is finding the right ingredients. Like Mom & Zia, I’ll choose only those vegetables that are fresh and “in season,” for best results. And if you end up with caponata that looks suspiciously like ratatouille, well, I won’t tell anyone.

Whatever vegetables you choose to include, try to chop them evenly, creating pieces that are roughly the same size by type. I cut the “firm” vegetables — onions, peppers, etc. — into strips. The “soft” vegetables — tomatoes, zucchini, eggplant, etc. — are chopped into 3/4 to 1 inch cubes. By cutting the ingredients into strips and cubes, you’ll be adding visual interest to the final dish. When sautéing, begin with the most firm vegetables and proceed until you’ve added the softest. The end-result should be a dish of vegetables that are fully cooked and not at all al dente. Caponata may be served hot, warm or at room temperature. It can be served as a side dish or as an appetizer, where it can be used as a spread or to make bruschetta. Like Mom before me, very often I’ll use it to dress pasta, resulting in a delicious vegetarian dish. Best of all, to my tastes, left-over caponata can be used to make a delicious frittata the next morning. In fact, when I was a boy, Mom always reserved a portion for my breakfast the following day. Today, if I go to a farmers’ market in the morning, it’s almost guaranteed that I’ll be having some form of caponata that evening. You can guess what I’ll be having for breakfast the next morning.

*     *     *

Caponata Recipe

Ingredients

  • 3 tbsp olive oil
  • 1 medium onion, halved and sliced
  • 2 bell pepper, sliced into strips – gypsy, cubanelle, or Italian peppers may be substituted
  • 2 cloves garlic, minced
  • 3 tbsp freshly chopped parsley
  • 1 doz. button or crimini mushrooms, quartered
  • 2 medium eggplants, cubed (peeling optional)
  • 1 – 2 zucchini, cubed
  • 2 plum tomatoes, cubed
  • salt & pepper, to taste

A Good Day at the Market

Directions

  1. Add oil to a large fry pan and heat over a medium-high heat. Add onion and bell pepper, season with salt & pepper, and sauté until barely soft, about 5 minutes.
  2. Add garlic & parsley and sauté for 1 minute.
  3. Add mushrooms and continue sautéing for about 5 minutes.
  4. Add eggplant, zucchini, and tomatoes, stir to combine, season with salt & pepper, and sauté until done to your liking, at least 8 minutes more.
  5. The dish is now done and may be served hot, warm, or at room temperature.

Variations

As mentioned above, this basic recipe can be modified in any number of ways. Thinly sliced fennel, cubed summer squash, currants, pine nuts, celery, you name it, all may be added. Once you’ve assembled and prepared the ingredients, it’s just a matter of adding them to the pan in an order that assures each will be done to your liking. If the order that I’ve listed above doesn’t do that for you, change it to suit your palate.

Notes

Left-over caponata can be served with pasta or used to make a tasty frittata. I’ll devote a later posting to our frittata recipe but, for now, I’ll share the “easy” method. For this, pre-heat your oven to 375*. In a fry pan over med-high heat, re-heat the caponata. Meanwhile, lightly scramble enough eggs to insure ample coverage of the re-heated caponata. Pour the eggs into the fry pan and, like you would with scrambled eggs, use a slotted turner or spatula to gently pull back the edge to let the eggs run behind it. After a few minutes, place the pan in the pre-heated oven and bake for about 10 minutes or until the top of the frittata is set.  Top with grated cheese, if desired, and serve immediately.

Coincidentally, while this recipe was waiting to be published, our local PBS station aired a re-broadcast of an episode of Jacques Pepin’s “More Fast Food My Way” during which he prepared ratatouille. Not only did he mention how similar ratatouille was to caponata, he used it to dress some penne pasta. How about that? You can add “French chef” to the list of Mom & Zia’s many titles and accomplishments!

*     *     *

Cacioni

Half-Moon Pie?

Cacioni are small, half-moon shaped pies which, in San Marino, are filled with greens, very often a combination of Swiss chard and spinach (cacioni con bietole e spinaci). In other parts of Italy, however, cacioni are filled with a variety of cheeses and, in one case, even beans are used. And then there’s Liguria where they make a torta pasqualina at Easter which is filled with greens — but the torte are much larger than cacioni and the filling also includes ricotta and grated cheese. Of all the recipes I’ve come across, however, only the Bartolini cacioni are deep-fried. In fact, Zia went to lunch with some Sammarinese friends a few years ago and one of the ladies brought baked cacioni for everyone. The idea of baking cacioni is a game changer for Zia and me. Up until now, we rarely made them because there was no way to store them. You fried and ate what you made and that was that. As such, it just wasn’t practical to make them if you lived alone. Now that baking is an option, however, we can make a dozen, reserve 2 for dinner, and freeze the rest. Suddenly, cacioni are back in our diets, but, what does this mean for you?

Well, I’m going to give you both options for preparing cacioni. The first will be deep-fried; the second will be baked using pastry dough. To that end, in a recent episode of Mad Hungry, Lucinda Scala Quinn prepared a pie crust that she used with her pocket pies. (If you’re not familiar with her blog, you should be.) Her recipe is perfect for cacioni and it really is fool-proof. No matter which cooking option you may choose, the filling will remain the same and we’ll start there.

*     *     *

Cacioni Recipe

(Swiss Chard & Spinach Filling)

Ingredients

  • 3 tbsp olive oil
  • 2 cloves garlic, crushed
  • 1 small yellow onion, chopped
  • 1 bunch  fresh Swiss chard, trimmed, leaves chopped after removal from stalks, stalks chopped and reserved
  • 1/2 pkg frozen chopped spinach, thawed  — use more or less, if you like
  • salt & pepper to taste

Directions

  1. Heat oil and garlic in a frying pan over medium heat until garlic begins to brown, about 5 minutes. Do not allow garlic to burn.
  2. Remove garlic, increase heat to med-high, add onion and as much of the chopped chard stalks as you prefer. Season with salt & pepper and sauté until translucent, about 8 to 10 minutes.
  3. Add chopped spinach to pan and continue sautéing until heated through, about 4 minutes.
  4. Add chard leaves, season with salt & pepper, and sauté until leaves are wilted and cooked to your preference.
  5. Place cooked greens in a colander or strainer, place a dish on top of the cooked vegetables, and place a heavy can or similar weight on top of the dish. This will help to drain as much liquid from the greens as possible before filling the cacioni.

*     *     *

Fried Cacioni

Swiss Chard & Spinach Cacioni

yield: 12 – 15 pies.

Ingredients

  • Swiss chard with spinach, sautéed and well-drained (recipe above)
  • 1/2 batch Mom’s pasta dough, rested for 30 minutes after preparation
  • Oil for frying — NOT olive oil

Directions

  1. Separate dough into quarters and wrap 3 quarters in plastic wrap.
  2. Using the remaining dough quarter, run it repeatedly through the pasta machine rollers until thin. If no. 1 is the widest setting, continue rolling the dough up to, and including, the no. 6 position.
  3. Spread the dough sheet on a flat surface. Using a bowl, saucer, or wide-mouthed mug/jar as a template, cut circles as large as you can on the dough sheet. Trim and reserve the excess dough for later use.
  4. Depending upon the size of the dough circle, place 2 to 4 tbsp of the chard filling in a line across the center of each one. Using a pastry brush or your finger tips, moisten the edge of each circle with water. Fold the pastry in half upon itself, creating a half-moon. Use a fork to press and seal the edges of the dough. Use the fork to prick each pie to let steam to escape during frying. Set aside.
  5. Continue until all the filling has been used. The left-over dough may be used to make the pasta of your choosing.
  6. Using a large frying pan, add enough vegetable/peanut oil to create a depth of 1 to 1 1/2 inches. To avoid boiling over, do not fill the pan over halfway full. (This is more a “shallow-fry” than deep-fry. Of course, if you prefer deep-frying, go for it.)
  7. Bring oil to 350*. Depending upon the pan size, fry 2, 3, or 4 cacioni at a time. Do not overcrowd. Fry until golden brown before turning each one over.
  8. Place a wire rack atop a baking sheet and place both into a warm oven. When each batch of cacioni are finished frying, place them on the rack in the oven to keep warm. Sprinkle with coarse kosher or sea salt.
  9. Repeat the process until all are fried. Serve immediately.

*     *     *

Baked Cacioni

Cacioni con Bietole e Spinaci

Note: This will require enough pastry dough as would be used to make a double-crusted, 9 inch pie. Use your own pastry dough recipe, try Lucinda’s cream cheese pastry dough, or buy it ready-made at your grocery store. Puff pastry, however, is not recommended.

yield: 10 – 12 pies.

Ingredients

  • Swiss chard with spinach, sautéed and very well-drained (recipe above)
  • pastry dough (see note above)
  • 1 egg yolk mixed with a tbsp of water to make a wash

Directions

  1. Separate dough into halves, wrap one half with plastic wrap and place in the fridge. Roll the remaining half as you would for a pie crust.
  2. Using a bowl, saucer, or wide-mouthed mug/jar as a template, cut circles as large as you can on the dough sheet. Trim and reserve the excess dough for later use.
  3. Depending upon the size of the dough circle, place 2 to 4 tbsp of the chard filling in a line across the center of each one. Using a pastry brush or your finger tips, moisten the edge of each circle with water. Fold the pastry in half upon itself, creating a half-moon. Use a fork to press and seal the edges of the dough. Use the fork to prick each pie to let steam to escape during baking. Set aside on a baking sheet lined with parchment paper.
  4. Continue until no more dough remains and then place the baking sheet into the fridge while you work with the second half of the pastry dough. Repeat the process until there is no more filling or dough.
  • TO COOK IMMEDIATELY
  1. Pre-heat oven to 375*
  2. Meanwhile, chill the cacioni for a few minutes before proceeding.
  3. Using a pastry brush, carefully coat the exposed surface of each pie with the egg wash. Sprinkle with salt.
  4. Place baking sheet into pre-heated oven and bake until golden brown, about 20 minutes.
  5. Serve immediately.
  • TO FREEZE & COOK
  1. Place newly prepared cacioni on a lined baking sheet and then into the freezer.
  2. After a couple of hours, place the cacioni into more permanent freezer containers.
  3. When ready to cook, DO NOT THAW. Pre-heat oven to 350*.
  4. Remove the cacioni from the freezer, place on a parchment-lined baking sheet, and, using a pastry brush, coat the exposed surface of each pie with egg wash. Sprinkle with coarse kosher or sea salt.
  5. Place the baking sheet into a pre-heated oven and bake until golden brown, about 30 minutes.
  6. Serve immediately.

Variations

Although my family has only used a combination of chard and spinach to fill our cacioni, there’s no reason other vegetables can’t be used. In fact, Zia and I are considering rapini (broccoli raab) as filling for some future cacioni — if I can ever remember to buy some and bring it with me when I visit.

Notes

Working on this recipe resulted in my making a couple dozen cacioni, both fried and baked. At one point, I had some left-overs that had been baked and were made with Lucinda’s pastry dough. Rather than refrigerate them, I placed them with some raw cacioni on one of the baking sheets in my freezer. Lucinda freezes her cooked pocket pies and re-heats them in the microwave, so, why not do the same with cacioni? Well, I’m happy to report that those frozen, fully baked cacioni were successfully re-heated in the microwave. They tasted great and I’ll definitely be doing this again. Special thanks to Lucinda and her Mad Hungry Blog. She’s the best!

So, there’s no longer a reason for us single folk not to enjoy cacioni on a regular basis. You can make a batch, bake what you need, and freeze the rest for future baking, or, if you prefer, you can bake them all, freeze the left-overs, and re-heat them in the microwave at some later date. Either way, you won’t be disappointed.

*     *     *

Gobbi (Cardoni)

Whether you call them gobbi, cardoni or cardi, in Italian, or cardoons, in English, this vegetable may look like celery — on steroids! — but don’t be fooled. Gobbi are actually a distant cousin of artichokes and their tastes are surprisingly similar. Moreover, like the artichoke, gobbi have thistle-like characteristics which must be dealt with before serving.

Gobbi

To begin, you may need to discard one or two of the outer stalks if they are too large or have been badly bruised. Like celery, the inner stalks of the bunch will grow lighter in color and more leafy as you get closer to the center. Although some may enjoy the leaves, my family does not and trims them away. The back of the stalks have long filaments or strands running their full length, similar to celery. These, too, may be trimmed and a vegetable peeler can handle them. The last parts of the vegetable to be trimmed are the stalks’ edges. A knife or vegetable peeler will get the job done. Once a stalk is trimmed, it should be cut into 1 to 2 inch pieces and then placed in a bowl of cold, acidulated water. (That’s a fancy term for water into which the juice of a couple of lemons has been added.) This will help keep the pieces from turning brown as you trim the remaining stalks. Once trimmed, you’ll need to address gobbi’s inherent bitterness, which reportedly grows stronger as the plant matures. This can be easily countered by blanching the pieces in boiling, salted water. The length of time required depends upon your taste preference, for the longer they’re blanched, the less bitter they become. You may wish to let them go until they are just about fork-tender. Personally, I don’t mind a little of the bitterness to remain. The rest of the recipe is easy enough to follow.

If you’ve glanced at the recipe below, you may have noticed that it is practically the same as was described in an entry that detailed Mom’s method of cooking Vegetables. So, why a separate post for this one? Well, gobbi are seasonal, arriving in groceries & markets around Thanksgiving and leaving shortly after New Year’s Day. Whenever I see it, I’m reminded of the Christmases of my youth. Unfortunately, it’s been some time since I’ve come across gobbi in a supermarket, the last being 4 or 5 years ago. That time, I bought what little was available and shared my find with Zia. This year, out of the blue, I found it in no less than 4 markets. Why the sudden surge in availability is beyond me but I did take advantage of the situation. As often as I could, I bought some, cleaned & blanched it, and then froze it for future meals. Admittedly, I may have overdone it but, then again, who knows whether it will be back next year? I might as well feast on it while I can. Oh, don’t worry. I’ll be sure to bring some to Zia, too.

*     *     *

Gobbi Recipe

total time: approx. 30 minutes (includes prep time)

Ingredients

  • 1 head of gobbi, trimmed, cut, & soaking in acidulated water
  • 2 tbsp extra virgin olive oil
  • 2 cloves garlic, sliced
  • salt & pepper, to taste

Gobbi Sautéed with Tomato & Garlic

Directions

  1. Place gobbi into a large pot of boiling, salted water. Return to boil and then reduce to a gentle simmer.
  2. When the gobbi has reached the desired tenderness and taste, remove from heat and drain away the water. To retain its green color, the gobbi may be placed immediately into an ice bath.
  3. Heat oil in a frying pan over medium heat. Add garlic and sauté for no more than two minutes before adding the blanched gobbi. Season with salt & pepper to taste.
  4. Continue cooking until the gobbi are fork-tender and heated through.
  5. Serve immediately.

Variations

  • The recipe, as written, is pretty straight-forward. I like to include a little tomato, “for color.” Just after adding garlic to the frying pan, I’ll add either some diced tomato, a little tomato paste, or, as pictured above, a few cherry/grape tomatoes that have been halved. A little chopped onion or shallot may be added, as well, but if you do,  sauté them for a few minutes before adding the garlic.

*     *     *

Vegetables (Verdure)

While growing up, Mom introduced us to a number of vegetables, with varying degrees of success depending upon the person. (Yes, I’m looking at you.) For the most part, she used one method when cooking vegetables and it’s pretty much the same as is used throughout Italy. I mention this, particularly the latter part, because we Americans tend to like our vegetables to be cooked but with some crispness retained. Well, not to disappoint anyone, but I’ve eaten my way across Italy a few of times and I’ve yet to be served a vegetable that was cooked al dente. It’s just not done, I’m afraid, but that doesn’t mean that the dishes aren’t tasty or are any less desirable. Besides, some, like kale or rapini, may be a little bitter while others, like Swiss chard, may have ribs or stems that are a little tough. This method of cooking will cut some of that.

Rainbow Chard

Although the recipe below mentions Swiss chard specifically, it’s the technique and not the vegetable that’s important. Briefly, you bring a pot of salted water to boil, blanch the vegetable for a few minutes, and sauté it in garlic-flavored extra virgin olive oil. Now, if you’ve watched any televised chefs, you’ve seen them do this, or something very similar, but they will place the vegetable in cold water after blanching. This will insure that the vegetable retains its brilliant color and, if I’m entertaining, I’ll do it, too. But I don’t entertain every night and placing them into an ice bath just adds another step and more time to my dinner prep, not to mention another dish to clean. I guess what I’m trying to say is that I don’t chill ’em if it’s just Max and me for dinner. Being color blind, he’s not likely to object.

*     *     *

Swiss Chard

serves 2

total time: approx.  30 minutes

Ingredients

  • 2 – 3 tbsp extra virgin olive oil
  • 3 cloves garlic, crushed
  • 1  bunch of Swiss chard.
  • 1 small yellow onion, sliced
  • 1 tsp salt
  • salt and pepper, to taste

Directions

  1. Add olive oil and garlic to a medium-sized frying pan and heat at medium until the garlic begins to brown, a few minutes. Discard the garlic, add the onion, and sauté until it becomes fully translucent and before caramelization starts.
  2. While the garlic is flavoring the olive oil, fill a medium sauce pan with water and bring to a boil.
  3. Meanwhile, clean and prep the chard. Leave as much of the stems as you find palatable. Separate the stems from the leaves and chop the stems into pieces no larger than one inch long. Rough chop the leaves into pieces slightly larger than you would for a salad.
  4. When the water boils, add the salt and then the chard stem pieces. The length of time the stems stay in the pot depends on how crisp you like them. The less time they boil, the more al dente they’ll be. A little before the stems are cooked to your liking, add the chard leaves to the pot.
  5. After 2 minutes, strain everything out of the boiling water and add to the frying pan with the onion. Be careful: the oil may splatter when it comes in contact with the wet chard.
  6. Raise the heat to medium-high, season with salt and pepper, and sauté the chard and onions until cooked to your liking. Serve.

Variations

Rather than list variations, here are some of the vegetables that can be cooked utilizing this method: rapini, asparagus, kale, broccolini, broccoli, cauliflower, green beans, cabbage, and even brussels sprouts. Some, like rapini or kale, may need more time sautéing, while others, like brussels sprouts will, also, need a lengthier time in the boiling water. You should skip the blanching altogether when you’re cooking delicate greens, like baby spinach, frisée, or arugula. Whether to include onions or, as pictured, a little tomato, is up to you and learning to flavor olive oil with garlic before sautéing is a neat trick. So, go ahead and give ’em a try. Let Common Sense and your own palate be your guides.

*     *     *