* * *
Hello there! When last we spoke, it was Christmas Eve and I announced my return to the wonderful world of Word Press. Well, that was the plan anyway. Shortly after posting, I met dear friends for dinner, during which I mentioned a “scratchy throat.” (Cue ominous music.)
Christmas morning I awoke with what would become the Mother of all Chest Colds. (It couldn’t possibly have been flu because I had received a flu vaccination last fall.) With Max playing nursemaid, I was sofa-bound for much of the next month. Even now, I’ve a mild case of the sniffles. Worse, this “thing” is making the rounds and a number of friends are similarly affected. Happy New Year!
But enough about me. Today’s recipe, like many to come, was written during my ever-so-lengthy “brief” hiatus last year. If and when I came upon a great recipe, I’d prepare it, record the recipe, and post its URL in a special file so that I could credit the author when the time came. What could possibly go wrong?
Earlier this week, I pulled up this recipe and looked for my file of recipe links. As you may have already guessed, the file was nowhere to be found, and my attempts to recover it from back-ups have, thus far, been unsuccessful. As such, we’ve little choice but to soldier on and I promise to come back and give credit for the original recipes when and if I find them.
I truly enjoy this dish and it has become part of my winter rotation of suppers. It is pure comfort food and just what’s needed when a Polar Vortex threatens. Truth be told, it’s for dinner tonight, although lamb is the protein but more about that later.
* * *
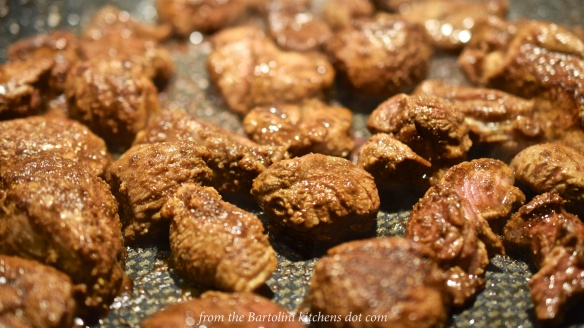
Brown the goat
* * *
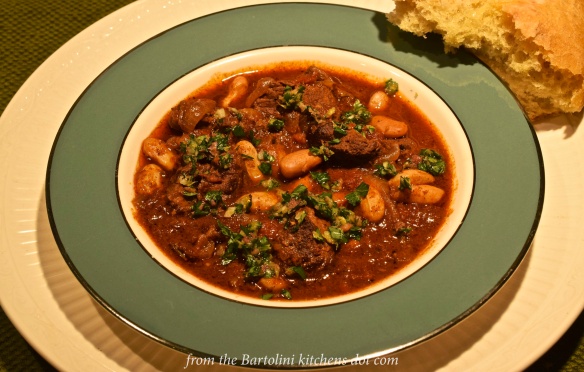
Harissa-Braised Goat with Borlotti Beans Recipe
Ingredients
- at least 4 tbsp Olio Santo, divided (see Notes)
- 2 – 3 lbs (900 – 1300 g) goat cut into 1 to 2 inch pieces (See Notes, & Variations)
- approx. 1/4 cup flour
- 2 tbsp coriander seeds, toasted and ground (see Notes)
- 2 tbsp cumin seeds, toasted and ground (see Notes)
- 1 large onion, sliced
- 1 inch ginger, grated
- 3 cloves garlic, minced or grated
- 1 small can (14.5 oz, 400 g) diced tomatoes
- 2 tbsp tomato paste
- 3 tbsp harissa sauce — more or less to taste
- 2 tbsp honey
- zest and juice of 1 lemon — 1/2 preserved lemon, sliced, may be substituted (recipe follows)
- 1 bay leaf
- 2 sprigs rosemary
- 1 cup dry white wine
- 1 lb (450 g) fresh Borlotti/cranberry/Roman beans (see Notes)
- salt and pepper
* * *
for the Gremolata (see Notes)
- 2 anchovy fillets, finely chopped — anchovy paste may be substituted
- 1 garlic clove, minced
- 3 tbsp fresh parsley, chopped
- zest of 1 lemon
* * *
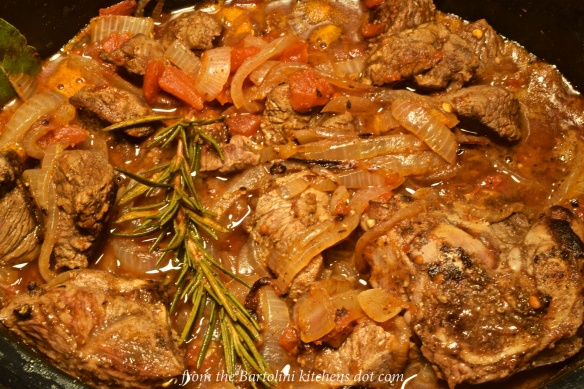
Start of Braise
* * *
Directions
- Heat 2 tbsp Olio Santo in a large frypan over med-high heat.
- Season the goat with salt and pepper.
- Use the flour to coat the goat pieces.
- Brown the goat pieces on all sides. Work in batches and it will take about 5 to 7 minutes per batch. Add more Olio Santo as needed. Remove and reserve the browned meat.
- Heat 2 more tbsp Olio Santo in the same pan and add the onions. Sauté until soft, about 8 minutes.
- Add the ginger and garlic, continue to sauté until fragrant, about 3 minutes.
- Meanwhile, add the tomatoes, tomato paste, harissa, honey, lemon juice & zest, rosemary, and bay leaf to the slow cooker. Stir to combine.
- Add the cooked onion mixture to the slow cooker when fully sautéed. Stir.
- Use the wine to deglaze the frypan. Add the liquid to the slow cooker when the pan is fully deglazed.
- Add the meat to the slow cooker and stir.
- Set slow cooker to LOW and cook for 4 hours.
- After 4 hours, add the beans and stir.
- Continue to cook on LOW for 4 more hours.
- Make the gremolata towards the end of the cooking process:
- In a small bowl, combine the anchovies, garlic, parsley, and zest. Stir until fully combined.
- Serve immediately, garnished with the gremolata. A chunk of bread wouldn’t hurt.
* * *
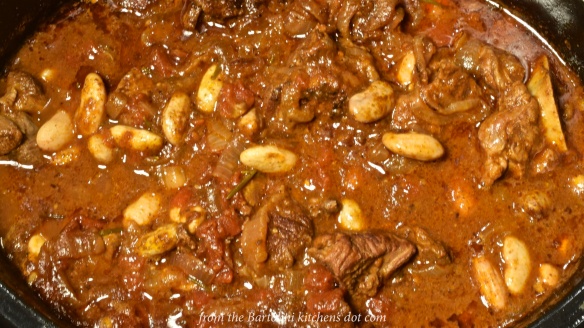
End of Braise
* * *
Notes …
Olive oil may be substituted for Olio Santo. If preferred, add red pepper flakes to the pan when the onions are added.
Use 2 lbs of meat when boneless, and closer to 3 lbs when bone-in.
This recipe requires 8 hours on LOW to prepare. You can reduce the cooking time by setting your cooker to HIGH for all or part of the time. Just remember that 1 hour on HIGH equals 2 hours on LOW.
When using whole herb seeds, it’s best to toast them prior to grinding. I use a small frypan on the stove top, while others prefer to spread the seeds on a baking sheet before placing in the oven. Either way, if you intend to use the same utensil, place the larger seeds on the heat source before the smaller to prevent the small seeds from scorching. Here, I toasted the coriander seeds for a minute or so before adding the cumin. Once cooled, I ground them together and added the mixture to the recipe.
Although I used fresh beans, you can use canned or rehydrated beans. If using canned, be sure to rinse them before adding to the slow-cooker 2 hours before the dish is fully cooked. If using dried beans that you’ve pre-soaked, treat them as fresh, adding them to the pot 4 hours before completion..
* * *
Variations …
Good quality goat is not available in all areas. Not to worry. You can substitute lamb and still enjoy a fantastic meal.
The gremolata recipe is one that I found in one of Mom’s recipe notepads. I prefer it because, unlike most others, it includes anchovies. If you prefer, you can omit the little fishies, or the gremolata altogether. if you do choose to leave out the gremolata, a bit of citrus zest — lime, orange, or lemon — makes a great garnish, as does a dollop of sour cream or Greek yogurt. The latter being particularly useful when you’ve added a bit too much harissa.
Although it is meant to be served as-is, I’ve found that a scoop of plain rice is a welcome addition, resulting in a very flavorful beans and rice dish.
* * *

* * *
Preserved Lemons Recipe
Preserved lemons are believed to have originated in Pakistan and India, before making their way to the Middle East. Today they are an integral part of many Moroccan recipes. The lemons add a distinct citrus-y flavor to a dish, and some say that the flavor intensifies the longer it cooks in the pot. Although there are a variety of recipes, each using a number of spices, all are based upon the same 3 ingredients: salt, lemons, and lemon juice. I use the simplest of recipes so that I can better control the flavor of the final dish.
Here in the States, Meyer’s lemons are in season. It is said that these lemons are closest to those found in Morocco. Of course, if you cannot find Meyer lemons, any old lemon will work.
To begin, take 4, 5, or 6 (Meyer) lemons, depending upon the jar size, and scrub well. Place 1 tbsp of kosher salt into a clean jar with a tight-fitting lid. Remove no more than the tip from each end of the lemon. Beginning at one end, slice the lemon at least halfway down but no more than 3/4. Do not separate the halves. Turn the lemon and repeat the process, slicing it into quarters. Place a tbsp of kosher salt between the sections, covering the cut surfaces, before placing the lemon into the jar. Repeat the process with more lemons, stuffing the jar as best you can. When finished, add another tbsp of kosher salt on top. If there isn’t enough liquid to cover the lemons, add the juice of a fresh lemon to “top off” the jar. Cover the jar and place in a warm room, shaking daily, for one month. Use as the recipe requires.
Your preserved lemons will last indefinitely. The liquid can be replenished using fresh lemon juice, as required. The liquid can even be used in recipes, or, to help start your next batch of preserved lemons,
* * *
It’s déjà vu all over again …

You may recall that in recent years, I’ve prepared honey mustard and ketchup at Christmas time, giving friends jars of the condiments as gifts, This year was no exception. Both are easy to make and so much better than anything that might be found on a grocer’s shelves. You can find the Honey Mustard recipe HERE, and the Ketchup recipe HERE.
* * *
Coming soon to a monitor near you …

Slow-Cooker Mole Pork
* * *