Happy St. Joseph’s Feast Day!!!!

I know. I know. I was supposed to share my cousin’s meatball recipe and I had every intention of doing so — and then I looked at the calendar. Forgive me, Giuseppe, but I forgot your feast day.

*     *     *

*     *     *

For those not familiar, some believe that St. Joseph’s intervention brought drought relief to Sicily during the Middle Ages, thus preventing widespread famine. In appreciation, the faithful vowed to prepare a large banquet in his honor and to forever commemorate his Feast Day. Over the years, St. Joseph was named the Patron Saint of towns and villages throughout Sicily and the Italian peninsula, and his Feast Day became Fathers Day in Italy.Today, March 19th, is cause for celebration with parades on both sides of the Atlantic That feast has evolved into the current day St. Joseph’s Table tradition in which the faithful bring a variety of foods and sweets to their parish churches. This is one potluck you don’t want to miss!  Any money collected during the celebrations is donated to the area’s needy.

Still interested? Here’s a more thorough description of the St. Joseph’s Table.

I’m sure you will understand if I postpone the meatball post one last time. After all, I’ve a virtual platter to prepare!

*     *     *

You can’t have a proper celebration without  music. As one of the many kids attending any number of weddings, we all sat mesmerized as our parents circled the dance floor again and again, each pass a little faster, as this music’s tempo increased.  Chicken dance? Ha! Hope your toes are in tapping condition.

*     *     *

*     *     *

Now, I must admit to initially drawing a blank when I attempted to think of recipes worthy of this illustrious Saint. The Bartolini recipe file is pretty much depleted of all dishes once served on festive occasions. What to do? What to do?

And then, an epiphany! (Considering the Saint, an epiphany sounds about right.) A number of years ago, my good friend, formerly known as my “Traveling Companion”, attended a family gathering and today’s dish, Cannoli Cream and Chips, was served. I could not believe my ears as he described the dish. Why hadn’t I thought of this?
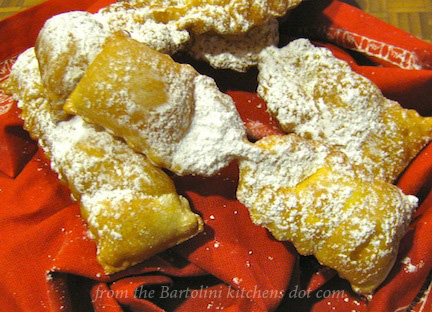
*     *     *

Home-made chips

*     *     *

Not very much later, I was invited to join him when he next visited his family. Before going further, let me talk about that family. When I first visited, walking over the threshold was like walking back in Time to the Bartolini family gatherings in the old two-flat. A welcoming cocktail and friendly conversation to be followed by a wonderful dinner with, of course, a platter of pasta the table centerpiece. His family welcomed me as one of their own and that evening remains a very special memory for me.

A few months after he described the wondrous confection, I was again invited to join him when he visited these good people. It was warmer this visit and we all gathered in what I believe was the sunroom. There, in the center of the table, was what I now consider the Holy Grail of Nibbles: a bowl of cannoli cream surrounded by chips made from broken cannoli tubes. Yes, you read that correctly, cannoli cream and chips!!!!  In my mind, “chips and dip” would never mean the same thing again.

Since that fateful day, I’ve learned that our dear hostess found this wonderful appetizer at one of the area’s groceries. Once I heard that, I went shopping and, yes, I, too, found them. In fact, they can be found in this store’s pastry department for just about any holiday. To be honest, I’ve never bought them. Where’s the fun in that? I’ve got time and a Kitchen Aid stand mixer. Let me at it!

I’m about to share recipes for both the cannoli cream and the chips. Truth be told, recipes aren’t the focus of this posting. It’s the way they’re served. So, if you’ve a favorite cannoli cream recipe, by all means use it. The same is true for the tubes. This post is about serving an old favorite in a new way.

*     *     *

Broken store-bought cannoli tubes

*     *     *

Cannoli Cream and Chips Recipe

Ingredients

for the cream (see Notes)

  • 1/2 cup heavy cream
  • 2 cups (17.5 oz, 500 g) ricotta, well-drained (see Notes)
  • 1/2 cup powdered/confectioners sugar
  • 1/2 tsp vanilla
  • 1/4 tsp cinnamon
  • 3 oz (84 g) semi-sweet chocolate – chips, chopped, or grated
  • chopped pistachios and/or grated chocolate, for garnish (optional)

for the chips

  • 2 cups all-purpose flour
  • 1 tbsp sugar
  • pinch salt
  • 2 tbsp butter, chilled and cut into pieced
  • 1/4 dry white wine
  • 1 egg, slightly beaten
  • powdered/confectioners sugar, optional

Directions

*     *     *

for the cream (see Notes)

  1. Whip the cream until stiff peaks form. Set aside.
  2. In another bowl, whisk the ricotta until smooth.
  3. Slowly add the sugar while continuing to whisk.
  4. Add the vanilla and cinnamon and whisk until well blended.
  5. Add the chocolate and carefully stir.
  6. Gently fold the whipped cream into the ricotta mixture. Cover and refrigerate for at least 1 hour before serving.
  7. Cannoli cream should be kept refrigerated and used within 2 days.

*     *     *

for the chips (see Notes)

  1. Before beginning, consider buying cannoli shells from the nearest Italian bakery. Once home, break the shells into pieces and serve. No muss, no fuss, and no panful of oil to discard. However, if you must …
  2. Sift together the flour, sugar, and salt.
  3. Add the pieces of butter and combine with the flour using your hands until the mixture resembles gravel.
  4. It’s not too late to change your mind and buy some cannoli shells.
  5. Add the egg and mix well.
  6. Add the wine, a teaspoon at a time, and knead to create the dough.
  7. Once a smooth dough is achieved, flatten it, wrap in plastic and refrigerate for no less than 15 minutes.
  8. When chilled, take a section of the dough, and roll until smooth and about the thickness of pasta. (See Notes)
  9. Use a pastry cutter to cut the dough into chip-sized pieces.
  10. Place oil for frying into a frypan to about a depth of 1/2 inch (1.25 cm).
  11. Preheat oil to 360˚ F (180˚ C)
  12. Place several pieces of dough into the hot oil and fry until golden. Flip to cook the other side. The chips should take no more than 3 minutes to completely fry. (See Notes)
  13. Use a slotted spoon to remove the chips and drain on paper towels.
  14. Cooled chips should be stored in an airtight container where they will keep for about one week.
  15. To serve, place on a platter within reach of the cannoli cream, and sprinkle with powdered sugar, if desired.

*     *     *

*     *     *

Notes

This is the time to make your own ricotta. It’s easy to do and the reward is a cheese that is far superior to any that you might find at your local grocery. Click HERE to see how I make my ricotta.

If you like, citrus zest and/or chopped candied fruit can be added to the cream for Sicilian-style cannoli cream.

For chocolate cannoli cream, add 3 to 4 teaspoons unsweetened cocoa powder to the ricotta in place of, or in addition to, the cinnamon.

If you are rolling pin-challenged like I am, grab your pasta machine and let the machine do the work for you.

A warning for all March Madness fans. Do not attempt to fry these chips when a local underdog (Loyola) makes its first appearance at the Big Dance in over 30 years. Worse, if the team is tied going into the closing minutes, turn off the stove and go watch the game. Well, a picture really is worth a thousand words.

ETA: Loyola played again on Saturday night and won!!! They now advance to the next round, the Sweet 16, and will play again on Thursday. Go Ramblers!

*     *     *

It’s déjà vu all over again  

Baked Calamari 5

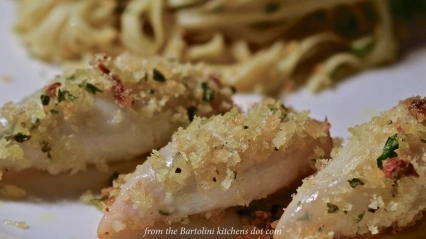
This is a holiday so why not take another look at one of the Bartolini all-time favorite dishes, Zia’s Baked Calamari?. It’s a family classic and one that’s sure to bring a smile to any Bartolini whenever it’s mentioned. You can read all about it HERE.

*     *     *

Coming soon to a monitor near you …

                                                    Marinella’s Meatballs                                                   (The lengths some will go to get one of those meatballs!)

*     *     *

Advertisement

Crostata

“What’s in a name? That which we call a rose
By any other name would smell as sweet.” (Shakespeare, “Romeo and Juliet”)

 *     *     *

About 3 years ago, I shared a recipe for the Apple Thingamajig, the name resulting from the inability of Zia and myself to remember the dessert’s correct name. In the Comments, some suggested calling it a “galette”, still others called it a “crostata.”, and I’ve even heard it called an “open-faced” or “rustic” pie. We would never have called it a crostata, however, for reasons I had intended to reveal shortly thereafter. You see, I had planned to share today’s recipe that Christmas (2011). Having missed that opportunity, crostata was to be featured the following December (2012), and, having failed that, last December (2013) would most certainly see a crostata recipe published.  And, so, here it is 2014 and the crostata recipe is finally making it to the big time. Even so, and to get back to my original point, say “crostata” to my family and we think of a jam-covered tart very much like the ones pictured throughout today’s post.

  *     *     *

Mom's Crostata 1

*     *     *

So why share the recipe now? Well, recently a good friend of the Bartolini Kitchens, Stefan of Stefan’s Gourmet Blog, shared his crostata recipe. (If you’ve not visited Stefan’s site, this is your chance. His is a fantastic blog filled with many wonderful recipes and you’ll find his Italian dishes as well-researched as they are delicious.) Seeing his crostata recipe lit a fire under me and I decided this would be the year to finally share the recipe for the benefit of the rest of the Clan. This time, though, I’d publish it ASAP, so, that there would be little chance of it being forgotten again in the rush towards Christmas.

We could always count on Mom preparing several treats for the Christmas holiday. Though she started making chocolate candies in her retirement, she always made sure that there were plenty of biscotti and a crostata for Christmas Day. For me, it wouldn’t have been Christmas without either being present, no matter what else she had prepared — the platter of ravioli notwithstanding.

*     *     *

Crostata 1

*     *     *

Not having any tart pans, Mom prepared her crostata on a small baking sheet. (In professional kitchens, it would be called a “quarter baking sheet”.) She would use 2 types of jam, with half of her crostata being coated with either strawberry or, very rarely, cherry, and, the other half peach. Mom didn’t start making jam and preserves until her retirement, so, she used store-bought jams for her crostata. She served it in little pieces, like those I’ve shown, presumably because the last thing we kids needed was more sugar on Christmas Day. Using a three-tiered serving dish, she was able to control how much we kids ate. When it was empty, there’d be no re-filling it for hours. Of course, when company was expected, the contents of that serving dish were strictly off-limits. Don’t worry. We still had our fill — just not from that tray.

With regards to this post, I didn’t feel right calling it “Mom’s Crostata”, for it really isn’t. Mom didn’t leave us a true cookbook. Yes, she gave us kids our own cookbooks but none were a complete listing of all of her recipes. I do have a couple of her notebooks but the recipes listed are in varying stages of completion. Some are fully written, while others are nothing more than a few notes. Today’s recipe falls into the latter category, though I remember watching her spread the jam over the pastry crust, my mouth-watering the entire time. The only real question that remained was what recipe to use for the shortbread crust — and Mom’s notes did specify a “shortbread crust”. The answer came from a surprising source.

Good Cooking CookbookDuring my last visit with Zia, she mentioned that she possessed a “Five Roses Flour” cookbook from 1938 that once belonged to her Mother-in-Law — the woman I’ve referred to as “Nonna” in earlier posts. While paging through it, I came across a shortbread recipe. Now, this is no ordinary shortbread. The recipe’s name is listed as “Prize Shortbread” and it’s noted that the recipe “has won many prizes at Fall Fairs and Exhibitions.” There was certainly no need to look any further for a shortbread recipe. Here, I’ve shared the recipe as it was originally written, although when I prepared the shortbread, I used my food processor and the resulting crust was quite good. (See below for a possible use for extra shortbread dough.)

Unlike Mom, I used my own jams for today’s crostate. In the first photo, strawberry jam with balsamic and black pepper, and, peach jam with white balsamic were used. The addition of balsamic vinegar is why both jams appear unusually dark in the photos. The 2nd crostata was made with tart cherry jam, to which a little bit of almond extract was added. Feel free to use whatever jam(s) you prefer.

  *     *     *

*     *     *

Crostata Recipe

Ingredients

for the pastry

  • 2 cups all-purpose (AP) flour
  • 1/2 cup confectioner’s (powdered) sugar
  • 1 cup unsalted butter, room temperature
  • 1/4 tsp salt
  • 1 egg yolk
  • an egg yolk and water wash

for the filling

  • jam/preserves, amount depending upon the crostata’s size and whether 2 flavors are to be used.

Directions

  1. Pre-heat oven to 350˚ F (175˚ C).
  2. In a mixing bowl, use a spoon to mix the sugar, butter, salt, and egg yolk. Slowly add the flour and continue to mix until the spoon can no longer be used.
  3. Turn on to a lightly floured board and begin kneading, adding more flour until the dough begins to crack.
  4. Reserve a small portion of dough to be used for the lattice.
  5. Roll the dough between 2 sheets of wax paper until about 1/8 inch thick and slightly larger than the tart pan or baking sheet.
  6. Carefully remove one sheet of wax paper and place the dough on to the tart pan, dough-side down. Remove the remaining sheet of wax paper. Gently press the dough to fit the contours of the pan. Trim the excess dough and add to the reserve.
  7. Use an offset spatula to spread the jam, evenly covering the pastry dough.
  8. Roll out the reserved pastry dough as you did for the crust. Cut the dough into strips.
  9. Starting at one end, diagonally place the strips across the tart. Once completed, work from the other side placing strips diagonally in the opposite direction, creating a lattice in the process.
  10. Use the egg wash to lightly coat the lattice and any of the exposed crust.
  11. Bake in the lower third of a pre-heated oven for 30 minutes or until crust and lattice are lightly browned.
  12. Allow to cool before cutting. Serve at room temperature.

Shortbread pastry dough recipe found in “A Guide to Good Cooking” by the Five Rose Flour Co. (1938)

*     *     *

Cherry Crostata 5

*     *     *

Notes

The first time I prepared this crostata, I “blind baked” the tart shell for 8 minutes before filling it. This was a mistake, as you can see when looking at the first photo. The lattice is considerably lighter in color than the crust. After that attempt, I’ve no longer blind baked the crust and the finished tart’s shortbread appears more evenly baked.

*     *     *

So, you’ve made a crostata and still have a little extra dough to burn …

I just couldn’t bring myself to discard the excess shortbread dough, nor was there enough to make another crostata. I was going to make a few shortbread cookies, a personal Shortbread Sandwichesfavorite, when I had an epiphany. Using a very small ice cream scoop, make equally sized balls of dough, placing them on a small baking sheet. Once the sheet was covered with evenly spaced dough balls, use the bottom of a glass to press each ball into a flat cookie. Bake in a pre-heated 350˚ F (175˚ C) oven until the edges just start to turn brown, about 15 minutes. Once cooled, use 2 cookies with a bit of Nutella in-between to make a single sandwich cookie. (You could just as easily use jam for the filling.) Like the crostate, these cookies were well-received by the taste testers that live above me. So well-received, in fact, that now I’m considering making a Nutella crostata.

*     *     *

It’s déjà vu all over again …

lumache-con-farfalle-1

This past Saturday is known as All Soul’s Day and in Marche, the Bartolini ancestral home, snails, lumache, are traditionally served.  I won’t say much more, for fear of stealing the post’s thunder, other than to mention that you can learn all about preparing this delicacy by clicking HERE.

*     *     *

Coming soon to a monitor near you …

Osso Buco Preview

Osso Buco

*     *     *

Pistachio Gelato

Gelato di Pistacchio

Pistachio Gelato 3Those of you that have followed this blog for a while will know that August means 2 things around here. First, it’s a birthday month for quite a few Bartolini (Mom would have been 90 on the 15th), as well as for many of the tasters and friends of the Kitchens.  Second, I normally schedule a visit with Zia sometime during the month but more about that later.

Mom really enjoyed ice cream and so, every August, I post at least one recipe in her honor and that of the rest of the August babies. Now, with so many memories of strolling about Florence, gelato in-hand, still-fresh in my mind, I decided that this month’s frozen treat would be a gelato, and, since Mom loved pistachio ice cream, deciding to make pistachio gelato was a no-brainer. Once I’d settled on the flavor, I knew exactly where to go for the recipe.

Last year, while in the middle of my moratorium on buying cookbooks, a blogging friend posted an ice cream recipe and referred me to a great book, Linda Tubby’s “Ices Italia.” I love this book but there is a problem. Although I remembered the book through the remainder of the moratorium, I’d completely forgotten the person who recommended it to me. Please identify yourself so that I might credit — and thank you — for leading me to the book and today’s recipe. The book is fantastic and the recipe a keeper, as you’ll soon see.

ETA: Since this recipe was posted, my friend and long-time supporter of this blog, Elaine, Le Petit Potager, has reminded me that it was she who introduced me to “Ices Italai”. We pistachio gelato lovers all thank you.

*     *     *

As for my visit with Zia, I had intended to leave in the next day or two but my car had other plans. I will not bore you with the details but suffice it to say that my departure has been postponed until some time next week. The kitchens will be closed for the duration, reopening on Wednesday, August 27th.

*     *     *

Pistachio Nuts

*     *     *

Pistachio Gelato Recipe

Ingredients

  • 1 heaping cup (160 g) pistachios, unsalted, roasted, skins removed  (see Notes)
  • 3/4 cup castor sugar (see Notes)
  • 1.5 cups (350 ml) whole, full-fat milk
  • 1.25 cups (300 ml) heavy cream
  • 1/2 tsp vanilla
  • pinch of salt
  • additional pistachios, crushed, for garnish — optional

Directions

  1. Place shelled, roasted pistachios into a large food processor and grind until sand-like.
  2. Add sugar and continue to grind until very fine.
  3. Place milk and heavy cream into a medium saucepan and heat slowly until just before boiling. Small bubbles will appear where the dairy meets the pan’s side.
  4. Add some of the hot milk to the ground nuts and process until smooth.
  5. Continue to gradually add hot milk to the bowl, processing after each addition, until no more milk remains (see Notes).
  6. Add vanilla and salt, process to combine, and then add mixture to a large bowl
  7. Refrigerate until chilled, at least 4 hours.
  8. Follow the manufacturer’s instructions for preparing ice cream.
  9. Place gelato in a freezer-proof container and store in the freezer. Ms. Tubby recommends waiting for 3 hours before serving.
  10. Garnish servings with optional crushed pistachios.

Recipe may be found in Linda Tubby’s excellent book “Ices Italia“.

*     *     *

Pistachio Gelato 1*     *     *

Notes

According to Ms. Tubby, unlike ice cream, gelato isn’t meant to be served when frozen solid. Once frozen, place the opened container in your fridge for about 30 minutes before serving. This will result in a gelato just like those served in your favorite gelateria.

I was unable to find raw pistachio nuts and had to resort to using those that were already roasted. I found that a 12 oz (340 g) bag provided me with a little more than I needed for the recipe, once I shelled them and rubbed off the skins. I used the excess for garnish.

For this recipe, you want to use a finer sugar so that your gelato isn’t grainy, as may be the case if regular, white sugar is used. Castor sugar is that finer sugar but there’s no need to buy it if you haven’t any. Just place white sugar in your food processor and grind it until it is fine, like castor.

This recipe will produce a very smooth gelato. If you prefer a little more texture, just process the nut and sugar mixture for less time (Step 1) and/or add all the heated dairy to the processor bowl at once and process only until the mixture is combined.

*     *     *

Variations

Raspberries*     *     *

Raspberries PureedI’ve a friend was recently released from hospital and faces some mighty tough dietary restrictions, while being told that he shouldn’t lose any more weight. Now, in the past, I would have delivered a tray of lasagna and a loaf of garlic bread to my friend, and that would have gone a long way towards at least maintaining his weight. Well, as incredible as it may sound, lasagna and garlic bread are not permitted on his diet. (I told you the restrictions were “mighty tough”.) He can eat ice cream, however, and that’s all I needed to know.

His favorite gelato flavor is raspberry, lampone, so, I took 12 oz (340 g) of raspberries, blitzed them in a food processor until broken down, and then strained the purée through a sieve to remove the seeds. For the dairy portion of the recipe, I reduced the quantity of whole milk to 3/4 cup (175 ml) and increased the amount of heavy cream to 2 cups Raspberry Gelato(475 ml). (There shall be no weight loss on my watch!) With no nuts to grind, I just added the heated dairy mixture to the sugar in the food processor, blitzed it long enough to melt the sugar, and then added the sieved raspberry purée, processing until blended. The mixture was chilled for 4 hours before my ice cream machine took over.

All who have taste it agree: this is one very good gelato.

*     *     *

Piazza della Signoria, Florence

Like cities and towns throughout Europe, Florence’s cityscape is peppered with public squares, piazze. Some are so small as to be little more than some free space at the intersection of 2 minor streets. Others, Like the Piazza dell Republicca, are relatively vast spaces, lined on all 4 sides with cafes and trattorie. As a tourist, though the prices are high, there’s no better place to people watch than at one of these “ringside” establishments. Of all the piazze in Florence, however, the Piazza della Signoria is the grand dame of them all.

The city’s heart since Roman times, the Piazza serves as Florence’s civic center and political hub. When Zia and I visited Florence 12 years ago, there was a transit strike on the day of our departure from Florence. The Piazza was jammed with people carrying banners, placards, and bull horns. I thought we’d never get through the throng. This visit, things were quite a bit different, though there were more tourists about than I’ve ever seen in Florence. It seemed whenever I stopped to take a photo, suddenly an umbrella, pennant, or hat would appear in front of my lens, as a tour guide gathered his/her charges to explain one of the Piazza’s many features — and there are many features.

When you enter the Piazza, you cannot help but notice the massive structure and tower near a corner. This is the Palazzo della Signoria but is known as the Palazzo Vecchio, Old Palace. As if it’s not impressive enough in its own right, the entrance is flanked with 2 larger-than-life statues. This is the site where Michelangelo’s “David” originally stood and where a replica now stands guard. Joining him is a statue of Hercules. Moving around the Piazza, you’ll see a bronze statue of “Cosmo I” de Medici atop his steed. To Cosmo’s side, you’ll find the bronze and marble fountain of Neptune. (Sorry, I couldn’t get close enough to get a photo worth publishing.)

 *     *     *

*     *     *

To my eye, the most praiseworthy section of the Piazza is the Loggia dei Lanzi, so beautifully designed and constructed that Michelangelo urged the city to repeat the facade on all the Piazza’s buildings. (Be sure to take the link to see the entire structure.) It is home to some stunning pieces of sculpture, though be prepared for some obstructed viewing – and not just because of the crowds. In all the times I’ve been to the Loggia, I’ve yet to enjoy a completely scaffolding-free view. Even so, the Loggia dei Lanza is one site that you must see if you find yourself in Florence. Here is some of the statuary on display there. To begin, there are the Medici Lions on either side of the steps leading into the Loggia – now a restricted area, by the way.

*     *     *

*     *     *

That concludes our tour of Florence. When I return, we’ll do a little touring in Rome

*     *     *

It’s déjà vu all over again …

La BombaSince I shared a gelato recipe today, I thought it best to send you back to the Granddaddy of all of my ice cream recipes, the Spumoni Bomba. Yes, it’s spumoni but so much more. You can see step-by-step instructions for making this show stopping dessert simply by clicking HERE.

*     *     *

Coming not too soon to a monitor near you …

Roast Duck PreviewRoast Duck

*     *     *

Gluten-Free Chocolate Torte

Flourless Chocolate Torte 3I’ve made no secret of my inability to bake. I have burned sheet after sheet of misshapen cookies and pulled countless cakes from the oven that failed to rise. A few years ago, after yet another bundt cake that had somehow been Super Glued to the pan, I threw both pan and cake into the trash — a very liberating experience.

Then there was the Fall that I was going to teach myself to bake my favorite cake, the Black Forest Cake. Yum, right? The first attempt quite literally made me sick. I couldn’t get that thing to the trash quick enough. The next week brought another attempt. That “cake” was better — it wasn’t life-threatening — but was certainly nothing to be proud of. The third cake proved I was on the right track, though it was in no way good enough to share with anyone. I hit pay-dirt with my 4th and, what would prove to be, my last attempt. That cake was a delight. Good thing, too, because that was 6 years ago and it was the last Black Forest Cake that I’ve tasted. Oh, I’ve been tempted to have a piece but, when I am, there’s a rumble down under that convinces me that now is not the time.

*     *     *

Perhaps it was my success with this torte that gave me the mistaken opinion that I could bake, leading me to the Black Forest Cake debacle. I first saw Jamie Oliver prepare the torte when he was known as The Naked Chef, so, this recipe has been around for some time. I’ve made it a number of times since without any problems whatsoever — not counting a misguided attempt to make it as a bundt cake with that accursed pan. Never mind that. Believe me. If I can bake this torte anyone can.

Now, a word about the recipe before proceeding. If you go searching for it on the web, you’ll find it titled a number of ways. Jamie Oliver’s: “Chocolate Torte”; “Flour-less Chocolate Torte”; and, “Two Nut Chocolate Torte”, are the most popular. Bear in mind that this recipe was demonstrated in an episode that aired in 2000, some time before most of us were aware of gluten-related issues. In fact, I’ve even see the recipe called “Flour-less” yet you’re instructed to grease and flour the pan before filling it with cake batter. Not to worry. This torte is gluten-free, hence the name change, and I coat the pan with powdered cocoa, not flour.

*     *     *

Chocolate Torte X

As Jamie intended

*     *     *

Gluten-Free Chocolate Torte Recipe

Ingredients

  • 5 1/2 oz (155 g) shelled and peeled almonds
  • 5 1/2 oz (155 g) shelled walnuts, finely ground
  • 11 oz (310 g) semi-sweet chocolate (separated – 2/3 & 1/3)
  • 1 heaped teaspoon unsweetened cocoa powder
  • 9 oz (255 g) butter
  • 3 1/2 oz (100 g) sugar
  • 6 large free-range eggs, separated
  • butter
  • cocoa powder
  • salt
  • powdered sugar

Directions

  1. Pre-heat the oven to 375˚ F (190˚ C). Use butter to grease the bottom of an 8 to 10 inch spring-form pan before lining the bottom with a piece of parchment paper. Butter the paper and sides of the pan. Use cocoa powder to coat the greased pan.
  2. Place the almonds into a food processor and grind them until finely ground.
  3. Add the walnuts and continue processing until all are finely ground. (See Notes)
  4. Add a pinch of salt and 2/3 of the chocolate and process for 30 seconds. Remove the nut-chocolate mixture to a large mixing bowl.
  5. Add the butter and sugar to the food processor and run until the mixture is a pale yellow and fluffy.
  6. Add the egg yolks, one by one, and process until well-blended.
  7. Add the egg mixture to the bowl with the chocolate mixture and stir until well-combined.
  8. Add the egg whites to a mixing bowl with a pinch of salt.  Using a whisk, hand mixer, or stand mixer, beat the eggs until stiff peaks form. (See Notes)
  9. Take 1/3 of the beaten egg whites and fold them into the bowl with the eggs and chocolate. Once blended, add the remaining 2/3 of the egg whites and fold into the batter. Do not over mix. (See Notes)
  10. Pour the batter into the prepared pan.
  11. Place the remaining chocolate chunks into the top of the torte’s batter. Press them slightly into the batter, though no need to cover them with batter.
  12. Bake on the center rack of a pre-heated oven for about an hour. After 55 minutes, use a knife to check to see if the torte is finished. Place the knife into the center, wait a few seconds, and remove. The blade should be relatively clean.
  13. Once cooled, remove from pan, invert to remove the paper, and place on a cake platter. Dust with powdered sugar.
  14. Serve as-is or with a dollop of whipped cream or crème fraîche.

This is a recipe from Jamie Oliver, The Naked Chef

*     *     *

Oven Ready

Ready for the oven

*     *     *

Notes

Be sure to keep an eye on your nuts when using the food processor or you may end up with almond-walnut butter.

To remove the almond skins: Add raw, shelled almonds to a small sauce pan filled with boiling water. Remove from the water after 3 minutes, placing the blanched nuts into an ice water bath. Strain and wipe dry. Squeeze each almond between your thumb and index finger to easily remove the skin.

This is how I beat egg whites:

  • Bring eggs to room temperature before separating. Be sure no yolk remains in the whites.
  • Place the whites in a mixing bowl. Whether whisking by hand or using a mixer, begin slowly at first. After about 30 seconds, continue beating at medium speed.
  • Once the eggs begin to color, beat at a higher rate until beaten to the recipe’s needs.

The beaten egg whites provide lift for this torte. If they aren’t folded into the batter correctly, the torte will not rise. Here’s a quick video demonstrating the proper technique for folding egg whites into batter.

*     *     *

*     *     *

For the chocoholics among us

Make a simple ganache.

  1. Place 8 oz (225 g) of chocolate pieces in a heat-resistant bowl – use whatever type of chocolate you prefer
  2. Heat 10 oz (300 ml) of heavy cream to the point of boiling.
  3. Pour the heated cream over the chocolate and let sit for a couple of minutes before stirring until smooth. As it cools, the ganache will thicken.
  4. If you prefer your ganache to be flavored, once the ganache is fully mixed, add 2 or more tbsp of:
      * Framboise for raspberry flavoring;
      * Grand Marnier or Cointreau for orange;
      * Amaretto for almond; or
      * Kahlúa for coffee.
  5. Either pour the ganache over the entire cake or each piece as it is served.

I usually make half the amount listed here and store the remainder in a sealed container in the fridge. I’ve no idea how long it will last because kitchen elves snack on it until it’s gone, usually within 48 hours — within 72 hours when Girl Scout cookies are atop the counter.

*     *     *

Chocolate Chocolate Torte

As John wanted

*     *     *

It’s déjà vu all over again …

Carnivale ends today in Italy, as it does round the World. In the days leading up to Ash fiocchetti1Wednesday, the beginning of Lent, celebrations of all kinds take place, each with its own particular sweets and confections. In New Orleans, it’s King Cake. In Chicago, it’s fried donuts called Paczkis. In the Bartolini kitchens, it was fiocchetti, which we called angel wings. These fried dough crisps, in one form or another, are made throughout Italy this time of year and go by a number of names. You can learn how to make them just by clicking HERE.

*     *     *

Coming soon to a monitor near you …

Pork Tenderloin - Plums 1

Pork Tenderloin with Plum Sauce

*     *     *

Blueberry-Lemon Slice

Blueberry-Lemon Slice

As many of you know, I spend some of my spare time watching a variety of cooking shows. (Note that I didn’t say the Food Network. Since they’ve gone to the dark side of broadcasting — a.k.a. “reality” TV — I watch that network far less.) Since I can not always watch them when broadcast, many of these programs end up recorded on my DVR. Then, on some rainy day or sleepless night, I’ll clear my DVR of these recordings, zipping through the programs hoping that something will catch my eye. That’s how I found today’s recipe and it was quite a catch, even if I do say so myself.

If you’re at all like me, you enjoy the combination of blueberry and lemon flavors. After all, a blueberry muffin without a hint of lemon is just a muffin. These slices have an abundance of both ingredients and the result is one delicious treat. It’s ridiculously easy to prepare and there are no exotic nor hard-to-find ingredients. If you don’t have fresh blueberries, go ahead and use frozen. In fact, I always buy and freeze blueberries at the peak of their season, so, that I can enjoy blueberry pie when the cold weather hits. This Winter I’ll have a slice, too. If you try this recipe, I bet I won’t be the only one.

*     *     *

Blueberry-Lemon Slice Recipe

Ingredients

  • 2 cups all-purpose (AP) flour
  • 1 cup sugar, divided
  • 1 tbsp baking powder
  • 2 tsp salt
  • 1 egg yolk mixed with 1 tbsp water
  • zest & juice of 1 lemon
  • 10 tbsp butter, cubed and placed in freezer for about 30 minutes
  • 3 cups blueberries, fresh or frozen may be used
  • 1 tbsp cornstarch
  • pinch of salt

 *     *     *

This slideshow requires JavaScript.

*     *     *

Directions

  1. Pre-heat oven to 350˚ F (177˚ C)
  2. Place flour, sugar, baking powder, salt and lemon zest in a food processor. Process the ingredients till thoroughly mixed. Add the egg mixture and continue to whirl until combined.
  3. Place the very chilled butter cubes into the food processor. Pulse the ingredients, repeatedly, until the mixture looks like little pearls,
  4. Reserve 2 cups of the crumble mixture and use the rest to cover a greased 9 X 9″ baking dish. Press it down to form a crust.
  5. Meanwhile, place the blueberries, remaining sugar, lemon juice, corn starch, and a pinch of salt into a large bowl. Gently stir until everything is evenly coated.
  6. Once the bottom crust has been formed in the baking dish, pour the blueberries into the baking dish, covering the crust.
  7. Use the reserved crumble to cover the blueberries.
  8. Bake in a pre-heated oven for 35 to 45 minutes. Blueberries should be soft and the crumble browned to your satisfaction.
  9. Allow to cool and set before cutting into squares.
  10. Serve as-is or with optional Lemon Cream & Limoncello Syrup. (See Notes)

Inspired by Clinton Kelly’s Blueberry Pucker Bars, on The Chew

*     *     *

Blueberry-Lemon Slice

*     *     *

Notes …

The sharp-eyed among you may notice that I used an 8 X 8″ baking dish and not the 9 X 9″ dish indicated in the recipe. My 9 X 9″ dish met an untimely end when it crashed into the floor. It was empty, thankfully.

Although I’ve never done so, it’s suggested these slices be served with a Lemon Cream & Limoncello Syrup. Here’s that recipe, also from The Chew:

Ingredients

1 cup limoncello
1/2 cup heavy cream
1 tablespoon granulated sugar
1/4 cup lemon curd

Directions

  1. In a small sauce pan over medium heat, reduce limoncello by half. Refrigerate until well-chilled.
  2. Meanwhile, whip together heavy cream with sugar until stiff peaks form. Fold in lemon curd.
  3. When ready to serve, place a dollop of the lemon cream mixture atop each slice, accompanied by a drizzle of the limoncello reduction.

*     *     *

It’s déjà vu all over again …

PuffballBack in our part of Michigan, it’s puffball season. Well, it’s supposed to be but you never really know until your find them. Sometime during October, these large, oblong-shaped funghi appear in areas that are mostly shaded from the sun. Up until a few years ago, 1 to 3 of them could be found behind Zia’s garage. Now, for reasons known only to Mother Nature, they’ve moved to its side. You needn’t worry about that, though, for you can find some, as well as learn how to prepare them,  by clicking HERE.

*     *     *

Coming soon to a monitor near you …

Preview

Something Special to Commemorate Columbus Day

Octopus

*     *     *

Tart Cherry Frozen Yogurt

Those of you who have followed my blog for some time know that August is Birthday Month for many of my friends and family. Mom and her Mother, Uncle and his Sister, Friends and Tasters, Nephews and a Boy Upstairs, and too many more to mention were all born in the 8th month. You might, also, recall, that Mom loved ice cream and to commemorate her birthday, I normally post ice cream recipes in August. Note the word “normally.”

*     *     *

Tart Cherry Frozen Yogurt

*     *     *

This year I though I would switch things up a bit. You see, about 20 years ago, I bought a fancy schmancy gelato maker and it broke long before the investment paid for itself in tasty frozen treats. Its recipe book survived, however, and one day I made a batch of “frozen yogurt.” Everyone loved it and marveled at the creaminess of this low-fat dessert. The only problem was that, just like the old Seinfeld episode, it wasn’t at all low-fat. There was just as much heavy cream in it as I use in normal ice cream. Yes, there was a little yogurt in the mix but nowhere near enough to justify it being called “frozen yogurt,” let alone “low-fat.” That was about 7 years ago and I’ve never attempted to make frozen yogurt again — until now.

With Birthday Month already underway, I turned to another recipe book for inspiration. I soon found it in the form of a tart cherry frozen yogurt. You see, on my return home following my last visit with Zia, I stopped at a farm and purchased 20 pounds of frozen, pitted tart cherries. (You may be interested to learn that Michigan produces as much as 70% of our country’s tart cherries.) Once home, I delivered some to a neighbor and the rest of the tarts are sitting pretty in my freezer.

So, with recipe and cherries in hand, I made my first batch of frozen yogurt. Unfortunately, it wasn’t at all what I had expected. Sure, the flavor was outstanding but its texture was very much like a sorbet rather than a creamy, frosted confection. Worse, I had doubled the recipe and now had 6 cups (1400 ml) of the stuff to eat — and eat it I did. Waste a frozen dessert in Mom’s Birthday Month? Never! Convinced I had made a mistake — not at all an uncommon occurrence in my kitchen — I tried it again, though this time I made a single batch. The result was the same and I had another 3 cups of frozen yogurt/sorbet to eat.  All the while, Birthday Month marched on.

Last week, having eaten 9 cups of the stuff during what had to have been the coolest August on record, I decided to try again. This time, I put aside the recipe book and borrowed a page from the old gelato maker’s recipes. I added heavy cream. That’s right, heavy cream and I played around with the other ingredient amounts, as well. The result? A frozen yogurt with a texture far closer to ice cream than sorbet and a tart cherry flavor that is oh, so very good. Not only that but since I made this dessert, Summer has returned and our temperatures have soared at least 10˚ F above normal for this time of year. Message received, Mom.

*     *     *

Tart Cherries - 1

*     *     *

In retrospect, I think the poor texture was due to the amount of liquid contained in the bags of frozen cherries. I bet if I had drained much of the liquid, the texture probably would have been less icy. It may have, also, been less flavorful. I guess the World will have to wait for the answer because I don’t think I’ll be making tart cherry yogurt again for quite some time — well, at least until next August, anyway.

*     *     *

Tart Cherry Frozen Yogurt

Ingredients

  • 1 lb (455 g) of tart cherries, pitted
  • 2/3 cup (135 g) sugar
  • pinch of salt
  • a few drops almond extract
  • 1 cups (245 g) whole-milk Greek yogurt
  • 4 oz (118 ml) heavy cream — the more the merrier

Directions

yield: a little less than 1 quart

  1. Place cherries and sugar in a medium sauce pan over med-high heat. Cover, bring to a boil, reduce heat, and simmer for 5 minutes.
  2. Remove from heat and allow to come to room temperature.
  3. Add the almond extract and place the cherries and juice into a food processor or blender. Process until smooth.
  4. Place mixture in a bowl, cover with plastic wrap, and chill in the refrigerator for at least 2 hours.
  5. Once fully chilled, stir to combine the cherries, heavy cream, and Greek yogurt.
  6. Add the mixture to your ice cream maker and process according to the manufacturer’s directions.
  7. Serve or freeze until the yogurt is frozen to your satisfaction.

Originally inspired by David Lebovitz, “The Perfect Scoop”

*     *     *

To make the chocolate sauce:

Melt 4 oz (110 g) in the top of a double boiler. Once melted, add 2 oz (60 ml) warmed heavy cream, a pinch of salt, and mix to combine. Take the chocolate off of the heat and add an 1/8 tsp of vanilla. Stir and serve.

*     *     *

*     *     *

Variations

While I was in the throes of trying to eat all of this sorbet masquerading as yogurt, Sally, creator of the enchanting Bewitching Kitchen blog, posted a recipe for blackberry-cherry yogurt, In it, she used banana to smooth the texture. Not heavy cream but banana! I had intended to follow her lead but Birthday Month was coming to an end faster than was my supply of substandard frozen yogurt. Not only that but there was heavy cream in the fridge but no bananas on the counter. I will, however, keep her “solution” in mind the next time I attempt to freeze yogurt.

Notes

Nothing goes better together than cherries and almonds. Even so, too much almond extract will totally overpower the tart cherry flavor. Use almond extract sparingly, tasting as you go.

This recipe will yield just under a quart of frozen yogurt. Let’s face it, one scant quart of any frozen dessert is hardly worth the effort to make it. Double the recipe and be happy.

*     *     *

It’s déjà vu all over again …

Nothing says "Happy Birthday!" like una bomba!

Nothing says “Happy Birthday!” like una bomba!

If we’re going to take a look back at the end of a frozen dessert post, there really is only one post deserving of mention, especially in August. For today’s blast from the past, I’m going to send you to the granddaddy ice cream post of them all. Yes, it’s the Spumoni Bomba. With layers of cherry, pistachio, and chocolate ice creams, this is one frozen treat your guests will never forget. All you need do is click HERE for the frosty details.

*     *     *

Coming soon to a monitor near you …

Pupster Peanut Butter

Pupster Peanut Butter

*     *     *

This Plum Cobbler is Magical!

You may recall that I shared a peach cobbler recipe a few weeks ago. Somewhere along the line, I mentioned having another recipe for cobbler, one where the topping starts in the bottom of the baking dish but rises to the occasion during baking, giving you a perfectly formed topping to the rich fruit/berry filling. How can this be?

**********

Do you believe in magic?

**********

I’ve made this cobbler more than a few times over the years. Peaches, plums, strawberries you name it, I’ve used them all. It’s an easy recipe, a fast recipe, and one that is sure to please everyone at your table. Just bear in mind that the topping of this cobbler, unlike the peach cobbler recipe I shared HERE, is more cake-like than biscuit. I happen to like them both and now you’ll have a choice.

The recipe is as easy as 1, 2, 3 …

*********

Melt Butter in Baking Dish

*********

Add Batter – Do Not Mix

*********

Add Par-Cooked Filling – Do Not Mix

**********

Bake while singing “Abracadabra!” and … Ecco!

*********

Plum Cobbler Recipe

Ingredients

  • 1/2 cup unsalted butter, melted
  • 1 cup all-purpose (AP) flour
  • 2 cups sugar – divided
  • 1 tbsp baking powder
  • pinch salt
  • 1 cup milk
  • 4 cups plums, pitted and chopped
  • 1 tbsp fresh lemon juice
  • ground cinnamon and/or nutmeg, to taste (optional)

Directions

  1. Pre-heat oven to 375 F (190 C).
  2. Pour melted butter into a 9 x 13 x 3″ baking dish.
  3. In a medium bowl, combine the flour, 1 cup sugar, baking powder, with salt and mix well.
  4. Add the milk, mixing until just combined. Pour this batter into the baking dish containing the melted butter. Do NOT mix.
  5. In a medium saucepan, combine the plums, lemon juice, with  remaining cup of sugar and bring to a boil over med-high heat. Stir constantly. Remove from heat and add optional cinnamon and/or nutmeg.
  6. Carefully pour the plum mixture into the baking dish. Do NOT mix.
  7. Bake on a baking sheet in the center of a pre-heated oven for 40 to 45 minutes or until the top is golden brown. Alternately, you can forget to set a timer and eventually find a cobbler in your oven resembling the one in the final picture above
  8. May be served warm or cold, garnished with ice cream or whipping cream.

**********

Variations

As mentioned, you can use whatever fruit or berry that you like for the filling. I’ve never used a thickening agent, like flour or cornstarch, for fear of it affecting the cake’s formation magic.

Although the recipe lists cinnamon and nutmeg as optional, I rarely use them. I find that they can easily overpower a dessert, so, I use them sparingly in my cobblers, if at all.

**********

It’s déjà vu all over again …

Today’s Blast from the Pasta, Spaghetti Aglio e Olio, is probably the most versatile of all pasta recipes. Prepared as written and you’ll be enjoying a delicious pasta dinner within minutes but that’s only part of the story. Saute some vegetables and you’ll have a great pasta primavera. Add some clams with a touch of white wine and you’ve got the classic pasta con vongole. The choices are endless and I prepare this dish, in one form or another, just about once a week. You can see the recipe by clicking HERE.

**********

Coming soon to a monitor near you …

Branzino al Cartoccio

**********

An Update

Although I’m the proud owner of some new, fancy schmancy equipment, I am still without a DSL. I have been promised, however, that service will be restored, better than ever, sometime this evening — and companies, especially very big companies, never ever lie.

Thanks for your comments and well-wishes.

*********

The Return of Mascarpone!

Hard to believe that it’s already been 11 weeks since we made mascarpone together. At the time, I said that I would revisit the dishes used to illustrate that post and, to that end, I’ve already shared the recipe for Pappardelle with Spinach, Mascarpone, and Pecorino Romano Cheeses. Today we’re going to use mascarpone in two desserts and again to make jalapeño poppers.

When most hear the word “mascarpone”, they think of tiramisu, that quintessential Italian treat — and who would blame them?  I do plan to share our family recipe for tiramisu but at a later date. That dish deserves a post all its own. So, instead, I’ll share two easy confections that combine whipped mascarpone with fresh berries. To make the whipped mascarpone, take some whipping cream and beat until peaks form. Add icing/confectioner’s sugar, to taste, during the process. To the sweetened whipped cream, add at least an equal amount of mascarpone and beat the mixture until peaks again form. Taste midway through to see if more sugar is needed. Set aside for use in either of the following two recipes.

In the first case, fresh strawberries are hulled and quartered before being macerated with a little sugar and balsamic vinegar.  There is only one real concern about this dish and that involves the balsamic vinegar. In the past, when I made this, I took a couple of ounces of balsamic, added a little sugar & lemon juice, and then reduced it by half over a med-high heat. Once cooled, I used it to make my parfaits. Last Christmas, my friends, Cynthia & Nigel, gave me a bottle of aged balsamic and it’s perfect for this dessert without being reduced or sweetened. Whether your balsamic is good as-is or has been reduced and cooled, the parfaits are made the same from this point forward. Hull and quarter 4 or 5 strawberries per serving. Sprinkle them with a little sugar, more or less depending upon the sweetness of the berries. Add  a couple of tablespoons of the (reduced) balsamic vinegar, mix well, and set aside for about a half hour. (This would be a good time to make the whipped mascarpone.)  Once the berries are ready, begin building the parfaits. Start with the mascarpone and create alternating layers of the whipped cheese and the berries in each parfait cup. You’ll want to finish with berries on top. When all the cups have been filled, divide whatever berry/balsamic sauce is left among the servings. Garnish with a piece of basil, if you like.

This next recipe uses chocolate sauce instead of balsamic vinegar. As you’ve probably noticed in the picture, I like a thick chocolate sauce. Here I created a granache, of sorts, by melting 4 semi-sweet chocolate squares in a double boiler, adding 1 to 2 tablespoons of  heavy cream, and stirring until well combined. Once cooled, I used it to top my dessert, resulting in a thick mass of chocolate-y goodness. For a thinner sauce, add more cream, some butter, and sugar to the double boiler and stir thoroughly. As for the berries, you can wash and trim them, serving them as-is, or, once cleaned, you can put them all in a bowl, add a little sugar & lemon juice, and let sit for 30 minutes. When ready to prepare your dessert, place a large dollop of whipped mascarpone in the center of each dessert plate and spoon mixed berries on top of each dollop.  Add another, smaller, dollop on each dish and top off each with more berries. Finish each dessert with some chocolate sauce and serve.

 *     *     *

The last recipe for today uses mascarpone to make jalapeño poppers. Most of us have favorite popper recipes and mine involves cream cheese, garlic, onion, and grated cheeses to make a filling for the peppers. Mascarpone, though creamier, isn’t as flavorful as cream cheese and, as a result, I do not add garlic nor onion to the filling for fear of completely overpowering the mascarpone. I do add grated Monterey Jack and cheddar cheeses to the filling to give it more “body.” I use 2 parts mascarpone to 1 part cheddar and 1 part Monterey Jack. To prepare the peppers, take off the top of each, creating a boat-like vessel to hold the cheese. (Cutting them in half will allow the cheese filling to spill during baking.) With a spoon, clean out the seeds and ribs from inside each “boat.” Now, filling each pepper, as-is, will result in pretty mild poppers. For more heat, dice the trimmed tops with as much of the seeds & ribs that you like and add them to the cheeses. Once thoroughly mixed, fill each boat with the cheese but not to over-flowing. Next, place some Panko bread crumbs and a couple of tablespoons of grated Pecorino Romano cheese in a shallow dish and roll each filled pepper into the dish, coating the cheese filling with the bread crumb mixture. Spray a baking sheet with cooking spray, place each on the tray, and cook in a pre-heated 400˚ oven until topping begins to brown.  I start checking at about the 15 minute mark. If the peppers bake for too long, the pepper walls might collapse, spilling the hot cheese filling all over your baking sheet. Once baked to your satisfaction, remove to a serving platter and allow to cool for a couple of minutes before serving.

 *     *     *

Coming Attractions

Warn the dairies! Next week we’re making American Mozzarella.

 *     *     *

By any other name …

“Helen Hayes”

 *     *     *

Spumoni Ice Cream (It’s da Bomba!)

As you already know, a number of people in my life have birthdays in August. Mom, Grandma, Uncle, my Friend the kitchens’ Taste Tester, my Friend the Entertainer, my Grand-Nephew, and the Oldest of the Boys Upstairs were all born in August. Well, in their honor, and since this is the last day of their collective birthday month, why not go out with a bang? Today’s recipe is the Spumoni Bomba.

These past few Fridays, I shared recipes for pistachio, chocolate, and cherry ice cream. Not so coincidentally, these are the 3 flavors used to create spumoni ice cream, Mom’s favorite. Dad often brought home boxes of spumoni from the restaurant, with each individual serving conveniently wrapped in paper. Klondike bars? Who needed ice cream sandwiches when we had boxes of spumoni in the freezer? Anyway, if we’re going to celebrate the end of Mom’s birthday month, spumoni is the only way to go.

Before offering instructions for creating the Bomba, as well as the traditional “loaf,” a few things should be mentioned. First off, I knew all along that I would be making spumoni ice cream and that’s why I chose to use the same base for all 3 flavors. I wanted all 3 ice cream layers to have the same creamy texture on the palate. Using a custard-based chocolate layer with a yogurt-based cherry layer and Mom’s pistachio layer, for example, just wouldn’t work. Secondly, “authentic” spumoni recipes call for a variety of candied fruit pieces to be added to the cherry layer. For me, these chunks do not freeze well and consequently ruin the texture of the ice cream. So, I dropped ’em! Moving beyond the rejected candied fruit, this recipe will use 3 batches of home-made ice cream, with each batch equaling 1 1/2 quarts. Of course, the amount of ice cream required will depend upon the size of the bowls you use to create the bomba. If you don’t wish to make home-made ice cream, store-bought can be substituted. You’ll need to let the ice cream soften a bit before you add any fruits or nuts, if desired, and before you use it to make either the loaf or bomba. Lastly, unless you have 3 canisters for your ice cream maker, this is going to take more than 1 day to create.

*     *     *

Magic happens when you slice into a bomba!

*     *     *

Spumoni Bomba Recipe

Special equipment: a set of 3 nested mixing bowls, each decreasing in size. Mine were approx. 10″, 8″, and 6″ in diameter, and/or 1 bread loaf pan.

Ingredients

Directions

  1. While the chocolate-chocolate hazelnut ice cream is being made, cover the exterior of the middle-sized bowl with plastic wrap, place it in the largest bowl, and place both in the freezer until needed.
  2. When the ice cream has been made, reserve 1 cup of it and pour the rest into the largest bowl. Place the plastic-covered middle bowl into the first and press down, causing the ice cream to flow upwards between the 2 bowls. Stop applying pressure when the ice cream reaches the top of the outer bowl. Place both bowls back into the freezer for a few hours.
  3. Remove the middle bowl and plastic wrap. With an offset spatula, use the reserved ice cream to fill any cracks that the plastic wrap may have created in the surface of the chocolate layer. Cover the ice cream-covered bowl with plastic wrap and return it to the freezer.
  4. As soon as the ice cream maker’s canister is ready, begin making the pistachio ice cream.
  5. Cover the exterior of the smaller bowl with plastic wrap and place in the freezer.
  6. Once the pistachio ice cream has been made, reserve 1 cup and pour the rest into the chocolate ice cream-covered bowl. Place the smallest bowl into the semi-frozen pistachio and press down, causing the ice cream to flow upwards between the 2 bowls. Stop applying pressure when the ice cream reaches the top of the chocolate-covered bowl. Place both bowls back into the freezer for a few hours..
  7. Remove the small bowl and plastic wrap. With an offset spatula, use the reserved ice cream to fill any cracks that the plastic wrap may have created in the surface of the pistachio layer. Cover with plastic wrap and return it to the freezer.
  8. As soon as the ice cream maker’s canister is ready, begin making the Maraschino cherry ice cream.
  9. When completed, use the cherry ice cream to fill the remaining cavity. Cover with plastic wrap and place in the freezer until fully frozen.
  10. To serve, place the bowl in a hot water bath briefly while running an offset spatula or knife along the outer edge of the molded ice cream.
  11. Quickly invert the ice cream bomba onto a chilled serving plate, sprinkle with the chopped nuts, top off with cherries, and serve. (See Notes below.)

*     *     *

*     *     *

Variations

If you wish to go the more traditional route and create a spumoni loaf, use a bread pan as your ice cream mold. Fill to 1/3 with chocolate ice cream and place in freezer until firm. Next, fill another 1/3 with pistachio ice cream and return to freezer until firm. Lastly, use cherry ice cream to fill the rest of the bread pan, cover with plastic wrap, and return to freezer until firm. When ready to serve, follow the same instructions for unmolding the bomba.

*     *     *

*     *     *

Notes

Looking at the pictures, you may have noticed that the bomba’s cherry ice cream center is larger (thicker) than the other 2 layers. If you want your layers to be more consistent, you can either use a set of smaller bowls or make/buy more chocolate ice cream to form the outer layer. As it was, I used the entire quart-and-a-half batch made by my ice cream maker.

As you also may have noticed, serving a bomba in a heat wave does have its risks and unless you’ll be dining in a walk-in freezer, you can expect some melting to occur. If possible, unmold the bomba onto an ice-cold serving platter and place it back in the freezer for a short while before serving.

Pictured was a “surprise birthday bomba, ” the recipient of which, my Friend the Entertainer, didn’t mind “the thaw” one bit and even waited patiently for the pictures to be taken.

*     *     *

Maraschino Cherry Ice Cream

This is the third ice cream recipe in the series celebrating the birthdays of Mom, Grandma, Uncle, my Friend the kitchens’ Taste Tester, and my Friend the Entertainer, not to mention those of my Grand-Nephew and the Oldest of the Boys Upstairs. Just like its chocolate predecessor, today’s recipe uses the same cream base as was found in Mom’s pistachio nut ice cream recipe. Simple to make, I like its creamy texture and saw no reason to look elsewhere when developing this recipe. So, although today’s recipe was not in the recipe book she gave me, I still consider it to be her recipe and I think you’ll find that it’s pretty good.

When you look over today’s recipe, you’ll note that I strain the chopped cherries, press out as much of the liquid as possible, and then soak them in half & half. That’s an attempt to replace as much of the watery syrup with the thicker half & half, in the hope that the fruit pieces will not form ice shards when frozen. You see, probably my least favorite “features” of home-made ice cream are the ice shards that can result from using fruit in a recipe. I believe the water in the fruit is the culprit and if I can eliminate the water, the problem is solved.  My method may not be 100% effective but there are far fewer shards when the fruit is handled this way. If you are aware of a better way, by all means let me know. And, again, although the recipe calls for a raw egg, I always use eggs with pasteurized shells to eliminate any risk of contamination.

*     *     *

*     *     *

Maraschino Cherry Ice Cream Recipe

yield: 1.5 quarts

Ingredients

  • 2 doz Maraschino cherries, drained, coarsely chopped
  • 1/3 cup Maraschino cherry syrup
  • 1 egg
  • 1 cup half & half
  • 3/4 cups sugar
  • 2 cups whipping cream
  • 1 tsp vanilla extract
  • 1/8 tsp Kirsch liqueur (optional)
  • whipping cream, for garnish (optional)
  • 1 cherry per serving, for garnish

Directions

  1. Coarsely chop cherries, place in sieve, and use a spoon to press as much liquid out of the cherries as possible. Save liquid for later use.
  2. Soak cherries in half & half for at least an hour before proceeding.
  3. Once again strain the cherries and place the strained half & half into the blender along with the egg. “Stir” for a few seconds. Moisten the cherries with a tbsp or so of cream and refrigerate until later use.
  4. Add the reserved cherry juice, sugar, whipping cream, vanilla extract, and Kirsch, if using, to the blender and “Stir” until fully blended.
  5. Refrigerate for at least a few hours or overnight.
  6. Pour both the cream mixture and the chopped cherries in cream into the ice cream maker and process according to manufacturer’s instructions.
  7. When completed, remove the ice cream from the canister to be either served or transferred to a sealable container to be frozen to your liking.
*     *     *

Variations

Although there are many ice creams recipes made with cherries, I chose to make one with Maraschino cherries because it’s about as far removed from tart cherries as possible. Besides, as pink as it is, it’s sure to be a big hit among some members of the Barbie Set.

Notes

This being the last of August’s Fridays, one would think that it would mean an end to the ice cream recipes. Well, it’s not a “birthday 3 and a half weeks” but it is a “birthday month.” So, with this month ending on Wednesday the 31st, I’ve little choice but to offer one last recipe for an ice cream confection. See you next Wednesday.

*     *     *