Roasted Vegetable Salad with Harissa

Harissa Veg 1Oh, harissa! How do I love thee?

This is another in the series of recipes dedicated to my new love, the ever so delectable harissa. I told you that I was harissa obsessed and today’s recipe is further proof. Prior to this, I’ve shared recipes for goat and for chicken cooked in harissa. Included in the latter post was a recipe for the spicy sauce. For that recipe, I trimmed away the seeds and ribs from all the chiles and said that I wouldn’t do it again the next time I prepared the sauce. And so I did, finding this batch to be more spicy than its predecessor and, this time, the heat didn’t completely dissipate during cooking. Perfect.

So, armed with a fresh batch of harissa, I went searching for a new use. I didn’t have to go far because the internet is jam-packed with recipes using harissa. I eventually chose a salad with roasted vegetables, which should be popular with our friends to the Far South, where colder temps are taking hold. If you’re in the North, though, don’t let that dissuade you from trying this salad. I found it to be a perfect lunch for a chilly Spring day — and we seem to be having more than our fair share of those.

Aside from using my own harissa sauce, I did make a few changes to the original recipe. In the first place, I halved the quantities. It’s a good salad but there’s only so much one person can eat. The cilantro/coriander was the next thing to go and in its place I used the leaves from a bunch of flat-leaf parsley. Once again, since good fresh tomatoes cannot be found, I used grape tomatoes that I sliced in half. I followed the rest of the recipe and was rewarded with a great salad, one that fits nicely into my plans to go meatless one day a week.

*     *     *

Harissa Veg 4*     *     *

Roast Vegetable Salad with Harissa Recipe

Ingredients

  • 3 tbsp harissa, divided – recipe found HERE
  • olive oil
  • 1lb (450 g) butternut squash, peeled and chopped
  • 1 lb (450 g) carrots, peeled and cut into chunks
  • 5 oz (142 g) green beans, trimmed and halved
  • 5 oz (142 g) fresh baby spinach
  • 1/2 preserved lemon, flesh removed and skin finely chopped
  • 12 cherry or grape tomatoes, halved
  • .5 oz (15 g) fresh parsley leaves – cilantro/coriander leaves may be substituted, if you’re one of those

*     *     *

Harissa Veg 3*     *     *

Directions

  1. Pre-heat oven to 365˚ F (185˚C)
  2. In a small bowl, mix 1 tbsp harissa with 2 tbsp olive oil.
  3. Place squash and carrot chunks in a large bowl and pour harissa-oil mixture over it. Mix to evenly coat the vegetables.
  4. Place on a baking sheet/dish, set on middle rack in oven, and bake until both types of vegetables can be easily pierced — 30 to 45 minutes. Remove and cool.
  5. Meanwhile, blanch green beans in a small pot of boiling water for 2 minutes. Remove and place in an ice water bath until needed.
  6. In a large non-reactive pot, add green beans, spinach, preserved lemons, tomatoes, parsley, and the now-cooled roasted vegetables.
  7. Combine remaining 2 tbsp harissa with 1 tbsp olive oil and use to dress the salad. Add more oil, if needed.
  8. May be serve chilled or at room temperature.

From a recipe published in The Australian Women’s Weekly.

*     *     *

Harissa Veg 2*     *     *

Notes

How much oil you add will depend upon how thick your harissa is. Mine is rather thick, so, I add olive oil to make it easier to coat the vegetables and, later, to dress the salad.

In all, I tried this recipe three ways. One is as you see listed above. In another, I used baby arugula (rocket) in place of the spinach. I found the leaves weren’t strong enough to withstand the harissa dressing and wilted pretty quickly. The 3rd and last time was prepared without spinach and with half the amount of parsley. The result was a dish of roasted vegetables that make a perfect side for a roast. This version is definitely worth making again, perhaps adding additional root vegetables to the mix.

I’ve found that my recipe for harissa yields 2 cups of the sauce, far too much for most recipes. Using an ice cube tray, I freeze the excess, placing the frozen harissa cubes in plastic bags until needed.

*     *     *

It’s déjà vu all over again …

Grandpa's Tuna SaladIt was about a year ago when I shared a favorite salad of my Grandpa, one simply made using canned tuna, anchovies, and sliced onion. I included my updated version, which used seared  tuna over a bed of salad greens. Both are lighter fare and equally tasty. You can see them both and decide which is best for you by clicking HERE.

*     *     *

Coming soon to a monitor near you …

Prosciutto Pizza PreviewPizza

*     *     *

Grandpa’s Tuna Salad gets a Makeover

Due Insalate di Tonno 

Ah, Spring! Who can forget the sights and aromas of a glorious Spring morning? Well, try as we might, none of us who called the two-flat home will ever forget a few not so glorious Spring days — and I imagine our neighbors would say the same.

As I’ve mentioned in prior posts, Grandpa’s retirement years revolved around his garden, although he always had various maintenance jobs to perform around the building, too. As a young boy, and later teen, one learned to make oneself scarce early in the morning or become part of the work crew. This was especially true in early Spring.

Grandpa sowed his seeds after consulting the lunar calendar and the Old Farmers Almanac. He needed no help with this and the process remains shrouded in mystery to this very day. No, Grandpa only called upon one or more of us boys when he needed muscle. In the Fall, we helped him clear all the old tomato plants and their support stakes before we turned over the soil. The only parts of the garden to escape this tilling were the lettuce and parsley patches. Those he covered in straw and it wasn’t unusual for us to have a bit of both with our Thanksgiving dinner.

Come the following year and the Spring Thaw, Grandpa would find one of us and, again, we tilled the garden, though this time no patch was left unturned. That was the easy part. You see, Grandpa was a firm believer in the power of manure to grow gigantic tomato plants.  (To his credit, there may be some truth to this. How many gardeners do you know that use old hockey sticks to support their tomatoes?) About the time of the tilling, he would ask if you wanted to go out to the farm with him. Grandpa had a farmer friend and how we kids loved going there.  After all, this was the same farm that had adopted our dogs, though they were always out running in the fields when we came to visit. Well, by the time we were old enough to till the garden, the jig was up as far as the dog tales were concerned.  We were, also, fully aware of why we were roped into offered the chance to accompany Grandpa on this particular trip to the farm.

*     *     *

*     *     *

The fact was that the garden needed manure and not just any manure. Grandpa’s tomato crop depended upon this farm’s sheep manure. So, once each Spring, we drove out to the farm and, after a few pleasantries, we drove off with a large metallic tub of sheep manure in the trunk, making us very popular at traffic lights if the wind shifted just the right way. Once home, we hauled the tub to the yard but it didn’t end there. Oh, if only it ended there!

As it turns out, sheep manure, in its natural state, is too strong for young tomato plants and, even if it wasn’t, there was no way we could haul enough manure in a car’s trunk to cover Grandpa’s ever-expanding garden. Grandpa had a solution, all right, and it’s lucky that he was so loved by our neighbors.  Using a very large metallic bucket and a hose, Grandpa made “soup” — his label not mine — which was then spread over the tilled earth. A couple of days later, one of us would be called upon to till the garden again. Don’t think we didn’t try to avoid that call to action but we were on our own. Our parents had their eyes on the prize: a wealth of tomatoes come August. Any inkling that we didn’t want to help Grandpa was met with a  reminder that “work never hurt anyone” and suddenly we found ourselves asking Grandpa if he needed help.

All facts considered, it was one bad afternoon, leaving 364 pretty good ones. Thankfully, it was early enough in the year that the Spring rains helped to quite literally clear the air, much to everyone’s relief. Most fortunately, since the boys’ bedrooms were closest to the garden, rain and cold temperatures prevented anyone from even considering opening a window “to let in some fresh air.”  And the tomatoes? Grandpa’s plants were huge and the crop large enough for 2 families. Sheep manure soup. Who knew?

*     *     *

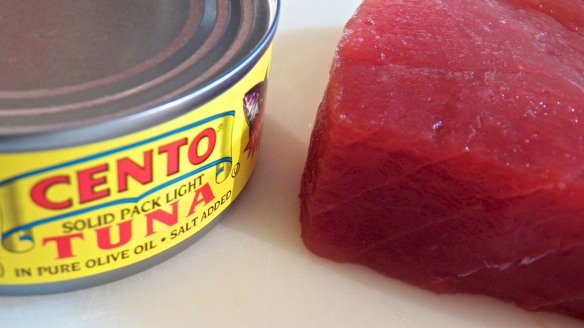
At noon on any given Friday, save those that fell in Winter or manure week, you could find Grandpa in his patio enjoying his lunch. It was usually a simple dish and, being Catholic, it was, also, meat-free. A favorite of Grandpa, and later my own, was this simple tuna salad. Believe me, it could not get any more simple and no further introduction is required. 

*     *     *

*     *     *

Grandpa’s Tuna Salad Recipe

Ingredients

  • 1 can (5 oz; 142 g) tuna, packed in olive oil, drained 
  • a bit of red onion, sliced or chopped
  • 2 whole anchovy fillets, more if desired
  • olive oil 
  • red wine vinegar
  • salt & pepper, to taste

Directions

  1. Place the tuna on a serving plate. it can be flaked or left in a ring shape.
  2. Top with onion and anchovies.
  3. Sprinkle with olive oil and red wine vinegar.
  4. Season with salt, & pepper, to taste
  5. Serve with crusty bread and a glass of homemade white wine.

*     *     *

That’s it. Quick and easy but surprisingly satisfying. I enjoyed this dish as a boy and continue to enjoy it today. Even so, nothing remains the same forever. As much as I enjoy Grandpa’s tuna salad, I wanted to try something a little different and, so, I gave Grandpa’s version a makeover. Enter tuna salad number 2.

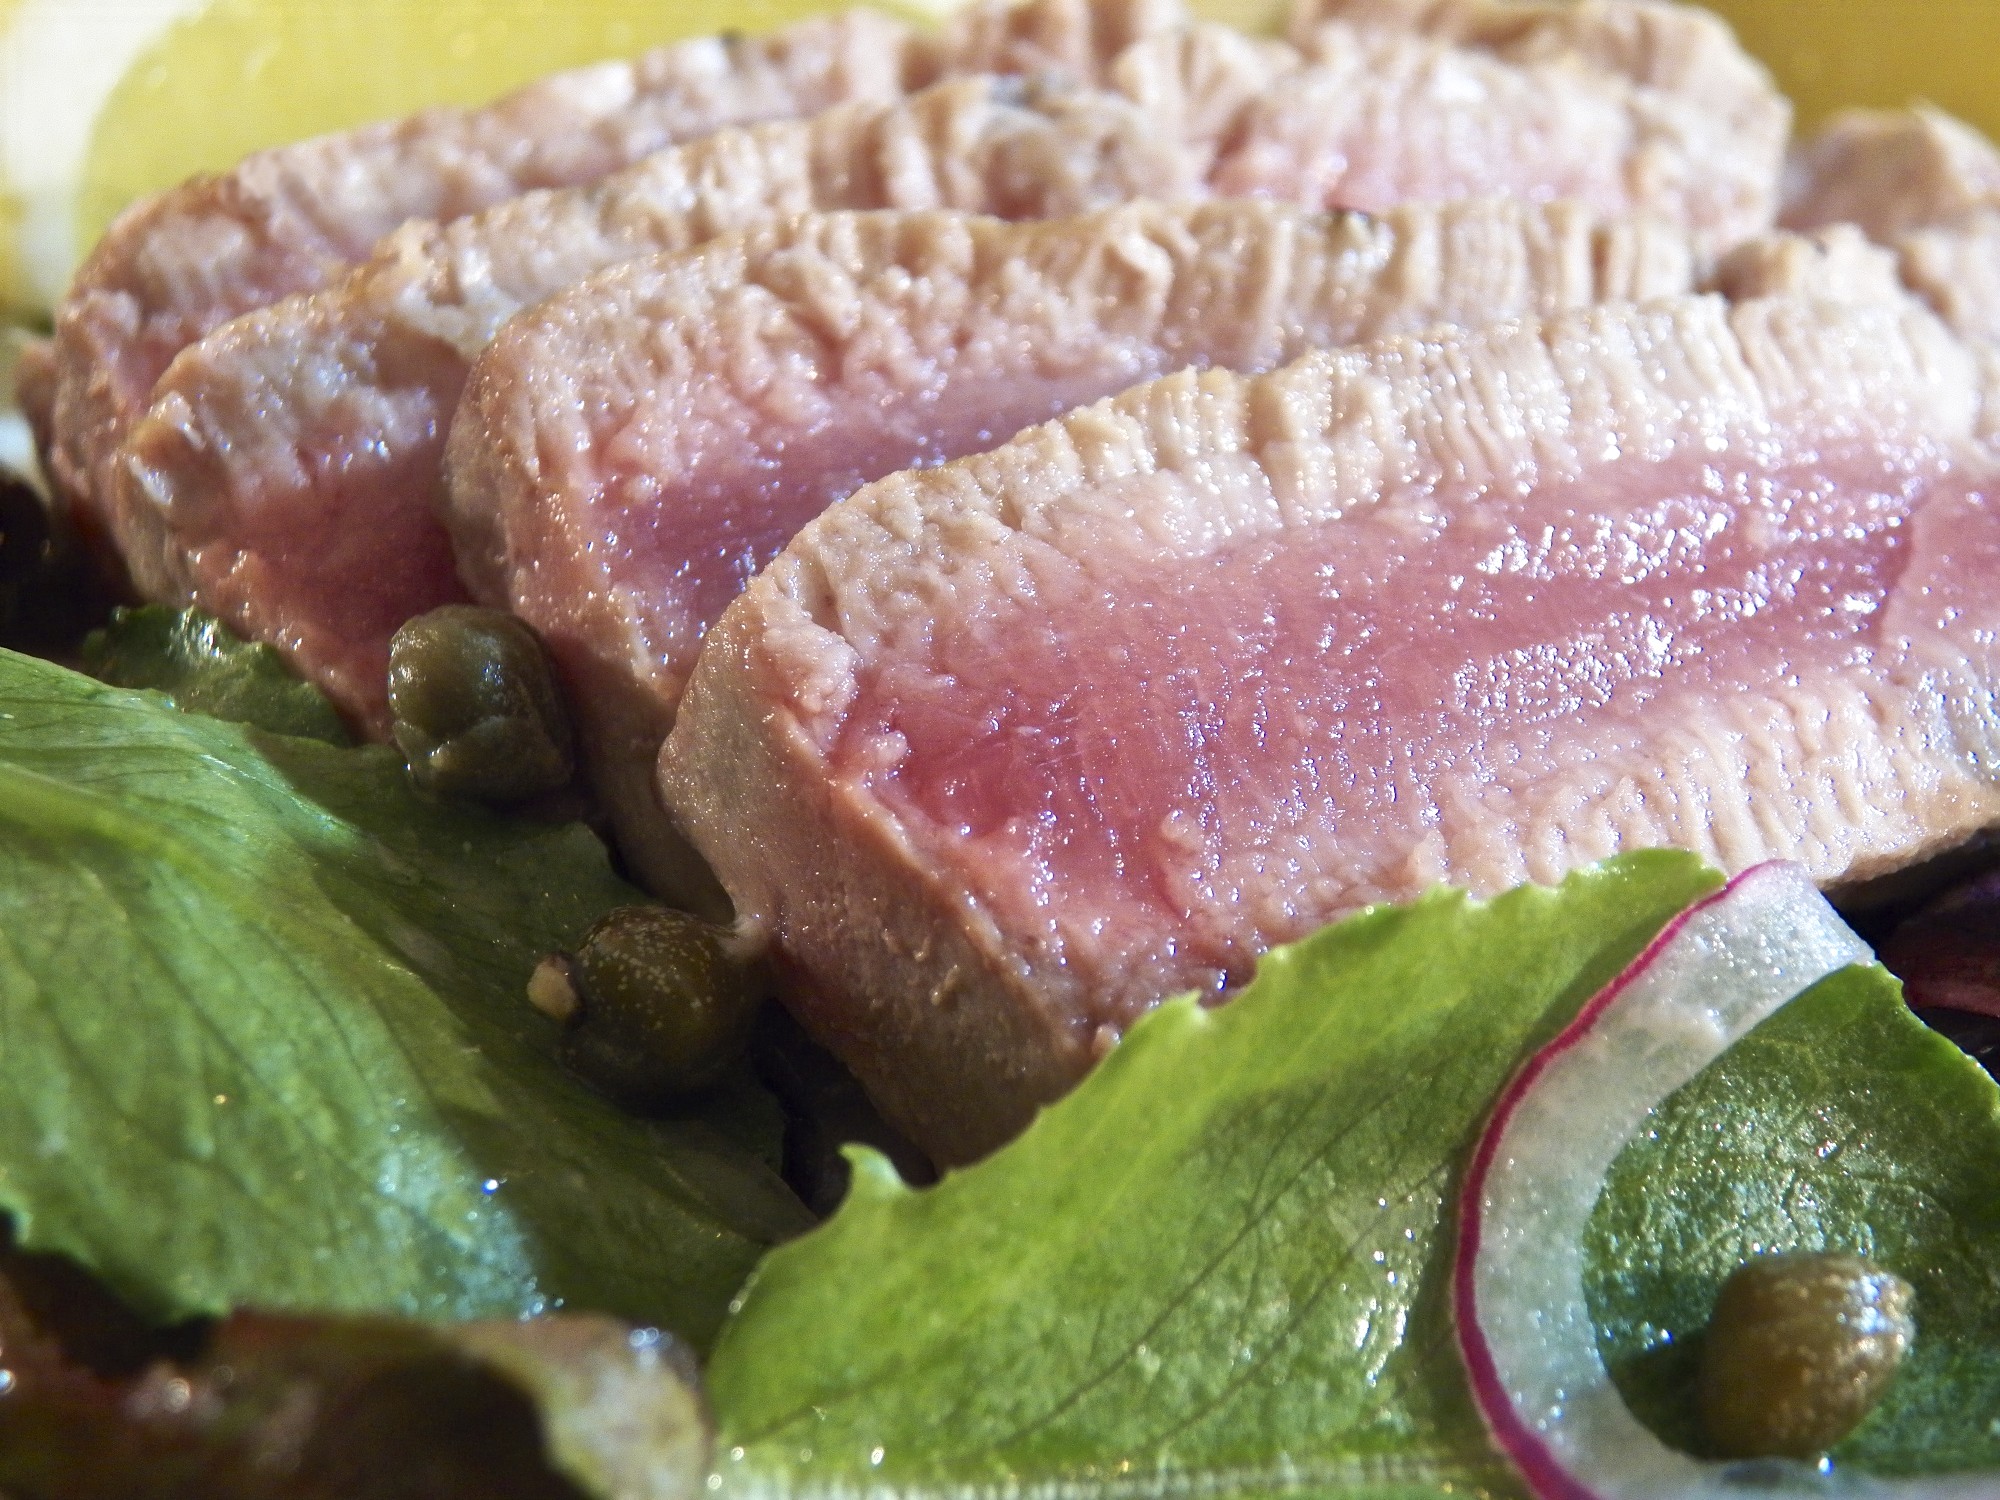
Whereas Grandpa’s tuna rested on a plate, the foot of my salad rests on a bed of mixed salad greens. Rather plainly dressed, Grandpa’s tuna was clothed with just onion, salt, pepper, and oil & vinegar. My new tuna salad is adorned with capers, onion, salt, pepper, olive oil, and freshly squeezed lemon juice. Most importantly, Grandpa’s tuna came to him by way of a can. My tuna skipped the middleman, taking a more direct route to my plate via a grill pan.

Now, to many, it isn’t really a makeover if there is no reveal. Not wanting to disappoint, here’s mine. On the right, you’ll see Grandpa’s original tuna salad and, on the left, may I present the new and “refreshed” tuna salad.

*     *     *

*     *     *

It wouldn’t benefit anyone if I didn’t explain how this transformation took place. Here, then, is how the makeover specialists of the Bartolini Kitchens performed this miracle.

*     *     *

Grandpa’s New & Improved Tuna Salad Recipe

Ingredients

  • 1 tuna steak per serving
  • mixed salad greens
  • 1 tsp capers per serving, more if desired
  • red onion, thinly sliced
  • olive oil
  • lemon juice
  • salt & pepper, to taste
  • lemon wedges for serving
  • whole anchovy fillets (optional)

*     *     *

*     *     *

Directions

  1. Place salad greens in a large bowl. Add onion & capers, dress with olive oil and fresh lemon juice, season with salt & pepper, and toss to combine. Set aside.
  2. Heat the grill pan over med-high heat. Lightly coat the tuna steak with olive oil and season with salt and pepper on both sides.
  3. When the grill is hot, moisten a (paper) towel with vegetable oil and use it to lightly coat the grill surface.
  4. Add the tuna steak to the grill pan. After 90 seconds, use a fish turner to give the steak a quarter turn.
  5. Cook for 60 to 120 seconds and then flip the steak over.
  6. After cooking for 60 seconds, give the steak a quarter turn. Continue cooking the steak for 60 to 90 seconds and remove from heat.
  7. Move tuna steak to a cutting board. Cutting with the grain, carve slices no less than 1/4 inch (2/3 cm) thick.
  8. Place salad on the serving plate and arrange tuna slices atop the salad. Garnish plate with lemon wedges and optional anchovy fillets.
  9. Serve with crusty bread and a white wine of your choosing.

*     *     *

Variations

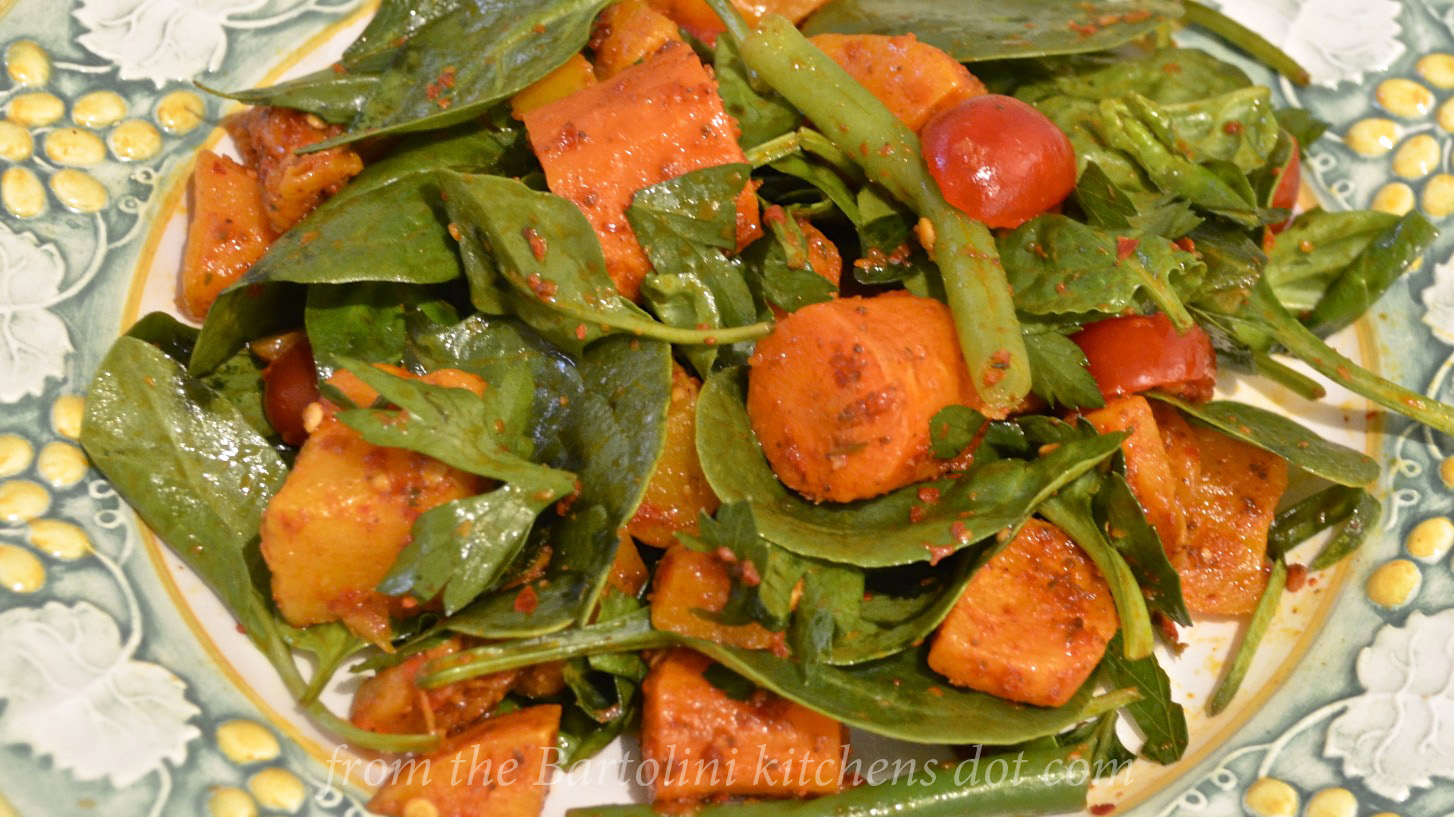
Although my tuna steak rested atop a bed of baby salad greens, you may choose whatever greens you prefer — baby spinach, baby kale, and rocket come to mind.

I chose to dress my tuna salad with a simple dressing of lemon juice and olive oil, reserving a little juice for the tuna, as well. You may wish to use another dressing, such as the lemon-caper sauce I shared within my grilled sturgeon recipe post.

*     *     *

Notes

I used a grill pan here but you could just as easily use your barbecue, broiler, or skillet to cook your tuna steak. Just resist the urge to move the steak until it’s time to turn it.

Cooking times, as you’ve probably noted, are anything but precise. The pan, the heat, and/or the tuna steak’s thickness all play a role. Remember, too, that the steak will continue to cook once it has been removed from the fire, as well as while you fiddle with a camera, trying to take photos for a blog entry. (#%*@^#&$!)

100_3954Whether you call it tinned or canned, whether it’s packed in oil or water, and whether it’s chunk or whole, please make sure that the tuna you’re about to purchase was harvested in ways that will not harm dolphin populations. The symbol located to the right, or something similar, should be found on the can. If it’s not there, please do not purchase that tuna.

*     *     *

It’s déjà vu all over again

freshly-made

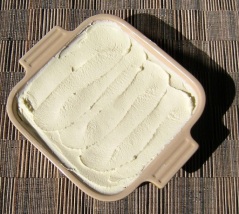
Freshly made mascarpone

A little over a year ago, I was in the middle of my cheese-making series when I shared the recipe for making mascarpone. Though widely known as the star ingredient in tiramisu, mascarpone is so much more than that, Whipped and flavored, this creamy cheese makes a wonderful dessert topping, while adding it to pasta gives new meaning to the words “cream sauce.” Best of all, mascarpone is a snap to make with results far better than you can imagine. But don’t take my word for it. You can see how it’s done by clicking HERE.

*     *     *

 Coming soon to a monitor near you … 

Frittata

*     *     *

The Bartolini Girls’ Beet Salad

Everyone has one — or maybe two or three. A go-to recipe used when an occasion calls for you to “bring a dish.” Today’s recipe is one that Mom and my Zia often used to fulfill their potluck obligation. To be honest, I’ve no idea who first “discovered” this recipe. I remember Mom serving it for dinner during my childhood and Zia brings it to dinners to this very day. A colorful dish, this is much lighter than potato salad and is sure to be a hit among beet lovers. Even so, not all beet lovers are fans of mayonnaise. Should that be true for you, I hope you’ll find this classic video more to your liking.

*     *     *

*     *     *

When you look over the recipe, you’ll notice that the ingredients are listed without accompanying amounts. Much depends upon the number of servings required and the size of the serving dish. When all is said and done, you’ll need to create a layer of beets that is about one inch deep. Next, the amount of chopped onion depends upon how just how strong that onion is. Be sure to taste it before adding it to the salad. If it is too strong, rinse it briefly under cold running water and pat it dry using paper towels before proceeding. With that settled, you can add as much or as little mayonnaise as you prefer, and the same can be said for the chopped, hard-boiled eggs. Remember, the beets are the star of the dish; everything else is meant to compliment rather than overpower.

Oh! Before you toss those beet greens away, you may wish to checkout my blogging friend David’s recipe for creamed beet greens over on his blog, the Gastronomic Gardener.

*     *     *

*     *     *

The Bartolini Girls’ Beet Salad Recipe

Ingredients

  • Raw beets, washed with greens trimmed
  • Diced onion
  • Mayonnaise
  • Eggs, hard-boiled and chopped
  • Salt & pepper, to taste

Directions

  1. To Prepare the Beets
    1. Pre-heat oven to 400˚ F (205˚ C)
    2. Place the beets in a roasting pan or on a baking sheet. Drizzle with olive oil, season with salt, and place in the middle of the oven. Roast for 30 – 40 minutes, depending upon the size of the beets. The beets are fully roasted when a knife’s blade meets little resistance when the largest beet is pierced. Set aside to cool.
    3. Once cool enough to handle, use a paring knife to trim the beets’ tops and bottoms. Much of the skin of each bulb should slip off easily. Use a paring knife to remove the rest.
    4. Use a knife, food processor, or mandoline to dice, shred, or slice the beets. Set aside.
  2. To Assemble the Salad
    1. Place beets in a serving dish. You’ll want to create layer of about an inch deep. Season lightly with salt.
    2. Sprinkle a couple of tablespoons of diced onion on top of the beets. Use more or less depending upon the onion’s strength.
    3. Add enough mayonnaise to completely cover the ingredients.
    4. Use the chopped, hard-boiled eggs to top off the salad.
    5. Season with salt, pepper, and sweet paprika.
  3. Chill fully before serving.

*     *     *

*     *     *

Variations

Although I’ve not tried to prepare them this way, I imagine one could steam the beets instead of roasting them. And if you’re in a crunch for time, you can always substitute canned beets, although I prefer the additional flavor that roasted beets bring to the dish.

Notes

To beginner cooks: mayonnaise and hot temperatures do not mix. Serious illness can result if mayonnaise is not kept properly chilled. When serving this salad or any mayonnaise-based dish on a warm day, be sure to keep it covered and iced until the last minute before serving and then nestle the serving dish in another slightly larger one filled with ice. It must be kept chilled and when in doubt, throw it out.

*     *     *

One Long Overdue Acknowledgement

Way back in May, I was fortunate to win a give-away over at Zesty Bean Dog’s wonderful blog. My original plan was to feature my prize, an OXO salad dressing shaker, with my next post featuring a salad. Well, in retrospect and given how few salad recipes I post, I should have come up with a better plan. And even though a salad shaker isn’t used in the preparation of today’s recipe, I thought it was about the closest I’d come to posting a salad recipe for at least a few weeks. ZBD, I hope you do not feel that I don’t appreciate or do not use your gift. It has remained “in service” pretty much from Day One and is one of those few kitchen items that goes from fridge to dishwasher and back again, without ever seeing the inside of a cupboard. So, thanks again, ZBD, for a great kitchen accessory.

*     *     *

By any other name …

“Black Baccara”

*     *     *

Dad and his Dandelions

Today’s recipe was a recurring star of quite a few springtime dinners at the old two-flat. There’s nothing particularly special about the salad, once you get past the idea that you’re dining on dandelions. No, for my generation of Bartolini, it’s not so much the recipe as the circumstances surrounding it that we recall somewhat fondly. This is especially true for Sis and I. You see, whereas most people see crocus and daffodils in bloom and think “Spring!”, a Bartolini sees these very same things and thinks, “Cicoria!” Well, maybe not so much now anymore but certainly back in the day.

 *     *     *

Dad’s Dandelion Salad

*     *     *

When the lawns started to green each Spring, the adults in the old two-flat became wild chicory and dandelion pickers. We kids, depending upon our age, also took part.  When very young, Mom & Zia would take us to some parkland where we’d play as they “harvested” the tender,  young dandelions growing about. A couple of years would pass and we would be considered old enough to join in on the fun. We were each given our own butter knife, shown how to cut the greens out of the ground, and taught to leave the area if “traces” of dog were spotted.  So, off we proudly went, with knife in one hand and an Easter basket in the other. That’s right. Our Easter baskets were re-purposed each Spring and used to carry the harvest.

Now, Dad loved his cicoria & dandelions and Sis & I often went with him, spending Sunday mornings after Mass picking dandelions. We loved every minute of it — until we were around 8 or 9 years of age. It was about that age when we learned that not all kids spent Sunday mornings picking dandelions. In fact, we were the only ones to do so. Peer pressure being what it was, we began to balk at the idea of spending Sunday mornings picking weeds. Did that stop Dad? Not in the slightest, for Dad’s love of dandelions knew little of, nor cared about, peer pressure. If anything, Dad’s peers probably encouraged him to get out there and pick those greens. For Sis and I, it wasn’t so much that he picked the greens, it was when and where he chose to do it.

You see, the old two-flat was on the same block as the parish church and about a half mile from both was a freeway. Having attended an early morning Mass, Sis and I would jump into the back seat of the car and off we’d go with Dad as he ran errands and stopped for “un caffè” with friends or family. That first part of the ride was fraught with anxiety for Sis and I. If Dad turned left at the Church, we were fine. It’s when he turned right that we began to get nervous — and it grew worse as we approached the freeway. If he turned anywhere before the overpass, we breathed a sigh of relief and all was well.  The same held true if we drove over and beyond the bridge. It was only when we heard his turn indicator as we drove on the overpass that we knew we were heading for the freeway and trouble! “Please, Dad, NO!” As soon as he made the left turn, Dad pulled the car onto the entrance ramp’s shoulder, no more than 10 feet from the corner.  There, in full view of our fellow parishioners — and classmates — walking to-and-from Sunday Mass, Dad pulled out his penknife & paper bag and started picking weeds, while Sis and I, mortified, dove for cover in the back seat. How could he do this to us! Two forevers later, he’d return to the car and off we’d go to the park where the pickings would be better, or so Dad said. We didn’t care. We just wanted out of there!

 *     *     *

Dandelion Salad

 *     *     *

Looking back, and hindsight being what it is, I’m pretty sure that Dad stopped along that ramp for more than just some dandelion greens. To begin with, Dad was a practical joker and he probably stood outside of the car and laughed as Sis and I tried to hide ourselves in the back seat. And although at the time it seemed like an eternity, we were actually parked there for only a few minutes and Dad never returned with more than a few greens, if any. No, we always needed to go to the park afterward and, suddenly, Sis and I were more than happy to accompany and even help him, proving there’d be no need to ever stop on that ramp again. As a result, we had all the greens Dad needed in no time flat and soon we were on our way to our next stop.

See what I mean? In today’s vernacular, we got played!

 *     *     *

Preparing a Dandelion Salad

Although I’ve seen dandelion greens in produce markets, the leaves are very large and usually served cooked. We use are the tender new plants that begin to grow in early Spring. Look for dandelions in areas where there is little chance of fertilizer or weed killer having been used and as far away from dog “traffic” as possible. Open parkland is good, as are rural fields.  Look for young plants. If it has a bloom, it’s likely too old and too large. Once you’ve found one suitable for harvesting, use your knife to sever the plant from its roots below ground level. Continue harvesting until you’ve enough for your needs. I normally pick enough for a minimum of 2 salads.

Once home, soak the greens in cold water. One by one, rinse under running water and trim away any off-color leaves and all of the (brown) root stem.  There may be underdeveloped flower buds in the heart of the plant. I remove them; you may prefer otherwise. Depending on the size of each plant, you may wish to cut it in half or, by trimming off the very bottom of the plant, separate the individual leaves. Place trimmed greens in cold, fresh water and continue until all are cleaned and trimmed. Dry the greens and reserve enough for your salad. Wrap the rest in a paper towel, seal in a plastic bag, and refrigerate. The greens will stay fresh for a few days if stored properly.

The salad itself is really quite basic and you may wish to add more ingredients. Our insalata consists of dandelions, some sliced onion, chopped hard-boiled eggs, a dressing of oil & red wine vinegar, and seasoned with salt & pepper. That’s all there is to it and I believe that’s because the greens were special and only available for a few weeks every Spring. Keeping the salad simple ensured that the tender dandelions took center stage and their flavor wasn’t overpowered. Make yourself one of these insalate and you’ll find it a tasty little salad and, like asparagus, a great way to bring Spring to the dinner table.

And if you’ve children, you may wish to borrow a page from Dad’s parenting book. Keep an old butter knife and bag under the driver’s seat of your car. If the kids are “acting up” in the car, just drive by a favorite playground or practice field and announce that the dandelions look delicious and that “Everyone’s going pickin’!”  I’m willing to bet that you’ll only need to get out of the car one time, if at all, especially if you wave to their friends as your drive up to the curb. Best of all,  you’ll give them a great memory to recall when they reach — ahem — middle age.

 *     *     *

A Slightly Wilted, Very Tasty, Surprisingly Filling, Spinach Salad

I hadn’t intended to share this recipe yet but, over the weekend, my vegetarian friend and fellow Wrigley Field denizen, Cynthia, convinced me to write it up and post it now. So, my dear Cubs Fan, this one’s for you …

*     *     *

*     *     *

I first saw this salad prepared a few weeks ago, just prior to Christmas, but my mind was too occupied with thoughts of the holiday dinners-to-come to give it any real consideration. I’ve always enjoyed a spinach salad, a trait Mom & I shared, but the thought of having a salad as a meal around the holidays is so not me. And then came the New Year’s Day porchetta (roasted pork).

Now, I thoroughly enjoyed that roast. It was everything I had hoped it would be and certainly lived up to my recollections of the porchette of my childhood. I, also, enjoyed the pork sandwiches and panini that followed but there came a point, much to my surprise, where the idea of another sandwich, porchetta or otherwise, was not the least bit enticing. Worse yet, and most unbelievably, I’d had my fill of pasta, too! One afternoon, I found myself walking around a grocery and nothing was the least bit appealing. You hear about this  happening to others but never in a million years do you think it will happen to you.

Dazed and confused, I pushed my cart passed the meat counter, beyond the seafood, through the dairy aisle, and into the produce section. What to do, what to do? That’s where it hit me. Spinach salad! As my anxiety waned, I began to remember the ingredients required. Luckily, I already had everything I needed at home, save the spinach. Moments later, with renewed vigor and a bag of baby spinach, I was out the door and on my way home. That evening, I dined on a spinach salad so good that I’ve prepared it twice again since that first meal. That’s right. Me. Eating salads for dinner! (Just how many Signs of the Apocalypse are there?)

*     *     *

A Slightly Wilted, Very Tasty, Surprisingly Filling, Spinach Salad Recipe

serves 4

Ingredients

  • 2 tbsp extra virgin olive oil, separated
  • 1/2 lb bacon cut into 1/2 inch strips (lardons)
  • 1 shallot, sliced
  • 1/2 lb crimini mushrooms, sliced or quartered
  • 1/2 cup chicken stock (water may be substituted)
  • 4 whole eggs
  • 1 bag (8 oz) pre-washed baby spinach
  • 6 tbsp balsamic vinegar, more or less to taste
  • salt & pepper, to taste

Directions

  1. Add 1 tbsp of olive oil to a sauté pan over med-high heat. Add bacon and sauté until cooked and crispy along the edges.
  2. Add the shallots and continue sautéing until translucent. Add the mushrooms and cook for a couple of minutes until soft.
  3. Use the chicken stock to deglaze the pan, then bring to a boil, reduce heat, and simmer until the liquid is reduced by half.
  4. Add all but 1 tbsp of the balsamic vinegar and stir. Taste the dressing and adjust, using more balsamic or olive oil, depending upon your preference. Remove from heat.
  5. In another, non-stick, skillet, heat 1 tbsp of olive oil over med-low heat.
  6. Gently add each of the 4 eggs to the pan, being careful to keep the yolks whole. Season with salt & pepper.
  7. Fry the eggs until the whites are thoroughly cooked but the yolks remain soft.
  8. Dress the spinach with the warm dressing in a large bowl. Mix well to allow the spinach to wilt evenly.
  9. Apportion the salad across 4 plates. Place a fried egg atop each salad and serve.

*     *     *

Notes

The ingredients can be easily adjusted to suit your tastes and/or the number of servings required. If you prefer your salad heavily wilted, dress the spinach with the warm dressing while the eggs are frying. If you prefer your spinach more firm, dress the spinach just prior to placing the eggs on top.

For you, Cynthia, and your fellow vegetarians: just skip the bacon, increase the olive oil to make up for the lack of bacon fat, and use water in place of the chicken stock. And, as always, Go Cubs!

*     *     *

Inspired by Michael Symon

*     *     *

Mom’s Calamari Salad


Insalata dei Calamari

Prior to the changes brought by Vatican Council II in the 1960′s, Christmas Eve was a “fast & abstain” day, meaning only 1 main meal could be consumed and no meat was to be eaten all day. For most Catholics around the World, it was a day of contemplation and that one meal was nothing special. With Christmas coming within 24 hours, all eyes — and appetites — were focused on the big day — and dinner — soon to come. Not so the Italians. If tomorrow’s a big holiday and today you can only have one meal, why not make that meal special? And so they did.  Can’t have any meat? No problem. With Italy being both peninsula and island, fish was very often more readily available than many meat products. And so it became a seafood banquet. Wait a minute! The Church may frown upon so grand a celebration on the eve of the birth of the Christ Child. Again, no problem. They made a point of serving seven fish, each one representing one of the Seven Sacraments of the Christian Faith. In one masterstroke, their seafood feast became an Act of Faith. What priest, bishop, or even Pope would dare interfere with these devout Catholics as they used the day’s only meal to commemorate the Seven Sacraments? (The fact that the clergy themselves were probably dining on an even more spectacular seafood supper didn’t hurt “the cause” either.) And so the Feast of the Seven Fishes was born and survives to this day wherever Italians call home.

It’s funny but I don’t recall hearing anything about the Feast of the 7 Fishes when I was growing up. This, despite our having a large seafood meal every Christmas Eve. Dad, working in a restaurant, would come home early in the evening of Christmas Eve, bearing gifts of clams, oysters, and red snapper, at the very least. This would be added to the shrimp and crabmeat that Mom was preparing as appetizers and the calamari she was using to make a salad. As Dad shucked, he helped Mom with the recipes for clams casino and oysters Rockefeller. (Yes, Dad could cook but it was a skill he successfully kept under wraps except on the most rare of occasions.) There was, of course, a big platter of home-made linguine with tuna — or possibly clams — to be served along with the red snapper that Mom had broiled. It was, by any measure, quite a feast of seafood — we just never counted the “participants”.

Although today I do not maintain this family tradition, I do, however, make sure that my plans for Christmas Eve include a meal of seafood, no matter what. Since I’ve posted a number of seafood recipes over the past several months, I thought I’d post links to them all for anyone planning a Feast of the 7 Fishes but who may be missing a fish or two. Before doing that, however, I’ll share Mom’s recipe for Calamari Salad because, well, you should have it; she said so. And, next week, I’ll share the Bartolini recipe for what is the traditional main course in many Italian homes on Christmas Eve, Baccalà (salted cod), which, by the way, is also one of the 7 Fishes.

*     *     *

The Real McCoy

*     *     *

Now, there are a few things to consider with the recipe I’m about to share. First off, when cooking calamari, it’s been said to either cook it for 1 minute or 45. Anything in between and you’ll be eating something akin to rubber. So, use a big pot, bring it to a rolling boil, and get those squid into, and out of, the pot quickly. Beyond that, this recipe is typical of most of my family’s in that it features a few ingredients with relatively few spices. It is all about balance, that’s why there are no amounts given. Yes, Mom listed 1 green and 1 red pepper but I omitted the quantities. It all depends upon how much calamari you use and you’ll note that Mom didn’t list the amount of calamari needed in her recipe. Chop and mix as much bell pepper, red and green, as your eye tells you. (For 1 1/2 lbs calamari, I used about 2/3 each green & red bell pepper.) Taste the onion and let that determine how much to use. If you feel it’s too strong, feel free to give it a quick rinse under cold water after you’ve chopped it. Still not liking the onion? Try a shallot or 2 instead. Lastly, if you’re not comfortable adding the dressing ingredients directly onto the calamari & peppers, then mix it first in a small bowl, taste it, adjust if necessary, and then dress your calamari with it. Bear in mind that most homemade vinaigrettes call for 3 parts oil (olive) for every one part acid (vinegar or, in this case, lemon juice).

*     *     *

Mom’s Calamari Salad Recipe

Ingredients

  • squid, cleaned and cut into rings (halve tentacles, if using)
  • green bell pepper, diced
  • red bell pepper, diced
  • red onion, diced
  • extra virgin olive oil
  • lemon juice
  • fresh parsley
  • salt & pepper, to taste

Directions

  1. Fill a large saucepan with water and bring to a rolling boil over high heat.
  2. Add the calamari, stir, and turn off the heat.
  3. After one minute remove from water and place in an ice bath to chill. (Calamari may be “held” here for a couple of hours until ready to be served.)
  4. Once fully chilled, drain, place calamari on paper towels, and pat dry before dressing immediately with lemon juice, olive oil, parsley, salt and pepper.
  5. Toss and serve.

*     *     *

This couldn’t be easier to prepare and, best of all, you can cook the calamari, make the dressing, and chop the peppers, onion, & parsley ahead of time and store it all separately in the fridge. Just before serving, mix the ingredients, season with salt & pepper, and bring it to the table. Who wants to be stuck in the kitchen when there are unattended gifts to shake?

*     *     *

All righty! That’s 1 recipe down and 11 more to go. As promised, here are the seafood recipes that I’ve shared during the past year.

Tomato Sauce with Tuna

*

Fried Calamari

*

Pasta with Clams (“White Sauce”)

*

Pasta al Salmone

*

Grandpa’s Barbecued Shrimp

*

 Pasta with Clams (“Red Sauce”)

*

Salmon en Papillote — on the grill

*

Pasta with Shrimp

*

Brodetto

*

Lumache alla Bartolini

*

Puttanesca Sauce

*

*

*     *     *

As you can see, of the 11 dishes presented, 7 involve pasta. I’m afraid that’s a bit too much pasta for a Feast of the 7 Fishes, even for me. So, I’ve got a plan. For your primo piatto, prepare my Brodetto. That’s 5 fish in one dish! Clear the table and serve today’s calamari salad alongside next week’s Baccalà and you’ll have all 7 fishes, present and accounted for, in only 2 courses. That wasn’t so hard, was it?

Oh! About dessert. Yes, you may have dessert but, keeping in mind that it is a day of fasting and in the spirit of the Feast of the 7 Fishes, go easy on the whipped cream and chocolate sauce. Besides, you’ll need room for the fruit & cheese platter that you’ll be  serving while the chestnuts are roasted.

*     *     *

No-Cook Couscous Salad

As I write this, much of our country has spent the last few days sweltering in a record-setting heat wave. As a result, my stove is officially off-limits and the barbecue has been all but abandoned. To further complicate matters, for every degree the temperature goes above 95, my appetite seems to decrease exponentially. So, today, with yet another heat index forecast to be well over 100*, I’m looking for something light, fresh, and easy to prepare for dinner. For me, that often means a pasta salad. (OK. It also means ordering a meal for home delivery but what kind of recipe post would that make?) We all have our favorite pasta salads and recipes abound for tabbouleh-like salads that use couscous in place of bulgur. Today’s recipe, a favorite of mine, is from David Rocco’s Dolce Vita and is perfect whenever it’s a hot time in the city.

*     *     *

*     *     *

Resembling a grain, couscous is actually a small bead of pasta. In fact, I’ve seen Lidia Bastianich actually make it on her show, Lidia’s Italy. It’s a simple process: flour — I believe it was semolina — is spread on a tabletop and water is sprinkled over its surface. A few minutes later, the resulting small pasta beads are carefully collected and sorted using sieves with holes of varying sizes. It was an interesting process to watch, although I doubt that I’ll ever attempt it, especially for today’s recipe. That’s because the main advantage to this pasta salad over all others is in its ease of preparation: there is no cooking. Instead, raw couscous is allowed to marinate in a rather generous amount of dressing and, as it hydrates, the couscous absorbs the dressing’s flavors. The result is a light, tasty salad and a kitchen that’s as cool as it was when you started. Believe me, on days such as these, my kitchen needs all the help it can get.

*     *     *

No-Cook Couscous Salad Recipe

Ingredients

  • 2 cups couscous
  • 1/2 cup extra virgin olive oil
  • 1 sweet onion, chopped
  • 2 bell peppers of differing colors, chopped
  • 1 celery stalk, diced
  • 1 carrot, diced
  • 1 doz cherry tomatoes, halved
  • 1 large can (28 oz) diced tomatoes plus liquid
  • 1/4 cup fresh lemon juice
  • basil leaves, torn, to taste
  • salt and pepper, to taste
  • splash of red wine vinegar (optional)

Directions

  1. Place olive oil, lemon juice, and canned tomatoes (juices included) into a large bowl and mix well. Add couscous and stir to combine.
  2. Add the bell peppers, onion, celery, carrot, and cherry tomatoes to the bowl and mix well. Cover with plastic wrap and refrigerate for a few hours. Give the salad an additional mix, or two, while it is being refrigerated.
  3. Just before serving, tear the basil leaves, add them to the salad, and mix well. If desired, add a light sprinkling of vinegar over the top of the salad.

Variations

Anyone who reads this recipe will probably think of additional ingredients to add to the mix. In fact, I added the celery, carrot, and splash of vinegar to David’s original dish. The interesting thing about the recipe is not so much the list of ingredients as the fact that no cooking is required. Still, if you’re looking for suggestions, you can try adding chick peas, sliced radishes, lettuce, walnuts, apple, you name it. And don’t forget herbs. Mint, for example, will add a completely new dimension to your salad’s flavor profile. Lastly, if you’re looking for something a bit more substantial, try topping off your salad with some flaked tuna that’s been dressed lightly with olive oil & wine vinegar. 

*     *     *