Garlic Scapes Pesto

Basil and Garlic Scapes Bouquet

*     *     *

With apologies, this blog entry, incomplete though it may be, was posted today in error. The recipe is complete, however. See you all soon.

Garlic Scapes Pesto Recipe

yield: about 1 cup (200 ml)

Ingredients

  • 3 oz (86 g) fresh garlic scapes — about a dozen, depending upon size
  • 1.5 oz (43 g) fresh basil leaves (see Notes)
  • 3 tbsp pine nuts, toasted
  • zest of 1/2 lemon
  • Pecorino Roman cheese, grated (see Notes)
  • 1/3 cup extra virgin olive oil (see Notes)
  • salt & pepper to taste

*     *     *

Garlic Scapes Pesto

*     *     *

Notes

I used a 2:1 ratio of garlic scapes to basil leaves. In retrospect, I should have gone 3:1. Although the pesto was flavorful, it wasn’t quite garlicky enough for my tastes.

For this amount of pesto, I would have used about 1/2 cup of grated Pecorino Romano cheese.

If I were to use this pesto immediately, I would have at least doubled the amount of extra virgin olive oil used above.

Because this recipe creates a paste, its yield is about 1/3 less than it would be if the grated cheese and all of the oil were added during preparation.

*     *     *

It’s déjà vu all over again …

Today’s look back features Pasta al Salmone, Pasta with Salmon. I first tasted this delicious pasta while in Italy for the first time and it was love at first bite. It took me a number of years to replicate that dish but I finally did and now I can enjoy Pasta al Salmone without having to deal with airports and surly flight attendants. You can see the recipe by clicking HERE.

*     *     *

Penne with Vodka-Cream Sauce

Pennette alla Vodka

Penne Vodka Cream 2

Note: This post was inadvertently posted earlier than I had planned. The”Crostata” recipe, which was scheduled for Wednesday, will be delayed until next week. Thanks for your understanding.

*     *     *

I really cannot recall just when I started making this dish. I do know it was around the time I moved here, to my current home, about 13 or 14 years ago. Being that I was tending bar at the time, in retrospect, finding another means of consuming alcohol of any kind doesn’t seem like the best of ideas. Still, regardless of when or why I started making this tomato sauce, it remains a favorite of mine, both for its simplicity and great taste.

Basically, this is nothing more than a tomato sauce laced with cream and vodka. It really is that simple. Over the years, what began as a meatless dish has evolved and I now make it using prosciutto, although I have been known to serve it using ham, pancetta or even shrimp.  You can pretty much use whatever protein you want and about the only thing you cannot skip is the vodka. Do that and all you’ve got is a marinara sauce with some cream added to it — not that there’s anything wrong with that. As for the brand of vodka to use, I opt for a higher quality brand, often “tasting” it first, in my kitchen, just to make sure that I’ve chosen wisely. Higher quality, however, doesn’t mean top shelf and I certainly will not be cooking with the highest quality vodka available. My basic rule of thumb is that if it’s good enough for my martini, it’s good enough for my pasta.

*     *     *

These are a few of my Favorite Things

These are a few of my Favorite Things

*     *     *

Penne with Vodka-Cream Sauce Recipe

Ingredients

  • olive oil
  • 1 tbsp butter
  • 1/4 – 1/3 lb. chopped prosciutto, cooked ham, or pancetta (optional for vegetarians)
  • 1/4 to 1/2 tsp red pepper flakes, (optional)
  • 1 medium onion, chopped
  • 2 cloves garlic, minced
  • 2/3 cup vodka
  • 1 large (28 oz.) can tomatoes, diced or crushed
  • 1/2 cup heavy cream
  • 3 tbsp fresh parsley, chopped
  • 2 tbsp fresh basil, chopped
  • salt & pepper, to taste
  • 1 lb penne pasta
  • reserved pasta water
  • grated pecorino romano cheese

Directions

  1. Heat oil in a large, deep skillet over med-low heat.
  2. Add pork product and slowly render the fat. Do not cook until crisp.
  3. Increase heat to med-high. Add butter, then onion, and sauté until soft, about 5 minutes. If needed, add some olive oil.
  4. Season with salt & pepper, add the garlic, and continue sautéing for another minute
  5. Remove pan from heat, add vodka, stir to combine, return to heat. Have a pan lid nearby to smother the flame should the vodka ignite. Allow to reduce for about 3 minutes.
  6. Add tomatoes, cream, parsley, season with salt and pepper, stir thoroughly, bring to a boil, and reduce to a low simmer.
  7. After sauce has simmered for 20 minutes, begin heating a large pot of salted water in which to cook the penne. Cook the pasta per package directions, cooking until about 2 minutes before al dente.
  8. Reserve a cup of the pasta water, strain the penne, and add the pasta to the tomato sauce.
  9. Continue cooking the combined pasta and sauce until the pasta is done to your liking. Add some of the reserved pasta water to the pan if the pasta becomes dry during this last step of the cooking process.
  10. Just before serving, add the basil, mix well, and garnish the serving platter with grated pecorino romano cheese.
  11. Serve immediately.

*     *     *

Penne Vodka Cream 1

*     *     *

Variations

One needn’t use meat to make this dish and a pound of large shrimp, cut in half, is a worthy substitute. If you do use shrimp, however, add them to the sauce just before you add the pasta. The shrimp only need a couple of minutes to cook, during which the pasta should finish cooking. Remember: no cheese!

*     *     *

Coming soon to a monitor near you … Just not as soon as you thought it would

Crostata Preview

Crostata

*     *     *

Spaghetti alla Chitarra all’Amatriciana and My (Not So) Authentic Souvenir from Rome

Pasta alla Chitarra 1Now that’s a mouthful, isn’t it? I was talking about the title but the same applies to the dish. It’s one that I was served in Rome and I couldn’t wait to make it at home — but there was a problem. Although I’ve dressed pasta in this way, I didn’t own a chitarra, (guitar). No, I’ve not taken up an instrument during my time off.

A chitarra is a piece of pasta making equipment that pre-dates the pasta machines common today. Abruzzo claims to be the instrument’s point of origin, believing it was developed there in the early 1800’s. A little larger than a shoe box, this chitarra has a number of strings evenly spaced on either side of a (removable) board. Each of the two sides creates a different pasta. Mine, for example, produces spaghetti and linguine. You place a dough strip on top of the strings and use a rolling-pin to score and form the pasta noodles. If they remain attached, a strum or two on the strings will cause them to fall to the board. Neat, huh? Unless, like me, you don’t own one.

When I went to Italy, I had a couple of things in mind to bring back home, one of which was a chitarra. Although I did see a couple in the first days of my trip, they didn’t make the type of pasta I wanted nor did they seem very durable, particularly considering that my “souvenir” would be stuffed into a suitcase. Remember the American Tourister adverts? These chitarre would never have survived the trip home, even though my bag was, coincidentally, an American Tourister. Unfortunately, I never saw a chitarra again — and it’s not for lack of looking. In fact, my last morning in Rome was spent going to housewares shops looking for the pasta maker. I finally gave up and, being near the Trevi Fountain, tossed in a few coins before treating myself to a peach gelato. Shopping is hard work, no matter the locale.

*     *     *

4 Coins for the Fountain

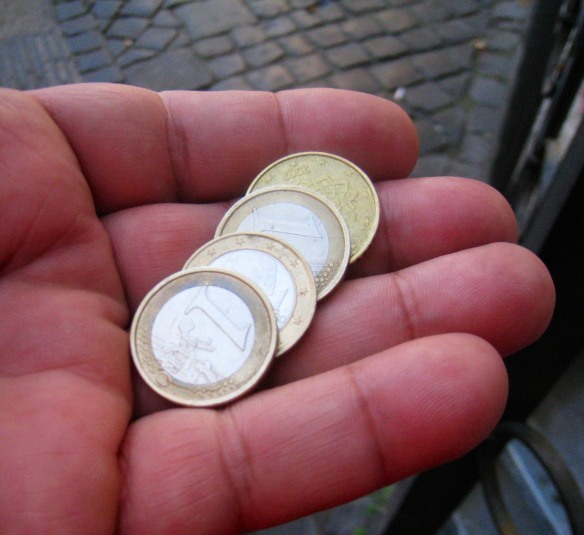
Didn’t find a chitarra but the morning wasn’t a complete loss. The Trevi Fountain was fed.

*     *     *

I probably would have let things end there but, as luck would have it, I was served today’s dish in Rome the night before and couldn’t get it out of my mind. The pasta was fantastic and I wanted a chitarra even more. So, when I returned home from Michigan, I went to my favorite online site for pasta equipment and bought myself a chitarra. Made on this side of the Atlantic, it’s a sturdy piece of equipment and, unlike those abroad, it can be sent back to be restrung when needed — for a price, of course. The chitarra was delivered within days and today’s dish is the result of our first duet. (By the way, if anyone asks, I bought my chitarra at a quaint little shop not far from our flat in Rome. Mum’s the word.)

*     *     *

Click to enlarge

*     *     *

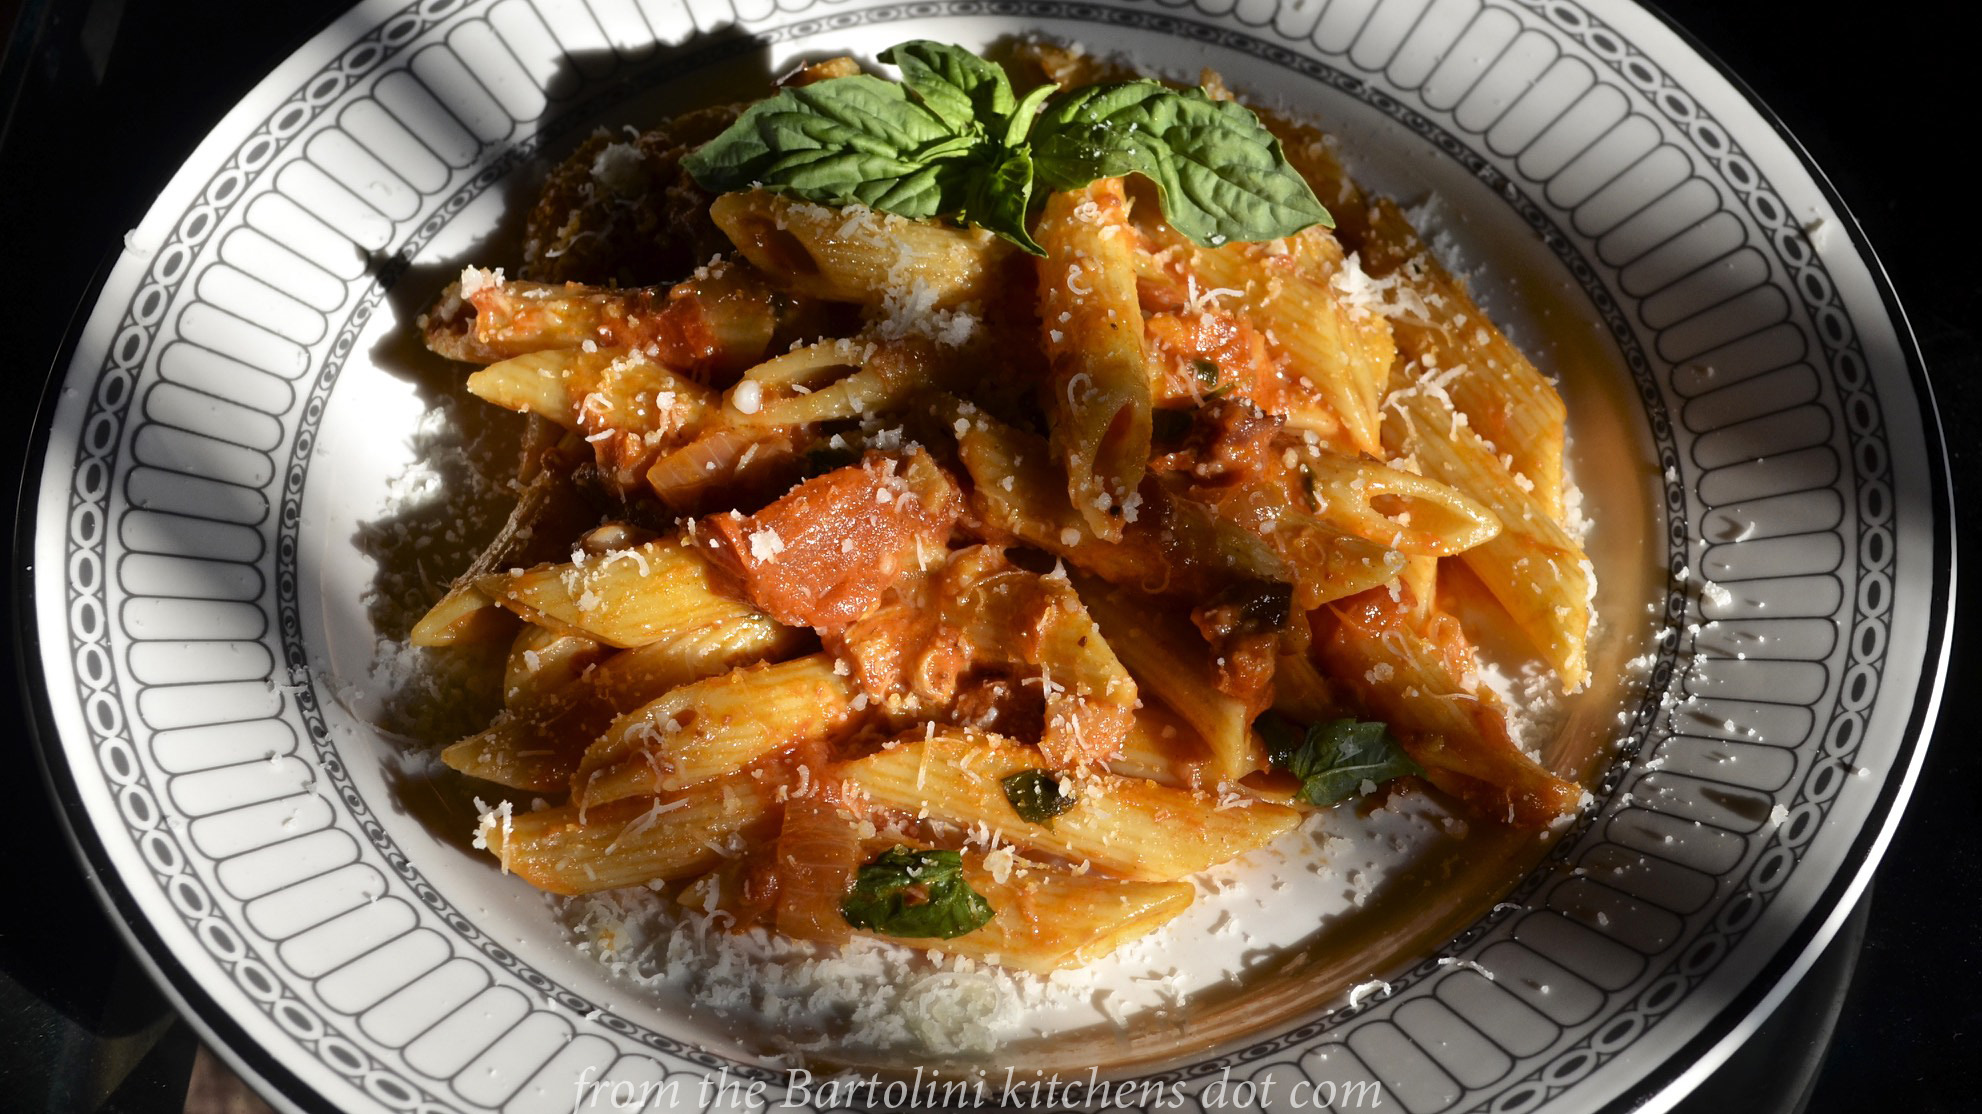
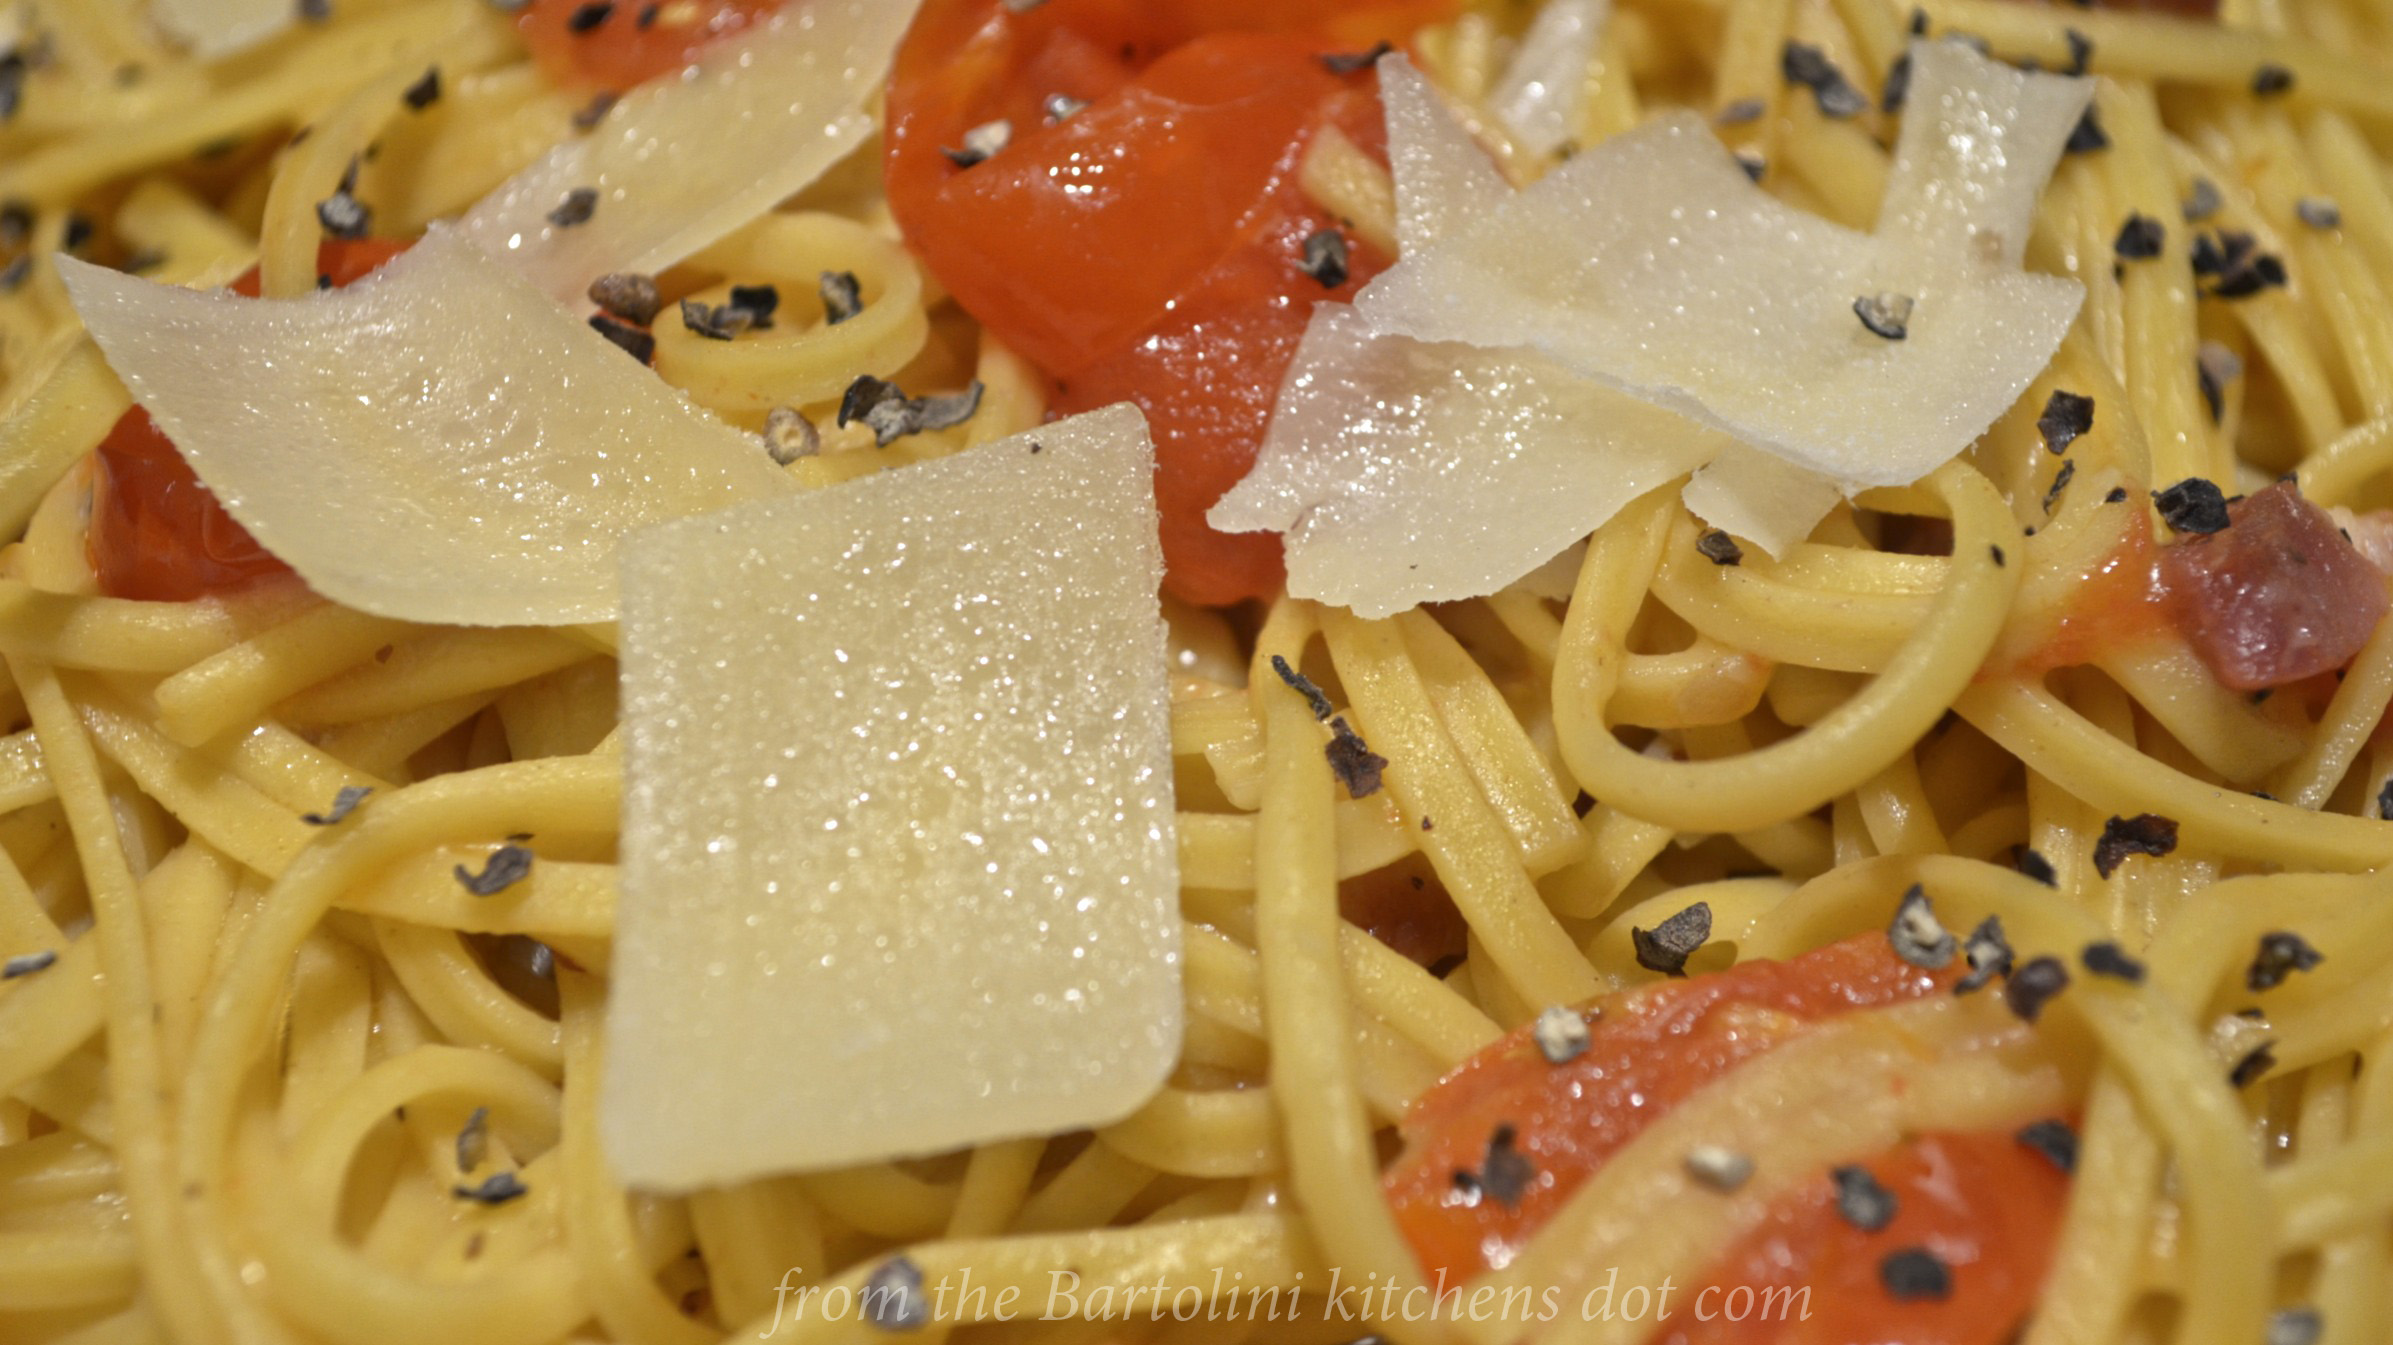
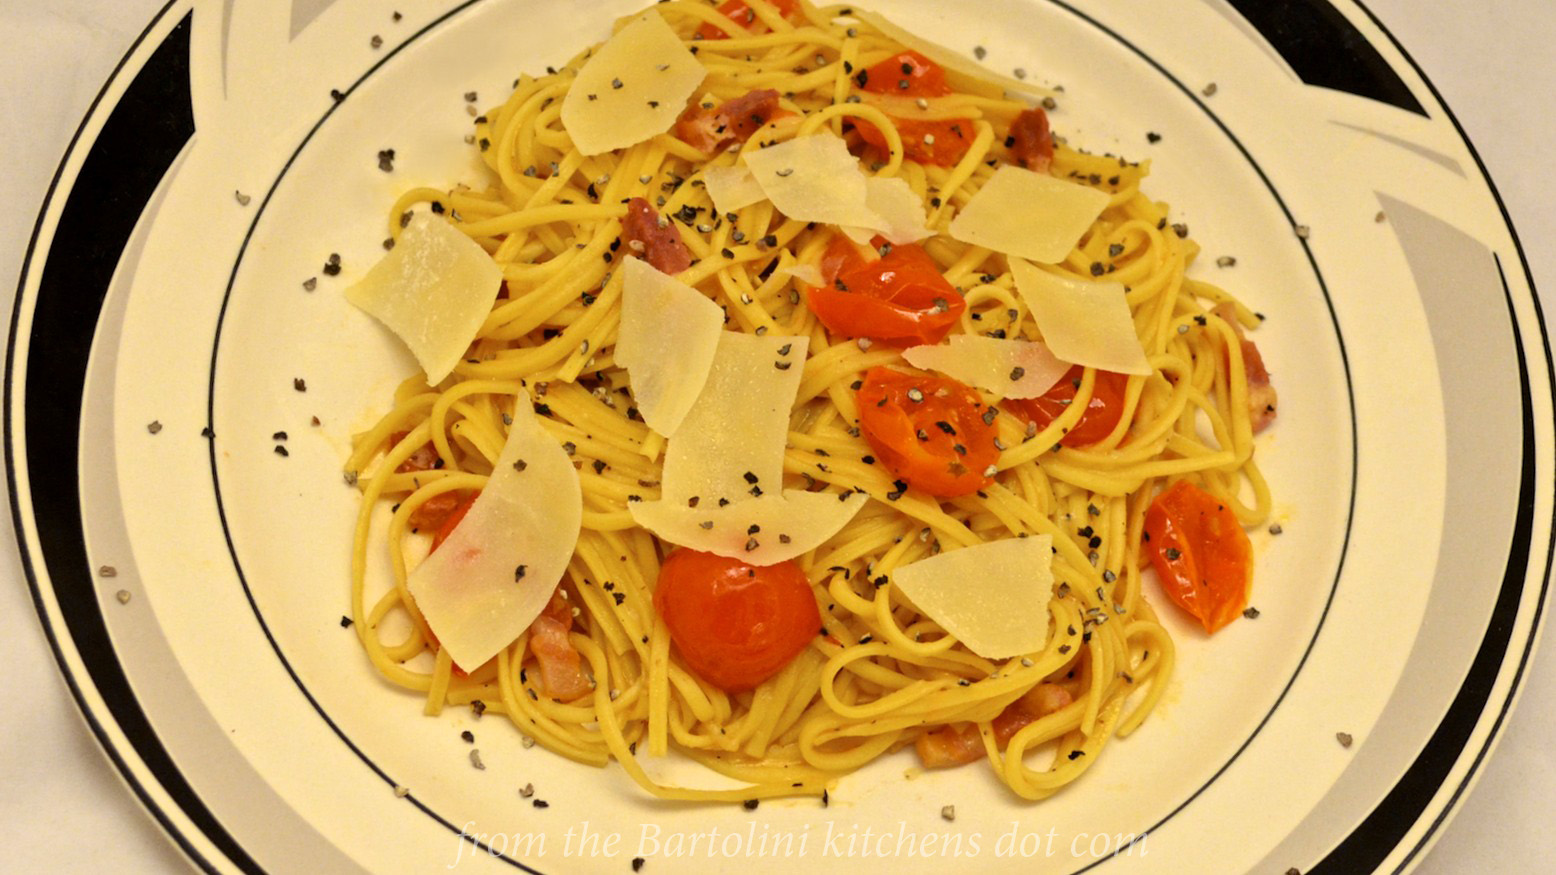
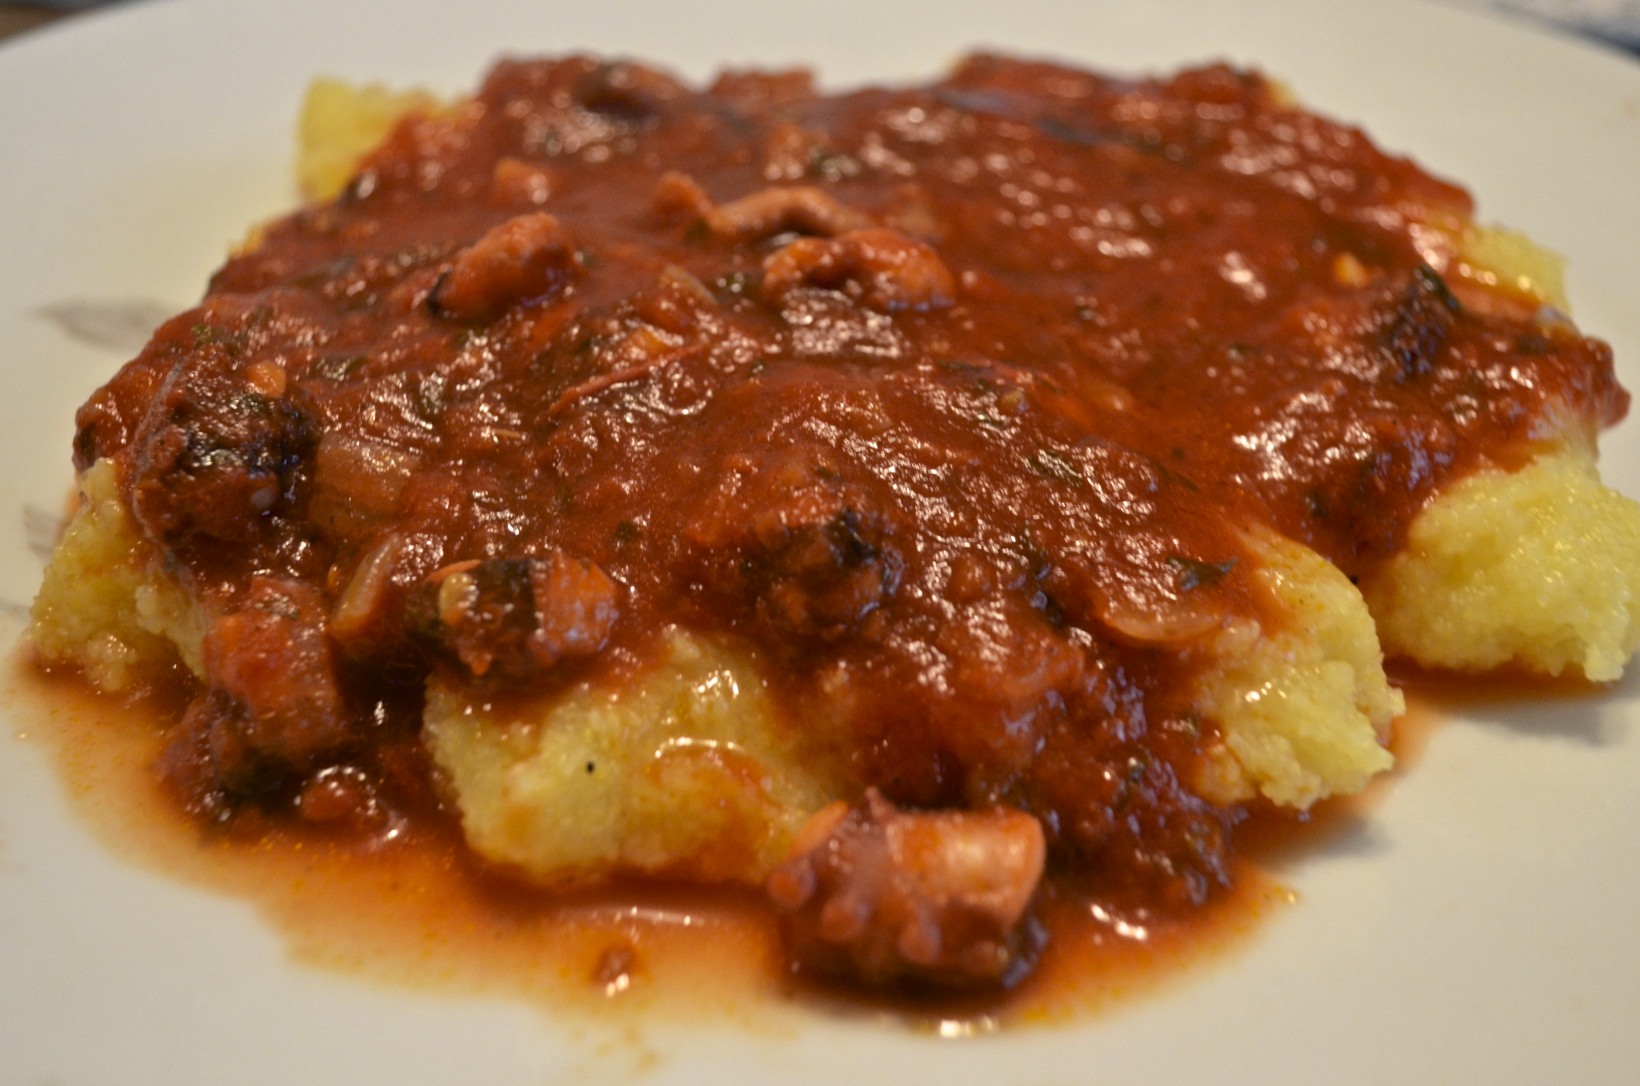
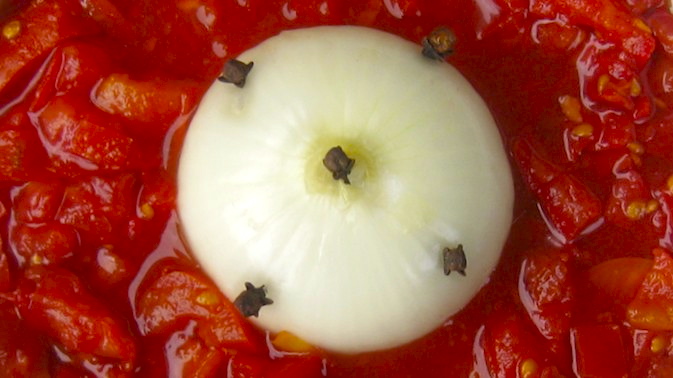
Though originating in Amatrice in the 18th century, this sugo is based upon one that pre-dates the arrival of tomatoes from America to the Italian peninsula. (That dish, Spaghetti alla Gricia, is another I enjoyed while in Rome and will be sharing the recipe in the weeks to come.) It wasn’t long before the dish traveled to Rome, where it was quickly adopted and has become one of the Eternal City’s “classic” dishes. Today, Amatriciana is often used to dress bucatini, though not exclusively, as proven by my dinner that night. As you’ll soon see, it is one of the easiest tomato-based pasta sauces to prepare.

Sugo all’Amatriciana, in its purest form, consists of 3 ingredients: guanciale, tomatoes, and Pecorino Romano cheese. Depending upon the amount of fat rendered from the guanciale, a little extra virgin olive oil may be required. Add a little salt and pepper and your sugo is ready to go. As you might imagine, there are variations. The pasta I was served contained a hint of garlic and a little heat from red pepper flakes. Onions were not used and, according to my waiter, they rarely, if ever, are. So there you have it. If you’re using homemade pasta, this dinner can be on the table in well under 30 minutes. In fact, it will take longer for the pasta water to boil than for any other part of the dish to be prepared.

*     *     *

Pasta alla Chitarra 1

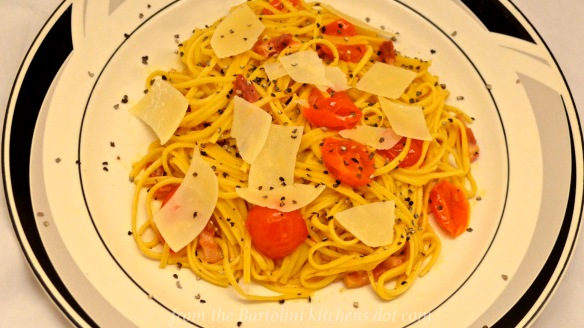
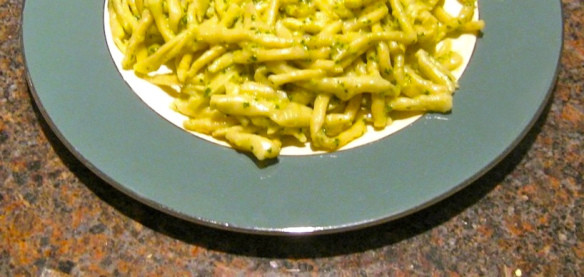
This is what I served

*     *     *

Spaghetti alla Chitarra all’Amatriciana Recipe

Ingredients

  • spaghetti alla chitarra, not quite fully cooked — bucatini may be substituted
  • 1 to 2 tbsp extra virgin olive oil
  • 1 to 4 oz (28 to 112 g) guanciale, cut in lardons — pancetta may be substituted (See Notes)
  • crushed red pepper flakes to taste (optional)
  • 1 clove garlic, crushed (optional)
  • cherry tomatoes, halved – quantity depends upon preference and servings prepared (See Notes)
  • Pecorino Romano cheese
  • salt and pepper

Directions

  1. Cook pasta in a large pot of salted water. (See Notes)
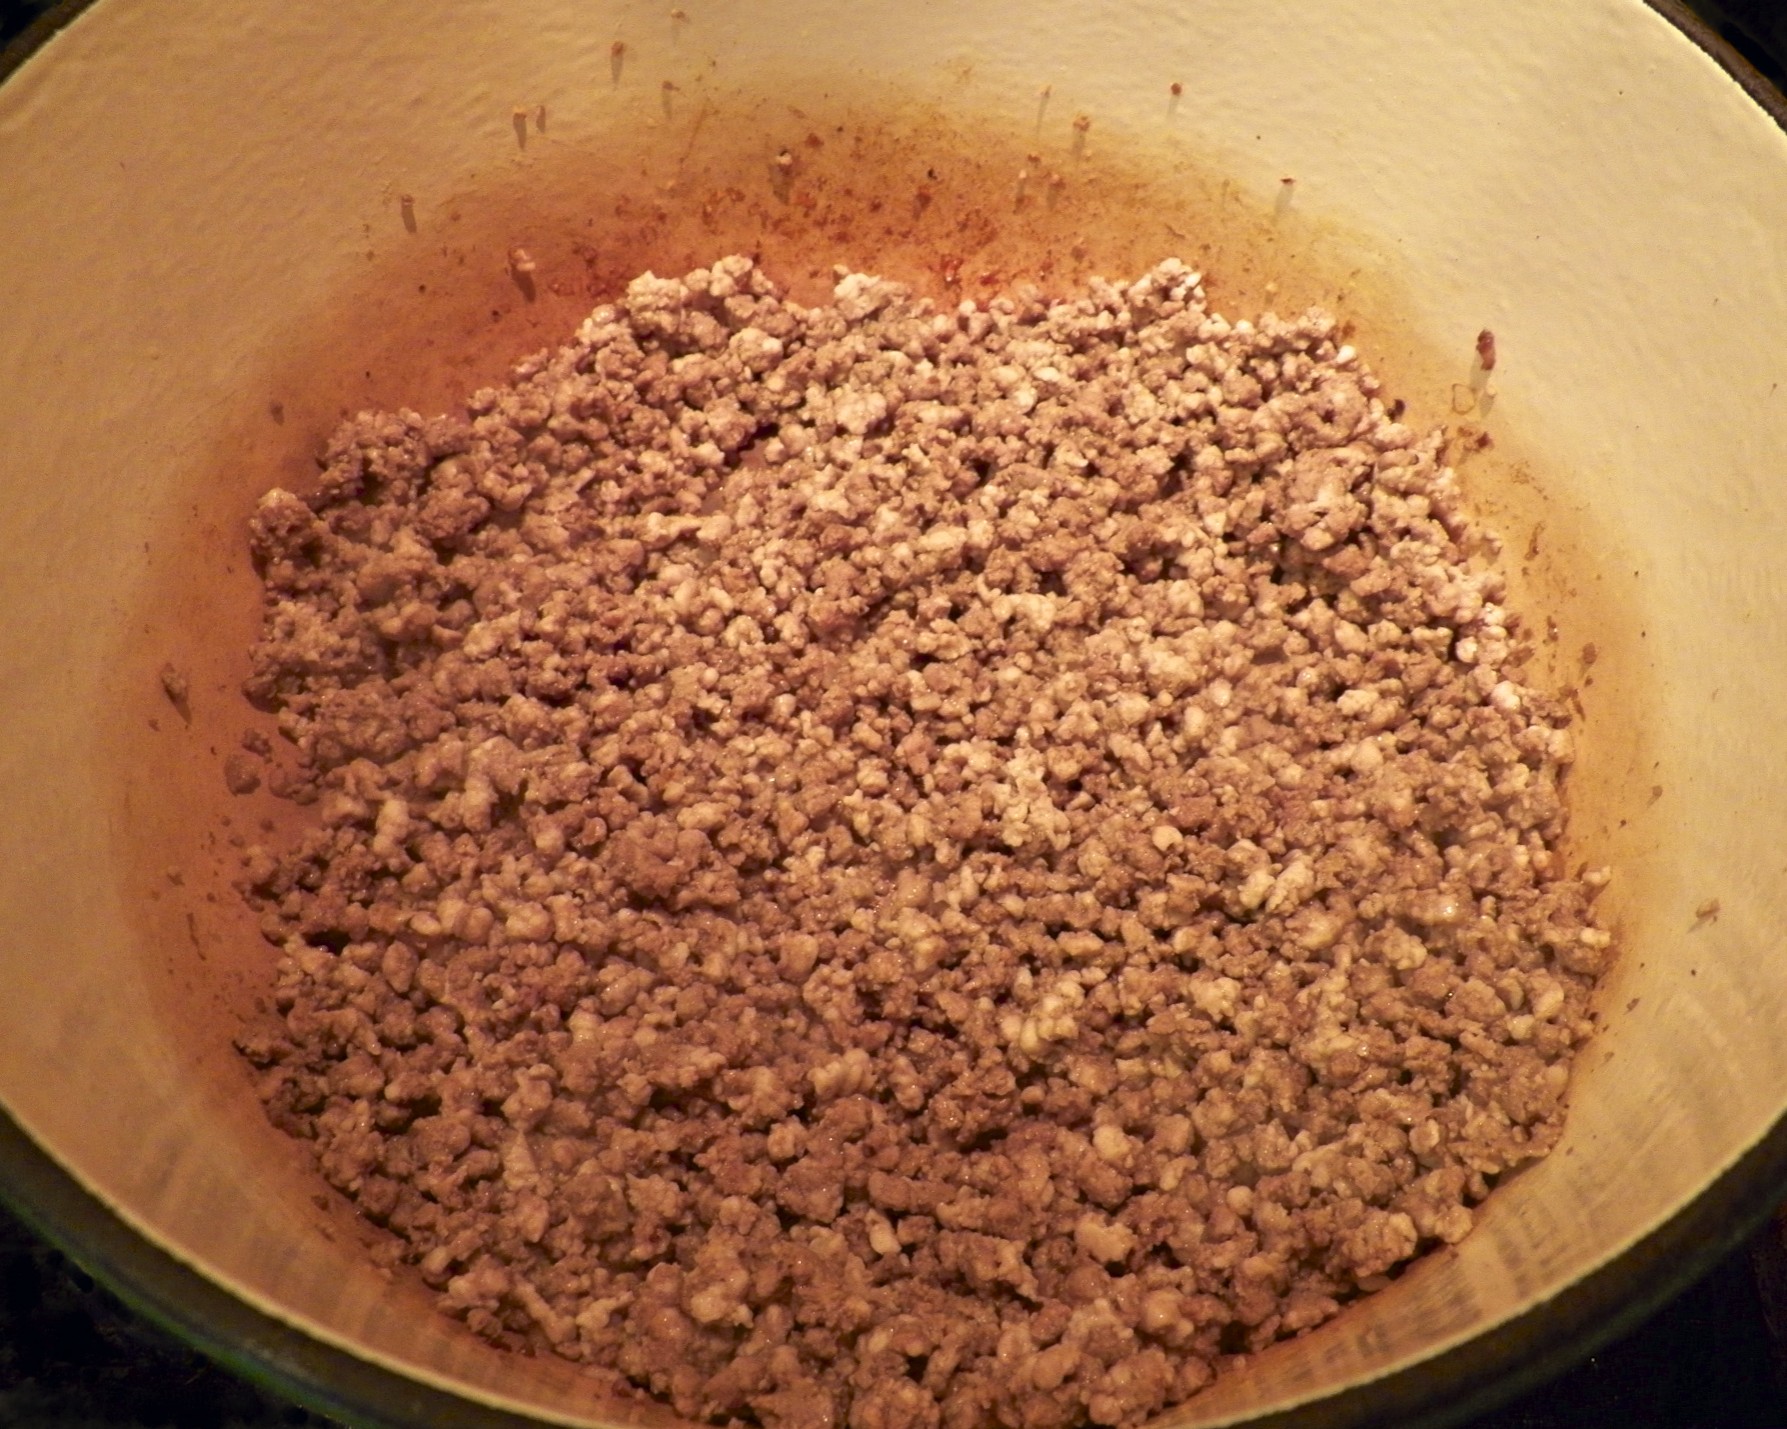
  2. Meanwhile, heat guanciale in a large frying pan over medium heat.
  3. When all the guanciale’s fat is just about rendered, add red pepper flakes and a crushed clove of garlic, if using. Add a little olive oil if the pan is too dry.
  4. When the garlic is golden brown, remove and discard it. By this point, the guanciale should be cooked but not “to a crisp”.
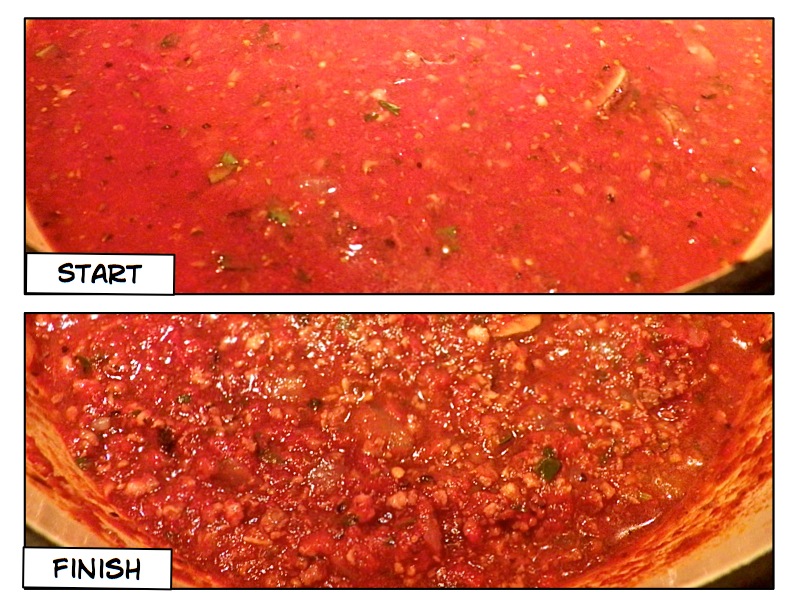
  5. The pasta should be nearing completion. Add the tomatoes to the frying pan. Raise the heat to med-high.
  6. Reserve a cup of the pasta water before draining the pasta.
  7. Add the pasta to the frying pan, stir and cook all the ingredients together until the pasta is cooked al dente. If too dry, add some of the pasta water to compensate.
  8. Turn off the heat, add a handful of grated Pecorino Romano cheese, and mix to combine. Add more pasta water if too dry.
  9. Serve immediately, garnished with more Pecorino Romano cheese and freshly cracked pepper.

*     *     *

Spaghetti alla Chitarra all'Amatriciana

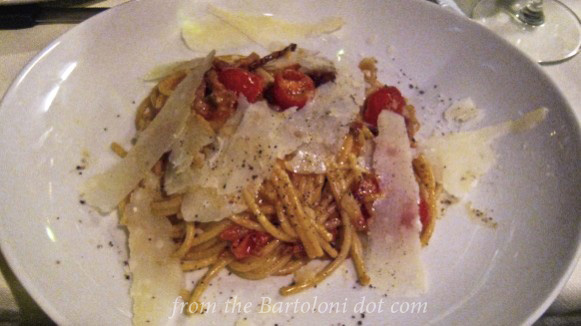
This is what I was served

*     *     *

Notes

The most important issue when preparing pasta alla Amatriciana has to do with timing. If using freshly made pasta, as I did, the sugo will need to be almost fully cooked when the pasta is added to the water since the pasta will be ready in 2 to 3 minutes. If using store-bought or dried pasta, follow the package directions and drain the pasta when it is about 2 minutes shy of al dente.

Although guanciale is preferred, not everyone can find this Italian pork product. Pancetta may be substituted, as can non-smoked bacon. As much as I love smoked bacon, its smoky flavor would overpower the rest of this simple dish.

The dish I was served used halved cherry tomatoes. You could easily substitute one or two chopped fresh tomatoes, depending on the portions to be served.

*     *     *

Bella Firenze

(Click to enlarge any/all photos)

Florence view

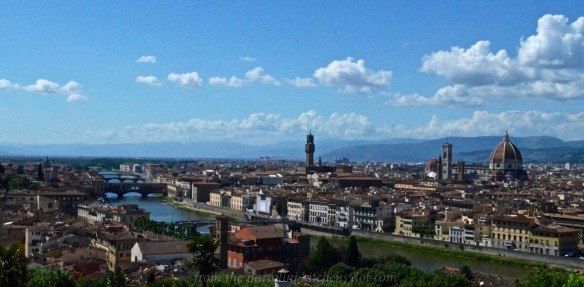
The City of Florence, West of the Arno River, as seen from the Piazzale di Michelangelo. On the left is the covered bridge, the Ponte Vecchio; in the center is the tower of the Palazzo Vecchio; further right are 2 domes, the smaller of which is the Basilica di San Lorenzo; and the remaining tower and dome belong to the Basilica di Santa Maria del Fiore, though known the World-over as Il Duomo.

*     *     *

My favorite city in the World, Florence was the birthplace and heart of the Italian Renaissance, while the city itself is a masterpiece. The basilicas that dot the landscape were each designed by the finest architects of the time. The art collections of the Uffizi Gallery — once the offices of the Medici family — are among the World’s finest, while the Piazza della Signoria is like no other. Walking its streets, you can feel the history and easily imagine you’re in the 15th century, hurrying to meet friends in front of the Baptistery of St. John. You don’t see Florence, you experience it.

I was the first to arrive at our flat, my friends were in transit from Sicily. This flat, too, had a terrace. To the South, we saw Il Duomo; to the North, San Lorenzo. Our days began and ended on that terrace.

Florence Terrace ViewsThat there are so many large cathedrals in the Florence speaks volumes of its stature in Italy and all of Europe in the 15th and 16th centuries. Each, a thing of beauty in its own right, contains priceless works of art, not to mention the tombs of some very famous people. Above them all sits the Basilica di Santa Maria del Fiore, Il Duomo. Its external walls are made of 3 kinds of marble, each a different color — red, green, and white — and positioned in patterns composed of vertical and horizontal lines The cathedral’s magnificent dome was designed by famed architect, Brunelleschi. Just beyond its main entrance lies the Baptistery of St. John, the bronze doors of which, “The Gates of Paradise“, were designed by Ghiberti, The Basilica di San Lorenzo, also, features a dome designedPeek-a-Boo Duomo, at night by Brunelleschi though he died before its completion. This cathedral contains the tombs of members of the powerful Medici family. If it’s tombs you like, then you must visit the Basilica di Santa Croce. Within this beautiful cathedral’s walls you’ll find the tombs of Michelangelo, Galileo, and Machiavelli, to name a few. There are, also, funerary monuments for other famous Florentines, like Fermi and Dante.

Too dark for you? Is “high art” more your style? Then head to the Basilica di San Miniato al Monte. Located atop one of the highest points in Florence, it is perhaps the best example of Romanesque architecture in all of Tuscany. While you’re there, be sure to visit the Piazzale di Michelangelo which offers one of the most beautiful views of the city of Florence. (See photos above and below.)

Don’t feel much like climbing a hill? Then stroll over to the Church of San Marco where you’ll find frescoes by the Renaissance artist, Fra Angelico. The Church, though, is only the starter. For the main course, head next door to the monastery, where Fra Angelico, himself a monk, and his students decorated each monk’s cell with a beautiful fresco upon which he could reflect and meditate. It is an incredible collection of early Renaissance works by a true Master. All that’s left, then, is the dessert. For that, head down the street to the Galerie de l’Académie, where you’ll find Michelangelo’s massive statue, “David”. A more satisfying meal cannot be served and there is still so much more of Florence to savor. Get ready for your first taste.

*     *     *

Since I’ve spent so much time writing about cathedrals, I thought I’d share some photos of the Basilica of Santa Maria Novella, named “Novella”, New, because it was built upon the site of an earlier Church, Santa Maria delle Vigne. Completed in 1470, it is the first of the city’s great cathedrals to be built. In the center of the Cathedral hangs Giotto’s “Crucifix”, while its walls and side chapels, capelle, are decorated with frescoes created by some of the Renaissance’s most gifted artists. The sanctuary behind the awe-inspiring altar is called the Cappella Tornabuoni. The remarkably well-preserved frescoes decorating its walls were created by Ghirlandaio and his assistants, the most famous of which was a young Michelangelo.

(Though all photos are mine — like you couldn’t tell? –Wikipedia supplied some details and historical data.)

*     *     *

*     *     *

 In and around Florence

*     *     *

*     *     *

Florence, East of the Arno River

The City of Florence, East of the Arno River, as seen from the Piazzale di Michelangelo. To the left are remnants of the City’s walls with Galileo’s home just beyond the crest. If you look closely, you can see the dome of the Basilica of Santo Spirito, in the distance just to the left of the Arno River, beyond the Ponte Vecchio.

*     *     *

There’s more Florence yet to come.

*     *     *

It’s déjà vu all over again …

Salmon with Dill en PapilloteNever mind our cool weather. It’s grilling season and here’s a way to cook fish on your barbecue without fear of the fillets sticking to the grates. Seasoned and enclosed in aluminum foil, you’d be hard-pressed to find an easier way to prepare fish.  Oh! Did I mention how flavorful it is? Well, you can see three recipes for preparing fish in this way just by clicking HERE.

*     *     *

Coming soon to a monitor near you …

Pistachio Gelato Pistachio Gelato

*     *     *

Stewed Quail

Quaglia in Umido

Quail with PappardelleThis is a dish that Zia and I prepared during my last visit home but it requires a bit of an explanation. I originally had intended to share my family’s recipe for preparing pigeon back in the day. The only problem was that I couldn’t source them, except for one place not far from here. Unfortunately, I was there once when an order for pigeons was placed and witnessed their “preparation”. Their handling was beyond rough and I could never purchase a pigeon there. Now, I’m fully aware of how meat comes to be displayed in our markets and, over the years, have watched more than my fair share of poultry “prepared” for our dinners. Hard as it may be for some to believe, there are comparatively humane ways to do this and when I see evidence to the contrary, I find another place to shop and something else to eat.  So, with quail more readily available, we substituted it for the pigeon in today’s recipe. Besides, you’ll probably find the tale I’m about to tell much more enjoyable if you know that we won’t be cooking pigeon later.

*     *     *

Although pigeon was prepared for dinner at the old two-flat, it certainly wasn’t served frequently or with any regularity.  It was simply a matter of supply, for it wasn’t every day that you could find enough pigeons to prepare and serve. The family did have its sources, though. One, a workmate of Uncle, bred pigeons and often gave us young birds that didn’t meet his standards. Of course, there was the farmers market and I often watched as Grandpa haggled with the vendor over an amount as little as a quarter. In reality, this was all a game and I had a front row seat. It’s not like there were dozens of vendors selling young pigeons, nor were there throngs of people queuing at their stalls demanding the birds. Grandpa and the vendor haggled a bit but both knew all along that the deal had been struck the moment Grandpa walked up to the vendor’s stall. For me, it was part of the fun of going with Grandpa to the market. The third source for pigeon was from Grandpa’s farmer friend. You may recall that this was the farm where our dogs went, never to be seen again. As luck would have it, they were always out in the fields playing when we visited the farm.

I must have been about 7 years old when Grandpa brought home a single, very young pigeon. Today, the source of this bird is a point of debate. There are those who think it came from Uncle’s friend while others believe it came from the farmer. No matter whence it came, this bird, being a loner, wasn’t destined for the table. “Duke” would become one of the most memorable pets that ever shared the two-flat with us.

Though it may sound odd to have a pigeon as a pet, Duke was only one of many animals that found their way to our home. There were dogs, fish, rabbits, turtles, chameleons, frogs, birds, Chinese pheasants, and even a snake, though the snake’s stay was quite brief before being set free in the yard. Our neighbor, Mrs. A, wasn’t happy about that and, for years, whenever she spotted a snake in her garden, it was ours that she saw. It was just our luck to have found and let loose the Methuselah of snakes. Poor, long-suffering Mrs. A. She was a wonderful woman who treated us kids very kindly. This despite our snake taking up residence in her garden, and, Duke roosting outside her bedroom window every night. That window ledge would never be the same.

Now, Duke was no ordinary pigeon nor pet, for that matter. First of all, Duke was actually a Duchess — having laid an egg under Zia’s sofa. It didn’t seem to mind having a masculine name so Duke she remained. She was ever-present. If you were in the backyard, Duke was sure to appear, swooping down from above. If you were eating a snack somewhere outside, Duke would find you quicker than the dog and wait for a piece of whatever it was you were eating. Even so, she was most closely attached to Grandpa and Nonna.

*     *     *

Parish School*     *     *

Pictured above is St. Juliana’s parish school and, for a time, church. In between the two entrances on the right is a row of 9 rather tall windows, indicating where the parish church was once located. (It was replaced in the early 1960’s.) Missing from this more recent photo are the large sconces, one of which was placed on either side of each entrance.

As you can see, the building was rather small and, with 16 classrooms, so was the church. Although there were several services on Sunday mornings, the 9:00 mass was meant for us kids and the service and sermon were more child-friendly. The 10:15 service was the one that Nonna, Grandpa, and Duke attended. Every Sunday morning at 10:00, Nonna and Grandpa would walk down the street to the church, with Duke circling overhead. When it was warm, Duke would wait for them from her perch atop the building. On cold or wet days, she’d take refuge in one of the sconces, its damaged pane allowing the bird access. Once mass was finished, Duke waited for Nonna and Grandpa to reappear and, again, circled overhead as they walked home. We often hear tales of dogs following children to school or church but a pigeon?

My most vivid memory of Duke, though, involves Grandpa and her. (Big surprise, eh?) As I’ve mentioned, Grandpa was an active retiree and was often behind the wheel on his way to visit friends or run errands. Duke would join him, at least for a couple of blocks, and ride on the car’s hood — “bonnet” for some of you — like an ornament. Of course, Grandpa drove very slowly, allowing Duke to play hood ornament for as long as possible. It was truly something to see, with children and adults alike pausing to watch them pass. More often than not, the children laughed and pointed while the adults smiled and shook their heads. When Grandpa approached a busy street, he’d rev the engine a bit, signaling to Duke that it was time for her to return home, and off she went.

Unfortunately, Duke was taken out late one evening and, in the dark, never made it back home. Although we often asked for another pigeon to raise, none was ever available. In retrospect, I think Grandpa knew that Duke was one of a kind and that no other bird could ever replace her. And today, mention Duke to any of the two-flat’s residents and you’re sure to get a smile in reply.

*     *     *

Today’s recipe can be used for either quail or pigeon and the main caution when preparing the birds is the same for both: do not over-brown. Quail are relatively small and if they are browned as one would beef, for example, they will be dry by the time they’re fully cooked. The same is true for pigeon, though they are larger and can be browned for a little while longer. In either case, you just want a little bit of color on the birds’ bodies.

*     *     *

Quail Simmering*     *     *

Stewed Quail Recipe

Ingredients

  • cooked pasta
  • 4 whole quail, dressed
  • 3 tbsp olive oil
  • 1 small – medium onion, chopped
  • 3 tbsp parsley, chopped
  • 3 cloves garlic, diced
  • 1 large can (28 oz, 794 g) tomatoes
  • 1/2 tsp marjoram
  • 4 oz white wine
  • salt & pepper
  • Pecorino Romano cheese, grated

*     *     *

*     *     *

Directions

  1. Heat oil in a large, heavy-bottomed pot over med-high heat.
  2. Add onions and sauté for about 5 minutes before adding garlic and parsley. Continue to sauté until fragrant, about a minute.
  3. Add quail to the pot and LIGHTLY brown on all sides.
  4. Remove quail and add remaining ingredients to the pot. Mix well and bring to the boil.
  5. Return quail to the pot and return to the boil before reducing the heat to a soft simmer. Cook until done, about 30 to 45 minutes. (See Notes)
  6. Remove quail to a serving dish.
  7. Use sauce to dress the pasta, reserving some for use at the table.
  8. Garnish the pasta with grated cheese and place both pasta and quail on a large serving platter.
  9. Serve immediately.

*     *     *

Quail 2*     *     *

Notes

It cannot be overstated: do not over-brown the birds.

Cooking times will vary depending upon whether you use quail or pigeon. Being larger, pigeon will take longer to stew. Use a fork to test each bird to see whether it is fully cooked. The meat should not be “falling off the bone”.

*     *     *

It’s déjà vu all over again …Passatini in Brodo

This time of year, there’s nothing quite like a steaming bowl of soup to warm you up. Easy to make and with ingredients every pantry is sure to have, passatini is a delicious soup and comforting meal, whether it’s served for lunch or dinner. You can see Mom’s recipe for passatini by clicking HERE.

.*     *     *

Coming soon to a monitor near you …

Tuna CasseroleMom’s Tuna Noodle Casserole

*     *     *

This Recipe has Legs: Strangozzi Pasta with Octopus

Strangozzi al Polipi

Recentlyour good friend Tanya, of Chica Andaluza fame, shared a recipe for Carpaccio of Octopus. (Do check out that recipe and, while you’re at it, take a few minutes to explore the rest of her fantastic blog.) I’d not thought about octopus in years and that post reminded me that my family once cooked octopus, polipo. I spoke to Zia about it and we decided to prepare it the next time I visited her. That visit took place last month and, with Monday having been Columbus Day, I thought octopus would make a fine way to commemorate his voyage across the Atlantic. After all, there were those that believed his ships would be sunk by a giant octopus long before they fell off the edge of the Earth.

*     *     *

Strangozzi al Polipi

Strangozzi al Polipi

*     *     *

It’s been quite some time since an octopus was given the place of honor at a Bartolini dinner — more than half a century, but who’s counting? We really have no reason for it not being served since then. The dish is delicious, reminiscent of calamari in umido, and it isn’t at all difficult to prepare. No matter. The dish was prepared by my family at one time and thereby has earned a page on this blog.

Back in the day, we would have prepared the octopus in umido, which in this case means stewed in a tomato sauce. Served in bowls with a chunk of good, crusty bread, the dish is delicious and, in some homes, is one of the dishes on the menu for the Feast of the Seven Fishes on Christmas Eve. Originally, I had planned to prepare today’s recipe in umido until reality intervened.

As of now, I know of only one place to buy octopus and that’s at my Italian market. Unfortunately, they only sell very small or very large octopi and each poses a problem for us. When you cook something in umido, it is best that the protein be in large pieces. This is not a soup but a stew, after all, and the pieces should reflect that. Well, the small octopi are so small that it would take 4 to equal a pound (450 g). When chopped, the

Octopus over Polenta

Octopus over Polenta

pieces are far too small for in umido presentation. In fact, Zia and I attempted to serve them over polenta and, though tasty, all but a few pieces were too small even for that. On the other end of the spectrum, the market sells frozen octopi that are 4 and 5 lbs. apiece. Though that would be wonderful to prepare for a Bartolini family dinner, an octopus that size is far too large for a meal for Zia and I. So, although we had to change the dish to suit the circumstances, the search is on now for an octopus weighing 1 pound. When I find one, I’ll either create a separate Polipo in Umido post or amend this one to include that recipe. Bear in mind, though, that the ingredients used in the in umido recipe are the same as those used here for this sauce. Differences, if there are any, will be in the amounts listed. I’ll only be sure of that once I find an octopus in the right size.

Since we couldn’t serve the octopus as we had originally intended, in umido, Zia and I served it over polenta. As I mentioned earlier, that dish didn’t quite work as well as we Bartolini Strangozzi Pastathought it would. Again the octopus pieces needed to be larger. Once home, I bought 3 more small octopi and decided to serve them over pasta. As luck would have it, a few weeks earlier my blogging friend, Lidia, had noticed something while shopping and sent her discovery to me. (Not only does she share the name of one of my favorite chefs, Lidia has a wonderful blog, Oh Lidia, and I hope you take time to have a look.) You can imagine my surprise when I opened the carton and found 3 pastas manufactured by a company called “Bartolini”. I can’t think of a better pasta to serve with this old family recipe than one that shares our family name. So, of the 3 sent, I chose to prepare strangozzi.

In an earlier post, I demonstrated how to make strozzapreti pasta and gave an account of how it got its name. (See It’s déjà vu all over again … ) Strozzapreti, you see, means priest choker and one legend states that this pasta was so delicious that priests choked when eating it for the first time. What does this have to do with strangozzi? Well, it is thought that the word strangozzi is derived from the Italian word for shoelaces, stringhe, yet this pasta has come to mean priest stranglers. Huh?  Stay with me. Centuries ago, in Umbria, the clergy was not looked upon kindly by the villagers. Legend says that they chased down the worst of the clergy and those that were caught were strangled with their shoelaces. These long pasta ribbons are thought to resemble those shoelaces. Death by shoelace immortalized in pasta. Ya gotta love it!

In reality, strangozzi are about the size of what we would call linguine, the only difference being in their thickness. Our linguine are cut from thin pasta sheets; strangozzi is cut from sheets twice as thick. The result is a hearty pasta that is perfect for heavier or meat-based sauces.

*     *     *

Before beginning the recipe, the octopus must be cleaned and readied. The head is actually a hood and the contents of its interior need to be removed. It is easy enough to do and you can slice its side to make it even easier. Next, the eyes must be removed. Make a small slice on either side of each eye, creating a small wedge. Remove each wedge and the eye with it. Since these octopi were so small, I sliced the octopus just above both eyes and again below, creating a ring. I then cut the eyes off of the ring. One last thing to be removed is the beak. Turning the octopus upside-down, you’ll notice a small whole at the center of the 8 legs. With your fingers, carefully feel the beak and note its size. With a sharp knife, cut around the beak and remove. Now that it’s cleaned, cut the legs section in half, creating 2 parts with 4 legs apiece. Cut those pieces in half again, and then again. In the end, you will have separated all 8 legs. Do not chop them but leave them whole and proceed with the recipe.

*     *     *

Click to see any/all photos enlarged.

*     *     *

Strangozzi Pasta with Octopus Recipe

Ingredients

  • octopus (See Notes)
  • 3 tbsp extra virgin olive oil
  • 1/4 tsp red pepper flakes (more or less to taste)
  • 1 small onion, diced
  • 2 cloves garlic, minced or grated
  • 1/3 cup chopped parsley
  • 1 large can, 28 oz (800 g), whole tomatoes – hand-torn
  • 1/2 tsp dried marjoram (2 tsp fresh)
  • 3 to 4 oz dry white wine
  • 1 lb  (450 g) cooked Strangozzi pasta — or whatever pasta you prefer — cooked al dente
  • reserved pasta water

Directions

  1. In a medium saucepan over med-high heat, bring to boil enough water to cover the octopus. Add the octopus and allow to simmer for 1 to 2 minutes after the pot returns to the boil. Small octopus should boil for 1 minute. Larger should be allowed to boil closer to 2 minutes. Remove the octopus and place in an ice bath to stop the cooking process and reserve. Once cooled, see Notes for chopping considerations.
  2. Over med-high heat, add olive oil in a medium sauce pan.
  3. Add red pepper flakes, onion, garlic, and parsley. Season with salt and pepper before sautéing until the onion is translucent and garlic fragrant — about 6 to 8 minutes.
  4. Add the tomatoes, wine, and marjoram, stir to combine. Bring to a boil before reducing to a soft simmer.
  5. After the sauce has thickened and darkened a bit — about 30 minutes — add the chopped octopus and continue to simmer.
  6. If using small octopi, it should be finished cooking in about 20 minutes. Taste a piece after 15 minutes to test for doneness and to check the seasoning. If necessary, add some of the reserved pasta water. (See Notes)
  7. Meanwhile, the pasta should have been cooked al dente and strained. Be sure to reserve some of the pasta water.
  8. In a large bowl or serving platter, combine the octopus sauce with the cooked pasta and mix. If the pasta seems too dry, add some of the reserved pasta water.
  9. Serve immediately.
  10. Like all mildly flavored seafood pastas, grated cheese is not recommended for it will overpower the dish.

*     *     *

*     *     *

Notes

The dish will determine the size of the pieces when chopping the octopus.

  • For pasta dishes, I would suggest chopping small octopi into pieces about 3/4 inches (2 cm). These pieces will shrink a little during cooking and will be easily managed no matter what pasta you choose.
  • For in umido, a larger octopus should be used and, when chopped, the pieces should be larger. Ultimately, the size will depend upon how comfortable you are dealing with the pieces while eating. Even so, I would suggest that all pieces be no less than an inch (2.5 cm) long. (Since this recipe was posted, I did find and prepare a 1 lb. octopus in umido. You can see that recipe by clicking HERE.)

No matter the preparation or the size of the pieces, do try to keep them all the same size. Doing so will ensure that all the octopus is evenly cooked.

Understandably, the larger the octopus, the longer it should simmer in the tomato sauce. A small octopus should take 15 to 20 minutes, as was stated in the recipe above. Larger octopi will take up to 30 minutes, maybe more. Be careful not to overcook lest the octopus become rubbery. If in doubt, taste a piece to see if it is cooked to your liking.

For reasons unknown to me, we’ve always discarded the water used to blanch the octopus. Even though the octopus is in it only briefly, the water does darken in color.

*     *     *

It’s déjà vu all over again …

Strozzapreti with Pesto

Strozzapreti with Pesto

With all of this talk of strangling priests, it’s only logical that today’s look back would be to the strozzapreti post. Not only will you learn how to make the pasta by hand, you’ll also learn how a few of the common pastas got their names. All this can be yours just by clicking HERE.

*     *     *

Coming soon to a monitor near you …

Damson Plum Jam Preview

Damson Plum Jam

*     *     *

Sauce in the Style of Bologna

Sugo alla Bolognese

Pappardelle alla Bolognese

Pappardelle alla Bolognese

To many, the district of Emilia-Romagna features the best of Italian cuisine and many of the foods we associate with Italy originated there — or so the locals claim. Balsamic vinegar (Modena), amaretti (Modena), prosciutto (Parma), Parmigiano Reggiano (Parma), and Grana Padano (Parma) are but a few of the area’s most famous contributions to Italian cuisine — and we’ve not yet mentioned the capital, Bologna. Home to what many believe to be the oldest, continuously running university in the World, the cooking of Bologna is often considered the Best of the Best and its contributions to Italian cuisine are many: mortadella, tortellini & tortelloni, lasagna(?), cannelloni(?), Sugo alla Bolognese, to name but a few. (Note: my family never referred to a sauce as “ragu”. “Sugo” was the word we used and that’s what will be used here to describe this sauce.)

One of the peculiarities of Italian cooking is that the preparation of a dish, any dish, can vary from district to district, province to province, town to town, and even house to house. Perhaps Chef Mario Batali said it best when he described Italian cuisine as the “cooking of Nonnas” and handed down from generation to generation.  With that history and with few recipes written down, it’s easy to see how the recipes can vary. When speaking of a Bolognese sauce, the first documented recipe for it appeared in the late 19th century, and, as recently as 1981, the Italian Academy of Cuisine (Accademia Italiana della Cucina) published what it considered to be the “classic” recipe (Source Wikipedia). If you’re expecting to find either of these recipes here, you’re going to be disappointed. Although many of the ingredients are the same, today’s recipe is one I’ve developed over a number of years and, if you ask me to write it down 2 years from now, it will probably be different from what I’m about to share. In short, it is, and will forever be, a work in progress. There are a few ingredients common to all Bolognese sauces and I urge you to assemble them and create your own sugo. One day your Grandkids will thank you.

To begin, many consider a Bolognese sauce as a tomato sauce that has meat. That’s not quite right. Most true Bolognese are predominantly meat with a bit of tomato or, as Chef Emeril Lagasse calls it, a “meat sauce with tomato.” To that end, I’ve included beef, veal, pork, sausage, and pancetta in the recipe to follow (see Notes). As for the tomato component, only tomato paste will be used below. No whole, chopped, or puréed tomatoes will be harmed in the making of this sugo. It’s also worth noting that most Bolognese feature relatively few spices and herbs, although I’ve included a couple because that’s just the way we Bartolini roll. Unique to a Bolognese, some form of dairy is added to the pot, though the timing may vary. I use a good amount, early in the preparation. Lastly, wine is added early on and though I choose to use a dry white, you may wish to use a red instead.

One more thing is worth mentioning and it’s a real time saver. The recipe calls for a number of ingredients chopped finely. Rather than chop them all — and since I do not like seeing pieces of carrot in my sauce — I smash the garlic and give the rest a rough chop before placing everything into the food processor. I let it run until the ingredients are all finely chopped and then add the mixture to the hot oil in the pan. Easy peasy!

 *     *     *

Sugo alla Bolognese Recipe

yield: 2.5 quarts (2.4 l)

Ingredients

  • 1 large onion, very finely chopped
  • 2 -3 carrots, very finely chopped
  • 2 -3 celery ribs, very finely chopped
  • 6 cloves garlic, diced
  • 4 tbsp fresh parsley, chopped
  • 3 tbsp extra virgin olive oil
  • 3/4 to 1 lb. (340 to 454 g) ground beef
  • 3/4 to 1 lb. (340 to 454 g) ground pork
  • 3/4 to 1 lb. (340 to 454 g) ground veal
  • 4 oz ground pancetta
  • 6 oz (170 g) ground pork sausage
  • 1 cup dry white wine
  • 12 oz half-and-half (whole milk or a mixture of whole milk & heavy cream may be substituted)
  • 1 can (12 oz, 355 ml) tomato paste
  • 2 cups low sodium beef stock
  • salt & pepper

Directions

  1. Heat oil in large sauce pan over a medium-high heat. Once hot, add carrots, onion, celery, garlic, and parsley, season lightly with salt & pepper, and sauté until the liquids are gone and the vegetables start to color.
  2. Add ground meats, stir well, and continue to sauté until well beyond the point where the meat is no longer pink. All of the juices should run clear and the meat should have darkened due to caramelization.
  3. Add the milk and sauté until about half has evaporated.
  4. Add tomato paste, mix thoroughly, and continue to sauté another 2 minutes.
  5. Add the wine and sauté until most has evaporated.
  6. Add the beef stock, stir well, and bring to a boil before reducing to a very low simmer.
  7. Continue to simmer until the sauce deepens in color and thickens — at least 2½ to 3 hours. Stir occasionally. At the end, season with salt and pepper, to taste.
  8. Sauce is ready for use with your favorite pasta or, once cooled, for storage in your refrigerator or freezer.

*     *     *

*     *     *

Variations

Some recipes that I’ve seen, and tasted, include ground chicken livers with the meat mixture. Frankly, I don’t see the need for the ingredient, being happy with this sugo as it is. Then again. come back in a few years and you may find me extolling the virtues of chicken livers in my Sugo alla Bolognese.

While “Spaghetti alla Bolognese” is a dish common to many Italian restaurant menus on this side of the Atlantic, in Italy Sugo alla Bolognese is most often served with pappardelle, tagliatelle, and even fettuccine.

*     *     *

Roll, Cut, & Unfurl Pappardelle

*     *     *

Notes

Know thy sausage! The sausage you add will have a big impact on your sauce’s flavor. Choose it wisely lest you run the risk of “contaminating” your sugo with an unpleasant taste.

*     *     *

It’s déjà vu all over again

Calamari FrittiI shared a Fried Calamari recipe 2 years ago, when this blog was still pretty young. Since then, it has become the most referenced recipe on my blog, by a nearly 2 to 1 margin, although Chicago Style Giardiniera is coming on strong. You can view the recipe that everyone is clamoring to see by clicking HERE.

*     *     *

Coming soon to a monitor near you …

The Return of Burrata

*     *     *

Basic Meat Sauce

Sugo di Carne Odd, isn’t it? The part of each post that will give us trouble. Last week it was the photos and labels. Just how many pictures does one need of meat & vegetables floating in water? And do I call it “broth”, “brodo”, or “stock”? In the end, I chose one photo and used all three monikers.

This week it’s the post’s title. First off, I thought using the word “Sugo” might be confusing to a few people.  In English, sugo means “gravy” but, unlike some, we never referred to tomato sauce as “gravy”. It was either “sauce” or “sugo”. “Gravy” was the stuff you put on mashed potatoes. But that’s not the only problem in the title. This sauce is not a Bolognese, although I have that recipe and will share it later. I am a Marchigiano but it would be arrogant for me to call my sauce alla Marchigiani, meaning “in the style of Le Marche”. I guess I could say it’s dei Bartolini, meaning “of the Bartolini”, but that would imply that there’s one common sauce for us all. That’s hardly the case.

Back in the old two-flat, each adult was quite capable of making a sauce for pasta. Granted, it was exceptionally rare for one of the men to make a sauce but that doesn’t mean each didn’t consider himself to be a master chef when it came to making one. Oddly enough, each of the adults’ sauces was as different from the others as the cook who prepared it. In fact, I’d be willing to bet that if it were somehow possible to recreate each individual’s sauce, I would still be able to determine who prepared each. Yes, they were that distinctive despite using almost the exact same ingredients. “Almost” because there were two minor differences: Mom had her “secret” spice (See Notes) and Nonna might use a little marjoram. It remains a mystery to me how 6 people could have used the same ingredients and achieve such different results. Today, I add a little wine to my sauce and I don’t recall anyone else having done that. The point to all of this is to make clear that there is no one sauce of the Bartolini and for me to use that title for my sauce would be mighty presumptuous. Nevertheless, the bottom line is that I still needed a title for this post, so, I took the path of least resistance. “Basic Meat Sauce” it is.

"Until the juices run clear"

“Until the juices run clear”

There are a few techniques that all of our tomato sauces include. In the first place, all of our sauces use onions. This is significant because the sweetness of the onion eliminates the need for the sugar that some add to their tomato sauces. When it comes to preparing a meat sauce, at one time large pieces of beef and pork were used and later served alongside of the pasta. Today those meats are ground before being added to the pot. Personally, I no longer buy ground meat and, as a result, am in better control of both the quality and fat content of my ingredients. Beyond that, the instructions for many sauces state to “Brown the meat.” Well, that’s half-right. If you only sauté the meat until the pink is gone, you’re missing an opportunity to add flavor to your sauce. As Zia says, make sure “the juices run clear” before you add anything else to the pot. This will ensure that all the liquid has evaporated, concentrating the flavor and leaving just fat behind. Only then can the meat really begin to brown and I’ll continue to sauté it for a few minutes more to do so. Lastly, I’ll add parsley and basil to the pot just like everyone else but I, also, go back and add more just after the sauce is taken off the heat. I find that doing so not only boosts the flavor of the sauce but adds to its aroma, as well.

 *     *     *

Basic Meat Sauce Recipe

yield: 2 quarts (1.9 l)

Ingredients

  • 3 tbsp extra virgin olive oil
  • 3/4 to 1 lb. (340 to 454 g) ground beef
  • 3/4 to 1 lb. (340 to 454 g) ground pork
  • 1 large onion, chopped
  • 8 cloves garlic, minced or grated
  • 4 tbsp fresh parsley, chopped – separated
  • 1 cup dry red wine
  • 10 crimini mushrooms, sliced – optional
  • 4 tbsp tomato paste
  • 2 quarts (1.9 l) tomatoes or 2 large (28 oz) cans, chopped
  • 2 tsp marjoram
  • 4 tbsp fresh basil, chopped – separated
  • salt & pepper

Directions

  1. Heat oil in large sauce pan over a medium-high heat. Once hot, add beef and pork, season lightly with salt & pepper, and sauté until the liquids run clear and the meat browns.
  2. Add onion, garlic, and half of the parsley. Stir, season lightly with salt & pepper, and continue to sauté until onion is translucent.
  3. Add the wine and sauté until all but a trace has evaporated.
  4. Optional: Add mushrooms and continue sautéing until soft, about 5 minutes.
  5. Add tomato paste, mix thoroughly, and continue to sauté another 2 minutes.
  6. Add the tomatoes, basil, marjoram, and stir to thoroughly combine.
  7. Bring to boil and reduce to a soft simmer.
  8. Continue to simmer until the sauce deepens in color and thickens — about 2 hours. Stir occasionally.
  9. Remove from heat, add remaining parsley & basil. Stir to combine.
  10. Sauce is ready for use with your favorite pasta or, once cooled, for storage in your refrigerator or freezer.

*     *     *

*     *     *

Notes

Although this recipe makes two quarts, it can easily be halved to make one quart of sauce.

When you choose to add wine to your sauce will affect its impact on the end-result. If added early, as I did in today’s recipe, the wine will blend into the background, adding to the overall taste of the sauce. Adding it later, towards the end, the wine flavoring will be much more prominent. When preparing a meat sauce, I add the wine early on. For a marinara, I add it later, as you’ll see below. It is yours to decide which you prefer.

Mom did have a “secret” spice that she added to her sauce.  It’s not that I’ve a problem revealing the secret, it’s just that we cannot agree on what that spice was. It’s been over 10 years since I last had a taste and, speaking for myself, my memory isn’t what it used to be. Now, normally this would have meant the end of the discussion, except for one little thing. Recently, while rearranging my basement freezer’s contents, I came across a quart of Mom’s sauce that had fallen in among the ice bags that I used to create a false bottom in the freezer. (The bags were supposed to make things easier to reach and, ironically, prevent something from “getting lost” down there.) Granted, as far as discoveries go, this is not on a par with King Tut’s tomb but is it still a great find. I seriously doubt that the sauce is in any condition to be eaten but, hopefully, we’ll be able to determine just what Mom’s secret ingredient was. To that end, I plan to bring it to Zia — when I remember — and let her palate settle this matter, once and for all. Lest there be any doubt, let me assure you that Zia is a fair and impartial judge. She would never be swayed by the fact that I arranged for her to hold the hand and receive the blessing of her Patron, the soon-to-be-Saint Pope John Paul II.

*     *     *

It’s déjà vu all over again

Since I shared one tomato sauce today, I might as well take you back to an earlier post in which I shared a marinara (meatless) sauce. You can see the recipe by clicking HERE. It was one of my earliest posts, so, be kind.

And while you’re there, be sure to take the link to check out that lasagna recipe. I doubt you’ve seen one like it.

*     *     *

Trippa alla Stefanina

There’s no way around it. Today’s recipe is tripe, another within the series of posts which many will find less than appealing, to put it mildly. And, once again, the overwhelming majority of my generation of the Bartolini Clan would agree.  I, myself, being the only exception. Yet, tripe is an ingredient found in most of the World’s cuisines and, when cooked properly, is really quite tasty. Still, many of you may be looking for the nearest exit and, if that’s the case, you may depart HERE. All right then …

Nonna

Trippa wasn’t something Mom ever prepared while I was growing up but it was a dish that the “People Upstairs” made and one that I absolutely loved. Even then, since Zia’s boys would have nothing to do with it, I believe it was usually Grandpa who requested trippa be on that day’s menu. Being that Zia had her own family’s dinner to prepare, the trippa was often made by her Mother-in-law, a woman we kids all called “Nonna”  and whose name was Stefanina. She was a sweet woman and, for my siblings and I, the only Nonna we would ever really know. Since tomorrow would have been her birthday, and yesterday was mine, what better way to celebrate both than by sharing this special recipe? And it is special, as you’ll soon see.

Now, before going further, we need to revisit the 2 flat’s floor plans. You may recall that a stairwell separated my bedroom from our kitchen and the rest of our home. Directly above my room, was my cousins’ bedroom and the stairwell, also, separated their room from Zia’s kitchen and the rest of their home. So, forgetting the stairwell for a moment, my bed was about a 10 feet, in a straight line, from Mom’s stovetop and certainly less than 20 feet away from Zia’s. (Remind me again. Why did I move away from home?)

On those occasions when Grandpa prevailed upon Nonna to make a batch of trippa, the aroma of some as yet unknown delicacy, wafting down the stairs, was my siren call. A quick run up the stairs and a stealth bomber-like cruise through their kitchen was all I needed to check things out. Trippa was on the menu! I returned home via the “front stairs” and the wait began in my room. After what seemed like an eternity, I would hear Nonna’s voice calling, “Johnny! Johnny, are you there? I’ve got surprise for you.” My feet couldn’t get me up those stairs fast enough. When I burst into the kitchen, she’d be standing there, smiling broadly, holding a dinner plate. “Would you like some polenta?” Trying not to appear too eager, I’d reply with something like, “Sure.” And so the lesson began. “This is how you make polenta, Johnny.” Holding the plate in one hand, she would use the other hand’s fingers to dot the plate’s surface with dabs of butter. Then she would sprinkle the plate with freshly ground Pecorino Romano cheese. Next, using a large spoon, Nonna would slowly and carefully cover the plate with a nice layer of freshly made polenta. By now, I was about ready to drool. “Pazienza, Johnny,” and she would dot the surface of the polenta with more butter, to be followed with another sprinkle of grated cheese. And then came the trippa. Da Vinci didn’t take such care painting the Mona Lisa as did this dear woman when she layered the trippa upon that polenta. Then came another sprinkle of cheese. And every time, when she was done, with a twinkle in her eye, she would hand me the plate and say, “This is how you make polenta with trippa.”

Many years later, I cooked a polenta dinner for Mom and Zia. They were dumbstruck when I prepared their plates just as Nonna had showed me all those years before. Although both were fully aware that she often made me a plate when she cooked trippa for Grandpa, they’d no idea how that plate was created. And today, some 40+ years after my last serving of Nonna’s cooking, I cannot prepare a dish of polenta with trippa without hearing her say, “Pazienza,” and, minutes later, when my plate is ready to eat, I just have to echo, “This is how you make polenta with trippa.”

The preparation and serving of trippa that I am about to present is in the style of Le Marche (alla Marchigiani). (For tripe prepared with a distinctly Spanish flair, check out Tanya’s fantastic Chica Andaluza blog.) Today’s recipe is pretty much the same as Nonna prepared, save 2 exceptions. The first, and easiest to explain, is that I use instant polenta and I don’t know if the product was even available when Nonna was fixing me a plate. I first brought instant polenta to Mom and Zia some 20 years ago and they never served me “regular” polenta again. In fact, during his last visit to Italy in the early ’60s, Grandpa brought back a copper “polenta pot.” Each time Nonna prepared my plate, she served me polenta that she had spent 45 minutes stirring in that very pot. With the arrival of instant polenta, there was no real need for it any longer and I was given the pot several years ago. And, as “payment,” when I return home for a visit, I always bring a container or 2 of instant polenta.

*     *     *

*     *     *

The second exception has to deal with a basic of Italian cooking. Most, if not all, of the Mediterranean countries begin many of their sauces, stews, and, well, just about anything, with a mixture of diced green pepper, celery, and onion. In Italy, this is called a soffrito and it is sautéed in olive oil at the very start of many dishes, just as is done in France (mirepoix) or in Spain, Latin America, and the Caribbean (sofrito) where the ingredients may vary a bit. Even New Orléans has its “holy trinity” of onion, carrot, and green bell pepper. My family often began dishes with a different kind of soffrito called “battuto.” To make a good “battut,” you need fine quality salt pork, onion, garlic, and parsley. Exact quantities are nearly impossible to gauge. This is something that must be learned by doing. I can say that the onion makes up the majority of a battuto and a small to medium size onion will do. You will, also, need 2 to 3 oz of salt pork sliced about 1/4 inch thick, 2 to 3 garlic cloves, and about 4 tbsp of fresh parsley. That should give you about 1 to 1 1/4 cups of battut, just perfect for today’s recipe. Begin by heating your knife’s blade over a stove’s burner. Once hot, use it to roughly chop the salt pork. Next, in no specific order, roughly chop the garlic, parsley, and onion. Combine the 3 ingredients on top of the salt pork and continue to chop them all. Do not create a paste but continue chopping until the ingredients are of uniform size and well-blended. Once chopped, sauté the battut in a sauce pan with olive oil over medium heat until it develops a little color. Do not rush it nor let it burn. Once done to your satisfaction, go ahead with your recipe. For today’s recipe, if you’d started with a battut, there would be no need for the pancetta, onion,  nor garlic, and the only parsley required would be added at the very end of cooking. You’ll be amazed at the flavor this simple mixture brings to a dish and your kitchen will be filled with an aroma that is just too good to be true.

My family used battuto as the base for sauces, braises, risotto, some soups, and even some vegetables. During the worst of the Great Depression, dinner often consisted of a large amount of polenta served on a large “polenta board” that had been placed in the middle of the dining table. At its very center, Grandma placed a little battuto and you had to eat your way through the polenta to get to it. Grandma, also, used battuto to dress pasta, her own version of aglio e olio. Mom and Zia stopped making battuto a number of years ago, about the time they stopped making sausage. They just couldn’t find good quality salt pork anymore. In its place, like in today’s recipe, they made a soffrito, of sorts. Not willing to give up, I keep searching for salt pork that will pass Zia’s inspection. To that end, I’ve recently learned of a Polish butcher on the West Side that reportedly has the best salt pork in town. We’ll see soon enough.

*     *     *

Trippa alla Stefanina Recipe 

Ingredients

  • 5 lbs honeycomb tripe
  • 3 tbsp extra virgin olive oil
  • 1/4 lb pancetta, chopped
  • 1 large onion, chopped
  • 4 tbsp fresh parsley, chopped, separated
  • 4 garlic cloves, diced
  • 1/2 cup dry white wine
  • 3 tbsp tomato paste
  • 1 large can (28 oz) crushed tomatoes
  • 1 large can (28 oz) diced tomatoes
  • 1 small onion, whole & studded with 5 – 6 whole cloves
  • 1 tbsp marjoram
  • salt & pepper, to taste
  • grated Pecorino Romano cheese for serving

*     *     *

*     *     *

Directions

  1. Rinse trippa under cold water and trim off unusable parts. Place in a large pot, cover with water, and bring to a boil. Reduce heat and simmer, uncovered, for 1 hour.
  2. Remove trippa from water and, when cool enough to handle, cut into strips 1 to 2 inches in length and 1/4 to 1/3 inch wide.
  3. While the trippa cools, heat olive oil in medium-sized sauce pan over med-high heat. Add pancetta and sauté until cooked but not crisp, about 8 minutes.
  4. Add the chopped onion, half of the parsley, and sauté until onion is translucent, about 5 minutes.  Season lightly with salt & pepper.
  5. Add garlic and sauté for another minute before adding the wine. Continue cooking until the wine is reduced and almost gone.
  6. Add the tomato paste and continue to sauté for 2 minutes before adding the tomatoes, marjoram, and trippa. Season with salt & pepper, stir well, and then add the clove-studded onion.
  7. Bring to a boil, reduce to a soft simmer, and continue cooking for at least 2 hours. Sauce should be dark and thick; the trippa should be quite tender.
  8. Remove studded onion and discard. Add most of the remaining parsley to the pot, taste to see if additional salt or pepper is needed, and stir well.
  9. Serve immediately, garnished with the remaining parsley and a sprinkling of cheese. Be sure to have grated cheese available at the table.

*     *     *

Serving Suggestions

Traditionally, trippa is served in deep soup bowls with a healthy chunk of crusty bread on the side. As mentioned above, our family usually served it atop polenta. Pasta fanatic that I am, I’ve even used it to dress pastas like farfalle or rotini.

Notes

Making instant polenta is quite an easy process. So much so that there’s little need to devote an entire post to it, especially since my family’s recipe is so simple. Following package directions (most require, per serving, 4 tbsp of polenta for each cup of water), bring the water to boil, add a pinch of salt, and pour the polenta into the water, whisking all the while until fully blended. Over a medium to med-low heat, stirring frequently, cook the polenta for 5 minutes. At the end, add a tablespoon of butter and grated cheese to taste. (The latter would depend upon the dish(es) that will accompany the polenta.) Mix well and serve. It couldn’t be more simple. Of course, if you want to serve polenta like Nonna, dabs of butter and all, then go for it. You won’t be disappointed.

*     *     *

About the Matter of Provenance

I’ve been asked, more than once, if these are really my family’s recipes. Certainly, not all of them are but, I can assure you, those that I say came from Mom, Zia, Nonna, etc., are, in fact, theirs. As further proof, below is an image of the Zia’s “polanta” recipe that can be found in the recipe book that she gave me.

*     *     *

*     *     *

Where’s Flat Ruthie Now?

Any guesses?  Stay tuned …

*     *     *

Lumache alla Bartolini

This is another within the series of posts which, quite frankly, is not for everyone, not even the intrepid tourist to the left. Truth be told, snails weren’t exactly popular among members of my generation at the old two-flat either. (If you wish to exit, you may do so HERE.) I am probably the only one to have eaten lumache back then and certainly am the only one willing to go back to that well again today. Still, if I’m going to record the family’s recipes for Posterity, I’m not about to start filtering them. Besides, the look on Zia’s face when I unveiled the lumache and announced my plans for dinner was priceless. This blog delights in ways I never dreamt possible!

As I recall, lumache, or babbaluci as they are known in Sicily, was not at all a common dish at our dinner table nor, for that matter, at Zia’s. I only remember them being served 2, maybe 3, times. That’s probably because of the amount of work involved in preparing them for the table. They had to be soaked to rouse them from dormancy, scrubbed, boiled, scrubbed again, and either removed from their shells or left intact for further cooking. As you can imagine, this was no 1 day job. Mom would put water, vinegar, and the dormant lumache into her largest pot; place a colander atop the pot, weighted with a heavy book or pan; and, set it aside to let the lumache come out of their shells. As they came to life, they would leave the water and head up into the colander — hence the reason for the weight. Unfortunately, that weight wasn’t heavy enough to prevent me from snatching a pet when I was about 6 years old. It was, however, too heavy for me to replace properly before I returned to bed, my new pet snail in a water glass at my bedside. Mom was just a tad upset when she woke me the next morning. Her kitchen cupboards and counters were covered with lumache on the lam. Even my pet (the little tattle-trail!) was well on its way to my bedroom’s ceiling by that time. Funny thing. I don’t recall ever having a pet snail after that.

*     *     *

*     *     *

I’ve chosen to share this recipe today because of Mario Batali. On a recent rebroadcast of Molto Mario, he mentioned that lumache was one of several dishes that the people of Le Marche (the Marchigiani) prepare on All Souls Day. Well, with the Bartolinis being Marchigiani and today being All Soul’s Day, what choice do I have? So, the recipe I’m going to share is the very recipe the Bartolini Girls cooked those many years ago — with 1 exception. There was no way on Earth that I was going to start with dormant lumache. With Max in the house, that is surely a disaster waiting to happen. I can just see him running around my home, trying to lure me into a game of keep-away with some unlucky snail in his mouth, while I’m on a ladder retrieving the rest off of my kitchen’s walls. No, no, no! So, I did a little googling — and it paid off. On Amazon (of course!), I found canned lumache that were cleaned, shelled, trimmed, and ready for stewing. What was once a multi-day, very messy affair suddenly became as easy as preparing a tomato sauce. I ordered them and, once delivered, I packed them up and brought them to Zia for one most memorable dinner.

*     *     *

Lumache alla Bartolini Recipe 

Ingredients

  • 1 can (15 oz, 48 count) very large size lumache
  • 2 tbsp extra virgin olive oil
  • 1 large onion, chopped
  • 3 garlic cloves, diced
  • 1 can (14 oz) crushed tomatoes
  • 1 can (14 oz) diced tomatoes
  • 4 oz dry white wine
  • 3 tbsp parsley
  • 1 tsp marjoram
  • salt & pepper, to taste
Directions

  1. Heat olive oil in medium-sized sauce pan over med-high heat. Add onions and sauté until translucent, about 5 minutes. Season lightly with salt & pepper.
  2. Add garlic and sauté for another minute before adding the tomatoes, wine, marjoram, and parsley.
  3. Bring to a boil, reduce to a simmer, and continue cooking for about 45 minutes or until the tomatoes are cooked and the sauce has darkened.
  4. Add the lumache with the canning liquid and continue to simmer for about 30 minutes more. The sauce should be dark and thick.
  5. Season with salt & pepper, to taste, and serve.

*     *     *

Serving Suggestions

                                  *                         When she cooked lumache in their shells, Mom served them in deep soup bowls with a chunk of crusty bread on the side. When removed from their shells, lumache may, also, be served as a dressing for pasta or atop polenta.

*     *     *

Notes

Back in the days preceding Vatican Council II, when eating meat was forbidden on Fridays and other “days of abstinence,” Catholics were allowed to eat lumache because they were considered seafood. Well, in classic Italian cuisine, cheese is very rarely used in a dish featuring seafood and if the Church labels something as seafood, who are we to argue? The use of cheese, therefore, in a dish with lumache is frowned upon. On the other hand, what you serve in your own home is your own business. (Was that thunder?)

*     *     *

Chicken gizzards? No way!

Admittedly, dishes featuring chicken gizzards are a hard sell and some of you will go no further than the picture above (Just click HERE, Cynthia.) and that’s fine.  Believe me, the majority of my family will be going with you. Since this blog was conceived as a means of recording and sharing my family’s recipes, however, I’d be remiss if I failed to mention these two. Who knows? Some future Bartolini Clan member may wish to know how to cook chicken gizzards and they won’t need to look any further than right here.

Mom and Zia were little girls when the Great Depression struck and our family, like so many others, was hit hard. By all accounts, these were lean times and our Grandparents struggled to put food on the table and keep a roof over their heads. Both Bartolini Girls marvel(ed) at how Grandma could make a single chicken last a full week, feeding a family of four in the process. Well, that’s when she could get a chicken. Both of today’s recipes come from that time. Mom often served us the first, a side dish of peas with gizzards, when I was growing up. No need to explain why it wasn’t an especially popular dish with my siblings. The second is a pasta dish that I “created” on my own. I remember telling Mom about it and, somewhat surprised, she recalled that Grandma used to make the same dish. Zia has mentioned that, as well. Since neither had ever mentioned or served me this pasta, I think it’s a sign that Grandma wants this dish prepared and, by sharing it here, I’m just doing my part to see that her wish is carried out.

I can’t speak of packaging during the Depression but, in today’s markets, one can usually find chicken gizzards and hearts sold together in 1 pound containers. Once cleaned and trimmed, I’ll divide them, with a quarter being reserved for the peas dish and the rest for pasta. One of the 2 portions will be set aside, even frozen, for later use. Cooking these meats can be a little tricky. To brown them like one would, say, beef chunks for stew, will render them nearly inedible. That shouldn’t be a problem if you follow the steps outlined in the recipes that follow.

*     *     *

Peas alla Nonna Recipe (aka Chicken Gizzards with Peas)

Ingredients

  • 5 or 6 oz chicken gizzards & hearts, cleaned and trimmed
  • 1/2 small onion, divided in halves
  • water
  • 1 tbsp olive oil
  • 2 tbsp butter
  • 1 plum tomato, chopped
  • 2 cups frozen or fresh peas
  • pinch of cloves
  • salt and pepper, to taste

Directions

  1. Place gizzards, half of the onion, and enough lightly salted water to cover into a medium saucepan, Cover, bring to a boil over med-high heat, and reduce to a soft simmer. Cook for 1 hour, checking periodically to ensure enough water remains. At the end of an hour, pour the pan’s contents through a strainer, discarding the onion and stewing liquid.
  2. Slice the remaining onion portion and roughly chop the stewed meat.
  3. In the same pan, heat oil and butter over medium high heat. Return gizzards to the pan, along with the sliced onion, and sauté until the onion is soft and translucent.
  4. Add tomato and sauté for a minute before adding peas, cloves, and a few tbsp of water to the pan. Season with salt and pepper, cover, and cook about 5 minutes or until peas are done to you liking.
  5. Serve immediately.

*     *     *

Pasta with Chicken Gizzards Recipe

Ingredients

  • 12 – 16 oz chicken gizzards & hearts, cleaned & trimmed
  • 2 tbsp extra virgin olive oil
  • 1/2 onion, chopped
  • 3 cloves garlic, minced
  • 1/2 cup dry white wine
  • 2 to 3 tbsp tomato paste
  • 1 large (28 oz) can tomatoes, whole or diced
  • 3 tbsp fresh parsley, chopped
  • 1 lb pasta, cooked to not quite al dente
  • grated parmesan cheese
  • salt and pepper, to taste

Directions

  1. Heat oil in a deep skillet over medium heat. Add gizzards and cook for 5 minutes. Do not allow to burn.
  2. Add onion, season with salt and pepper, and cook until translucent.
  3. Add garlic and sauté for 1 minute before adding the wine. Cook until almost all the wine has evaporated.
  4. Add the tomato paste and sauté for 1 to 2 minutes. Add parsley and tomatoes. If using whole tomatoes, tear them apart before adding to the pan. Season with salt and pepper.
  5. Bring to a boil, cover partially, and reduce to a soft simmer.
  6. The sauce should cook for 45 minutes. Check the pasta’s package directions and time its cooking so that the pasta is about 2 minutes shy of being al dente when the sauce is ready.
  7. Reserve some of the pasta water before adding the pasta to the frying pan. Mix well and continue cooking until the pasta is done to your liking. Add some of the reserved pasta water to the pan if the pasta becomes dry during this last step of the cooking process.
  8. Serve immediately, garnished with the grated parmesan cheese.

*     *     *

Notes

And so ends our treatment of chicken gizzards and hearts. Oh, don’t you worry. We’ll be coming back to these ingredients when the Bartolini Family Risotto recipe is shared. That won’t be for a while, however, so, all you chickens out there can rest easy. Your giblets are safe — for now.

*     *     *