Grilled Octopus Salad

Buon Natale a Tutti!

No matter what you may do during the holidays, if you don’t embarrass the little ones, you ain’t doing it right!

*     *     *

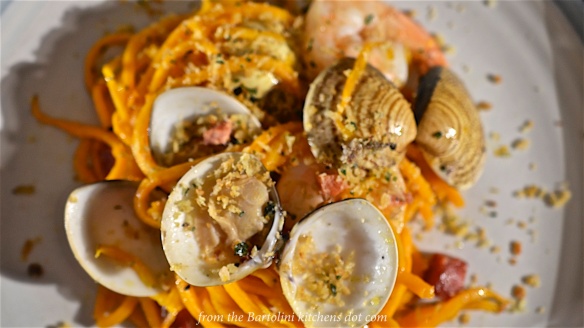
Well, it’s that time again. Time for the Feast of the 7 Fishes. Yes, I know I’ve been away for a while but I couldn’t let Christmas Eve pass without offering at least one suggestion for your Feast of the 7 Fishes.  Can  your guess what it is?

*     *     *

*     *     *

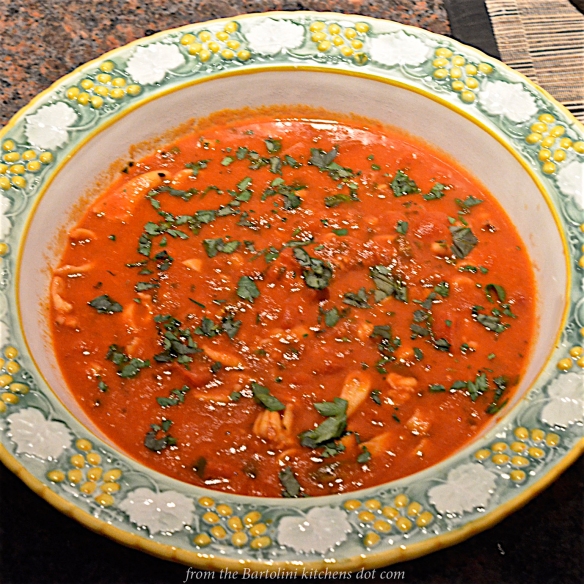
That’s right, we’re grilling octopus. Now, there’s nothing particularly special about this dish. Once grilled, I prepared it in a salad much like Mom’s Calamari Salad. The reason for posting the recipe has little to do with the salad but everything to do with the preparation of the octopus.

To start, put away the copper pot; no need to boil water for dipping; find another use for those wine corks; bash something else against that rock in the garden; keep your cephalopod out of the freezer; and, save the salt rub for something with fewer legs. Instead, grab a pressure cooker and kiss those rubbery octopi good-bye.

In the past, I had my feet firmly planted in the “Cook ’em slow, cook ’em long” camp. Even then I was never sure if my octopus was going to be tender or chewing gum. And grilling? I gave up on that idea years ago. Well, not anymore! Cooking octopus now takes minutes, not hours, and the result is as close to perfection as I dared hope. Give it a try. You will not be disappointed.

*     *     *

Grilled Octopus Salad Recipe

Ingredients

  • 2 lb (900 g) octopus, rinsed and cleaned (See Notes)
  • 1 lemon, divided
  • red bell pepper, diced
  • jalapeño pepper, diced
  • red onion, diced
  • extra virgin olive oil
  • lemon juice
  • fresh parsley, chopped
  • salt & pepper, to taste
  • Belgian endive (optional)

Directions

  1. Place the cleaned octopus and half the lemon into the pressure cooker and cover with water. Do not exceed the pot’s maximum content limit. Secure lid and heat over a med-high flame.
  2. Follow the manufacturer’s directions for use, maintaining high pressure for 15 minutes. (See Notes)
  3. Release the pot’s pressure completely, remove the lid, and allow the octopus to cool in the liquid. (See Notes)
  4. Meanwhile, gather the remaining ingredients and prepare.
  5. Once cooled, remove the octopus, drain, pat dry, and sever each tentacle at its base.
  6. If using the head, remove both eyes before chopping.
  7. If using the body, remove and discard the beak located at the very center where the 8 tentacles join before chopping the remainder.
  8. Lightly coat the pieces with olive oil.
  9. Heat the grill (pan) over high heat.
  10. Once hot, clean the grill grates before using an oil-soaked cloth to coat them.
  11. Place the octopus on to the grill (pan) and cook until the pieces begin to lightly char. Turn the pieces and continue cooking until evenly colored, Depending upon the grill’s heat and size of the octopus, this could take as few as 5 minutes total.
  12. Allow to cool before chopping into bite-sized pieces.
  13. Add all the ingredients into a bowl and gently toss.
  14. Either serve as-is or cover and refrigerate until dinnertime. Slice remaining half-lemon for garnish.

*     *     *

*     *     *

Serving Suggestion

Although this can easily be served as one would any salad, serving it atop individual leaves of Belgian endive adds a bit of flair to the dish, perfect for the Feast.

*     *     *

Notes

Safety features should prevent its opening but do not attempt to remove the lid of a pressure cooker until the pressure has been released fully.

Ask your fishmonger to clean the octopus. If you’re willing to tackle the job yourself, carefully remove the contents within the head. You can remove the beak now, or later as indicated in the recipe. Give it a good rinse and you’re set to go.

Cooking times may vary depending upon the size of the octopus. For example, I cook a 1 lb. octopus on high for 10 minutes, not 15 as indicated in the recipe.

Use as much or as little of the salad ingredients listed above according to your preferences.

*     *     *

It’s déjà vu all over again …

If you’re planning to serve the Feast of Seven Fishes, you may be looking for suggestions to complete your menu. Click HERE to see earlier seafood posts that I’ve shared.

*     *     *

Coming soon to a monitor near you …

Harissa-Braised Goat with Borlotti Beans

*     *     *

One more thing …

Yes, I’m back. See you in the New Year!!!!!

*     *     *

Advertisement

Dad’s Grilled Red Snapper

red-snapper-5

Those of you who follow me on Instagram know that I’ve been recently waylaid by a rather unfortunate run-in with a bit of black walnut-shell. In perhaps the most unkindest cut of all, the blow was delivered by one of my beloved post-Thanksgiving turkey sammiches. (I knew The Fates could be cruel but who knew they had a taste for irony, as well?) The resultant series of appointments meant that I’ve not been around WordPress very much of late. Although there’s more work to be done, I’m happy to say that the worst of the ordeal is now behind me. I’ll be back at 100% before you know it but, please, I’m begging you, no more jokes about whistling merry Christmas.

Neither of today’s dishes — I wouldn’t really call them recipes — are in any way complicated or difficult to prepare. Given my current situation, they are just what the dentists ordered. In my mind, however, both are closely tied to the upcoming holidays. The first, red snapper, was a favorite of my Dad. It’s also my last post before Christmas Eve and I’ve a tradition of offering a seafood dish for those preparing a Feast of the Seven Fishes.  The second dish shared today, roasted chestnuts, was the very last Mom served on the holidays.

I’ve wanted to post a red snapper recipe for some time but it’s a little complicated. You see, snapper is endangered depending upon where and how it’s harvested. If caught by hook and line in the Gulf of Mexico, it’s OK to purchase. Red snapper caught in the South Atlantic, however, should be avoided. Ruby snapper — its Hawaiian cousin — is OK to purchase. (Source: Monterey Bay Aquarium Seafood Watch). I’ve often seen red snapper for sale but, as a rule of thumb, if the monger cannot tell me where or how a fish is caught, I choose another fish or, in some cases, another monger. Over the years, I’ve passed up a lot of red snapper. That’s not so complicated. Well, stay with me.

*     *     *

red-snapper-2

*     *     *

Recently, my fish monger had fresh red snapper and I eagerly bought 2 fillets, one to be grilled that night and the second to be prepared the following night. See the opening photo? That’s  proof that I actually grilled red snapper. Unfortunately, it’s the only photo that I have because moments later my grill ran out of propane. I finished cooking the fillet on a grill pan.

That was a Friday 2 weeks ago. The following day, Saturday, we were hit with a snowstorm.(We’ve had snow on each of the past 3 weekends with more expected tomorrow.) I spent my day pushing the snow off of the walkways. For some reason, replacing my grill’s propane tank never crossed my mind — until dinner time. That’s when I made an executive decision. I wasn’t going anywhere and fired up the grill pan, instead.

Complications aside, this is about the easiest preparation for a dish that  I’ve ever posted. It’s not so much the fish but the memories that go along with it. Yes, it was  Dad’s favorite fish but he wanted it grilled. No matter the season, no matter the weather, if red snapper fillets were on the menu that night, Dad was at the barbecue getting the grill ready.

grandpas-barbecueAs I’ve mentioned in other posts, our barbecue was made of brick and built by Grandpa in the late1950s. Mention that barbecue and In my mind’s eye, I see Dad standing before it, preparing our main course.  Once, during a summer storm, Dad was wearing a trench coat over a pair of shorts, his bare legs extending beyond the coat’s hem. His right hand was tending our meal while his left hand struggled to maintain control of the wind-whipped umbrella. Now that’s dedication.

red-snapper-1Although I can’t say for certain what he was grilling on that foul weather day, it would be a pretty good bet to say that it was red snapper. That’s how much he enjoyed grilled red snapper fillets! I do, too, maybe not to that extent but I do enjoy red snapper when grilled.

The fish is easy enough to prepare. Season both sides of the fillet with salt & pepper before drizzling with olive oil. Light the grill and while it heats, place equal amounts of butter and lemon juice in a small sauce pan over low heat. Softly simmer the two while the fish cooks. Red snapper fillets flake easily so we, Dad and I, use(d) a fish basket to hold them in place on the grill. There’s nothing worse than watching part of your dinner fall between the spaces in your grill plates. Depending upon how hot your grill is, the fillets should cook in about  3 to 4 minutes for the first side and about 2 minutes for the other. Place the fish skin-side down to start. (See NOTES) Once finished, remove the fillets to a serving platter and drizzle with lemon butter sauce. Serve immediately with lemon wedges. See? Couldn’t be easier but oh, so very good!

*     *     *

Since the red snapper dish was so simple to prepare, I thought I’d make this post a two-fer. Recently my Brother asked where my post for roasted chestnuts was located. Um … it wasn’t. I’d forgotten all about them. So, here’s another easy recipe that also means holiday to me.

On Thanksgiving, Christmas, and New Years Day, once the deserts had been served and the table cleared, while the adults dipped anise-flavored biscotti into their caffè and chatted, Mom would bring freshly roasted chestnuts, castagne, to the table. No matter how sated, everyone at that table managed to eat a few chestnuts, You see, much like the old Jell-O advert, there’s aways room for castagne.roasted-chestnuts-2016

Sometime that afternoon or early evening, Dad would use his penknife to slice an “X” in the rounded side of each chestnut. Later, they would be placed on a baking sheet which was then put into a 425˚ F pre-heated oven. After about 20 to 25 minutes, the chestnuts were removed and allowed to cool slightly before being served.

I wish I could be more precise but much depends upon how fresh the nuts are and whether all have been properly roasted. You see, a chestnut has a shell within a shell. We’re all familiar with the brown outer shell but the one on the inside will give you fits. It’s inedible, paper-thin, fuzzy, and can stick to the chestnut like glue. If your chestnut is roasted for tool long or too short, you can expect problems with that inner shell. Oh! There’s an added bonus to roasting them for too long: the chestnuts become rock-hard.

Now, there are those who par-boil their nuts before roasting but I’ve never tried that. Mom boiled a few and, once chopped, included them in her turkey stuffing. If I remember correctly, she didn’t fare any better with the boiled chestnuts than we did later that evening with them roasted. Problems aside, a few roasted chestnuts to end the meal are as much a part of my holiday feast memories as are those of the much-beloved platters of ravioli that began them.

Speaking of the holidays, we at the Bartolini kitchens wish you all a holiday season most memorable, with a new year filled with wonder and joy.

*     *     *

Notes

The red snapper fillets can easily be prepared on a grill pan or under the broiler. In the first case, heat the grill pan as you would a barbecue. Cook the fish as if it were on a grill, skin-side down, for a few minutes before turning it over for about another 2 minutes. If you broil the fillets, place them skin-side down on an unheated broiler pan/tray about 4 inches under the heating element, They should be ready in about 4 minutes but keep a close eye on them. If you’ve used a broiler with seafood, you know exactly what I mean.

*     *     *

It’s déjà vu all over again …

braised-eel

Tomorrow is Christmas Eve so why not take a look back at a dish traditionally served on that night? I’m talking about eels and though I only remember it being served once when I was very young, peering into a sink full of eels definitely left an impression. You can see how they’re prepared by clicking HERE.

*     *     *

Coming soon to a monitor near you …

panettone-bread-pudding-1

Panettone: A Bread with Promise

*     *     *

Fish Tacos with Roasted Tomatillo Salsa

Yes, you read the post’s title correctly. Today I’m sharing a recipe for fish tacos. As I’ve said on several of your blogs, I rarely make tacos. I don’t think it worth the effort just to make 2 or 3 tacos for my dinner. I still feel that way but at the time this post was written, my chile plants were producing at a rate that rivaled my eggplant crop.. If only my tomato plants had been so competitive.

*     *     *

Fried Fish Tacos - 1

This Fish is Fried

*     *     *

Well, it was far too humid to try to dry the peppers and without a dehydrator, I was loath to turn on the oven, no matter how low the temperature would be set.. So, I cooked some, pickled others, and added a few to the cherry bomb peppers that I was preserving. But the chiles kept coming and Lucy can only eat so many. Thanks to a couple blogging friends, I decided to make tomatillo salsa. (That recipe follows this one.)

Well, the salsa did make a dent — albeit a small one — in the chile inventory but what to do with it? I was stumbling around the grocery, trying to figure out what to prepare when I saw that there was a sale on pollock. That’s all I needed to make up my mind. Fish tacos would be on the night’s menu.

Since my tomatillo salsa was rather smooth, I felt that the taco needed something more crispy than shredded lettuce. That’s why the shredded cabbage was included but you should use whichever you prefer. The same is true for the tortillas. As much as I like corn tortillas, I bought flour because I felt that corn tortillas would just about disintegrate by the time I was done snapping photos. Oh, to be a better — read faster — photographer. And, by the way, hats off to those who would make their own tortillas for a dinner for one.

To prepare the fish for breading, the fillets were cut into strips about 3 inches (8 cm) long. Seasoned corn starch was used to coat the strips, just as was done when soft shell crabs were prepared several weeks ago. Once coated, the strips were dipped in a mixture of eggs, milk, and Sriracha. From there, they were coated in Panko bread crumbs and reserved. Easy peasy.

A note about the ingredients. Few amounts are listed because they will depend upon the number of tacos to be prepared and your own taste preferences. More cornstarch and breadcrumbs will be needed if you’re feeding 4, for example, than if you are preparing tacos for 1.

Lastly, for those avoiding fried foods, I’ve included instructions for baking the fish, as well as for frying.

*     *     *

Fish Tacos - Baked 1

Tacos with Baked Fish

*     *     *

Fish Taco Recipe

Ingredients

  • Fish fillets cut into strips (see Notes)
  • corn starch seasoned with paprika, ground chipotle, cumin, salt, and pepper, to taste
  • 2 eggs, beaten
  • 2 tbsp milk
  • 2 tbsp Sriracha sauce, more or less to taste
  • Panko bread crumbs
  • tortillas
  • roasted tomatillo salsa – recipe follows
  • shredded cabbage
  • diced tomato (optional)
  • sour cream (optional)
  • diced red onion (optional)
  • limes, quartered

Directions

  1. Set up a breading station:
    • In the first dish, place corn starch seasoned with paprika, ground chipotle, cumin, salt & pepper to taste.
    • In the second, combine and beat the eggs, milk, and Sriracha.
    • In the 3rd dish, add enough Panko breadcrumbs to coat the pieces of fish.
  2. To fry:
    • Add enough oil to the pan for a depth of 1/2 inch (1.5 cm).
    • Heat over med-high heat to 360˚ (180˚C).
    • Place breaded strips into the hot oil and fry until golden brown, about 2 minutes per side.
    • Remove from oil, place on paper towels, season with salt immediately.
  3. To bake:
    • Pre-heat oven to 400˚ F (200˚ C)
    • Place breaded strips on to a rack placed atop a baking sheet.
    • Bake until golden brown, about 10 to 12 minutes, turning them over midway through the bake.
    • Remove to a platter and season with salt.
  4. To assemble the tacos:
    • Over med-high heat, warm the tortillas on a grill pan, cast iron fry pan, skillet, or barbecue grill until heated through.
    • Create a taco using a tortilla, pieces of fish, a couple tbsp of salsa, some shredded cabbage, and a squeeze of lime.
      • Sour cream, onions, and tomatoes may be added, according to personal tastes.
  5. Garnish with lime quarters and serve.

*     *     *

Fried Fish Tacos - 2

More Fried Fish Tacos

*     *     *

Notes

Although I used pollock here, feel free to use any white fish. Cod, hake, or tilapia come to mind, although mahi mahi, halibut, or even tuna would be very good, too. You may want to adjust the seasoning depending upon the fish you’ve selected.

Roast Chicken Tacos 2Fish not your thing? Tacos are a great way to re-purpose leftover roast chicken. Use a fork to pull apart the chicken meat and warm it quickly in a frypan with a little butter. Once heated, use it to build your taco with a bit of tomatillo salsa and whatever other fixins you like: shredded cabbage/lettuce, sour cream, diced onion, diced tomato, fresh cilantro, and/or a bit of shredded cheese would work just fine.

Roast Chicken with Tomatillo SalsaDid I say roast chicken leftovers? Well, first you have to roast that bird. Do it however you wish. Mine was spatchcocked and seasoned with plenty of herbs, lemon juice, and olive oil before roasting. Be sure to have the salsa nearby so that you can generously spoon some atop the chicken once served.

*     *     *

Roasted Tomatillo Salsa Recipe

I have 2 blogging buddies to thank for this post, Kathryn of Another Foodie Blogger and MJ of MJ’s Kitchen. Had it not been for Kathryn, I never would have bought tomatillos, and MJ is the Queen of Chiles. Now, this salsa and serving suggestions may not be exact duplicates of their recipes — shower them with all the praise and I’ll shoulder any blame — but I was certainly inspired by them. If you’re looking for some inspiration, by all means check out these 2 wonderful blogs.

Ingredients

  • 6 tomatillos, husked and washed (see Notes)
  • 4 cayenne chilies, tops trimmed (see Notes)
  • 1 chile de agua, top trimmed
  • 2 to 3 cloves garlic
  • small sweet onion or half of a large, cut in half
  • olive oil
  • cilantro, to taste
  • lime juice, to taste
  • salt & pepper, to taste

Directions

  1. Pre-heat oven to 400˚F (205˚C).
  2. Place tomatillos, all the chilies, garlic, and onion into a large bowl, drizzle with olive oil, and spread on a baking sheet in an even layer. Roast for 30 minutes.
  3. Once cooled, place all the roasted ingredients into a food processor, along with cilantro and the juice of 1 lime.
  4. Pulse the ingredients several times until the salsa is the consistency you prefer. Midway through, taste and season with salt and pepper. Add more cilantro or lime juice, if needed.
  5. Refrigerate until needed.

*     *     *

fried-fish-tacos-3

One More Fried

*     *     *

Notes

After removing their paper coverings, be sure to rinse the tomatillos very well to remove their somewhat sticky coating.

Until this point, I hadn’t tasted any of my home-grown chiles, all having been pickled and preserved. Now that I’ve tasted this salsa, I will only add 2 cayenne peppers in the future. For my tastes,  4 of these cayenne are a bit much. (Please pass the milk.)

*     *     *

It’s déjà vu all over again …

Crostini Look Back

With the holidays fast approaching, it’s never too early to start working on the menu for the holiday feast(s). It wouldn’t be much of a celebratory meal if there aren’t any appetizers, and crostini/bruschette are tasty ones to whip up. You can see a couple of suggestions by clicking HERE.

*     *     *

Coming soon to a monitor near you …

Sweet Potatoes au Gratin Preview

Sweet Potatoes au Gratin

*     *     *

The Spiralizer Chronicles, Chapter 2: Butternut Squash “Noodles” with Pancetta, Clams and Shrimp

Squash with Seafood 1

Although I may not be posting many recipes that rely upon my new love, the spiralizer, I continue to us it frequently. In fact — hold on to your hats — I use it more often than I do my pasta machine. I know! I never would have thought such a thing possible. Yet, here I am with about 3/4 lb of homemade pasta in my pasta basket, where’s its been for just about 3 weeks now. 3 weeks!!! This would have been unthinkable just last summer and I have butternut squash to credit — or is it blame?

As much as I enjoy zucchini noodles, “zoodles”, their texture often leaves much to be desired, They can go from al dente to unappealingly soft in the blink of an eye. To avoid this, I often serve them raw, making more of a pasta salad than a dish of freshly cooked pasta. Not so with butternut squash. Roasting doesn’t affect these noodles’ “bite” but it does add flavor to the final dish. Best of all, these noodles can be served hot, making a number of dishes possible. Today’s recipe is one such dish.

As is the case with most seafood pasta dishes, this one is easy to prepare and you’ll find that roasted butternut squash compliments seafood quite well. Truth be told, I’ve a squash just waiting for me to return home from the fishmonger with more seafood. It won’t be long now.

*     *     *

Squash with Seafood 2

*     *     *

Butternut Squash Noodles with Seafood Recipe

Ingredients

  • 1 small butternut squash
  • 2 tbsp olive oil, divided
  • 2 oz (56 g) pancetta, chopped
  • about 12 small clams — manila, littleneck, or cockles will do (See Notes)
  • 1 clove garlic, minced or grated
  • about 12 shrimp — no smaller than 41 to 50 ct/lb
  • 2 tbsp breadcrumbs – omit if GF (See Notes)
  • 2 tsp parsley per serving, chopped
  • olive oil
  • salt and pepper to taste

Directions

  1. Preheat oven to 400˚ F (195˚ C).
  2. Separate neck of squash from the bulb end that contains the seeds. Reserve the bulb for another use.
  3. Peel the squash before using a spiralizer to create spaghetti-like noodles.
  4. Place noodles on a baking sheet, season with salt and pepper, and sprinkle with 1 tablespoon olive oil. Place in oven and roast for 15 minutes.
  5. Combine breadcrumbs, parsley, and a bit of olive oil. Mix thoroughly. Place mixture in a small fry pan over medium heat. Cook until mixture is golden brown. Set aside.
  6. Begin heating remaining olive oil in a large frypan with a lid. Add the pancetta and begin to render its fat. Do not allow the pancetta to burn. It should be fully rendered about the time that the noodles have 5 minutes to go.
  7. Place the garlic and clams in the pan with the pancetta and cover. Sauté for 5 minutes before adding the shrimp to the pan. Cover the pan.
  8. After a minute or so, stir the frying pan’s contents and cover.
  9. Remove noodles from the oven and dump them into the pan with the seafood and pancetta. Stir to evenly coat everything with the pan juices.
  10. Continue to sauté until the clams and shrimp are fully cooked — no more than 2 minutes more.
  11. DISCARD ANY CLAMS THAT REMAIN UNOPENED.
  12. Remove to a serving platter and garnish with the toasted breadcrumbs created in Step 5.
  13. Serve immediately.

*     *     *

Squash with Seafood 3

*     *     *

Notes

Use a brush reserved for food-prep to scrub all clams before cooking. Any that remain open after a thorough scrubbing should be discarded. Opinions vary as to whether to soak fresh clams in salt or fresh water to cause the clams to expel grit. Some feel that commercially harvested and shipped clams do not need such purging. If, however, your clams are bought directly from the fishermen or harvested yourself, they must be soaked for at least 30 minutes before scrubbing, changing the water midway through.

In Italian cooking, it is definitely not recommended to use grated Parmigiano or Pecorino cheese on a dish with most varieties of seafood. Very often, toasted breadcrumbs are substituted, just as I did above. Do you remember the stuffed calamari recipe I shared back in March? At the time, I suggested freezing the extra cooked breading mixture. They would make the perfect garnish for this dish, as well as a number of other pasta with seafood dishes. Being roasted already, all you need do is to warm them in a small frying pan. Use them as you would grated cheese, as a garnish just before serving.

I’ve seen recipes where squash noodles are boiled first, much like pasta, rather than roasted. I’ve yet to prepare them that way. If it ain’t broke …

My spiralizer is an attachment for a stand mixer. As such, it makes quick work of the “neck” of a butternut squash. Some may find this squash is too firm for their hand-cranked spiralizer. I’ve no experience with any of them and look forward to hearing from you in the Comments.

Of course, for a gluten-free version do not include the toasted breadcrumbs unless they’re GF. Garnish with chopped parsley instead.

*     *     *

It’s déjà vu all over again …

Tart Cherry Frozen Yogurt with Chocolate Sauce

With September almost here, there’s no time like the present for frozen treats. If you’re like me and took advantage of the sour cherry season, stashing some of the red beauties in your freezer, well, now’s the time to set some of them free! Follow this LINK to learn how to use them to prepare frozen yogurt, as well as a tasty chocolate sauce to smother it. All that’s missing is the cherry on top!

*     *     *

Coming soon to a monitor near you …

General Tso's - Preview

General Tso’s Chicken

*     *     *

Soft Shell Crab Po’ Boys with Sriracha Aioli

Soft Shell Crab Po' 6oy 1

This is another of the recipes that I had scheduled before leaving for Italy last April. Most will be held until next year when they better match the season. Because soft shell crabs are still available, even if frozen, I decided to go ahead and publish this recipe. 

*     *     *

In the first soft shell crab recipe I shared, it was mentioned that I was introduced to them at a restaurant in The Loop. For lunch that day, the crabs were served open-faced on a baguette. Since then, although I’ve enjoyed them several ways, that first meal has always been on my mind. I’ve since replicated the dish but, rather than open-faced, I prefer to serve them in the style of a po’ boy sandwich.

Like beignets at the Cafe du Monde, po’ boy sandwiches are a signature dish of New Orleans. Whether the protein used is meat or seafood, all are served on a relatively thinly crusted French roll with lettuce, very often sliced tomato, and a sauce. That sauce could be an aioli, rémoulade, tartar sauce, or even just plain mayo. For me, a well-made po’ boy is about as good a sandwich that there is.

When I first tried to make a soft shell crab po’ boy, I experimented with batters to coat the crabs. Although each attempt was tasty, the crab wasn’t as crispy as I wanted. I then switched over to using Panko bread crumbs but first I coated the crabs in corn starch before dipping them in the egg and dredging them in the bread crumbs. Once fried, I used them in a sandwich made with freshly baked rolls, a spicy garlic aioli, and with tomatoes out of season, I added a bit of pickle on top. The result? Well, I swore that I heard singing as I took that first bite. OK, maybe that was just me but it sure was a tasty sandwich!

The recipe itself is very easy to follow. I’ve included links and recipes should you wish to duplicate the sandwich exactly.

*     *     *

Soft Shell Crab Po' Boy 2

*     *     *

Soft Shell Crab Po’ Boy Sandwich Recipe

Ingredients

  • Soft shell crabs, cleaned
  • enough corn starch to cover each crab
  • salt, pepper, sweet paprika, to taste (See Notes)
  • 1 large egg, slightly beaten
  • about 2 tbsp milk
  • Panko breadcrumbs to coat each crab
  • oil for frying (I used grape seed oil)

for the aioli

  • 1 large egg yolk
  • 1 tsp lemon juice
  • 3 roasted garlic cloves, smashed (see Notes for recipe)
  • 1 tsp Dijon mustard
  • 2 to 3 tbsp Sriracha sauce, more/less to taste
  • 6 to 8 oz (177 ml to 237 ml) olive oil (see Notes)
  • salt and pepper, to taste

*     *     *

Soft Shell Crab Po' Boy 3

*     *     *

Directions

  1. Make the aioli:
    • Place the egg yolk, lemon juice, garlic, Dijon mustard, and Sriracha sauce into the bowl of a food processor.
    • Season lightly with salt and pepper and process.
    • Once fully combined and while the processor continues to run, slowly add the olive oil in a steady stream until the aioli reaches the consistency you prefer.
    • Cover and refrigerate for at least 1 hour before using.
  2. Set up a breading station:
    • In a not-too-shallow dish, combine the corn starch, salt, pepper, and paprika. Use a whisk to mix thoroughly.
    • In another equally shallow dish, add the egg & milk and stir to combine .
    • In a 3rd dish, create an even layer of Panko breadcrumbs.
  3. Meanwhile, begin heating the oil in a frying pan over medium heat. You want the oil to be a depth of about an inch and to reach a temperature of about 165˚ F.
  4. When the oil nears the correct temperature, dredge the crabs in the dry flour mixture. before giving them a bath in the egg mixture.
  5. Remove the crabs and allow the excess egg mixture to drain a bit before placing each in the Panko breadcrumbs. Be sure each crab is evenly coated with breadcrumbs before placing in the hot oil. The crabs will spatter when they hit the oil, so, be very careful not to burn your hands/fingers.
  6. The crabs will reach golden brown in about 2 minutes. Carefully flip each one and continue frying an additional 2 minutes or until the crabs are evenly colored. Frying times may vary depending upon the pan size, heat/flame setting, and number of crabs being fried simultaneously. Keep an eye on them.
  7. Remove crabs to drain on paper towels and season with salt before placing on a serving platter.
  8. Bring to the table with sliced rolls, lettuce, the aioli, pickles, tomato slices, lemon wedges, and/or whatever condiments you prefer.

*     *     *

Soft Shell Crab Po' Boy 5

*     *     *

Notes

Knowing that the aioli was flavorful as well as spicy, I used a light hand when seasoning the components of the dish. Of course, you’re free to season the dish as much, or as little, as you like.

One of the key points of a true Po’ Boy sandwich is the bread. A form of French bread, the rolls have an even crumb and relatively soft crust. The crunch in this sandwich is on the inside. (Pssst. It’s the crabs.) I found a recipe for New Orleans French bread on the Saveur website and enjoyed it very much. I did halve the recipe, however, since I didn’t wish to watch bread go stale on my counter top.

Although I used olive oil to make my aioli, you may prefer to use a lighter oil instead.

To roast garlic:

  • Pre-heat oven to 400˚ F (200˚ C)
  • Use a sharp knife to cut off the top of a whole garlic bulb.
  • Place the bottom section, cut-side up, in a piece of aluminum foil.
  • Drizzle the bulb with olive oil before sealing the foil around the bulb.
  • Bake in the oven for 45 to 60 minutes.
  • Cool before using.

*     *     *

It’s déjà vu all over again …

Zucchini Blossom Look Back

Have too large a harvest of zucchini come August? Well, why not stuff a few blossoms now and get ahead of the problem? Today’s look back will show you how it’s done. All you need do now is to click HERE.

*     *     *

Coming soon to a monitor near you …

Bone Marrow Risotto - Preview

Beef Bone Marrow Risotto with Porcini and Morel Mushrooms

*     *     *

Trenette with Soft Shell Crabs and Morel Mushrooms

Present conditions notwithstanding, spring’s arrival is certainly welcomed in these parts, for it means the return of flowers and green to our drab landscape. It also means that fresh produce and vegetables begin to make their return to our markets, starting with asparagus and a variety of mushrooms. One yearly event that may escape your notice is the arrival of soft shell crabs. A crab’s shell does not grow, so, every year the crabs shed their old shells in favor of this year’s newer, more spacious models. The new shell is relatively soft for a few weeks, setting off a rush to harvest as many crabs as possible before they toughen up for another 11 months.

Lucky for me, I’ve a great fishmonger that provides many of the fruits of spring. Located not far from my home in Chicago, The Fishguy Market & Wellfleet is my go-to place for seafood and, in the spring, for items like morel mushrooms, asparagus, and ramps. Today’s post may have been written last spring and held until now but its morels and soft shell crabs, as well as the duck eggs used to make the trenette pasta, all came from the Fishguy. They offer much more than I could possibly mention here and my advice for those living in Chicagoland would be to join the mailing list. You may find it worth your while to stop there some day but be forewarned. If you’re going for a sale on clams or soft shell crabs, get there early. They are the favorites of some selfish blogger who, by his own admission, cannot resist buying them.

*     *     *

Linguine with Soft Shell Crabs and Morels 1

*     *     *

I first enjoyed soft shell crabs some 20+ years ago while working in The Loop. A few of us went to lunch at a nearby hotel and soft shell crabs were on the menu. I decided to give them a try and it was love at first bite. Lightly floured and deep-fried, the crabs were served open-face on a long roll reminiscent of New Orleans’ oyster poor boy sandwiches.  Since that fateful day, I order or prepare them whenever I see them. (By the way, a recipe for soft shell crab po’ boys is in the works, as well as a yellow curry.)

It is best to purchase the crabs at their peak of freshness, meaning they should be alive if possible. It also means that you’ll have to kill and clean them before using them in your dish. Well, I love the crabs but let my fishmonger handle the dirty work. As for the morels, a simple brushing should remove any dirt. If need be, you can give them a quick rinse — do not soak — but be sure to pat them dry before using. (See Notes.)

Last week, a number of you inquired about the trenette used in these recipes. Cut a little thinner than linguine, trenette most closely resembles that which Mom cut by hand when I was a boy. Luckily, I found an attachment for my pasta machine that recreates this nostalgia-packed pasta. If you go looking for the pasta, be sure to buy “TRENETTE” and not “TRENNETTE“.  The first is Mom’s pasta. The latter is another pasta that is much like penne, though a little more narrow.  Regardless, don’t be alarmed if you cannot find trenette. Look for a dried pasta called linguine fini. It will make a fine substitute.

*     *     *

Scheduling Note 

This is it, my last post for the next few weeks. My nephew and I will be traveling to Italy to visit Dad’s family in The Republic of San Marino and then it’s off to see Rome. Later, while he boards a plane to return home, I’ll board a train to Corinaldo, the wellspring of the Bartolini Clan. See you on the other side.

*     *     *

Trenette with Soft Shell Crabs and Morels 4

*     *     *

Trenette with Soft Shell Crabs and Morel Mushrooms Recipe

Ingredients

  • 1 lb (450 g) trenette – linguine may be substituted
  • 3 or 4 soft shell crabs, cleaned
  • 2 tbsp buter
  • 2 tbs olive oil
  • 3 cloves garlic, smashed
  • red pepper flakes, to taste
  • 2 to 4 oz (56 to 112 g) morel mushrooms (see Notes)
  • salt and pepper to taste
  • reserved pasta water
  • fresh parsley, for garnish

Directions

  1. Heat oil and butter in a large frypan with a lid over medium heat. Add the garlic and sauté until browned but not burnt. Remove and discard the garlic, leaving the now-flavored oil in the pan.
  2. Add the red pepper flakes and crabs to the pan, lower the heat to med-low, and cover the pan.
  3. Continue to gently sauté the crabs for about 15 minutes, turning them over mid-way through. The crabs will turn crimson when cooked.
  4. Meanwhile, bring to the boil a large pot of salted water. Add the trenette and cook until it is about 2 minutes shy of being al dente. (If using packaged pasta, refer to the package instructions.) Time the components so that the crabs and pasta are ready at the same time. Now is the time to reserve a cup of the pasta water.
  5. Turn the heat to med-high before placing the morels into the pan with the crabs.
  6. Drain the trenette and dump the pasta into the pan. Stir/toss to combine. If too dry, add some of the reserved pasta water.
  7. Continue to sauté until the pasta is cooked to your satisfaction.
  8. Remove to a serving platter and garnish with freshly chopped parsley before bringing to the table.

*     *     *

Linguine with Soft Shell Crabs and Morels 2

*     *     *

Notes

As this blog’s good friend (and honorary Bartolini) Stefan proved, mushrooms do not absorb enough water to affect taste when cleaned by rinsing with water. Morels have a pitted surface to which water may cling. If you do rinse them, take extra time to dry them as much as possible. Failure to do so may result in the morels being steamed in the frypan instead of being sautéed.

Timing is important with this dish but not as critical as it was in last week’s mollusks dish. Still, you don’t want the pasta or crabs to sit waiting for the other component to complete. Fresh pasta will cook in about 3 minutes, so, drain and add it to the pan after it has cooked for about 2 minutes. Follow the package instructions for dried pasta, draining it about 2 minutes before the stated time for al dente.

Whenever you’re cooking pasta, always reserve some of the pasta water, removing it just before you drain the pasta. Should the finished dish be too dry, a little of this water will work wonders. Not only will it moisten the dish but its starch content will help to thicken whatever sauce is being used to dress the pasta.

If you cannot source fresh morels, dried may be substituted. Soak them in hot, NOT boiling, water for at least 30 minutes or overnight. Once hydrated, strain the mushrooms and use in today’s recipe but reserve the soaking liquid. Filter the liquid to remove any grit and freeze, to be used to flavor your next mushroom risotto.

*     *     *

My comments regarding the Fishguy Market were my own. I requested and was granted permission to mention the market with no compensation trading hands for my doing so.

*     *     *

It’s déjà vu all over again …

Ramps Ravioli with Morel Mushrooms

Since we’re talking about utilizing spring’s harvest, why not continue the theme with today’s look back? Hard to believe it was 3 years ago that I posted a recipe for ramps ravioli dressed with a morel mushroom sauce. WIth its ingredients soon coming into season, now’s the time to consider preparing the recipe. You can see how it’s prepared by clicking HERE.

*     *     *

Coming soon to a monitor near you …

Corzetti Pasta Preview

A Surprise!

*     *     *

Trenette with Mussels and Clams

Trenette con Cozze e Vongole

Trenette with Clams and Mussels 3

Just when you think you’ve got all bases covered, The Fates take note and decide to have a little fun. I have been busily at work getting recipes and posts together for the next several weeks. With my trip fast approaching, I don’t want any loose ends to complicate matters. Having posts written and scheduled means that my attention, such as it is,  can be diverted elsewhere with minimal affect to the blog. That was the plan and, with everything in place, I went to the fishmonger.

How was I to know that there would be a sale on clams and mussels? More to the point, how was I supposed to ignore the sale on clams and mussels? The truth is, I couldn’t. I left the shop with a bag full of mollusks and a head full of pasta ideas. On the way home, I stopped at a grocery and bought everything I needed to make today’s dish. Afterwards, I wrote this post and inserted it here, shifting the other posts to accommodate it.

So why the schedule change? Asparagus. It’s coming into season and the green stalks are every bit the star of today’s dish as are its shelled companions. You may not find clams or mussels on sale but you’re sure to see plenty of asparagus. It makes a wonderful addition to just about any pasta that you might prepare in the weeks ahead.

At this point, you would think that all’s well with my schedule and I can rest easy. Oh, how little you know of The Fates. Having finished adjusting the posts to accommodate the new entry, I searched for my soft shell crab pasta recipe to use as the déjà vu photo for today’s post. It was nowhere to be found. I soon discovered that although it had been included in the cookbook, the recipe never made it to the blog. Curses! With soft shell crabs currently in season, that recipe needs to be posted and the recipe has been inserted into the schedule for next time. Once again, all subsequent posts have been shifted to make room for the new guy. One step forward, two steps back.

*     *     *

Trenette with Clams and Mussels 1

*     *     *

Trenette with Mussels and Clams Recipe

Ingredients

  • 1 lb (450 g) trenette pasta – spaghetti or linguine may be substituted
  • 3 tbs olive oil
  • 1 clove garlic, minced or diced
  • red pepper flakes, to taste
  • 3 plum tomatoes, peeled, seeded, and chopped
  • about 1/2 cup dry white wine
  • 1 lb littleneck clams, soaked to remove grit and scrubbed (See Notes)
  • 1 lb mussels, scrubbed with beards removed
  • 1/2 lb of fresh asparagus, chopped into 2 inch (5 cm) pieces
  • 2 tbs fresh basil chopped
  • salt and pepper to taste
  • roasted bread crumbs for garnish – optional  (See Notes)
  • fresh parsley for garnish

*     *     *

Trenette with Clams and Mussels 4

*     *     *

Directions

  1. Begin heating a large pot of salted water to be used to cook the pasta.
  2. Heat the olive oil in a large frying pan with a lid over medium heat.
  3. Add garlic and red pepper flakes. Cook for 2 minutes.
  4. Add tomatoes and wine. Stir well to combine.
  5. Continue cooking until most of the wine has reduced and the tomatoes have broken down — about 20 to 25 minutes.
  6. Add the asparagus and basil, stir, and then add the clams. Cover the frying pan.
  7. Add the pasta to the boiling water. (See Notes).
  8. About 2 minutes later, add the mussels to the frying pan and cover again.
  9. The mussels and clams should be opening at just about the time the pasta is nearing al dente – about 4 to 5 minutes.
  10. Drain the pasta and add it to the frying pan. Toss to combine. Continue cooking until the pasta is cooked to your satisfaction.
  11. Place the frying pan’s contents into the serving bowl. Be sure to remove and discard any unopened clams and mussels. When in doubt, toss it out!
  12. Garnish the dish with toasted bread crumbs and parsley before serving. Please, no cheese for this seafood dish.

*     *     *

Empty Molluscs

*     *     *

Notes

Unlike years ago, most clams bought today from retail outlets have already been purged of sand, or so I’ve heard. That’s not the case, however, if you harvest your own or buy them along the shore. Even so, I still soak my clams to give them a chance to eliminate any sand. To do this, place the clams in a bowl of cold, fresh water and allow them to soak for a half hour or more, changing the water mid-way through. This is not the only way, however, and some advise that salt water is better at getting clams to discharge their sand. In both camps, there are some who believe that a bit of cornmeal will speed the process.

Do you remember last week’s baked calamari post? At the time, I advised making extra breading and reserving all of it left in the roasting pan once the calamari were removed and served. Well, this is one of the reasons why I suggested saving it. Rather than toast some breadcrumbs to garnish your pasta, grab some of these reserved breadcrumbs instead. They’re already cooked so either let them come to room temperature or nuke ’em for about 30 seconds before using. They are a great source of seafood flavor for your pasta.

This recipe is based on cooking dried pasta with an al dente cooking time of about 6 minutes. When I made the dish pictured, I used fresh trenette pasta that I had made just about an hour before cooking. Freshly made pasta cooks in 2 to 3 minutes. As a result, I waited an additional 2 minutes before adding it to the boiling water.

*     *     *

It’s déjà vu all over again …

Asparagus Ravioli Deja vu

WIth this post’s mention of asparagus, it would be a missed opportunity should I not point you to another asparagus-related post. Made with asparagus, crimini mushrooms, and freshly made ricotta, these ravioli are a great springtime dish, whether served as a starter or main course. You can learn how to make the ravioli HERE.

*     *     *

Coming soon to a monitor near you …

Trenette with Soft Shell Crabs and Morels Preview

Trenette with Soft Shell Crabs and Morel Mushrooms

*     *     *

Zia’s Baked Calamari

Calamari Cotti della Zia

St. Joseph’s Feast Day is just around the corner (March 19th) and what better way to celebrate than to share one of the few remaining Bartolini recipes, Zia’s Baked Calamari.

*     *     *

Baked Calamari 6

.*     *     *

The 12 of us living together in the two-flat were treated to some exceptional cooking, courtesy of Mom, Zia, and Nonna. We all had our favorites, to be sure, and I’ve made no attempt to hide my never-ending love of Bartolini ravioli. Even so, Zia’s baked calamari is the one dish that reigns supreme in several of our hearts,. You can be sure that when that platter is set on the table, photos will be snapped and dispatched to those not present. The caption is guaranteed to read something like, “Look what we had for dinner.” When not included, the “Nyeah, nyeah!” is implied.

Now that I know how they’re prepared, it all seems so easy. Getting here, though, was tortuous, leaving a trail of barely edible cephalopods in my wake. From over-stuffing the tubes with breading that was far too oily to roasting them at too high a temperature and for too long, if there was a mistake to be made, I found and made it — sometimes more than once. Finally I made it a point to stay in her kitchen and watch Zia perform every step of the process, even grabbing a bit of breading to get a feel for the amount of oil needed. And then it happened. I got it right. I’ve not been so happy with a dish since I made my first batch of our family ravioli. I am very happy to say that calamari is now a frequent guest of honor at my dinner table.

Since that momentous dinner, I have made a couple modest changes to the original recipe, adding a garlic clove to the stuffing and some lemon juice to the baking dish just before placing it in the oven. You can easily skip both if you like. Otherwise, you’ll find that the stuffing is very similar to the breading used in several of my family’s recipes. Zia adds a bit of lemon juice and the chopped tentacles to the mixture. No need to include the latter if you don’t want them.

Now, as I so painfully learned, here are the problems to avoid. Do not over saturate the filling with olive oil. It should be moist to the touch, not sopping wet. Fill, do not stuff, the tubes. Calamari shrink while being baked and, If too heavily stuffed, much of the excess will spill out. When properly filled, the tubes will shrink around the filling without any being lost. Lastly, raising the oven temperature will result in over-cooked calamari with under-cooked filling. (Been there, there, and, yes, even there.)

*     *     *

Happy St. Joseph’s Feast Day, everyone!

*     *     *

Baked Calamari Filling

*     *     *

Baked Calamari Recipe

Ingredients

  • 3 lbs calamari, fresh or frozen, cleaned (tentacles optional)
  • 2 cups plain bread crumbs – Panko may be substituted
  • half cup chopped parsley
  • 2 tbsp fresh lemon juice
  • 1 garlic clove, minced or grated (optional)
  • enough olive oil to moisten the bread crumbs – should not be sopping wet
  • salt and pepper to taste
  • fresh lemon juice (optional)

Directions

  1. Clean the calamari, if necessary. Make sure to remove the beak located in the center of the tentacles. (See Notes)
  2. Chop the tentacles, if using.
  3. Combine all the ingredients, except for the calamari tubes, and mix well.
  4. Use the breading mixture to fill the calamari tubes. Do not overfill. The tubes will shrink while cooking.
  5. Place filled calamari in a baking dish that has been lightly oiled or sprayed with cooking spray.
  6. Sprinkle excess breading mixture on top of the calamari. (See Notes)
  7. Sprinkle lightly with olive oil and, if you like, a little lemon juice.
  8. Place in a pre-heated 350˚ F (175˚C) for 35 to 40 minutes. (See Notes)
  9. Serve immediately.

*     *     *

Baked Calamari 5

*     *     *

Notes

I was unable to capture the process but you can watch a chef clean whole squid right HERE.

In the past, I’ve mentioned that rubbery calamari will result when not cooked quickly or for at least 45 minutes. Here, because they’re baked, a few minutes have been shaved off the cooking time. The calamari will be slightly crisp instead of being chewy.

In the highly unlikely event that there are leftovers, I like to slice them into rings and use them when I prepare pasta aglio e olio. Just follow the pasta recipe and add the calamari to the pan of seasoned oil when you add the pasta. When the pasta is ready, the calamari will be heated through.

The breading remnants in the baking dish are worth their weight in gold. Gather and place them in a sealable plastic bag to be stored in the freezer. Use them to garnish a future seafood pasta dish in place of cheese. They will add plenty of flavor to your pasta and all you need do is reach into the freezer to retrieve a bag.

*     *     *

It’s déjà vu all over again …

Easter Bread Deja Vu

WIth Easter fast approaching, why not take a look at a bread that’s traditionally prepared in Marchigiani homes for the holy day? The recipe comes from King Arthur Flour’s website but it is very reminiscent of a loaf that my Nonna made for her two young daughters, Mom and my Zia. You can learn all about it just by clicking HERE.

*     *     *

Coming soon to a monitor near you …

Trenette with Clams and Mussels Preview

Trenette with Mussels and Clams

*     *     *

Stewed Cuttlefish and Squid

Sepia e Calamari in Umido

It’s that time of year when some will surf the net looking for seafood recipes. In many Italian households, you see, Christmas Eve will be celebrated with a Feast of the 7 Fishes … or 11 Fishes … or 12 Fishes … or 13 Fishes. The number itself is dependent upon: a) the number of Christian Sacraments (7); b) the number of Apostles minus Judas (11); c) the number of original Apostles (12); or, d) the number of original Apostles plus Jesus (13). No matter how or why you count them — and there are more versions than those I’ve listed — that’s a lot of fish dishes.

*     *     *

Sepia e Calamari in Umido

*     *     *

Although my family never celebrated with a Feast of however many Fishes, we did have a variety of seafood dishes to enjoy on Christmas Eve. I’ve shared those recipes, along with a meatless dish or two, in previous years. To make it easier for you to access them, I’ve created a “Christmas Eve” category that you can access at the end of this post or on the right side of the blog’s Home Page. If you need more suggestions, you may want to check out my Seafood (Frutti di Mare) category. There you’ll find every seafood dish I’ve shared over the past 5 years. (5 years!! Do you believe it?)

I doubt that today’s recipe was ever served at either home of the two-flat. The fact is, either cuttlefish (sepia) or squid (calamari) would have been served but never both in the same pot. Believe me. Initially I had no intention of doing it either. The fact is that the fishmonger was out of fresh cuttlefish and the box contained fewer than were needed to make today’s dish. As luck would have it, that was the only box that he had. It had been decades since either Zia or myself had even seen cuttlefish and I wanted to surprise her with them during the last Visitation. So, I bought some fresh squid and decided to sail into uncharted culinary waters.

Before getting into the recipe, lets talk seafood. Cuttlefish, squid, and octopus are all members of the cephalopod family. As you can see in the photo below, a cuttlefish has the shorter, more round body with tentacles that are also shorter and thicker than its squid cousin. If you own a parakeet/budgie, you may have purchased a cuttlebone for it to use to maintain its beak. That “bone” comes from cuttlefish. In squid, that bone is a smaller, clear, and flexible piece of cartilage. It’s known as the “pen”. The flesh of cuttlefish is thicker than that of squid and most believe it to be more tender. When cooked in umido, like today’s dish, the difference is too minimal to be noticed — at least to my palate. Lastly, because of the differences in body type, I sliced the cuttlefish lengthwise into strips. The squid’s body was cut into rings. The tentacles of both were cut in half but if you find them unappealing, just discard them. (See NOTES for help with cleaning squid.)

*     *     *

Cuttlefish & Squid

*     *     *

Stewed Cuttlefish and Squid Recipe

Ingredients

  • 2 to 3 tbs olive oil
  • 2 or 3 anchovies
  • 4 cloves garlic, chopped or grated
  • red pepper flakes to taste
  • 1 lb raw cuttlefish, skinned, cleaned and cut into strips. If using tentacles, cut in half.
  • 1 lb raw squid, skinned, cleaned, and cut into rings. If fusing tentacles, cut in half.
  • 1 cup dry white wine
  • 1 large can (28 oz, 800 g) whole tomatoes
  • 1 small can (14 oz, 400 g ) diced tomatoes
  • 2 tbs fresh parsley, chopped
  • 2 tbs fresh basil, chopped
  • salt and pepper, to taste
  • 1 whole clove garlic, minced or grated
  • sliced, thick crusted bread for serving

Directions

  1. Heat oil over med-high heat in a medium, heavy bottomed sauce pan.
  2. Add the anchovies, garlic, and red pepper flakes before reducing heat to med-low. Cook for about 2 minutes. Do not allow garlic to burn.
  3. Add cuttlefish and squid and continue to cook until flesh whitens – about 5 minutes.
  4. Add wine and increase heat to med-high. Continue to cook until wine is reduced by half – about 7 to 10 minutes.
  5. Add both cans of tomatoes, tearing the tomatoes by hand as you add them to the pot.
  6. Combine the parsley and basil and use 3/4 to season the pot. Reserve the rest. Stir to fully combine.
  7. Reduce the heat to medium and allow the pot to simmer for at least 20 minutes. It is ready to be served when the stew has thickened and grown deeper in color.
  8. Bring to the table garnished with the remaining chopped basil and parsley.

To Serve

While the stew simmers, toast some crusty bread, one slice per serving. While still warm. rub the remaining garlic clove across the bread. Place one slice of the now garlicky bread

into the bottom of each serving bowl. When it has finished simmering, ladle the stew over the bread in each bowl. Buon appetito!

*     *     *

Notes

When cooking cuttlefish or squid, either cook them for less than a minute or more than 45 minutes. Anything in between will result in seafood with the texture of rubber. Because this is a stewed dish, if in doubt, taste a piece. If it’s chewy, continue to cook until tender.

As you know, I work alone in the kitchen, taking all the photos as I go. Normally, there isn’t a problem that a time delay and remote shutter cannot handle. Cleaning squid, however, is a different matter completely. Being the ham-fisted person that I am, there really was no way for me to capture the cleaning without in some way impacting my camera. Is squid juice corrosive? I didn’t want to find out, so, I’ve found a video that will teach you what you need to know about cleaning squid — all in under 3 minutes. Enjoy!  How to clean squid.

This is another seafood dish in which the flavors are relatively mild. Using grated cheese would pretty much obliterate them. Save that cheese for some other dish on the night’s menu.

*     *     *

Leftovers?

Squid and Sepia Leftovers

Was there any doubt?

*     *     *

It’s déjà vu all over again …

Frutti di Mare, Deja vu

Whether you choose to serve this dish individually, with each dinner guest receiving a packet, or en masse, with a large packet placed in the table’s center, few dishes will delight your table mates like Linguine with Seafood in Parchment. After all, who doesn’t like receiving gifts this time of year and this one comes with a fantastic aroma that’s released upon opening. It doesn’t get much better than this and you can learn all about it HERE.

 *     *     *

Coming soon to a monitor near you …

Braised Rabbit Preview
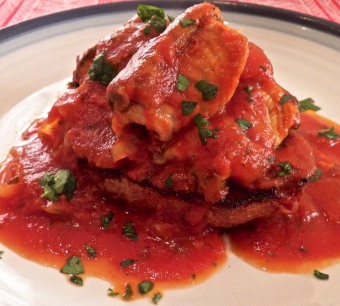
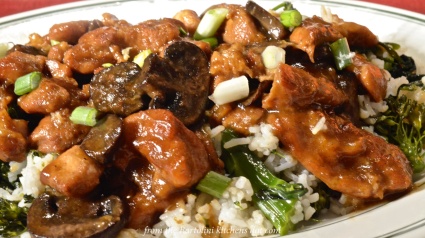
Stovetop Braised Rabbit

(You may want to skip this one, Eva.)

 *     *     *

Grilled Clams

I do enjoy going to the fishmonger. I may go in with something in mind but I always leave with something else entirely. One of my last visits is a case in point.

This particular Tuesday I went shopping for chicken. My fishmonger is the only place in town that I know of where you can buy fresh, never frozen, organic chicken. I left with a chicken — and a little more than a pound of “Vancouver blue clams”. I just couldn’t resist them.

*     *     *

Preview Clams

*     *     *

These clams were small — about the size of manila clams — and there were 36 of the beauties in my purchase. Best of all, they’re mighty tasty. In fact, I’m already thinking of going back for more.

Once home, I decided to try something different. Believe me. Deciding not to cook them with linguine was one of the toughest culinary decisions I’ve made in a very long time. Even so, having watched a number of chefs grill clams, I thought I’d give it a try myself. The chefs placed the clams directly upon the grill grates, let them open, and then carefully removed them to a serving platter. That wouldn’t work for me.

Being so small, I envisioned watching them open and spilling their delicious juices on to the flames. They’re simply not large enough to comfortably ride the grates. Worse, any liquids to have survived the opening would surely be dumped as I clumsily tried to move the clams to a platter. A cast iron skillet was the answer. First, though, the clams had to be cleaned.

Using my food brush, the clams’ shells were scrubbed clean. After that, they were placed in a bowl of cold, fresh water and left to soak for almost an hour. Midway through, the water was dumped and the bowl refilled. That gave the clams plenty of time to expel any sand. Clams that refused to close were discarded.

*     *     *

Blue Clams 1

*     *     *

The grill was lit and the flames set to high. Meanwhile, a lemon-butter sauce was prepared using 4 tbsp butter, the juice of 1/2 lemon, and 1 clove of garlic, smashed. The butter and garlic were gently heated in a small saucepan. When the butter just started to simmer, the lemon juice was added and the heat was shut off. The garlic was allowed to steep in the lemon-butter for a few minutes.

Next, a 10 inch cast iron skillet was placed on the grill directly over the flames. While it heated, some fresh parsley was chopped and a chunk of ciabatta bread was sliced in half. The cut side of both pieces was lightly coated with olive oil and the bread was set aside.

The clams were drained and returned to the bowl, along with a couple of ounces of both white wine and water. By now, the pan was screaming hot. The clams with the wine mixture were poured into the pan and the bread was placed on the grill to toast a bit. The grill lid was then closed.

Back in the kitchen, the garlic was removed from the lemon-butter sauce and the pan was returned to a low heat.

It took barely 2 minutes for the bread to toast, I removed both pieces and the clams were already opening. Within 5 minutes, all the clams were open and were quickly removed to a serving bowl. The pan liquids were added, as well. (Note: be sure to discard any clams that remain unopened after cooking.)

*     *     *

Grilled Clams 1

*     *     *

To serve, the bottom piece of bread was placed in a bowl and topped with some clams and a bit of the pan juices. The lemon-butter sauce was poured over the dish and fresh parsley was used to garnish. The top side of the toasted ciabatta bread was served on the side.

Yeah. I’m going back for more clams, but it’s anyone’s guess what else I’ll bring home.

*     *     *

It’s déjà vu all over again …

LingClams_Lrg300

Nothing but a Pasta with Clams recipe would be appropriate here. It is one of my favorite dishes and one I’m sure you’ll enjoy. You can see how the dish is prepared simply by clicking HERE.

*     *     *

Coming soon to a monitor near you …

Sepia e Calamari in Umido Preview

Stewed Cuttlefish and Squid

*     *     *