Crostata

“What’s in a name? That which we call a rose
By any other name would smell as sweet.” (Shakespeare, “Romeo and Juliet”)

 *     *     *

About 3 years ago, I shared a recipe for the Apple Thingamajig, the name resulting from the inability of Zia and myself to remember the dessert’s correct name. In the Comments, some suggested calling it a “galette”, still others called it a “crostata.”, and I’ve even heard it called an “open-faced” or “rustic” pie. We would never have called it a crostata, however, for reasons I had intended to reveal shortly thereafter. You see, I had planned to share today’s recipe that Christmas (2011). Having missed that opportunity, crostata was to be featured the following December (2012), and, having failed that, last December (2013) would most certainly see a crostata recipe published.  And, so, here it is 2014 and the crostata recipe is finally making it to the big time. Even so, and to get back to my original point, say “crostata” to my family and we think of a jam-covered tart very much like the ones pictured throughout today’s post.

  *     *     *

Mom's Crostata 1

*     *     *

So why share the recipe now? Well, recently a good friend of the Bartolini Kitchens, Stefan of Stefan’s Gourmet Blog, shared his crostata recipe. (If you’ve not visited Stefan’s site, this is your chance. His is a fantastic blog filled with many wonderful recipes and you’ll find his Italian dishes as well-researched as they are delicious.) Seeing his crostata recipe lit a fire under me and I decided this would be the year to finally share the recipe for the benefit of the rest of the Clan. This time, though, I’d publish it ASAP, so, that there would be little chance of it being forgotten again in the rush towards Christmas.

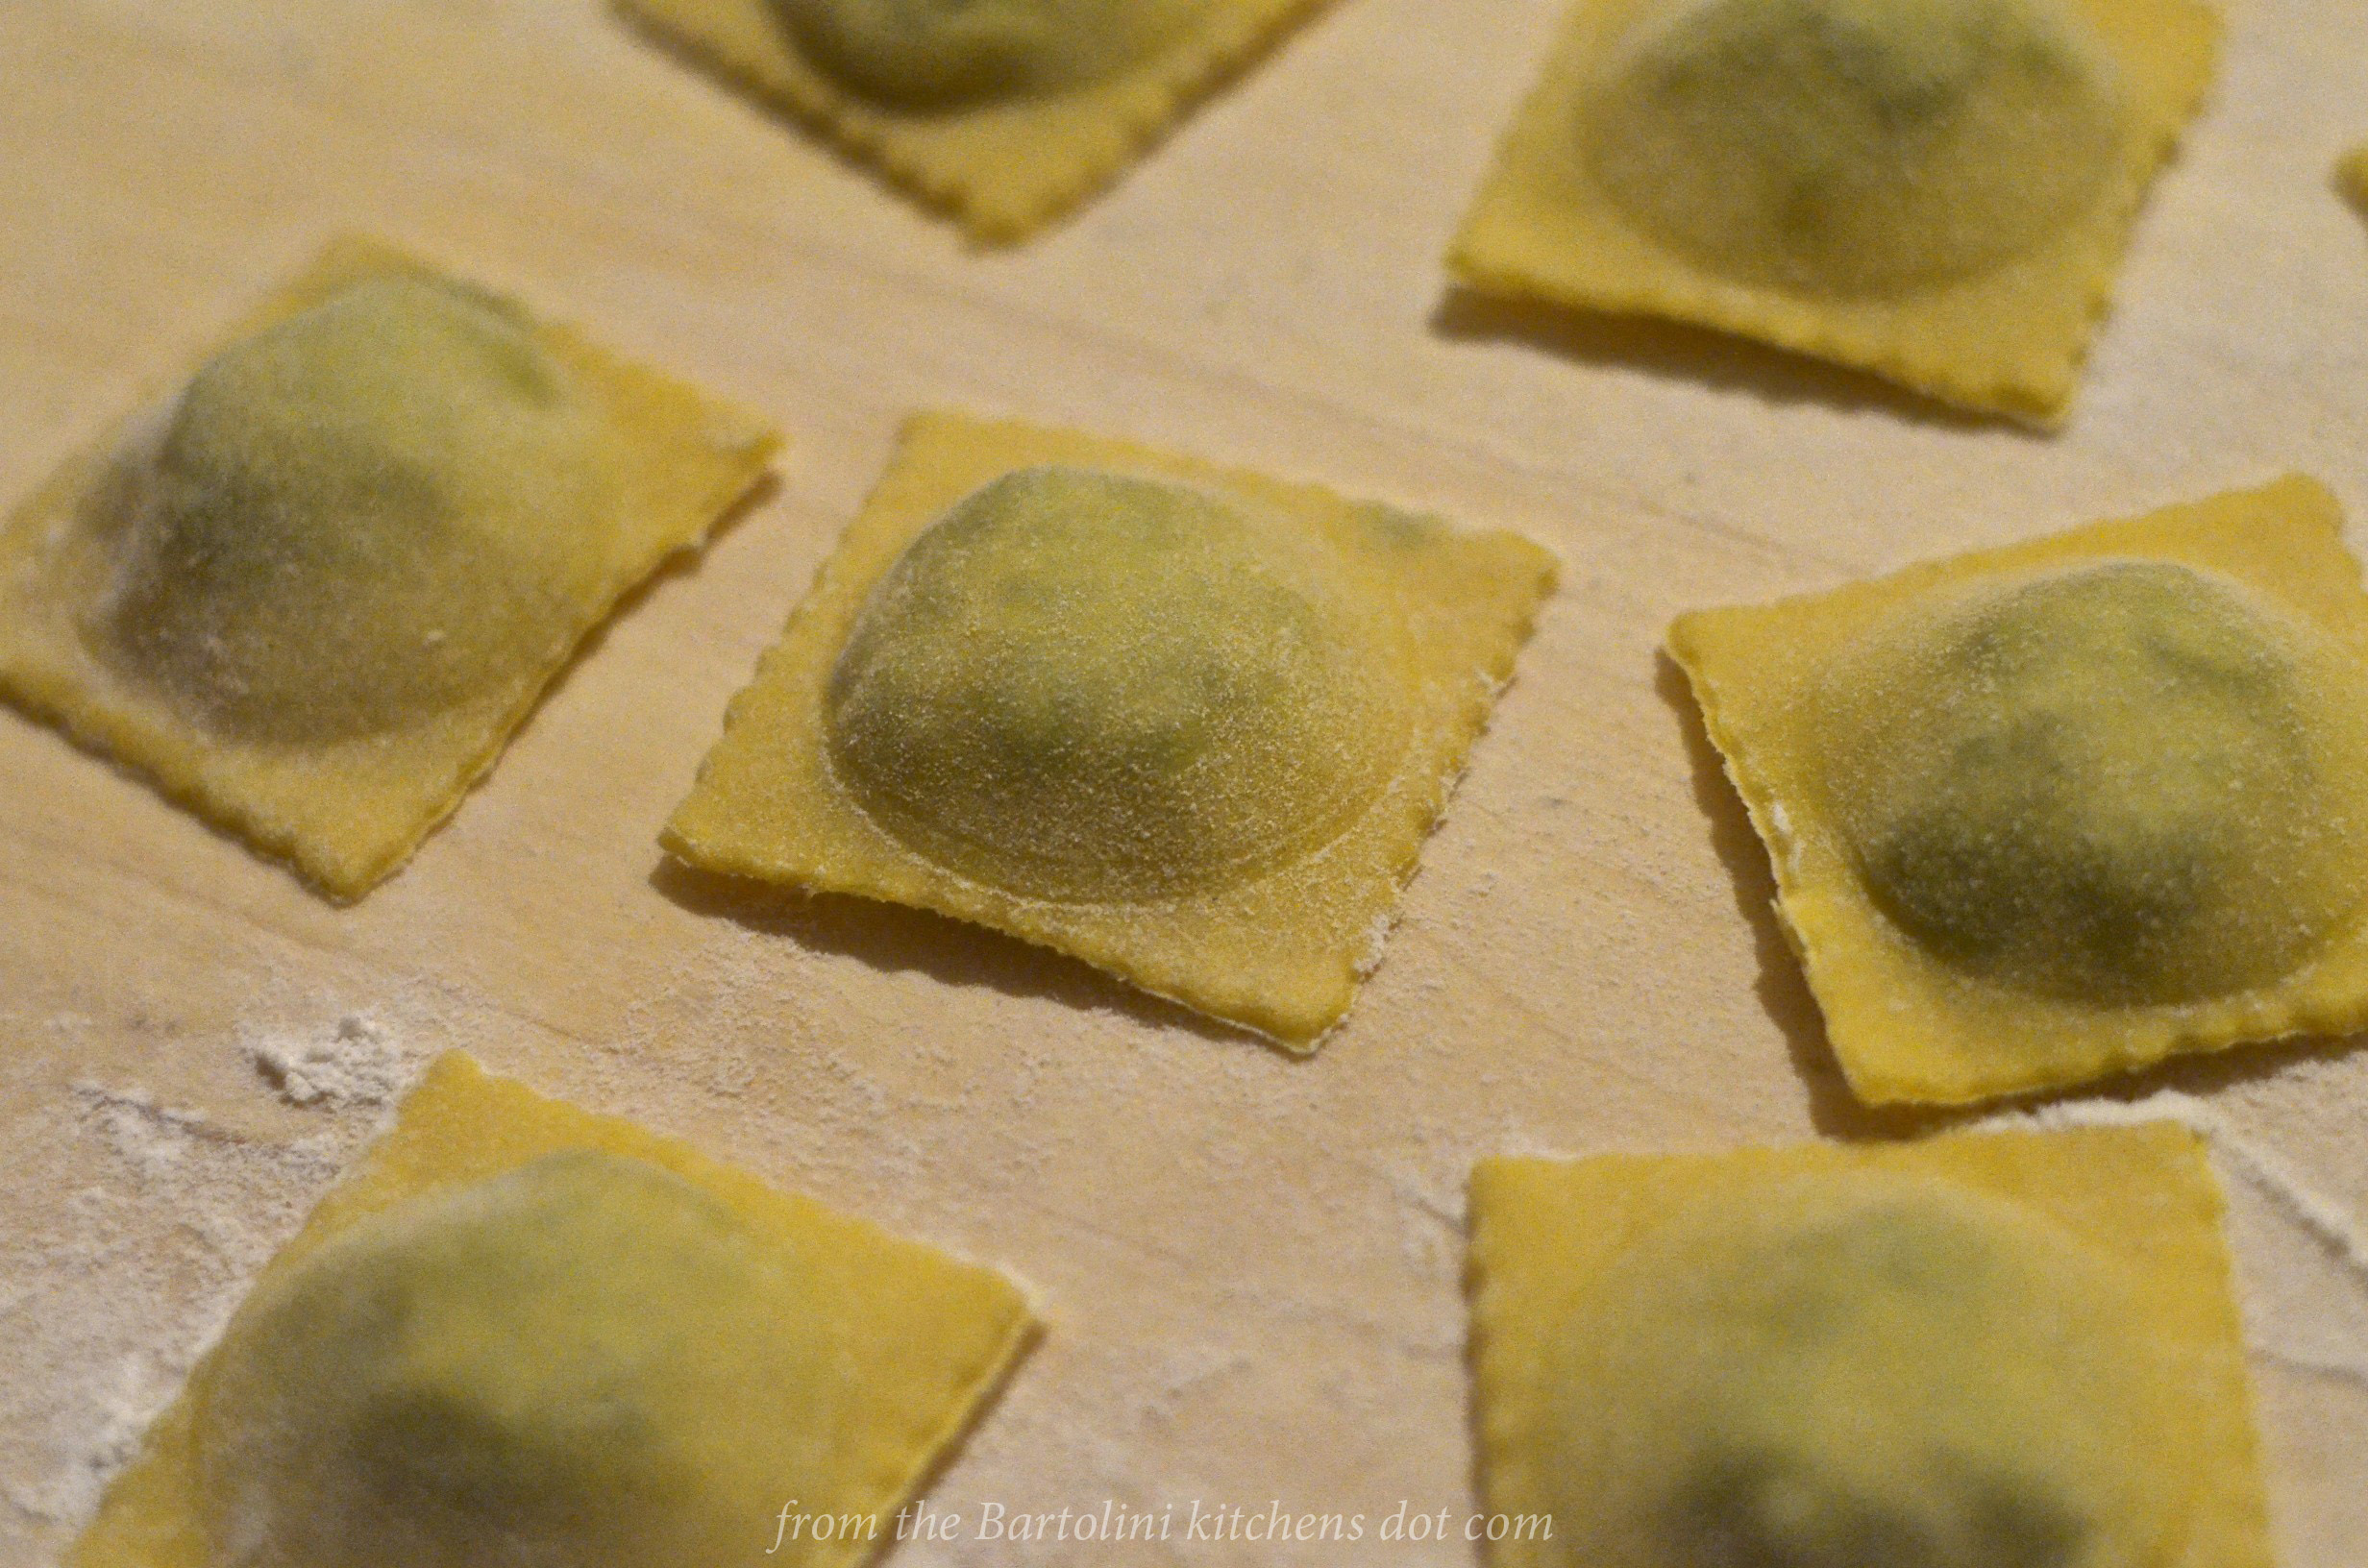
We could always count on Mom preparing several treats for the Christmas holiday. Though she started making chocolate candies in her retirement, she always made sure that there were plenty of biscotti and a crostata for Christmas Day. For me, it wouldn’t have been Christmas without either being present, no matter what else she had prepared — the platter of ravioli notwithstanding.

*     *     *

Crostata 1

*     *     *

Not having any tart pans, Mom prepared her crostata on a small baking sheet. (In professional kitchens, it would be called a “quarter baking sheet”.) She would use 2 types of jam, with half of her crostata being coated with either strawberry or, very rarely, cherry, and, the other half peach. Mom didn’t start making jam and preserves until her retirement, so, she used store-bought jams for her crostata. She served it in little pieces, like those I’ve shown, presumably because the last thing we kids needed was more sugar on Christmas Day. Using a three-tiered serving dish, she was able to control how much we kids ate. When it was empty, there’d be no re-filling it for hours. Of course, when company was expected, the contents of that serving dish were strictly off-limits. Don’t worry. We still had our fill — just not from that tray.

With regards to this post, I didn’t feel right calling it “Mom’s Crostata”, for it really isn’t. Mom didn’t leave us a true cookbook. Yes, she gave us kids our own cookbooks but none were a complete listing of all of her recipes. I do have a couple of her notebooks but the recipes listed are in varying stages of completion. Some are fully written, while others are nothing more than a few notes. Today’s recipe falls into the latter category, though I remember watching her spread the jam over the pastry crust, my mouth-watering the entire time. The only real question that remained was what recipe to use for the shortbread crust — and Mom’s notes did specify a “shortbread crust”. The answer came from a surprising source.

Good Cooking CookbookDuring my last visit with Zia, she mentioned that she possessed a “Five Roses Flour” cookbook from 1938 that once belonged to her Mother-in-Law — the woman I’ve referred to as “Nonna” in earlier posts. While paging through it, I came across a shortbread recipe. Now, this is no ordinary shortbread. The recipe’s name is listed as “Prize Shortbread” and it’s noted that the recipe “has won many prizes at Fall Fairs and Exhibitions.” There was certainly no need to look any further for a shortbread recipe. Here, I’ve shared the recipe as it was originally written, although when I prepared the shortbread, I used my food processor and the resulting crust was quite good. (See below for a possible use for extra shortbread dough.)

Unlike Mom, I used my own jams for today’s crostate. In the first photo, strawberry jam with balsamic and black pepper, and, peach jam with white balsamic were used. The addition of balsamic vinegar is why both jams appear unusually dark in the photos. The 2nd crostata was made with tart cherry jam, to which a little bit of almond extract was added. Feel free to use whatever jam(s) you prefer.

  *     *     *

*     *     *

Crostata Recipe

Ingredients

for the pastry

  • 2 cups all-purpose (AP) flour
  • 1/2 cup confectioner’s (powdered) sugar
  • 1 cup unsalted butter, room temperature
  • 1/4 tsp salt
  • 1 egg yolk
  • an egg yolk and water wash

for the filling

  • jam/preserves, amount depending upon the crostata’s size and whether 2 flavors are to be used.

Directions

  1. Pre-heat oven to 350˚ F (175˚ C).
  2. In a mixing bowl, use a spoon to mix the sugar, butter, salt, and egg yolk. Slowly add the flour and continue to mix until the spoon can no longer be used.
  3. Turn on to a lightly floured board and begin kneading, adding more flour until the dough begins to crack.
  4. Reserve a small portion of dough to be used for the lattice.
  5. Roll the dough between 2 sheets of wax paper until about 1/8 inch thick and slightly larger than the tart pan or baking sheet.
  6. Carefully remove one sheet of wax paper and place the dough on to the tart pan, dough-side down. Remove the remaining sheet of wax paper. Gently press the dough to fit the contours of the pan. Trim the excess dough and add to the reserve.
  7. Use an offset spatula to spread the jam, evenly covering the pastry dough.
  8. Roll out the reserved pastry dough as you did for the crust. Cut the dough into strips.
  9. Starting at one end, diagonally place the strips across the tart. Once completed, work from the other side placing strips diagonally in the opposite direction, creating a lattice in the process.
  10. Use the egg wash to lightly coat the lattice and any of the exposed crust.
  11. Bake in the lower third of a pre-heated oven for 30 minutes or until crust and lattice are lightly browned.
  12. Allow to cool before cutting. Serve at room temperature.

Shortbread pastry dough recipe found in “A Guide to Good Cooking” by the Five Rose Flour Co. (1938)

*     *     *

Cherry Crostata 5

*     *     *

Notes

The first time I prepared this crostata, I “blind baked” the tart shell for 8 minutes before filling it. This was a mistake, as you can see when looking at the first photo. The lattice is considerably lighter in color than the crust. After that attempt, I’ve no longer blind baked the crust and the finished tart’s shortbread appears more evenly baked.

*     *     *

So, you’ve made a crostata and still have a little extra dough to burn …

I just couldn’t bring myself to discard the excess shortbread dough, nor was there enough to make another crostata. I was going to make a few shortbread cookies, a personal Shortbread Sandwichesfavorite, when I had an epiphany. Using a very small ice cream scoop, make equally sized balls of dough, placing them on a small baking sheet. Once the sheet was covered with evenly spaced dough balls, use the bottom of a glass to press each ball into a flat cookie. Bake in a pre-heated 350˚ F (175˚ C) oven until the edges just start to turn brown, about 15 minutes. Once cooled, use 2 cookies with a bit of Nutella in-between to make a single sandwich cookie. (You could just as easily use jam for the filling.) Like the crostate, these cookies were well-received by the taste testers that live above me. So well-received, in fact, that now I’m considering making a Nutella crostata.

*     *     *

It’s déjà vu all over again …

lumache-con-farfalle-1

This past Saturday is known as All Soul’s Day and in Marche, the Bartolini ancestral home, snails, lumache, are traditionally served.  I won’t say much more, for fear of stealing the post’s thunder, other than to mention that you can learn all about preparing this delicacy by clicking HERE.

*     *     *

Coming soon to a monitor near you …

Osso Buco Preview

Osso Buco

*     *     *

Advertisement

Oatmeal Cookies with Two Chocolates, Dried Cherries, and Almonds

Cherry Choc Chip 1

Despite today’s post and a few more on the schedule, I am no baker. I do not bake. It is a classic catch-22. I don’t bake because I make mistakes and I make mistakes because I don’t bake. My experience with today’s recipe is a perfect example.

Although I’ve prepared these cookies a number of times, I’ve made more than my fair share of mistakes. Some weren’t so bad, like grabbing dark brown sugar instead of light or forgetting to add the salt. I wasn’t always so lucky, however, like the time I forgot the baking soda. Those little nuggets were tasty but hardly the cookies I had envisioned. Perhaps the worst, though, was the time I forgot to add the flour. Who forgets flour? You wouldn’t but I sure did. You can rest assured, knowing that I’ll never do that again. Even so, there has to be a better way to learn something without nearly ruining 2 baking sheets.

My lack of baking prowess — a.k.a common sense — aside, these are great cookies that freeze well. That’s important for me because if I don’t stash cookies in my basement freezer as soon as they’ve cooled, they’ll be gone within a day. I’ve absolutely no will power when it comes to freshly baked anything. (Yet another reason I so rarely bake.)

This recipe can easily be modified to suit your own kitchen and preferences. I’ve made these cookies using my food processor, as the original recipe directs, but I’ve also prepared them with my stand mixer. I’ve used dried cranberries instead of the cherries, and omitted the white chocolate altogether, doubling the amount of dark chocolate in its place. And if you like almond flavoring, try using almond extract instead of vanilla. In short, feel free to make whatever substitutions you like, just don’t forget the flour!

*     *     *

Announcing …

It’s time once again for the Honey Man to open shop in Michigan’s Thumb. This means I’ll be closing the Kitchens so that I can make the yearly honey run. Normally, I’d reopen the Kitchens in 2 weeks but not this year. You see, honey won’t be the only precious cargo that I’ll be bringing back to Chicago. I’m very happy to say that I’ll be playing host to a most special Guest and the Kitchens will be closed for the entire visit, known affectionately in these parts as “The Visitation.” Rest assured, the Kitchens will reopen once I’ve returned my Guest to her Michigan home.

*     *     *

Cherry Choc Chip 3*     *     *

Oatmeal Cookies with Two Chocolates and Dried Cherries Recipe

Ingredients

  • 1/2 cup unsalted butter at room temperature
  • 1/2 cup light brown sugar, packed
  • 1/4 cup sugar
  • 1/2 tsp vanilla extract
  • 1 large egg
  • 1/2 tsp baking soda
  • 1/2 tsp salt
  • 3/4 cup AP flour
  • 1 cup old-fashioned oats
  • 2/3 cup dried cherries
  • 1/3 cup semi-sweet chocolate chips
  • 1/3 cup white chocolate chips
  • 1/4 cup slivered almonds, toasted

Directions

  1. Pre-heat oven to 375˚ F (190˚ C). Place 2 oven racks on the top and bottom thirds of the oven.
  2. Cream together the butter, 2 sugars, and vanilla in a food processor
  3. To the processor bowl, add the egg, baking soda, and salt. Process until combined.
  4. Add the flour and again process till combined.
  5. Add the oats and pulse a few times. The object is to mix without pulverizing the oats. Empty the contents of the processor bowl into a large mixing bowl.
  6. Add the almonds, cherries, and both chocolates to the mixing bowl and use a spoon to mix the contents.
  7. Use a large ice cream scoop or tablespoon to create evenly sized cookies. Place scoops of dough on 2 large, parchment-covered baking sheets, about 2 inches apart.
  8. Bake for 6 minutes before turning and switching racks. Bake for another 6 or 7 minutes. Cookies should be lightly browned.
  9. Remove from oven and place cookies on a rack to cool.
  10. Store in an airtight container.

Adapted from a recipe on Epicurious

*     *     *

Cherry Choc Chip 2*     *     *

Notes

Like the fried chicken of 2 weeks ago, these cookies are good for long car rides. Very good.

*     *     *

The Colosseum and Forum of Rome

Just down the street from our flat was the Colosseum, one of the World’s few arena’s older than Wrigley Field. It is usually one of the first and last sights I see when I’m in Rome. As I’ve told my friends — ad nauseam, I’m sure — I’m a tactile person and only when I touch the Colosseum do I truly feel that I am in Rome.

(Click to enlarge any/all photos)

*     *     *

*     *     *

Right outside of the stadium lie the ruins of Ludus Magnus, the best of the gladiator schools. Tunnels once connected it to the “basement” of the Colosseum, which housed everything from wild animals and gladiators to their unfortunate victims. The amphitheater itself is huge with seating estimates that surpass 45,000 people. Yet, it could be vacated in as few as 5 minutes in an emergency. Located around the arena are thick cement posts, of a sort. These were used to support a retractable roof that provided shade from the hot Roman sun, while the arena floor could be flooded to permit mock naval battles to be performed. When not flooded, the stadium floor featured numerous trap doors, allowing for the “introduction” of fierce animals into the arena. Like so much of Rome, history comes alive as you walk around the Colosseum.

*     *     *

Inside the Colosseum    *     *     *

The heart of the ancient city, the Forum, was where Romans came to conduct business, shop, talk politics, and worship. On one side lay the Colosseum, easily the largest amphitheater of its time. On another, atop Palatine Hill, is where the emperors lived, as well as the Republic’s wealthiest citizens. Being slightly elevated, it was believed to be a bit cooler than the surrounding area and it gave the inhabitants the opportunity to literally look down upon the masses milling about the Forum. Following the main path through the Forum, the Via Sacra, you’ll pass the ruins of numerous temples, basilicas, and the Curia, where the Roman Senate met and where Julius Cæsar was assassinated. Speaking of which, you’ll also come across the altar used for Cæsar’s cremation. (The first time I visited the Forum was on March 17th quite a few years ago and red roses were strewn about the altar.)

*     *     *

*     *     *

If you are at all interested in the Roman Empire and find yourself in Rome, you really must see the Colosseum and Forum. Words and photos cannot describe the sensation of walking along the Via Sacra, tracing the steps of people like Julius Cæsar, Tiberius, Augustus, and every Emperor that was to follow them, not to mention countless notables of the ancient civilization. It was, for me, the perfect way to end my holiday and this series.

*     *     *

It’s déjà vu all over again …

Aglio e OlioToday’s blast form the past isn’t at all a seasonal dish, at its core, but you could make it one, if you wanted.  Aglio e Olio is so simple to prepare that it is a “late home from work” dish; a “we spent the night out with friends and need something quick to eat” dish; and/or a “my cupboard is bare and I’m hungry” dish. Aglio e Oilo can be all these things and so much more. You can learn all about it by clicking HERE.

*     *     *

Coming soon to a monitor near you …

Roast Duck Ravioli PreviewRoast Duck Ravioli

*     *     *

Tart Cherry Frozen Yogurt

Those of you who have followed my blog for some time know that August is Birthday Month for many of my friends and family. Mom and her Mother, Uncle and his Sister, Friends and Tasters, Nephews and a Boy Upstairs, and too many more to mention were all born in the 8th month. You might, also, recall, that Mom loved ice cream and to commemorate her birthday, I normally post ice cream recipes in August. Note the word “normally.”

*     *     *

Tart Cherry Frozen Yogurt

*     *     *

This year I though I would switch things up a bit. You see, about 20 years ago, I bought a fancy schmancy gelato maker and it broke long before the investment paid for itself in tasty frozen treats. Its recipe book survived, however, and one day I made a batch of “frozen yogurt.” Everyone loved it and marveled at the creaminess of this low-fat dessert. The only problem was that, just like the old Seinfeld episode, it wasn’t at all low-fat. There was just as much heavy cream in it as I use in normal ice cream. Yes, there was a little yogurt in the mix but nowhere near enough to justify it being called “frozen yogurt,” let alone “low-fat.” That was about 7 years ago and I’ve never attempted to make frozen yogurt again — until now.

With Birthday Month already underway, I turned to another recipe book for inspiration. I soon found it in the form of a tart cherry frozen yogurt. You see, on my return home following my last visit with Zia, I stopped at a farm and purchased 20 pounds of frozen, pitted tart cherries. (You may be interested to learn that Michigan produces as much as 70% of our country’s tart cherries.) Once home, I delivered some to a neighbor and the rest of the tarts are sitting pretty in my freezer.

So, with recipe and cherries in hand, I made my first batch of frozen yogurt. Unfortunately, it wasn’t at all what I had expected. Sure, the flavor was outstanding but its texture was very much like a sorbet rather than a creamy, frosted confection. Worse, I had doubled the recipe and now had 6 cups (1400 ml) of the stuff to eat — and eat it I did. Waste a frozen dessert in Mom’s Birthday Month? Never! Convinced I had made a mistake — not at all an uncommon occurrence in my kitchen — I tried it again, though this time I made a single batch. The result was the same and I had another 3 cups of frozen yogurt/sorbet to eat.  All the while, Birthday Month marched on.

Last week, having eaten 9 cups of the stuff during what had to have been the coolest August on record, I decided to try again. This time, I put aside the recipe book and borrowed a page from the old gelato maker’s recipes. I added heavy cream. That’s right, heavy cream and I played around with the other ingredient amounts, as well. The result? A frozen yogurt with a texture far closer to ice cream than sorbet and a tart cherry flavor that is oh, so very good. Not only that but since I made this dessert, Summer has returned and our temperatures have soared at least 10˚ F above normal for this time of year. Message received, Mom.

*     *     *

Tart Cherries - 1

*     *     *

In retrospect, I think the poor texture was due to the amount of liquid contained in the bags of frozen cherries. I bet if I had drained much of the liquid, the texture probably would have been less icy. It may have, also, been less flavorful. I guess the World will have to wait for the answer because I don’t think I’ll be making tart cherry yogurt again for quite some time — well, at least until next August, anyway.

*     *     *

Tart Cherry Frozen Yogurt

Ingredients

  • 1 lb (455 g) of tart cherries, pitted
  • 2/3 cup (135 g) sugar
  • pinch of salt
  • a few drops almond extract
  • 1 cups (245 g) whole-milk Greek yogurt
  • 4 oz (118 ml) heavy cream — the more the merrier

Directions

yield: a little less than 1 quart

  1. Place cherries and sugar in a medium sauce pan over med-high heat. Cover, bring to a boil, reduce heat, and simmer for 5 minutes.
  2. Remove from heat and allow to come to room temperature.
  3. Add the almond extract and place the cherries and juice into a food processor or blender. Process until smooth.
  4. Place mixture in a bowl, cover with plastic wrap, and chill in the refrigerator for at least 2 hours.
  5. Once fully chilled, stir to combine the cherries, heavy cream, and Greek yogurt.
  6. Add the mixture to your ice cream maker and process according to the manufacturer’s directions.
  7. Serve or freeze until the yogurt is frozen to your satisfaction.

Originally inspired by David Lebovitz, “The Perfect Scoop”

*     *     *

To make the chocolate sauce:

Melt 4 oz (110 g) in the top of a double boiler. Once melted, add 2 oz (60 ml) warmed heavy cream, a pinch of salt, and mix to combine. Take the chocolate off of the heat and add an 1/8 tsp of vanilla. Stir and serve.

*     *     *

*     *     *

Variations

While I was in the throes of trying to eat all of this sorbet masquerading as yogurt, Sally, creator of the enchanting Bewitching Kitchen blog, posted a recipe for blackberry-cherry yogurt, In it, she used banana to smooth the texture. Not heavy cream but banana! I had intended to follow her lead but Birthday Month was coming to an end faster than was my supply of substandard frozen yogurt. Not only that but there was heavy cream in the fridge but no bananas on the counter. I will, however, keep her “solution” in mind the next time I attempt to freeze yogurt.

Notes

Nothing goes better together than cherries and almonds. Even so, too much almond extract will totally overpower the tart cherry flavor. Use almond extract sparingly, tasting as you go.

This recipe will yield just under a quart of frozen yogurt. Let’s face it, one scant quart of any frozen dessert is hardly worth the effort to make it. Double the recipe and be happy.

*     *     *

It’s déjà vu all over again …

Nothing says "Happy Birthday!" like una bomba!

Nothing says “Happy Birthday!” like una bomba!

If we’re going to take a look back at the end of a frozen dessert post, there really is only one post deserving of mention, especially in August. For today’s blast from the past, I’m going to send you to the granddaddy ice cream post of them all. Yes, it’s the Spumoni Bomba. With layers of cherry, pistachio, and chocolate ice creams, this is one frozen treat your guests will never forget. All you need do is click HERE for the frosty details.

*     *     *

Coming soon to a monitor near you …

Pupster Peanut Butter

Pupster Peanut Butter

*     *     *

My Cherry Amour, The Return (This time it’s personal)

OK! I admit it. I have a problem. At first it was interesting, even quaint. Then it became mildly neurotic, with close friends beginning to question my actions. Now, I’m afraid, it’s a full-blown obsession and I’ve been urged to seek help — until the concerned individual learns that s/he will be receiving the fruits of my addiction. How quickly concern becomes encouragement. Enablers all! To think, I was happily satisfied with my frozen stash of muffins and cherries. Thrilled that my cherry pie had been well-received and was good to the very last bite. All in all, there was certainly no need for me to seek out more cherries — until I noticed a “Jam” category at Tanya’s wonderful ChicaAndaluza blog.  Lo and behold! Just a few short weeks ago, she made cherry jam. My heart raced as I read her post. Ah! She canned her jam and I don’t can. (I suffer from botulismaphobia.) My heart beat returned to normal — but wait. She canned them without a water bath. How could this be? I used her post’s comment section to ask if it were possible to can something without a hot water bath, knowing full-well that it would be days before her answer was received, long after yesterday morning’s trip to the farmers’ market and, presumably, after this season’s tart cherries were gone. I was in the clear and the few remaining tart cherries within the tri-state area breathed a sigh of relief. And then the unthinkable happened. Tanya answered my question within 2 hours. TWO  HOURS!! I knew instantly that I was doomed.

*     *     *

*     *     *

Yesterday morning, Saturday, in the middle of a driving rain storm, Max & I headed to the farmers’ market. I promised myself that we would turn around and come home if the rain didn’t let up. In fact, it got worse as we drove north toward Evanston. Confidently, I drove onward. And then, about 1/2 mile from the market, it was as if Moses himself had waved his staff. The clouds parted and the rain stopped completely. Again, my heart began to race. Upon parking the car, I went immediately to both fruit stands that had, unwittingly, fed my addiction in prior weeks. There were no sour cherries to be found at either location. Relieved, I went about buying an assortment of vegetables — I’ve giardiniera to make. Within minutes, my shopping bags were full and I was headed back to the car, where Max and the traffic coördinator had been keeping company. That’s when I saw them. 8 quarts of tart cherries where, just minutes before, there had been none. The young woman apologized. Something about the rain. Arriving late. Being short-handed. I don’t really remember what else, if anything, was said; my head was reeling. I pointed to 2 quarts, paid her in silence, walked backed to my car, and drove home, managing to avoid looking Max in the eye the entire trip. Forget about whatever had been planned, the day had become cherry jam day.

*     *     *

*     *     *

Never having canned anything before, I referenced 3 sources. Tanya’s Summer Cherry Jam recipe, of course; David Lebovitz’s No-Recipe Cherry Jam; and the pectin envelope’s instructions. I pitted the 2 quarts of cherries and they yielded 3 lbs of cherries and juice. I reserved 8 oz, put the remaining portion into a food processor, and pulsed until the cherries were coarsely chopped. I then returned the whole cherries to the mix, per Lebovitz’s suggestion to keep a few cherries unchopped. The jars, all new, were washed in my dish washer, using the “sanitize” cycle. The lids were washed in warm soapy water, rinsed, and then placed in a deep bowl. While the cherries were being cooked, boiling water was poured over the lids and they remained in the water until needed. With everything now prepared, I followed Tanya’s recipe and made just about 7 cups of cherry jam. Thanks to Tanya, my first foray into canning wasn’t nearly as painful as I had feared. Even so, I think I’ll limit my future canning exploits to the making of jam. No need to press my luck.

*     *     *

Notes

We will NOT be going to the Skokie Farmers’ Market today — I think.

*     *     *


My Cherry Amour, Reprise (Bigger, better, badder!)

Having professed my love of tart cherries last week, I’m sure you can understand my remorse now that cherry season has come to an end. Rather than mourn their passing, however, I’ve decided to celebrate their sour little lives by baking one last cherry pie. (Put another way, I’ve got a freezer full of cherry muffins and there’s still another quart of pitted cherries in the fridge.)

I’ve used both of these recipes for several years now. The first, for pastry dough, uses a food processor to mix the dough. That alone makes it a winner in my book. The recipe, however, makes only enough pastry dough for one 9 inch pie crust. I’ve found that I get better results if I make 2 batches of dough, rather than doubling the recipe for a double-crusted pie. Don’t ask me why but that’s just the way it works. The recipe for the pie filling is about as simple as can be. Flour, not cornstarch or tapioca, is the thickening agent and there’s no need to pre-cook the fruit filling mixture before placing it into the pie shell. So, if you’re good working with pastry dough, you can have a pie in the oven pretty quickly. Me? It’s an afternoon project, often including wailing, the gnashing of teeth, and the rending of garments.

There is one last thing to consider, especially if you, like me, tend to throw common sense out the window when you see all the pretty quarts of tart cherries lined up in the market or at some farmer’s stand. I mean, how can you not buy a few quarts? It all makes perfect sense until you arrive home and realize that you have to pit them all before you can do anything else with them. Well, there is hope for us. I’ve found a website that should be called “How to deal with the fruit and stuff that result from ChgoJohn going to a farmers’ market.com?” It has been called, instead, Kraft Foods something or other and it explains how to freeze a variety of baked goods. You can reach it by clicking here and I recommend that you bookmark the site. It’s one of those web pages that you probably won’t need today, you may not need tomorrow, but you are going to need it some day.

*     *     *

Food Processor Pie Crust Recipe

Yield: One 9 inch pie crust

For best results:

  • Do not over-process the dough.
  • Use only enough water to create a crumbly texture.
  • Do not run the processor long enough to form a dough ball. Use your hands to do that.

Ingredients

  • 1 1/2 cups flour
  • 4 tbsp unsalted butter, chilled/frozen, cubed
  • 5 tbsp shortening, chilled/frozen, cubed
  • 1/2 tsp salt
  • 3 tbsp ice water

Directions

  1. Add flour and salt to the processor. Pulse it a few times to mix the 2 ingredients.
  2. Add the very cold butter and shortening cubes.
  3. Pulse the machine 3 times, with each pulse lasting a 3-count. Your ingredients will now be lightly mixed.
  4. With the machine running, slowly add the ice water. Do not add so much that a ball of dough forms. Remove the lid and, with your hands, test the dough to see if a ball of dough can be formed.
    1. If so, turn the dough until a very lightly floured service, form a ball, wrap it in plastic wrap, and refrigerate for 30 minutes.
    2. If a dough ball will not form, add a little more water, pulse the machine a couple of times, and test it again. When you can form a ball of dough, follow step A above.
  5. After 30 minutes, remove the dough from the fridge and roll it until large enough to completely cover the bottom of a 9 inch pie pan. Place the dough into the pan, trim any access, and return the crust and pan to the fridge until needed further.
  6. I usually postpone handling the 2nd pie crust, the “top,” until just before it is needed. The colder the dough going into the oven, the flakier the crust coming out.

*     *     *

Pie Eyed

*     *     *

Cherry Pie Recipe 

Ingredients

  • Pastry for 1 double-crust 9 inch pie.
  • 4 cups fresh, tart cherries, pitted
  • 1 1/3 cups sugar
  • 1/3 cup ap flour
  • 1/4 tsp salt
  • 1/4 tsp almond extract
  • 2 tbsp butter, cut into small cubes
  • 3 tbsp milk
  • sugar

Directions

  1. Pre-heat oven to 425*.
  2. Use half of the pastry dough to line the pie plate. Place it in the refrigerator to chill until needed.
  3. Gently combine the cherries, sugar, flour, salt, and almond extract.
  4. Roll out the other half of the pastry and prepare for use. If covering the entire pie, leave as is. If creating a lattice, cut the strips. If, as I did, you’re creating leaves, use a stamp to form them all, place on a baking sheet lined with parchment paper, and refrigerate until needed.
  5. Pour the cherry mixture into the chilled pie shell and dot the pie with the cubes of butter.
    1. If covering the entire pie, spread the top portion of the pastry dough, seal its edge with the bottom’s dough, crimp the edge, and create slits in the top to allow steam to vent.
    2. For a lattice cover, retrieve the strips and, starting at one end of the pie, weave a lattice across the pie’s top. (See Notes below.)
    3. For a leaf top, place the dough leaves across the top,  being careful to leave enough openings for steam to vent.
  6. Use a pastry brush to coat the upper crust with milk. Sprinkle the top with a light dusting of sugar.
  7. Bake on a baking sheet — in case of overflow — in a pre-heated 425* oven for 35 to 40 minutes until golden.
  8. Allow to cool before serving so that the filling sets properly.

*     *     *

"... And let's have another piece of pie."

*     *     *

Notes

The reason one sees so many lattice-topped cherry pies is because a woven top allows the pie’s juices to evaporate somewhat during the baking process, making for a better pie. Cook’s Illustrated Magazine’s book, Baking Illustrated (p. 148), suggests creating the lattice on parchment paper and not atop the pie. Once woven, place both the lattice and parchment paper in the freezer. When the lattice is firm, gently transfer it from the paper to the pie’s top and carefully connect it to the bottom crust. Brush it with milk, sprinkle with sugar, and bake as directed above.

And so ends this year’s journey down Cherry Lane, where pitting is such tart sorrow.

*     *     *


My Cherry Amour

point of pride for the Great Lake State, Michigan’s west coast is an incredible fruit belt. It’s hard to believe that those Winter storms blowing in from Lake Michigan help to create a climate that’s perfect for growing a variety of fruit. Of all the fruit grown, however, the one that I most anticipate is the tart cherry. Depending upon the weather each Spring, these cherries come into season sometime during the latter half of June and last but a few weeks. Now that doesn’t leave me much time to get my share. In years past, I’ve detoured while traveling to, or from, a visit home; I’ve made “cherry runs,” driving 2 1/2 hours each way to get to just the right farm; or the Fates have smiled upon me and I’ve come across some at one of our farmers’ markets — like this year. As thrilled as I am to be able to buy some without a long drive, I must say, buying directly from the farm does have its advantages. Not only are they less than half the price, but many farms sell them pitted and frozen, as well as whole. In one trip, I can get enough cherries for a couple of pies and a few batches of muffins, with nary a pit to be found.

This recipe was in a book of recipes Mom assembled for me after I moved to Chicago. She and her Sister, Zia, both gave me recipe books and I often refer to them. In fact, quite a few of the recipes already in this blog, and many more to come, are from those 2 books. The thing is, this recipe was not a part of the book; it was on an index card stuck within its pages. As a result, I have no idea where it actually came from or who gave it to me. As far as muffin recipes go, it’s pretty basic. It does, however, include an optional topping made of flour, butter, and sugar. Though not necessary, it does add a nice element to each muffin top. All facts considered, the only real problem I have with this recipe is that a dozen muffins, even if small, are a few too many for me, being I live alone. So, I’ll drop a few off with friends and freeze the rest. These freeze well and nothing starts the day off better than doing so with a home-made muffin. But what if cherry muffins do nothing for you? Then I suggest you check out this recipe for Blackberry Jam Muffins over at Katherine & Greg’s blog, Rufus’ Food and Spirits Guide. Not only is it a good recipe but theirs is a great blog to follow.

*     *     *

*     *     *

Cherry Muffin Recipe

Ingredients

  • 2 cups all-purpose flour
  • 3 tsp baking powder
  • 1/2 tsp salt
  • 1/2 cup sugar
  • 1/2 tsp cinnamon
  • 1/2 tsp almond extract
  • 1 egg, lightly beaten
  • 1/4 cup vegetable oil
  • 1 cup milk — buttermilk may be substituted
  • 2 cups cherries, pitted & roughly chopped by hand
  • OPTIONAL TOPPING
    • 3 tbsp cold, unsalted butter, cut into bits
    • 1/2 cup flour
    • 3 1/2 tbsp sugar

Directions

  1. Pre-heat oven to 375*. Either spray muffin tin with cooking spray or place one liner in each cup.
  2. In a large mixing bowl, whisk together flour, baking powder, salt, cinnamon, and sugar.
  3. In a separate bowl, combine egg, almond extract, vegetable oil, and milk.
  4. Add wet ingredients to dry and barely mix before adding the cherries. Mix entire batter until just combined. Batter should be lumpy. Muffins will be too dense if batter is over-mixed.
  5. Use an ice cream scoop or large spoon to fill each of 12 muffin cups equally.
  6. If topping is desired: Using a fork, combine the flour, butter, and sugar to create a crumble topping. Sprinkle an equal amount on top of each of the filled muffin cups.
  7. Bake until golden or the muffins pass the clean toothpick test, about 20 – 25 minutes.
  8. Allow to cool at least 5 minutes before removing from pan to cool further on a rack.

*     *     *

Good Morning!

*     *     *

Notes

As you can see, this recipe doesn’t rely upon a lot of sugar. I don’t want sugar to take away from the tartness of the cherries. Since I didn’t create the topping for this batch, I did, however,  give each muffin a very light sprinkle of sugar. While it won’t detract from the cherries, a light dusting of sugar will help to crisp the muffin top. And when you’re preparing the cherries, chop them by hand and not in a food processor. I’ve found that no matter how hard I try, a food processor over-chops the fruit. By using a large knife to roughly chop the cherries, you’ll end up with flavorful muffins containing large pieces of fruit.

*     *     *