The Bartolini Family Risotto

Risotto della Famiglia di Bartolini

Risotto 1

This is it! The twice-delayed, much-anticipated, and another of the Bartolini Crown Jewels, my family’s risotto recipe. Though it’s been a long time coming, I think you’ll find it appealing, even if it is unlike most that you may know. You see, the Bartolini risotto is missing a couple of the dish’s standard ingredients and includes one that most do not — but we’ll discuss that in a bit.

Our risotto had quite a reputation among the branches of my family that did not reside in the two-flat. When our relatives from Cincinnati, at the time the southernmost members of the Clan, came for a visit, they had a standing request that this risotto be served as part of their welcoming dinner. I remember Mom making it for Dad’s Mother during her visits with us and risotto was often served when either of the two-flat’s families entertained. What made the Bartolini risotto so special? Chicken gizzards, an ingredient that was lacking from almost all other risotto recipes. If you liked gizzards, you loved this risotto. Of course, if you didn’t, well, you’d probably go hungry that night. The latter point being responsible for the greatest cover-up in the long and storied history of the Bartolini.

As popular as this dish was with the adults seated at the table, there was one member of the family, my sibling, who would have none of it. The child — henceforth referred to as “It” to protect “Its” identity — refused to eat them. Mom, in an effort to get the child to at least eat the risotto, told the child that they were “dried mushrooms” and “It” should put them aside and eat the rice. Knowing that the child balked at eating dried mushrooms, there’s no way so much as a grain of rice would have been eaten if “It” knew there were gizzards on that platter. Out of earshot of the child, Mom then turned to me and my other sibling, commanding we keep quiet about this, “Or else!”

Now, there’s nothing so unusual about what Mom did. After all, Mothers since the dawn of time have cajoled, bribed, and, yes, lied to their children, all in the name of good nutrition. (How many broccoli crowns have been hidden in meatloaf throughout the millennia?) No, the truly surprising thing about this tale is how long the ruse lasted.

We had all gathered at my Parent’s home for a family dinner, an event that had become more and more rare. When “It” noticed that Mom was preparing risotto, “It” asked Mom if dried mushrooms were to be included. Hearing that, I started to laugh and, much to Mom’s dismay, the cover-up was exposed. The astonishing fact is that the child was now in “Its” 30s! That’s right: 30’s! One “Or else!” from Mom and my sibling and I kept quiet for 3 decades. Kids today have it easy.

*     *     *

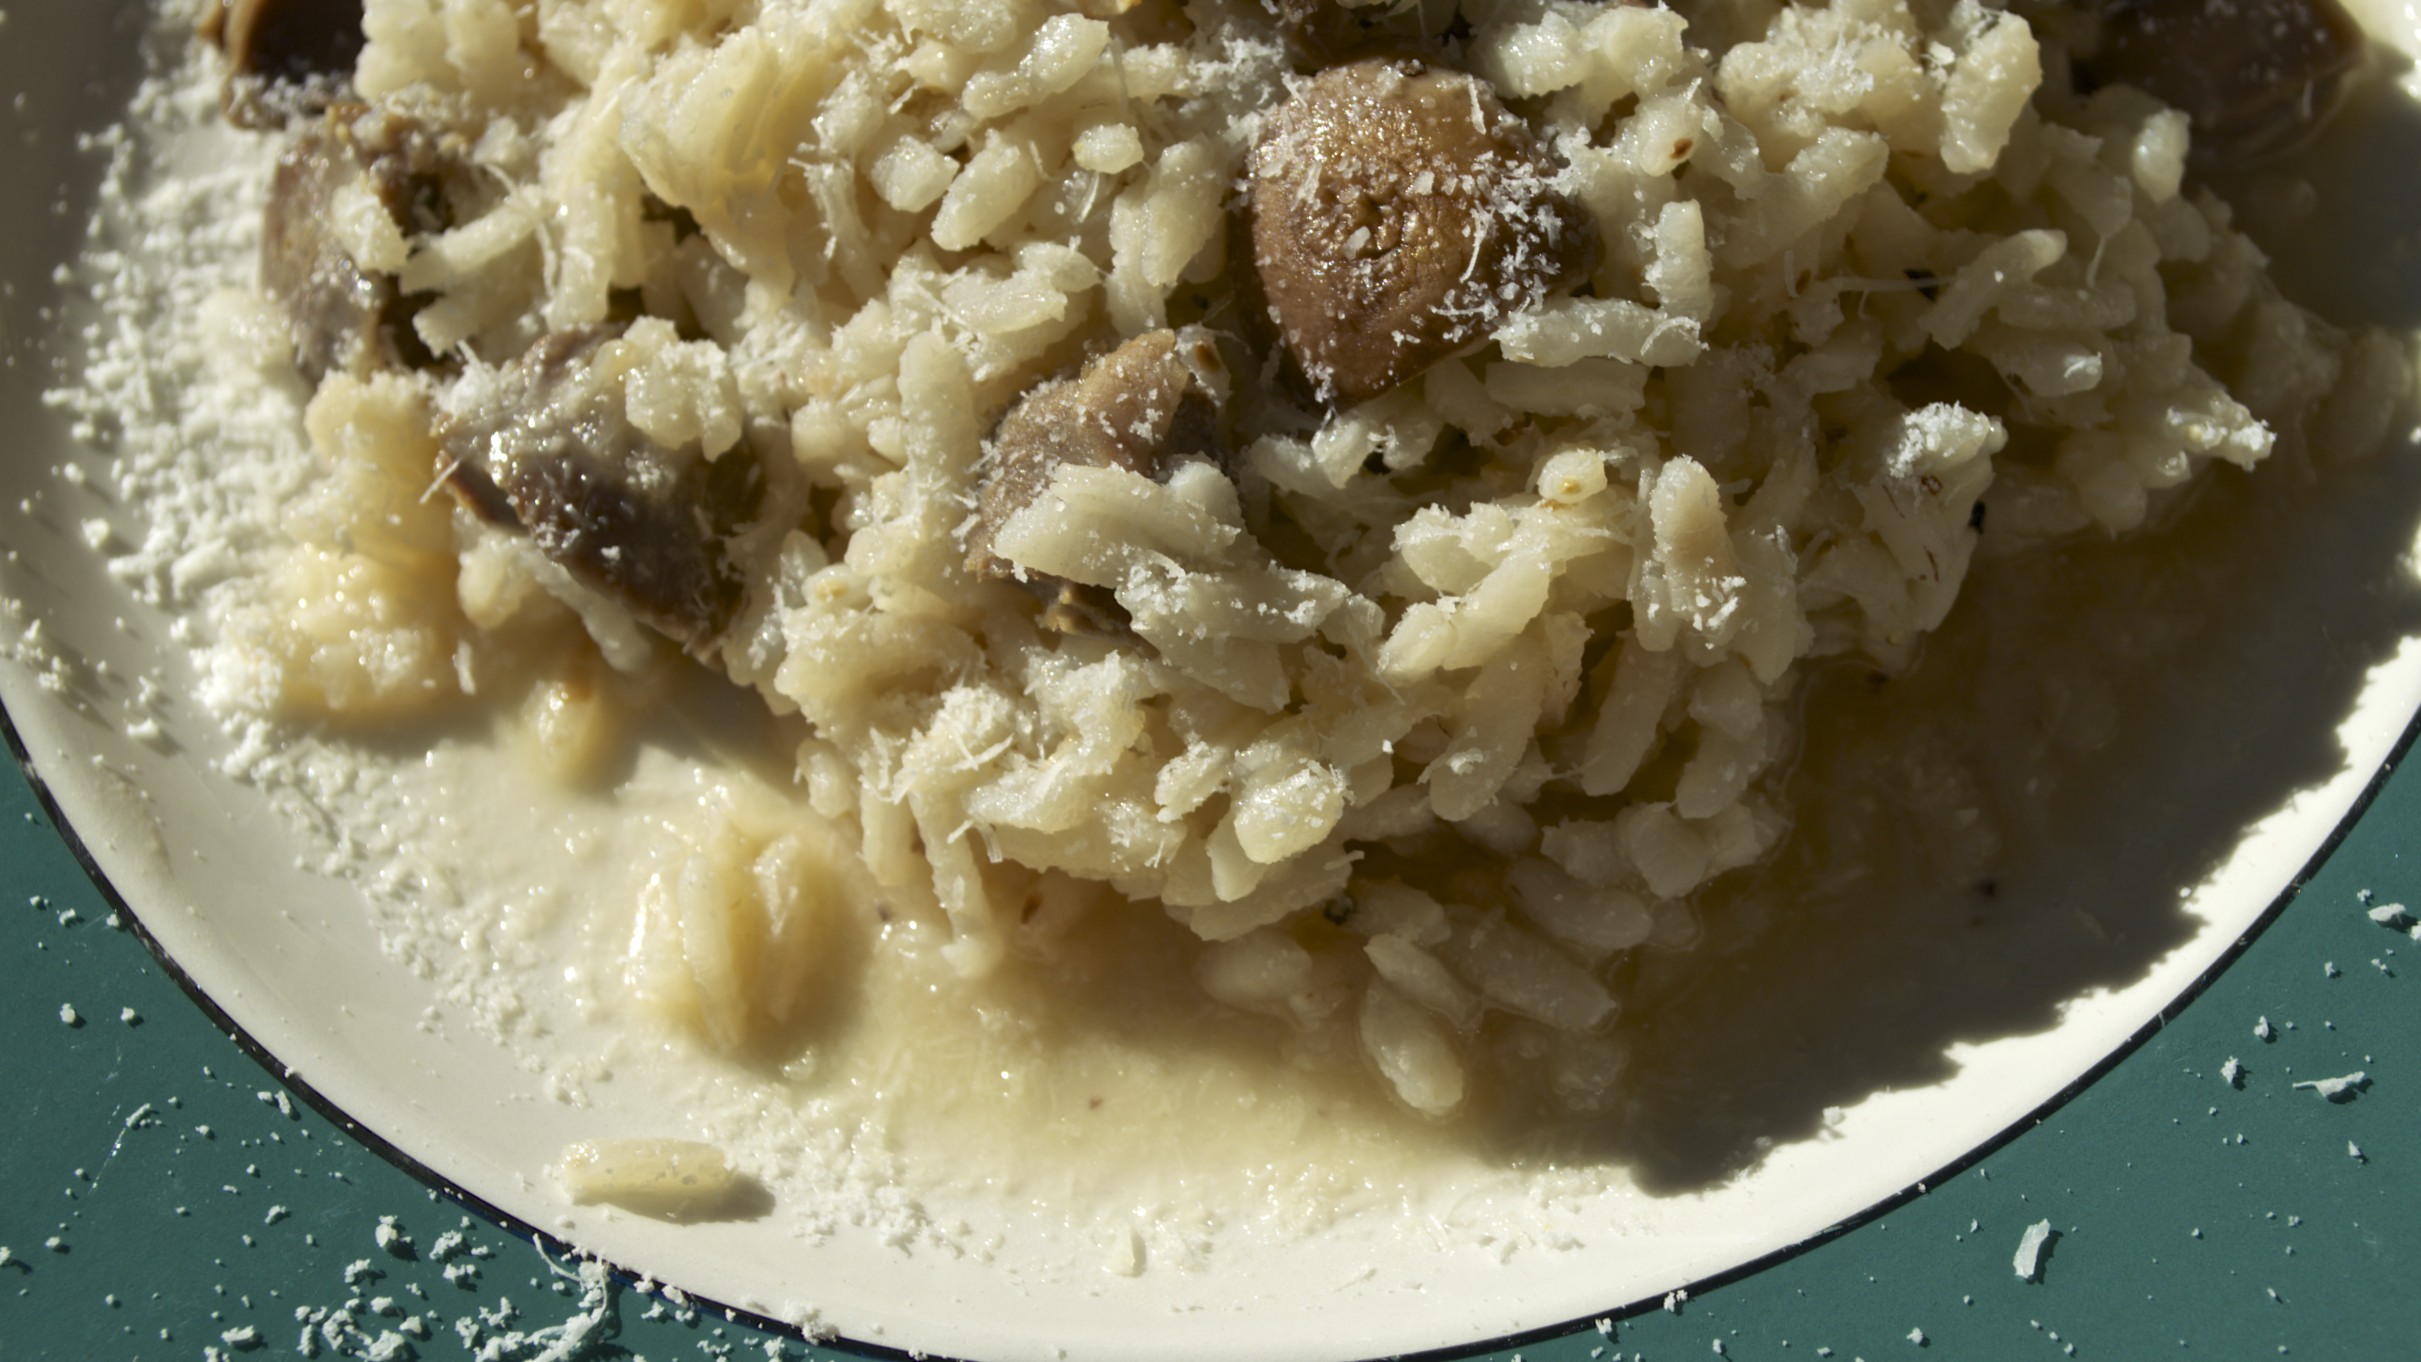
Our risotto is a bit more complicated than most. The gizzards, after all, must be cooked first. To do this, they are sautéed before being used to create a stock. As you’ll see in the recipe below, both the gizzards and the stock are then used to create the risotto. You’ll also note that 2 cups of Arborio rice are used. This will make a rather large platter of risotto. You may wish to reduce the amounts.

Risotto Recipe

Ingredients

  • 1 lb (455 g) chicken gizzards & hearts (see Notes)
  • 1 celery stalk
  • 1 carrot
  • 1 medium onion
  • 1 tbsp butterSautéing
  • 1 tbsp olive oil
  • water
  • 2 cups arborio rice
  • 2 tbsp butter
  • 1 small – medium onion, diced fine
  • 10 button or cremini mushrooms, chopped (see Notes)
  • 7 to 8 cups stock (see Notes)
  • salt & pepper, to taste
  • Pecorino Romano cheese

Directions

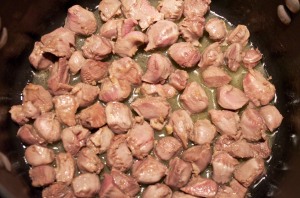
  1. Add the butter and olive oil to a saucepan over medium heat. Add the cleaned chicken gizzards to the pot and sauté for about 10 minutes. The object is to give them a bit of color, not fry them till fully cooked.
  2. Turn the heat to high before adding the onion, celery, carrot, and 2 quarts of water.
  3. Bring to a boil and reduce to a soft simmer. Continue to simmer for 90 minutes, removing any foam that may rise to the top.
  4. After 90 minutes, strain and reserve the stock. Remove the gizzards and set aside to cool. Remove the vegetables and discard.
  5. Once cooled to touch, chop the gizzards to your preference.
  6. In a large sauce pan or deep frying pan, melt the butter over med-high heat. Add the onion and sauté for about 5 minutes. Season with salt and pepper.
  7. Add the mushrooms and sauté for a few minutes until some color is achieved.
  8. Add the gizzards and sauté until heated through. The onion should be translucentSimmering away by this time. Season with salt and pepper.
  9. Add the rice and sauté for another 5 minutes or so to toast it. The grains should be partially opaque.
  10. Reduce the heat to medium, add a ladle or 2 of hot stock, and stir the rice. Though you needn’t stir it constantly, you shouldn’t leave it for more than a couple of minutes.
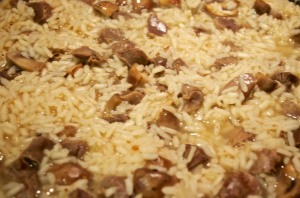
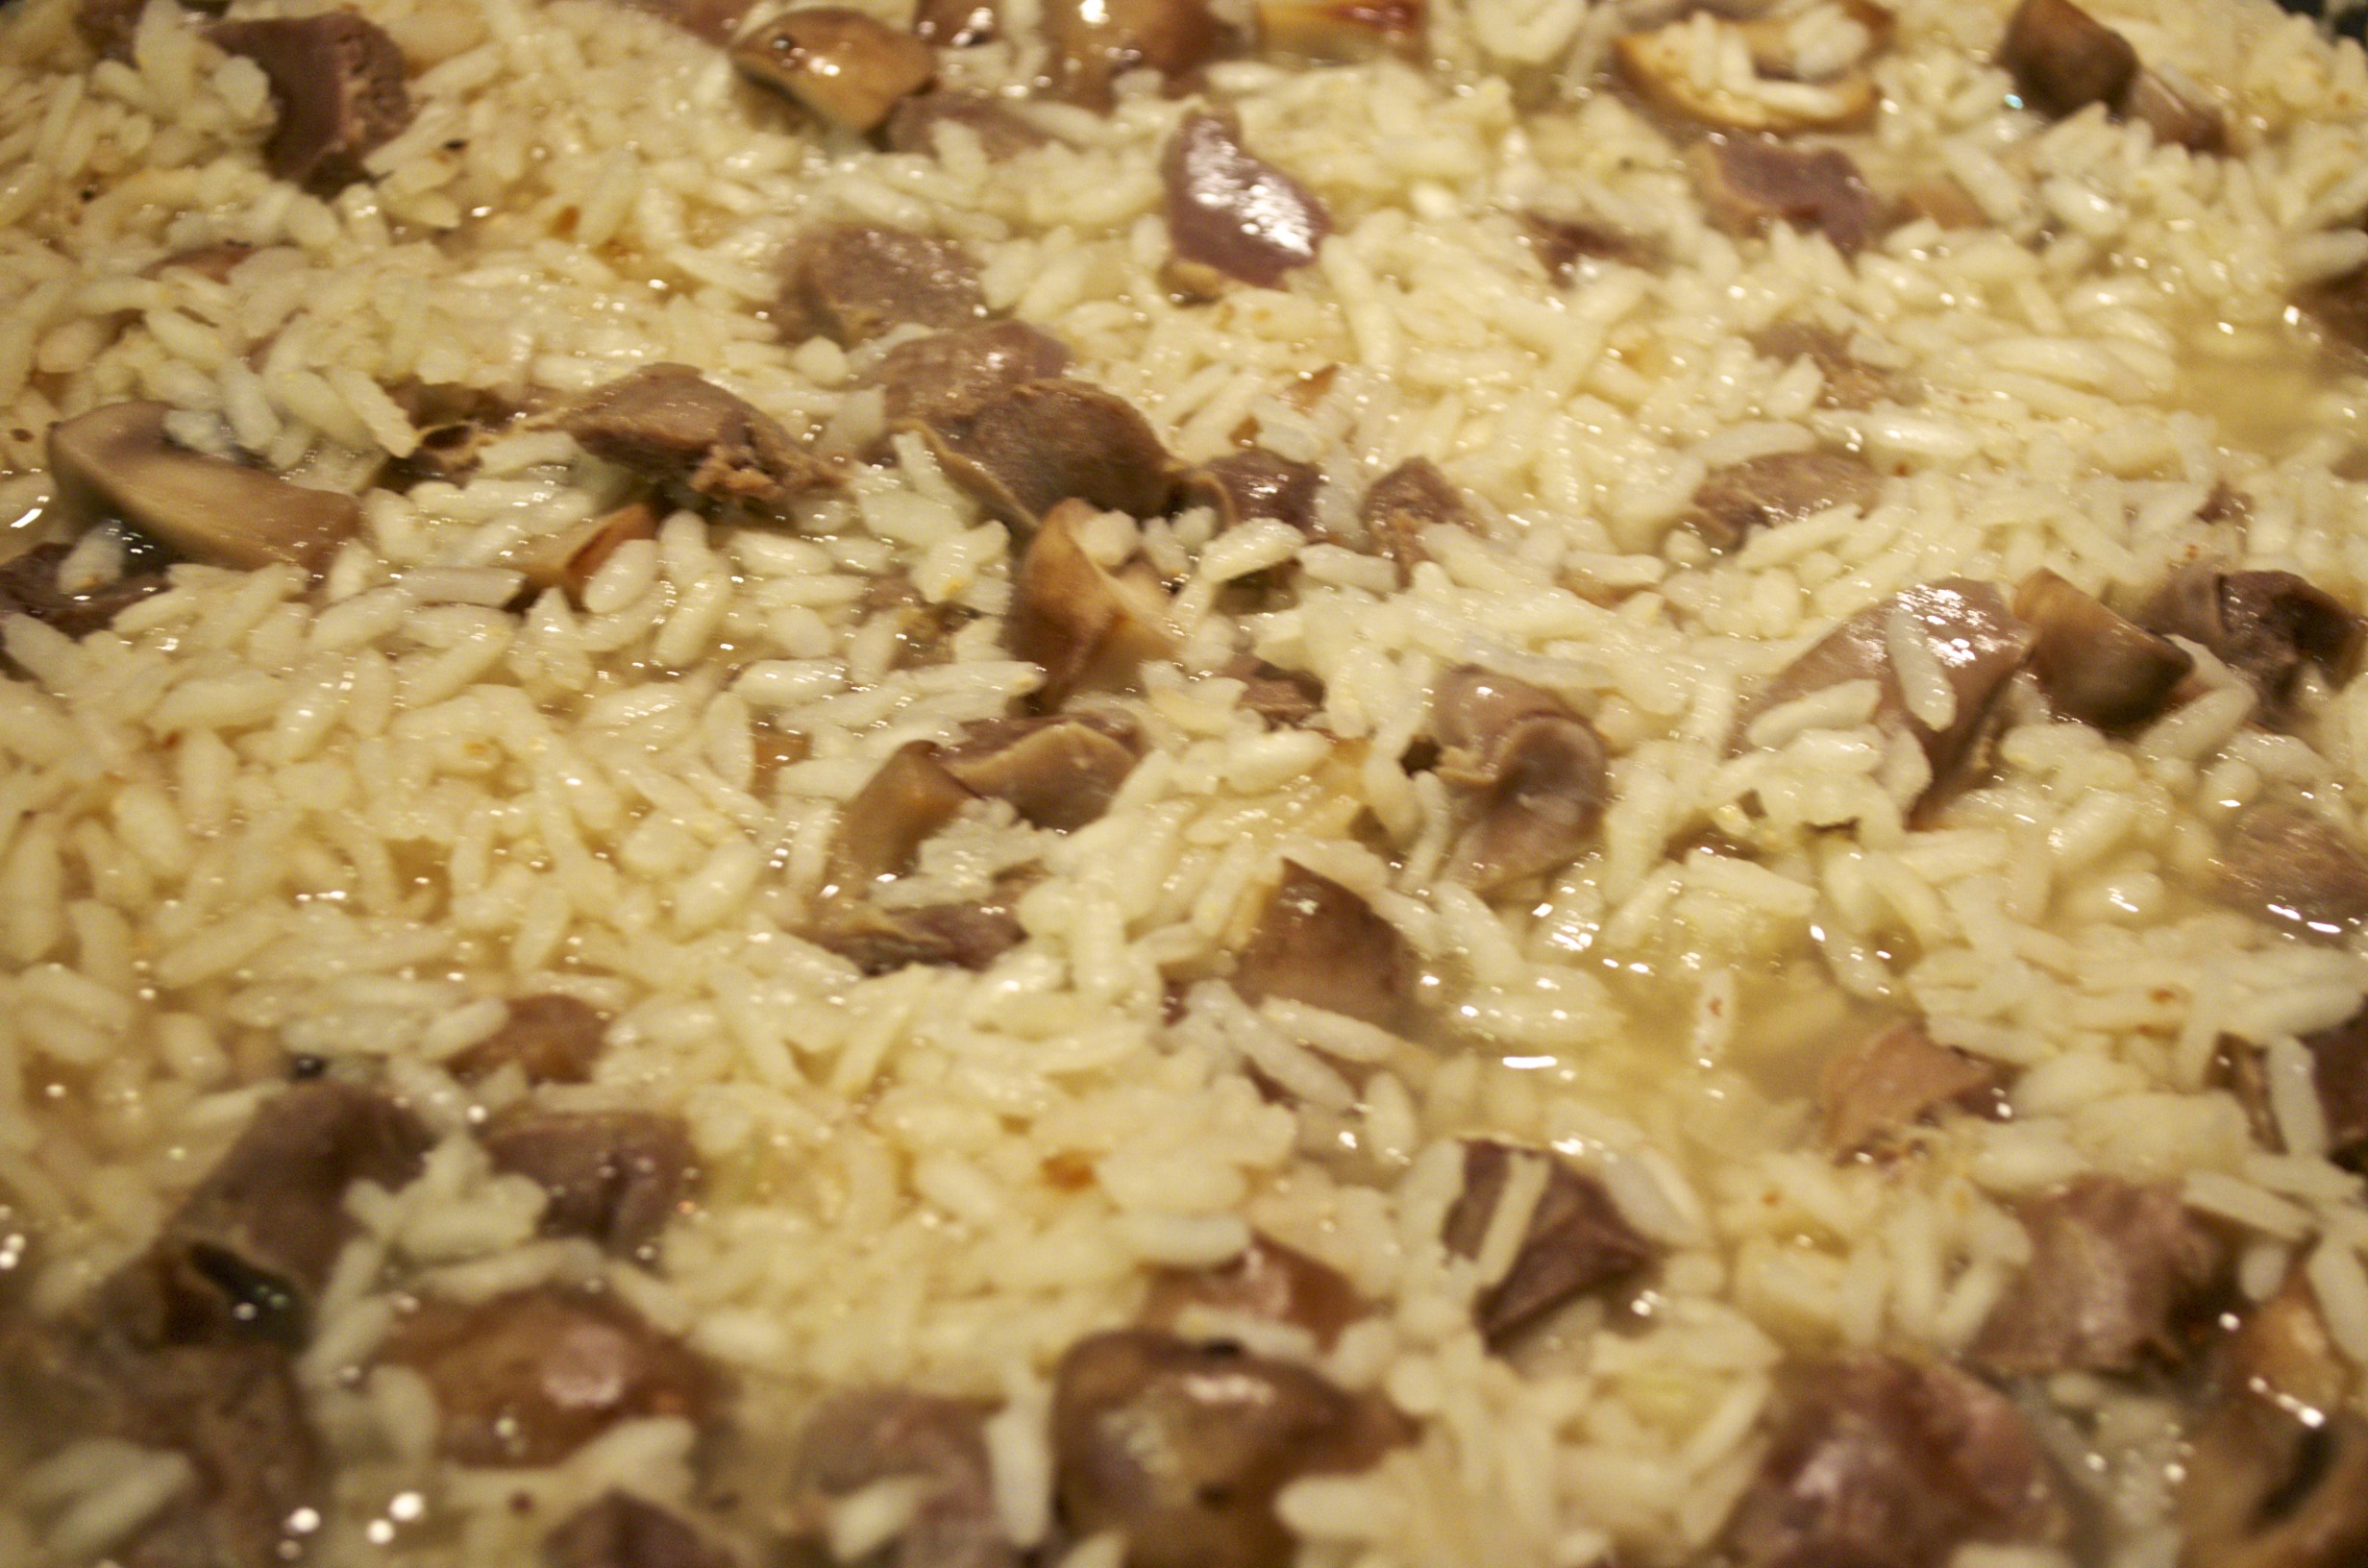
  11. When the stock is all but gone, add another ladle of stock and stir. Repeat this process again and again until the rice is just about cooked. This should take about 20 minutes and the risotto should not be gummy but very moist, though not so much as to be a soup.
  12. Taste and add salt & pepper, as needed.
  13. Turn off the heat, add a final ladle or 2 of stock, cover the pan, and let the risotto rest for 5 minutes.
  14. Add a handful or 2 of grated Pecorino Romano cheese, stir to combine, and place on the serving platter.
  15. Garnish with more grated cheese and serve.

*     *     *

Risotto 3

*     *     *

Variations

In many versions of risotto, white wine and saffron are added to the rice, although neither are used in my family’s risotto recipe. At a later date, I will post a recipe for Risotto alla Milanese, in which both ingredients are required.

Notes

In my area, chicken gizzards are sold in 1 lb packages. Before cooking, they must be rinsed and trimmed of any fatty and/or dark parts. Try to keep the fleshy parts as intact as possible. These will be chopped once cooked.

If you’re trying to “disguise” the gizzards, it’s best to chop the mushrooms in about the same size as the chopped gizzards, keeping in mind that the mushrooms will shrink when cooked.

The standard ratio of rice to stock when making risotto is about 1 to 3½, meaning for every cup of rice you’ll need 3½ cups of stock. It never hurts to have extra stock on hand just in case more is needed to cook the risotto.

The stock created with the chicken gizzards is relatively simple, with the few ingredients left in large pieces. This makes it far easier to retrieve the gizzards once cooked.

When ready to start cooking your risotto, combine  the stock made when cooking the gizzards with enough homemade chicken stock to give you the amount required in the recipe. Of course, store-bought, low-sodium, chicken stock may be substituted.

Keep the stock hot but not boiling. If kept boiling, much of it will immediately evaporate upon hitting the hot risotto pan without having a chance to be absorbed by the rice.

*     *     *

It’s déjà vu all over again … Corn RelishIt’s that time of the year again. In this part of the country, every grocery, market, and vegetable stand features at least one bin filled to over-flowing with ears of fresh corn. If you’re at all like me you just cannot get enough of the stuff. That’s all well and good for now, but what are you going to do come Fall when today’s surplus is but a memory? Well, with today’s blast from the past, you’ll be laughing all the way to the pantry. Zia’s Corn Relish is a great way to preserve today’s corn for tomorrow’s meals. It’s a simple recipe and you can find it by clicking HERE.

*     *     *

Coming soon to a monitor near you …

Ravioli with Morels

Ravioli made with Ramps and Dressed with Morel Mushroom Sauce

*     *     *

The Kitchens are in a Pickle

This post is really little more than a comedy of errors. I had another recipe in mind for today but that was before forces beyond my control intervened. You see, I was at the farmers market, minding my own business when I came upon the radishes, French breakfast radishes, no less. So, I bought them. Never mind that I was already lugging around a full shopping bag. Exiting the vendor’s stall, I literally bumped into the beets display. WIth my shirt now sporting a mixture of mud and beet juice, I thought it a sign and bought a bunch of large red beets. On the way out of the market, I bought a few more things, filling a 2nd bag, and headed for home.

*     *     *

*     *     *

Once home, I unpacked my bounty, dreaming of following Roger’s suggestion for buttery radishes and re-creating Mom’s beet salad. And that’s when it hit me. I’d be leaving for Michigan in a few days. I should be subtracting from my refrigerator’s shelves, not adding to them. WIth no possible way to clear my fridge before I was to leave, Plan B was put into effect: food preservation. I’d freeze some and the rest? Well, that’s how today’s pickling post was born and first up were the radishes.

Googling pickled radish recipes, I came upon one from David Lebovitz and looked no further. I’ve had very good luck with his recipes. Unfortunately, I didn’t have any white vinegar — this was a spur of the moment pickle, after all — so I married what I had until I reached the required amount. The radishes turned out great and, subsequently having earned Zia’s seal of approval, I see no reason to change things. The “married” amounts are the ones listed in the recipe’s ingredients.

Next were the beets. I didn’t have my own recipe, so, I again I turned to google. After checking a number of them out, I decided to wing it. The recipe below is the result. There’s one critical error, however. I had intended to use these beets in a salad but I included whole cloves in jars of red shoestring beets. How could anyone find those cloves when it’s time to serve the beets? With 2 jars already filled, I had little choice but to continue with the recipe, adding whole cloves to the remaining jars, watching them disappear into the beets. Since I had promised beets to some friends, I knew I would have to make more. These wouldn’t do.

The Saturday following my return from Michigan, I once again returned to the farmers market and bought 2 bunches of beets. This time I bought Chioggia beets, an Italian variety of heirloom beets with alternating red & white rings when cut. There was no way any cloves could hide among these beauties. Still, I wasn’t going to take any chances. These beets would be sliced rather than shredded. While the beets were roasting, I surfed the web looking at pickling recipes. I stumbled upon a USDA site and their recipe for pickled beets. With some changes, that’s the recipe I used and have shared below.

*     *     *

Shoestring Beets

Pickled Red “Shoestring” Beets Recipe

Ingredients

  • 1 bunch (4 or 5) large red beets, washed and greens removed
  • olive oil
  • 1 cup (235 ml) cider vinegar
  • 1 cup water (237 ml)
  • 1/2 cup (100 g) sugar
  • 1 tsp kosher salt
  • 2 cinnamon sticks, halved
  • 3 whole cloves per jar

Directions

  1. Pre-heat oven to 400˚ (205˚ C).
  2. Place washed beets on a foil line baking sheet, cover lightly with olive oil, and use another sheet  of foil to enclose the baking sheet and beets.
  3. Place beets in oven and bake for 45 minutes or until a knife can be inserted into a beet with little resistance.
  4. Uncover the beets and set aside until cool enough to handle.
  5. Beet skins should peel off, though a paring knife may be needed for some spots.
  6. Using a food processor with blade inserted, shred the beets created “shoestrings.”
  7. Meanwhile, add vinegar, water, salt, and sugar in a small sauce pan and heat until both are dissolved. Keep hot though not boiling.
  8. Using 4, sanitized pint-sized jars, add 1 clove and 1/2 stick of cinnamon to each. Add some beets, another clove, enough beets to fill, and one more clove. Add enough of the hot pickling liquid to fill each jar to within 1/2 inch of the jar’s top.
  9. Seal each jar until “finger tight” and process in a boiling water bath for 30 minutes, Remove from water and set, undisturbed, on a kitchen towel covered baking sheet in a draft-free spot. Jars may be moved after 24 hours.

*     *     *

“Quick Pickle” Radishes Recipe

Ingredients

  • 9 oz (260 g) radishes, cleaned, trimmed, and sliced thin.  Peel where needed.
  • 2 oz (60 g) red onion, sliced thin
  • 1 1/3 cup (316 ml) red wine vinegar
  • 2/3 cup (157 ml) cider vinegar
  • 1 cup water (237 ml)
  • 1 tbsp sugar
  • 1 tbsp kosher salt
  • 2 garlic cloves, cut in half
  • 24 green peppercorns, divided
  • 24 red peppercorns, divided

Directions

  1. Add vinegar, water, salt, and sugar in a small sauce pan and heat until both are dissolved. Set aside to cool.
  2. Using 4, sanitized, pint-sized jars, add 1/2 garlic clove and 6 of each, red and green peppercorns.
  3. Divide the onion and radishes evenly among the jars.
  4. Once cooled, pour enough pickling liquid to fill each jar within 1/2 inch of the top. Seal each jar with a sterile lid and refrigerate.

Inspired by David Lebovitz

*     *     *

Chioggia Beets

Pickled Sliced Chioggia Beets Recipe


Ingredients

  • 2 bunches (9 or 10) medium Chioggia beets, washed and greens removed
  • olive oil
  • 1 medium onion, sliced thin
  • 4 cups (950 ml) cider vinegar
  • 2 cup water (475 ml)
  • 2 cups (400 g) sugar
  • 2 tsp kosher salt
  • 3 cinnamon sticks
  • 10 whole cloves

Directions

  1. Pre-heat oven to 400˚ (205˚ C).
  2. Place washed beets on a foil line baking sheet, cover lightly with olive oil, and use another sheet  of foil to enclose the baking sheet and beets.
  3. Place beets in oven and bake for 45 minutes or until a knife can be inserted into a beet with little resistance.
  4. Uncover the beets and set aside until cool enough to handle.
  5. Beet skins should peel off, though a paring knife may be needed for some spots.
  6. Slice the beets as thin as you prefer.
  7. Meanwhile, place cinnamon sticks and cloves into a small pouch or piece of cheese cloth and tie to secure.
  8. Place vinegar, water, salt, sugar, and spice bag into a sauce pan and bring to the boil.
  9. Add sliced beets and onion, simmering for 5 minutes.
  10. Remove the spice bag and fill each jar with enough beets, onion, and pickling liquid to within 1/2 inch of the top.
  11. Seal each jar until “finger tight” and process in a boiling water bath for 30 minutes, Remove from water and set, undisturbed, on a kitchen towel covered baking sheet in a draft-free spot. Jars may be moved after 24 hours.

Inspired by National Center for Home Food Preservation

*     *     *

Notes

The radishes should sit in the refrigerator for a few days before use and they will last about 3 to 4 weeks if kept in the fridge. Both beet pickles are processed and will last for months on a cool, dark shelf. If you like, you can skip the boiling water bath, put a sterile lid on each jar, and refrigerate them. They, too, will last about 3 to 4 weeks this way.

Although I used French breakfast radishes for this post, I’ll use the more common, globe-shaped radishes for future pickles. They’ll produce larger slices, which I prefer.

You needn’t roast the beets before pickling. Many recipes suggest boiling the beets for 20 to 30 minutes before peeling and continuing with the pickling.

*     *     *

It’s déjà vu all over again …

Giardiniera-topped Mount Burger

Giardiniera-topped Mount Burger

It’s Summer and people are googling season-appropriate recipes. Pesto was hot but now my giardiniera recipe has caught the internet’s eye. It’s probably because the ingredients are all readily available now, as are reasons for having a jar on-hand. It is barbecue & picnic season, after all, and neither can be a success without a jar of giardiniera handy. You can find out what so many others are googling by simply clicking HERE.

*     *     *

Coming soon to a monitor near you …

Risotto Preview

Risotto

Let’s try this again, shall we?

*     *     *

Salted Cod Salad

Insalata del Baccalà For some, the timing of today’s post may seem rather odd. A salted cod salad is very often served in Italian households as part of the Feast of the Seven Fishes on Christmas Eve — but not in our house. We Bartolini prepared this salad virtually any time throughout the year except during the holidays. On Christmas Eve, we served our salted cod stewed in tomato sauce, baccalà in umido. Frankly, I prefer it this way, with a stew served in Winter and a salad served in the warmer months.

This is the third recipe I’ve shared that features salted cod. The first, Baccalà alla Marchigiana, is the stew that we served on Christmas Eve. In the second post, the cod was barbecued, although the same preparation could be used to bake the fish. Today’s recipe is a salad and a snap to make, once you’ve re-hydrated and rinsed the cod.

Briefly, in the days long before refrigeration, cod was dried and salted as a means of preservation. To make it suitable for cooking, the cod must be soaked in cold water for at least one day and no more than three. During that time, the water should be changed three times daily. The longer the soak, the less salty the taste. It is up to you to decide what level of salinity is acceptable.

With the cod re-hydrated, the dish, like most green salads, is really quite simple to prepare. Though the ingredients may have varied from one salad to the next, we always dressed our salad with a bit of red wine vinegar and olive oil. You, like many, may prefer to use lemon juice in place of the vinegar. Even so, with absolutely no cooking involved, you can easily see how this salad would make a perfect meal during Summer’s dog days.

*     *     *

Salted Cod Salad Recipe

Ingredients

  • 1lb (455 g) of baccalà (See Variations)
  • pickled bell peppers, chopped (See Notes)
  • 1/2 yellow bell pepper, chopped
  • 1 celery stalk, chopped
  • red onion chopped
  • nonpareil capers, rinsed
  • Kalamata olives, halved
  • 1/4 cup fresh parsley, chopped
  • extra virgin olive oil
  • red wine vinegar — lemon juice may be substituted
  • salt & pepper, to taste

*     *     *

*     *     *

Directions

  1. To ready the baccalà: Place the fish in an oblong glass dish or pan. Add enough water to cover, dump the water, and repeat a few times. Add enough water to cover and set aside. Change the water 3 times daily for at least 1 day and no more than 3. When ready, the cod will be considerably thicker than when your started and will taste far less salty. (See Notes)
  2. Remove any bones and skin before proceeding,
  3. Bring a large pot of water to the boil.
  4. Meanwhile, cut the re-hydrated baccalà into chunks from 3 to 4 inches apiece.
  5. When the water is boiling hard, add the baccalà and, when the water returns to the boil, reduce the heat to a soft simmer.
  6. Simmer until the baccalà can be easily flaked, usually about 5 to 8 minutes.
  7. Using a slotted spoon or small strainer, remove the baccalà from the water and set aside.
  8. Once cool, carefully flake baccalà and place in another bowl.
  9. To that bowl, add the peppers, celery, onion, capers, olives, and parsley. Gently toss the ingredients until combined.
  10. Add enough of the olive oil to lightly coat the salad, followed by the vinegar/lemon juice to taste. Season with pepper but be sure to taste before adding any salt.
  11. If not to be served immediately, cover and refrigerate until you’re ready to do so.

*     *     *

Variations

This recipe used raw salted cod, baccalà, to make the salad. The salad could also be made using left-over baked, broiled, or grilled baccalà, as well. When using left-over cod, there’s no need to boil or cut it up into chunks. Skip those steps and start flaking the pieces.

You can vary the salad ingredients to suit your own tastes. Carrots, shallots, garlic, etc., can be added or used to substitute for any of the ingredients listed.

*     *     *

*     *     *

Notes

You’ll note that I used bell peppers twice in this recipe. The first were miniatures, “Tulip Bells”, that I pickled last August. They added color and a vinegar element. The yellow bell was added for both color and crunch. Neither pepper brings any heat to the salad. If you like, you can add cherry bomb peppers, jalapeños, or Serranos, raw or pickled, to kick up the heat.

One sure way to know whether the baccalà is ready to be cooked is to taste a very small piece of it, once it seems fully hydrated. If it is still too salty, keep soaking the fish until it reaches the level of salinity that you prefer, bearing in mind that it will be boiled once it passes your inspection.

Do not add any salt to the dish until the very end.

This salad will keep for 2 days if refrigerated, though we’ve rarely had left-overs.

*     *     *

It’s déjà vu all over again …

Today’s post featured a recipe tailor-made for Summer’s hottest days, when we’re all loathe to turn on the stove. The same can be said for today’s blast from the past. Two years ago I shared a recipe for a couscous salad that requires not one bit of cooking. Just put the ingredients in a bowl, give them a toss, and set your salad in the fridge while you sip Long Island iced tea on the patio. A few hours later you’ll have a tasty salad for lunch or dinner without ever touching a pot or pan. You can see how it’s prepared by clicking HERE.

*     *     *

Coming soon to a monitor near you …

Pickles

*     *     *

Fried Zucchini Blossoms

Fiori Fritti dello Zucchini

*     *     *

For a number of years now, it seems that every cook and chef on television has demonstrated the fine art of stuffing zucchini/squash blossoms before being fried. This was not something we ever tried at the two-flat. First of all, Grandpa would never plant something in his garden that would take up so much space. Tomatoes were his main interest and a plant that sprawled, no matter what kind, just wasn’t welcome. More importantly, even if he found a suitable spot for, say, zucchini, picking the blossoms would not have been acceptable to him in the slightest. He planted zucchini and anything that would lessen the crop would not have been allowed. So, without the crutch of a family recipe, I headed into new territory when I bought my first bunch of zucchini blossoms late last Summer.

Those first blossoms proved to be a disaster. They were an impulse buy and I’d no idea how to store them, so, I treated them like I would cut flowers. I awoke the next morning to find a wilted mess in a glass of water. That was the last I saw of blossoms until a few weeks ago, when I came across some at the farmers market. With my car in the shop, they survived the trip home in surprisingly good shape. Problems arose, however, when it came to creating a stuffing. Not wishing to test the CTA’s reliability a 2nd time that day, I raided the fridge, finding fresh mozzarella and fontinella cheeses. A quick trip to the corner store and I returned with a 1/2 gallon of whole milk that was used to make ricotta. These three cheeses were used to prepare the stuffing used in today’s recipe.

With the stuffing decided, I set about creating a batter to coat them. I tried a number of versions, over the course of 3 Saturdays, finally settling on a batter of flour, corn starch, cornmeal, and club soda. This batter was, by far, the best, resulting in blossoms that were crispy without being buried in batter.

I also continued to experiment with fillings. My favorite consisted of mozzarella and anchovies. Unfortunately, my photos from that batch were a mess, though I did post the “best” one later in this post.

There is one more thing worth mentioning. Be sure to open each blossom and check to see if there are any stow-aways. Although any one of a number of insects might be found lurking in there, I’m more concerned with creatures of the eight-legged variety. Although I’ve yet to come across one, I check the blossoms over the sink with the garbage disposal running. Just sayin’ …

*     *     *

I’ll be leaving for Michigan and the Kitchens will be closed as a result. It’s time for a little R&R on the beach with Max. See you in 2 weeks.

*     *     *

Che Bei Fiori!

*     *     *

Fried Zucchini Blossoms Recipe

Ingredients

  • 12 fresh zucchini/squash blossoms
  • 2 oz (56 g) mozzarella, grated
  • 2 oz (56 g) fontinella, grated
  • 4 oz (113 g) whole milk ricotta, well-drained
  • 1/2 cup AP flour
  • 1/4 cup corn starch/flour
  • 1/4 cup cornmeal
  • club soda
  • salt & pepper
  • oil for frying

*     *     *

Fontinella, Ricotta, & Mozzarella Cheeses

*     *     *

Directions

  1. Using tweezers, remove stamen and gently wash each blossom. Carefully blot each one dry. Remove the stems just beneath the blossom.
  2. Place a coffee filter into a strainer and add ricotta. Allow to drain a couple of hours. Discard the liquid (whey) and reserve the ricotta.
  3. Coarsely grate mozzarella and fontinella cheeses. (See Notes)
  4. Combine ricotta, mozzarella, and fontinella cheeses. Mix well.
  5. Add flour, corn starch, salt & pepper into a bowl and whisk to combine.
  6. Add enough club soda to make a batter.
  7. Place the cheese mixture  into a pastry bag or plastic storage bag. If using the latter, cut off one of the bag’s bottom corners and force the cheese into that part of the bag.
  8. Grab hold of a blossom in one hand and gently separate the petals to reveal a “pocket”. Gently blowing into the blossom may help open it up.
  9. Place the tip of the cheese-filled pasty/plastic bag into the pocket and squeeze some of the cheese into the blossom. Do not overfill nor allow the blossom to split. Continue until all are stuffed.
  10. Fill a medium-sized sauce pan with about 2 inches (5 cm) of oil. Heat to about 350˚. You’ll know it is hot enough if a bit of batter instantly begins to fry when dropped into the hot oil.
  11. Take one blossom and twist the petal ends to seal the cheese inside. Grabbing hold of the twisted petal ends, dip the blossom into the batter to cover. Drain excess batter and then place in the hot oil. Continue with more blossoms. Work in batches to avoid overcrowding the pan.
  12. When golden brown (2 to 4 minutes), flip each blossom. Fry for another 2 minutes
  13. Remove to a paper towel lined dish and season with salt.
  14. Serve immediately

*     *     *

*     *     *

Variations

Though stuffed blossoms are wonderful when fried, you really don’t need to stuff them with anything before frying. Just dip them in the batter and fry them. You’ll get a light, crispy treat without the hassle of trying to fill blossoms with cheese.

Mozzarella & Anchovy  Zucchini Blossom

You can stuff the blossoms with whatever you like. Any cheese or mixture of cheeses will work. I chose a combination of 3 cheese for this post. My favorites, though were blossoms stuffed with mozzarella and an anchovy. Simply prepare the blossom as indicated above, cut a stick of mozzarella, wrap it with an anchovy, insert both into the blossom before dredging and frying. Unfortunately, the photo on the right is the best of those I took that afternoon.

There are several ways to coat your blossoms. Some prefer to use eggs in their batter while others “go it alone” with just a coating of flour. Some use breadcrumbs to form a coating and others like only flour. I like a thinner batter, so, I use a little club soda poured into a mixture of 1 part each of corn meal and corn starch/flour for every 2 parts AP flour. When mixed, I prefer a batter that’s a little thicker than buttermilk but not quite as thick as pancake batter.

*     *     *

Notes

I’ve yet to discover a good way to store blossoms. I was told to treat them like freshly cut flowers and that didn’t work. I’ve since searched the web and it’s suggested that the blossoms be tightly sealed and refrigerated. (One of the vendors expressly stated not to refrigerate them.) I’ve yet to try this for when I returned last weekend for more blossoms, none were to be found — hence the blurry photo above.

By far, the easiest way to stuff a blossom is to use a pastry or plastic bag, tip inserted into the blossom. If and when I find more blossoms, I think I’ll try the 3 cheeses again, only doubling the amount of mozzarella and fontinella before adding chopped anchovies to the mixture. Yes, I do love my anchovies!

Whenever soft cheeses like mozzarella need to be grated, it’s easiest if your place the cheese in the freezer for about 30 minutes beforehand. This should harden the cheese a bit, making grating a snap.

Initially, I tried a shallow fry, using about a half-inch of oil in the pan. I did not like the results at all. The lack of oil meant the blossoms had to be “handled” more so that they could be flipped and evenly fried. This raised the risk of damaged blossoms and leaking cheese. Using about 2 inches (5 cm) of oil made frying so much easier and consequently no blossoms were harmed in the making of this tasty treat.

*     *     *

It’s déjà vu all over again …

For many, a meal isn’t complete until coffee and an after-dinner liqueur are served. If that meal is served during the Summer, a dish of ice cream is very often part of the equation. With an eye towards reducing the average dishwasher’s workload, the Italians took these 3 traditions and united them in one simple dessert, affogato al caffè. Often served in a cup, affogato is a combination of ice cream and espresso, with an optional shot of your favorite liqueur. I think you’ll agree that an affogato is a wonderful way to end a meal — without having to loosen your belt afterward. You can see directions for creating a variety of affogati by clicking HERE.

*     *     *

Coming soon to a monitor near you …

Baccalà Salad

Baccalà Salad

*     *     *

Grilled Rack of Spring Lamb

Carré di Abbacchio alla Griglia

As a boy, I was aware that Mom was a good cook. I’d been to enough of my friends’ homes for dinner to know that few shared Mom’s skill in the kitchen. Judging by their response, my friends came to the same conclusion when they stayed for dinner at our home. In fact, a Mom called mine one evening asking how she prepared spinach. To her surprise, upon returning home after dinner with us, my friend couldn’t stop raving about the spinach, something he refused to eat at his own home. Apparently, she had only served her family canned spinach. Over the phone, Mom gave her instructions for sautéing fresh spinach in garlic-flavored olive oil. Decades before Jamie Oliver, Mom was changing how America ate, one dinner table at a time. Incidentally, to this day, I’ve never eaten canned spinach, no matter what Popeye said or did.

*     *     *

*     *     *

Knowing that Mom was a good cook was one thing, realizing the authenticity of her cooking was something else. During my first trip to Florence, I followed a tour book’s suggestion and dined at a family owned restaurant. Just as the book described, we were greeted by the owner/chef, taken to our table, and then he disappeared, returning a few minutes later with menus and a list of the specials. In the kitchen, just as the book stated, Mamma could be seen helping to get the orders out to the diners. I followed our host’s suggestion and ordered lamb chops. A few minutes later, I glanced into the kitchen and there was Mamma, just beyond the restaurant’s back door, grilling my chops. When I was served, I was surprised to learn that they tasted exactly — not similarly but exactly — as if my own Mom had prepared them. That was the day I realized just how authentically Italian Mom and Zia cooked. That was quite a souvenir to bring back home.

Although a recipe is listed below, today’s post is more about the method used than anything else. This was how all of our chops and steaks were prepared, no matter who manned the barbecue. This is not an exact science nor will it ever be. The only difference in method when cooking the various meats is that a little lemon juice might be added when cooking lamb. Otherwise, a simple combination of olive oil, garlic, rosemary, salt, and pepper are used to marinate the meats. It really is that simple but don’t take my word for it. Karen has shared her own flavorful version of this simple recipe for grilled lamb in her wonderful blog, Back Road Journal.

As for today’s lamb, a couple of days after Easter, I was pleasantly surprised to see 2 small racks (a 3 rib & a 4 rib) of Spring lamb in the meat display. I asked the butcher about them and learned that they have been trimmed to  fulfill special orders for the holiday. I bought them — at half price! — and stored them in the freezer, bringing them with me when I last visited Michigan. Believe me, after every future holiday I will be sure to check every meat counter within reason, looking for a similar deal.

*     *     *

*     *     *

Grilled Rack of Spring Lamb Recipe

Ingredients

  • 2 portions of Spring rack of lamb, 7 ribs in total, french cut
  • 1 to 3 cloves garlic, chopped
  • rosemary, roughly chopped
  • olive oil
  • 1 to 2 tbsp fresh lemon juice (optional)
  • salt and pepper
  • parsley for garnish (optional)

Directions

  1.  A couple of hours before you are to roast the lamb, remove it from the refrigerator and place on a pie plate or similar dish.
  2. Season with garlic, rosemary, salt, and pepper before sprinkling with optional lemon juice and enough olive oil to lightly coat everything. The lamb is already dead. No need to drown it in oil.
  3. Set aside to marinate until you’re ready to cook. If your kitchen is warm, place the rack in the fridge until 30 minutes before you intend to cook it.
  4. Pre-heat your barbecue on high. Wrap the chop tips with aluminum foil, something I forgot to do.
  5. Place the rack directly over the heat and sear the meat for a couple of minutes before moving it to an area on the grill away from the heat.
  6. Using an instant read thermometer, we pulled the racks off of the grill when the temperature reached 120˚ F (49 C).
  7. While the racks rested, covered, I grilled the asparagus while Zia dressed the salad.
  8. The racks were served, garnished with a bit of parsley (optional).

*     *     *

Notes

The olive oil marinade is not one that is left on the meat overnight. At most, the meat was left to marinate for 3 hours, with 1 to 2 hours the norm.

As you can see in the photo, the rosemary wasn’t chopped before being used.  Most, if not all, will be lost during grilling. The same is true for the garlic, so, don’t be overly concerned with chopping/dicing everything evenly.

The racks could just as easily be broiled if a barbecue or grill pan is not available. As always, do not forget about them lest your return to find Spring rack of lamb flambé.

*     *     *

It’s déjà vu all over again …

Cherries JammedI mentioned last week that tart cherries are now in season. In my opinion, these cherries make the best pies, muffins, and jams. Yes, it can be a bit tedious pitting the little red devils but the end result certainly makes it all worthwhile. If you’re interested, you can see my recipe for making this delicious jam by clicking HERE.

*     *     *

Coming soon to a monitor near you …

Fried Zucchini Blossoms 

*     *     *

Farmers Market Pasta

Pasta Primavera

It happens every Spring. After having spent the Winter avoiding most fresh vegetables because they’ve seemingly spent more time in transit than in some distant fields, the farmers markets open and I can barely contain myself. I go with a general idea of what I’d like to buy and return home with two bags full of produce and a loaf of bread. As I unpack Saturday’s harvest, I begin to plan my meals.

In the past, I’ve commented on a couple of blogs that I’m amazed at how we all could look at the same ingredients and “see” different dishes. Nazneen, for example, could take these ingredients and have no trouble creating a tasty pullao. BAM, on the other hand, could easily prepare a flavorful GF stir fry. Then, of course, there’s Katherine and Greg. Heaven only knows the dish they’d create but I guarantee it would be delicious and I wouldn’t be the only one to bookmark the recipe. Me? Every week I break out the flour and start making pasta. The only question in my mind is what vegetables to use for which pasta. And when all is said and done, on Thursday or Friday night, I use leftovers and whatever vegetables remain to make a fresh egg frittata. Come Saturday, with a newly cleaned-out refrigerator, I head back to the market and start the process all over again. Today’s recipe is one of these farmers market pastas.

*     *     *

Primavera is the Italian word for Spring. Pasta Primavera is a dish that celebrates the freshest of ingredients. It is a true marriage of flavors, with no single taste dominating  the rest. To dress the pasta, the “sauce” can be cream-based, oil or butter-based, and even include tomatoes. In short, a pasta primavera can be whatever you would like it to be, so long as the ingredients are fresh.

For today’s recipe, I rendered some guanciale and used the resulting fat as the base of my sauce. Since I was adding scapes, there was no need for garlic but I did add a couple dried red peperoncini to add some heat to the dish. Beyond that, fresh peas, asparagus, and a few mushrooms were added, with a splash of white wine to round out the dish. And just to make sure that they didn’t get “lost”, I grilled the scapes and asparagus spears before adding them to the pasta. Then, after adding a sprinkle of cheese, dinner was served.

And to my fellow Americans, have a happy and safe 4th of July.

*     *     *

Farmers Market Pasta Recipe

Ingredients

  • 3/4 lb (340 g) cooked trenette — any “ribbon” pasta can be used
  • 6 to 9 garlic scapes
  • 9 to 12 asparagus spears
  • 3 oz (113 g) guanciale, chopped — pancetta, prosciutto, bacon, or ham can be used
  • dried peperoncini (optional)
  • 1/2 lb ( 227 g) fresh peas
  • 8 to 12 small mushrooms, halved or quartered depending upon size
  • white wine
  • salt & pepper
  • Pecorino Romano cheese, grated, for serving — Parmigiano Reggiano can be substituted.

*     *     *

100_4649

*     *     *

Directions

  1. Clean and heat the barbecue or grill pan
  2. Lightly coat scapes and asparagus with olive oil
  3. Place the scapes and asparagus atop the hot grill surface. Cook each vegetable to your liking before removing from heat. When cool, roughly chop both vegetables.
  4. Meanwhile, bring a large pot of salted water to the boil.
  5. Add the guanciale to a large frying pan over med-high heat. Continue to cook until the fat has rendered and the guanciale is not quite fully cooked.
  6. Crumble the dried peperoncini by hand before adding to the pan.
  7. Add the mushrooms and continue to sauté for a few minutes.
  8. Lower the heat to medium, add a couple of ounces of wine and the peas. Continue to sauté.
  9. Time the pasta to be just shy of al dente at about the time that the peas are cooked to your satisfaction.
  10. Drain the pasta, reserving a cup of the pasta water, and add the pasta to the frying pan.
  11. Add the chopped scapes and asparagus, mix well, and continue to cook until the pasta has reached al dente. Add pasta water if the pan’s contents are too dry.
  12. Remove to a serving platter, garnish with grated cheese, and serve.

*     *     *

*     *     *

Notes

Be careful not to use too much guanciale. If you do, the taste will become predominant and you’ll be unable to taste much else. I’ve made that mistake and although it is still a very flavorful pasta, it’s also a waste of garlic scapes.

I like a little heat in the dish so I crumbled 2 dried peperoncini that came from the heart of Italy’s peperoncini region, Calabria. You could easily substitute red pepper flakes or skip them entirely, if you like.

Before using the scapes, I trim an inch or two off the bottom of each scape and, because they can get hard and unpalatable when grilled, I trim off each top just above the flower bulge.

I used 3/4 lbs. of trenette pasta because that’s the amount of dough I had left over when I made last week’s ravioli. Use as much, or as little, pasta as you like. The same holds true for the rest of the ingredients.

As the Summer progresses  the ingredients will change to include broccoli, chard, cauliflower, and/or whatever else catches my eye as I walk around the market. You can and should do the same with your pasta primavera.

*     *     *

A word about the pasta …

I have an attachment for my pasta machine that will cut trenette pasta. Used throughout Genoa and Liguria, trenette — not to be confused with trennette — are one of the flat, “ribbon” pastas, this one being about “a silly millimeter thinner” than linguine. Although trenette is traditionally dressed with Pesto Genovese, I like the pasta because it most closely resembles the pasta Mom & Zia cut by hand when I was a boy. I can almost hear Mom’s knife as she quickly cut the rolled sheet of pasta, sfoglia, all the while having a conversation with whomever was in the room or seated at the table. The speed of that blade was truly a marvel, at a rate easily 5 or 6 times my best. And the noodles were all uniformly cut, something I cannot do even when working at a snail’s pace. So I cheated. I bought myself a trenette pasta machine attachment — and one for Zia — and now we can enjoy a dish of pasta just like back in the day.

*     *     *

Cheaters do prosper sometimes …

When this year’s seedlings didn’t fare so well, I bought heirloom tomato plants from the farmers market. Lo and behold! For the first time in years, I’ll be eating home-grown  tomatoes, even if only the tiniest of cherries, on the 4th of July.

*     *     *

It’s déjà vu all over again …

Lucky for us, all is not vegetable at the markets. We are now in cherry season and this year I’m twice blessed. Not only are Michigan’s tart cherries hitting the markets but I’ve a friend that surprised me with enough cherries to make a fantastic pie. Now, I can eat sweet Bing cherries by the fistful but these tart red beauties are meant for pies, muffins, and jam.  Pictured on the right is a bit of the pie I made with my friend’s gift. You can see the recipe I followed by clicking HERE.

*     *     *

Coming soon to a monitor near you …

Rack of Spring Lamb

*     *     *

Asparagus, Crimini Mushroom, and Ricotta Ravioli Filling

Yes, it’s another ravioli filling recipe, though not the one I had originally intended to post. Today’s filling recipe was to include ramps, a dish Zia and I developed during my last visit home. Well, ramp season has passed and I doubt that any of the wild onions are to be found anywhere. Asparagus, on the other hand, is still around, though it’s numbers have greatly decreased over the last 2 weekends. (The ramps post is written and will be published soon.) Seeing that asparagus season is also fleeting, I thought it best to post a recipe using the spears now, while you can still get some that are locally grown. In fact, all 3 recipes presented in today’s post will take advantage of the current harvest. The “Déjà vu” recipe will feature strawberries, while “Coming soon” is a pasta recipe that includes a number of fresh ingredients. 

Today’s post will only detail how to make asparagus ravioli filling. If you’re interested in seeing how to use ravioli molds/dies to create the stuffed pasta pillows, you can see step-by-step instructions by clicking HERE. For serving suggestions, see Notes below.

*     *     *

*     *     *

Asparagus, Crimini Mushroom, & Ricotta Ravioli Filling Recipe

Yield: See Notes below. 

Ingredients

  • 1 tbsp olive oil
  • 1 tbsp butter
  • 8 oz (228 g) fresh asparagus, chopped
  • 8 oz (228 g) fresh crimini mushrooms, chopped
  • 3 oz (86 g) Spring onions, chopped
  • 2 garlic cloves, minced or grated
  • 1/2 tsp kosher salt
  • 1/8 tsp white pepper
  • 3/4 cup (12 oz, 340 g) ricotta, well-drained
  • 1/2 cup Pecorino Roman cheese, grated

Directions

  1. Clean and roughly chop the asparagus (see Notes), mushrooms, onion, & garlic
  2. Heat olive oil and butter over med-high heat. Add asparagus, mushroom, and onion, lower heat to medium, and sauté until mixture just begins to change color — about 6 or 7 minutes.
  3. Add garlic, salt, and pepper, and continue to sauté until liquids are gone. Do not allow to burn.
  4. Remove from heat and allow to cool fully before proceeding.
  5. If using a food processor:
    1. Place the asparagus mixture into the processor, add the ricotta and Romano cheeses, and process until uniformly smooth.
  6. If not using a food processor:
    1. Chop the asparagus mixture as finely as possible.
    2. Add the cheeses and stir to thoroughly combine.
  7. Filling may now be used with your favorite stuffed pasta recipe.

*     *     *

*     *     *

Notes

Using this recipe and my large, 2 inch (5 cm), ravioli die/mold , I made 90 ravioli. You might make more or less, depending upon the size of the die or stamp used.

Whether you use homemade or store-bought ricotta, place the cheese in a clean coffee filter, where it can drain for at least a few hours to remove the excess liquid.  The drier the better. 

You can serve your asparagus ravioli in a number of ways. I’ve found that a brown butter and sage sauce works very well, as do cream and “light” tomato sauces. For those who really enjoy asparagus, simply sauté a few chopped asparagus spears in butter and use that to dress freshly cooked ravioli. A bit of lemon zest on top works very well. In all the examples given, grated cheese should be sprinkled atop the dressed ravioli.

*     *     *

Testing, testing, 1, 2, 3

I’ve made this and a couple other ravioli fillings over the course of the past couple of  months and it gave me an opportunity to experiment with a few things.

  1. All Purpose V Double 0 Flour. Last Fall I, finally, located a source for “00” flour, doppio 0. This is the finely ground durum flour used to make pasta and pizza dough in Italy. Although it’s roughly twice as expensive as AP flour, both Zia and I agree that using it creates pasta dough with a great feel. When cooked al dente, the pasta has a good bite, just as it should, and I’ll continue to buy and use it. Decisions have consequences, however, and I now have yet another container of flour in my kitchen. For those keeping track, that makes  6 — AP, bread, wheat, spelt, semolina, and now 00.  
  2. Attachment V Ravioli Die/Mold. I decided to pull out the KitchenAid ravioli maker and give it another shot. In the past I’ve found it less than perfect and, frankly, more trouble than it’s worth. All along, I thought that the fault may lie with the fillings I used, that the attachment would work best if a softer filling was in the hopper. Today’s asparagus ravioli filling was used to test my theory. I must admit that the ravioli maker worked better than it ever has and waste — which was a big problem with earlier trials — was minimal. Even if a bit cumbersome to operate, probably due to my inexperience, it did produce row after row of perfect ravioli. All’s not well, though. In order to get perfect ravioli, the dough sheets must be thick, more than double the thickness that we normally would use. That means you need to make at least twice the amount of pasta dough than would normally be required when using ravioli molds/dies. It, also, means the ratio of filling to pasta is different from the ravioli to which I’m accustomed. (Yes, my generation of Bartolini are a spoiled lot.)  In short, the ravioli attachment is back on the shelf, waiting for me to give it another go, probably in 2015 sometime.
  3. Chicken V Duck Eggs. Recently, while waiting to buy eggs at the farmers market, the customer before me bought a half-dozen duck eggs. Prior to this, I thought they were only sold by the dozen. So, I 86’ed the chicken and went duck. A couple of days later, I used them to make the pasta dough used in the ravioli pictured throughout this post. For those unfamiliar, Mom’s pasta dough recipe calls for 4 eggs and enough water to make a cup of liquid. Because they’re larger, only 3 duck eggs plus less than a tbsp of water will yield the required cup of liquid. Once made, the dough was much more yellow than normal but, to be fair, that may be due to the eggs’ freshness more than anything else. As for taste, I really could not detect a difference but, then again, without side-by-side taste tests, I should really say that I don’t “remember” a difference. Given that duck eggs are twice the price of chicken eggs, I’m not sure that I’ll be a regular customer for them anytime soon.

*     *     *

It’s déjà vu all over again …

As was mentioned, we’re just about at the end of asparagus season here in the Chicago area. The tables upon tables of the tasty spears have been replaced — by strawberries! Pictured on the right is just one vendor’s berries at the Evanston farmers market. Believe me, there are many more and I defy anyone, save those with allergies, to walk around that market without buying at least one quart. So, what will you do with these sweet & juicy red gems? Why, make strawberry jam, of course! You can see Mom’s recipe by clicking HERE.

*     *     *

Coming soon to a monitor near you …

Farmers Market Pasta

*     *     *

The Bartolini Have Hit The Road!


Going for a Ride

If there’s one thing we Bartolini enjoy as much as a dish of pasta, it’s a good old-fashioned road trip. So, when one such opportunity presented itself, I shut down the Kitchens, packed up the car, and headed out — to Washington D.C.

Now, I just didn’t pick D.C. as a destination out of thin air. No, the Kitchens’ good buddy and fellow blogger, Jed, recently invited me to guest host at his blog, sports-glutton.com. There he leads a team of sportswriters that covers the world of sports, offering ego-free commentary and well-reasoned conclusions. With every post, each of these gentlemen offers true insight into his respective field of expertise. Sounds pretty good, huh? Yeah? Well, wait! There’s more.

Jed and his wife, Liz, share recipes that are sure to appeal to the latent glutton in each of us. From appetizers to desserts, and all dishes in-between, these two know their way around a stove — and campfire.  And just when you think sports-glutton.com couldn’t get any better, Thursday arrives. That’s the day that Jed reviews, one bottle at a time, a wide variety of beer and wine. Whether you’re in the mood for a Japanese ale or a Chilean Pinot Noir, not to mention a Wyoming micro brew or whiskey from Utah, this is the place to check before you go shopping for spirits.  Drat! I’ve gotten ahead of myself. You see, every Monday Jed starts off the week with a bit of humor. Think of it as you would a refreshing sorbet, preparing you for his posts to come.

How’s that for a blog? There’s quite literally something for everyone.

So, as you can well imagine, when asked to take part in his  MLB Recipe Series, I could hardly refuse the honor and jumped at the chance. Now, for the uninformed, every Wednesday of the Major League Baseball season, Jed celebrates a different team by offering a recipe that, in some way, is connected to that team. Being a Cubs fan, I contributed my recipe for Jack Brickhouse Chicken, for reasons that will become clear when you follow me to Jed’s place by clicking here to read my guest post. Once you’ve checked out my recipe, be sure to take a look around. You’re sure to find something of interest.

Thanks, Jed, for the honor of participating in your series, allowing me to share a recipe commemorating our Cubs. One of these years …

*     *     *

Regular programming will resume at the Bartolini Kitchens next week, once I figure out a way to explain to Max that we’re not really going anywhere.

Coming soon to a monitor near you …

Asparagus Ravioli made with Duck Egg Pasta

*     *     *

Homemade Gnocchi in Gorgonzola Sauce

Gnocchi in Salsa di Gorgonzola

“The future ain’t what it used to be” and today’s post is the proof. You may have noticed last week’s “Coming Soon …” photograph depicted a recipe called “Jack BRICKhouse CHICKEN” and, as a result, you may have deduced that was to be today’s recipe. Well, guess again. That recipe is scheduled for next week — has been all along — and cannot be rescheduled for reasons that will become apparent in the post. I must admit that it came as a surprise for me to learn that I cannot read a calendar and my newly found malady did leave me in a bit of a lurch for this week’s post. All’s not lost, though, since I’ve a bagful of recipes from my recent visit with Zia from which to choose. Because so many of you were interested in my family’s risotto, I set to work writing that recipe and blog entry. All was going swimmingly until Saturday morning when I noticed that Stefan, of Stefan’s Gourmet Blog, posted his recipe for Risotto with Peas & Mint. The very next day, Nick, of Frugal Feeding, posted his recipe for Tomato and Basil Risotto. That’s when I began to rethink my post. The third and final blow was struck when Paul, of That Other Cooking Blog, posted his recipe for Risotto al Nero di Seppie (squid ink risotto). Deciding that my post could be postponed a bit, I went back to the bag of recipes from my visit home and pulled out today’s gnocchi recipe. Even so, if all of this talk of risotto has you yearning for the creamy rice dish, be sure to check out those 3 recipes and, while you’re at it, spend a little time looking around each blog. You will not be disappointed.

One of the first things we kids were allowed to help make in the kitchen were gnocchi. Mom and Zia would make the dough and then hand us a piece to roll into a log, though we called them snakes. With a butter knife we were taught how to cut the snake and, depending upon the gnocchi’s use, we might even have been allowed to try to roll them across a fork’s tines to make the grooves. By “use” I mean whether dinner guests or family were to dine on the fruit of our labor. Mom always put her best gnocchi forward for company and she took charge of the groove-making, reshaping any malformed gnocchi along the way. Unlike today’s recipe, however, Mom’s gnocchi were always served with her meat sauce.

Although I’ve enjoyed gnocchi with gorgonzola at restaurants, I never thought about replicating the recipe at home until several years ago. My Entertainer Friend mentioned how much he enjoyed gnocchi with bleu cheese and I thought I’d come up with a recipe and treat him. Over the years, I’ve tried a number of variations, using several spices and herbs, and eventually switched from bleu cheese to gorgonzola, but I always came back to the simple recipe I’ll share today. It’s yet another example of “Less is More.” As for my Entertainer Friend, now that I’ve reminded him, I’d better start planning that gnocchi dinner.

*     *     *

*     *     *

Gnocchi in Gorgonzola Sauce Recipe

yield: roughly 1.5 lbs (680 g)

Ingredients

  • 2 large russet potatoes, once cooked, peeled, & riced = 18 oz (510 g) (See Notes.)
  • 2 cups (10.2 oz; 290 g) all-purpose flour
  • 1 large egg, slightly beaten
  • corn meal or additional flour for dusting surfaces
  • 5 oz (142 g) gorgonzola, crumbled, more or less to taste (See Notes)
  • 1/2 cup (118 ml) heavy cream, more or less to taste
  • salt and pepper, to taste
  • grated or flaked Pecorino Romano cheese for garnish — Parmigiano Reggiano may be substituted

Directions

To make the gnocchi

  1. Pre-heat oven to 400˚ F (204˚ C). Use a fork to pierce the potatoes numerous times.
  2. Place potatoes on center rack and bake until cooked, from 50 to 60 minutes, depending upon potato size.
  3. Meanwhile gather the other ingredients. Allow the egg to come to room temperature.
  4. Once cooked, remove potatoes and set aside until they can be safely handled.
  5. Slice each potato in half, lengthwise, and use a spoon to scoop out all of potato, reserving the skin for some other purpose.
  6. Run cooked potatoes through a ricer or food mill. (See Notes.)
  7. Use the riced potatoes to create a mound on a floured work surface. Make a well in the center of the mound, as you would when making pasta dough.
  8. Sprinkle the top of the well’s walls with 3/4 cup of flour. Place the egg in the center well after the potato has cooled enough so that the egg won’t cook.
  9. Using a fork, slowly combine the potato & flour with the egg. Once the dough renders the fork useless, continue mixing the dough with your hands.
  10. The dough should come together within 4 to 5 minutes. It will be ready when it is firm and a little moist-to-the-touch without being tacky. Add more flour as needed but remember: the less flour used, the better.
  11. Form a ball with the dough and divide it into fourths.
  12. Take one-quarter and divide it in half. Roll one of the sections into a log with a width of your preference. We normally roll them about an inch (2.5 cm) thick — the width of an index finger.
  13. Use a sharp knife or board scraper to cut the log into segments, each 1/2 (1.3 cm) to an inch (2.5 cm) long.
  14. If grooves are desiredFlour the back of a dinner fork, place a segment at the top of the tines, use your finger to roll it over the tines, creating gnocchi with grooves on one side and a dimple where your finger rolled it.
  15. If grooves aren’t wanted: Use a finger to push and roll each segment across the work surface, creating smooth surfaced gnocchi with dimples where you’d placed your fingers.
  16. Place the gnocchi on a lined baking sheet that’s been dusted with flour or corn meal.
  17. If not going to be cooked within a few hours, place the gnocchi-covered baking sheet in a freezer and once the gnocchi are frozen solid, place them in containers/bags suitable for freezer storage.

*     *     *

*     *     *

To cook the gnocchi

  1. Bring a large pot of salted water to the boil over high heat.
  2. Once the water boils, add the gnocchi and stir gently.
  3. When the water resumes boiling, reduce the heat to a simmer and notice when the gnocchi begin to float. This should only take a couple of minutes when fresh and a few more when the gnocchi are frozen. Gnocchi will be ready about 1 minute after the last start floating. If in doubt, taste one.

*     *     *

To prepare the gorgonzola sauce

  1. While waiting for the water to boil, heat the cream in a small sauce pan over medium heat.
  2. Once the cream is hot, add the gorgonzola and stir until melted. Taste and adjust, adding more cream or gorgonzola to suit your own taste. If you prefer, you can add a bit of the water used to cook the gnocchi to thin the sauce without adding more cream.
  3. Don’t forget to taste and season with salt & pepper, if required.

*     *     *

To assemble and serve

  1. Use a hand strainer — “Spider” strainer — to remove the gnocchi from the boiling water and place in the serving bowl. Add the gorgonzola sauce and mix gently until all are coated.
  2. Serve immediately, garnished with grated/flaked Pecorino Romano cheese.

*     *     *

Variations

Like most Italian dishes, there are many recipes around for making gnocchi. No matter which recipe you choose to follow, 2 rules will apply. 1) The fluffier the smashed/riced potato the better, and, 2) the less flour the better. Keep those 2 rules in mind and you’ll be well-rewarded with a most palatable platter of puffy potato pillows rather than the much less than spectacular spud scuds.

One popular variation for preparing gnocchi is to bake them before serving. Follow the directions above for making and cooking the gnocchi, as well as making the gorgonzola sauce. Use all the sauce to dress the gnocchi and place in a baking dish. Top with grated cheese or bread crumbs that have been moistened by olive oil or butter. Bake in a 375˚ F (190˚ C) pre-heated oven for 20 to 25 minutes or until hot & bubbly with a golden brown topping.

Even after being reduced, some may want a thicker sauce. (Bear in mind it will thicken once taken off the heat and begins to cool.) If you want a very thick sauce, you can start by making a roux. Melt 2 tbsp of butter in a small sauce pan. Add an equal amount of AP flour and whisk until fully blended. Allow to cook for 2 to 3 minutes. Do not let the roux darken or it will color your cheese sauce. Add the half the cream and whisk till incorporated. Add the remaining cream and keep whisking as it heats and begins to thicken. Once thickened, about 5 minutes, add the gorgonzola and keep whisking until melted. If too thick, you can adjust by adding more cream or some of the water used to cook the gnocchi.

*     *     *

If they’re all identical, no one will believe you made them.

*     *     *

Notes

Much like making pasta, making gnocchi is not an exact science. The moisture in the potatoes, the size of the egg, the humidity, and even the brand of flour can all affect the amount of flour required. As was mentioned, use as little flour as possible to create a firm, slightly moist-to-the-touch dough that isn’t at all tacky.

I used 2 large russet potatoes that weighed 26.8 oz (760 g). Once baked, peeled and riced, they weighed a total of 18 oz (510 g). For accuracy I weighed the flour, starting with 2 cups or 10.2 oz (290 g). When I was finished, the remaining flour weighed 4 oz (114 g), meaning I used a little over 1 cup of flour for a little over a pound of riced potatoes. Lastly, to determine the yield, I weighed the frozen gnocchi before bagging. Your yield may vary due to the above-mentioned factors.

Not everyone has a potato ricer or food mill and I seriously doubt that my Nonnas had either one. They used a large fork to smash the potatoes and there’s no reason you can’t do the same. You can, also, use a potato masher or a box grater, if need be. Just be sure to use a fork to fluff the smashed potatoes as much as possible before proceeding.

It had been some time since I last made this dish when I prepared it for Zia. As a result, I misjudged and used a full cup (236 ml) of heavy cream with 5 oz (142 g) gorgonzola. That resulted in a very runny sauce. Thankfully, gnocchi was to be our primo piatto so I was able to reduce the sauce to the consistency I wanted without affecting the rest of the dinner. Today’s recipe uses half the amount of cream I used for that dinner.

It’s not a bad idea to have extra gorgonzola and cream on-hand the first time you make this sauce, just in case your idea of the perfect gorgonzola sauce differs from mine. You can add more cheese or cream, as required.

*     *     *

It’s déjà vu all over again … 

Blueberry

I don’t care what the weatherman says. The calendar says it’s June and that means it’s ice cream season. Time to dust off the ice cream machines and get those canisters into the freezer. Now I’ve shared several ice cream recipes but this one, blueberry swirl cheesecake, is Number One among family, friends, friends of family, and families of friends — but don’t take our word for it. Try it for yourself. You can find the recipe by clicking HERE.

*     *     *

Coming soon to a monitor near you … 

Jack BRICKhouse CHICKEN

*     *     *

Baked Haddock

Eglefini al Forno

Today’s recipe once again calls upon my family’s breading mixture to keep the fish fillet moist as it adds flavor to the dish. There really is no need for me to explain the breading much more than that for fear of boring you to tears. And I wish I had a great story to tell about haddock but, the truth is, I had originally planned to use baccalà for this post. Then I saw fresh haddock on sale and, well, that piece of salted cod will be used to make a fine salad.

Haddock is a popular fish on both sides of the Atlantic. Having once been over-fished, its numbers have increased and it is now considered a success story here in the US. In our Northeast, specifically the Boston area, young haddock may also be called scrod. That’s a bit of a misnomer, however, because that name is used for both young cod and young haddock. Needless to say, haddock is very similar to cod in both taste and texture, with haddock having a slightly stronger flavor. Like cod, it flakes when cooked so be careful if you try to grill haddock. If you do, it’s probably best to use a grilling basket.

*     *     *

This slideshow requires JavaScript.

*     *     *

As I’ve mentioned in other posts, this breading mixture is used in a number of the Bartolini dishes. To be honest, I never realized how many until I started documenting my family’s recipes. Depending upon its use, it can be more/less moist and with/out lemon juice. Combine bread crumbs, diced garlic, chopped fresh parsley, and salt & pepper in a bowl. In this case, I used the juice of a half-lemon and then enough olive oil to moisten the mixture but not to the point that it’s sopping wet. How much of each ingredient you need will depend upon how many fillets there are to cook and whether you’ve plans for the excess breading. (See Notes.) Under normal circumstances, you’ll want enough breading to adequately cover each fillet, as well as to form a thin layer underneath each piece of fish so that there’s little chance of it sticking while baking. And what if you make too much? Spread it on the baking dish/sheet and roast it along with the fish. Excess breading can be frozen for later use with pasta.

Once the fillets have been breaded and placed on a baking sheet, place them in the center of a pre-heated 375˚ (190˚ C) oven. Your fish should be ready in about 15 minutes, maybe 20 depending upon the thickness of the pieces.  Haddock fillets will be opaque white and flake easily when fully cooked, very much like cod. Remove the baked fillets to a serving dish, garnish will lemons slices, and serve. In the photo, the haddock was accompanied by sautéed artichokes.

*     *     *

Notes

Normally, my family would only put a small amount of bread crumbs under the fish to prevent the fillets from sticking while baking. Here I placed the haddock on a bed that was about 1/3 inch (.85 cm) thick because I had use for those bread crumbs. Once the fish was removed to a serving platter, I used the now-roasted bread crumbs left on the baking sheet to garnish a side dish of pasta aglio e olio instead of cheese.

*     *     *

An Update

I telephoned a 5th company today to inquire about getting the vine removed. Within an hour, they were here and removed the vine within the next hour. They will be back to haul it away at the end of the week. The only real damage sustained was to a single rosebush but it is early enough in the season that it should recover without a problem. Thank you all for your concern and well-wishes.

*     *     *

It’s déjà vu all over again …

Though the weather may not be cooperating, it is definitely grilling season here in the US & Canada. If you’re at all like me, a burger just isn’t a burger if there aren’t pickles on top. Now, as much as I love a good kosher dill, for my burgers and sandwiches, I crave Bread & Butter pickles. Easier to make than you might think, my original recipe didn’t require canning and the pickles were stored in the refrigerator. I’ve since added instructions for canning them. Either way, I think you’ll agree that a few of these tasty slices is the only way to top a burger. Click HERE to learn how to make these great tasting pickles.

*     *     *

Coming soon to a monitor near you …

“Jack BRICKhouse CHICKEN”

*     *     *