In a previous post, I’ve mentioned that when I was a boy, a young goat was the meat of choice for our Easter dinner. Goat, however, was to be replaced by Spring lamb but even its reign was cut short, since my siblings weren’t at all enamored of it. As a result, Mom switched to serving some sort of roast for our holiday meal, reserving lamb for other, not so special, nights. (Sorry that I cannot be more specific but, as I’ve also mentioned before, my attention during holiday meals was always fixated on the platter of ravioli.) For those non-holiday dinners, she would serve lamb for the 3 of us and some other dish for my siblings. Lamb shanks were most often served for no other reason, I thought, than they were so easy to prepare. Remember, she had another dinner to cook for my siblings.
Although I don’t have Mom’s recipe in written form, I know it well. We spoke of it often and she was delighted to hear that I would be serving lamb shanks for dinner. It turned out that, as much as Dad and I enjoyed lamb, Mom was crazy about it. She’d rather make 2 meals than go without her lamb.
Today’s recipe is pretty much all Mom. I did make a couple of adjustments, though. Namely, Mom used red wine and I use white with a little sherry vinegar. Then, too, for today’s recipe, I used a slow cooker and Mom’s was nowhere near large enough for lamb shanks. If that’s you or you don’t like slow cookers, this dish can just as easily be made in the oven or on the stove top. Instructions to do so follow the recipe below.
* * *
Whether you’re celebrating Passover or getting ready for Easter, the Bartolini Clan and I wish you a very Happy Holiday.
* * *
 * * *
* * *
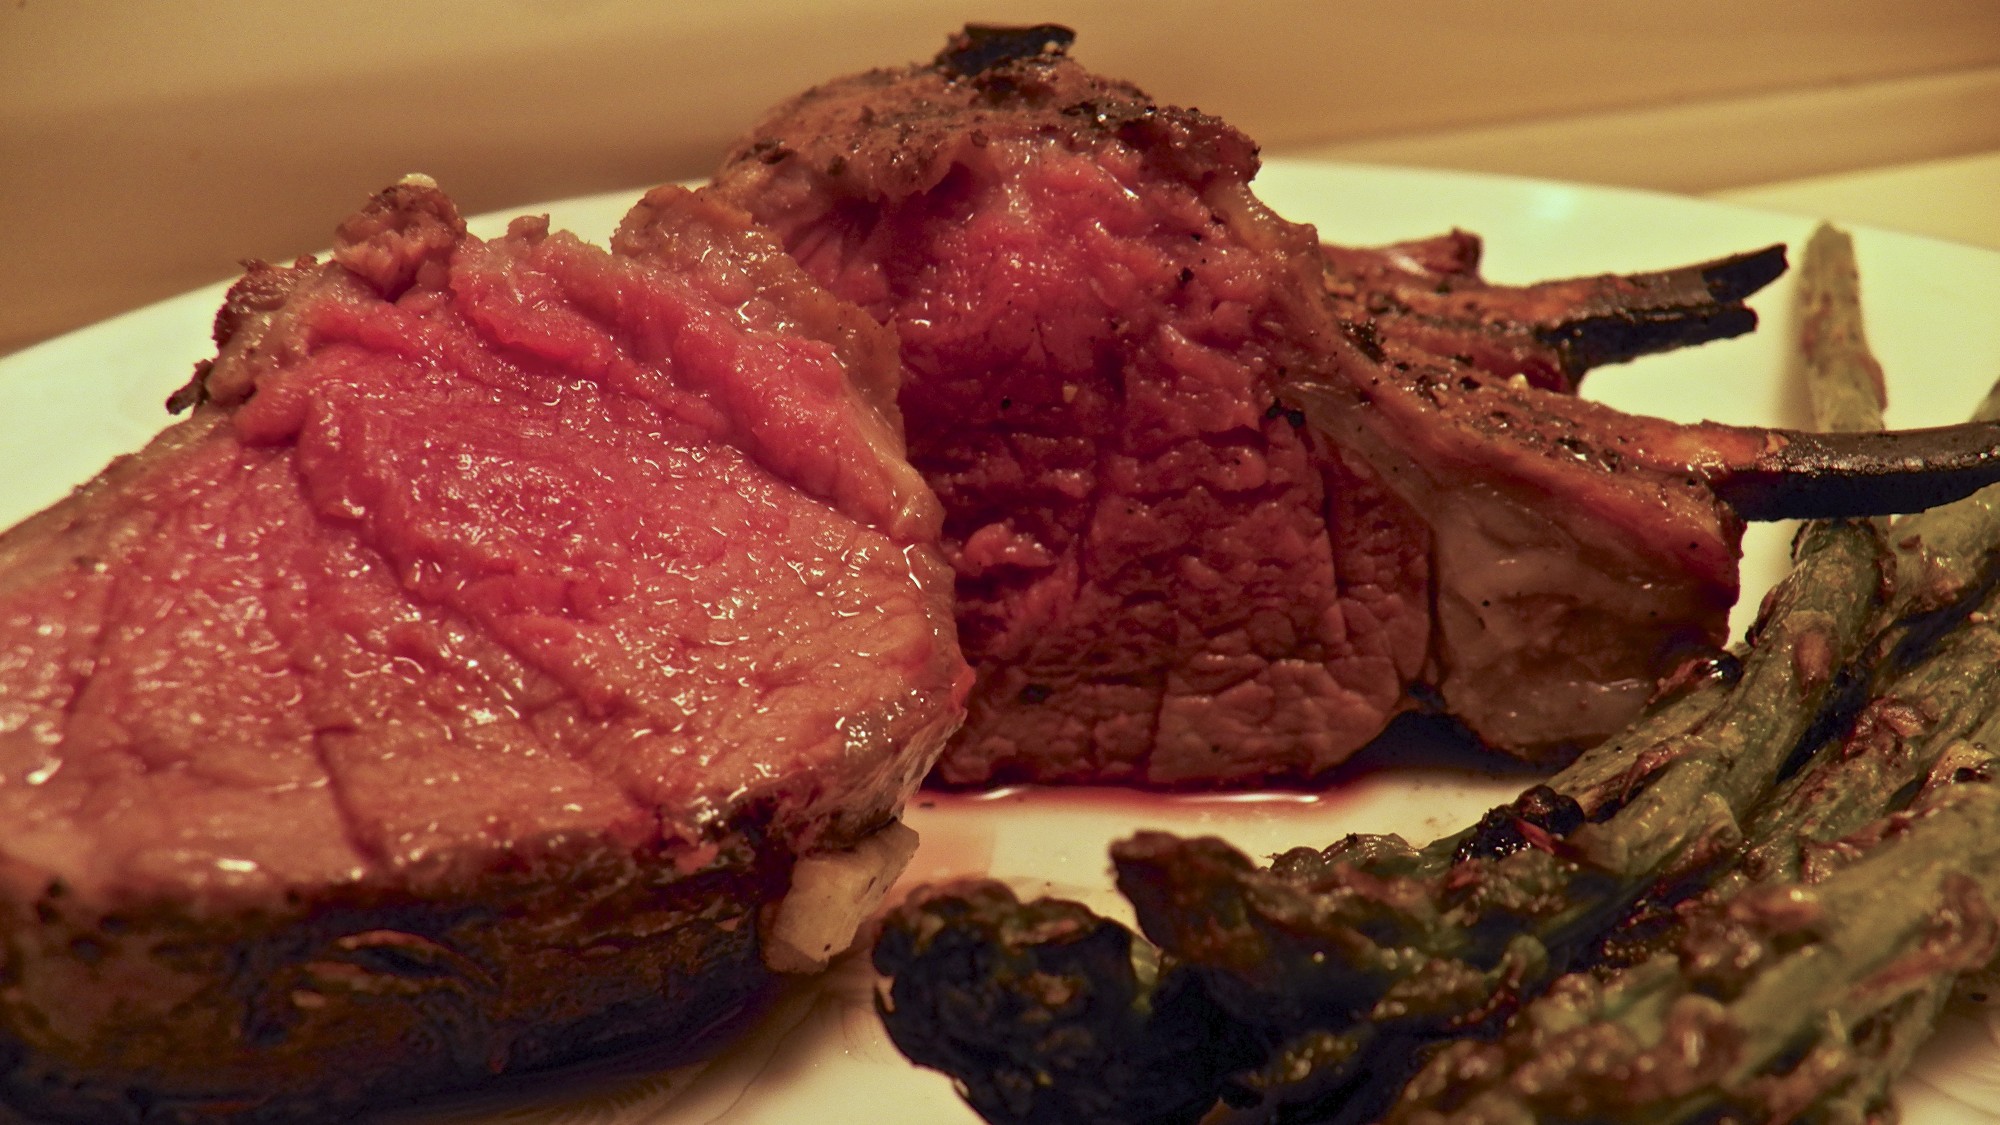
Braised Lamb Shanks Recipe
Ingredients
- 2 lamb shanks (See Notes)
- 2 tbsp olive oil
- 2 medium carrots, roughly chopped
- leaves and stalks from the top of a celery heart, about 1 cup
- 1 onion, sliced
- 6 cloves of garlic, smashed, separated
- 4 sprigs of rosemary
- 1 bay leaf
- 1 cup white wine (Mom used red wine)
- 2 tbsp tomato paste
- 3/4 cup sherry vinegar (Mom didn’t use any vinegar)
- vegetable stock (See Notes) (Mom used her chicken stock)
- salt & pepper to taste
- lemon zest for garnish, optional (See Notes)
* * *
 * * *
* * *
Directions
- In a large fry pan, heat the olive oil over med-high heat.
- Add 2 smashed garlic cloves and sauté until golden. Remove the garlic and discard. (See Notes).
- Season the lamb shanks with salt and pepper and place them into the pan, browning them on all sides. This could take anywhere from 10 to 15 minutes.
- Remove and reserve the lamb shanks.
- Place all the vegetables into the pan, season with salt and pepper, and sauté until some color is achieved.
- Add the tomato paste and cook until fragrant and its color deepens, 2 to 3 minutes.
- Remove the mixture from the pan and place into the slow cooker, along with the garlic, rosemary, bay leaf, and sherry vinegar.
- Use the white wine to deglaze the pan and then add it to the slow cooker. Season with salt & pepper.
- Place the lamb shanks into the pot and add enough vegetable stock so that half of the shanks are submerged. Cover the slow cooker. (See Notes)
- Cook on low for 8 hours, turning over the shanks about every 90 minutes. (See Notes)
- Remove meat and cover while the liquids are strained and the sauce prepared. (See Notes)
- Serve, garnished with lemon zest, and with the sauce on the side.
* * *
For those without a slow cooker
Instead of using a fry pan, brown the shanks and sauté the vegetables in a Dutch oven or heavy bottom pot with a lid. Follow the recipe and place everything into the pot. Add enough vegetable stock to submerge 2/3 of the shanks. Bring to a boil over med-high heat and cover. At this point, you can:
- Leave the pot on the stove, reduce the heat to a soft simmer, and cook for 90 to 120 minutes. Meat should be nearly falling off of the bone. Turn over the shanks occasionally.
- Place the pot into a pre-heated 250˚ F (120˚ C) oven and cook for 3 hours. Turn over the shanks occasionally.
Serve as indicated in the recipe above.
* * *
 * * *
* * *
Notes
Be sure to remove any excess fat and as much gray skin as you can. Rather than show you how I did it, you can see a pro do it HERE. It’s not the most thorough set of photos but they will give you a better idea than mine would have. (Work for food? Applications are now being accepted for a photographic assistant.)
If at all possible, make you own vegetable stock and use the flavors that you will use to braise the lamb shanks. One or two days before you cook the shanks, place one onion (quartered), 2 celery stalks (roughly chopped), 2 carrots (roughly chopped), 2 cloves of garlic (smashed), 2 sprigs of fresh rosemary, a few sprigs of fresh parsley, 1 bay leaf, and 6 or 7 cups of water into a medium sauce pan. Over med-high heat, bring the contents to a boil, then reduce to a low simmer. I let mine simmer for 2 hours and got a full quart of vegetable stock. I did not use any salt nor pepper in this stock so that I could better control both seasonings during the braising process.
Because less liquid evaporates from a slow cooker, less braising liquid is needed than when a Dutch oven is used to braise on the stove top or in the oven.
Using smashed garlic cloves to flavor the cooking oil is something Mom did all the time. It’s especially useful when sautéing vegetables, giving them garlic flavor without having pieces of garlic in the dish.
If you haven’t got 8 hours to wait for dinner, you can reduce the cooking time by setting the slow cooker’s setting to “High”. As a general rule, one hour of cooking on “High” is worth 2 hours on “Low”.
A few months ago, Chef Michael Symon mentioned that he uses citrus zest as a garnish when he serves braised meats. I decided to give it a try and, since then, I’ve used orange zest on beef cheeks and lemon zest on harissa chicken and today’s lamb shanks. In all cases, the zest added a bit of freshness to the dish that I liked very much.
Once you’ve strained the liquids and removed the fat, you can:
- serve the sauce as-is;
- reduce it and serve; or,
- if needed, use a thickening agent —I used arrowroot — to make gravy.
No matter how you finish the sauce, be sure to taste and adjust its seasoning as needed.
* * *
It’s déjà vu all over again …
 Since I’ve shared a lamb shanks recipe for Easter dinner, why not share a bread recipe, as well? Today’s blast from the past will take you to my post for the Easter bread of Le Marche, the ancestral home of the Bartolini side of my family. Braided and loaded with cheese, this bread will fill your kitchen with an irresistible aroma while it bakes. Be forewarned. Don’t bake this bread too far in advance of Easter, for it has a tendency to disappear. You can learn all about this crescia by clicking HERE.
* * *
Coming soon to a monitor near you …
 Roasted Vegetables Salad with Harissa
* * *