Braised Goat in the Moorish Style

Capra Basata nello Stile di Moresco

Braised Goat with Harissa

I’m back and the Kitchens are once again open. Zia and I thank you all for your kind words and well wishes. She sends her warm regards. She, also, sent me home with a few new recipes — octopus and quail are at the top of that list — and I’ll be sharing them in the weeks to come.

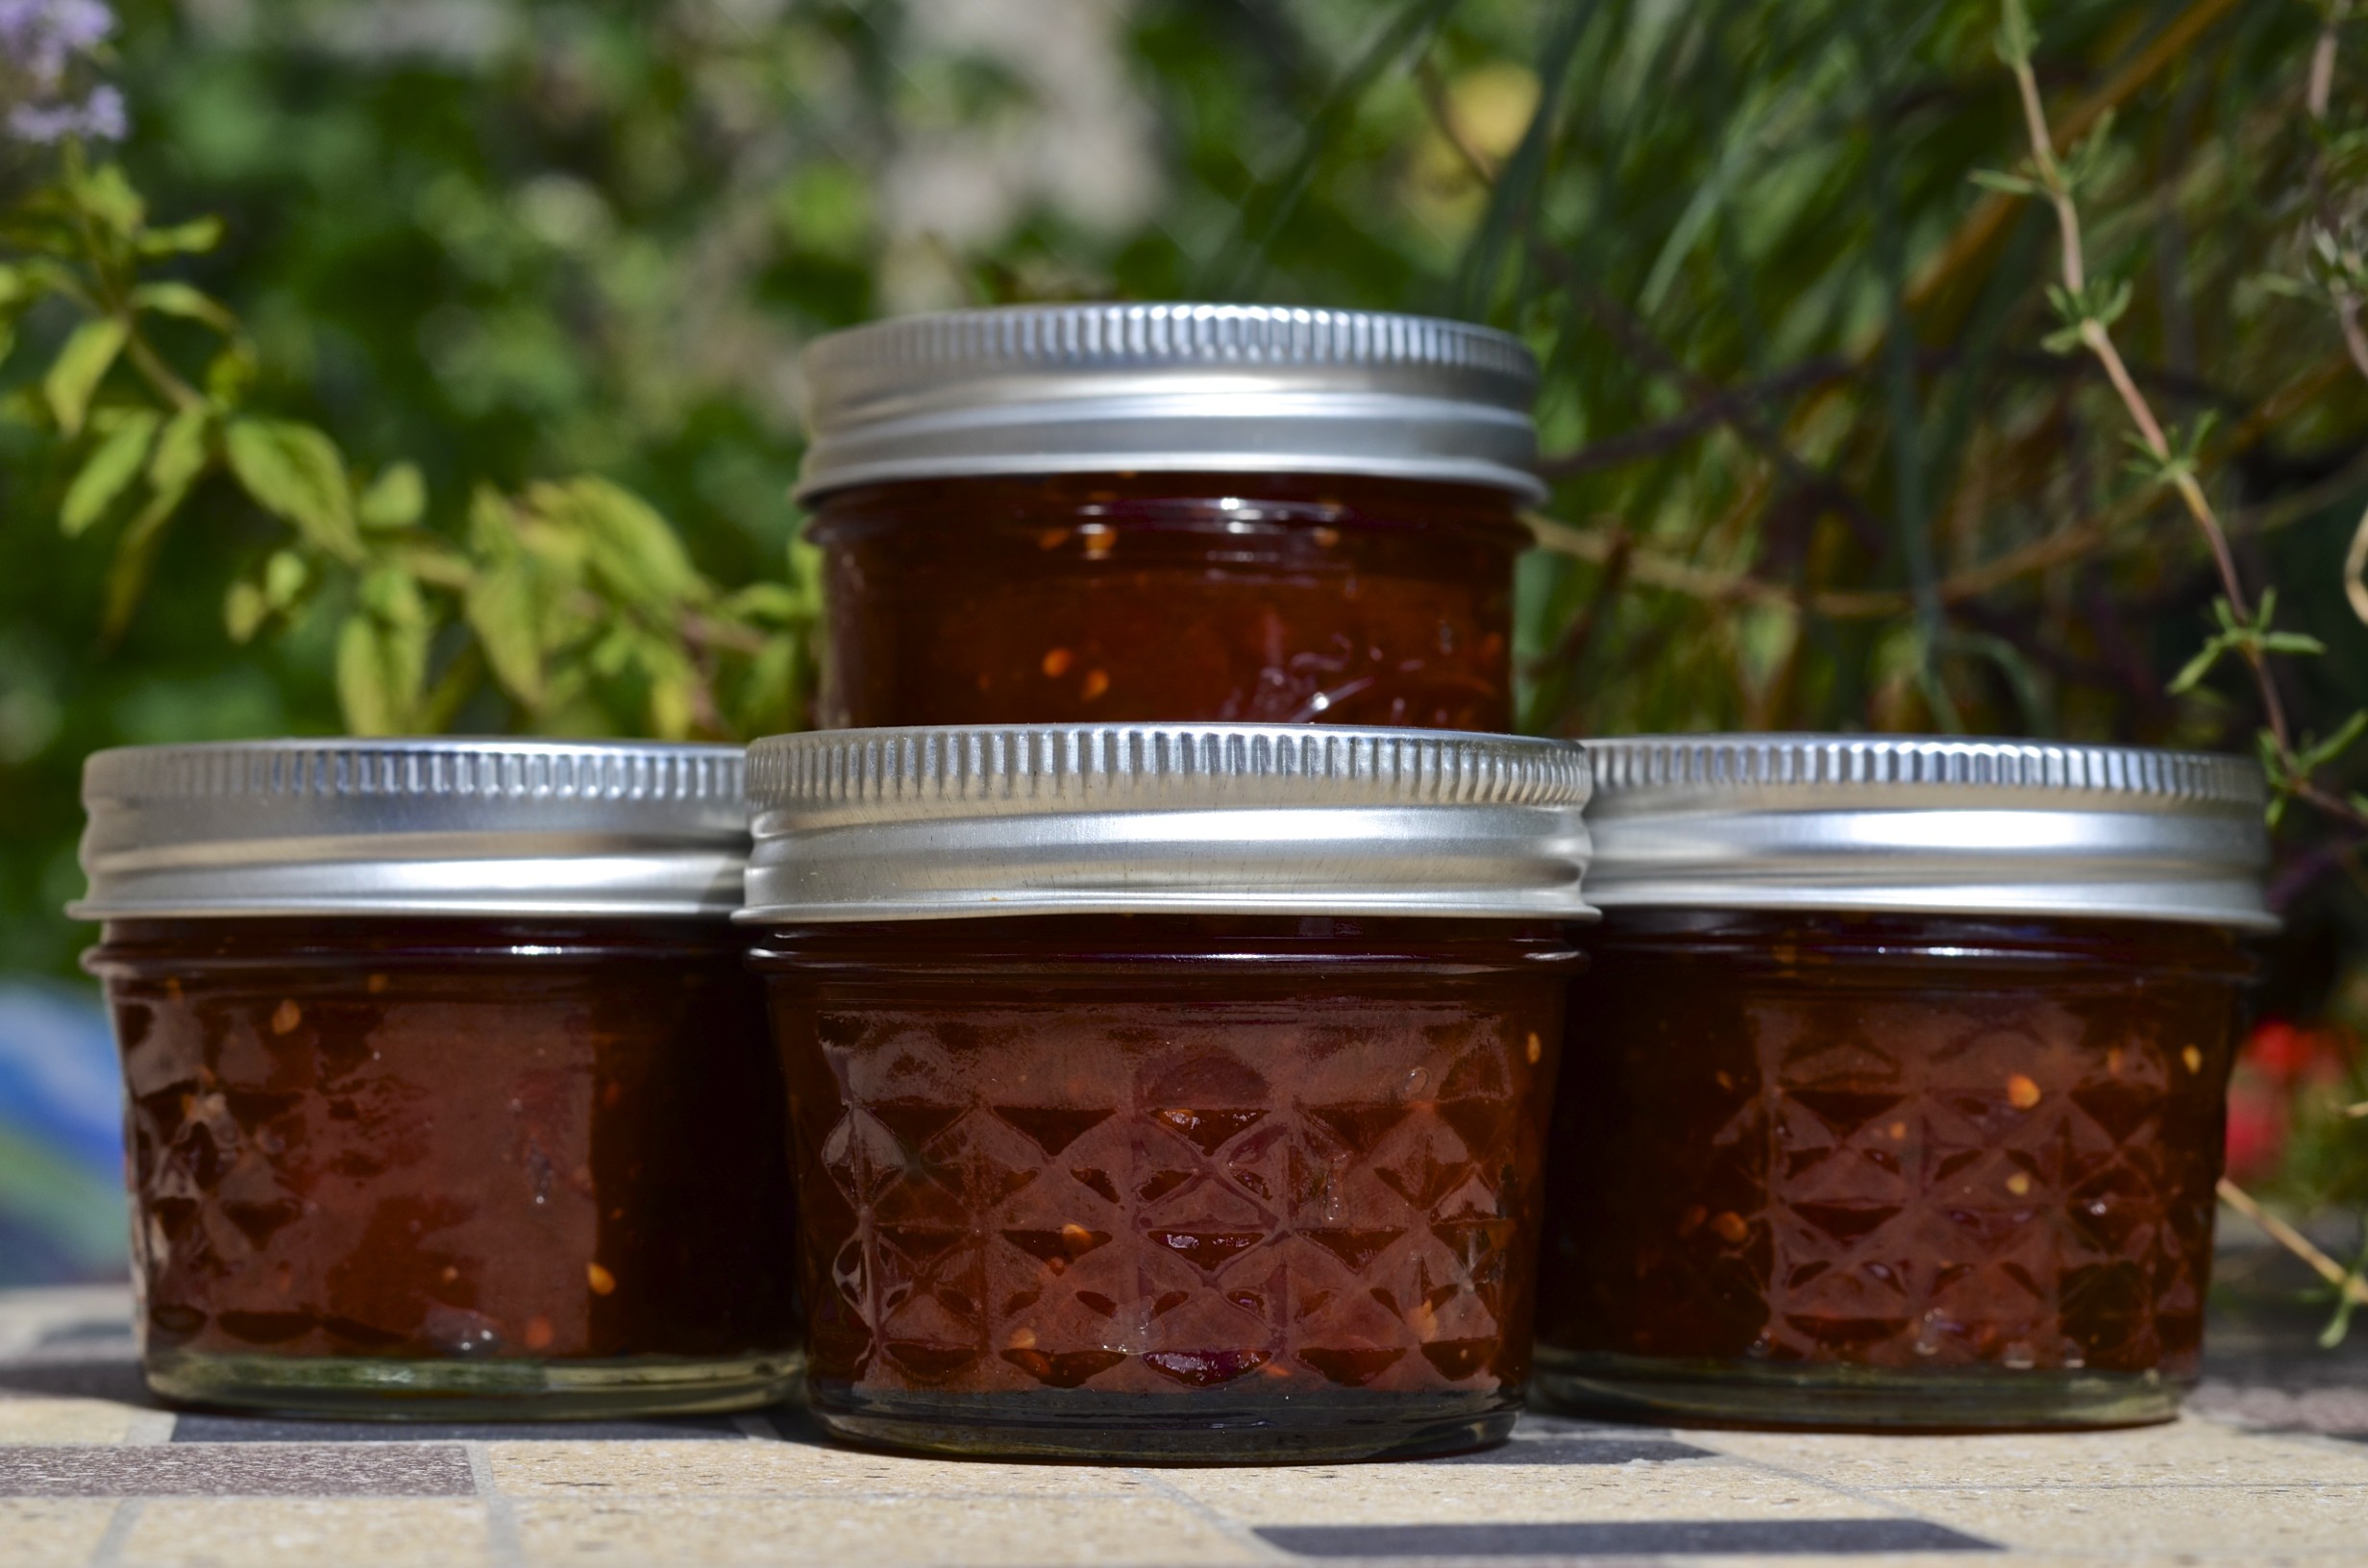
Of course, we did buy our share of honey, over 4 gallons between the two of us. Although I brought home 2.25 gallons (8.5 l), almost all went to my neighbors for distribution among their family members. The “Honey Man”, Mr. Falkenberg, has about 100 hives and they produce enough honey for him to sell it in some of that area’s markets, as well as during not one but two weekends this year. He also sold apples, grapes, and black walnuts.  I bought a 5 pound bucket of grapes for $2.00 and used them to make grape jelly yesterday. The apples were used to make apple sauce and my Zia Mariolla’s apple cake. That recipe will be shared in the near future.

*     *     *

(Click to enlarge any photo)

*     *     *

I’ve mentioned in the past that my family prepared goat, very often at Easter. As the years past, we relied more upon lamb for that holiday meal and I cannot tell you the last time I enjoyed goat in any form. Worse yet, I had no idea where I might purchase some. Well, that all changed a few weeks ago. I didn’t realize it but the vendor at the farmers market from whom I buy organic chicken also sells a variety of meats, goat being among them. Although I couldn’t buy any at the time, I knew I’d be back to purchase some. And that’s the last I’ve seen of that vendor. For whatever reason, they are no longer at the farmers market. Not only did I lose my long sought-after source for fresh goat meat but I lost my organic chicken vendor, too.

Well, returning home after the third week of the vendor’s absence, I decided to take matters into my own hands. I pulled the car to the curb and googled, “Where to buy goat in Chicago?” Lo and behold! Just about a half-mile from my home, there’s a Middle Eastern grocery and butcher. It’s one block West of the Indian market where I buy spices and I’ve walked past it any number of times. Within minutes, I was on my way with a goat shoulder wrapped in brown paper.

Once home and after a quick web search, I settled upon a great recipe. Unfortunately, it required harissa and I didn’t have a recipe for the sauce nor did I feel like experimenting. So, I did what I often do. I went to the Middle East Bakery & Grocery, a little gem of a store located in my old neighborhood. As luck would have it, they make their own harissa on-site and it’s good enough to be used in a number of the restaurants in town.

So, with a goat shouder on the counter, harissa in-hand, and a jar of preserved lemons hiding out in the back of my fridge, I set about making braised goat — but with one major difference. The original recipe uses a dutch oven to braise the roast, slowly, in the oven. When I finally bought the meat, Summer had returned to this area with a vengeance, I wasn’t about to turn on my oven for anything, let alone a long and slow braise. Instead, I pulled out the slow cooker and my kitchen kept its cool. This is the version described in the recipe below.

Oh! One more thing. I will be bringing some goat with me to Michigan next time so that I can learn and share my family’s recipe for roasting it. Get ready, Zia!

*     *     *

Raw Goat Shoulder

*     *     *

Goat in the Moorish Style Recipe

Ingredients

  • 1 cup harissa for marinade
  • 2 – 3 tbsp extra virgin olive oil
  • 2 carrots, chopped
  • 1 large onion, sliced
  • 6 cloves garlic, smashed
  • 2 bay leaves
  • 1 cinnamon stick
  • 3 cilantro stems – that’s right, I’m using cilantro
  • 2 cups low/no sodium chicken stock
  • 1/2 cup dry white wine
  • 1 tbsp honey
  • the rind from half of a preserved lemon, finely chopped
  • salt and pepper
  • harissa for serving
  • Greek yogurt for serving

*     *     *

Goat ready to be cooked

*     *     *

Directions

  1. With a very sharp knife, remove gray skin from the meat. Season with salt & pepper.
  2. Place meat in a large, seal-able plastic bag, add the harissa and completely coat the meat. Place the bag and contents in the fridge overnight. Turn bag over every couple of hours. Remove from fridge 1 hour before cooking is to begin.
  3. Heat oil over med-high heat in a medium sauté pan. Add onions, carrot, garlic, bay leaves, and cinnamon stick, sautéing until soft and fragrant. Season with salt and pepper.
  4. Meanwhile, place stock, white wine, and honey in a small sauce pan, bring to a boil, and then keep warm over a very low flame.
  5. Once the vegetables have been sautéed, dump that pan’s contents into the slow cooker. Add the cilantro and stir.
  6. Place the goat meat atop the vegetables, Be sure to include any remaining harissa left in the bag.
  7. Pour the wine mixture around the roast in the slow cooker. Cover and set to “Low”.
  8. Turn the roast after 1 hour, and then again every 2 hours after. Roast will be cooked in 8 hours.
  9. After 8 hours, remove roast to a dish and cover. Strain the pan juices, discarding the braising vegetables. Set aside to allow the fat to separate and then remove.
  10. See Serving Suggestions below

Inspired by a recipe in the NY Times.

*     *     *

Goat Plated

*     *     *

Serving Suggestions

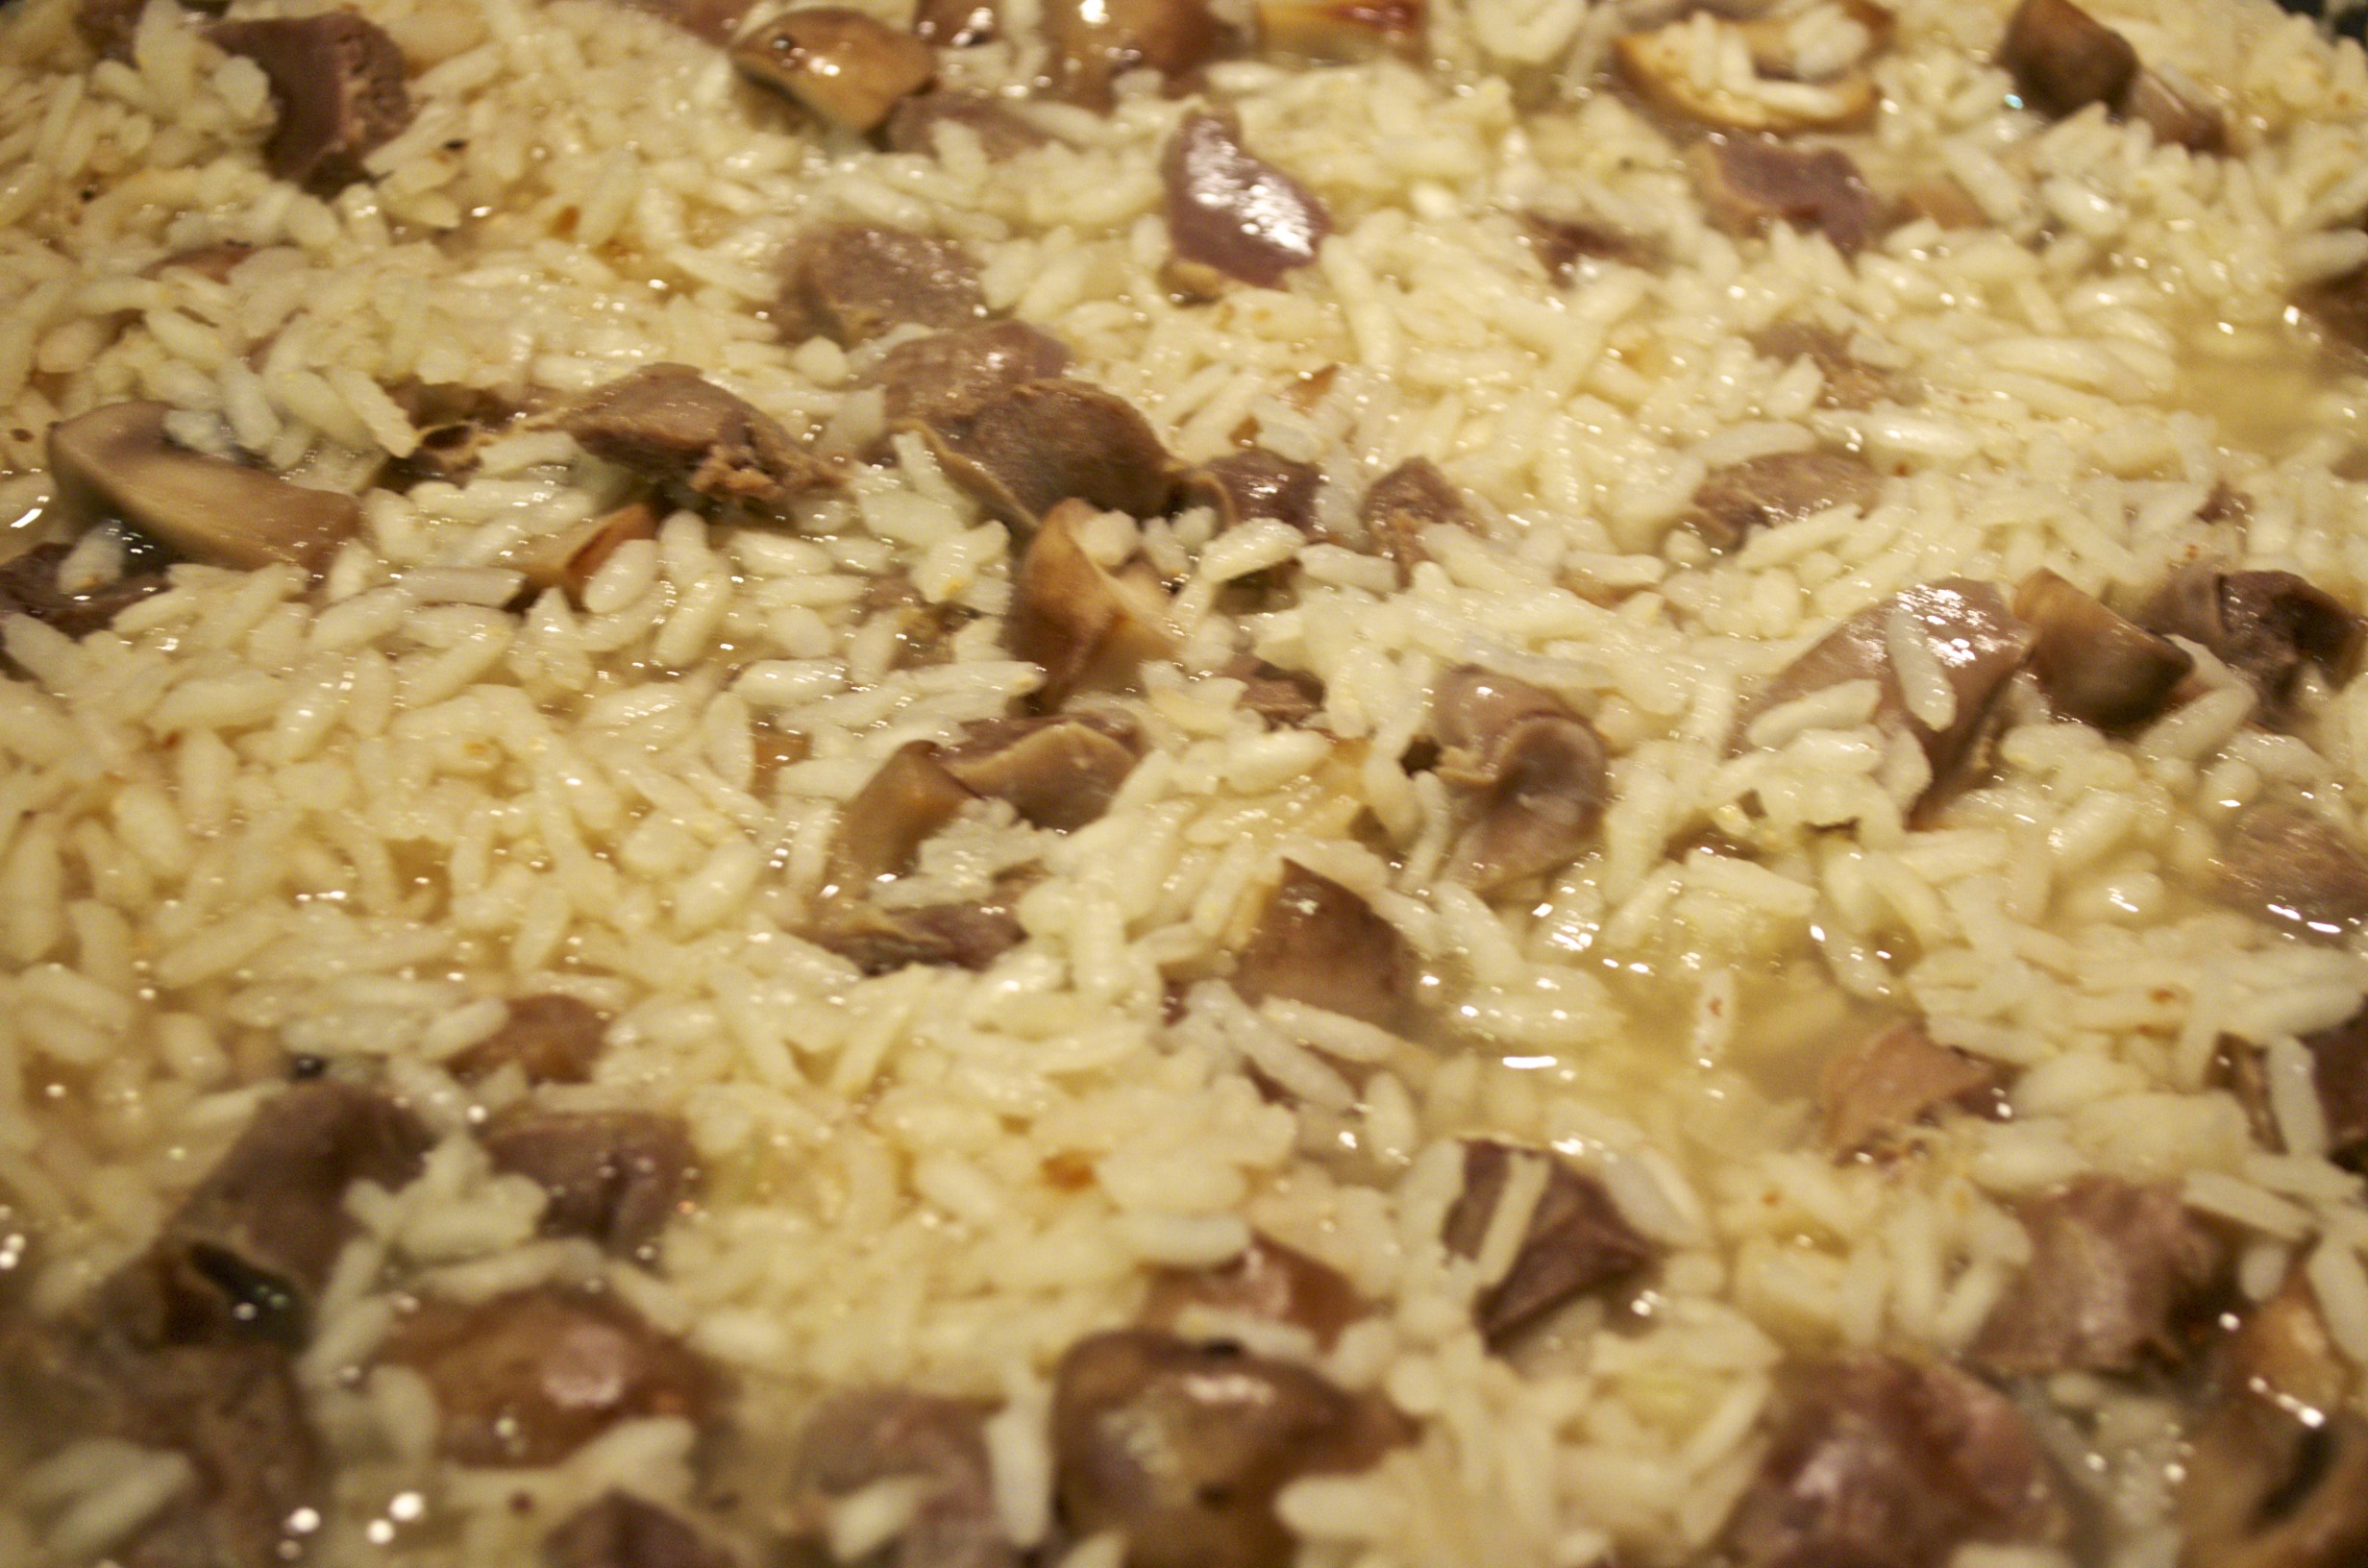
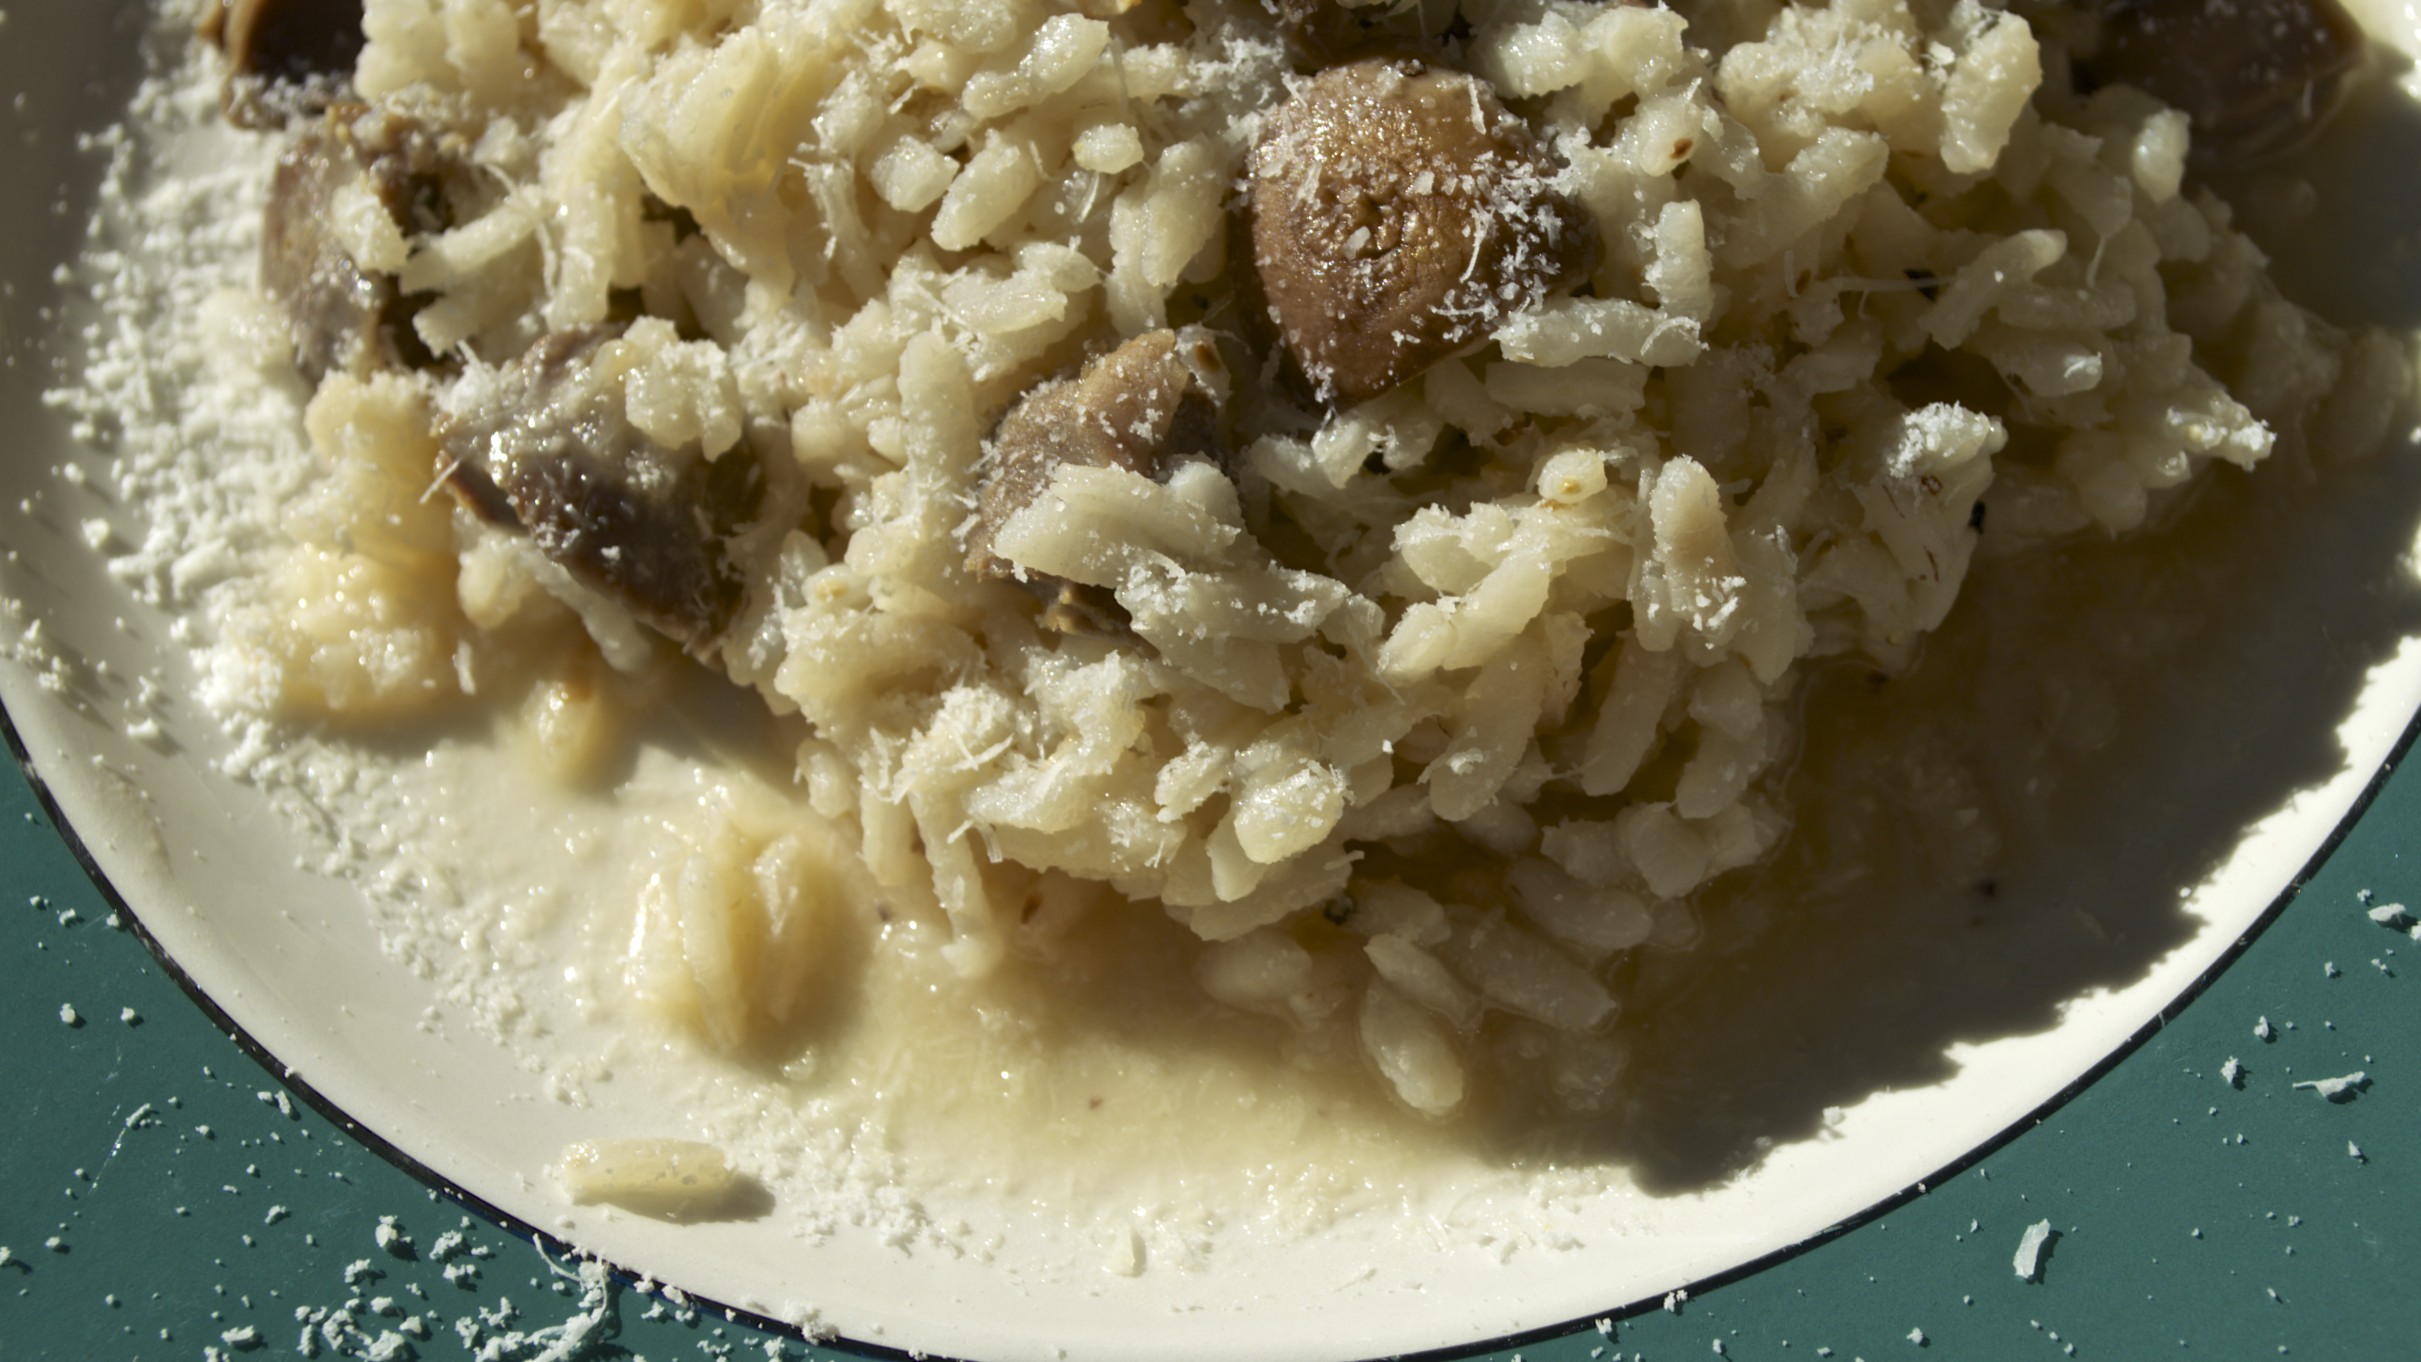
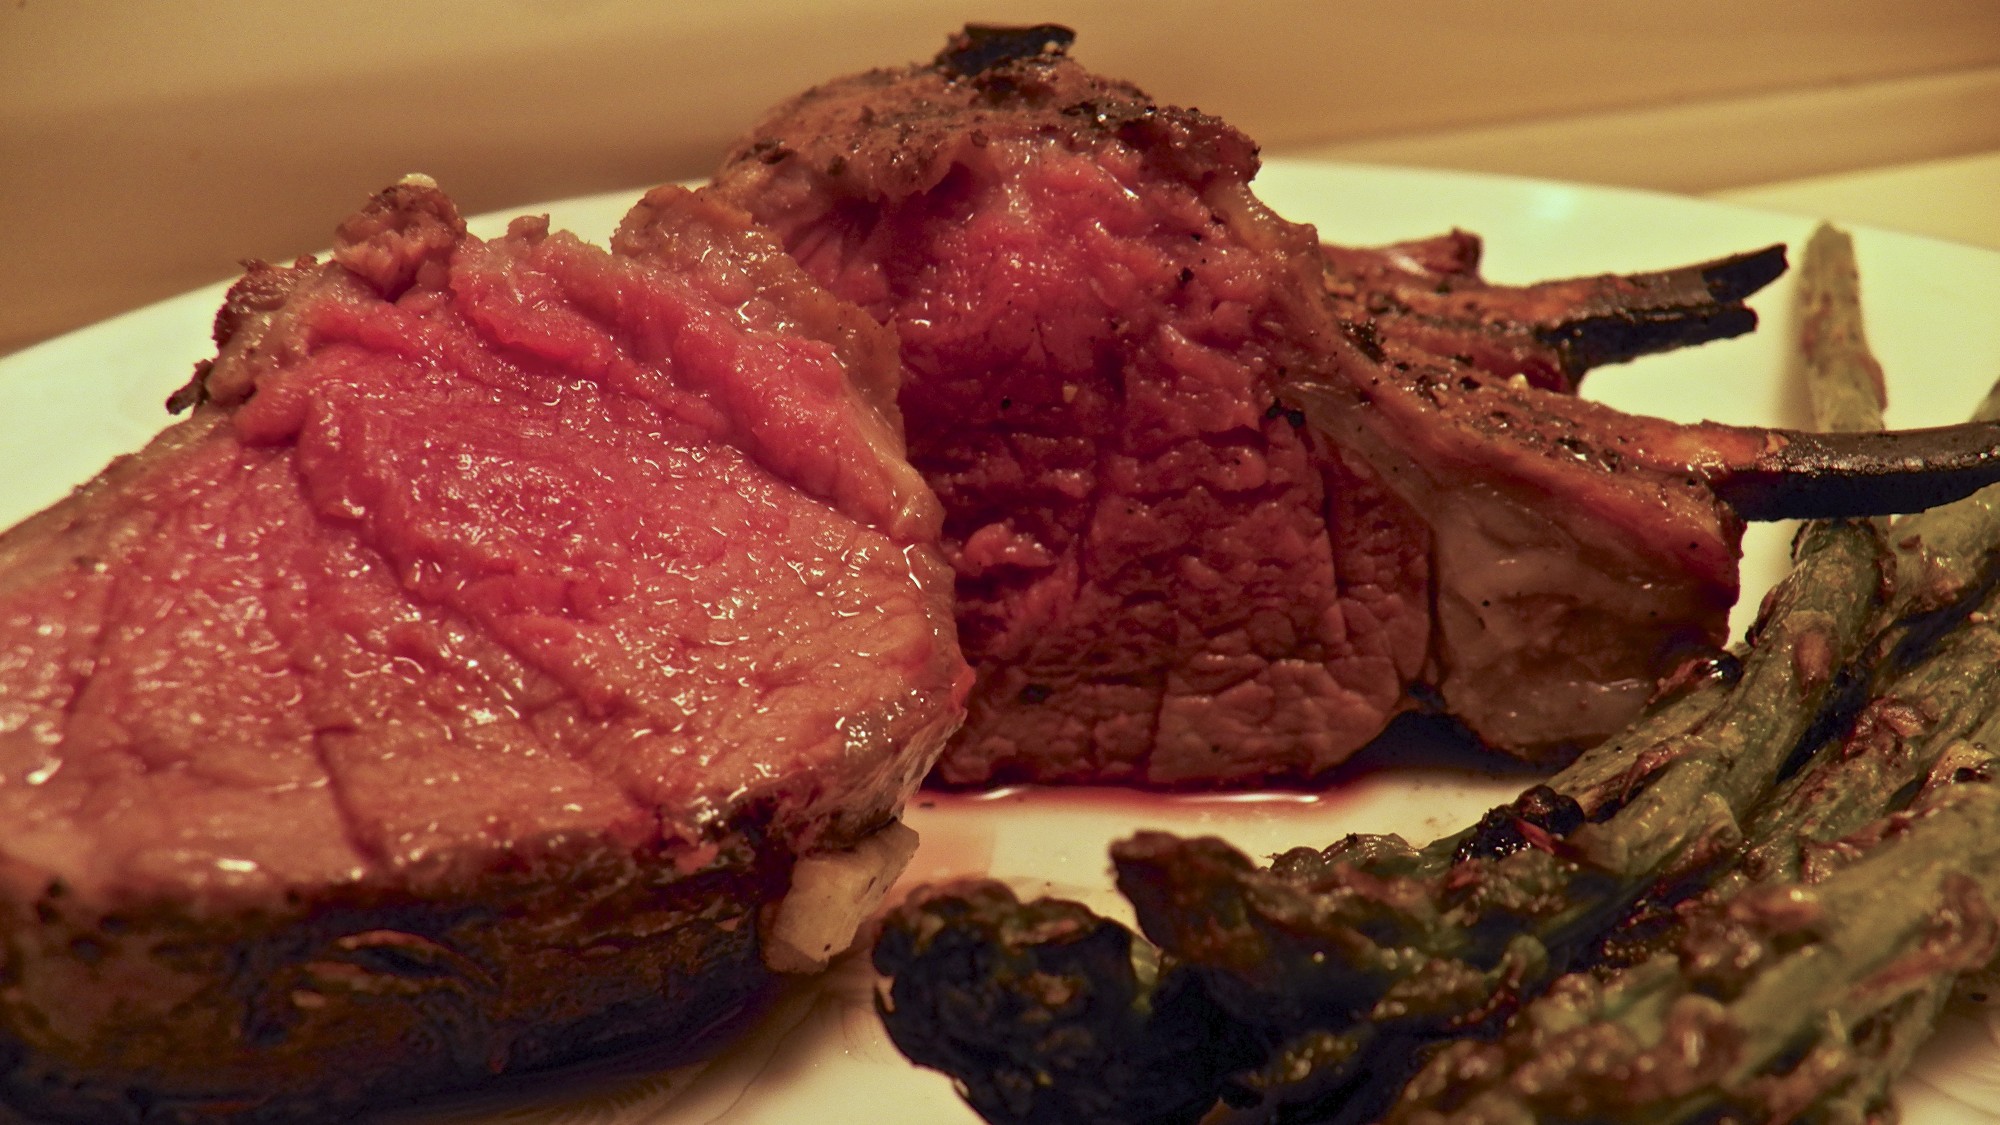
1) Once cooked, the roast can be carved and served as-is. Sprinkle with the preserved lemon. Suggested accompaniments would be rice, yogurt, and a bit of harissa on the side. The sauce can be reduced to the thickness of your choice. Check for seasoning before serving on the side.

2) Debone the cooked roast and treat it as you would pulled pork. Return in to the slow cooker. Add the preserved lemon and mix thoroughly. Reduce the sauce to the desired thickness and either add it to the pulled goat or serve on the side.

*     *     *

Goat Sandwich on Baby Arugula with Greek Yogurt and Harissa

Pulled Goat Sandwich on Baby Arugula with Greek Yogurt and Harissa

*     *     *

It’s déjà vu all over again …

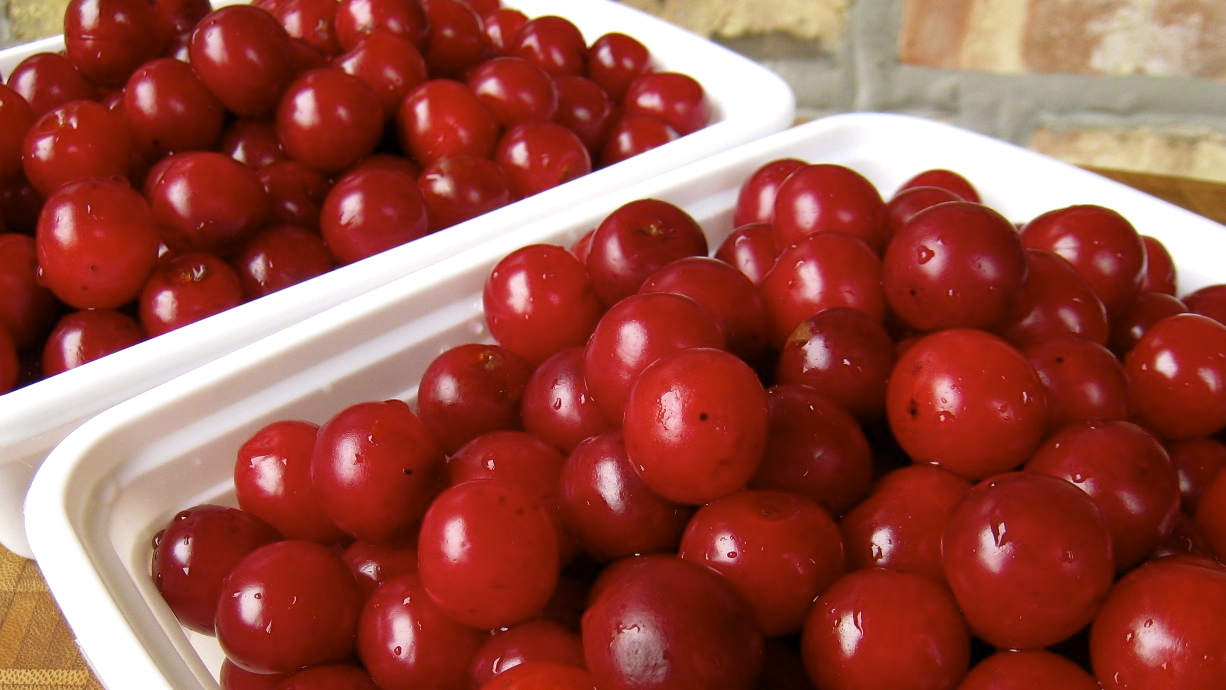
About a year ago, I posted a recipe for plum cobbler that I jokingly called “magical.” What I didn’t know, but learned while I was visiting Zia, was that the recipe contained a typo. Instead of listing “1 TBSP baking powder”, I had written “1 TSP baking powder.” Big difference, no? I’ve since corrected the recipe  and please make sure you do the same if you’ve made a copy for yourself.

*     *     *

Coming soon to a monitor near you …

_DSC0001 2

Blueberry-Lemon Slice

*     *     *

My Tomatoes Are In A Jam

With today’s post another short one, I thought I’d share a bit more about my Grandpa. When we last left him, he had just finished painting the trim on the two-flat’s peak and had invited the neighbors to come into the backyard to “see my tomatoes” …

(Those interested can read the painting story by clicking HERE.)

*     *     *
Tomato Jam 2

*     *     *

Grandpa was well-known throughout our neighborhood and he could often be seen strolling about, his hands behind his back, with his right hand holding the index and middle fingers of his left hand. The little boy across the street took note and would often mimic Grandpa as they walked together or on opposite sides of the street. For Grandpa, this was the highest form of flattery.

He did more than just stroll about, however. If he heard the rumble of heavy equipment or the whir of power tools, he would be at the job site or backyard within minutes. Having once owned a contracting company, Grandpa knew and understood quite a bit about building and repair work. It wouldn’t be long before he’d be advising the worker(s) and oftentimes he’d pitch in, showing them how whatever it was should be done. His opinion was respected and very often sought out by our neighbors and the parish.

For example, the front of our church was a massive, floor-to-ceiling mosaic depicting a number of Grandpa & Cookiesaints and religious symbols. As the church settled, a large crack began to appear in the center of the mosaic at its base, stretching upward like some leafless tree. Grandpa was called in to repair the crack and to replace the tiny colored tiles. Not long after that, following a lightning strike, Grandpa’s knowledge of masonry was required to help with the repairs to the school. As I said, Grandpa was well-known and respected.

Well, once the heavier garden work — the tilling, fertilizing, and planting — was done for the season and with no repair projects to tackle, Grandpa had time to relax. You could often find him sipping a beer while resting in his hammock under the grape arbor, listening to George Kell announce the play-by-play for the games of his beloved baseball team, the Detroit Tigers. Sometimes he watered the garden from the hammock, using a sprinkler to get those places beyond his reach. Eventually the game would end and that was cause for concern for some of the wives in the neighborhood, for Grandpa would go for a walk.

It didn’t matter who you were — neighbor, passer-by, parish priest, mail carrier, etc. — if Grandpa saw you, he would strike up a conversation and, at just the right moment, invite you to “see my tomatoes.” Within minutes, there you were, looking at his 2 dozen tomato plants, tied to their hockey sticks in neat little rows. He’d show you the brick barbecue, his very much prized Chinese pheasants, the lettuce patch, the grape vines, the potted lemon tree, and his latest attempt at growing a fig tree. Within minutes you’d be invited into the patio and he’d have a cold one in front of you before your rear end settled into your chair. What’s this? You don’t like beer? Not to worry. There was a jug of red wine under the table. Oh? You prefer white wine? There just so happened to be a jug of white wine next to the red. Well, that first beer or glass of wine led to another and another and then another. Somewhere along the line, shot glasses would appear and whiskey was introduced into the conversation. Although the length of these backyard tours varied, they usually ended in the same way, with his guest leaving the yard, though quite a bit more wobbly than when the tour first began. In fact, there were a few times when one of us kids was asked to walk his guest home.

These visits did not go unnoticed by the wives in the neighborhood and a few men refused Grandpa’s subsequent invitations. Others would accept but leave abruptly after Come Into My Parlor ...the first beer. Of course, there were a couple who, for whatever reason, accepted the invitation with no apparent qualms at all. It was after one such visit that a neighbor approached Mom, angry because her husband had ignored her wishes and had returned home moments before, more wobbly than usual. I don’t recall whether she wanted Mom to control Grandpa, her husband, or both but Mom, recognizing a no win situation, did nothing of the kind, The husband, perhaps wisely, kept his distance and I don’t recall ever seeing him in the backyard again.

That’s too bad because he missed one of the greatest parties held in our yard. It was Grandpa’s birthday, though neither Zia nor I can remember the exact one. As was the case for each of his birthdays, all 13 of us ate dinner together in the patio, with a couple of family friends seated at the table as well.  Once the dinner was finished, neighbors and friends joined the party just in time for cake and liquid refreshments. As I said, Grandpa was well-known and you never really knew who’d show up. This year, even the parish Pastor stopped by. The poor man didn’t stand a chance, for the wine, beer, and whiskey flowed freely. I’ve no idea how much time had transpired but I do know that my Dad was seated on our front porch as Grandpa walked the priest back to the rectory. (You may recall the rectory was located at the opposite end of our block.) Dad was still on the porch when the two returned a while later. Apparently, when they finally reached the rectory, the priest kindly offered to walk Grandpa home, he accepted, and so they returned. Realizing that this could go on for hours, Dad offered to walk the good priest home and sent Grandpa to bed. Oddly enough, although he was invited, our Pastor was a no-show at Grandpa’s next birthday party. That was OK, however, for another priest, a recent transfer from Wisconsin, unknowingly took his place …

*     *     *

I first became aware of tomato jam last year through my blogging friend, Marie, when she posted a link to a recipe for tomato jam that used Sungold cherry tomatoes. When I mentioned it to Zia, she remembered that Grandma had made tomato jam when both she and Mom were little girls. The way I saw it, I had little choice but to make a batch, which I enjoyed very much.

This year, my tomato plants did much better than they have in recent years but the weather was far from cooperative. Though Summer started quite warmly, the sun and high temperatures soon departed, not to return until late August. Up until that time, my tomatoes grew but never got the sun and heat needed to ripen. Then, as September started, so did the ripening and soon I had more tomatoes than I could handle. That’s when I decided to revisit tomato jam, making two batches within days of each other.

Unlike last year, however, my tomatoes weren’t Sungolds. In the first batch, I used only heirloom plum tomatoes. In the second, I used an even mix of tiny cherry tomatoes and more heirloom plum tomatoes. Since my tomatoes weren’t as sweet as Sungolds, I referenced Mark Bittman’s recipe for tomato jam, as well as the one suggested by Marie.

*     *     *

_DSC0006 3

*     *     *

Tomato Jam Recipe

Ingredients

  • 3.5 lbs (1590 g) tomatoes, cored, and roughly chopped (peeling optional)
  • 2 1/3 cups sugar
  • 3 green Thai chiles chopped, seeds and veins removed (see Notes)
  • juice and zest of 2 limes
  • 2 tbsp fresh ginger, grated
  • 2 tsp cumin, ground
  • 1 cinnamon stick
  • 1/4 tsp cloves, ground
  • 2 tsp salt

Directions

  1. Place sugar, chiles, and tomatoes in a thick bottomed, non-reactive pot. Stir and allow to sit for 1/2 hour.
  2. Using medium heat, add the remaining ingredients, and bring to a boil, before reducing to a simmer. Stir often to prevent scorching.
  3. Continue to simmer until the mixture resembles jam. This could take as little as 90 minutes or as long as 3 hours, maybe longer. If unsure whether your jam is ready, perform a plate test. (See Notes.)
  4. Once your tomatoes are jammin’, fill sterilized jars to 1/4 inch of the rim. Place the lid on each jar and process in a boiling water bath for 15 minutes. Remove from the boiling water, place on a towel lined baking sheet, and place them all in a draft-free area where they will remain undisturbed for at least 12 to 24 hours.
  5. Check to make sure each jar is properly sealed and store them in a cool, dark place. Those not sealed should be refrigerated and eaten within two weeks.

*     *     *

*     *     *

Notes

When researching the amount of time required to process these jars in a hot water bath, I came across 3 different time requirements; 5, 10, and 15 minutes. Preferring to err on the side of caution, I processed my jam for 15 minutes in a boiling water bath.

Although I peeled the tomatoes in the first batch, it was virtually impossible to peel the dozens of cherry tomatoes, so, I didn’t. I was surprised to find there was no detectable difference in texture between the two batches and I won’t be peeling tomatoes for jam in the future.

After cooking for an hour or so, I used a potato masher to crush any of the cherry tomatoes that remained whole. This released their liquid into the pot and, I believe, shortened the cooking process.

In the first batch, I used 3 green Thai chiles, removing both seeds and veins, thinking they would be too hot if used whole. Well, I could not detect them at all. In the second batch, I used one green Thai chile, leaving seeds and veins intact as I chopped it. It’s heat was barely detectable. I’ve yet to figure out what I’ll do next time but I’ve a feeling there’s one batch of very spicy tomato jam in my future.

There are a few ways to test whether your jam will set. I use the plate test. While your jam is boiling on your stove top, place a dish in your freezer. When you think your jam is ready, take about a half-teaspoon of jam and place it on the now chilled plate. Allow the jam to rest a few minutes before using another spoon or your fingertip to see if the jam has set or is still too runny. If the latter, continue to simmer the jam while returning the plate to the freezer to await the next test.

The cherry tomatoes that I used are an heirloom variety called “Mexican Midget”. One plant will produce a great deal of fruit, though smaller than “normal” cherry or grape tomatoes. The largest of these tomatoes are no bigger than my thumbnail, with many as small as the nail of my little finger. Up until I used them to make jam, I tossed a handful of them into each of my dinner salads — and still dozens remained on the plant.

*     *     *

Tomato Jam 3

*     *     *

It’s déjà vu all over again …

Black FigsSince this is a jammin’ post, we might as well be consistent. Today’s blast from the past is a recipe that I shared last year, Fig Preserves with Balsamic Vinegar and Black Pepper. Not only is this jam great when served with toast and, say, goat cheese, but it works beautifully when used to stuff a pork roast. WIth figs now filling our markets, this is one jam you won’t want to miss. Just click HERE for the details.

*     *     *

Coming soon to a monitor near you …

Braised Goat over RIce

Goat in the Moorish Style

*     *     *

Peanut Butter for Your Pupster

Peanut Butter for Dogs

*     *     *

Today’s recipe is a simple one and the post brief, so, I though I’d take the opportunity to share another Grandpa story. If you’re not interested, just scroll down until you reach the peanut photo. That’s where the recipe begins.

*     *     *

Grandpa was, by all accounts, a Jack of all Trades. Having owned a contracting business, few maintenance and repair jobs around the old two-flat fell outside of his skill set. At any given time, especially in the Summer, he could usually be found performing any one of a number of jobs around the building: cement work, carpentry, tile setting, painting, roof repair, and the occasional electrical project.

As children, we were often enlisted to help him with these projects. When very little, our main duty was to stay out-of-the-way. We soon graduated to beer fetchers and water bearers. “Go-fer” was the next position and, depending on the project and number of men involved, we could be kept running. Soon we were allowed to water the The Old Wheelbarrowdry ingredients to make cement, under supervision of course. Not long thereafter, we were permitted to use the hoe with 2 holes to mix the cement, as well as a variety of small jobs. You might, for example, fill buckets with cement, haul them, maybe cut a board or two, hammer a few nails, etc. And then, one day, you were deemed old enough and big enough to push a loaded wheelbarrow. That was the pinnacle of success for us laborers, for it meant that you big enough and strong enough to do man’s work. Make no mistake, pushing a wheelbarrow full of cement was certainly man’s work. especially under the watchful eyes of the adults present. You did not want it to tip over and there were plenty of opportunities, for every Summer there was at least one job that involved cement. To be sure, though, not all jobs required cement or even a work crew. For those jobs, Grandpa flew solo, like the time he painted the trim of the house.

Unlike bungalows and ranch-style homes, painting a two-flat’s trim was no easy task. As you can see in the photo below, much of the trim is about 25 feet above the ground, with the peak another 8 or so feet higher. To further complicate matters, there were 2 aluminum awnings attached to the front of the house, a small one over Zia’s living room, while a much larger awning shielded our windows and the entire porch minus the entryway. (The photo is current, the awnings having been removed sometime after we left in 1985.) When Grandpa decided the trim needed painting, he was about 71 years of age. This was long before “70 is the new 50”; 70 was 70. I was about 15.

One Summer afternoon, Grandpa called for me to give him a hand. By the time I got to the front of the house, Grandpa had already started up the ladder and was waiting for me. The ladder, however, was not long enough to reach the top, or even near the top, of the peak. Not only that but the awnings prevented it from resting against the building. Instead, it was on a bit of an incline as it laid across both awnings, its top-end suspended a little more than a foot from the wall.

When he saw me, I was instructed to stand on the bottom of the ladder. Grandpa then began to climb higher. In his hand was a hockey stick with a paint brush lashed to the end. I started pleading with him to stop. He ignored me and further up he went. I The Old Two Flatdidn’t know it but he had already placed a bucket of paint on top of the second awning. When he reached the end of the ladder, and with his left arm acting as a brace against the side of the building, he started painting the building’s peak, dipping his hockey stick brush into the paint can below him and then swinging it over his head. Whether because he heard my voice or just by luck, a neighbor came out and, horrified, ran to help me steady the ladder, all the while yelling, “Bart, get down!” Grandpa, of course, ignored him, as well. There was a job to be done, after all. Within minutes, more neighbors came, all pleading with him to stop. All for naught.

As I’ve mentioned in other posts, the parish school was across the street and at the end of the block. At the time, Mom worked there as the school’s secretary. That day, being it was Summer, Mom left her office at 4:00 pm. She didn’t walk far before she noticed a crowd gathering on our lawn and quickened her pace. When she got close enough, she noticed Grandpa on the ladder, swinging a hockey stick. Now running, and a few doors away, Mom was yelling, “Pa! Get Down!” Unperturbed, Grandpa kept painting.

When he had finished, the entire episode having lasted about 30 minutes, Grandpa calmly came down the ladder, handed his hockey stick to someone, went back up for the paint can, and came back down again for the last time. Mom and the neighbors demanded that he stop painting and he complied. In reality, his compliance was by no means submission. The peak was the last of the trim to be painted. His work was done.

The men helped Grandpa put away the ladder and paint supplies. For that, he invited them back to “see my tomatoes.” The invitation had little to do with tomatoes but that’s better left for another post. For now, there’s peanut butter to make.

*     *     *

When I first decided to make peanut butter for Max, he was still a puppy. Then, like now, he loved peanut butter over all other treats. Well, when I read the label of a jar of peanut butter, I decided to make my own. It’s easy enough, as you’ll soon see.

I’ve chosen to remove the shells, roast the peanuts, and then remove most of the “paper skins” before making the butter. You must remove the shells but whether you roast and/or remove the skins is up to you, although I did read that roasting peanuts increases their anti-oxidant effects. That’s about all there is to the recipe. Yes, it really is that simple and your pooch can enjoy a treat without any additives whatsoever.

*     *     *

100_4769

*     *     *
Roasted Peanut Butter Recipe

Ingredients

yield: 1 pint

  • 3 cups unsalted, raw peanuts, shelled (use organic if you can find them)

Directions

  1. Pre-heat oven to 350˚ F (175˚ C)
  2. Place peanuts, single layer, on a baking sheet and roast for 20 minutes. Stir midway through for even roasting.
  3. Remove from oven and set aside until cool enough to handle.
  4. Once cooled, take the baking sheet & peanuts outdoors. Rub a handful of peanuts between your palms. The clean nuts will drop and their “paper skins” will float away on the breeze. (See Notes)
  5. Once cleaned to your liking, place the nuts in a food processor and run.
  6. The peanuts will go through stages:
    1. The nuts will go from coarse to finely chopped in a couple of minutes.
    2. Soon a “dough ball” will form.
    3. A couple of minutes more and a creamy peanut butter will develop. The longer you process it, the more fluid it will be.
  7. Place in an airtight container and store in the refrigerator.

*     *     *

*     *     *

Variations

If using peanuts in the shell, roast for 25 minutes. Once cooled, remove shells and as much of the “paper skins” as you prefer.

If your pooch prefers chunky-style peanut butter — very helpful if this is to be used to hide pills — remove up to 1/2 cup of the nuts after they’ve been coarsely chopped. Add them back to the peanut butter once it has reached the preferred consistency. Stir by hand to combine.

To make peanut butter for the two-legged members of your household, follow the same method as dictated above. When the peanuts are first added to the food processor, you may wish to add salt, and/or a sweetener like honey or sugar, to taste. If you prefer your peanut butter to be more smooth, add a teaspoon or two of a neutral-tasting oil.

Notes

I’ve seen no documentation that states the “paper skins” are harmful or should be removed from the peanuts, whether the peanut butter is intended for use by humans or dogs. Nonetheless, I remove the majority of them, though I’m nowhere near having them 100% cleaned.

As I’ve mentioned, Max loves peanut butter. He has 2 hollow bones that I bought him years ago from a pet store. I put a couple of tablespoons of peanut butter in each and put them in the freezer. If I have to crate him, I give him one of these bones and it keeps him occupied.

Dogs do not sweat as we do. They cool themselves by panting, sending cooler air over the tongue. Giving your dog a frozen treat on the hottest of Summer’s days will help him to keep his cool. With that in mind, I reward my puppy with ice cubes. When fully grown and Summer’s heat is at its worst, I give my dog an ice cube “treat”. He loves it and it will cool him off.

*     *     *

It’s déjà vu all over again …

In my part of the country, the farmers markets are at their peak. Sure, some fruits and A Penne for your Zucchiniberries are gone for the year but the vendor stalls are bursting with many other fruits and vegetables. Judging by what I’ve seen, my use of zucchini blossoms earlier this season didn’t affect their harvest in the slightest. There’s enough zucchini and Summer squash left to go around — and then some. If you’re looking to use some of these squash, while cutting back on carbs, you might wish to check out this recipe for penne with zucchini and Summer squash.

*     *     *

Coming soon to a monitor near you …

Preview Tomato Jam

Tomato Jam

*     *     *

Ramps Ravioli with Morel Mushrooms

Ravioli della Cipolle Selvatiche con i Funghi della Spugnola Ramps Ravioli with Morel Mushrooms

You may recall that I visited my Zia last May and returned to Chicago with a number of recipes to share. Though it may have taken a while, today’s post is the last of those recipes, even if not quite what I had planned.

I had a devil of a time finding ramps this past Spring. My normal vendor didn’t harvest any and I was always just a bit late with my other sources. (Evidently ramps, like porcini mushrooms, are in big demand by the area’s restaurants.) Surprisingly, at the very end of the season, my fishmonger had some for sale. I bought up what he had, hoping that they would “keep” the 4 days before I left for Michigan and they did — kinda. Upon my arrival at Zia’s, I unwrapped the ramps, only to find the leaves to be a wilted, soggy mess. I quickly discarded them and kept the bulbs. This meant I would need something green for my ravioli and Zia and I decided fresh spinach would make a nice substitute. My attention now focused on the morels.

Known to but a few, there is a place near Zia’s home where morel mushrooms grow. Living 400 miles away, it is purely a matter of luck for me to be present when the pock Old Morelmarked fungi appear. Nonetheless, everyday I trotted out to the morel patch to see if anything had sprouted and everyday I returned home empty-handed. On the 4th day I gave up. Having had an inkling that this might happen, I had brought a package of dried morels with me to Michigan and used them in today’s dish. By the way, I continued to check the patch everyday until I left and none ever appeared. I did find one morel, however, far past its “use by” date, growing right next to Zia’s porch. I left it alone so that its spores could work their magic. I’ll be back next Spring.

Now, I know that it’s a little late in the year to be posting this recipe, both ramps and morels being out of season, but I did promise to post it. If you wish to prepare this now, you can follow my lead and use dried morels — a far cheaper substitute — and you can use shallots instead of the ramps. No, shallots and ramps are not the same thing but the shallots are readily available year-round and you won’t be at all disappointed with the ravioli.

*     *     *

Ramps Ravioli with Morel Mushrooms 2

*     *     *

Ramps Ravioli and Morel Mushroom Sauce Recipes

Ingredients

For the Ravioli Filling

  • 1/2 tbsp butter
  • 1/2 tbsp extra virgin olive oil
  • 2 cups packed, chopped fresh spinach
  • 1/2 cup ramps diced
  • 1/4 tsp nutmeg
  • 1/2 tsp sea/kosher salt, or to taste
  • 1/8 tsp pepper, or to taste
  • 1/4 cup Pecorino Romano cheese, grated
  • 8 oz (226 g) ricotta cheese, well-drained

For the Sauce

  • 1/2 oz (14 g) dried morels, re-hydrated, liquid strained and reserved
  • 1 tbsp butter
  • t tbsp extra virgin olive oil
  • 1 new garlic bulb, diced
  • 1 to 3 oz of dry white wine
  • 1 cup mushroom soaking liquid
  • 3 thyme stems
  • 1 tbsp butter
  • salt & pepper

*     *     *

Ramps Ravioli

*     *     *

Directions

For the Ravioli Filling

  1. In a frying pan, heat the butter and olive oil over med-high heat. Add the spinach and sauté until cooked through.
  2. Use a slotted spoon to remove the spinach to cool.
  3. Using the same pan, sauté the diced ramps until translucent, remove from heat, and allow to cool.
  4. Once cooled, place the spinach in a clean kitchen towel and wring out as much liquid as possible.
  5. In a mixing bowl, add the spinach, ramps, nutmeg, ricotta cheese, Pecorino Romano, salt, and pepper. Mix thoroughly.
  6. Refrigerate for a few hours or overnight to allow the flavors to meld and the cheese to firm, making it easier to work with later on.

To make ravioli using ravioli dies/molds, please click HERE to see an expert at work. There you’ll, also, find directions for cooking the pasta pillows.

*     *     *

Three morels

*     *     *

For the Morels “Sauce”

  1. In a frying pan, add the butter and olive oil over med-high heat. Add the garlic and sauté until fragrant, about 90 seconds.
  2. Add the morels and sauté for a few minutes, just long enough to give them a little color.
  3. Add the wine and sauté until all but gone.
  4. Add the mushroom soaking liquid and thyme and reduce until the consistency you like for the ravioli.
  5. Add the remaining butter and season with salt & pepper to taste.
  6. Use to lightly dress the ravioli prepared above.
  7. Serve immediately garnished with grated Pecorino Romano cheese.

*     *     *

Ramps Ravioli with Morel Mushrooms 3

*     *     *

Notes

Be aware that there are 2 types of mushrooms, known as false morels, that resemble morels but that are inedible. Do not go foraging for morels unless you know exactly what you are looking for. As is the case with all mushrooms, if in doubt, throw it out.

Morels should not be eaten raw. Stomach distress may result if they are not fully cooked before being eaten. Soaking them is not cooking them.

To re-hydrate morels, soak them in lukewarm water for 30 to 60 minutes before needed. Unlike most mushrooms, it wouldn’t hurt to first briefly hold them under running water to clear any grit that may be in the dimples.

*     *     *

It’s déjà vu all over again …

Tomato and Bread Soup

Tomato and Bread Soup

This is the time of year when gardens in this area are producing tomatoes of all shapes, sizes, and colors. If you don’t stay on top of the situation, you’ll soon be swamped with ripe tomatoes — and that’s true even if you’ve an Evil Squirrel to battle. Today’s blast from the past is a delicious way to utilize the excess. In fact, the more ripe the tomatoes, the better the dish. Pappa al Pomodoro, is a delicious soup that could not be easier to prepare. Just click HERE to learn all about it.

*     *     *

Coming soon to a monitor near you …

Tart Cherry Frozen Yogurt

Tart Cherry Frozen Yogurt

*     *     *

The Bartolini Family Risotto

Risotto della Famiglia di Bartolini

Risotto 1

This is it! The twice-delayed, much-anticipated, and another of the Bartolini Crown Jewels, my family’s risotto recipe. Though it’s been a long time coming, I think you’ll find it appealing, even if it is unlike most that you may know. You see, the Bartolini risotto is missing a couple of the dish’s standard ingredients and includes one that most do not — but we’ll discuss that in a bit.

Our risotto had quite a reputation among the branches of my family that did not reside in the two-flat. When our relatives from Cincinnati, at the time the southernmost members of the Clan, came for a visit, they had a standing request that this risotto be served as part of their welcoming dinner. I remember Mom making it for Dad’s Mother during her visits with us and risotto was often served when either of the two-flat’s families entertained. What made the Bartolini risotto so special? Chicken gizzards, an ingredient that was lacking from almost all other risotto recipes. If you liked gizzards, you loved this risotto. Of course, if you didn’t, well, you’d probably go hungry that night. The latter point being responsible for the greatest cover-up in the long and storied history of the Bartolini.

As popular as this dish was with the adults seated at the table, there was one member of the family, my sibling, who would have none of it. The child — henceforth referred to as “It” to protect “Its” identity — refused to eat them. Mom, in an effort to get the child to at least eat the risotto, told the child that they were “dried mushrooms” and “It” should put them aside and eat the rice. Knowing that the child balked at eating dried mushrooms, there’s no way so much as a grain of rice would have been eaten if “It” knew there were gizzards on that platter. Out of earshot of the child, Mom then turned to me and my other sibling, commanding we keep quiet about this, “Or else!”

Now, there’s nothing so unusual about what Mom did. After all, Mothers since the dawn of time have cajoled, bribed, and, yes, lied to their children, all in the name of good nutrition. (How many broccoli crowns have been hidden in meatloaf throughout the millennia?) No, the truly surprising thing about this tale is how long the ruse lasted.

We had all gathered at my Parent’s home for a family dinner, an event that had become more and more rare. When “It” noticed that Mom was preparing risotto, “It” asked Mom if dried mushrooms were to be included. Hearing that, I started to laugh and, much to Mom’s dismay, the cover-up was exposed. The astonishing fact is that the child was now in “Its” 30s! That’s right: 30’s! One “Or else!” from Mom and my sibling and I kept quiet for 3 decades. Kids today have it easy.

*     *     *

Our risotto is a bit more complicated than most. The gizzards, after all, must be cooked first. To do this, they are sautéed before being used to create a stock. As you’ll see in the recipe below, both the gizzards and the stock are then used to create the risotto. You’ll also note that 2 cups of Arborio rice are used. This will make a rather large platter of risotto. You may wish to reduce the amounts.

Risotto Recipe

Ingredients

  • 1 lb (455 g) chicken gizzards & hearts (see Notes)
  • 1 celery stalk
  • 1 carrot
  • 1 medium onion
  • 1 tbsp butterSautéing
  • 1 tbsp olive oil
  • water
  • 2 cups arborio rice
  • 2 tbsp butter
  • 1 small – medium onion, diced fine
  • 10 button or cremini mushrooms, chopped (see Notes)
  • 7 to 8 cups stock (see Notes)
  • salt & pepper, to taste
  • Pecorino Romano cheese

Directions

  1. Add the butter and olive oil to a saucepan over medium heat. Add the cleaned chicken gizzards to the pot and sauté for about 10 minutes. The object is to give them a bit of color, not fry them till fully cooked.
  2. Turn the heat to high before adding the onion, celery, carrot, and 2 quarts of water.
  3. Bring to a boil and reduce to a soft simmer. Continue to simmer for 90 minutes, removing any foam that may rise to the top.
  4. After 90 minutes, strain and reserve the stock. Remove the gizzards and set aside to cool. Remove the vegetables and discard.
  5. Once cooled to touch, chop the gizzards to your preference.
  6. In a large sauce pan or deep frying pan, melt the butter over med-high heat. Add the onion and sauté for about 5 minutes. Season with salt and pepper.
  7. Add the mushrooms and sauté for a few minutes until some color is achieved.
  8. Add the gizzards and sauté until heated through. The onion should be translucentSimmering away by this time. Season with salt and pepper.
  9. Add the rice and sauté for another 5 minutes or so to toast it. The grains should be partially opaque.
  10. Reduce the heat to medium, add a ladle or 2 of hot stock, and stir the rice. Though you needn’t stir it constantly, you shouldn’t leave it for more than a couple of minutes.
  11. When the stock is all but gone, add another ladle of stock and stir. Repeat this process again and again until the rice is just about cooked. This should take about 20 minutes and the risotto should not be gummy but very moist, though not so much as to be a soup.
  12. Taste and add salt & pepper, as needed.
  13. Turn off the heat, add a final ladle or 2 of stock, cover the pan, and let the risotto rest for 5 minutes.
  14. Add a handful or 2 of grated Pecorino Romano cheese, stir to combine, and place on the serving platter.
  15. Garnish with more grated cheese and serve.

*     *     *

Risotto 3

*     *     *

Variations

In many versions of risotto, white wine and saffron are added to the rice, although neither are used in my family’s risotto recipe. At a later date, I will post a recipe for Risotto alla Milanese, in which both ingredients are required.

Notes

In my area, chicken gizzards are sold in 1 lb packages. Before cooking, they must be rinsed and trimmed of any fatty and/or dark parts. Try to keep the fleshy parts as intact as possible. These will be chopped once cooked.

If you’re trying to “disguise” the gizzards, it’s best to chop the mushrooms in about the same size as the chopped gizzards, keeping in mind that the mushrooms will shrink when cooked.

The standard ratio of rice to stock when making risotto is about 1 to 3½, meaning for every cup of rice you’ll need 3½ cups of stock. It never hurts to have extra stock on hand just in case more is needed to cook the risotto.

The stock created with the chicken gizzards is relatively simple, with the few ingredients left in large pieces. This makes it far easier to retrieve the gizzards once cooked.

When ready to start cooking your risotto, combine  the stock made when cooking the gizzards with enough homemade chicken stock to give you the amount required in the recipe. Of course, store-bought, low-sodium, chicken stock may be substituted.

Keep the stock hot but not boiling. If kept boiling, much of it will immediately evaporate upon hitting the hot risotto pan without having a chance to be absorbed by the rice.

*     *     *

It’s déjà vu all over again … Corn RelishIt’s that time of the year again. In this part of the country, every grocery, market, and vegetable stand features at least one bin filled to over-flowing with ears of fresh corn. If you’re at all like me you just cannot get enough of the stuff. That’s all well and good for now, but what are you going to do come Fall when today’s surplus is but a memory? Well, with today’s blast from the past, you’ll be laughing all the way to the pantry. Zia’s Corn Relish is a great way to preserve today’s corn for tomorrow’s meals. It’s a simple recipe and you can find it by clicking HERE.

*     *     *

Coming soon to a monitor near you …

Ravioli with Morels

Ravioli made with Ramps and Dressed with Morel Mushroom Sauce

*     *     *

Salted Cod Salad

Insalata del Baccalà For some, the timing of today’s post may seem rather odd. A salted cod salad is very often served in Italian households as part of the Feast of the Seven Fishes on Christmas Eve — but not in our house. We Bartolini prepared this salad virtually any time throughout the year except during the holidays. On Christmas Eve, we served our salted cod stewed in tomato sauce, baccalà in umido. Frankly, I prefer it this way, with a stew served in Winter and a salad served in the warmer months.

This is the third recipe I’ve shared that features salted cod. The first, Baccalà alla Marchigiana, is the stew that we served on Christmas Eve. In the second post, the cod was barbecued, although the same preparation could be used to bake the fish. Today’s recipe is a salad and a snap to make, once you’ve re-hydrated and rinsed the cod.

Briefly, in the days long before refrigeration, cod was dried and salted as a means of preservation. To make it suitable for cooking, the cod must be soaked in cold water for at least one day and no more than three. During that time, the water should be changed three times daily. The longer the soak, the less salty the taste. It is up to you to decide what level of salinity is acceptable.

With the cod re-hydrated, the dish, like most green salads, is really quite simple to prepare. Though the ingredients may have varied from one salad to the next, we always dressed our salad with a bit of red wine vinegar and olive oil. You, like many, may prefer to use lemon juice in place of the vinegar. Even so, with absolutely no cooking involved, you can easily see how this salad would make a perfect meal during Summer’s dog days.

*     *     *

Salted Cod Salad Recipe

Ingredients

  • 1lb (455 g) of baccalà (See Variations)
  • pickled bell peppers, chopped (See Notes)
  • 1/2 yellow bell pepper, chopped
  • 1 celery stalk, chopped
  • red onion chopped
  • nonpareil capers, rinsed
  • Kalamata olives, halved
  • 1/4 cup fresh parsley, chopped
  • extra virgin olive oil
  • red wine vinegar — lemon juice may be substituted
  • salt & pepper, to taste

*     *     *

*     *     *

Directions

  1. To ready the baccalà: Place the fish in an oblong glass dish or pan. Add enough water to cover, dump the water, and repeat a few times. Add enough water to cover and set aside. Change the water 3 times daily for at least 1 day and no more than 3. When ready, the cod will be considerably thicker than when your started and will taste far less salty. (See Notes)
  2. Remove any bones and skin before proceeding,
  3. Bring a large pot of water to the boil.
  4. Meanwhile, cut the re-hydrated baccalà into chunks from 3 to 4 inches apiece.
  5. When the water is boiling hard, add the baccalà and, when the water returns to the boil, reduce the heat to a soft simmer.
  6. Simmer until the baccalà can be easily flaked, usually about 5 to 8 minutes.
  7. Using a slotted spoon or small strainer, remove the baccalà from the water and set aside.
  8. Once cool, carefully flake baccalà and place in another bowl.
  9. To that bowl, add the peppers, celery, onion, capers, olives, and parsley. Gently toss the ingredients until combined.
  10. Add enough of the olive oil to lightly coat the salad, followed by the vinegar/lemon juice to taste. Season with pepper but be sure to taste before adding any salt.
  11. If not to be served immediately, cover and refrigerate until you’re ready to do so.

*     *     *

Variations

This recipe used raw salted cod, baccalà, to make the salad. The salad could also be made using left-over baked, broiled, or grilled baccalà, as well. When using left-over cod, there’s no need to boil or cut it up into chunks. Skip those steps and start flaking the pieces.

You can vary the salad ingredients to suit your own tastes. Carrots, shallots, garlic, etc., can be added or used to substitute for any of the ingredients listed.

*     *     *

*     *     *

Notes

You’ll note that I used bell peppers twice in this recipe. The first were miniatures, “Tulip Bells”, that I pickled last August. They added color and a vinegar element. The yellow bell was added for both color and crunch. Neither pepper brings any heat to the salad. If you like, you can add cherry bomb peppers, jalapeños, or Serranos, raw or pickled, to kick up the heat.

One sure way to know whether the baccalà is ready to be cooked is to taste a very small piece of it, once it seems fully hydrated. If it is still too salty, keep soaking the fish until it reaches the level of salinity that you prefer, bearing in mind that it will be boiled once it passes your inspection.

Do not add any salt to the dish until the very end.

This salad will keep for 2 days if refrigerated, though we’ve rarely had left-overs.

*     *     *

It’s déjà vu all over again …

Today’s post featured a recipe tailor-made for Summer’s hottest days, when we’re all loathe to turn on the stove. The same can be said for today’s blast from the past. Two years ago I shared a recipe for a couscous salad that requires not one bit of cooking. Just put the ingredients in a bowl, give them a toss, and set your salad in the fridge while you sip Long Island iced tea on the patio. A few hours later you’ll have a tasty salad for lunch or dinner without ever touching a pot or pan. You can see how it’s prepared by clicking HERE.

*     *     *

Coming soon to a monitor near you …

Pickles

*     *     *

Fried Zucchini Blossoms

Fiori Fritti dello Zucchini

*     *     *

For a number of years now, it seems that every cook and chef on television has demonstrated the fine art of stuffing zucchini/squash blossoms before being fried. This was not something we ever tried at the two-flat. First of all, Grandpa would never plant something in his garden that would take up so much space. Tomatoes were his main interest and a plant that sprawled, no matter what kind, just wasn’t welcome. More importantly, even if he found a suitable spot for, say, zucchini, picking the blossoms would not have been acceptable to him in the slightest. He planted zucchini and anything that would lessen the crop would not have been allowed. So, without the crutch of a family recipe, I headed into new territory when I bought my first bunch of zucchini blossoms late last Summer.

Those first blossoms proved to be a disaster. They were an impulse buy and I’d no idea how to store them, so, I treated them like I would cut flowers. I awoke the next morning to find a wilted mess in a glass of water. That was the last I saw of blossoms until a few weeks ago, when I came across some at the farmers market. With my car in the shop, they survived the trip home in surprisingly good shape. Problems arose, however, when it came to creating a stuffing. Not wishing to test the CTA’s reliability a 2nd time that day, I raided the fridge, finding fresh mozzarella and fontinella cheeses. A quick trip to the corner store and I returned with a 1/2 gallon of whole milk that was used to make ricotta. These three cheeses were used to prepare the stuffing used in today’s recipe.

With the stuffing decided, I set about creating a batter to coat them. I tried a number of versions, over the course of 3 Saturdays, finally settling on a batter of flour, corn starch, cornmeal, and club soda. This batter was, by far, the best, resulting in blossoms that were crispy without being buried in batter.

I also continued to experiment with fillings. My favorite consisted of mozzarella and anchovies. Unfortunately, my photos from that batch were a mess, though I did post the “best” one later in this post.

There is one more thing worth mentioning. Be sure to open each blossom and check to see if there are any stow-aways. Although any one of a number of insects might be found lurking in there, I’m more concerned with creatures of the eight-legged variety. Although I’ve yet to come across one, I check the blossoms over the sink with the garbage disposal running. Just sayin’ …

*     *     *

I’ll be leaving for Michigan and the Kitchens will be closed as a result. It’s time for a little R&R on the beach with Max. See you in 2 weeks.

*     *     *

Che Bei Fiori!

*     *     *

Fried Zucchini Blossoms Recipe

Ingredients

  • 12 fresh zucchini/squash blossoms
  • 2 oz (56 g) mozzarella, grated
  • 2 oz (56 g) fontinella, grated
  • 4 oz (113 g) whole milk ricotta, well-drained
  • 1/2 cup AP flour
  • 1/4 cup corn starch/flour
  • 1/4 cup cornmeal
  • club soda
  • salt & pepper
  • oil for frying

*     *     *

Fontinella, Ricotta, & Mozzarella Cheeses

*     *     *

Directions

  1. Using tweezers, remove stamen and gently wash each blossom. Carefully blot each one dry. Remove the stems just beneath the blossom.
  2. Place a coffee filter into a strainer and add ricotta. Allow to drain a couple of hours. Discard the liquid (whey) and reserve the ricotta.
  3. Coarsely grate mozzarella and fontinella cheeses. (See Notes)
  4. Combine ricotta, mozzarella, and fontinella cheeses. Mix well.
  5. Add flour, corn starch, salt & pepper into a bowl and whisk to combine.
  6. Add enough club soda to make a batter.
  7. Place the cheese mixture  into a pastry bag or plastic storage bag. If using the latter, cut off one of the bag’s bottom corners and force the cheese into that part of the bag.
  8. Grab hold of a blossom in one hand and gently separate the petals to reveal a “pocket”. Gently blowing into the blossom may help open it up.
  9. Place the tip of the cheese-filled pasty/plastic bag into the pocket and squeeze some of the cheese into the blossom. Do not overfill nor allow the blossom to split. Continue until all are stuffed.
  10. Fill a medium-sized sauce pan with about 2 inches (5 cm) of oil. Heat to about 350˚. You’ll know it is hot enough if a bit of batter instantly begins to fry when dropped into the hot oil.
  11. Take one blossom and twist the petal ends to seal the cheese inside. Grabbing hold of the twisted petal ends, dip the blossom into the batter to cover. Drain excess batter and then place in the hot oil. Continue with more blossoms. Work in batches to avoid overcrowding the pan.
  12. When golden brown (2 to 4 minutes), flip each blossom. Fry for another 2 minutes
  13. Remove to a paper towel lined dish and season with salt.
  14. Serve immediately

*     *     *

*     *     *

Variations

Though stuffed blossoms are wonderful when fried, you really don’t need to stuff them with anything before frying. Just dip them in the batter and fry them. You’ll get a light, crispy treat without the hassle of trying to fill blossoms with cheese.

Mozzarella & Anchovy  Zucchini Blossom

You can stuff the blossoms with whatever you like. Any cheese or mixture of cheeses will work. I chose a combination of 3 cheese for this post. My favorites, though were blossoms stuffed with mozzarella and an anchovy. Simply prepare the blossom as indicated above, cut a stick of mozzarella, wrap it with an anchovy, insert both into the blossom before dredging and frying. Unfortunately, the photo on the right is the best of those I took that afternoon.

There are several ways to coat your blossoms. Some prefer to use eggs in their batter while others “go it alone” with just a coating of flour. Some use breadcrumbs to form a coating and others like only flour. I like a thinner batter, so, I use a little club soda poured into a mixture of 1 part each of corn meal and corn starch/flour for every 2 parts AP flour. When mixed, I prefer a batter that’s a little thicker than buttermilk but not quite as thick as pancake batter.

*     *     *

Notes

I’ve yet to discover a good way to store blossoms. I was told to treat them like freshly cut flowers and that didn’t work. I’ve since searched the web and it’s suggested that the blossoms be tightly sealed and refrigerated. (One of the vendors expressly stated not to refrigerate them.) I’ve yet to try this for when I returned last weekend for more blossoms, none were to be found — hence the blurry photo above.

By far, the easiest way to stuff a blossom is to use a pastry or plastic bag, tip inserted into the blossom. If and when I find more blossoms, I think I’ll try the 3 cheeses again, only doubling the amount of mozzarella and fontinella before adding chopped anchovies to the mixture. Yes, I do love my anchovies!

Whenever soft cheeses like mozzarella need to be grated, it’s easiest if your place the cheese in the freezer for about 30 minutes beforehand. This should harden the cheese a bit, making grating a snap.

Initially, I tried a shallow fry, using about a half-inch of oil in the pan. I did not like the results at all. The lack of oil meant the blossoms had to be “handled” more so that they could be flipped and evenly fried. This raised the risk of damaged blossoms and leaking cheese. Using about 2 inches (5 cm) of oil made frying so much easier and consequently no blossoms were harmed in the making of this tasty treat.

*     *     *

It’s déjà vu all over again …

For many, a meal isn’t complete until coffee and an after-dinner liqueur are served. If that meal is served during the Summer, a dish of ice cream is very often part of the equation. With an eye towards reducing the average dishwasher’s workload, the Italians took these 3 traditions and united them in one simple dessert, affogato al caffè. Often served in a cup, affogato is a combination of ice cream and espresso, with an optional shot of your favorite liqueur. I think you’ll agree that an affogato is a wonderful way to end a meal — without having to loosen your belt afterward. You can see directions for creating a variety of affogati by clicking HERE.

*     *     *

Coming soon to a monitor near you …

Baccalà Salad

Baccalà Salad

*     *     *

Grilled Rack of Spring Lamb

Carré di Abbacchio alla Griglia

As a boy, I was aware that Mom was a good cook. I’d been to enough of my friends’ homes for dinner to know that few shared Mom’s skill in the kitchen. Judging by their response, my friends came to the same conclusion when they stayed for dinner at our home. In fact, a Mom called mine one evening asking how she prepared spinach. To her surprise, upon returning home after dinner with us, my friend couldn’t stop raving about the spinach, something he refused to eat at his own home. Apparently, she had only served her family canned spinach. Over the phone, Mom gave her instructions for sautéing fresh spinach in garlic-flavored olive oil. Decades before Jamie Oliver, Mom was changing how America ate, one dinner table at a time. Incidentally, to this day, I’ve never eaten canned spinach, no matter what Popeye said or did.

*     *     *

*     *     *

Knowing that Mom was a good cook was one thing, realizing the authenticity of her cooking was something else. During my first trip to Florence, I followed a tour book’s suggestion and dined at a family owned restaurant. Just as the book described, we were greeted by the owner/chef, taken to our table, and then he disappeared, returning a few minutes later with menus and a list of the specials. In the kitchen, just as the book stated, Mamma could be seen helping to get the orders out to the diners. I followed our host’s suggestion and ordered lamb chops. A few minutes later, I glanced into the kitchen and there was Mamma, just beyond the restaurant’s back door, grilling my chops. When I was served, I was surprised to learn that they tasted exactly — not similarly but exactly — as if my own Mom had prepared them. That was the day I realized just how authentically Italian Mom and Zia cooked. That was quite a souvenir to bring back home.

Although a recipe is listed below, today’s post is more about the method used than anything else. This was how all of our chops and steaks were prepared, no matter who manned the barbecue. This is not an exact science nor will it ever be. The only difference in method when cooking the various meats is that a little lemon juice might be added when cooking lamb. Otherwise, a simple combination of olive oil, garlic, rosemary, salt, and pepper are used to marinate the meats. It really is that simple but don’t take my word for it. Karen has shared her own flavorful version of this simple recipe for grilled lamb in her wonderful blog, Back Road Journal.

As for today’s lamb, a couple of days after Easter, I was pleasantly surprised to see 2 small racks (a 3 rib & a 4 rib) of Spring lamb in the meat display. I asked the butcher about them and learned that they have been trimmed to  fulfill special orders for the holiday. I bought them — at half price! — and stored them in the freezer, bringing them with me when I last visited Michigan. Believe me, after every future holiday I will be sure to check every meat counter within reason, looking for a similar deal.

*     *     *

*     *     *

Grilled Rack of Spring Lamb Recipe

Ingredients

  • 2 portions of Spring rack of lamb, 7 ribs in total, french cut
  • 1 to 3 cloves garlic, chopped
  • rosemary, roughly chopped
  • olive oil
  • 1 to 2 tbsp fresh lemon juice (optional)
  • salt and pepper
  • parsley for garnish (optional)

Directions

  1.  A couple of hours before you are to roast the lamb, remove it from the refrigerator and place on a pie plate or similar dish.
  2. Season with garlic, rosemary, salt, and pepper before sprinkling with optional lemon juice and enough olive oil to lightly coat everything. The lamb is already dead. No need to drown it in oil.
  3. Set aside to marinate until you’re ready to cook. If your kitchen is warm, place the rack in the fridge until 30 minutes before you intend to cook it.
  4. Pre-heat your barbecue on high. Wrap the chop tips with aluminum foil, something I forgot to do.
  5. Place the rack directly over the heat and sear the meat for a couple of minutes before moving it to an area on the grill away from the heat.
  6. Using an instant read thermometer, we pulled the racks off of the grill when the temperature reached 120˚ F (49 C).
  7. While the racks rested, covered, I grilled the asparagus while Zia dressed the salad.
  8. The racks were served, garnished with a bit of parsley (optional).

*     *     *

Notes

The olive oil marinade is not one that is left on the meat overnight. At most, the meat was left to marinate for 3 hours, with 1 to 2 hours the norm.

As you can see in the photo, the rosemary wasn’t chopped before being used.  Most, if not all, will be lost during grilling. The same is true for the garlic, so, don’t be overly concerned with chopping/dicing everything evenly.

The racks could just as easily be broiled if a barbecue or grill pan is not available. As always, do not forget about them lest your return to find Spring rack of lamb flambé.

*     *     *

It’s déjà vu all over again …

Cherries JammedI mentioned last week that tart cherries are now in season. In my opinion, these cherries make the best pies, muffins, and jams. Yes, it can be a bit tedious pitting the little red devils but the end result certainly makes it all worthwhile. If you’re interested, you can see my recipe for making this delicious jam by clicking HERE.

*     *     *

Coming soon to a monitor near you …

Fried Zucchini Blossoms 

*     *     *

Farmers Market Pasta

Pasta Primavera

It happens every Spring. After having spent the Winter avoiding most fresh vegetables because they’ve seemingly spent more time in transit than in some distant fields, the farmers markets open and I can barely contain myself. I go with a general idea of what I’d like to buy and return home with two bags full of produce and a loaf of bread. As I unpack Saturday’s harvest, I begin to plan my meals.

In the past, I’ve commented on a couple of blogs that I’m amazed at how we all could look at the same ingredients and “see” different dishes. Nazneen, for example, could take these ingredients and have no trouble creating a tasty pullao. BAM, on the other hand, could easily prepare a flavorful GF stir fry. Then, of course, there’s Katherine and Greg. Heaven only knows the dish they’d create but I guarantee it would be delicious and I wouldn’t be the only one to bookmark the recipe. Me? Every week I break out the flour and start making pasta. The only question in my mind is what vegetables to use for which pasta. And when all is said and done, on Thursday or Friday night, I use leftovers and whatever vegetables remain to make a fresh egg frittata. Come Saturday, with a newly cleaned-out refrigerator, I head back to the market and start the process all over again. Today’s recipe is one of these farmers market pastas.

*     *     *

Primavera is the Italian word for Spring. Pasta Primavera is a dish that celebrates the freshest of ingredients. It is a true marriage of flavors, with no single taste dominating  the rest. To dress the pasta, the “sauce” can be cream-based, oil or butter-based, and even include tomatoes. In short, a pasta primavera can be whatever you would like it to be, so long as the ingredients are fresh.

For today’s recipe, I rendered some guanciale and used the resulting fat as the base of my sauce. Since I was adding scapes, there was no need for garlic but I did add a couple dried red peperoncini to add some heat to the dish. Beyond that, fresh peas, asparagus, and a few mushrooms were added, with a splash of white wine to round out the dish. And just to make sure that they didn’t get “lost”, I grilled the scapes and asparagus spears before adding them to the pasta. Then, after adding a sprinkle of cheese, dinner was served.

And to my fellow Americans, have a happy and safe 4th of July.

*     *     *

Farmers Market Pasta Recipe

Ingredients

  • 3/4 lb (340 g) cooked trenette — any “ribbon” pasta can be used
  • 6 to 9 garlic scapes
  • 9 to 12 asparagus spears
  • 3 oz (113 g) guanciale, chopped — pancetta, prosciutto, bacon, or ham can be used
  • dried peperoncini (optional)
  • 1/2 lb ( 227 g) fresh peas
  • 8 to 12 small mushrooms, halved or quartered depending upon size
  • white wine
  • salt & pepper
  • Pecorino Romano cheese, grated, for serving — Parmigiano Reggiano can be substituted.

*     *     *

100_4649

*     *     *

Directions

  1. Clean and heat the barbecue or grill pan
  2. Lightly coat scapes and asparagus with olive oil
  3. Place the scapes and asparagus atop the hot grill surface. Cook each vegetable to your liking before removing from heat. When cool, roughly chop both vegetables.
  4. Meanwhile, bring a large pot of salted water to the boil.
  5. Add the guanciale to a large frying pan over med-high heat. Continue to cook until the fat has rendered and the guanciale is not quite fully cooked.
  6. Crumble the dried peperoncini by hand before adding to the pan.
  7. Add the mushrooms and continue to sauté for a few minutes.
  8. Lower the heat to medium, add a couple of ounces of wine and the peas. Continue to sauté.
  9. Time the pasta to be just shy of al dente at about the time that the peas are cooked to your satisfaction.
  10. Drain the pasta, reserving a cup of the pasta water, and add the pasta to the frying pan.
  11. Add the chopped scapes and asparagus, mix well, and continue to cook until the pasta has reached al dente. Add pasta water if the pan’s contents are too dry.
  12. Remove to a serving platter, garnish with grated cheese, and serve.

*     *     *

*     *     *

Notes

Be careful not to use too much guanciale. If you do, the taste will become predominant and you’ll be unable to taste much else. I’ve made that mistake and although it is still a very flavorful pasta, it’s also a waste of garlic scapes.

I like a little heat in the dish so I crumbled 2 dried peperoncini that came from the heart of Italy’s peperoncini region, Calabria. You could easily substitute red pepper flakes or skip them entirely, if you like.

Before using the scapes, I trim an inch or two off the bottom of each scape and, because they can get hard and unpalatable when grilled, I trim off each top just above the flower bulge.

I used 3/4 lbs. of trenette pasta because that’s the amount of dough I had left over when I made last week’s ravioli. Use as much, or as little, pasta as you like. The same holds true for the rest of the ingredients.

As the Summer progresses  the ingredients will change to include broccoli, chard, cauliflower, and/or whatever else catches my eye as I walk around the market. You can and should do the same with your pasta primavera.

*     *     *

A word about the pasta …

I have an attachment for my pasta machine that will cut trenette pasta. Used throughout Genoa and Liguria, trenette — not to be confused with trennette — are one of the flat, “ribbon” pastas, this one being about “a silly millimeter thinner” than linguine. Although trenette is traditionally dressed with Pesto Genovese, I like the pasta because it most closely resembles the pasta Mom & Zia cut by hand when I was a boy. I can almost hear Mom’s knife as she quickly cut the rolled sheet of pasta, sfoglia, all the while having a conversation with whomever was in the room or seated at the table. The speed of that blade was truly a marvel, at a rate easily 5 or 6 times my best. And the noodles were all uniformly cut, something I cannot do even when working at a snail’s pace. So I cheated. I bought myself a trenette pasta machine attachment — and one for Zia — and now we can enjoy a dish of pasta just like back in the day.

*     *     *

Cheaters do prosper sometimes …

When this year’s seedlings didn’t fare so well, I bought heirloom tomato plants from the farmers market. Lo and behold! For the first time in years, I’ll be eating home-grown  tomatoes, even if only the tiniest of cherries, on the 4th of July.

*     *     *

It’s déjà vu all over again …

Lucky for us, all is not vegetable at the markets. We are now in cherry season and this year I’m twice blessed. Not only are Michigan’s tart cherries hitting the markets but I’ve a friend that surprised me with enough cherries to make a fantastic pie. Now, I can eat sweet Bing cherries by the fistful but these tart red beauties are meant for pies, muffins, and jam.  Pictured on the right is a bit of the pie I made with my friend’s gift. You can see the recipe I followed by clicking HERE.

*     *     *

Coming soon to a monitor near you …

Rack of Spring Lamb

*     *     *

Asparagus, Crimini Mushroom, and Ricotta Ravioli Filling

Yes, it’s another ravioli filling recipe, though not the one I had originally intended to post. Today’s filling recipe was to include ramps, a dish Zia and I developed during my last visit home. Well, ramp season has passed and I doubt that any of the wild onions are to be found anywhere. Asparagus, on the other hand, is still around, though it’s numbers have greatly decreased over the last 2 weekends. (The ramps post is written and will be published soon.) Seeing that asparagus season is also fleeting, I thought it best to post a recipe using the spears now, while you can still get some that are locally grown. In fact, all 3 recipes presented in today’s post will take advantage of the current harvest. The “Déjà vu” recipe will feature strawberries, while “Coming soon” is a pasta recipe that includes a number of fresh ingredients. 

Today’s post will only detail how to make asparagus ravioli filling. If you’re interested in seeing how to use ravioli molds/dies to create the stuffed pasta pillows, you can see step-by-step instructions by clicking HERE. For serving suggestions, see Notes below.

*     *     *

*     *     *

Asparagus, Crimini Mushroom, & Ricotta Ravioli Filling Recipe

Yield: See Notes below. 

Ingredients

  • 1 tbsp olive oil
  • 1 tbsp butter
  • 8 oz (228 g) fresh asparagus, chopped
  • 8 oz (228 g) fresh crimini mushrooms, chopped
  • 3 oz (86 g) Spring onions, chopped
  • 2 garlic cloves, minced or grated
  • 1/2 tsp kosher salt
  • 1/8 tsp white pepper
  • 3/4 cup (12 oz, 340 g) ricotta, well-drained
  • 1/2 cup Pecorino Roman cheese, grated

Directions

  1. Clean and roughly chop the asparagus (see Notes), mushrooms, onion, & garlic
  2. Heat olive oil and butter over med-high heat. Add asparagus, mushroom, and onion, lower heat to medium, and sauté until mixture just begins to change color — about 6 or 7 minutes.
  3. Add garlic, salt, and pepper, and continue to sauté until liquids are gone. Do not allow to burn.
  4. Remove from heat and allow to cool fully before proceeding.
  5. If using a food processor:
    1. Place the asparagus mixture into the processor, add the ricotta and Romano cheeses, and process until uniformly smooth.
  6. If not using a food processor:
    1. Chop the asparagus mixture as finely as possible.
    2. Add the cheeses and stir to thoroughly combine.
  7. Filling may now be used with your favorite stuffed pasta recipe.

*     *     *

*     *     *

Notes

Using this recipe and my large, 2 inch (5 cm), ravioli die/mold , I made 90 ravioli. You might make more or less, depending upon the size of the die or stamp used.

Whether you use homemade or store-bought ricotta, place the cheese in a clean coffee filter, where it can drain for at least a few hours to remove the excess liquid.  The drier the better. 

You can serve your asparagus ravioli in a number of ways. I’ve found that a brown butter and sage sauce works very well, as do cream and “light” tomato sauces. For those who really enjoy asparagus, simply sauté a few chopped asparagus spears in butter and use that to dress freshly cooked ravioli. A bit of lemon zest on top works very well. In all the examples given, grated cheese should be sprinkled atop the dressed ravioli.

*     *     *

Testing, testing, 1, 2, 3

I’ve made this and a couple other ravioli fillings over the course of the past couple of  months and it gave me an opportunity to experiment with a few things.

  1. All Purpose V Double 0 Flour. Last Fall I, finally, located a source for “00” flour, doppio 0. This is the finely ground durum flour used to make pasta and pizza dough in Italy. Although it’s roughly twice as expensive as AP flour, both Zia and I agree that using it creates pasta dough with a great feel. When cooked al dente, the pasta has a good bite, just as it should, and I’ll continue to buy and use it. Decisions have consequences, however, and I now have yet another container of flour in my kitchen. For those keeping track, that makes  6 — AP, bread, wheat, spelt, semolina, and now 00.  
  2. Attachment V Ravioli Die/Mold. I decided to pull out the KitchenAid ravioli maker and give it another shot. In the past I’ve found it less than perfect and, frankly, more trouble than it’s worth. All along, I thought that the fault may lie with the fillings I used, that the attachment would work best if a softer filling was in the hopper. Today’s asparagus ravioli filling was used to test my theory. I must admit that the ravioli maker worked better than it ever has and waste — which was a big problem with earlier trials — was minimal. Even if a bit cumbersome to operate, probably due to my inexperience, it did produce row after row of perfect ravioli. All’s not well, though. In order to get perfect ravioli, the dough sheets must be thick, more than double the thickness that we normally would use. That means you need to make at least twice the amount of pasta dough than would normally be required when using ravioli molds/dies. It, also, means the ratio of filling to pasta is different from the ravioli to which I’m accustomed. (Yes, my generation of Bartolini are a spoiled lot.)  In short, the ravioli attachment is back on the shelf, waiting for me to give it another go, probably in 2015 sometime.
  3. Chicken V Duck Eggs. Recently, while waiting to buy eggs at the farmers market, the customer before me bought a half-dozen duck eggs. Prior to this, I thought they were only sold by the dozen. So, I 86’ed the chicken and went duck. A couple of days later, I used them to make the pasta dough used in the ravioli pictured throughout this post. For those unfamiliar, Mom’s pasta dough recipe calls for 4 eggs and enough water to make a cup of liquid. Because they’re larger, only 3 duck eggs plus less than a tbsp of water will yield the required cup of liquid. Once made, the dough was much more yellow than normal but, to be fair, that may be due to the eggs’ freshness more than anything else. As for taste, I really could not detect a difference but, then again, without side-by-side taste tests, I should really say that I don’t “remember” a difference. Given that duck eggs are twice the price of chicken eggs, I’m not sure that I’ll be a regular customer for them anytime soon.

*     *     *

It’s déjà vu all over again …

As was mentioned, we’re just about at the end of asparagus season here in the Chicago area. The tables upon tables of the tasty spears have been replaced — by strawberries! Pictured on the right is just one vendor’s berries at the Evanston farmers market. Believe me, there are many more and I defy anyone, save those with allergies, to walk around that market without buying at least one quart. So, what will you do with these sweet & juicy red gems? Why, make strawberry jam, of course! You can see Mom’s recipe by clicking HERE.

*     *     *

Coming soon to a monitor near you …

Farmers Market Pasta

*     *     *