Aunt Mary’s Apple Cake

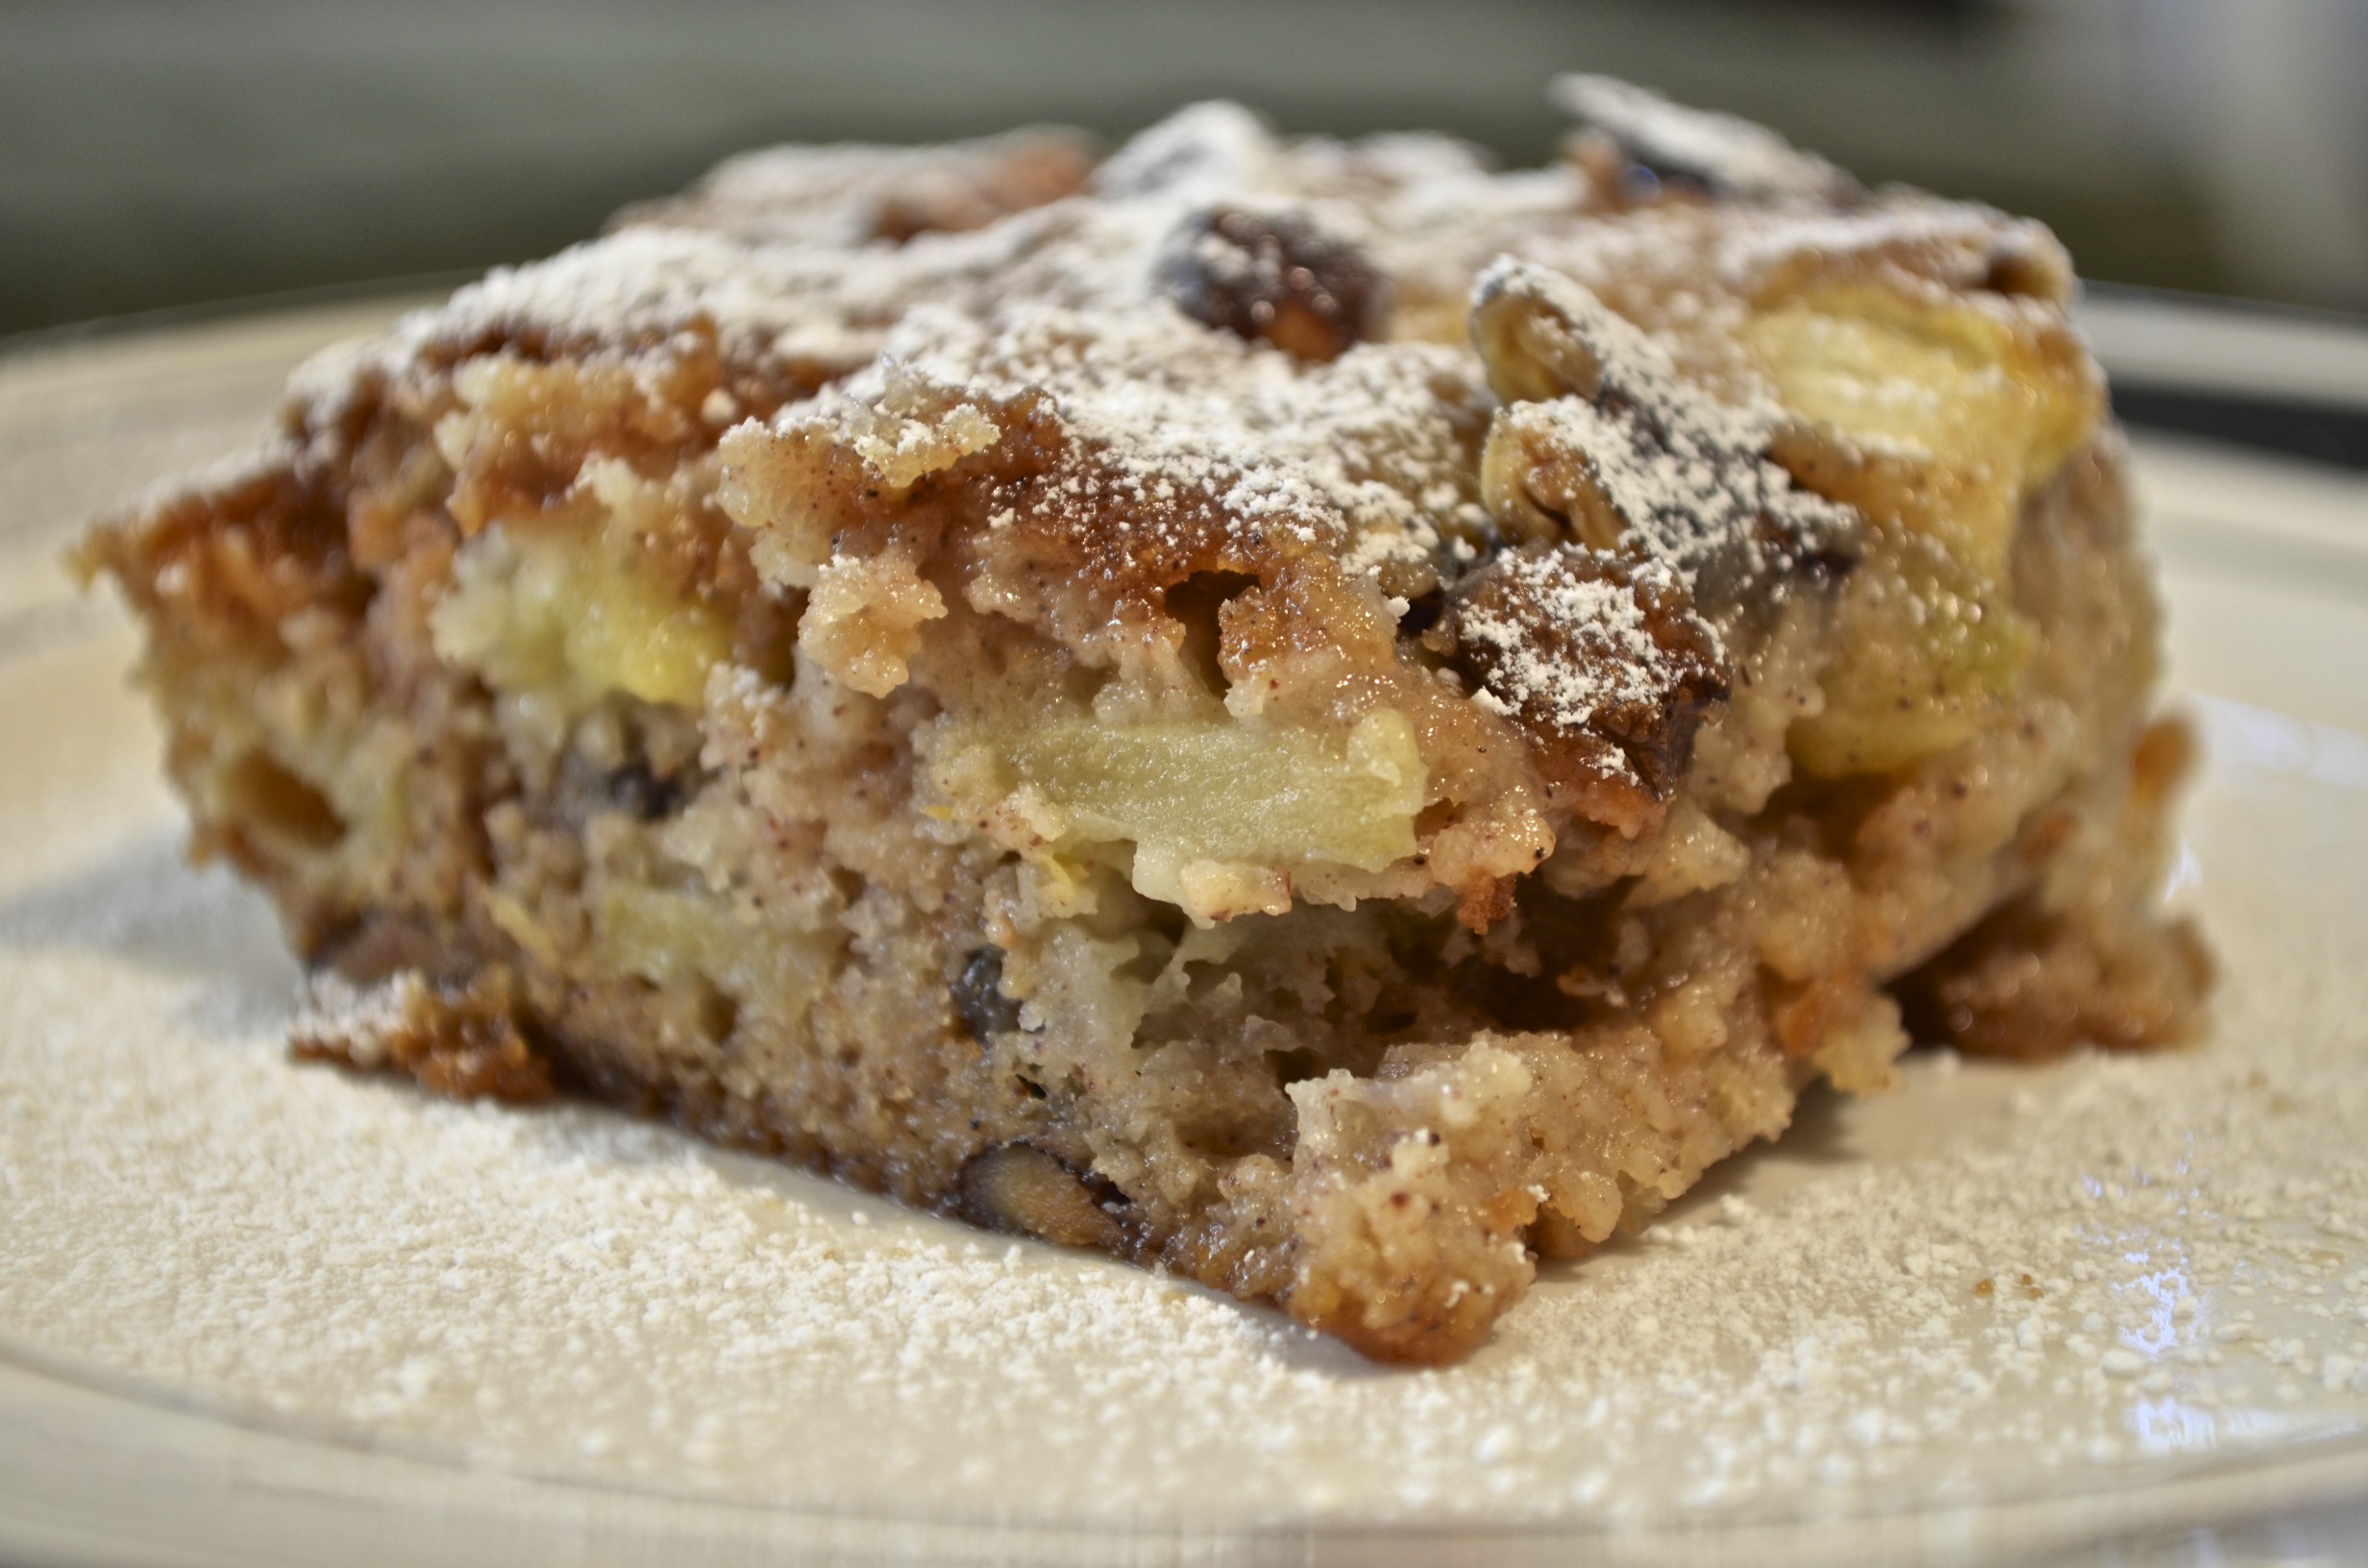
Torta di Mele di Zia Mariolla

Apple Cake

This is one of the recipes I brought home with me following my last visit with Zia but its path to this blog is nowhere near as direct as that statement makes it sound.

While having coffee with Zia, I mentioned that I baked a wonderful apple cake two years ago but have since lost the recipe. Try as I might, I can neither find nor duplicate that cake. My story reminded Zia of a slice of cake she was once served at her Daughter-in-Law’s home. She complimented my Cousin and asked for the recipe. Surprisingly, the recipe came from the other side of my family, my beautiful Zia Mariolla, who’s married to my Dad’s youngest Brother, Zio Leo. I’ve no idea how the recipe got to my Cousin’s cookbook but, lucky for us, it found its way into mine.

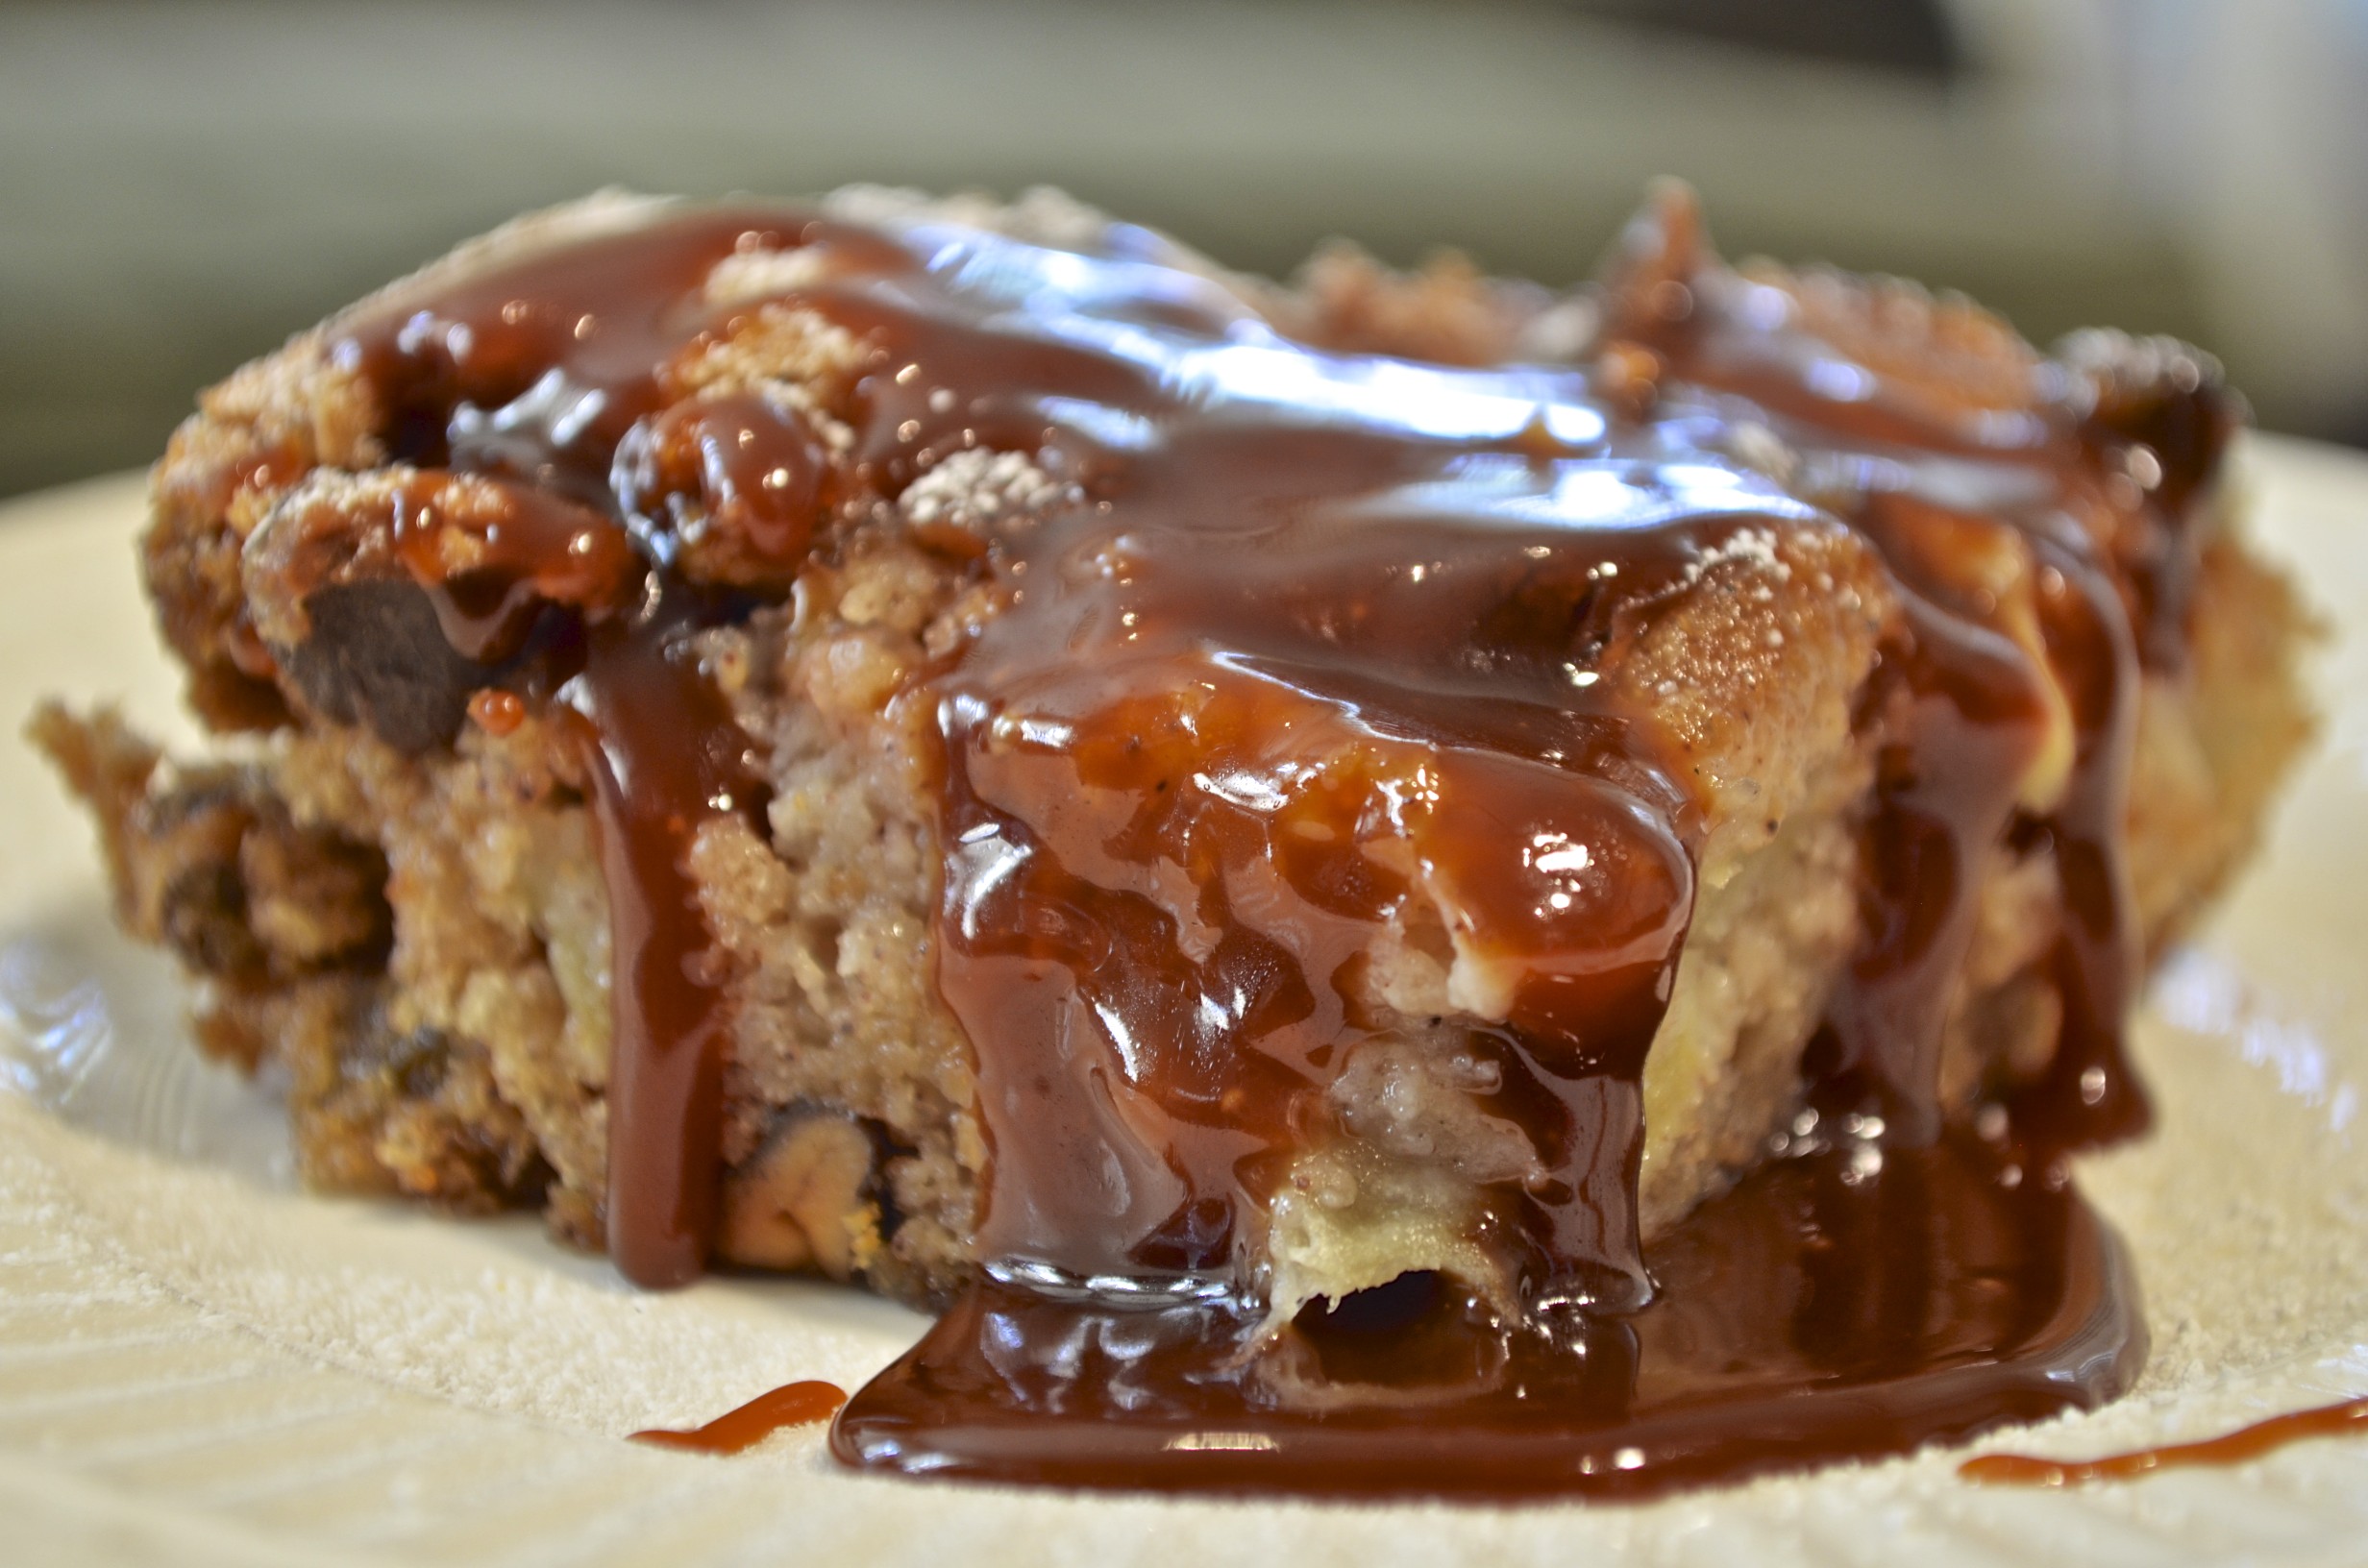
Perhaps what I like most about this cake is that it isn’t overly sweet and, in that regard, its lack of icing is a big plus. If you or your guests prefer a dessert that’s not too sweet, than serve them a piece of Zia’s cake just as she intended, with a dusting of powdered sugar on top. If, however, someone at the table would prefer something a bit more sweet, then have I got the thing for you, a salted caramel sauce. Within this post, I’ve included the recipe for the sauce  and you’ll find it the perfect accompaniment for Zia’s cake. See? With or without the sauce, you really can have your cake and eat it, too.

Now, as for the recipe itself, the original doesn’t specify the kind of apples, raisins, nor nuts to be used. Having just visited the Honey Man in Michigan, I had fresh Cortland apples and black walnuts at my disposal. I used golden raisins simply because I had them on-hand. That’s it. The rest of the ingredients are quite common and you should have little trouble preparing this cake.

*     *     *

On the road again …

I’m leaving for this year’s last visit with Zia. The Kitchens will be closed while I’m gone and will be re-opened on Wednesday, November 20th.

*     *     *

Apple Cake -2

*     *     *

Aunt Mary’s Apple Cake Recipe

Ingredients

Apple Cake

  • 1-3/4 c sugar
  • 3/4 c oil
  • 3 eggs
  • 1/2 tsp salt
  • 2 cup AP flour
  • 1 tsp baking soda
  • 1 tsp cinnamon
  • 1 tsp vanilla
  • 4 or 5 Cortland apples, peeled, cored, sliced thin
  • 1 cup chopped black walnuts, divided — any nuts may be substituted
  • 1 cup golden raisins (pre-soak in warm water for 30 minutes)
  • confectioners sugar (optional)
  • salted caramel sauce for serving (optional)

Salted Caramel Sauce

  • 1 cup sugar
  • 6 tbsp butter, cubed
  • 1/2 cup heavy cream, room temperature
  • 2 tsp kosher salt (see Notes)

Directions

To prepare the cake

  1. Pre-heat oven to 350˚ F (175˚ C).
  2. Place all ingredients — except apples, raisins, and nuts — in a large mixing bowl. Beat with a spoon until well-blended. Batter will be stiff.
  3. Add apples, raisins, and half the nuts to the bowl and stir till evenly distributed.
  4. Pour batter into a well-greased 9 X 13″ baking dish. Sprinkle the top with the remaining nuts.
  5. Bake in pre-heated 350˚ oven for 45 minutes. A toothpick inserted into center should be clean upon removal.
  6. Allow to cool before dusting with confectioners (powdered) sugar and serving.

To prepare the salted caramel sauce

  1. Pour the sugar into a medium sauce pan (see Notes) over med-high heat.
  2. Stir the sugar as it begins to melt and continue to do so until it begins to boil. Stop stirring the moment it begins to boil. (see Notes)
  3. Once boiling, look for it to change to an amber color. If necessary, swirl liquid in the pan but do not stir.
  4. Once the sugar has turned amber in color, reduce heat to medium, add the butter and whisk vigorously until melted and fully blended.
  5. Remove from heat, gradually add the cream, whisking all the while. Once blended, add the salt and continue to whisk until fully mixed.
  6. Set aside to cool for a few minutes before pouring into a sealable container for storage in the fridge, where it will keep for a couple of weeks.
  7. Warm before serving with your favorite dessert.

*     *     *

Apple Cake Preview

*     *     *

Notes

The recipe will prepare salted caramel sauce. If you’re not a fan of salted caramel, reduce the amount of salt used, but do not eliminate all of it. A bit of salt is usually recommended with sweet preparations. I’d suggest using 1/8 or 1/4 tsp instead of the amount listed in the recipe.

Be sure to use a large enough saucepan. The sugar will boil and could boil over if your pan is too small.

You may stir the sugar as it melts but must stop stirring the moment it begins to boil. Failure to do so may result in sugar crystals ruining the texture of the finished sauce. Once almost all the sugar is melted, it’s best to put away the spoon and swirl the pan’s contents until all is melted, boiling, and begins to turn amber-colored.

Do not, I repeat DO NOT catch a dropped spoon that was used to stir the melting sugar. I can tell you from personal experience that the momentary joy you may feel for actually catching something with your left hand will be obliterated by the searing pain that only sugar burns can deliver.

*     *     *

It’s déjà vu all over again …

Lumache ShellsLast Saturday, All Souls’ Day was observed in a number of Christian churches. In Marche, where the Bartolini are from, it’s traditional to serve snails, lumache, on that day. Although my family never observed that custom, we did, on very rare occasions, prepare and serve lumache. If you’re interested in learning how it’s done, just click HERE

*     *     *

Coming soon to a monitor near you …

Green Tomato Relish 3

Green Tomato Relish

*     *     *

Roasted Arctic Char with Fennel, Onions, and Potatoes

Salmerino Alpino Arrostito con Finocchio, Cipolle, e Patate

Arctic Char 1

I think the fishmongers have learned my shopping habits and display their “wares” accordingly. Oh, I enter the store with a list in-hand but, unlike for most, my list is merely the starting point. I need to walk around the store before the real buying begins — and that’s where my fishmongers enter the picture. Knowing that I will come their way, they never fail to have something on display that is sure to catch my eye, and then they simply reel me in. One week it might be a collection of the smallest and sweetest of clams. Another time, it could be merluzzo so fresh I expect them to flap around in the display case. Not so surprisingly, last week, after writing that I was on a mission to find a 1 lb. octopus, I saw the octopus of my dreams perched atop its smaller, inferior brethren and I swear one of its arms motioned for me to come over and have a look. Coincidence? I think not.

It should come as no surprise, therefore, that when I walked up to the counter recently, there, in the center of the display, where only the week before rested snow-white fillets of cod, was today’s arctic char. With flesh more red than salmon (see Notes), these fillets were farm-raised, most likely in tanks on land. (Thank you, Seafood Watch.) Of course, I bought a nice fillet, just like the fishmonger knew I would.

Stepping away from the counter, I realized I didn’t know what to do with my purchase. My only experience with the fish, if you can call it that, was to watch it prepared on “Iron Chef.” The one thing I did know for certain was that I should cook it that night. What’s the point of buying fresh fish if it’s going to sit in the fridge or, worse yet, the freezer, waiting to be called into duty? Moments later with phone in-hand, I googled “arctic char recipes” and, lo and behold, one of the search results was a recipe from Seafood Watch. That is the dish I’m sharing today, with a couple of modifications to suit my tastes.

*     *     *

Ingredients

*     *     *

Roasted Arctic Char with Fennel, Onions, and Potatoes Recipe

Ingredients

  • 12 oz (340 g) arctic char fillet
  • 1 large bulb of fennel, sliced thick
  • 1 medium red onion, sliced thick
  • 12 new/fingerling potatoes, halved and quartered to make them equally sized
  • 1 orange, juice and zest, divided
  • 1/4 cup balsamic vinegar
  • 1/4 cup orange juice
  • 2 tsp brown sugar
  • 1/4 cup olive oil, divided
  • salt & pepper
  • fennel fronds, chopped
  • orange slices, garnish

*     *     *

Veg Cooked

*     *     *

Directions

  1. Pre-heat oven to 450˚ F (235˚ C). Place 1 oven rack in the upper third of the oven, and, another rack in the lower third.
  2. Place potatoes in a baking dish, season with salt, pepper, and 2 tbsp olive oil. Stir to evenly coat. Place on upper rack in the pre-heated oven and roast for 20 minutes.
  3. Place fennel and onion into a bowl. Add half of the orange zest, the rest of the olive oil, and season with salt and pepper. Gently mix to evenly coat the ingredients.
  4. Lightly oil and season both sides of the arctic char. Place on a lightly oiled baking sheet.
  5. After 20 minutes, add the fennel and onion to the potatoes and stir to combine. Return to oven for 15 minutes.
  6. After 15 minutes, place the baking sheet with the arctic char on the lower rack of the oven. Stir the roasting vegetables and return to the oven’s top shelf. Continue to roast for another 10 to 12 minutes, depending upon the thickness of the fish fillet. The fillet is cooked when the flesh flakes easily and is opaque in the center, not translucent.
  7. Meanwhile, place remaining orange zest, balsamic vinegar, orange juice and brown sugar into a small sauce pan over med-high heat. Bring to a boil, lower the heat, and reduce sauce to the consistency you desire.
  8. When fish is cooked, remove to a plate and serve with the roasted vegetables. Drizzle sauce over both fish and vegetables and garnish with a sprinkling of fennel fronds. Place orange slices on the plate, the juice of which may be squeezed on the fillet.

Inspired by a recipe found on the Monterey Bay Aquarium: Seafood Watch site.

*     *     *

Roasted Arctic Char 2

*     *     *

Notes

As mentioned, the flesh of arctic char can be more red than salmon — usually indicating the fish has been farm-raised — but it can be a lighter hue, as well. It is said to taste like a cross between salmon and trout, and not quite as strong as salmon. For this reason, some may feel it tastes a bit more like trout. As a general rule, prepare arctic char as you would salmon and you will not be disappointed.

The Monterey Bay Aquarium created and maintains the Seafood Watch site and App. The App is free and can be loaded into your Apple or Android smart phone and tablet. It is meant to encourage us, the consumers, to purchase seafood that is “fished or farmed in ways that don’t harm the environment.” The App rates seafood as “Best Choice” and “Good Alternatives”, as well those which we should “Avoid.”  Whether at the market or in a restaurant, I use the App to guide my seafood purchases. Unfortunately, Seafood Watch only covers the United States and Hawaii, though there may be a similar App for your corner of the World.

*     *     *

It’s déjà vu all over again …

Homemade dog jerky

Recently, “hits” on my dog jerky post have soared and it has become this blog’s most popular post for each day since dog treats came back into the news. Once again, something in store-bought jerky treats is causing dogs to become ill and far too many have died. (TIME: The FDA has No Idea Why Jerky Treats Are Killing Hundreds of Dogs.) Every dog that I have owned has loved these treats but they are hardly worth the risk, especially when it is so easy to make jerky at home. Before you buy another bag of jerky for your dog, please click HERE to see how easy — and inexpensive — it is to make your own beef & chicken jerky for your pupster.

*     *     *

Coming soon to a monitor near you …

Apple Cake Preview

Aunt Mary’s Apple Cake

*     *     *

This Recipe has Legs: Strangozzi Pasta with Octopus

Strangozzi al Polipi

Recentlyour good friend Tanya, of Chica Andaluza fame, shared a recipe for Carpaccio of Octopus. (Do check out that recipe and, while you’re at it, take a few minutes to explore the rest of her fantastic blog.) I’d not thought about octopus in years and that post reminded me that my family once cooked octopus, polipo. I spoke to Zia about it and we decided to prepare it the next time I visited her. That visit took place last month and, with Monday having been Columbus Day, I thought octopus would make a fine way to commemorate his voyage across the Atlantic. After all, there were those that believed his ships would be sunk by a giant octopus long before they fell off the edge of the Earth.

*     *     *

Strangozzi al Polipi

Strangozzi al Polipi

*     *     *

It’s been quite some time since an octopus was given the place of honor at a Bartolini dinner — more than half a century, but who’s counting? We really have no reason for it not being served since then. The dish is delicious, reminiscent of calamari in umido, and it isn’t at all difficult to prepare. No matter. The dish was prepared by my family at one time and thereby has earned a page on this blog.

Back in the day, we would have prepared the octopus in umido, which in this case means stewed in a tomato sauce. Served in bowls with a chunk of good, crusty bread, the dish is delicious and, in some homes, is one of the dishes on the menu for the Feast of the Seven Fishes on Christmas Eve. Originally, I had planned to prepare today’s recipe in umido until reality intervened.

As of now, I know of only one place to buy octopus and that’s at my Italian market. Unfortunately, they only sell very small or very large octopi and each poses a problem for us. When you cook something in umido, it is best that the protein be in large pieces. This is not a soup but a stew, after all, and the pieces should reflect that. Well, the small octopi are so small that it would take 4 to equal a pound (450 g). When chopped, the

Octopus over Polenta

Octopus over Polenta

pieces are far too small for in umido presentation. In fact, Zia and I attempted to serve them over polenta and, though tasty, all but a few pieces were too small even for that. On the other end of the spectrum, the market sells frozen octopi that are 4 and 5 lbs. apiece. Though that would be wonderful to prepare for a Bartolini family dinner, an octopus that size is far too large for a meal for Zia and I. So, although we had to change the dish to suit the circumstances, the search is on now for an octopus weighing 1 pound. When I find one, I’ll either create a separate Polipo in Umido post or amend this one to include that recipe. Bear in mind, though, that the ingredients used in the in umido recipe are the same as those used here for this sauce. Differences, if there are any, will be in the amounts listed. I’ll only be sure of that once I find an octopus in the right size.

Since we couldn’t serve the octopus as we had originally intended, in umido, Zia and I served it over polenta. As I mentioned earlier, that dish didn’t quite work as well as we Bartolini Strangozzi Pastathought it would. Again the octopus pieces needed to be larger. Once home, I bought 3 more small octopi and decided to serve them over pasta. As luck would have it, a few weeks earlier my blogging friend, Lidia, had noticed something while shopping and sent her discovery to me. (Not only does she share the name of one of my favorite chefs, Lidia has a wonderful blog, Oh Lidia, and I hope you take time to have a look.) You can imagine my surprise when I opened the carton and found 3 pastas manufactured by a company called “Bartolini”. I can’t think of a better pasta to serve with this old family recipe than one that shares our family name. So, of the 3 sent, I chose to prepare strangozzi.

In an earlier post, I demonstrated how to make strozzapreti pasta and gave an account of how it got its name. (See It’s déjà vu all over again … ) Strozzapreti, you see, means priest choker and one legend states that this pasta was so delicious that priests choked when eating it for the first time. What does this have to do with strangozzi? Well, it is thought that the word strangozzi is derived from the Italian word for shoelaces, stringhe, yet this pasta has come to mean priest stranglers. Huh?  Stay with me. Centuries ago, in Umbria, the clergy was not looked upon kindly by the villagers. Legend says that they chased down the worst of the clergy and those that were caught were strangled with their shoelaces. These long pasta ribbons are thought to resemble those shoelaces. Death by shoelace immortalized in pasta. Ya gotta love it!

In reality, strangozzi are about the size of what we would call linguine, the only difference being in their thickness. Our linguine are cut from thin pasta sheets; strangozzi is cut from sheets twice as thick. The result is a hearty pasta that is perfect for heavier or meat-based sauces.

*     *     *

Before beginning the recipe, the octopus must be cleaned and readied. The head is actually a hood and the contents of its interior need to be removed. It is easy enough to do and you can slice its side to make it even easier. Next, the eyes must be removed. Make a small slice on either side of each eye, creating a small wedge. Remove each wedge and the eye with it. Since these octopi were so small, I sliced the octopus just above both eyes and again below, creating a ring. I then cut the eyes off of the ring. One last thing to be removed is the beak. Turning the octopus upside-down, you’ll notice a small whole at the center of the 8 legs. With your fingers, carefully feel the beak and note its size. With a sharp knife, cut around the beak and remove. Now that it’s cleaned, cut the legs section in half, creating 2 parts with 4 legs apiece. Cut those pieces in half again, and then again. In the end, you will have separated all 8 legs. Do not chop them but leave them whole and proceed with the recipe.

*     *     *

Click to see any/all photos enlarged.

*     *     *

Strangozzi Pasta with Octopus Recipe

Ingredients

  • octopus (See Notes)
  • 3 tbsp extra virgin olive oil
  • 1/4 tsp red pepper flakes (more or less to taste)
  • 1 small onion, diced
  • 2 cloves garlic, minced or grated
  • 1/3 cup chopped parsley
  • 1 large can, 28 oz (800 g), whole tomatoes – hand-torn
  • 1/2 tsp dried marjoram (2 tsp fresh)
  • 3 to 4 oz dry white wine
  • 1 lb  (450 g) cooked Strangozzi pasta — or whatever pasta you prefer — cooked al dente
  • reserved pasta water

Directions

  1. In a medium saucepan over med-high heat, bring to boil enough water to cover the octopus. Add the octopus and allow to simmer for 1 to 2 minutes after the pot returns to the boil. Small octopus should boil for 1 minute. Larger should be allowed to boil closer to 2 minutes. Remove the octopus and place in an ice bath to stop the cooking process and reserve. Once cooled, see Notes for chopping considerations.
  2. Over med-high heat, add olive oil in a medium sauce pan.
  3. Add red pepper flakes, onion, garlic, and parsley. Season with salt and pepper before sautéing until the onion is translucent and garlic fragrant — about 6 to 8 minutes.
  4. Add the tomatoes, wine, and marjoram, stir to combine. Bring to a boil before reducing to a soft simmer.
  5. After the sauce has thickened and darkened a bit — about 30 minutes — add the chopped octopus and continue to simmer.
  6. If using small octopi, it should be finished cooking in about 20 minutes. Taste a piece after 15 minutes to test for doneness and to check the seasoning. If necessary, add some of the reserved pasta water. (See Notes)
  7. Meanwhile, the pasta should have been cooked al dente and strained. Be sure to reserve some of the pasta water.
  8. In a large bowl or serving platter, combine the octopus sauce with the cooked pasta and mix. If the pasta seems too dry, add some of the reserved pasta water.
  9. Serve immediately.
  10. Like all mildly flavored seafood pastas, grated cheese is not recommended for it will overpower the dish.

*     *     *

*     *     *

Notes

The dish will determine the size of the pieces when chopping the octopus.

  • For pasta dishes, I would suggest chopping small octopi into pieces about 3/4 inches (2 cm). These pieces will shrink a little during cooking and will be easily managed no matter what pasta you choose.
  • For in umido, a larger octopus should be used and, when chopped, the pieces should be larger. Ultimately, the size will depend upon how comfortable you are dealing with the pieces while eating. Even so, I would suggest that all pieces be no less than an inch (2.5 cm) long. (Since this recipe was posted, I did find and prepare a 1 lb. octopus in umido. You can see that recipe by clicking HERE.)

No matter the preparation or the size of the pieces, do try to keep them all the same size. Doing so will ensure that all the octopus is evenly cooked.

Understandably, the larger the octopus, the longer it should simmer in the tomato sauce. A small octopus should take 15 to 20 minutes, as was stated in the recipe above. Larger octopi will take up to 30 minutes, maybe more. Be careful not to overcook lest the octopus become rubbery. If in doubt, taste a piece to see if it is cooked to your liking.

For reasons unknown to me, we’ve always discarded the water used to blanch the octopus. Even though the octopus is in it only briefly, the water does darken in color.

*     *     *

It’s déjà vu all over again …

Strozzapreti with Pesto

Strozzapreti with Pesto

With all of this talk of strangling priests, it’s only logical that today’s look back would be to the strozzapreti post. Not only will you learn how to make the pasta by hand, you’ll also learn how a few of the common pastas got their names. All this can be yours just by clicking HERE.

*     *     *

Coming soon to a monitor near you …

Damson Plum Jam Preview

Damson Plum Jam

*     *     *

Braised Goat in the Moorish Style

Capra Basata nello Stile di Moresco

Braised Goat with Harissa

I’m back and the Kitchens are once again open. Zia and I thank you all for your kind words and well wishes. She sends her warm regards. She, also, sent me home with a few new recipes — octopus and quail are at the top of that list — and I’ll be sharing them in the weeks to come.

Of course, we did buy our share of honey, over 4 gallons between the two of us. Although I brought home 2.25 gallons (8.5 l), almost all went to my neighbors for distribution among their family members. The “Honey Man”, Mr. Falkenberg, has about 100 hives and they produce enough honey for him to sell it in some of that area’s markets, as well as during not one but two weekends this year. He also sold apples, grapes, and black walnuts.  I bought a 5 pound bucket of grapes for $2.00 and used them to make grape jelly yesterday. The apples were used to make apple sauce and my Zia Mariolla’s apple cake. That recipe will be shared in the near future.

*     *     *

(Click to enlarge any photo)

*     *     *

I’ve mentioned in the past that my family prepared goat, very often at Easter. As the years past, we relied more upon lamb for that holiday meal and I cannot tell you the last time I enjoyed goat in any form. Worse yet, I had no idea where I might purchase some. Well, that all changed a few weeks ago. I didn’t realize it but the vendor at the farmers market from whom I buy organic chicken also sells a variety of meats, goat being among them. Although I couldn’t buy any at the time, I knew I’d be back to purchase some. And that’s the last I’ve seen of that vendor. For whatever reason, they are no longer at the farmers market. Not only did I lose my long sought-after source for fresh goat meat but I lost my organic chicken vendor, too.

Well, returning home after the third week of the vendor’s absence, I decided to take matters into my own hands. I pulled the car to the curb and googled, “Where to buy goat in Chicago?” Lo and behold! Just about a half-mile from my home, there’s a Middle Eastern grocery and butcher. It’s one block West of the Indian market where I buy spices and I’ve walked past it any number of times. Within minutes, I was on my way with a goat shoulder wrapped in brown paper.

Once home and after a quick web search, I settled upon a great recipe. Unfortunately, it required harissa and I didn’t have a recipe for the sauce nor did I feel like experimenting. So, I did what I often do. I went to the Middle East Bakery & Grocery, a little gem of a store located in my old neighborhood. As luck would have it, they make their own harissa on-site and it’s good enough to be used in a number of the restaurants in town.

So, with a goat shouder on the counter, harissa in-hand, and a jar of preserved lemons hiding out in the back of my fridge, I set about making braised goat — but with one major difference. The original recipe uses a dutch oven to braise the roast, slowly, in the oven. When I finally bought the meat, Summer had returned to this area with a vengeance, I wasn’t about to turn on my oven for anything, let alone a long and slow braise. Instead, I pulled out the slow cooker and my kitchen kept its cool. This is the version described in the recipe below.

Oh! One more thing. I will be bringing some goat with me to Michigan next time so that I can learn and share my family’s recipe for roasting it. Get ready, Zia!

*     *     *

Raw Goat Shoulder

*     *     *

Goat in the Moorish Style Recipe

Ingredients

  • 1 cup harissa for marinade
  • 2 – 3 tbsp extra virgin olive oil
  • 2 carrots, chopped
  • 1 large onion, sliced
  • 6 cloves garlic, smashed
  • 2 bay leaves
  • 1 cinnamon stick
  • 3 cilantro stems – that’s right, I’m using cilantro
  • 2 cups low/no sodium chicken stock
  • 1/2 cup dry white wine
  • 1 tbsp honey
  • the rind from half of a preserved lemon, finely chopped
  • salt and pepper
  • harissa for serving
  • Greek yogurt for serving

*     *     *

Goat ready to be cooked

*     *     *

Directions

  1. With a very sharp knife, remove gray skin from the meat. Season with salt & pepper.
  2. Place meat in a large, seal-able plastic bag, add the harissa and completely coat the meat. Place the bag and contents in the fridge overnight. Turn bag over every couple of hours. Remove from fridge 1 hour before cooking is to begin.
  3. Heat oil over med-high heat in a medium sauté pan. Add onions, carrot, garlic, bay leaves, and cinnamon stick, sautéing until soft and fragrant. Season with salt and pepper.
  4. Meanwhile, place stock, white wine, and honey in a small sauce pan, bring to a boil, and then keep warm over a very low flame.
  5. Once the vegetables have been sautéed, dump that pan’s contents into the slow cooker. Add the cilantro and stir.
  6. Place the goat meat atop the vegetables, Be sure to include any remaining harissa left in the bag.
  7. Pour the wine mixture around the roast in the slow cooker. Cover and set to “Low”.
  8. Turn the roast after 1 hour, and then again every 2 hours after. Roast will be cooked in 8 hours.
  9. After 8 hours, remove roast to a dish and cover. Strain the pan juices, discarding the braising vegetables. Set aside to allow the fat to separate and then remove.
  10. See Serving Suggestions below

Inspired by a recipe in the NY Times.

*     *     *

Goat Plated

*     *     *

Serving Suggestions

1) Once cooked, the roast can be carved and served as-is. Sprinkle with the preserved lemon. Suggested accompaniments would be rice, yogurt, and a bit of harissa on the side. The sauce can be reduced to the thickness of your choice. Check for seasoning before serving on the side.

2) Debone the cooked roast and treat it as you would pulled pork. Return in to the slow cooker. Add the preserved lemon and mix thoroughly. Reduce the sauce to the desired thickness and either add it to the pulled goat or serve on the side.

*     *     *

Goat Sandwich on Baby Arugula with Greek Yogurt and Harissa

Pulled Goat Sandwich on Baby Arugula with Greek Yogurt and Harissa

*     *     *

It’s déjà vu all over again …

About a year ago, I posted a recipe for plum cobbler that I jokingly called “magical.” What I didn’t know, but learned while I was visiting Zia, was that the recipe contained a typo. Instead of listing “1 TBSP baking powder”, I had written “1 TSP baking powder.” Big difference, no? I’ve since corrected the recipe  and please make sure you do the same if you’ve made a copy for yourself.

*     *     *

Coming soon to a monitor near you …

_DSC0001 2

Blueberry-Lemon Slice

*     *     *

The Bartolini Family Risotto

Risotto della Famiglia di Bartolini

Risotto 1

This is it! The twice-delayed, much-anticipated, and another of the Bartolini Crown Jewels, my family’s risotto recipe. Though it’s been a long time coming, I think you’ll find it appealing, even if it is unlike most that you may know. You see, the Bartolini risotto is missing a couple of the dish’s standard ingredients and includes one that most do not — but we’ll discuss that in a bit.

Our risotto had quite a reputation among the branches of my family that did not reside in the two-flat. When our relatives from Cincinnati, at the time the southernmost members of the Clan, came for a visit, they had a standing request that this risotto be served as part of their welcoming dinner. I remember Mom making it for Dad’s Mother during her visits with us and risotto was often served when either of the two-flat’s families entertained. What made the Bartolini risotto so special? Chicken gizzards, an ingredient that was lacking from almost all other risotto recipes. If you liked gizzards, you loved this risotto. Of course, if you didn’t, well, you’d probably go hungry that night. The latter point being responsible for the greatest cover-up in the long and storied history of the Bartolini.

As popular as this dish was with the adults seated at the table, there was one member of the family, my sibling, who would have none of it. The child — henceforth referred to as “It” to protect “Its” identity — refused to eat them. Mom, in an effort to get the child to at least eat the risotto, told the child that they were “dried mushrooms” and “It” should put them aside and eat the rice. Knowing that the child balked at eating dried mushrooms, there’s no way so much as a grain of rice would have been eaten if “It” knew there were gizzards on that platter. Out of earshot of the child, Mom then turned to me and my other sibling, commanding we keep quiet about this, “Or else!”

Now, there’s nothing so unusual about what Mom did. After all, Mothers since the dawn of time have cajoled, bribed, and, yes, lied to their children, all in the name of good nutrition. (How many broccoli crowns have been hidden in meatloaf throughout the millennia?) No, the truly surprising thing about this tale is how long the ruse lasted.

We had all gathered at my Parent’s home for a family dinner, an event that had become more and more rare. When “It” noticed that Mom was preparing risotto, “It” asked Mom if dried mushrooms were to be included. Hearing that, I started to laugh and, much to Mom’s dismay, the cover-up was exposed. The astonishing fact is that the child was now in “Its” 30s! That’s right: 30’s! One “Or else!” from Mom and my sibling and I kept quiet for 3 decades. Kids today have it easy.

*     *     *

Our risotto is a bit more complicated than most. The gizzards, after all, must be cooked first. To do this, they are sautéed before being used to create a stock. As you’ll see in the recipe below, both the gizzards and the stock are then used to create the risotto. You’ll also note that 2 cups of Arborio rice are used. This will make a rather large platter of risotto. You may wish to reduce the amounts.

Risotto Recipe

Ingredients

  • 1 lb (455 g) chicken gizzards & hearts (see Notes)
  • 1 celery stalk
  • 1 carrot
  • 1 medium onion
  • 1 tbsp butterSautéing
  • 1 tbsp olive oil
  • water
  • 2 cups arborio rice
  • 2 tbsp butter
  • 1 small – medium onion, diced fine
  • 10 button or cremini mushrooms, chopped (see Notes)
  • 7 to 8 cups stock (see Notes)
  • salt & pepper, to taste
  • Pecorino Romano cheese

Directions

  1. Add the butter and olive oil to a saucepan over medium heat. Add the cleaned chicken gizzards to the pot and sauté for about 10 minutes. The object is to give them a bit of color, not fry them till fully cooked.
  2. Turn the heat to high before adding the onion, celery, carrot, and 2 quarts of water.
  3. Bring to a boil and reduce to a soft simmer. Continue to simmer for 90 minutes, removing any foam that may rise to the top.
  4. After 90 minutes, strain and reserve the stock. Remove the gizzards and set aside to cool. Remove the vegetables and discard.
  5. Once cooled to touch, chop the gizzards to your preference.
  6. In a large sauce pan or deep frying pan, melt the butter over med-high heat. Add the onion and sauté for about 5 minutes. Season with salt and pepper.
  7. Add the mushrooms and sauté for a few minutes until some color is achieved.
  8. Add the gizzards and sauté until heated through. The onion should be translucentSimmering away by this time. Season with salt and pepper.
  9. Add the rice and sauté for another 5 minutes or so to toast it. The grains should be partially opaque.
  10. Reduce the heat to medium, add a ladle or 2 of hot stock, and stir the rice. Though you needn’t stir it constantly, you shouldn’t leave it for more than a couple of minutes.
  11. When the stock is all but gone, add another ladle of stock and stir. Repeat this process again and again until the rice is just about cooked. This should take about 20 minutes and the risotto should not be gummy but very moist, though not so much as to be a soup.
  12. Taste and add salt & pepper, as needed.
  13. Turn off the heat, add a final ladle or 2 of stock, cover the pan, and let the risotto rest for 5 minutes.
  14. Add a handful or 2 of grated Pecorino Romano cheese, stir to combine, and place on the serving platter.
  15. Garnish with more grated cheese and serve.

*     *     *

Risotto 3

*     *     *

Variations

In many versions of risotto, white wine and saffron are added to the rice, although neither are used in my family’s risotto recipe. At a later date, I will post a recipe for Risotto alla Milanese, in which both ingredients are required.

Notes

In my area, chicken gizzards are sold in 1 lb packages. Before cooking, they must be rinsed and trimmed of any fatty and/or dark parts. Try to keep the fleshy parts as intact as possible. These will be chopped once cooked.

If you’re trying to “disguise” the gizzards, it’s best to chop the mushrooms in about the same size as the chopped gizzards, keeping in mind that the mushrooms will shrink when cooked.

The standard ratio of rice to stock when making risotto is about 1 to 3½, meaning for every cup of rice you’ll need 3½ cups of stock. It never hurts to have extra stock on hand just in case more is needed to cook the risotto.

The stock created with the chicken gizzards is relatively simple, with the few ingredients left in large pieces. This makes it far easier to retrieve the gizzards once cooked.

When ready to start cooking your risotto, combine  the stock made when cooking the gizzards with enough homemade chicken stock to give you the amount required in the recipe. Of course, store-bought, low-sodium, chicken stock may be substituted.

Keep the stock hot but not boiling. If kept boiling, much of it will immediately evaporate upon hitting the hot risotto pan without having a chance to be absorbed by the rice.

*     *     *

It’s déjà vu all over again … Corn RelishIt’s that time of the year again. In this part of the country, every grocery, market, and vegetable stand features at least one bin filled to over-flowing with ears of fresh corn. If you’re at all like me you just cannot get enough of the stuff. That’s all well and good for now, but what are you going to do come Fall when today’s surplus is but a memory? Well, with today’s blast from the past, you’ll be laughing all the way to the pantry. Zia’s Corn Relish is a great way to preserve today’s corn for tomorrow’s meals. It’s a simple recipe and you can find it by clicking HERE.

*     *     *

Coming soon to a monitor near you …

Ravioli with Morels

Ravioli made with Ramps and Dressed with Morel Mushroom Sauce

*     *     *

Salted Cod Salad

Insalata del Baccalà For some, the timing of today’s post may seem rather odd. A salted cod salad is very often served in Italian households as part of the Feast of the Seven Fishes on Christmas Eve — but not in our house. We Bartolini prepared this salad virtually any time throughout the year except during the holidays. On Christmas Eve, we served our salted cod stewed in tomato sauce, baccalà in umido. Frankly, I prefer it this way, with a stew served in Winter and a salad served in the warmer months.

This is the third recipe I’ve shared that features salted cod. The first, Baccalà alla Marchigiana, is the stew that we served on Christmas Eve. In the second post, the cod was barbecued, although the same preparation could be used to bake the fish. Today’s recipe is a salad and a snap to make, once you’ve re-hydrated and rinsed the cod.

Briefly, in the days long before refrigeration, cod was dried and salted as a means of preservation. To make it suitable for cooking, the cod must be soaked in cold water for at least one day and no more than three. During that time, the water should be changed three times daily. The longer the soak, the less salty the taste. It is up to you to decide what level of salinity is acceptable.

With the cod re-hydrated, the dish, like most green salads, is really quite simple to prepare. Though the ingredients may have varied from one salad to the next, we always dressed our salad with a bit of red wine vinegar and olive oil. You, like many, may prefer to use lemon juice in place of the vinegar. Even so, with absolutely no cooking involved, you can easily see how this salad would make a perfect meal during Summer’s dog days.

*     *     *

Salted Cod Salad Recipe

Ingredients

  • 1lb (455 g) of baccalà (See Variations)
  • pickled bell peppers, chopped (See Notes)
  • 1/2 yellow bell pepper, chopped
  • 1 celery stalk, chopped
  • red onion chopped
  • nonpareil capers, rinsed
  • Kalamata olives, halved
  • 1/4 cup fresh parsley, chopped
  • extra virgin olive oil
  • red wine vinegar — lemon juice may be substituted
  • salt & pepper, to taste

*     *     *

*     *     *

Directions

  1. To ready the baccalà: Place the fish in an oblong glass dish or pan. Add enough water to cover, dump the water, and repeat a few times. Add enough water to cover and set aside. Change the water 3 times daily for at least 1 day and no more than 3. When ready, the cod will be considerably thicker than when your started and will taste far less salty. (See Notes)
  2. Remove any bones and skin before proceeding,
  3. Bring a large pot of water to the boil.
  4. Meanwhile, cut the re-hydrated baccalà into chunks from 3 to 4 inches apiece.
  5. When the water is boiling hard, add the baccalà and, when the water returns to the boil, reduce the heat to a soft simmer.
  6. Simmer until the baccalà can be easily flaked, usually about 5 to 8 minutes.
  7. Using a slotted spoon or small strainer, remove the baccalà from the water and set aside.
  8. Once cool, carefully flake baccalà and place in another bowl.
  9. To that bowl, add the peppers, celery, onion, capers, olives, and parsley. Gently toss the ingredients until combined.
  10. Add enough of the olive oil to lightly coat the salad, followed by the vinegar/lemon juice to taste. Season with pepper but be sure to taste before adding any salt.
  11. If not to be served immediately, cover and refrigerate until you’re ready to do so.

*     *     *

Variations

This recipe used raw salted cod, baccalà, to make the salad. The salad could also be made using left-over baked, broiled, or grilled baccalà, as well. When using left-over cod, there’s no need to boil or cut it up into chunks. Skip those steps and start flaking the pieces.

You can vary the salad ingredients to suit your own tastes. Carrots, shallots, garlic, etc., can be added or used to substitute for any of the ingredients listed.

*     *     *

*     *     *

Notes

You’ll note that I used bell peppers twice in this recipe. The first were miniatures, “Tulip Bells”, that I pickled last August. They added color and a vinegar element. The yellow bell was added for both color and crunch. Neither pepper brings any heat to the salad. If you like, you can add cherry bomb peppers, jalapeños, or Serranos, raw or pickled, to kick up the heat.

One sure way to know whether the baccalà is ready to be cooked is to taste a very small piece of it, once it seems fully hydrated. If it is still too salty, keep soaking the fish until it reaches the level of salinity that you prefer, bearing in mind that it will be boiled once it passes your inspection.

Do not add any salt to the dish until the very end.

This salad will keep for 2 days if refrigerated, though we’ve rarely had left-overs.

*     *     *

It’s déjà vu all over again …

Today’s post featured a recipe tailor-made for Summer’s hottest days, when we’re all loathe to turn on the stove. The same can be said for today’s blast from the past. Two years ago I shared a recipe for a couscous salad that requires not one bit of cooking. Just put the ingredients in a bowl, give them a toss, and set your salad in the fridge while you sip Long Island iced tea on the patio. A few hours later you’ll have a tasty salad for lunch or dinner without ever touching a pot or pan. You can see how it’s prepared by clicking HERE.

*     *     *

Coming soon to a monitor near you …

Pickles

*     *     *

Fried Zucchini Blossoms

Fiori Fritti dello Zucchini

*     *     *

For a number of years now, it seems that every cook and chef on television has demonstrated the fine art of stuffing zucchini/squash blossoms before being fried. This was not something we ever tried at the two-flat. First of all, Grandpa would never plant something in his garden that would take up so much space. Tomatoes were his main interest and a plant that sprawled, no matter what kind, just wasn’t welcome. More importantly, even if he found a suitable spot for, say, zucchini, picking the blossoms would not have been acceptable to him in the slightest. He planted zucchini and anything that would lessen the crop would not have been allowed. So, without the crutch of a family recipe, I headed into new territory when I bought my first bunch of zucchini blossoms late last Summer.

Those first blossoms proved to be a disaster. They were an impulse buy and I’d no idea how to store them, so, I treated them like I would cut flowers. I awoke the next morning to find a wilted mess in a glass of water. That was the last I saw of blossoms until a few weeks ago, when I came across some at the farmers market. With my car in the shop, they survived the trip home in surprisingly good shape. Problems arose, however, when it came to creating a stuffing. Not wishing to test the CTA’s reliability a 2nd time that day, I raided the fridge, finding fresh mozzarella and fontinella cheeses. A quick trip to the corner store and I returned with a 1/2 gallon of whole milk that was used to make ricotta. These three cheeses were used to prepare the stuffing used in today’s recipe.

With the stuffing decided, I set about creating a batter to coat them. I tried a number of versions, over the course of 3 Saturdays, finally settling on a batter of flour, corn starch, cornmeal, and club soda. This batter was, by far, the best, resulting in blossoms that were crispy without being buried in batter.

I also continued to experiment with fillings. My favorite consisted of mozzarella and anchovies. Unfortunately, my photos from that batch were a mess, though I did post the “best” one later in this post.

There is one more thing worth mentioning. Be sure to open each blossom and check to see if there are any stow-aways. Although any one of a number of insects might be found lurking in there, I’m more concerned with creatures of the eight-legged variety. Although I’ve yet to come across one, I check the blossoms over the sink with the garbage disposal running. Just sayin’ …

*     *     *

I’ll be leaving for Michigan and the Kitchens will be closed as a result. It’s time for a little R&R on the beach with Max. See you in 2 weeks.

*     *     *

Che Bei Fiori!

*     *     *

Fried Zucchini Blossoms Recipe

Ingredients

  • 12 fresh zucchini/squash blossoms
  • 2 oz (56 g) mozzarella, grated
  • 2 oz (56 g) fontinella, grated
  • 4 oz (113 g) whole milk ricotta, well-drained
  • 1/2 cup AP flour
  • 1/4 cup corn starch/flour
  • 1/4 cup cornmeal
  • club soda
  • salt & pepper
  • oil for frying

*     *     *

Fontinella, Ricotta, & Mozzarella Cheeses

*     *     *

Directions

  1. Using tweezers, remove stamen and gently wash each blossom. Carefully blot each one dry. Remove the stems just beneath the blossom.
  2. Place a coffee filter into a strainer and add ricotta. Allow to drain a couple of hours. Discard the liquid (whey) and reserve the ricotta.
  3. Coarsely grate mozzarella and fontinella cheeses. (See Notes)
  4. Combine ricotta, mozzarella, and fontinella cheeses. Mix well.
  5. Add flour, corn starch, salt & pepper into a bowl and whisk to combine.
  6. Add enough club soda to make a batter.
  7. Place the cheese mixture  into a pastry bag or plastic storage bag. If using the latter, cut off one of the bag’s bottom corners and force the cheese into that part of the bag.
  8. Grab hold of a blossom in one hand and gently separate the petals to reveal a “pocket”. Gently blowing into the blossom may help open it up.
  9. Place the tip of the cheese-filled pasty/plastic bag into the pocket and squeeze some of the cheese into the blossom. Do not overfill nor allow the blossom to split. Continue until all are stuffed.
  10. Fill a medium-sized sauce pan with about 2 inches (5 cm) of oil. Heat to about 350˚. You’ll know it is hot enough if a bit of batter instantly begins to fry when dropped into the hot oil.
  11. Take one blossom and twist the petal ends to seal the cheese inside. Grabbing hold of the twisted petal ends, dip the blossom into the batter to cover. Drain excess batter and then place in the hot oil. Continue with more blossoms. Work in batches to avoid overcrowding the pan.
  12. When golden brown (2 to 4 minutes), flip each blossom. Fry for another 2 minutes
  13. Remove to a paper towel lined dish and season with salt.
  14. Serve immediately

*     *     *

*     *     *

Variations

Though stuffed blossoms are wonderful when fried, you really don’t need to stuff them with anything before frying. Just dip them in the batter and fry them. You’ll get a light, crispy treat without the hassle of trying to fill blossoms with cheese.

Mozzarella & Anchovy  Zucchini Blossom

You can stuff the blossoms with whatever you like. Any cheese or mixture of cheeses will work. I chose a combination of 3 cheese for this post. My favorites, though were blossoms stuffed with mozzarella and an anchovy. Simply prepare the blossom as indicated above, cut a stick of mozzarella, wrap it with an anchovy, insert both into the blossom before dredging and frying. Unfortunately, the photo on the right is the best of those I took that afternoon.

There are several ways to coat your blossoms. Some prefer to use eggs in their batter while others “go it alone” with just a coating of flour. Some use breadcrumbs to form a coating and others like only flour. I like a thinner batter, so, I use a little club soda poured into a mixture of 1 part each of corn meal and corn starch/flour for every 2 parts AP flour. When mixed, I prefer a batter that’s a little thicker than buttermilk but not quite as thick as pancake batter.

*     *     *

Notes

I’ve yet to discover a good way to store blossoms. I was told to treat them like freshly cut flowers and that didn’t work. I’ve since searched the web and it’s suggested that the blossoms be tightly sealed and refrigerated. (One of the vendors expressly stated not to refrigerate them.) I’ve yet to try this for when I returned last weekend for more blossoms, none were to be found — hence the blurry photo above.

By far, the easiest way to stuff a blossom is to use a pastry or plastic bag, tip inserted into the blossom. If and when I find more blossoms, I think I’ll try the 3 cheeses again, only doubling the amount of mozzarella and fontinella before adding chopped anchovies to the mixture. Yes, I do love my anchovies!

Whenever soft cheeses like mozzarella need to be grated, it’s easiest if your place the cheese in the freezer for about 30 minutes beforehand. This should harden the cheese a bit, making grating a snap.

Initially, I tried a shallow fry, using about a half-inch of oil in the pan. I did not like the results at all. The lack of oil meant the blossoms had to be “handled” more so that they could be flipped and evenly fried. This raised the risk of damaged blossoms and leaking cheese. Using about 2 inches (5 cm) of oil made frying so much easier and consequently no blossoms were harmed in the making of this tasty treat.

*     *     *

It’s déjà vu all over again …

For many, a meal isn’t complete until coffee and an after-dinner liqueur are served. If that meal is served during the Summer, a dish of ice cream is very often part of the equation. With an eye towards reducing the average dishwasher’s workload, the Italians took these 3 traditions and united them in one simple dessert, affogato al caffè. Often served in a cup, affogato is a combination of ice cream and espresso, with an optional shot of your favorite liqueur. I think you’ll agree that an affogato is a wonderful way to end a meal — without having to loosen your belt afterward. You can see directions for creating a variety of affogati by clicking HERE.

*     *     *

Coming soon to a monitor near you …

Baccalà Salad

Baccalà Salad

*     *     *

The Bartolini Have Hit The Road!


Going for a Ride

If there’s one thing we Bartolini enjoy as much as a dish of pasta, it’s a good old-fashioned road trip. So, when one such opportunity presented itself, I shut down the Kitchens, packed up the car, and headed out — to Washington D.C.

Now, I just didn’t pick D.C. as a destination out of thin air. No, the Kitchens’ good buddy and fellow blogger, Jed, recently invited me to guest host at his blog, sports-glutton.com. There he leads a team of sportswriters that covers the world of sports, offering ego-free commentary and well-reasoned conclusions. With every post, each of these gentlemen offers true insight into his respective field of expertise. Sounds pretty good, huh? Yeah? Well, wait! There’s more.

Jed and his wife, Liz, share recipes that are sure to appeal to the latent glutton in each of us. From appetizers to desserts, and all dishes in-between, these two know their way around a stove — and campfire.  And just when you think sports-glutton.com couldn’t get any better, Thursday arrives. That’s the day that Jed reviews, one bottle at a time, a wide variety of beer and wine. Whether you’re in the mood for a Japanese ale or a Chilean Pinot Noir, not to mention a Wyoming micro brew or whiskey from Utah, this is the place to check before you go shopping for spirits.  Drat! I’ve gotten ahead of myself. You see, every Monday Jed starts off the week with a bit of humor. Think of it as you would a refreshing sorbet, preparing you for his posts to come.

How’s that for a blog? There’s quite literally something for everyone.

So, as you can well imagine, when asked to take part in his  MLB Recipe Series, I could hardly refuse the honor and jumped at the chance. Now, for the uninformed, every Wednesday of the Major League Baseball season, Jed celebrates a different team by offering a recipe that, in some way, is connected to that team. Being a Cubs fan, I contributed my recipe for Jack Brickhouse Chicken, for reasons that will become clear when you follow me to Jed’s place by clicking here to read my guest post. Once you’ve checked out my recipe, be sure to take a look around. You’re sure to find something of interest.

Thanks, Jed, for the honor of participating in your series, allowing me to share a recipe commemorating our Cubs. One of these years …

*     *     *

Regular programming will resume at the Bartolini Kitchens next week, once I figure out a way to explain to Max that we’re not really going anywhere.

Coming soon to a monitor near you …

Asparagus Ravioli made with Duck Egg Pasta

*     *     *

Homemade Gnocchi in Gorgonzola Sauce

Gnocchi in Salsa di Gorgonzola

“The future ain’t what it used to be” and today’s post is the proof. You may have noticed last week’s “Coming Soon …” photograph depicted a recipe called “Jack BRICKhouse CHICKEN” and, as a result, you may have deduced that was to be today’s recipe. Well, guess again. That recipe is scheduled for next week — has been all along — and cannot be rescheduled for reasons that will become apparent in the post. I must admit that it came as a surprise for me to learn that I cannot read a calendar and my newly found malady did leave me in a bit of a lurch for this week’s post. All’s not lost, though, since I’ve a bagful of recipes from my recent visit with Zia from which to choose. Because so many of you were interested in my family’s risotto, I set to work writing that recipe and blog entry. All was going swimmingly until Saturday morning when I noticed that Stefan, of Stefan’s Gourmet Blog, posted his recipe for Risotto with Peas & Mint. The very next day, Nick, of Frugal Feeding, posted his recipe for Tomato and Basil Risotto. That’s when I began to rethink my post. The third and final blow was struck when Paul, of That Other Cooking Blog, posted his recipe for Risotto al Nero di Seppie (squid ink risotto). Deciding that my post could be postponed a bit, I went back to the bag of recipes from my visit home and pulled out today’s gnocchi recipe. Even so, if all of this talk of risotto has you yearning for the creamy rice dish, be sure to check out those 3 recipes and, while you’re at it, spend a little time looking around each blog. You will not be disappointed.

One of the first things we kids were allowed to help make in the kitchen were gnocchi. Mom and Zia would make the dough and then hand us a piece to roll into a log, though we called them snakes. With a butter knife we were taught how to cut the snake and, depending upon the gnocchi’s use, we might even have been allowed to try to roll them across a fork’s tines to make the grooves. By “use” I mean whether dinner guests or family were to dine on the fruit of our labor. Mom always put her best gnocchi forward for company and she took charge of the groove-making, reshaping any malformed gnocchi along the way. Unlike today’s recipe, however, Mom’s gnocchi were always served with her meat sauce.

Although I’ve enjoyed gnocchi with gorgonzola at restaurants, I never thought about replicating the recipe at home until several years ago. My Entertainer Friend mentioned how much he enjoyed gnocchi with bleu cheese and I thought I’d come up with a recipe and treat him. Over the years, I’ve tried a number of variations, using several spices and herbs, and eventually switched from bleu cheese to gorgonzola, but I always came back to the simple recipe I’ll share today. It’s yet another example of “Less is More.” As for my Entertainer Friend, now that I’ve reminded him, I’d better start planning that gnocchi dinner.

*     *     *

*     *     *

Gnocchi in Gorgonzola Sauce Recipe

yield: roughly 1.5 lbs (680 g)

Ingredients

  • 2 large russet potatoes, once cooked, peeled, & riced = 18 oz (510 g) (See Notes.)
  • 2 cups (10.2 oz; 290 g) all-purpose flour
  • 1 large egg, slightly beaten
  • corn meal or additional flour for dusting surfaces
  • 5 oz (142 g) gorgonzola, crumbled, more or less to taste (See Notes)
  • 1/2 cup (118 ml) heavy cream, more or less to taste
  • salt and pepper, to taste
  • grated or flaked Pecorino Romano cheese for garnish — Parmigiano Reggiano may be substituted

Directions

To make the gnocchi

  1. Pre-heat oven to 400˚ F (204˚ C). Use a fork to pierce the potatoes numerous times.
  2. Place potatoes on center rack and bake until cooked, from 50 to 60 minutes, depending upon potato size.
  3. Meanwhile gather the other ingredients. Allow the egg to come to room temperature.
  4. Once cooked, remove potatoes and set aside until they can be safely handled.
  5. Slice each potato in half, lengthwise, and use a spoon to scoop out all of potato, reserving the skin for some other purpose.
  6. Run cooked potatoes through a ricer or food mill. (See Notes.)
  7. Use the riced potatoes to create a mound on a floured work surface. Make a well in the center of the mound, as you would when making pasta dough.
  8. Sprinkle the top of the well’s walls with 3/4 cup of flour. Place the egg in the center well after the potato has cooled enough so that the egg won’t cook.
  9. Using a fork, slowly combine the potato & flour with the egg. Once the dough renders the fork useless, continue mixing the dough with your hands.
  10. The dough should come together within 4 to 5 minutes. It will be ready when it is firm and a little moist-to-the-touch without being tacky. Add more flour as needed but remember: the less flour used, the better.
  11. Form a ball with the dough and divide it into fourths.
  12. Take one-quarter and divide it in half. Roll one of the sections into a log with a width of your preference. We normally roll them about an inch (2.5 cm) thick — the width of an index finger.
  13. Use a sharp knife or board scraper to cut the log into segments, each 1/2 (1.3 cm) to an inch (2.5 cm) long.
  14. If grooves are desiredFlour the back of a dinner fork, place a segment at the top of the tines, use your finger to roll it over the tines, creating gnocchi with grooves on one side and a dimple where your finger rolled it.
  15. If grooves aren’t wanted: Use a finger to push and roll each segment across the work surface, creating smooth surfaced gnocchi with dimples where you’d placed your fingers.
  16. Place the gnocchi on a lined baking sheet that’s been dusted with flour or corn meal.
  17. If not going to be cooked within a few hours, place the gnocchi-covered baking sheet in a freezer and once the gnocchi are frozen solid, place them in containers/bags suitable for freezer storage.

*     *     *

*     *     *

To cook the gnocchi

  1. Bring a large pot of salted water to the boil over high heat.
  2. Once the water boils, add the gnocchi and stir gently.
  3. When the water resumes boiling, reduce the heat to a simmer and notice when the gnocchi begin to float. This should only take a couple of minutes when fresh and a few more when the gnocchi are frozen. Gnocchi will be ready about 1 minute after the last start floating. If in doubt, taste one.

*     *     *

To prepare the gorgonzola sauce

  1. While waiting for the water to boil, heat the cream in a small sauce pan over medium heat.
  2. Once the cream is hot, add the gorgonzola and stir until melted. Taste and adjust, adding more cream or gorgonzola to suit your own taste. If you prefer, you can add a bit of the water used to cook the gnocchi to thin the sauce without adding more cream.
  3. Don’t forget to taste and season with salt & pepper, if required.

*     *     *

To assemble and serve

  1. Use a hand strainer — “Spider” strainer — to remove the gnocchi from the boiling water and place in the serving bowl. Add the gorgonzola sauce and mix gently until all are coated.
  2. Serve immediately, garnished with grated/flaked Pecorino Romano cheese.

*     *     *

Variations

Like most Italian dishes, there are many recipes around for making gnocchi. No matter which recipe you choose to follow, 2 rules will apply. 1) The fluffier the smashed/riced potato the better, and, 2) the less flour the better. Keep those 2 rules in mind and you’ll be well-rewarded with a most palatable platter of puffy potato pillows rather than the much less than spectacular spud scuds.

One popular variation for preparing gnocchi is to bake them before serving. Follow the directions above for making and cooking the gnocchi, as well as making the gorgonzola sauce. Use all the sauce to dress the gnocchi and place in a baking dish. Top with grated cheese or bread crumbs that have been moistened by olive oil or butter. Bake in a 375˚ F (190˚ C) pre-heated oven for 20 to 25 minutes or until hot & bubbly with a golden brown topping.

Even after being reduced, some may want a thicker sauce. (Bear in mind it will thicken once taken off the heat and begins to cool.) If you want a very thick sauce, you can start by making a roux. Melt 2 tbsp of butter in a small sauce pan. Add an equal amount of AP flour and whisk until fully blended. Allow to cook for 2 to 3 minutes. Do not let the roux darken or it will color your cheese sauce. Add the half the cream and whisk till incorporated. Add the remaining cream and keep whisking as it heats and begins to thicken. Once thickened, about 5 minutes, add the gorgonzola and keep whisking until melted. If too thick, you can adjust by adding more cream or some of the water used to cook the gnocchi.

*     *     *

If they’re all identical, no one will believe you made them.

*     *     *

Notes

Much like making pasta, making gnocchi is not an exact science. The moisture in the potatoes, the size of the egg, the humidity, and even the brand of flour can all affect the amount of flour required. As was mentioned, use as little flour as possible to create a firm, slightly moist-to-the-touch dough that isn’t at all tacky.

I used 2 large russet potatoes that weighed 26.8 oz (760 g). Once baked, peeled and riced, they weighed a total of 18 oz (510 g). For accuracy I weighed the flour, starting with 2 cups or 10.2 oz (290 g). When I was finished, the remaining flour weighed 4 oz (114 g), meaning I used a little over 1 cup of flour for a little over a pound of riced potatoes. Lastly, to determine the yield, I weighed the frozen gnocchi before bagging. Your yield may vary due to the above-mentioned factors.

Not everyone has a potato ricer or food mill and I seriously doubt that my Nonnas had either one. They used a large fork to smash the potatoes and there’s no reason you can’t do the same. You can, also, use a potato masher or a box grater, if need be. Just be sure to use a fork to fluff the smashed potatoes as much as possible before proceeding.

It had been some time since I last made this dish when I prepared it for Zia. As a result, I misjudged and used a full cup (236 ml) of heavy cream with 5 oz (142 g) gorgonzola. That resulted in a very runny sauce. Thankfully, gnocchi was to be our primo piatto so I was able to reduce the sauce to the consistency I wanted without affecting the rest of the dinner. Today’s recipe uses half the amount of cream I used for that dinner.

It’s not a bad idea to have extra gorgonzola and cream on-hand the first time you make this sauce, just in case your idea of the perfect gorgonzola sauce differs from mine. You can add more cheese or cream, as required.

*     *     *

It’s déjà vu all over again … 

Blueberry

I don’t care what the weatherman says. The calendar says it’s June and that means it’s ice cream season. Time to dust off the ice cream machines and get those canisters into the freezer. Now I’ve shared several ice cream recipes but this one, blueberry swirl cheesecake, is Number One among family, friends, friends of family, and families of friends — but don’t take our word for it. Try it for yourself. You can find the recipe by clicking HERE.

*     *     *

Coming soon to a monitor near you … 

Jack BRICKhouse CHICKEN

*     *     *

Baked Haddock

Eglefini al Forno

Today’s recipe once again calls upon my family’s breading mixture to keep the fish fillet moist as it adds flavor to the dish. There really is no need for me to explain the breading much more than that for fear of boring you to tears. And I wish I had a great story to tell about haddock but, the truth is, I had originally planned to use baccalà for this post. Then I saw fresh haddock on sale and, well, that piece of salted cod will be used to make a fine salad.

Haddock is a popular fish on both sides of the Atlantic. Having once been over-fished, its numbers have increased and it is now considered a success story here in the US. In our Northeast, specifically the Boston area, young haddock may also be called scrod. That’s a bit of a misnomer, however, because that name is used for both young cod and young haddock. Needless to say, haddock is very similar to cod in both taste and texture, with haddock having a slightly stronger flavor. Like cod, it flakes when cooked so be careful if you try to grill haddock. If you do, it’s probably best to use a grilling basket.

*     *     *

This slideshow requires JavaScript.

*     *     *

As I’ve mentioned in other posts, this breading mixture is used in a number of the Bartolini dishes. To be honest, I never realized how many until I started documenting my family’s recipes. Depending upon its use, it can be more/less moist and with/out lemon juice. Combine bread crumbs, diced garlic, chopped fresh parsley, and salt & pepper in a bowl. In this case, I used the juice of a half-lemon and then enough olive oil to moisten the mixture but not to the point that it’s sopping wet. How much of each ingredient you need will depend upon how many fillets there are to cook and whether you’ve plans for the excess breading. (See Notes.) Under normal circumstances, you’ll want enough breading to adequately cover each fillet, as well as to form a thin layer underneath each piece of fish so that there’s little chance of it sticking while baking. And what if you make too much? Spread it on the baking dish/sheet and roast it along with the fish. Excess breading can be frozen for later use with pasta.

Once the fillets have been breaded and placed on a baking sheet, place them in the center of a pre-heated 375˚ (190˚ C) oven. Your fish should be ready in about 15 minutes, maybe 20 depending upon the thickness of the pieces.  Haddock fillets will be opaque white and flake easily when fully cooked, very much like cod. Remove the baked fillets to a serving dish, garnish will lemons slices, and serve. In the photo, the haddock was accompanied by sautéed artichokes.

*     *     *

Notes

Normally, my family would only put a small amount of bread crumbs under the fish to prevent the fillets from sticking while baking. Here I placed the haddock on a bed that was about 1/3 inch (.85 cm) thick because I had use for those bread crumbs. Once the fish was removed to a serving platter, I used the now-roasted bread crumbs left on the baking sheet to garnish a side dish of pasta aglio e olio instead of cheese.

*     *     *

An Update

I telephoned a 5th company today to inquire about getting the vine removed. Within an hour, they were here and removed the vine within the next hour. They will be back to haul it away at the end of the week. The only real damage sustained was to a single rosebush but it is early enough in the season that it should recover without a problem. Thank you all for your concern and well-wishes.

*     *     *

It’s déjà vu all over again …

Though the weather may not be cooperating, it is definitely grilling season here in the US & Canada. If you’re at all like me, a burger just isn’t a burger if there aren’t pickles on top. Now, as much as I love a good kosher dill, for my burgers and sandwiches, I crave Bread & Butter pickles. Easier to make than you might think, my original recipe didn’t require canning and the pickles were stored in the refrigerator. I’ve since added instructions for canning them. Either way, I think you’ll agree that a few of these tasty slices is the only way to top a burger. Click HERE to learn how to make these great tasting pickles.

*     *     *

Coming soon to a monitor near you …

“Jack BRICKhouse CHICKEN”

*     *     *