Aunt Mary’s Apple Cake

Torta di Mele di Zia Mariolla

Apple Cake

This is one of the recipes I brought home with me following my last visit with Zia but its path to this blog is nowhere near as direct as that statement makes it sound.

While having coffee with Zia, I mentioned that I baked a wonderful apple cake two years ago but have since lost the recipe. Try as I might, I can neither find nor duplicate that cake. My story reminded Zia of a slice of cake she was once served at her Daughter-in-Law’s home. She complimented my Cousin and asked for the recipe. Surprisingly, the recipe came from the other side of my family, my beautiful Zia Mariolla, who’s married to my Dad’s youngest Brother, Zio Leo. I’ve no idea how the recipe got to my Cousin’s cookbook but, lucky for us, it found its way into mine.

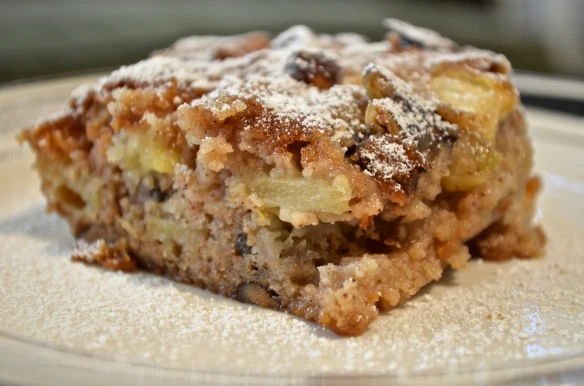
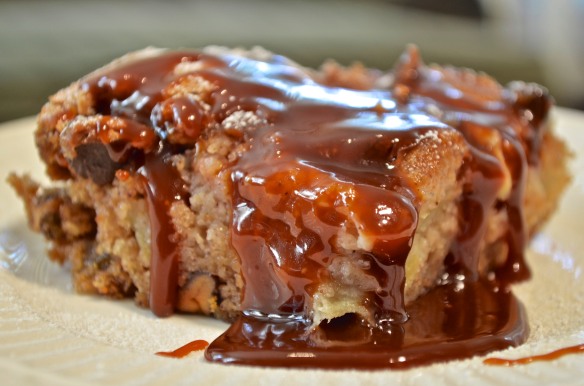
Perhaps what I like most about this cake is that it isn’t overly sweet and, in that regard, its lack of icing is a big plus. If you or your guests prefer a dessert that’s not too sweet, than serve them a piece of Zia’s cake just as she intended, with a dusting of powdered sugar on top. If, however, someone at the table would prefer something a bit more sweet, then have I got the thing for you, a salted caramel sauce. Within this post, I’ve included the recipe for the sauce  and you’ll find it the perfect accompaniment for Zia’s cake. See? With or without the sauce, you really can have your cake and eat it, too.

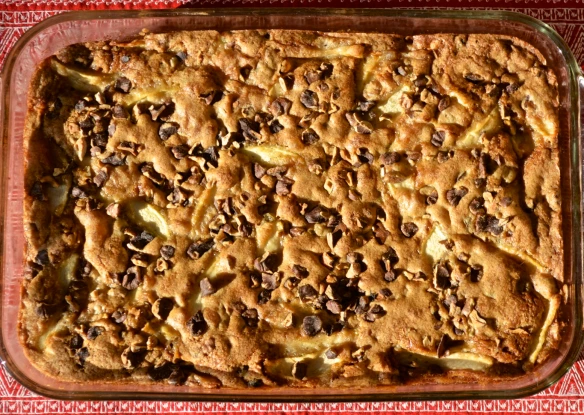
Now, as for the recipe itself, the original doesn’t specify the kind of apples, raisins, nor nuts to be used. Having just visited the Honey Man in Michigan, I had fresh Cortland apples and black walnuts at my disposal. I used golden raisins simply because I had them on-hand. That’s it. The rest of the ingredients are quite common and you should have little trouble preparing this cake.

*     *     *

On the road again …

I’m leaving for this year’s last visit with Zia. The Kitchens will be closed while I’m gone and will be re-opened on Wednesday, November 20th.

*     *     *

Apple Cake -2

*     *     *

Aunt Mary’s Apple Cake Recipe

Ingredients

Apple Cake

  • 1-3/4 c sugar
  • 3/4 c oil
  • 3 eggs
  • 1/2 tsp salt
  • 2 cup AP flour
  • 1 tsp baking soda
  • 1 tsp cinnamon
  • 1 tsp vanilla
  • 4 or 5 Cortland apples, peeled, cored, sliced thin
  • 1 cup chopped black walnuts, divided — any nuts may be substituted
  • 1 cup golden raisins (pre-soak in warm water for 30 minutes)
  • confectioners sugar (optional)
  • salted caramel sauce for serving (optional)

Salted Caramel Sauce

  • 1 cup sugar
  • 6 tbsp butter, cubed
  • 1/2 cup heavy cream, room temperature
  • 2 tsp kosher salt (see Notes)

Directions

To prepare the cake

  1. Pre-heat oven to 350˚ F (175˚ C).
  2. Place all ingredients — except apples, raisins, and nuts — in a large mixing bowl. Beat with a spoon until well-blended. Batter will be stiff.
  3. Add apples, raisins, and half the nuts to the bowl and stir till evenly distributed.
  4. Pour batter into a well-greased 9 X 13″ baking dish. Sprinkle the top with the remaining nuts.
  5. Bake in pre-heated 350˚ oven for 45 minutes. A toothpick inserted into center should be clean upon removal.
  6. Allow to cool before dusting with confectioners (powdered) sugar and serving.

To prepare the salted caramel sauce

  1. Pour the sugar into a medium sauce pan (see Notes) over med-high heat.
  2. Stir the sugar as it begins to melt and continue to do so until it begins to boil. Stop stirring the moment it begins to boil. (see Notes)
  3. Once boiling, look for it to change to an amber color. If necessary, swirl liquid in the pan but do not stir.
  4. Once the sugar has turned amber in color, reduce heat to medium, add the butter and whisk vigorously until melted and fully blended.
  5. Remove from heat, gradually add the cream, whisking all the while. Once blended, add the salt and continue to whisk until fully mixed.
  6. Set aside to cool for a few minutes before pouring into a sealable container for storage in the fridge, where it will keep for a couple of weeks.
  7. Warm before serving with your favorite dessert.

*     *     *

Apple Cake Preview

*     *     *

Notes

The recipe will prepare salted caramel sauce. If you’re not a fan of salted caramel, reduce the amount of salt used, but do not eliminate all of it. A bit of salt is usually recommended with sweet preparations. I’d suggest using 1/8 or 1/4 tsp instead of the amount listed in the recipe.

Be sure to use a large enough saucepan. The sugar will boil and could boil over if your pan is too small.

You may stir the sugar as it melts but must stop stirring the moment it begins to boil. Failure to do so may result in sugar crystals ruining the texture of the finished sauce. Once almost all the sugar is melted, it’s best to put away the spoon and swirl the pan’s contents until all is melted, boiling, and begins to turn amber-colored.

Do not, I repeat DO NOT catch a dropped spoon that was used to stir the melting sugar. I can tell you from personal experience that the momentary joy you may feel for actually catching something with your left hand will be obliterated by the searing pain that only sugar burns can deliver.

*     *     *

It’s déjà vu all over again …
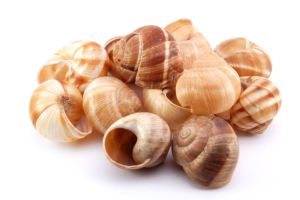
Lumache ShellsLast Saturday, All Souls’ Day was observed in a number of Christian churches. In Marche, where the Bartolini are from, it’s traditional to serve snails, lumache, on that day. Although my family never observed that custom, we did, on very rare occasions, prepare and serve lumache. If you’re interested in learning how it’s done, just click HERE

*     *     *

Coming soon to a monitor near you …

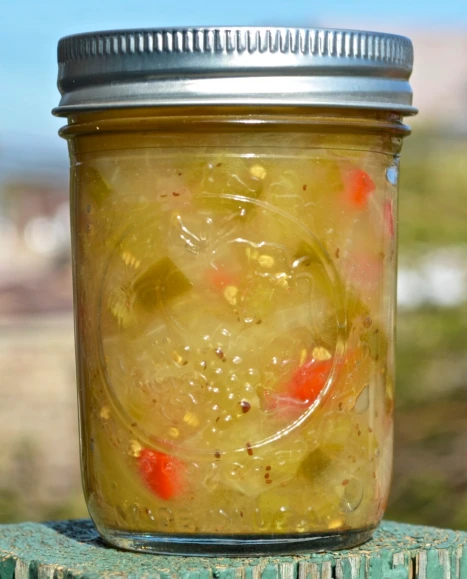
Green Tomato Relish 3

Green Tomato Relish

*     *     *

Apple Pie with a Cheddar Cheese Crust

I’ll be the first to admit that serving apple pie with a slice of cheddar cheese is not necessarily a common thing to do and it certainly wasn’t a family tradition. In fact, I was a young adult when Uncle first told me about it. Since then, I’ve enjoyed apple pie with cheddar cheese several times although, to be honest, I’ll take vanilla ice cream before cheddar cheese any day. (I am my Mother’s son, after all.) Still, I was happy with my apple pie adorned with the occasional slice of cheddar until one day a few months ago. I was busy doing whatever and, in the background, there was a Food Network program on the TV. It was one of those shows I’ve grown to dislike, with people talking about how great some dish is at this diner or that restaurant without ever telling how it’s made. Well, I watch these programs to learn new techniques, to get recipes, to see a dish prepared. If I want to hear people talk about how good a dish is, I’ll go to a diner and survey the people eating at the counter. Anyway, a restaurant was mentioned that was known for its pie and which featured an apple pie with cheddar cheese in the crust. Aside from that comment and seeing some grated cheddar dumped into a commercial mixer, the actual recipe was left a mystery. Did I mention how much I dislike these shows? Anyway, my quest began that very day …

In the weeks that followed, I baked a number of test pies. I varied the amount of grated cheddar cheese in the crust from 2 to 6 ounces per crust. I adjusted the amount of fat in the crusts and even swapped spices in the filling. And left in my wake was a trail of apple pies that stretched from the shores of Lake Michigan to those of Lake Huron, not to mention devoted taste testers in both locales. In the end, I settled on using 4 ounces of grated, sharp cheddar cheese and 7 tbsp of fat per crust while, in the pie filling, I replaced nutmeg with cardamom. The result was a pie with a crust that was manageable when raw and, when baked, was relatively light with the distinctive — but not overpowering — taste of cheddar. Success!

With the cheddar question out of the way, let’s talk filling. Just like with our Thingamajig, I use both tart and sweet apples. For the sweet, I find that Fuji work best because they, like Granny Smiths, hold up well during baking. I prefer the apples in my pie filling to be in chunks rather than thinly sliced and that way they remain somewhat firm when baked. Once the apples are peeled, cored, and chopped, I heat them in a saucepan with some butter. All I’m doing is heating them through; I take them off the heat when their juices first begin to appear in the pan. I’ve found that this helps to prevent a finished pie that has a gap of over an inch between the apple pie filling and the crust “dome” above it. It’s important, though, to pull the apples off of the heat as soon as they start to render their juices and to cool them completely before assembling the pie. Cook them too long or fill the pie while they’re still hot and your apples will not be at all crisp when the pie has finished baking.

*     *     *

No pie dome here!

*     *     *

The Apple with a Cheddar Cheese Crust Recipe

Ingredients

  • For Apple Pie Filling
    • 6 Granny Smiths (or similar, tart apples) peeled, cored, and sliced evenly
    • 2 Fuji (or similar, sweet apple) peeled, cored, and sliced evenly
    • 3 tbsp lemon juice
    • 2 tbsp butter
    • 1/4 cup raisins, soaked in hot water and drained (optional)
    • 1/2 cup sugar
    • 1/4 cup dark brown sugar
    • 1/4 cup AP flour
    • 3/4 tsp cinnamon
    • 1/4 tsp cardamom (or nutmeg)
    • 1/2 tsp salt
    • 1 egg, beaten
    • sugar
  • For Each of 2 Pie Crusts
    • 1 1/2 cups AP flour
    • 1/4 tsp salt
    • 3 tbsp vegetable shortening, cut into cubes and well-chilled
    • 4 tbsp unsalted butter, cut into cubes and well-chilled
    • 4 oz. sharp cheddar cheese, grated
    • 3 tbsp ice water, plus 1 tbsp, if needed
    • 1 tbsp cider vinegar

Directions

  • For apple pie filling
    1. In a large mixing bowl, combine the apple slices and lemon juice. Stir to coat the apples.
    2. In a sauce pan large enough to hold the apples, melt the butter over medium heat.
    3. Add the apples and sauté just until the apples begin to give up their liquid. Do not cook until the apples grow soft.
    4. Meanwhile, in a small bowl, mix together the sugar, brown sugar, flour, cinnamon, cardamom, and salt.
    5. Return heated apple pieces to large mixing bowl.
    6. Add the raisins, if using, and spice mixture to the apples and gently stir until the apples are coated evenly.
    7. Set aside to cool completely and until the pie crusts are ready.

  • For Pie Crust – Best if each crust is made individually in the food processor.
    1. Add flour, cheddar cheese, and salt to the processor. Pulse it a few times to combine the 3 ingredients.
    2. Add the very cold butter & shortening cubes.
    3. Pulse the machine 3 times, with each pulse lasting a 3-count. Your ingredients will now be lightly mixed. If need be, pulse again.
    4. With the machine running, add the vinegar and then slowly add the ice water. Do not add so much that a ball of dough forms. Remove the lid and, with your hands, test the dough to see if a ball of dough can be formed.
      1. If so, turn the dough until a very lightly floured service, form a ball, wrap it in plastic wrap, and refrigerate for 30 minutes.
      2. If a dough ball will not form, add a little more water, pulse the machine a couple of times, and test it again. When you can form a ball of dough, follow step A above.
    5. While the dough rests in the fridge, prepare the 2nd crust.
  • Assembly, to occur only after filling is cooled completely and pie crusts rested
    1. Pre-heat oven to 400.
    2. After 30 minutes, remove the dough from the fridge and roll it until large enough to completely cover the bottom of a 9 inch pie pan. Place the dough into the pan, trim any access, and return the crust and pan to the fridge until needed further.
    3. Roll out the 2nd crust, though slightly smaller, it must be large enough to cover the pie with a little excess.
    4. Retrieve the pie’s bottom crust from the fridge, fill it with the apple pie mixture, and cover it with the 2nd pie crust.
    5. Seal the pie by gently lifting the bottom crust’s edge while placing the top crust’s edge behind it. Work you way around the entire pie.
    6. Again, working your way around the pie, crimp the edge to further seal the pie.
    7. Use the egg to coat the top crust. Sprinkle with sugar. Use a sharp knife to create steam vents in the pie’s upper crust.
    8. Bake in a pre-heated 400* oven for 15 minutes. Without opening the door, lower the heat to 375* and continue baking for 40 – 45 minutes.
    9. After a total time of 30 minutes, and 15 minutes thereafter, check to see if the crust’s edge is too dark. If so, cover with aluminum foil and continue baking.
    10. When top is golden brown, remove pie from oven and place on a cooling rack. I always allow my apple pie to cool at least 2 hours before serving.

*     *     *

Fresh from the oven

*     *     *

Variations

This recipe is more concerned about the crust than it is the pie filling. So, if you prefer sweet apples, walnuts, or currants, use them. If you hate raisins, ditch them. If you don’t like or haven’t any cardamom, use nutmeg. In short, change the filling to suit your tastes. The same goes with the crust. If you find that adding cheddar to your favorite pie crust recipe makes a better pie, then please come back here and tell us about it.

*     *     *

Notes

One last thing about the crust. Add too little cheddar and you won’t taste it; too much and the pastry dough is rendered unmanageable. And even under the best of circumstances, the cheddar cheese will affect the crust’s flakiness. So, it’s basically a trade-off. The trick is to add as much cheddar cheese flavor as you can without sacrificing too many of the crust’s better qualities. My taste testers and I agree that this recipe “works.” If you try it, I hope you feel the same way.

*     *     *

The Apple Thingamajig

I’d planned to start this post by extolling the apple and its many uses but it’s hard to sing a fruit’s praises when there’s a thingamajig dangling atop your blog, metaphorically speaking, of course.  So, I might as well explain the name of this dish and get it over with — in a minute or two.

I’ve been busy elsewhere the past few days, so, these acknowledgements are a tad late. Last Friday, Kristy, of Eat, Play, Love was kind enough to pass me the Versatile Blogger Award, as did Eva of Kitchen Inspirations the very next day. Kristy’s blog is a family affair, featuring 2 gourmands-in-the-making, Mr. N and Miss A. Her recipes come from around the World and the blog’s stars are adorable. 4 spoons all the way! Eva’s blog is a treat, as well. Visit her blog and you may find yourself having brunch in a Montreal café or sharing a Moroccan feast that she researched and prepared herself. And every post is beautifully photographed. If you haven’t already done so, do yourself a favor and visit these 2 wonderful blogs. And as for the award itself, I am very thankful for the honor but, having just received this award a week ago, I won’t be passing it along. (As I mentioned to Kristy, I fear putting us all into some sort of infinite loop.) I will, however, refer you to my post of a week ago. Now, about that thingamajig …

Several years ago, at about this time of the year, my cooking shows were all featuring apple pies. Now, I love apple pie but had shied away from making them because my pie crusts were terrible and the poor apples turned to mush. That Fall, I decided to teach myself how to bake a pie and, every week to 10 days, I baked an apple pie. Well, with parents who were children of the Great Depression, we learned very early on that one  never wastes food. Period. So, if I made a pie, I ate a pie. True, eventually my pies got better and I was confident enough to share them with friends — but I ate a whole lotta pie before then. Still, even though I eventually settled on recipes for both crust and filling, one pie is a lot if you live alone, as Zia and I often commiserated. As a result, neither of us baked apple pie because we didn’t want to be greeted by the same pie every time we entered our kitchens for the next week or so. That was until 2 years ago. It was about that time that we both saw cooks on television prepare apples in a form that was part pie and part tart. They called them “open-faced” pies or tarts but, to our minds, they’re neither. So, we started calling them apple “thingamajigs” and the confusion ended, at least between the two of us. Best of all, an apple thingamajig is half the size of a pie and, therefore, better suited to our swinging single lifestyles.

Now, there are plenty of recipes around for thingamajigs and mine is based upon my apple pie recipe, with one notable exception. I include cheddar cheese in my apple pie crust but not here. Being a thingamajig has only one crust, the cheddar cheese flavor is too mild to be noticed and adding more cheese to the recipe only serves to make the crust unmanageable. So, the cheddar is reserved for double-crusted pies and it’s probably just as well. (My apple pie recipe with a cheddar crust is forthcoming.) A thingamajig, being open-faced, is less “runny” than a normal pie due to evaporation during baking. (See Notes.) As you’ll see and much to my liking, the apple slices remain firm and more apple flavor retained. As for the apples themselves, I always use tart apples, preferably Granny Smith, but I also add a sweet one — Fuji or Honeycrisp — to the filling, usually in a 3 tart to 1 sweet apple ratio. That way, you get an occasional taste of sweet among the sour. Raisins or currants will do the same. To that end, I don’t use a lot of sugar nor a number of spices in my apple filling. Why use tart apples if you’re going to add a ton of sugar and spice to the filling? For me, when it comes to apple filling, less is more.

*     *     *

The Apple Thingamajig Recipe

Ingredients

  • For Pie Crust
    • 1 1/2 cups AP flour
    • 1/4 tsp salt
    • 5 tbsp vegetable shortening, cut into cubes and well-chilled
    • 4 tbsp unsalted butter, cut into cubes and well-chilled
    • 3 tbsp ice water
    • 1 tbsp cider vinegar

  • For Apple Filling
    • 3 Granny Smiths (or similar, tart apples) peeled, cored, and sliced evenly
    • 1 Fuji (or similar, sweet apple) peeled, cored, and sliced evenly
    • 2 tbsp lemon juice
    • 1/4 cup sugar
    • 2 tbsp dark brown sugar
    • 2 tbsp AP flour
    • 1/2 tsp cinnamon
    • 1/8 tsp nutmeg
    • 1/4 tsp salt
    • 1 egg, beaten
    • sugar
    • butter

Directions

  • For Pie Crust
    1. Add flour and salt to the processor. Pulse it a few times to mix the 2 ingredients.
    2. Add the very cold butter & shortening cubes.
    3. Pulse the machine 3 times, with each pulse lasting a 3-count. Your ingredients will now be lightly mixed. If need be, pulse again.
    4. With the machine running, add the vinegar and then slowly add the ice water. Do not add so much that a ball of dough forms. Remove the lid and, with your hands, test the dough to see if a ball of dough can be formed.
      1. If so, turn the dough until a very lightly floured service, form a ball, wrap it in plastic wrap, and refrigerate for 30 minutes.
      2. If a dough ball will not form, add a little more water, pulse the machine a couple of times, and test it again. When you can form a ball of dough, follow step A above.
    5. While the dough rests in the fridge, prepare the filling.

  • For Apple Filling
    1. In a large mixing bowl, combine the apple slices and lemon juice. Stir to coat the apples.
    2. In a small bowl, mix together the sugar, brown sugar, flour, cinnamon, nutmeg, and salt.
    3. Add the spice mixture to the apples and gently stir until the apples are coated evenly.
    4. Set aside until the pie crust is ready.


  • Assembly
    1. Roll the dough as if making a bottom crust for a 9 inch pie.
    2. Place the apples in the center of the dough circle, leaving a 2 inch border around the filling. Creative types may wish to carefully place the apples in a circular design. (That is soo not me.)
    3. Carefully lift the border, working your way around the filling, crimping as needed. You are creating the crust for your open-faced thingamajig.
    4. Dot the top of the apple filling with small bits of butter.
    5. With a pastry brush, lightly coat the exposed crust with the beaten egg. Sprinkle the sugar.
    6. Place in a pre-heated 375* oven and bake for 40 to 45 minutes or until golden brown.
    7. Should not be served piping hot but may be served warm.

*     *     *

Variations

Just like its cousins the tart and pie, you can add ingredients to the filling to suit your own tastes. In the past, I’ve added raisins, currants, and chopped walnuts to the filling and enjoyed each. And, of course, you can change this dessert completely by selecting different apples. I like tart; you may prefer sweet. Lucky for us, there are plenty of apples to choose from.

*     *     *

Notes

Because there are fewer pie juices to contain, this pie crust can be rolled thinner than you would for a pie and, as a result, you can easily make 2 thingamajigs — as I often do and did today. I keep one for myself and give the other to a friend.  I believe it was Confucius who said, “It is easier to give someone a thingamajig than it is to give half a pie.”

*     *     *

Don’t sit under that apple tree. Make apple sauce!

I love this time of the year. Here in Chicago, Winter’s relentless, Spring’s nonexistent, Summer’s hot & humid, but Fall, beautiful, wonderful Fall is our reward for putting up with the rest of the year’s weather. The days are warm, the nights cool, the lakefront a thing of beauty and the Park, which borders the Lake for pretty much the full breadth of the City, gradually transforms from lush green to a multi-colored patchwork. As nice as that all sounds and is, truthfully, there’s but one thing missing and, surprisingly, it has little to do with my adoptive home but everything to do with the time of year. It’s apples. I love apples. Cook ’em, bake ’em, turn ’em into sauce. Give me a pie, a tart, a crisp, a cobbler. How about a muffin? A piece of cake? A slice of  bread? A stack of flapjacks? Or, if all else fails, just give one to me raw. Believe me, you cannot go wrong offering me apples in any way, shape, or form.

So, for years, when Fall rolled around, I set about making pies and cobblers, with an occasional loaf of bread or a baked apple thrown in for good measure. This all changed 2 Summers ago when I bought my Roma Sauce Maker. (Do you hear a harp? I always hear a harp when I mention that strainer.) I bought it to process my tomatoes before freezing but I quickly learned that it was good for making apple sauce. Well, that was a game changer around this place.

In prior posts, I’ve mentioned the two boys that live above me with their Mom. The oldest, like most kids, loves sweets of any kind. The youngest is his polar opposite and doesn’t like sweets. Period. This poses a problem for me. I’d love to bring them ice cream, cookies, or whatever it is I’m making in the kitchen but I shy away from it because I don’t want the little guy to feel left out. That, however, was before my Roma Sauce Maker came home. (C’mon! You had to have heard that!) The Li’l Guy, you see, loves apple sauce. So, this time of year, he gets all the apple sauce he wants. That was, until very recently. Now, I CAN, which means the apple sauce I make today can, and will, be given to him next May when I give his brother some cookies, or, in July when I make ice cream for the house. And, best of all, he can still have plenty of apple sauce now, too! There really is an upside to this canning business. Who knew!

Now, as for the sauce, I am by no means an expert but I have had some pretty good luck with it. To begin, I never use anything but apples, a few ounces of organic apple juice, and a pinch of salt. That’s it, no sugar whatsoever and, for that matter, no cinnamon either. I use about 4 kinds of apples, all sweet, for every batch of sauce. This week, as shown, I used Molly Delicious, McIntosh, Honey Crisp, and Regal Gala. Because they’re so small, I selected 7 Galas and 6 of each of the other varieties; their total weight being 10 and a half pounds (4.8 kg). Although there’s no need to core or peel the apples when you use a strainer or food mill,  you still need to cut up the apples. So, I used my corer/slicer and, in about 10 minutes, had all of these in the pot and ready to go. Since I don’t add sugar or cinnamon to my apple sauce, there really isn’t a recipe to share. Instead, I’ll give you the steps that I follow and, as you’ll soon find out, making apple sauce isn’t at all difficult.

First off, select apples known for their sweetness — i.e., Gala, Honey Crisp, McIntosh, Pink Lady, Fuji, Delicious, Macoun, and Golden Delicious, to name a few. Begin by washing all the fruit and, if you have a strainer or food mill, cut the apples into equal-sized slices or chunks. If no strainer, peel and core the apples before chopping the apples. Place the apple pieces into a heavy bottomed sauce pan over medium heat. Add 4 to 6 oz apple juice and simmer, stirring frequently. You want the apple slices to be soft when finished. This could take anywhere from 30 to 60 minutes, depending upon your stove, the pot, the amount of apples, and whether you’ve offended the gods that morning. Once soft, pass the apples through your food strainer or food mill, separating the peel, core, and seeds from the pulp. If you haven’t a strainer or food mill, once the apples are soft enough, you can mash them with a potato masher or force the pulp through a sieve. No matter which method you use, place the resultant pulp into a sauce pan. This is when I season it with a pinch of salt. You may wish to add sugar or cinnamon, to taste. If you’ve chosen your apples carefully, however, I think you’ll be surprised to learn just how sweet it is — and how totally unnecessary the sugar is. At this point, you can place it in your fridge where it will last about a week; cool it and freeze it; or can it.

If you chose to can it, according to the Pick Your Own website, you will need to re-heat the sauce; use clean, sterile jars that are still hot; use sterile tops and lids; and process in a boiling water bath for 15 minutes if using pint containers or 20 minutes if using quarts. Once removed from the boiling bath, place on a towel-covered baking sheet and place in a spot away from drafts where they will remain undisturbed for 12 to 24 hours.

My 10 and a half pounds of apples resulted in 6 pints of apple sauce. I canned 3 pints and froze the remainder in 6 single cup-sized containers. He doesn’t know it yet but there’s going to be one happy little boy living above me.

*     *     *

OK. One last time. Roma Sauce Maker! All right, this time I agree with you. I couldn’t hear the harp because the fanfare was blaring. You did hear the fanfare, right? Right?

*     *     *