Today’s Jam is a Real Plum, Damson Plum with Cardamom

My poor Damson plums. Way back in September, I bought 2 overflowing quarts of the diminutive beauties, planning to make and freeze cobblers. Yum, right? Well, this was the Saturday before I was to leave for Michigan and, as luck would have it, there was no time for making cobbler before I left. No problem. I’d bring them to Michigan with me and make cobblers for Zia. The night before I was to leave, I placed the bag of plums on my dining table, along with some of the parts to my ice cream machine. A few hours later, I finished loading the car and left for Michigan. Once there, I realized I had left everything on the table. Poor Zia. She got neither cobbler nor ice cream during my last visit.

*     *     *

Damson Plum Jam 2

*     *     *

Upon my return home, as I unpacked the car I passed by that bag of plums a few times. I really wasn’t in any hurry to look inside, figuring it would be an unsightly mess, at best. So, once everything was unpacked, and with my laundry going, I decided to brave the bag and have a peek. Unbelievably, they were pretty much as I had left them. I dumped them into a colander and, though a few were smashed, none were spoilt. I discarded those that were smashed and rinsed the rest. Now, what to do with them?

Sadly, the cobbler idea had lost its appeal. Having brought home plenty of apples, there were pies and apple cake (recipe forthcoming) in my future and I just wasn’t interested in making cobbler anymore. (A decision I’m sure to regret this Winter.) That meant my long-neglected plums would be used to make jam.

Damson plums are smaller than others and their peel ranges from dark blue to black, some with a hint of deep purple. (Sorry, I forgot to photograph them fresh. See? Neglected.) The flesh is greenish-yellow and the pits adhere to that flesh, something you’ll need to consider when using them in a recipe. When it comes to taste, the flesh is somewhat sweet while the skin is a bit tart. For me, this makes Damson plums perfect for jam. Use a little sugar for a tart jam, more for a sweeter taste.

Today’s recipe is a basic jam and no pectin is required. The only questionable part is the addition of the cardamom pods. If you want, you can just toss them into the pot and fish them out of the plums when you remove the pits. Personally, I don’t like that method. It’s far too likely for one to slip past me and, guaranteed, it will be in a jar that I give to a friend or family member. I much prefer to tie the pods in cheesecloth before placing them in the pot. Depending upon how much cardamom flavor you like, the pod package can be put back into the pot after the plum pits have been removed, an option not available if your use the pods alone. Other than the use of the cardamom pods, you’ll find the recipe to be straight-forward.

*     *     *

Damson Plum Jam - 1

*     *     *

Damson Plum with Cardamom Jam Recipe

Ingredients

  • 36 oz. (1 kg) damson plums
  • 3 c sugar
  • 1 c water
  • 5 cardamom pods (refer to above commentary and Notes)
  • pinch of salt

Directions

  1. Rinse the plums, removing any stems in the process.
  2. Place the plums, cardamom pods, and water in a thick-bottomed pot over medium-high heat and bring to a boil. Reduce heat to low and simmer for about an hour. Remove from heat and allow to cool to touch.
  3. Using your hands, squeeze each plum to remove the pit. Discard the pits as well as all the cardamom pods. Reserve everything else.
    1. Alternately, a food mill may be used to remove the pits and pods.
  4. Place the broken down plums back into the thick-bottomed pot. Add sugar, salt, and cook over medium to med-high heat until a temperature of 320˚ F (160˚ C) is reached.
  5. Test to see if jam is ready (See Notes).
  6. If your plums are jamming, place in sterile jars and seal.
    1. They may be refrigerated and will keep for about a month.
    2. They may be frozen and will keep up to a year. Once thawed, use within 3 weeks.
    3. If preserved/canned (see Notes), jam will keep up to a year if stored in a cool, dark place. Once opened, use within a month.
    4. Source: Home Center For Home Food Preservation
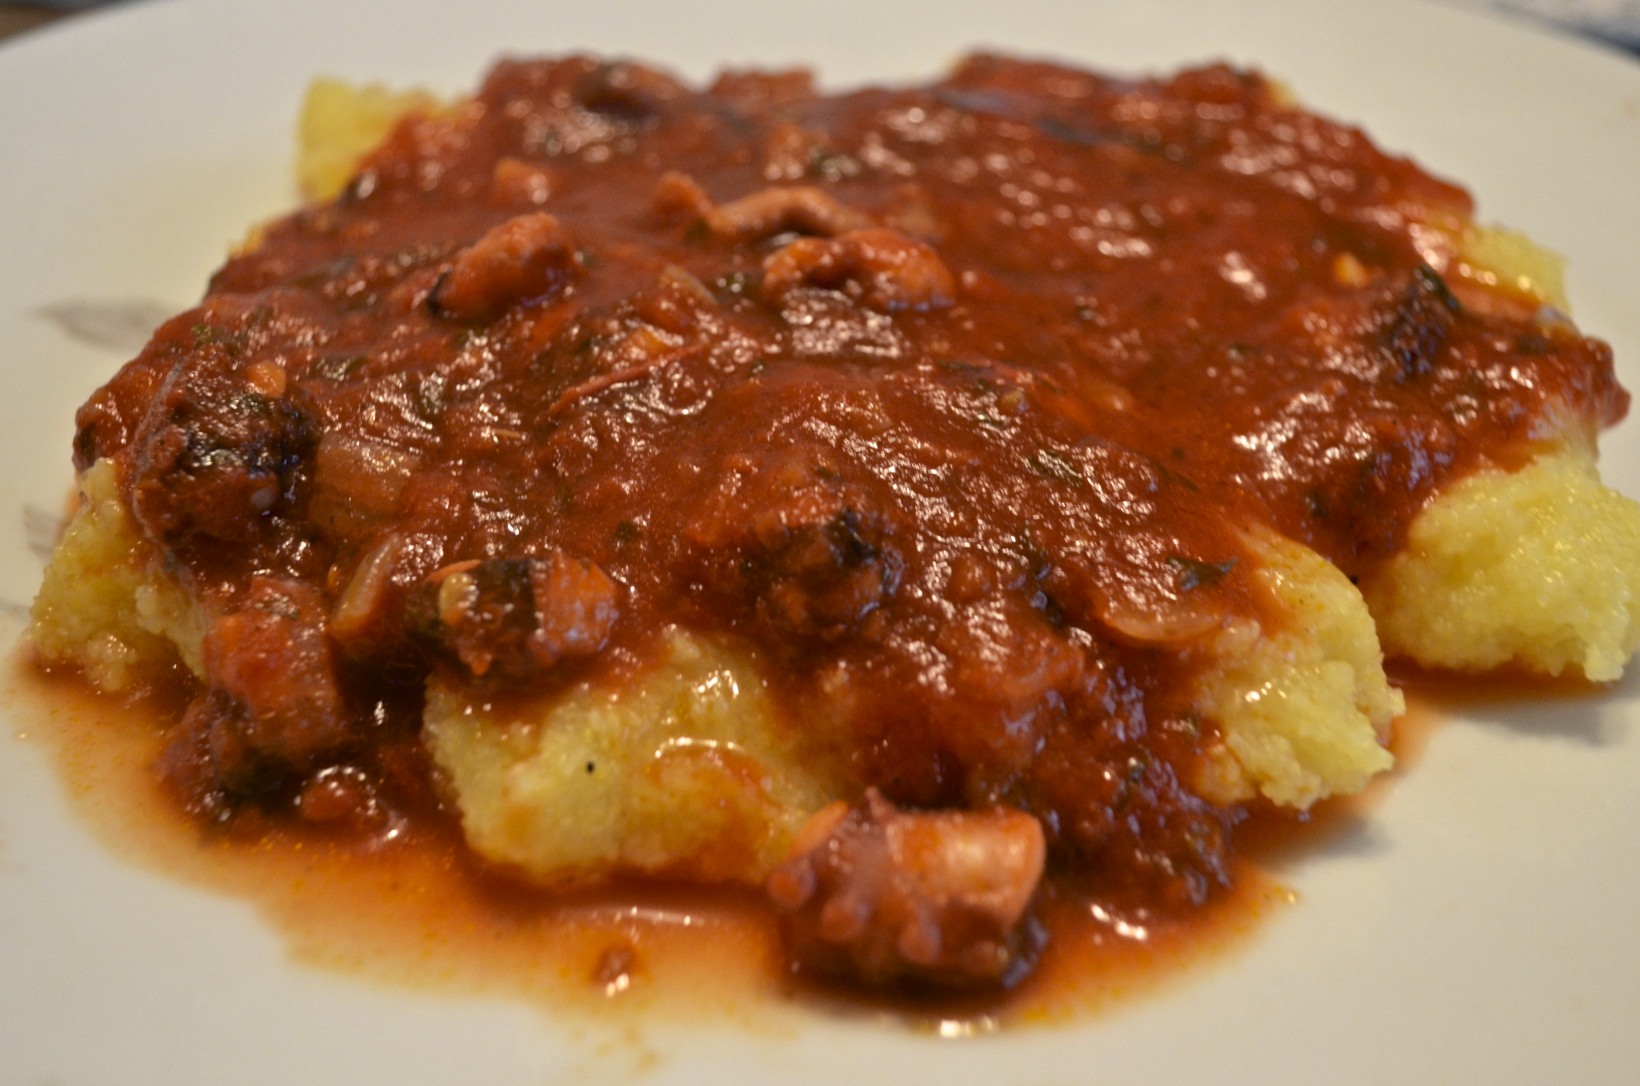
  7. Serve as you would your favorite jam and may be used to flavor roasts, particularly pork.

*     *     *

Damson Plum Jam 4

*     *     *

Notes

According to a number of sites, 5 cardamom pods would equal about 3/4 tsp of ground cardamom. I have not prepared this jam using ground cardamom, so, I’ve no idea whether it will have a stronger taste.

Though there are a few methods of testing to see if your fruit is jammin’, I prefer to use the plate test. While the fruit/berries are boiling on the stove top, place a dish in your freezer. When you think the jam is ready, take about a half-teaspoon of jam and place it on the now chilled plate. Allow the jam to rest a few minutes before using another spoon or your fingertip to see if the jam has set or is still too runny. If the latter, continue to simmer the jam while returning the plate to the freezer to await the next test.

Canning this jam is simple and not unlike other jams & jellies. Once the jam is ready, fill the sterilized jars, leaving 1/2 inch head space. Place lids on top of each jar, tightening until not quite as tight as possible. (I tighten mine fully and then unscrew the lid slightly.) Place each jar on a rack in a large pot of boiling water. Jars must not sit directly on the kettle bottom. Once the pot returns to the boil, begin timing. This jam will need to be processed (boiled) for 10 minutes, if using half-pint or smaller jars (235 ml or smaller). After 10 minutes, remove jars to a cloth-covered counter or baking sheet, away from any drafts. Do not move for at least 12 hours — 24 hours is best — so that the jars fully seal and the jam sets.

*     *     *

It’s déjà vu all over again …

Roast Loin of Pork

Roast Loin of Pork

When our temperatures start to drop, I begin to think of preparing roasts for dinner. The oven brings welcome warmth to the kitchen and my house soon fills with the heavenly aroma of a roast in that oven. About a year ago, I posted a recipe for roast loin of pork that was butterflied, slathered with fig preserves and wrapped in pancetta before roasting. The result was a dinner fit for a holiday. You can see the recipe, along with step-by-step instructions, by clicking HERE.

*     *     *

Coming soon to a monitor near you …

Roasted Arctic Char 3

 Roasted Arctic Char

*     *     *

This Recipe has Legs: Strangozzi Pasta with Octopus

Strangozzi al Polipi

Recentlyour good friend Tanya, of Chica Andaluza fame, shared a recipe for Carpaccio of Octopus. (Do check out that recipe and, while you’re at it, take a few minutes to explore the rest of her fantastic blog.) I’d not thought about octopus in years and that post reminded me that my family once cooked octopus, polipo. I spoke to Zia about it and we decided to prepare it the next time I visited her. That visit took place last month and, with Monday having been Columbus Day, I thought octopus would make a fine way to commemorate his voyage across the Atlantic. After all, there were those that believed his ships would be sunk by a giant octopus long before they fell off the edge of the Earth.

*     *     *

Strangozzi al Polipi

Strangozzi al Polipi

*     *     *

It’s been quite some time since an octopus was given the place of honor at a Bartolini dinner — more than half a century, but who’s counting? We really have no reason for it not being served since then. The dish is delicious, reminiscent of calamari in umido, and it isn’t at all difficult to prepare. No matter. The dish was prepared by my family at one time and thereby has earned a page on this blog.

Back in the day, we would have prepared the octopus in umido, which in this case means stewed in a tomato sauce. Served in bowls with a chunk of good, crusty bread, the dish is delicious and, in some homes, is one of the dishes on the menu for the Feast of the Seven Fishes on Christmas Eve. Originally, I had planned to prepare today’s recipe in umido until reality intervened.

As of now, I know of only one place to buy octopus and that’s at my Italian market. Unfortunately, they only sell very small or very large octopi and each poses a problem for us. When you cook something in umido, it is best that the protein be in large pieces. This is not a soup but a stew, after all, and the pieces should reflect that. Well, the small octopi are so small that it would take 4 to equal a pound (450 g). When chopped, the

Octopus over Polenta

Octopus over Polenta

pieces are far too small for in umido presentation. In fact, Zia and I attempted to serve them over polenta and, though tasty, all but a few pieces were too small even for that. On the other end of the spectrum, the market sells frozen octopi that are 4 and 5 lbs. apiece. Though that would be wonderful to prepare for a Bartolini family dinner, an octopus that size is far too large for a meal for Zia and I. So, although we had to change the dish to suit the circumstances, the search is on now for an octopus weighing 1 pound. When I find one, I’ll either create a separate Polipo in Umido post or amend this one to include that recipe. Bear in mind, though, that the ingredients used in the in umido recipe are the same as those used here for this sauce. Differences, if there are any, will be in the amounts listed. I’ll only be sure of that once I find an octopus in the right size.

Since we couldn’t serve the octopus as we had originally intended, in umido, Zia and I served it over polenta. As I mentioned earlier, that dish didn’t quite work as well as we Bartolini Strangozzi Pastathought it would. Again the octopus pieces needed to be larger. Once home, I bought 3 more small octopi and decided to serve them over pasta. As luck would have it, a few weeks earlier my blogging friend, Lidia, had noticed something while shopping and sent her discovery to me. (Not only does she share the name of one of my favorite chefs, Lidia has a wonderful blog, Oh Lidia, and I hope you take time to have a look.) You can imagine my surprise when I opened the carton and found 3 pastas manufactured by a company called “Bartolini”. I can’t think of a better pasta to serve with this old family recipe than one that shares our family name. So, of the 3 sent, I chose to prepare strangozzi.

In an earlier post, I demonstrated how to make strozzapreti pasta and gave an account of how it got its name. (See It’s déjà vu all over again … ) Strozzapreti, you see, means priest choker and one legend states that this pasta was so delicious that priests choked when eating it for the first time. What does this have to do with strangozzi? Well, it is thought that the word strangozzi is derived from the Italian word for shoelaces, stringhe, yet this pasta has come to mean priest stranglers. Huh?  Stay with me. Centuries ago, in Umbria, the clergy was not looked upon kindly by the villagers. Legend says that they chased down the worst of the clergy and those that were caught were strangled with their shoelaces. These long pasta ribbons are thought to resemble those shoelaces. Death by shoelace immortalized in pasta. Ya gotta love it!

In reality, strangozzi are about the size of what we would call linguine, the only difference being in their thickness. Our linguine are cut from thin pasta sheets; strangozzi is cut from sheets twice as thick. The result is a hearty pasta that is perfect for heavier or meat-based sauces.

*     *     *

Before beginning the recipe, the octopus must be cleaned and readied. The head is actually a hood and the contents of its interior need to be removed. It is easy enough to do and you can slice its side to make it even easier. Next, the eyes must be removed. Make a small slice on either side of each eye, creating a small wedge. Remove each wedge and the eye with it. Since these octopi were so small, I sliced the octopus just above both eyes and again below, creating a ring. I then cut the eyes off of the ring. One last thing to be removed is the beak. Turning the octopus upside-down, you’ll notice a small whole at the center of the 8 legs. With your fingers, carefully feel the beak and note its size. With a sharp knife, cut around the beak and remove. Now that it’s cleaned, cut the legs section in half, creating 2 parts with 4 legs apiece. Cut those pieces in half again, and then again. In the end, you will have separated all 8 legs. Do not chop them but leave them whole and proceed with the recipe.

*     *     *

Click to see any/all photos enlarged.

*     *     *

Strangozzi Pasta with Octopus Recipe

Ingredients

  • octopus (See Notes)
  • 3 tbsp extra virgin olive oil
  • 1/4 tsp red pepper flakes (more or less to taste)
  • 1 small onion, diced
  • 2 cloves garlic, minced or grated
  • 1/3 cup chopped parsley
  • 1 large can, 28 oz (800 g), whole tomatoes – hand-torn
  • 1/2 tsp dried marjoram (2 tsp fresh)
  • 3 to 4 oz dry white wine
  • 1 lb  (450 g) cooked Strangozzi pasta — or whatever pasta you prefer — cooked al dente
  • reserved pasta water

Directions

  1. In a medium saucepan over med-high heat, bring to boil enough water to cover the octopus. Add the octopus and allow to simmer for 1 to 2 minutes after the pot returns to the boil. Small octopus should boil for 1 minute. Larger should be allowed to boil closer to 2 minutes. Remove the octopus and place in an ice bath to stop the cooking process and reserve. Once cooled, see Notes for chopping considerations.
  2. Over med-high heat, add olive oil in a medium sauce pan.
  3. Add red pepper flakes, onion, garlic, and parsley. Season with salt and pepper before sautéing until the onion is translucent and garlic fragrant — about 6 to 8 minutes.
  4. Add the tomatoes, wine, and marjoram, stir to combine. Bring to a boil before reducing to a soft simmer.
  5. After the sauce has thickened and darkened a bit — about 30 minutes — add the chopped octopus and continue to simmer.
  6. If using small octopi, it should be finished cooking in about 20 minutes. Taste a piece after 15 minutes to test for doneness and to check the seasoning. If necessary, add some of the reserved pasta water. (See Notes)
  7. Meanwhile, the pasta should have been cooked al dente and strained. Be sure to reserve some of the pasta water.
  8. In a large bowl or serving platter, combine the octopus sauce with the cooked pasta and mix. If the pasta seems too dry, add some of the reserved pasta water.
  9. Serve immediately.
  10. Like all mildly flavored seafood pastas, grated cheese is not recommended for it will overpower the dish.

*     *     *

*     *     *

Notes

The dish will determine the size of the pieces when chopping the octopus.

  • For pasta dishes, I would suggest chopping small octopi into pieces about 3/4 inches (2 cm). These pieces will shrink a little during cooking and will be easily managed no matter what pasta you choose.
  • For in umido, a larger octopus should be used and, when chopped, the pieces should be larger. Ultimately, the size will depend upon how comfortable you are dealing with the pieces while eating. Even so, I would suggest that all pieces be no less than an inch (2.5 cm) long. (Since this recipe was posted, I did find and prepare a 1 lb. octopus in umido. You can see that recipe by clicking HERE.)

No matter the preparation or the size of the pieces, do try to keep them all the same size. Doing so will ensure that all the octopus is evenly cooked.

Understandably, the larger the octopus, the longer it should simmer in the tomato sauce. A small octopus should take 15 to 20 minutes, as was stated in the recipe above. Larger octopi will take up to 30 minutes, maybe more. Be careful not to overcook lest the octopus become rubbery. If in doubt, taste a piece to see if it is cooked to your liking.

For reasons unknown to me, we’ve always discarded the water used to blanch the octopus. Even though the octopus is in it only briefly, the water does darken in color.

*     *     *

It’s déjà vu all over again …

Strozzapreti with Pesto

Strozzapreti with Pesto

With all of this talk of strangling priests, it’s only logical that today’s look back would be to the strozzapreti post. Not only will you learn how to make the pasta by hand, you’ll also learn how a few of the common pastas got their names. All this can be yours just by clicking HERE.

*     *     *

Coming soon to a monitor near you …

Damson Plum Jam Preview

Damson Plum Jam

*     *     *

Blueberry-Lemon Slice

Blueberry-Lemon Slice

As many of you know, I spend some of my spare time watching a variety of cooking shows. (Note that I didn’t say the Food Network. Since they’ve gone to the dark side of broadcasting — a.k.a. “reality” TV — I watch that network far less.) Since I can not always watch them when broadcast, many of these programs end up recorded on my DVR. Then, on some rainy day or sleepless night, I’ll clear my DVR of these recordings, zipping through the programs hoping that something will catch my eye. That’s how I found today’s recipe and it was quite a catch, even if I do say so myself.

If you’re at all like me, you enjoy the combination of blueberry and lemon flavors. After all, a blueberry muffin without a hint of lemon is just a muffin. These slices have an abundance of both ingredients and the result is one delicious treat. It’s ridiculously easy to prepare and there are no exotic nor hard-to-find ingredients. If you don’t have fresh blueberries, go ahead and use frozen. In fact, I always buy and freeze blueberries at the peak of their season, so, that I can enjoy blueberry pie when the cold weather hits. This Winter I’ll have a slice, too. If you try this recipe, I bet I won’t be the only one.

*     *     *

Blueberry-Lemon Slice Recipe

Ingredients

  • 2 cups all-purpose (AP) flour
  • 1 cup sugar, divided
  • 1 tbsp baking powder
  • 2 tsp salt
  • 1 egg yolk mixed with 1 tbsp water
  • zest & juice of 1 lemon
  • 10 tbsp butter, cubed and placed in freezer for about 30 minutes
  • 3 cups blueberries, fresh or frozen may be used
  • 1 tbsp cornstarch
  • pinch of salt

 *     *     *

This slideshow requires JavaScript.

*     *     *

Directions

  1. Pre-heat oven to 350˚ F (177˚ C)
  2. Place flour, sugar, baking powder, salt and lemon zest in a food processor. Process the ingredients till thoroughly mixed. Add the egg mixture and continue to whirl until combined.
  3. Place the very chilled butter cubes into the food processor. Pulse the ingredients, repeatedly, until the mixture looks like little pearls,
  4. Reserve 2 cups of the crumble mixture and use the rest to cover a greased 9 X 9″ baking dish. Press it down to form a crust.
  5. Meanwhile, place the blueberries, remaining sugar, lemon juice, corn starch, and a pinch of salt into a large bowl. Gently stir until everything is evenly coated.
  6. Once the bottom crust has been formed in the baking dish, pour the blueberries into the baking dish, covering the crust.
  7. Use the reserved crumble to cover the blueberries.
  8. Bake in a pre-heated oven for 35 to 45 minutes. Blueberries should be soft and the crumble browned to your satisfaction.
  9. Allow to cool and set before cutting into squares.
  10. Serve as-is or with optional Lemon Cream & Limoncello Syrup. (See Notes)

Inspired by Clinton Kelly’s Blueberry Pucker Bars, on The Chew

*     *     *

Blueberry-Lemon Slice

*     *     *

Notes …

The sharp-eyed among you may notice that I used an 8 X 8″ baking dish and not the 9 X 9″ dish indicated in the recipe. My 9 X 9″ dish met an untimely end when it crashed into the floor. It was empty, thankfully.

Although I’ve never done so, it’s suggested these slices be served with a Lemon Cream & Limoncello Syrup. Here’s that recipe, also from The Chew:

Ingredients

1 cup limoncello
1/2 cup heavy cream
1 tablespoon granulated sugar
1/4 cup lemon curd

Directions

  1. In a small sauce pan over medium heat, reduce limoncello by half. Refrigerate until well-chilled.
  2. Meanwhile, whip together heavy cream with sugar until stiff peaks form. Fold in lemon curd.
  3. When ready to serve, place a dollop of the lemon cream mixture atop each slice, accompanied by a drizzle of the limoncello reduction.

*     *     *

It’s déjà vu all over again …

PuffballBack in our part of Michigan, it’s puffball season. Well, it’s supposed to be but you never really know until your find them. Sometime during October, these large, oblong-shaped funghi appear in areas that are mostly shaded from the sun. Up until a few years ago, 1 to 3 of them could be found behind Zia’s garage. Now, for reasons known only to Mother Nature, they’ve moved to its side. You needn’t worry about that, though, for you can find some, as well as learn how to prepare them,  by clicking HERE.

*     *     *

Coming soon to a monitor near you …

Preview

Something Special to Commemorate Columbus Day

Octopus

*     *     *

Braised Goat in the Moorish Style

Capra Basata nello Stile di Moresco

Braised Goat with Harissa

I’m back and the Kitchens are once again open. Zia and I thank you all for your kind words and well wishes. She sends her warm regards. She, also, sent me home with a few new recipes — octopus and quail are at the top of that list — and I’ll be sharing them in the weeks to come.

Of course, we did buy our share of honey, over 4 gallons between the two of us. Although I brought home 2.25 gallons (8.5 l), almost all went to my neighbors for distribution among their family members. The “Honey Man”, Mr. Falkenberg, has about 100 hives and they produce enough honey for him to sell it in some of that area’s markets, as well as during not one but two weekends this year. He also sold apples, grapes, and black walnuts.  I bought a 5 pound bucket of grapes for $2.00 and used them to make grape jelly yesterday. The apples were used to make apple sauce and my Zia Mariolla’s apple cake. That recipe will be shared in the near future.

*     *     *

(Click to enlarge any photo)

*     *     *

I’ve mentioned in the past that my family prepared goat, very often at Easter. As the years past, we relied more upon lamb for that holiday meal and I cannot tell you the last time I enjoyed goat in any form. Worse yet, I had no idea where I might purchase some. Well, that all changed a few weeks ago. I didn’t realize it but the vendor at the farmers market from whom I buy organic chicken also sells a variety of meats, goat being among them. Although I couldn’t buy any at the time, I knew I’d be back to purchase some. And that’s the last I’ve seen of that vendor. For whatever reason, they are no longer at the farmers market. Not only did I lose my long sought-after source for fresh goat meat but I lost my organic chicken vendor, too.

Well, returning home after the third week of the vendor’s absence, I decided to take matters into my own hands. I pulled the car to the curb and googled, “Where to buy goat in Chicago?” Lo and behold! Just about a half-mile from my home, there’s a Middle Eastern grocery and butcher. It’s one block West of the Indian market where I buy spices and I’ve walked past it any number of times. Within minutes, I was on my way with a goat shoulder wrapped in brown paper.

Once home and after a quick web search, I settled upon a great recipe. Unfortunately, it required harissa and I didn’t have a recipe for the sauce nor did I feel like experimenting. So, I did what I often do. I went to the Middle East Bakery & Grocery, a little gem of a store located in my old neighborhood. As luck would have it, they make their own harissa on-site and it’s good enough to be used in a number of the restaurants in town.

So, with a goat shouder on the counter, harissa in-hand, and a jar of preserved lemons hiding out in the back of my fridge, I set about making braised goat — but with one major difference. The original recipe uses a dutch oven to braise the roast, slowly, in the oven. When I finally bought the meat, Summer had returned to this area with a vengeance, I wasn’t about to turn on my oven for anything, let alone a long and slow braise. Instead, I pulled out the slow cooker and my kitchen kept its cool. This is the version described in the recipe below.

Oh! One more thing. I will be bringing some goat with me to Michigan next time so that I can learn and share my family’s recipe for roasting it. Get ready, Zia!

*     *     *

Raw Goat Shoulder

*     *     *

Goat in the Moorish Style Recipe

Ingredients

  • 1 cup harissa for marinade
  • 2 – 3 tbsp extra virgin olive oil
  • 2 carrots, chopped
  • 1 large onion, sliced
  • 6 cloves garlic, smashed
  • 2 bay leaves
  • 1 cinnamon stick
  • 3 cilantro stems – that’s right, I’m using cilantro
  • 2 cups low/no sodium chicken stock
  • 1/2 cup dry white wine
  • 1 tbsp honey
  • the rind from half of a preserved lemon, finely chopped
  • salt and pepper
  • harissa for serving
  • Greek yogurt for serving

*     *     *

Goat ready to be cooked

*     *     *

Directions

  1. With a very sharp knife, remove gray skin from the meat. Season with salt & pepper.
  2. Place meat in a large, seal-able plastic bag, add the harissa and completely coat the meat. Place the bag and contents in the fridge overnight. Turn bag over every couple of hours. Remove from fridge 1 hour before cooking is to begin.
  3. Heat oil over med-high heat in a medium sauté pan. Add onions, carrot, garlic, bay leaves, and cinnamon stick, sautéing until soft and fragrant. Season with salt and pepper.
  4. Meanwhile, place stock, white wine, and honey in a small sauce pan, bring to a boil, and then keep warm over a very low flame.
  5. Once the vegetables have been sautéed, dump that pan’s contents into the slow cooker. Add the cilantro and stir.
  6. Place the goat meat atop the vegetables, Be sure to include any remaining harissa left in the bag.
  7. Pour the wine mixture around the roast in the slow cooker. Cover and set to “Low”.
  8. Turn the roast after 1 hour, and then again every 2 hours after. Roast will be cooked in 8 hours.
  9. After 8 hours, remove roast to a dish and cover. Strain the pan juices, discarding the braising vegetables. Set aside to allow the fat to separate and then remove.
  10. See Serving Suggestions below

Inspired by a recipe in the NY Times.

*     *     *

Goat Plated

*     *     *

Serving Suggestions

1) Once cooked, the roast can be carved and served as-is. Sprinkle with the preserved lemon. Suggested accompaniments would be rice, yogurt, and a bit of harissa on the side. The sauce can be reduced to the thickness of your choice. Check for seasoning before serving on the side.

2) Debone the cooked roast and treat it as you would pulled pork. Return in to the slow cooker. Add the preserved lemon and mix thoroughly. Reduce the sauce to the desired thickness and either add it to the pulled goat or serve on the side.

*     *     *

Goat Sandwich on Baby Arugula with Greek Yogurt and Harissa

Pulled Goat Sandwich on Baby Arugula with Greek Yogurt and Harissa

*     *     *

It’s déjà vu all over again …

About a year ago, I posted a recipe for plum cobbler that I jokingly called “magical.” What I didn’t know, but learned while I was visiting Zia, was that the recipe contained a typo. Instead of listing “1 TBSP baking powder”, I had written “1 TSP baking powder.” Big difference, no? I’ve since corrected the recipe  and please make sure you do the same if you’ve made a copy for yourself.

*     *     *

Coming soon to a monitor near you …

_DSC0001 2

Blueberry-Lemon Slice

*     *     *

Tart Cherry Frozen Yogurt

Those of you who have followed my blog for some time know that August is Birthday Month for many of my friends and family. Mom and her Mother, Uncle and his Sister, Friends and Tasters, Nephews and a Boy Upstairs, and too many more to mention were all born in the 8th month. You might, also, recall, that Mom loved ice cream and to commemorate her birthday, I normally post ice cream recipes in August. Note the word “normally.”

*     *     *

Tart Cherry Frozen Yogurt

*     *     *

This year I though I would switch things up a bit. You see, about 20 years ago, I bought a fancy schmancy gelato maker and it broke long before the investment paid for itself in tasty frozen treats. Its recipe book survived, however, and one day I made a batch of “frozen yogurt.” Everyone loved it and marveled at the creaminess of this low-fat dessert. The only problem was that, just like the old Seinfeld episode, it wasn’t at all low-fat. There was just as much heavy cream in it as I use in normal ice cream. Yes, there was a little yogurt in the mix but nowhere near enough to justify it being called “frozen yogurt,” let alone “low-fat.” That was about 7 years ago and I’ve never attempted to make frozen yogurt again — until now.

With Birthday Month already underway, I turned to another recipe book for inspiration. I soon found it in the form of a tart cherry frozen yogurt. You see, on my return home following my last visit with Zia, I stopped at a farm and purchased 20 pounds of frozen, pitted tart cherries. (You may be interested to learn that Michigan produces as much as 70% of our country’s tart cherries.) Once home, I delivered some to a neighbor and the rest of the tarts are sitting pretty in my freezer.

So, with recipe and cherries in hand, I made my first batch of frozen yogurt. Unfortunately, it wasn’t at all what I had expected. Sure, the flavor was outstanding but its texture was very much like a sorbet rather than a creamy, frosted confection. Worse, I had doubled the recipe and now had 6 cups (1400 ml) of the stuff to eat — and eat it I did. Waste a frozen dessert in Mom’s Birthday Month? Never! Convinced I had made a mistake — not at all an uncommon occurrence in my kitchen — I tried it again, though this time I made a single batch. The result was the same and I had another 3 cups of frozen yogurt/sorbet to eat.  All the while, Birthday Month marched on.

Last week, having eaten 9 cups of the stuff during what had to have been the coolest August on record, I decided to try again. This time, I put aside the recipe book and borrowed a page from the old gelato maker’s recipes. I added heavy cream. That’s right, heavy cream and I played around with the other ingredient amounts, as well. The result? A frozen yogurt with a texture far closer to ice cream than sorbet and a tart cherry flavor that is oh, so very good. Not only that but since I made this dessert, Summer has returned and our temperatures have soared at least 10˚ F above normal for this time of year. Message received, Mom.

*     *     *

Tart Cherries - 1

*     *     *

In retrospect, I think the poor texture was due to the amount of liquid contained in the bags of frozen cherries. I bet if I had drained much of the liquid, the texture probably would have been less icy. It may have, also, been less flavorful. I guess the World will have to wait for the answer because I don’t think I’ll be making tart cherry yogurt again for quite some time — well, at least until next August, anyway.

*     *     *

Tart Cherry Frozen Yogurt

Ingredients

  • 1 lb (455 g) of tart cherries, pitted
  • 2/3 cup (135 g) sugar
  • pinch of salt
  • a few drops almond extract
  • 1 cups (245 g) whole-milk Greek yogurt
  • 4 oz (118 ml) heavy cream — the more the merrier

Directions

yield: a little less than 1 quart

  1. Place cherries and sugar in a medium sauce pan over med-high heat. Cover, bring to a boil, reduce heat, and simmer for 5 minutes.
  2. Remove from heat and allow to come to room temperature.
  3. Add the almond extract and place the cherries and juice into a food processor or blender. Process until smooth.
  4. Place mixture in a bowl, cover with plastic wrap, and chill in the refrigerator for at least 2 hours.
  5. Once fully chilled, stir to combine the cherries, heavy cream, and Greek yogurt.
  6. Add the mixture to your ice cream maker and process according to the manufacturer’s directions.
  7. Serve or freeze until the yogurt is frozen to your satisfaction.

Originally inspired by David Lebovitz, “The Perfect Scoop”

*     *     *

To make the chocolate sauce:

Melt 4 oz (110 g) in the top of a double boiler. Once melted, add 2 oz (60 ml) warmed heavy cream, a pinch of salt, and mix to combine. Take the chocolate off of the heat and add an 1/8 tsp of vanilla. Stir and serve.

*     *     *

*     *     *

Variations

While I was in the throes of trying to eat all of this sorbet masquerading as yogurt, Sally, creator of the enchanting Bewitching Kitchen blog, posted a recipe for blackberry-cherry yogurt, In it, she used banana to smooth the texture. Not heavy cream but banana! I had intended to follow her lead but Birthday Month was coming to an end faster than was my supply of substandard frozen yogurt. Not only that but there was heavy cream in the fridge but no bananas on the counter. I will, however, keep her “solution” in mind the next time I attempt to freeze yogurt.

Notes

Nothing goes better together than cherries and almonds. Even so, too much almond extract will totally overpower the tart cherry flavor. Use almond extract sparingly, tasting as you go.

This recipe will yield just under a quart of frozen yogurt. Let’s face it, one scant quart of any frozen dessert is hardly worth the effort to make it. Double the recipe and be happy.

*     *     *

It’s déjà vu all over again …

Nothing says "Happy Birthday!" like una bomba!

Nothing says “Happy Birthday!” like una bomba!

If we’re going to take a look back at the end of a frozen dessert post, there really is only one post deserving of mention, especially in August. For today’s blast from the past, I’m going to send you to the granddaddy ice cream post of them all. Yes, it’s the Spumoni Bomba. With layers of cherry, pistachio, and chocolate ice creams, this is one frozen treat your guests will never forget. All you need do is click HERE for the frosty details.

*     *     *

Coming soon to a monitor near you …

Pupster Peanut Butter

Pupster Peanut Butter

*     *     *

Ramps Ravioli with Morel Mushrooms

Ravioli della Cipolle Selvatiche con i Funghi della Spugnola Ramps Ravioli with Morel Mushrooms

You may recall that I visited my Zia last May and returned to Chicago with a number of recipes to share. Though it may have taken a while, today’s post is the last of those recipes, even if not quite what I had planned.

I had a devil of a time finding ramps this past Spring. My normal vendor didn’t harvest any and I was always just a bit late with my other sources. (Evidently ramps, like porcini mushrooms, are in big demand by the area’s restaurants.) Surprisingly, at the very end of the season, my fishmonger had some for sale. I bought up what he had, hoping that they would “keep” the 4 days before I left for Michigan and they did — kinda. Upon my arrival at Zia’s, I unwrapped the ramps, only to find the leaves to be a wilted, soggy mess. I quickly discarded them and kept the bulbs. This meant I would need something green for my ravioli and Zia and I decided fresh spinach would make a nice substitute. My attention now focused on the morels.

Known to but a few, there is a place near Zia’s home where morel mushrooms grow. Living 400 miles away, it is purely a matter of luck for me to be present when the pock Old Morelmarked fungi appear. Nonetheless, everyday I trotted out to the morel patch to see if anything had sprouted and everyday I returned home empty-handed. On the 4th day I gave up. Having had an inkling that this might happen, I had brought a package of dried morels with me to Michigan and used them in today’s dish. By the way, I continued to check the patch everyday until I left and none ever appeared. I did find one morel, however, far past its “use by” date, growing right next to Zia’s porch. I left it alone so that its spores could work their magic. I’ll be back next Spring.

Now, I know that it’s a little late in the year to be posting this recipe, both ramps and morels being out of season, but I did promise to post it. If you wish to prepare this now, you can follow my lead and use dried morels — a far cheaper substitute — and you can use shallots instead of the ramps. No, shallots and ramps are not the same thing but the shallots are readily available year-round and you won’t be at all disappointed with the ravioli.

*     *     *

Ramps Ravioli with Morel Mushrooms 2

*     *     *

Ramps Ravioli and Morel Mushroom Sauce Recipes

Ingredients

For the Ravioli Filling

  • 1/2 tbsp butter
  • 1/2 tbsp extra virgin olive oil
  • 2 cups packed, chopped fresh spinach
  • 1/2 cup ramps diced
  • 1/4 tsp nutmeg
  • 1/2 tsp sea/kosher salt, or to taste
  • 1/8 tsp pepper, or to taste
  • 1/4 cup Pecorino Romano cheese, grated
  • 8 oz (226 g) ricotta cheese, well-drained

For the Sauce

  • 1/2 oz (14 g) dried morels, re-hydrated, liquid strained and reserved
  • 1 tbsp butter
  • t tbsp extra virgin olive oil
  • 1 new garlic bulb, diced
  • 1 to 3 oz of dry white wine
  • 1 cup mushroom soaking liquid
  • 3 thyme stems
  • 1 tbsp butter
  • salt & pepper

*     *     *

Ramps Ravioli

*     *     *

Directions

For the Ravioli Filling

  1. In a frying pan, heat the butter and olive oil over med-high heat. Add the spinach and sauté until cooked through.
  2. Use a slotted spoon to remove the spinach to cool.
  3. Using the same pan, sauté the diced ramps until translucent, remove from heat, and allow to cool.
  4. Once cooled, place the spinach in a clean kitchen towel and wring out as much liquid as possible.
  5. In a mixing bowl, add the spinach, ramps, nutmeg, ricotta cheese, Pecorino Romano, salt, and pepper. Mix thoroughly.
  6. Refrigerate for a few hours or overnight to allow the flavors to meld and the cheese to firm, making it easier to work with later on.

To make ravioli using ravioli dies/molds, please click HERE to see an expert at work. There you’ll, also, find directions for cooking the pasta pillows.

*     *     *

Three morels

*     *     *

For the Morels “Sauce”

  1. In a frying pan, add the butter and olive oil over med-high heat. Add the garlic and sauté until fragrant, about 90 seconds.
  2. Add the morels and sauté for a few minutes, just long enough to give them a little color.
  3. Add the wine and sauté until all but gone.
  4. Add the mushroom soaking liquid and thyme and reduce until the consistency you like for the ravioli.
  5. Add the remaining butter and season with salt & pepper to taste.
  6. Use to lightly dress the ravioli prepared above.
  7. Serve immediately garnished with grated Pecorino Romano cheese.

*     *     *

Ramps Ravioli with Morel Mushrooms 3

*     *     *

Notes

Be aware that there are 2 types of mushrooms, known as false morels, that resemble morels but that are inedible. Do not go foraging for morels unless you know exactly what you are looking for. As is the case with all mushrooms, if in doubt, throw it out.

Morels should not be eaten raw. Stomach distress may result if they are not fully cooked before being eaten. Soaking them is not cooking them.

To re-hydrate morels, soak them in lukewarm water for 30 to 60 minutes before needed. Unlike most mushrooms, it wouldn’t hurt to first briefly hold them under running water to clear any grit that may be in the dimples.

*     *     *

It’s déjà vu all over again …

Tomato and Bread Soup

Tomato and Bread Soup

This is the time of year when gardens in this area are producing tomatoes of all shapes, sizes, and colors. If you don’t stay on top of the situation, you’ll soon be swamped with ripe tomatoes — and that’s true even if you’ve an Evil Squirrel to battle. Today’s blast from the past is a delicious way to utilize the excess. In fact, the more ripe the tomatoes, the better the dish. Pappa al Pomodoro, is a delicious soup that could not be easier to prepare. Just click HERE to learn all about it.

*     *     *

Coming soon to a monitor near you …

Tart Cherry Frozen Yogurt

Tart Cherry Frozen Yogurt

*     *     *

The Bartolini Family Risotto

Risotto della Famiglia di Bartolini

Risotto 1

This is it! The twice-delayed, much-anticipated, and another of the Bartolini Crown Jewels, my family’s risotto recipe. Though it’s been a long time coming, I think you’ll find it appealing, even if it is unlike most that you may know. You see, the Bartolini risotto is missing a couple of the dish’s standard ingredients and includes one that most do not — but we’ll discuss that in a bit.

Our risotto had quite a reputation among the branches of my family that did not reside in the two-flat. When our relatives from Cincinnati, at the time the southernmost members of the Clan, came for a visit, they had a standing request that this risotto be served as part of their welcoming dinner. I remember Mom making it for Dad’s Mother during her visits with us and risotto was often served when either of the two-flat’s families entertained. What made the Bartolini risotto so special? Chicken gizzards, an ingredient that was lacking from almost all other risotto recipes. If you liked gizzards, you loved this risotto. Of course, if you didn’t, well, you’d probably go hungry that night. The latter point being responsible for the greatest cover-up in the long and storied history of the Bartolini.

As popular as this dish was with the adults seated at the table, there was one member of the family, my sibling, who would have none of it. The child — henceforth referred to as “It” to protect “Its” identity — refused to eat them. Mom, in an effort to get the child to at least eat the risotto, told the child that they were “dried mushrooms” and “It” should put them aside and eat the rice. Knowing that the child balked at eating dried mushrooms, there’s no way so much as a grain of rice would have been eaten if “It” knew there were gizzards on that platter. Out of earshot of the child, Mom then turned to me and my other sibling, commanding we keep quiet about this, “Or else!”

Now, there’s nothing so unusual about what Mom did. After all, Mothers since the dawn of time have cajoled, bribed, and, yes, lied to their children, all in the name of good nutrition. (How many broccoli crowns have been hidden in meatloaf throughout the millennia?) No, the truly surprising thing about this tale is how long the ruse lasted.

We had all gathered at my Parent’s home for a family dinner, an event that had become more and more rare. When “It” noticed that Mom was preparing risotto, “It” asked Mom if dried mushrooms were to be included. Hearing that, I started to laugh and, much to Mom’s dismay, the cover-up was exposed. The astonishing fact is that the child was now in “Its” 30s! That’s right: 30’s! One “Or else!” from Mom and my sibling and I kept quiet for 3 decades. Kids today have it easy.

*     *     *

Our risotto is a bit more complicated than most. The gizzards, after all, must be cooked first. To do this, they are sautéed before being used to create a stock. As you’ll see in the recipe below, both the gizzards and the stock are then used to create the risotto. You’ll also note that 2 cups of Arborio rice are used. This will make a rather large platter of risotto. You may wish to reduce the amounts.

Risotto Recipe

Ingredients

  • 1 lb (455 g) chicken gizzards & hearts (see Notes)
  • 1 celery stalk
  • 1 carrot
  • 1 medium onion
  • 1 tbsp butterSautéing
  • 1 tbsp olive oil
  • water
  • 2 cups arborio rice
  • 2 tbsp butter
  • 1 small – medium onion, diced fine
  • 10 button or cremini mushrooms, chopped (see Notes)
  • 7 to 8 cups stock (see Notes)
  • salt & pepper, to taste
  • Pecorino Romano cheese

Directions

  1. Add the butter and olive oil to a saucepan over medium heat. Add the cleaned chicken gizzards to the pot and sauté for about 10 minutes. The object is to give them a bit of color, not fry them till fully cooked.
  2. Turn the heat to high before adding the onion, celery, carrot, and 2 quarts of water.
  3. Bring to a boil and reduce to a soft simmer. Continue to simmer for 90 minutes, removing any foam that may rise to the top.
  4. After 90 minutes, strain and reserve the stock. Remove the gizzards and set aside to cool. Remove the vegetables and discard.
  5. Once cooled to touch, chop the gizzards to your preference.
  6. In a large sauce pan or deep frying pan, melt the butter over med-high heat. Add the onion and sauté for about 5 minutes. Season with salt and pepper.
  7. Add the mushrooms and sauté for a few minutes until some color is achieved.
  8. Add the gizzards and sauté until heated through. The onion should be translucentSimmering away by this time. Season with salt and pepper.
  9. Add the rice and sauté for another 5 minutes or so to toast it. The grains should be partially opaque.
  10. Reduce the heat to medium, add a ladle or 2 of hot stock, and stir the rice. Though you needn’t stir it constantly, you shouldn’t leave it for more than a couple of minutes.
  11. When the stock is all but gone, add another ladle of stock and stir. Repeat this process again and again until the rice is just about cooked. This should take about 20 minutes and the risotto should not be gummy but very moist, though not so much as to be a soup.
  12. Taste and add salt & pepper, as needed.
  13. Turn off the heat, add a final ladle or 2 of stock, cover the pan, and let the risotto rest for 5 minutes.
  14. Add a handful or 2 of grated Pecorino Romano cheese, stir to combine, and place on the serving platter.
  15. Garnish with more grated cheese and serve.

*     *     *

Risotto 3

*     *     *

Variations

In many versions of risotto, white wine and saffron are added to the rice, although neither are used in my family’s risotto recipe. At a later date, I will post a recipe for Risotto alla Milanese, in which both ingredients are required.

Notes

In my area, chicken gizzards are sold in 1 lb packages. Before cooking, they must be rinsed and trimmed of any fatty and/or dark parts. Try to keep the fleshy parts as intact as possible. These will be chopped once cooked.

If you’re trying to “disguise” the gizzards, it’s best to chop the mushrooms in about the same size as the chopped gizzards, keeping in mind that the mushrooms will shrink when cooked.

The standard ratio of rice to stock when making risotto is about 1 to 3½, meaning for every cup of rice you’ll need 3½ cups of stock. It never hurts to have extra stock on hand just in case more is needed to cook the risotto.

The stock created with the chicken gizzards is relatively simple, with the few ingredients left in large pieces. This makes it far easier to retrieve the gizzards once cooked.

When ready to start cooking your risotto, combine  the stock made when cooking the gizzards with enough homemade chicken stock to give you the amount required in the recipe. Of course, store-bought, low-sodium, chicken stock may be substituted.

Keep the stock hot but not boiling. If kept boiling, much of it will immediately evaporate upon hitting the hot risotto pan without having a chance to be absorbed by the rice.

*     *     *

It’s déjà vu all over again … Corn RelishIt’s that time of the year again. In this part of the country, every grocery, market, and vegetable stand features at least one bin filled to over-flowing with ears of fresh corn. If you’re at all like me you just cannot get enough of the stuff. That’s all well and good for now, but what are you going to do come Fall when today’s surplus is but a memory? Well, with today’s blast from the past, you’ll be laughing all the way to the pantry. Zia’s Corn Relish is a great way to preserve today’s corn for tomorrow’s meals. It’s a simple recipe and you can find it by clicking HERE.

*     *     *

Coming soon to a monitor near you …

Ravioli with Morels

Ravioli made with Ramps and Dressed with Morel Mushroom Sauce

*     *     *

The Kitchens are in a Pickle

This post is really little more than a comedy of errors. I had another recipe in mind for today but that was before forces beyond my control intervened. You see, I was at the farmers market, minding my own business when I came upon the radishes, French breakfast radishes, no less. So, I bought them. Never mind that I was already lugging around a full shopping bag. Exiting the vendor’s stall, I literally bumped into the beets display. WIth my shirt now sporting a mixture of mud and beet juice, I thought it a sign and bought a bunch of large red beets. On the way out of the market, I bought a few more things, filling a 2nd bag, and headed for home.

*     *     *

*     *     *

Once home, I unpacked my bounty, dreaming of following Roger’s suggestion for buttery radishes and re-creating Mom’s beet salad. And that’s when it hit me. I’d be leaving for Michigan in a few days. I should be subtracting from my refrigerator’s shelves, not adding to them. WIth no possible way to clear my fridge before I was to leave, Plan B was put into effect: food preservation. I’d freeze some and the rest? Well, that’s how today’s pickling post was born and first up were the radishes.

Googling pickled radish recipes, I came upon one from David Lebovitz and looked no further. I’ve had very good luck with his recipes. Unfortunately, I didn’t have any white vinegar — this was a spur of the moment pickle, after all — so I married what I had until I reached the required amount. The radishes turned out great and, subsequently having earned Zia’s seal of approval, I see no reason to change things. The “married” amounts are the ones listed in the recipe’s ingredients.

Next were the beets. I didn’t have my own recipe, so, I again I turned to google. After checking a number of them out, I decided to wing it. The recipe below is the result. There’s one critical error, however. I had intended to use these beets in a salad but I included whole cloves in jars of red shoestring beets. How could anyone find those cloves when it’s time to serve the beets? With 2 jars already filled, I had little choice but to continue with the recipe, adding whole cloves to the remaining jars, watching them disappear into the beets. Since I had promised beets to some friends, I knew I would have to make more. These wouldn’t do.

The Saturday following my return from Michigan, I once again returned to the farmers market and bought 2 bunches of beets. This time I bought Chioggia beets, an Italian variety of heirloom beets with alternating red & white rings when cut. There was no way any cloves could hide among these beauties. Still, I wasn’t going to take any chances. These beets would be sliced rather than shredded. While the beets were roasting, I surfed the web looking at pickling recipes. I stumbled upon a USDA site and their recipe for pickled beets. With some changes, that’s the recipe I used and have shared below.

*     *     *

Shoestring Beets

Pickled Red “Shoestring” Beets Recipe

Ingredients

  • 1 bunch (4 or 5) large red beets, washed and greens removed
  • olive oil
  • 1 cup (235 ml) cider vinegar
  • 1 cup water (237 ml)
  • 1/2 cup (100 g) sugar
  • 1 tsp kosher salt
  • 2 cinnamon sticks, halved
  • 3 whole cloves per jar

Directions

  1. Pre-heat oven to 400˚ (205˚ C).
  2. Place washed beets on a foil line baking sheet, cover lightly with olive oil, and use another sheet  of foil to enclose the baking sheet and beets.
  3. Place beets in oven and bake for 45 minutes or until a knife can be inserted into a beet with little resistance.
  4. Uncover the beets and set aside until cool enough to handle.
  5. Beet skins should peel off, though a paring knife may be needed for some spots.
  6. Using a food processor with blade inserted, shred the beets created “shoestrings.”
  7. Meanwhile, add vinegar, water, salt, and sugar in a small sauce pan and heat until both are dissolved. Keep hot though not boiling.
  8. Using 4, sanitized pint-sized jars, add 1 clove and 1/2 stick of cinnamon to each. Add some beets, another clove, enough beets to fill, and one more clove. Add enough of the hot pickling liquid to fill each jar to within 1/2 inch of the jar’s top.
  9. Seal each jar until “finger tight” and process in a boiling water bath for 30 minutes, Remove from water and set, undisturbed, on a kitchen towel covered baking sheet in a draft-free spot. Jars may be moved after 24 hours.

*     *     *

“Quick Pickle” Radishes Recipe

Ingredients

  • 9 oz (260 g) radishes, cleaned, trimmed, and sliced thin.  Peel where needed.
  • 2 oz (60 g) red onion, sliced thin
  • 1 1/3 cup (316 ml) red wine vinegar
  • 2/3 cup (157 ml) cider vinegar
  • 1 cup water (237 ml)
  • 1 tbsp sugar
  • 1 tbsp kosher salt
  • 2 garlic cloves, cut in half
  • 24 green peppercorns, divided
  • 24 red peppercorns, divided

Directions

  1. Add vinegar, water, salt, and sugar in a small sauce pan and heat until both are dissolved. Set aside to cool.
  2. Using 4, sanitized, pint-sized jars, add 1/2 garlic clove and 6 of each, red and green peppercorns.
  3. Divide the onion and radishes evenly among the jars.
  4. Once cooled, pour enough pickling liquid to fill each jar within 1/2 inch of the top. Seal each jar with a sterile lid and refrigerate.

Inspired by David Lebovitz

*     *     *

Chioggia Beets

Pickled Sliced Chioggia Beets Recipe


Ingredients

  • 2 bunches (9 or 10) medium Chioggia beets, washed and greens removed
  • olive oil
  • 1 medium onion, sliced thin
  • 4 cups (950 ml) cider vinegar
  • 2 cup water (475 ml)
  • 2 cups (400 g) sugar
  • 2 tsp kosher salt
  • 3 cinnamon sticks
  • 10 whole cloves

Directions

  1. Pre-heat oven to 400˚ (205˚ C).
  2. Place washed beets on a foil line baking sheet, cover lightly with olive oil, and use another sheet  of foil to enclose the baking sheet and beets.
  3. Place beets in oven and bake for 45 minutes or until a knife can be inserted into a beet with little resistance.
  4. Uncover the beets and set aside until cool enough to handle.
  5. Beet skins should peel off, though a paring knife may be needed for some spots.
  6. Slice the beets as thin as you prefer.
  7. Meanwhile, place cinnamon sticks and cloves into a small pouch or piece of cheese cloth and tie to secure.
  8. Place vinegar, water, salt, sugar, and spice bag into a sauce pan and bring to the boil.
  9. Add sliced beets and onion, simmering for 5 minutes.
  10. Remove the spice bag and fill each jar with enough beets, onion, and pickling liquid to within 1/2 inch of the top.
  11. Seal each jar until “finger tight” and process in a boiling water bath for 30 minutes, Remove from water and set, undisturbed, on a kitchen towel covered baking sheet in a draft-free spot. Jars may be moved after 24 hours.

Inspired by National Center for Home Food Preservation

*     *     *

Notes

The radishes should sit in the refrigerator for a few days before use and they will last about 3 to 4 weeks if kept in the fridge. Both beet pickles are processed and will last for months on a cool, dark shelf. If you like, you can skip the boiling water bath, put a sterile lid on each jar, and refrigerate them. They, too, will last about 3 to 4 weeks this way.

Although I used French breakfast radishes for this post, I’ll use the more common, globe-shaped radishes for future pickles. They’ll produce larger slices, which I prefer.

You needn’t roast the beets before pickling. Many recipes suggest boiling the beets for 20 to 30 minutes before peeling and continuing with the pickling.

*     *     *

It’s déjà vu all over again …

Giardiniera-topped Mount Burger

Giardiniera-topped Mount Burger

It’s Summer and people are googling season-appropriate recipes. Pesto was hot but now my giardiniera recipe has caught the internet’s eye. It’s probably because the ingredients are all readily available now, as are reasons for having a jar on-hand. It is barbecue & picnic season, after all, and neither can be a success without a jar of giardiniera handy. You can find out what so many others are googling by simply clicking HERE.

*     *     *

Coming soon to a monitor near you …

Risotto Preview

Risotto

Let’s try this again, shall we?

*     *     *

Salted Cod Salad

Insalata del Baccalà For some, the timing of today’s post may seem rather odd. A salted cod salad is very often served in Italian households as part of the Feast of the Seven Fishes on Christmas Eve — but not in our house. We Bartolini prepared this salad virtually any time throughout the year except during the holidays. On Christmas Eve, we served our salted cod stewed in tomato sauce, baccalà in umido. Frankly, I prefer it this way, with a stew served in Winter and a salad served in the warmer months.

This is the third recipe I’ve shared that features salted cod. The first, Baccalà alla Marchigiana, is the stew that we served on Christmas Eve. In the second post, the cod was barbecued, although the same preparation could be used to bake the fish. Today’s recipe is a salad and a snap to make, once you’ve re-hydrated and rinsed the cod.

Briefly, in the days long before refrigeration, cod was dried and salted as a means of preservation. To make it suitable for cooking, the cod must be soaked in cold water for at least one day and no more than three. During that time, the water should be changed three times daily. The longer the soak, the less salty the taste. It is up to you to decide what level of salinity is acceptable.

With the cod re-hydrated, the dish, like most green salads, is really quite simple to prepare. Though the ingredients may have varied from one salad to the next, we always dressed our salad with a bit of red wine vinegar and olive oil. You, like many, may prefer to use lemon juice in place of the vinegar. Even so, with absolutely no cooking involved, you can easily see how this salad would make a perfect meal during Summer’s dog days.

*     *     *

Salted Cod Salad Recipe

Ingredients

  • 1lb (455 g) of baccalà (See Variations)
  • pickled bell peppers, chopped (See Notes)
  • 1/2 yellow bell pepper, chopped
  • 1 celery stalk, chopped
  • red onion chopped
  • nonpareil capers, rinsed
  • Kalamata olives, halved
  • 1/4 cup fresh parsley, chopped
  • extra virgin olive oil
  • red wine vinegar — lemon juice may be substituted
  • salt & pepper, to taste

*     *     *

*     *     *

Directions

  1. To ready the baccalà: Place the fish in an oblong glass dish or pan. Add enough water to cover, dump the water, and repeat a few times. Add enough water to cover and set aside. Change the water 3 times daily for at least 1 day and no more than 3. When ready, the cod will be considerably thicker than when your started and will taste far less salty. (See Notes)
  2. Remove any bones and skin before proceeding,
  3. Bring a large pot of water to the boil.
  4. Meanwhile, cut the re-hydrated baccalà into chunks from 3 to 4 inches apiece.
  5. When the water is boiling hard, add the baccalà and, when the water returns to the boil, reduce the heat to a soft simmer.
  6. Simmer until the baccalà can be easily flaked, usually about 5 to 8 minutes.
  7. Using a slotted spoon or small strainer, remove the baccalà from the water and set aside.
  8. Once cool, carefully flake baccalà and place in another bowl.
  9. To that bowl, add the peppers, celery, onion, capers, olives, and parsley. Gently toss the ingredients until combined.
  10. Add enough of the olive oil to lightly coat the salad, followed by the vinegar/lemon juice to taste. Season with pepper but be sure to taste before adding any salt.
  11. If not to be served immediately, cover and refrigerate until you’re ready to do so.

*     *     *

Variations

This recipe used raw salted cod, baccalà, to make the salad. The salad could also be made using left-over baked, broiled, or grilled baccalà, as well. When using left-over cod, there’s no need to boil or cut it up into chunks. Skip those steps and start flaking the pieces.

You can vary the salad ingredients to suit your own tastes. Carrots, shallots, garlic, etc., can be added or used to substitute for any of the ingredients listed.

*     *     *

*     *     *

Notes

You’ll note that I used bell peppers twice in this recipe. The first were miniatures, “Tulip Bells”, that I pickled last August. They added color and a vinegar element. The yellow bell was added for both color and crunch. Neither pepper brings any heat to the salad. If you like, you can add cherry bomb peppers, jalapeños, or Serranos, raw or pickled, to kick up the heat.

One sure way to know whether the baccalà is ready to be cooked is to taste a very small piece of it, once it seems fully hydrated. If it is still too salty, keep soaking the fish until it reaches the level of salinity that you prefer, bearing in mind that it will be boiled once it passes your inspection.

Do not add any salt to the dish until the very end.

This salad will keep for 2 days if refrigerated, though we’ve rarely had left-overs.

*     *     *

It’s déjà vu all over again …

Today’s post featured a recipe tailor-made for Summer’s hottest days, when we’re all loathe to turn on the stove. The same can be said for today’s blast from the past. Two years ago I shared a recipe for a couscous salad that requires not one bit of cooking. Just put the ingredients in a bowl, give them a toss, and set your salad in the fridge while you sip Long Island iced tea on the patio. A few hours later you’ll have a tasty salad for lunch or dinner without ever touching a pot or pan. You can see how it’s prepared by clicking HERE.

*     *     *

Coming soon to a monitor near you …

Pickles

*     *     *

Fried Zucchini Blossoms

Fiori Fritti dello Zucchini

*     *     *

For a number of years now, it seems that every cook and chef on television has demonstrated the fine art of stuffing zucchini/squash blossoms before being fried. This was not something we ever tried at the two-flat. First of all, Grandpa would never plant something in his garden that would take up so much space. Tomatoes were his main interest and a plant that sprawled, no matter what kind, just wasn’t welcome. More importantly, even if he found a suitable spot for, say, zucchini, picking the blossoms would not have been acceptable to him in the slightest. He planted zucchini and anything that would lessen the crop would not have been allowed. So, without the crutch of a family recipe, I headed into new territory when I bought my first bunch of zucchini blossoms late last Summer.

Those first blossoms proved to be a disaster. They were an impulse buy and I’d no idea how to store them, so, I treated them like I would cut flowers. I awoke the next morning to find a wilted mess in a glass of water. That was the last I saw of blossoms until a few weeks ago, when I came across some at the farmers market. With my car in the shop, they survived the trip home in surprisingly good shape. Problems arose, however, when it came to creating a stuffing. Not wishing to test the CTA’s reliability a 2nd time that day, I raided the fridge, finding fresh mozzarella and fontinella cheeses. A quick trip to the corner store and I returned with a 1/2 gallon of whole milk that was used to make ricotta. These three cheeses were used to prepare the stuffing used in today’s recipe.

With the stuffing decided, I set about creating a batter to coat them. I tried a number of versions, over the course of 3 Saturdays, finally settling on a batter of flour, corn starch, cornmeal, and club soda. This batter was, by far, the best, resulting in blossoms that were crispy without being buried in batter.

I also continued to experiment with fillings. My favorite consisted of mozzarella and anchovies. Unfortunately, my photos from that batch were a mess, though I did post the “best” one later in this post.

There is one more thing worth mentioning. Be sure to open each blossom and check to see if there are any stow-aways. Although any one of a number of insects might be found lurking in there, I’m more concerned with creatures of the eight-legged variety. Although I’ve yet to come across one, I check the blossoms over the sink with the garbage disposal running. Just sayin’ …

*     *     *

I’ll be leaving for Michigan and the Kitchens will be closed as a result. It’s time for a little R&R on the beach with Max. See you in 2 weeks.

*     *     *

Che Bei Fiori!

*     *     *

Fried Zucchini Blossoms Recipe

Ingredients

  • 12 fresh zucchini/squash blossoms
  • 2 oz (56 g) mozzarella, grated
  • 2 oz (56 g) fontinella, grated
  • 4 oz (113 g) whole milk ricotta, well-drained
  • 1/2 cup AP flour
  • 1/4 cup corn starch/flour
  • 1/4 cup cornmeal
  • club soda
  • salt & pepper
  • oil for frying

*     *     *

Fontinella, Ricotta, & Mozzarella Cheeses

*     *     *

Directions

  1. Using tweezers, remove stamen and gently wash each blossom. Carefully blot each one dry. Remove the stems just beneath the blossom.
  2. Place a coffee filter into a strainer and add ricotta. Allow to drain a couple of hours. Discard the liquid (whey) and reserve the ricotta.
  3. Coarsely grate mozzarella and fontinella cheeses. (See Notes)
  4. Combine ricotta, mozzarella, and fontinella cheeses. Mix well.
  5. Add flour, corn starch, salt & pepper into a bowl and whisk to combine.
  6. Add enough club soda to make a batter.
  7. Place the cheese mixture  into a pastry bag or plastic storage bag. If using the latter, cut off one of the bag’s bottom corners and force the cheese into that part of the bag.
  8. Grab hold of a blossom in one hand and gently separate the petals to reveal a “pocket”. Gently blowing into the blossom may help open it up.
  9. Place the tip of the cheese-filled pasty/plastic bag into the pocket and squeeze some of the cheese into the blossom. Do not overfill nor allow the blossom to split. Continue until all are stuffed.
  10. Fill a medium-sized sauce pan with about 2 inches (5 cm) of oil. Heat to about 350˚. You’ll know it is hot enough if a bit of batter instantly begins to fry when dropped into the hot oil.
  11. Take one blossom and twist the petal ends to seal the cheese inside. Grabbing hold of the twisted petal ends, dip the blossom into the batter to cover. Drain excess batter and then place in the hot oil. Continue with more blossoms. Work in batches to avoid overcrowding the pan.
  12. When golden brown (2 to 4 minutes), flip each blossom. Fry for another 2 minutes
  13. Remove to a paper towel lined dish and season with salt.
  14. Serve immediately

*     *     *

*     *     *

Variations

Though stuffed blossoms are wonderful when fried, you really don’t need to stuff them with anything before frying. Just dip them in the batter and fry them. You’ll get a light, crispy treat without the hassle of trying to fill blossoms with cheese.

Mozzarella & Anchovy  Zucchini Blossom

You can stuff the blossoms with whatever you like. Any cheese or mixture of cheeses will work. I chose a combination of 3 cheese for this post. My favorites, though were blossoms stuffed with mozzarella and an anchovy. Simply prepare the blossom as indicated above, cut a stick of mozzarella, wrap it with an anchovy, insert both into the blossom before dredging and frying. Unfortunately, the photo on the right is the best of those I took that afternoon.

There are several ways to coat your blossoms. Some prefer to use eggs in their batter while others “go it alone” with just a coating of flour. Some use breadcrumbs to form a coating and others like only flour. I like a thinner batter, so, I use a little club soda poured into a mixture of 1 part each of corn meal and corn starch/flour for every 2 parts AP flour. When mixed, I prefer a batter that’s a little thicker than buttermilk but not quite as thick as pancake batter.

*     *     *

Notes

I’ve yet to discover a good way to store blossoms. I was told to treat them like freshly cut flowers and that didn’t work. I’ve since searched the web and it’s suggested that the blossoms be tightly sealed and refrigerated. (One of the vendors expressly stated not to refrigerate them.) I’ve yet to try this for when I returned last weekend for more blossoms, none were to be found — hence the blurry photo above.

By far, the easiest way to stuff a blossom is to use a pastry or plastic bag, tip inserted into the blossom. If and when I find more blossoms, I think I’ll try the 3 cheeses again, only doubling the amount of mozzarella and fontinella before adding chopped anchovies to the mixture. Yes, I do love my anchovies!

Whenever soft cheeses like mozzarella need to be grated, it’s easiest if your place the cheese in the freezer for about 30 minutes beforehand. This should harden the cheese a bit, making grating a snap.

Initially, I tried a shallow fry, using about a half-inch of oil in the pan. I did not like the results at all. The lack of oil meant the blossoms had to be “handled” more so that they could be flipped and evenly fried. This raised the risk of damaged blossoms and leaking cheese. Using about 2 inches (5 cm) of oil made frying so much easier and consequently no blossoms were harmed in the making of this tasty treat.

*     *     *

It’s déjà vu all over again …

For many, a meal isn’t complete until coffee and an after-dinner liqueur are served. If that meal is served during the Summer, a dish of ice cream is very often part of the equation. With an eye towards reducing the average dishwasher’s workload, the Italians took these 3 traditions and united them in one simple dessert, affogato al caffè. Often served in a cup, affogato is a combination of ice cream and espresso, with an optional shot of your favorite liqueur. I think you’ll agree that an affogato is a wonderful way to end a meal — without having to loosen your belt afterward. You can see directions for creating a variety of affogati by clicking HERE.

*     *     *

Coming soon to a monitor near you …

Baccalà Salad

Baccalà Salad

*     *     *