Fig Preserves with Balsamic Vinegar and Black Pepper

Argh! “The best laid schemes o’ Mice an’ Men”. It’s happened again. I have a schedule for these posts. I really do. Today’s entry, for example, was to have been an instructional post detailing how to make Italian mozzarella. The Fates, however, intervened. In the days preceding my trip to Michigan, I failed twice to make the cheese.  I thought I’d be able to try again once I returned home but soon there were peppers to pickle, figs to preserve, olives to cure, and a seemingly endless stream of posts to read and comments to write. So — and by stating my plans I’m taking a big risk with those pesky Fates —  I decided to schedule Italian mozzarella for October 10th.

Now, pushing mozzarella off into the future left me in a bind.  I had no post for today. Earlier I mentioned I had figs to preserve. Well, that recipe suddenly became today’s post, meaning I had some writing to do. As you can see, I got it done but, as for the backlog of posts & comments, I’m still working on them. Sorry for the delay.

 *     *     *

 *     *     *

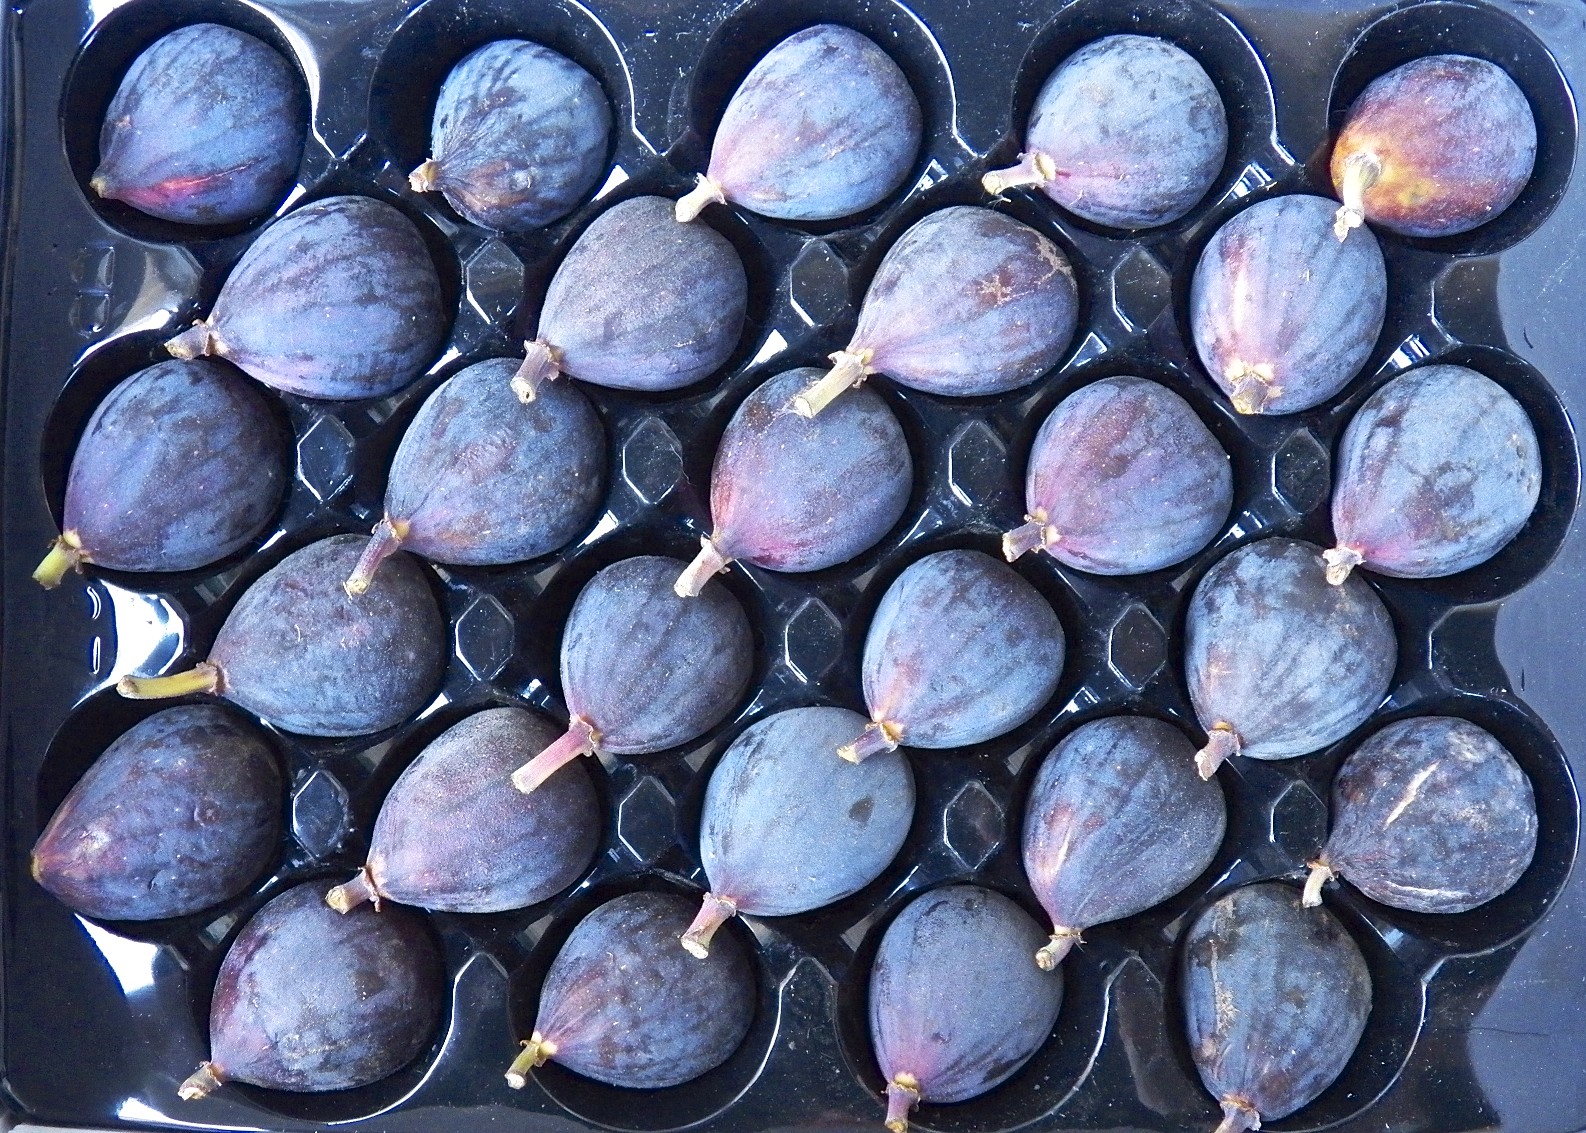
A few weeks ago, chaiselongue1 posted Jamming, an entry about making fig jam. (If you’re not familiar with this beautiful blog, olivesandartichokes, now is as good a time as any to check it out.) I thought that jam sounded delicious but that’s about as far as it went — until a market last week had crates of Mission figs for half the price I’d previously seen. Next thing you know, I’ve got 2 crates (about 3 lbs) of figs in my cart. Once I got home, I checked the Jamming post again, as well as the Pick Your Own website, as I always do before I preserve anything. Once there, a sentence caught my eye. “If you like strawberry jam, you’ll love fig jam.” That got me to thinking. I went back to the recipe I’d shared for strawberry jam with balsamic vinegar (thanks, Sarah!) and decided to use it as a guide for these preserves.

Unlike the strawberry recipe – but like Jamming — this recipe doesn’t use pectin. It takes a bit longer to prepare but if you take your time, the preserves will set as nicely as if you used pectin. Just like the strawberry jam, however, I included cracked black pepper. I really enjoyed the “bite” it brought to the strawberries. Lastly, these figs were sweet enough, allowing me to use less sugar than was used with the strawberries. Besides, I’ve got plans for these preserves that don’t involve toast. Stay tuned …

 *     *     *

*     *     *

Fig Preserves with Balsamic Vinegar and Black Pepper Recipe 

yield: 5 – 6 cups

Ingredients

  • 4 – 5 cups fresh Mission figs, prepped & chopped (about 3 lbs.)
  • 3 cups sugar
  • ½ cup water
  • 1 tsp butter (optional)
  • pinch of salt
  • ⅔ cup balsamic vinegar
  • ¼ cup lemon juice
  • 1 tbsp cracked black pepper

Directions

To Prepare

  1. Sterilize the jars and wash the jar lids and rings in hot, soapy water. Place lids and rings in a deep bowl and pour near-boiling water over them.
  2. Start bringing to boil a large, deep canning kettle of water to be used for the canning process and a second, smaller pot of water to be used to replenish water that may boil away during the canning process.
  3. Trim stem and bottom of each fig before chopping. When finished, use a potato masher to smash them.

To Make the Jam

  1. Place a small plate in the freezer. Place the figs, sugar, and water into a sauce pan over high heat and bring to a boil. Reduce heat to medium, add the salt, optional butter, and stir occasionally until a rolling boil is achieved. (A rolling boil is one that cannot be stirred away. Using a candy thermometer, that’s about 220˚F (104˚ C).)
  2. Once a rolling boil has been achieved, place a small amount of the fig mixture on the now frozen plate. Once the cooked figs have returned to room temperature, check to see if it is jam-like. If too runny, continue cooking for 10 minutes and test again. When the right consistency is achieved, remove from heat and continue to the next step.
  3. With a large spoon, carefully skim the surface to remove any foam.
  4. Add the balsamic, black pepper, and  lemon juice. Stir well to thoroughly combine.

To Preserve

  1. Using a funnel and large ladle, fill each jar to ¼ inch from the rim. Wipe the rim to make sure no jam has spilt, place a lid on each jar, and then the ring, tightening until “finger tight” but not as tight as you can make it. Act quickly, filling and capping all the jars.
  2. Jars placed directly on the kettle’s bottom might burst, so, a rack of some sort must be put into the canning kettle to cover the bottom. Many large pots have one, as do many pressure cookers.
  3. Keep each jar level as you place them, one by one, into the canning kettle filled with now boiling water. The jars should not touch each other, nor should they be allowed to tip over. Depending upon the size of the kettle and number of jars, you may need to work in batches.
  4. Once the jars are in the kettle, make sure that there is at least one inch of water over the top of the tallest jar(s). If not, add boiling water from the smaller pot mentioned in Step 2 of  To Prepare.
  5. Cover the pot and begin timing when the water returns to the boil. The jars must be boiled, “processed”, for 5 to 10 minutes, depending upon the size of jar used.
  6. Meanwhile, place a baking sheet on a level surface and line it with a clean kitchen towel.
  7. Once the time has passed, carefully remove each jar and place it on to the towel-lined baking sheet. Leave about an inch separating the jars.
  8. Once all the jars have been processed and placed on the baking sheet, remove the baking sheet & jars to a place that is draft-free and where they will remain undisturbed for 24 hours.
  9. After 24 hours have passed, check each jar to insure it’s sealed and then store on a shelf in a cool, dark place, where it will stay fresh for months.

*     *     *

Notes

Once opened, the preserves should be refrigerated and fully used within a month.

*     *     *

Coming soon to a monitor near you …

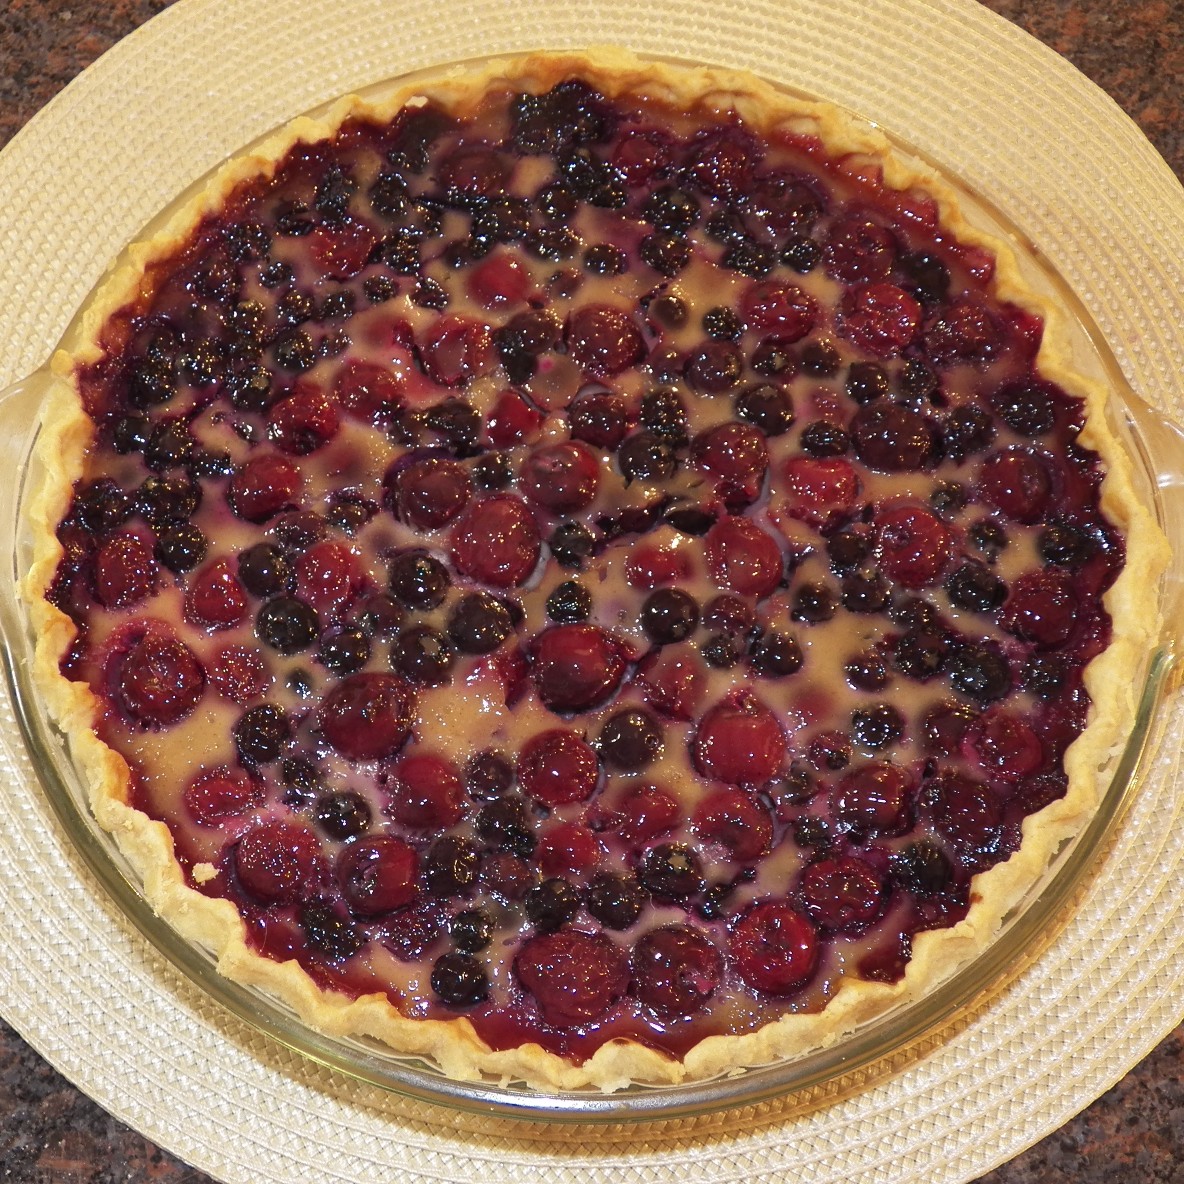
Pancetta-Topped Roast Loin of Pork with Fig Preserves

*     *     *

It’s déjà vu all over again …

It’s that time of year again. Concord grape time, that is. In our farmers markets, groceries, and vegetable/fruit stands, the grapes are on full display. Although a sure sign of Summer’s end, they do mean that it’s time to start making some jelly — and I’ve got a few pounds of the blue beauties just waiting to be transformed.  I’ll be following a recipe that I used last year. If you’re interested in doing the same or just want to check it out, you can do so by clicking HERE.

*     *     *

What I Did On My Summer Vacation

For homes not built on Lake Huron’s bluff, this is the path to the beach. In some places, it is at least a 45˚ incline, making it difficult, at best, and often treacherous when the least bit wet.                   (Click to enlarge)

Last Monday I returned from what has become an annual trip home to visit my Zia. She lives in a house she and Uncle built about 1970, retiring there a few years later, in a rural community along Michigan’s Lake Huron shore. I was about 15 when I first went “up North” with them. Back then, the property was used as a weekend get-away, with Zia & Uncle using a camper-trailer for their lodging and the rest of us in tents. Within a couple of years, Uncle began building their home, as did many of their current neighbors. (Because so many of them bought multiple lots, this will remain a sparsely populated area.) When my Parents were preparing for retirement, they bought the home “next door” to Zia’s. With only 2 lots separating the homes, Grandpa’s lifelong wish that his Girls remain together was once again fulfilled.

40 years ago, the water level of Lake Huron was high enough that this “pier” was almost submerged with sections made slippery with algae. We often fished off the end of the pier and what is now beach on the pier’s left was completely under water. Although smelt still “run” every Spring in the creek to the left of the pier, thanks to the efforts of the DNR, Coho salmon also used the creek to spawn during the 70’s and into the 80’s.

Searching for his ball.

In the years since, we’ve seen private phone lines come to the area, although modern services like call waiting and caller I.D. were made available only recently. About 10 years ago, running water was made available to the communities that wanted it.  Surprisingly, not everyone does and the water mains slowly continue to spread to those that do. Most importantly, however, was the community that the residents built together. As their homes went up, neighbors became friends and  the families mingled. Today, the kids have all grown and have families of their own, some even have their own grandkids. My Brother and his Wife raised their 2 Sons in a small community about 10 miles up the road. Two of Zia’s Sons remain in the Detroit Metropolitan area, less than a 2 hour drive away, as does my Sister and her 2 kids.

From abandoned hummingbird feeders to trees recently set ablaze, the signs of Autumn’s return were everywhere. Mom & Dad’s house was on the other side of the line of trees visible in the background of the photo of the hummingbird feeder.  (Click to enlarge)

All of this means that a visit with Zia is so much more than just that. My Brother and his Wife are sure to stop by for a visit. Most often, when he’s not playing with his grandkids here in suburban Chicago, Zia’s Eldest Son and the bane of my fantasy sports teams will visit for a few days. Don’t be fooled. He’s not there to visit with me. He’s come to play with Max. The two are inseparable as long as he’s there. And of course, her neighbors will be sure to stop by to visit and we’ll often have Sunday brunch together, meeting at one of the area’s restaurants after they’ve attended Mass. In between the visits, Zia and I will cook for each other. When she’s not teaching me a family recipe, I’m showing her one that I’ve found, often from my WP “family”.  This is the routine, for lack of a better word, followed during my visits home. Well, for all except my yearly visit in late Summer or early Fall.

This time of year my visit home is to help Zia fill her freezer. I bring my KitchenAid mixer, my pasta-making equipment, and, of course, my ice cream maker, although I very often forget some critical piece of equipment. (Once, I arrived without the door to Max’s crate; another time the paddle to my ice cream maker was left behind; and, most recently, I forgot my ravioli dies.) Still, we “make do” and spend a few afternoons working together.

*     *     *

This year, we spent 2 afternoons making ravioli. When all was said and done, we used 16 eggs worth of dough (you pasta makers will know how much that is) to make almost 900 of the pasta pillows. Not only that, but I used the leftover dough to make well over a pound of hand-cut fettuccine. All of this was accomplished under the watchful eye of Max who was able to snag 3 ravioli that fell off the table. This was a disappointing year for him. Last year he somehow stole 5 ravioli as we worked and literally vacuumed up another 30 as we sat a mere 10 feet away. Despite Max, these are some of my favorite times with Zia. We often reminisce, “filling in the blanks” to each other’s memories, and I’ve also learned a great deal of my family’s history during these work sessions. And, of course, sooner or later Grandpa’s name is sure to come up and we’ll laugh as we recall some incident involving the Bartolini Patriarch. Don’t worry. I’ll get to those tales eventually.

*     *     *

On another afternoon during this visit, the two of us turned our attention to sausage production. Although you sausage purists may object, a couple of years ago I convinced Zia to put away her casings and to make patties instead of links. Aside from being far easier and less time-consuming to make, sausage patties can be stacked for storage and are more easily used in sauces or whenever sausage meat is needed. To make things even easier, on yet another sleepless night a few years ago, I bought a patty press. Armed with a kitchen scale and my press, Zia and I whipped up a batch of 20 identical sausage patties in no time. And once again, Max was thwarted and unable to get to any of the ingredients. He did, however, try to pull off what has become his signature move when I’m working in the kitchen. As he has always done, he stayed close to where the action is, waiting for some morsel to hit the floor. This time, though, he waited for me to put my hand to my side and when I did, he gave it a good licking. Of course, that meant I had to stop and wash my hands — and herein lies the beauty of his plan. Up until I caught on, once I left the work area, he would “clean up”, gobbling as much as he could while my back was turned. This time, with Zia right there, his plan was foiled and, when we’re at home, he either accompanies me to the sink or I move the object(s) of his desire to higher ground while I wash.

*     *     *

September is Honey Time in her area of Michigan. A local man has 20 hives — that I saw — and on one or two weekends in September, he sells his honey to the locals for $2.25/lb. His honey is also available year-round at a couple of the local stores. I bought some for people back here in Chi-town and Zia bought more for her family. All told, we bought 3 gallons of honey from the man — and Zia said she was going back for more. Unfortunately, while I was taking pictures of the hives, a number of customers arrived and I never did get permission to publish photos of anything else. Next year!

*     *     *

As dedicated foodies, no narrative of a vacation would be complete without at least a mention of the meals served. When I visit Zia, there are 2 things that I know will be waiting for me: a Manhattan and a risotto dinner. I’ve yet to see anyone prepare risotto the Bartolini way, so, I’ll be posting that recipe later in the year. When Mom was still with us, upon my arrival, she’d serve me a Manhattan while she prepared soup for our dinner. I don’t know why I drink Manhattans back home for I rarely, if ever, drink them anywhere else. Nevertheless, for decades, Manhattans are the house cocktail when I visit. In fact, one afternoon, about 20 years ago, I’d gone down to the beach to get some sun.  I was there about 30 minutes when Zia appeared, carrying a pitcher of Manhattans with 2 glasses.  After about 15 minutes, as we sat, sipping our cocktails, Mom appeared carrying another pitcher of Manhattans with 2 glasses. After a good laugh, the 3 of us spent the afternoon together, sitting on the beach, sipping Manhattans. Thank heavens this took place before smartphones and the Video Age for there is no footage of the 3 of us struggling to get up that hill, empty pitchers in hand.

Now, back to the food …

With homes atop the bluff, this shoreline is repeated throughout much of this part of Michigan … well, not including Max, of course.

My 2nd night there, I took over the kitchen, preparing Mom’s Chicken Cacciatore and serving it over a bed of polenta. Zia fired back on the 3rd night, fixing broiled pork chops and serving them with a side of spaghetti dressed with her meat sauce. Peace reigned on the 4th night, a Friday, and we went to a local restaurant’s fish fry. I was back at the stove top the next night and I prepared Pappa al Pomodoro, a kind of tomato soup, the recipe for which I’ll be sharing next week. My final night, Zia prepared my farewell dinner, baked shells stuffed with homemade ricotta & spinach. Once the dust had settled, the judges rendered their verdict. Zia had won September’s Battle in the Kitchen. Though they appreciated my efforts, including the 6 quarts of blueberry cheesecake ice cream I’d prepared and the frozen cobbler I’d brought from home, I’d not done enough to overcome Zia’s home court advantage. You see, she’d kept the Manhattans flowing at the judges’ table.  I never did stand a chance.

*     *     *

So ends my essay on what I did on my Summer vacation. As you can see, not only did I have a wonderful time but Zia’s freezer is well-stocked for the cold months ahead. And, rest assured, the next time I visit, I’m going to insist on judges who are teetotalers.

*     *     *

It’s déjà vu all over again …

Since I mentioned it in the post above, I thought this post’s blast from the past would be the recipe for Mom’s Chicken (that’s not really) Cacciatore. I really enjoy this dish. It can be served as-is or atop a bed of polenta or buttered noodles. Best of all, no matter how it’s served, your kitchen will be filled with the irresistible aroma of the rosemary & garlic used in this dish’s preparation. Mom hit this one out of the park and you can view the recipe by clicking HERE.

*     *     *

Peach and Bing Cherry Cobbler

Well, it certainly took me a while to get here but this is it, the end of this year’s peach recipes. And, as far as this blogger is concerned, I saved the best for last. You see, I happen to really like peach cobbler. I make them with a batter that rises through the peaches, creating a cake-like top. I make them with a biscuit placed on top and baked.  I eat them as they are, still warm from the oven. I eat them with a scoop of vanilla ice cream or a large spoonful of whipped cream. And there lies the problem. I eat them. All of them. Every last morsel of every last one of them. There just aren’t many recipes for peach cobbler for one. So, I make a cobbler and for the next week, my snacks and desserts are all servings of peach cobbler.  I know, poor me! Well, this time around, I decided to try something different. I divided the cobbler among 6 smaller dishes and froze all but the one I tested for “quality control”. (Thank you, Tanya.)  See Variations below to see what I did.

Oh, yes. I almost forgot about the cherries. Most will recall that a few weeks ago I shared 2 recipes for a blueberry and cherry pie. The final pie was so good that I’ve been thinking of combining other fruit in other pies. Well, this being peach cobbler season, why not  experiment? Last week at the farmers market, I purchased what would turn out to be the last of the season’s Bing cherries and a plan was born. Upon my return home, Google gave me the recipe.

Today’s cobbler combines Bing cherries with fresh peaches and is crowned by a biscuit, of sorts. There’s nothing complicated about it, though pitting the cherries can be a bit tiresome. Even so, once the fruit is prepared, the rest of the recipe is a snap. And once you taste this cobbler, you won’t remember anything about pitting cherries — unless you wore a white t-shirt. When will I learn?

 *     *     *

 *     *     *

This post was written prior to my departure for Michigan and scheduled to post now. The trip went as planned, Zia’s freezer is filled, and we took turns cooking dinner. I hope to have a “vacation” post written by the weekend. Internet service was deplorable and, as a result, it will take me a while to get caught up with all of your posts and comments but I’ll get there. Thanks for your patience.

 *     *     *

Peach and Bing Cherry Cobbler Recipe

Ingredients

  • 3½ lbs peaches, peeled and sliced or chopped  (about 6 large peaches)
  • 2 lbs Bing cherries, pitted
  • ¾ cup sugar
  • ¼ cup cornstarch
  • 3 tbsp lemon juice

for the biscuit topping

  • 2 cups all-purpose (AP) flour
  • ⅓ cup plus 2 tbsp sugar, divided
  • 2½ tsp baking powder
  • ½ tsp salt
  • ½ cup unsalted butter, chilled and cubed
  • ¾ cup plus 2 tbsp whipping cream, divided
  • ¼ tsp ground cinnamon
  • ice cream for serving (optional)

Directions

  1. Liberally grease a 9 X 13″ baking dish. Pre-heat oven to 425˚ F (218˚ C)
  2. In a large saucepan over high heat, combine peaches, cherries, and sugar. Stir carefully, bring to a boil, and simmer for 1 minute.
  3. Remove filling from heat and pour into prepared baking dish.
  4. In a mixing bowl, whisk together the AP flour,  ⅓ cup of sugar, baking powder, and salt.
  5. Using knives or a pastry blender, cut the butter into the dry ingredients until a very coarse mixture results. Stir in ¾ cup whipping cream and knead only enough to create a dough. DO NOT OVER-WORK THE DOUGH.
  6. Place dough on a floured surface and roll to a ½ inch thickness. Use cookie or biscuit cutters to cut shapes in the dough. Place the shapes on the filling in any pattern you wish.
  7. Combine cinnamon with remaining sugar and whipping cream. Use a pastry brush to coat the tops of all the pasty cutouts.
  8. Bake in a 425˚ F (218˚ C) pre-heated oven for 20 to 25 minutes. Filling should be hot and bubbling.
  9. Serve warm with optional ice cream.

 *     *     * 

*     *     *

Variations

As I mentioned, I used 6 small baking dishes for this recipe rather than 1 large dish. 4 of these dishes each held 500 ml while the other 2 were a little smaller at about 400 ml. I greased and filled each one, using biscuit cutters for the topping. Once they were baked and cooled completely, I wrapped each in plastic wrap before sealing them again in aluminum foil. They were placed on a baking sheet and frozen. To serve, remove the plastic wrap and recover using the foil before placing it in an oven pre-heated to 350˚F (177˚C). After 30 minutes, remove foil and continue heating until filling is bubbly, about another 15 minutes. Cooking time will depend upon size/amount frozen.

I think next year I’m going to try this recipe using tart cherries instead of Bing and with a little almond extract in the biscuit instead of the cinnamon. It’s not that there is anything wrong with this cobbler, I just happen to prefer tart cherries and want to see if they’d be at least as good.

*     *     *

It’s déjà vu all over again …

Peaches are all but gone from our farmers markets and though a few berries, plums, and pears remain, apples have started to take over the vendors’ stalls. It’s the time of year for apple pies, muffins, crumbles, and sauce. If you choose your apples wisely, your pie will be as tart, and your apple sauce as sweet, as you like.  As proof of the latter, last year I shared a recipe for apple sauce that does not call for any sugar whatsoever. You can see the recipe by clicking HERE.

*     *     *

And another thing or three …

Aside from the recipes I’ve posted, the Kitchens have been busy trying out recipes from two great blogs. Thanks to David, The Gastronomic Gardener, I have jars of brandied figs and 2 kinds of pickled peppers on my shelf. And thanks to Richard, REMCooks, my tasters and I all have jars of  peach preserves with jalapeños and cardamom. Both guys have great blogs and I hope you take some time to check them out.

*     *     *

Peach Ice Cream – Revisited with Custard and Nectar


Yes, I know it’s getting a little late for ice cream recipes and peaches are all but gone from the farmers markets, but I just couldn’t let this one sit around until next year. My previous peach ice cream used sour cream for its base. Today’s recipe uses custard for a base but it, also, uses peach nectar for added flavor.  That peach nectar also affects the ice cream’s texture. One of my tasters said it was like a cross between sorbet and ice cream. Despite its great taste, though, you may prefer a more traditional, custard only, ice cream. Lucky for us all, Betsy has already shared her recipe for peach ice cream on her blog, Bits & Breadcrumbs. (Do take a few minutes to check out both her recipe and her blog. You won’t be disappointed.)  So, you now have 3 peach ice creams from which to choose but if you think I’m done with peaches, you’d be mistaken. Next week I’ll share a recipe for peach cobbler, with a twist.

This ice cream will have a better “mouth feel” if you fully purée the peaches.  Although you can process the peaches until merely chunky, I find it better if they are puréed until completely smooth. This recipe will make 3 quarts of ice cream. That’s quite a bit if you’ve a smaller machine like mine. The saving grace of my machine is that I purchased it on Amazon during a sale in which I received an additional freezing canister for free. That additional canister means that I can get all 3 quarts made and put away in one night. To see how it’s done, be sure to check out the Notes section below.

Now, I’m already in Michigan, where Zia and I have plans to stock her freezer with ravioli and sausage, that is if we can keep Max occupied elsewhere. So, I’ll keep the posts for today and next week on the short side. Given the sorry state of that area’s internet coverage, I hope you’ll understand if I’m not quick to respond to your comments or to leave a remark on your blogs.

 *     *     *

 *     *     *

Peach Ice Cream Recipe

Ingredients

  • 4 cups peeled and chopped peaches (about 3 lbs or 6 large peaches)
  • 1 cup nectar
  • ½ cup sugar
  • 4 egg yolks
  • 4 cups milk
  • 1 cup half-and-half
  • 1 tbsp lemon juice
  • ¼ tsp cinnamon
  • pinch of salt
  • sliced fresh peaches and toasted pecans for garnish (optional but strongly advised)

Directions

  1. In a large bowl, combine peaches, sugar, and nectar. Mix thoroughly.
  2. Working in batches, use a food processor or blender to fully purée the peach mixture until smooth. Refrigerate.
  3. In a mixing bowl, whisk together egg yolks and milk until fully blended. Add the egg mixture to a heavy-bottomed pan or double boiler (my favorite). Heat over a med-high heat, stirring constantly, until it thickens and a custard forms, about 20 to 25 minutes. DO NOT ALLOW TO BOIL.
  4. Once thick enough to coat the back of a wooden smooth, remove from heat and pour the custard through a fine mesh strainer into the reserved peach purée. Add the half-and-half, lemon juice, cinnamon, and salt, whisking until fully combined.
  5. Cover and place in the refrigerator for at least 4 hours.
  6. Make your ice cream using this peach custard and following your machine’s instructions. Place in freezer until frozen to your liking.
  7. When ready to serve, garnish with sliced peaches and toasted pecans. (See Variations)

 *     *     *

Variations

This is a good ice cream recipe but it is so much better when served with sliced fresh peaches and toasted pecans. To prepare the peaches, just peel and slice a ripe peach, putting the slices in a resealable container. Sprinkle a little sugar on top, seal the container, and place in the fridge for at least 30 minutes, giving the fruit a chance to macerate. In the meantime, toast the pecan chips in a small frying pan over medium heat. Be attentive or they’ll burn before you know it. Add a little of both to your ice cream cup for a dessert that is just about perfect.

Notes

As I’ve mentioned, this recipe will make enough peach custard to make 3 quarts of ice cream. That is 2 quarts too many for a single machine like mine and even though I’ve got a 2nd canister, that still leaves me with one quart of custard too many. Since it takes a full 24 hours to freeze my canister, this recipe could stretch out over 2 days, at least. Here’s what I do to get around the problem.

Once the custard is chilled and ready to be put into the machine, I put it into the canister and refrigerate the excess.  When it’s ready, after about 25 minutes, I quickly dump the newly formed ice cream into a container, place it in the freezer,  and quickly refill the canister with more custard. If there’s leftover ice cream in the canister, all the better. After 25 minutes, I will not have ice cream but I will have a thicker, chilled custard.  I then pour this custard into the unused frozen canister, which I’ve kept in the freezer until now. No need to let the machine process for all the 25 minutes, 15 minutes will do. Quickly remove the ice cream, use it to fill another quart container, and place it in the freezer. I then pour the remainder of the custard into the same canister and let her rip! Surprisingly, after about 30 minutes, I’ll have another quart of ice cream ready to be frozen. And what do I do with 3 quarts of ice cream? I give 2 quarts to my tasters and keep one for me.

Adapted from Southern Living, July 2005

*     *     *

It’s déjà vu all over again …

Well, with today’s recipe being an ice cream, what better recipe to pull from the past than the one for pickles, Bread & Butter Pickles? These are not preserved but are kept in the refrigerator, where they will keep for weeks. You needn’t worry about that, though. These pickles will disappear long before freshness is an issue. You can read the recipe by clicking HERE.

*     *     *

The parting shot …

For the past 13 weeks, I’ve ended each blog entry with a photo. Well, I’ve no more roses to share but I didn’t think it right to abruptly stop the practice. So, I give you this last photo and, although this may have nothing to do with roses, it is, in its own way, every bit as memorable. With thanks to Chris.

*     *     *

A Pasta for the Open

I don’t know about you but when I hear that the US Open Tennis Championships are about to begin, I immediately think of pasta. I mean, how could I not? So, when the Open starts, I naturally prepare some form of pasta to mark the occasion, just as so many of you do, I’m sure. In the past, it didn’t really matter what pasta was selected for that meal, and my choices have ranged from Bucatini to Ziti, and several pastas in-between. This all changed, however, one day when I toured the newly discovered Italian market’s pasta aisles. That’s where I discovered Racchette, a racket-shaped pasta.

*     *     *

*     *     *

Although I’m certainly no expert, I think it safe to say that Racchette are a relatively new pasta and virtually all are manufactured by machines. I mean, I just cannot imagine Nonnas — be they from Today or the 19th Century — rolling out dough sheets and making these little rackets. I know my Nonnas certainly didn’t — but if yours did, please leave a comment and I’ll be more than happy to amend this paragraph. Moving beyond Racchette’s manufacture, I can say, in all honesty, that the first any of the Bartolini women heard of Racchette was when I mentioned the pasta to my Zia a couple of weeks ago during a conversation. It should come as no surprise to anyone, therefore, that there is no Bartolini family recipe for Racchette.

Without a family recipe to use, I did what most do in this situation:  I googled it. That search returned thousands of results but most were very similar. That base recipe is one that I will make but I’ll do it in Spring, when the ingredients are fresh and readily available. Onward I went, wading through more of the search results until I came upon a recipe that was presented by the company that made the pasta. I went into kitchen, grabbed the box, and, sure enough, the recipe was on the back of the box of Racchette. (Isn’t it always the last place you look?) That recipe, Racchette California Style, is the one I’ll share today.

The recipe, as written, calls for red, white, and Marsala wines. When I prepared it, I used what I had on-hand, Pinot Grigio, Merlot, and a sweet Marsala. You may have better wine selections in mind (Jed) and, if you do, I hope you’ll use the Comments section to make your suggestions — and that includes ideas beyond wine selection. I think you’ll find this to be a simple, easy to prepare recipe. All you need to do now is to find the Racchette.

*     *     *

*     *     *

Racchette “California Style” Recipe

Ingredients

  • 1 lb Racchette
  • 1 handful fresh basil
  • 2 tbsp pine nuts
  • 1 clove garlic, smashed
  • 1 tsp grated Parmesan cheese
  • 1 tsp grated Pecorino Romano cheese
  • ½ cup white wine (I used Pinot Grigio)
  • ½ cup red wine (I used Merlot)
  • ½ cup Marsala wine (I used a sweet variety)
  • 2 tbsp butter, softened

Directions

  1. Bring a large pot of salted water to boil and cook Racchette per package directions or to taste.
  2. Meanwhile, add the basil, pine nuts, garlic, and cheese to a food processor until blended.
  3. Add the wines and process until well-mixed.
  4. When cooked to you liking drain the pasta. Add the softened butter to the sauce, giving it a creamier texture.
  5. Add the sauce to the pasta, toss, garnish with additional grated cheese & cracked pepper (optional), and serve.

Inspired by the De Cecco company’s Racchette California Style recipe

*     *     *

Notes

I must admit to having been surprised by this pasta. Neither Zia nor myself have ever used wine in pasta without cooking it, even if only for a few minutes. Using a total of 1½ cups of “raw” wine to dress a pound of pasta is completely new and something I never would have considered doing on my own. And the verdict? I enjoyed it. I make simple pastas with garlic, mushrooms, lemon, basil, or cheese as the predominant flavor within the “sauce”. Why not wine? Of course, if you’re not a wine lover, this dish isn’t for you. On the other hand, if you do enjoy a glass of wine every now and again, you just might want to give this dish a try.

*     *     *

It’s déjà vu all over again …

Just as was done in the last 2 posts, today’s look back will take advantage of the season’s harvest. Illinois is a leading producer of corn in this country and, even though the state is suffering the effects of a severe drought, there’s still plenty of corn in the farmers markets — at least in this area. This recipe for Corn Relish comes from Zia’s kitchen and is one that she prepared and canned every year. You can make it as spicy as you like and it is a terrific way to add a little Summer to your meal in the dead of Winter. Just be sure to make a double batch. It’s the only way to ensure you’ll have a few jars when Winter comes. Click HERE to see the full recipe.

*     *     *

By any other name …

In morning light …

*     *     *

Later that day

Never one to show up on time, she’s finally bloomed. Meet the last of my girls and last of my roses, “Marilyn Monroe”. Officially said to be apricot-colored, some say that the blooms are flesh-toned and mirror the complexion of its namesake.

*     *     *

Mom’s City Chicken and Grandpa’s Water Works

Funny how this Summer has worked out. At its start, I’d planned to continue making cheese with you, sharing some seasonal recipes, posting more ice cream flavors, and sharing photos of “my girls” and their companions in the garden. Suddenly, Labor Day is here and I’ve run out of time. We’ve still not made Italian mozzarella, I’ve a couple of tomato recipes to share, and there’s still a custard-based peach ice cream to make. Oh! Mustn’t forget the cobbler. Fall will just start late this year. To further complicate my schedule, today’s post was reserved for a special pasta celebrating the US Open Tennis Championship. That was before I saw a package of veal at the market. That changed everything.

Last year, Linda posted a recipe for City Chicken on her wonderful blog, Savoring Every Bite.  At the time, I commented that I’d not thought about City Chicken in years. Mom prepared a version but it’s been some 35 years since I last tasted her City Chicken. Had Linda not shared her recipe, who knows when I would have remembered Mom’s? Anyway, after Linda’s reminder, I decided to put City Chicken on the schedule — last Summer! Well, as you know, it never made it but I had every intention of sharing Mom’s recipe this Summer — and then it again got lost. Last week, however, I saw veal cubes at the market and immediately thought of City Chicken. Since it would make a great dish for the coming holiday weekend, Mom’s City Chicken was suddenly on the schedule. Its addition pushed my special tennis pasta back a week and, well, Fall’s arrival, at least on this blog, has been delayed yet another week. By the way, don’t be surprised if Thanksgiving and Christmas are celebrated in one post this year. Hopefully, I’ll then be able to start the New Year sometime in January.

((cue the harp))

Throughout my childhood, Mom served us City Chicken almost exclusively on Wednesday or Sunday, when Dad was home to work the grill. Although I’ve already mentioned The Barbecue, I’ve not talked much of the rest of our yard. You see, the two-flat was built on a vast expanse of land, in the very center of which was the beautiful, privately owned, Lake Bartolini (pictured below, click to enlarge). While we kids frolicked, Dad was likely at The Barbecue, grilling that night’s meal, City Chicken being a family favorite. In the years following the barbecue’s construction in 1959, Grandpa would build a garage with an enclosed patio, attach a grape arbor, and plant his tomatoes on the lawn just beyond The Lake, after the first of what would become yearly land-grabs. (His tomatoes needed more land, always more land.) When The Lake was lost, the much larger and deeper Bartolini Sea, was erected and filled. As we would all come to learn, ripening beefsteak tomatoes can somehow attract errant pool toys, especially whenever Grandpa strolled through the yard. When the Sea gave way to what must have been near tectonic forces, it was replaced by the even larger and more formidable Bartolini Ocean, the last of the series.

OK, that is the official account of the Crystal Blue Waters of the Bartolini, the version you’ll see on the historical markers that dot the area. Here, for the first time anywhere, is the real story.

Grandpa wanted a garden, desperately, and even though Lake Bartolini stood in his way, he would never do anything to disappoint his adoring Grandchildren. No, not Grandpa. His was a problem that would have befuddled Solomon. You can well imagine, therefore, Grandpa’s relief the morning we kids awoke to find Lake Bartolini had been completely drained. Upon close examination, we saw that one side of  The Lake was inexplicably peppered with holes, while the most attentive among us claimed to have overheard our Parents whispering something about buckshot. Grandpa’s subsequent claim that one of us kids was to blame fell on deaf ears. Our Parents, calmly and coolly, bought and built the Bartolini Sea. With walls made of corrugated steel, the Sea glistened just to the West of the where the original Lake once stood. Grandpa got his garden and we kids had a new, buckshot-proof, Sea in which to swim. All went well until that thing about tomatoes attracting pool toys was discovered, much to Grandpa’s great displeasure.

Not but a couple of years after it’s installation, again we awoke to find that our gorgeous swimming hole, the Bartolini Sea, was but a mere puddle. On one side of the Sea, in the corrugated steel, was a gash of not quite a foot long. Bent inward, the steel pierced the Sea’s lining and flooded the yard. Depending upon which Parent asked, Grandpa said that my Youngest Cousin or I did it with the lawn mower. In our defense, I will merely point out that an old push mower was used to maintain the lawns. Even if we teamed up, together pushing that relic and with a 100 foot running start, never could we two young boys get up enough steam to create so much as a dent, let alone pierce, that steel siding. Our wise Parents, though they never determined “the how”, quickly surmised “the who” and soon thereafter we were erecting the bigger, better, and even sturdier Bartolini Ocean. It remained in our yard until it died of natural causes, some years later. Grandpa, too, remained in his garden, ensuring both he and his tomatoes never went thirsty, for years to come.  Though this marks the end of Grandpa’s Water Works, this is hardly the end of his story. Frankly, I’m just getting started.

Now, back to the Present. Mom’s City Chicken couldn’t be any simpler to prepare. Equally sized cubes of veal, beef, and pork are marinated, skewered, wrapped with a rasher of bacon, and grilled. It really is that easy. I don’t give any amounts in the recipe to follow because so much will depend upon how many skewers are to be prepared. You can add, or subtract, spices to the marinade. Just be sure to make enough so that some can be reserved and later brushed on the skewers as they come off the grill. (Something I forgot to do for the photos.) Although the FDA no longer requires pork to be cooked well-done, many still prefer it cooked more than beef or veal. To accomplish this, I always place 3 pieces of meat on each skewer, pork always being the last/top one. As you’ll see in the recipe to follow, this will allow you to keep the pork closest to the fire, assuring it is cooked more than the other meats.

*     *     *

*     *     *

Mom’s City Chicken Recipe

Ingredients

  • Beef, cut into approx. 1½ inch cubes
  • Veal, cut into approx. 1½ inch cubes
  • Pork, cut into approx. 1½ inch cubes
  • Bacon, 1 rasher for every skewer
  • marinade

Marinade

  • juice and zest of one lemon
  • rosemary, chopped
  • garlic, minced or grated
  • Italian seasoning
  • olive oil
  • salt & pepper

Directions

  1. Add all the marinade ingredients to a bowl, whisk to combine, and set aside, reserving  a ¼ cup for later use. Place the meats into the bowl, mix until coated, and refrigerate for at least one hour or overnight
  2. Soak wooden skewers overnight. (This will prevent their burning during grilling.)
  3. When ready, light the grill.
  4. Using one thick skewer or 2 thin for each city chicken, pierce one end of a bacon rasher, followed by one piece of each type of meat. Be sure that the top piece of meat for each skewer is pork. After the pork is in place, wrap the meats with the bacon and secure its remaining end by piercing it with the skewer(s) tip(s).
  5. Once finished and the grill is hot, shut down part of the grill to facilitate  indirect grilling. Use a rag dipped in oil to grease the grill plate.
  6. Place the skewered meat on the grill with the pork closest to the fire/heat.
  7. Turn the meat after a few minutes, more or less depending upon the grill’s heat. The object is to cook the skewered meat without torching the bacon. The pork, being closest to the fire, will cook faster.
  8. With the meat still very rare, move the skewers directly over the fire/heat. Now the object is to crisp the bacon and to finish cooking the skewered meats. Turn the skewers occasionally to ensure even cooking.
  9. When grilled to your satisfaction, remove to a  platter, brush with reserved marinade, and serve.

*     *     *

Variations

Although Mom used all 3 meats, you needn’t if you prefer otherwise.  Use whatever meat(s) you like. The same is true for the bacon. I’m sure turkey bacon could be easily substituted.

Mom used 1 short, thick skewer for each of her City Chickens, skewers she got from her butcher. Try as I might, I’ve been unable to find them. Instead, I use 2 of the more readily available long, thin bamboo skewers. Before soaking, I trim off about 4 inches from each, making it much easier to grill them, especially if you’ve a small grill surface.

*     *     *

It’s déjà vu all over again …

Although some have already reached the end of tomato season, many of us are still harvesting the red beauties. One of my first posts featured Mom’s Tomato Antipasti that she made with Grandpa’s tomatoes. This time of year, his vines produced enough fruit to keep both families well-supplied and rarely was an evening meal prepared without tomatoes playing a role. Those who missed it the first time around  can find my post for Mom’s Tomato Antipasti by clicking HERE.

*     *     *

By any other name …

“Don Juan”

This tour of roses began on one side of my yard with “Opening Night”, a red hybrid tea rose, and ends on the opposite side of my yard with “Don Juan”, a red hybrid tea rose. (Who better to indulge my girls?)

*     *     *

The Kitchens have a Peach of a Jam

*     *     *

Peaches in this area are just passing their peak season and the farmers markets are filled with them. Over the next few weeks, peaches will disappear and the pears and apples will supplant them. For now, though, they seem to be calling to me, just as the tart cherries, blueberries, and strawberries did before them. So, I’ve answered their call and bought some each time I’ve gone to the market. Admittedly, the first purchases were eaten as-is. How could I not?  After that, I made ice cream and posted a recipe in honor of Mom’s birthday last week. Having made a few quarts of peach ice cream, it was time to move on.

Several weeks ago, when strawberries were at their peak for this area, I posted a strawberry jam recipe made with Balsamic vinegar and black pepper. In the Comments section of that post, Betsy, of Bits and Bread Crumbs, and Elaine, of Le Petit Potager, discussed making peach jam.  Betsy wondered about using balsamic and black pepper. Hmm …

After my last trip to the farmers market, I had what I thought was enough peaches to make a small-ish batch of peach jam — with a little balsamic vinegar. The recipe enclosed within the pectin packaging called for 4 cups of cleaned fruit. Incredibly, I somehow ended up with 7½ cups. I decided to use 6 cups here and to save the rest for a custard-based ice cream. (Recipe to come.) This recipe is very similar to the one used to make the strawberry jam, except I used white balsamic so that the peaches wouldn’t discolor; I used both lemon juice and zest; and, I didn’t add any pepper — maybe next time. Because I used so many more peaches than I had intended, I followed a tip from the Pick Your Own website. The author always adds an additional 20% of pectin than what the recipe calls for, just to ensure a good set. So, rather than add 49 g (1 envelope) I added 60 g to the peach mixture. My jam set perfectly although, next time, if I use 6 cups of peaches, I’ll increase the amount of white balsamic by another tablespoonful or two.

What if you’re not a balsamic lover? What if you just want to make some really good peach jam? Well, then, waste no time and click this link to go to Barb’s Just a Smidgen blog, where you’ll be treated to a fantastic recipe for making peach jam, not to mention a thorough, step by step, description of the canning process.

*     *     *

*     *     *

Peach with Balsamic Vinegar Jam Recipe 

yield: 7 – 8 cups

Ingredients

  • 6 cups fresh peaches, cleaned, peeled, sliced or chopped
  • 4 cups sugar – separated
  • 1 envelope + 20% more low-sugar pectin (60 g  total pectin)
  • 1 tsp butter (optional)
  • pinch of salt
  • juice & zest of one medium-sized lemon
  • ½ cup white balsamic vinegar

Directions

To Prepare

  1. Sterilize the jars and wash the jar lids and bands in hot, soapy water. Place lids and bands in a deep bowl and pour near-boiling water over them.
  2. Start bringing to boil a large, deep canning kettle of water to be used for the canning process and a second, smaller pot of water to be used to replenish water that may boil away during the canning process.
  3. Mix the pectin with ¼ cup of the sugar. Set aside.
  4. Working in batches, add sliced/chopped peaches into a large bowl and use a potato masher to smash them as much as you like. I skipped this step; my slices were thin and needed no further handling.

To Make the Jam

  1. Place the peaches and the pectin-sugar mixture into a heavy-bottomed pot over a med-high heat. A Dutch oven works nicely. Add butter, if desired, to limit foam.
  2. Stirring frequently, you are heating the peaches until a rolling boil is achieved at about 220˚F. A rolling boil is one that will not dissipate when the pot’s contents are stirred.
  3. Add the remaining sugar and stir well. Stir frequently while you wait for the pot to return to a rolling boil.
  4. Once a rolling boil has returned, keep stirring for exactly one minute before removing the pot from the heat.
  5. With a large spoon, carefully skim the surface to remove any foam.
  6. Add balsamic vinegar, lemon juice, and zest. Stir well to thoroughly combine.

To Preserve

  1. Using a funnel and large ladle, fill each jar to ¼ inch from the rim. Wipe the rim to make sure no jam has spilt, place a lid on each jar, and then the band, tightening until “finger tight” but not as tight as you can make it. Act quickly, filling and capping all the jars.
  2. Jars placed directly on the kettle’s bottom might burst, so, a rack of some sort must be put into the canning kettle to cover the bottom. Many large pots have one, as do many pressure cookers. (I use a rack from an old pot that has long since been discarded.)
  3. Keep each jar level as you place them, one by one, into the canning kettle filled with now boiling water. The jars should not touch each other, nor should they be allowed to tip over. Depending upon the size of the kettle and number of jars, you may need to work in batches.
  4. Once the jars are in the kettle, make sure that there is at least one inch of water over the top of the tallest jar(s). If not, add boiling water from the smaller pot mentioned in Step 2 of  To Prepare.
  5. Cover the pot and begin timing when the water returns to the boil. The jars must be boiled, “processed”, for 10 minutes.
  6. Meanwhile, place a baking sheet on a level surface and line it with a clean kitchen towel.
  7. Once 10 minutes have passed, carefully remove each jar and place it on to the towel-lined baking sheet. Leave about an inch separating the jars.
  8. Once all the jars have been processed and placed on the baking sheet, remove the baking sheet & jars to a place that is draft-free and where they will remain undisturbed for 24 hours.
  9. After 24 hours have passed, check each jar to insure it’s sealed and then store on a shelf in a cool, dark place, where it will stay fresh for months.

*     *     *

It’s déjà vu all over again …

This time of year, our farmers markets are filled with fresh fruits and vegetables, and with Labor Day barbecues quickly approaching, there’s no better time to make a batch of Chicago-style giardiniera. This colorful condiment is a great way to add some crunch, and a little heat, to your burgers, dogs, wurst, and sandwiches. The recipe was shared last August and you can find it by clicking  HERE.

*     *     *

By any other name …

“Sunset Celebration”

 *     *     *

It’s Mom’s Birthday and I’ve Got a Peach of an Idea!

As you may, or may not, recall, August is the birthday month for a number of people in my life, with today, August 15th, being Mom’s birthday as well as that of her Mother, Grandma Bartolini. Zia’s husband, “Uncle”, was born on the 11th  — and we’re just getting started. My Friend, one of the Kitchens’ tasters, had a birthday on the 7th, while another, my Friend the Entertainer, will be celebrating on the 20th.  And we mustn’t forget the kids. My Grand-Nephew’s birthday was the 1st, my not-quite-a-nephew Nephew will be blowing out candles on the 24th, and the Oldest of the Boys Upstairs has a birthday this Saturday, on the 18th. That’s a lot of birthdays!

So to celebrate, last August I posted 3 separate ice cream recipes that I combined for the finale. The first was taken from a recipe book that Mom gave me shortly after I moved to Chicago in 1980.

*     *     *

Pistachio Nut Ice Cream

*     *     *

Next on that month’s agenda was an ice cream based on Mom’s own chocolate recipe.

Chocolate-Chocolate Chip Hazelnut Ice Cream

*     *     *

Then came the third recipe. Again, using Mom’s recipe as a base, I created this “pretty in pink” ice cream.

Maraschino Cherry Ice Cream

*     *     *

Well, with those 3 recipes laying the ground work, I had little choice but to put them together.

Spumoni Ice Cream (It’s da Bomba!)

*     *     *

Now, having mentioned those 3 ice cream recipes and a Bombe, I might as well finish off this little round-up by sending you to the hands-down favorite ice cream recipe of all the Kitchens’ tasters, family, and friends. It may not be a frozen custard nor traditional ice cream but, I have to say, it’s damn good!  (Pssst! It’s the crumbled graham cracker crust.)

Blueberry Cheesecake Ice Cream

*     *     *

As great as that all sounds, this year I was in quite a pickle. What should I do for this year’s Birthday Month? How could I possibly top a Spumoni Bombe? Well, I can’t and won’t even try. What I will do, however, is share a recipe for an ice cream flavor that Mom loved. Yes, when it came to ice cream, Mom had a number of favorites. Frankly, I doubt that Mom ever tasted an ice cream that she didn’t like — and we haven’t even mentioned sherbet yet.

So, with that monkey off my back, I decided to take full advantage of the bounty in this area’s farmers markets. Today’s recipe will be for peach ice cream. It’s a simple recipe that results in a peachy frozen delight.  It’s Mom’s birthday, however, and “peachy” just won’t do. Directly following the recipe is a serving suggestion that Mom would have surely enjoyed. I hope you will, too.

Now, if you’ve no experience working with peaches, this paragraph is for you. In the first place, you may not be able to find fruit that are perfectly ripe, even in your farmers market. Just place the best you can find in a paper bag, place it on a counter, and check them every morning. In a couple of days, your peaches will be exactly how you like them. So, once your peaches are ripe, how do you peel them? Bring a large pot of water to boil. In the meantime, fill a large bowl with iced water. Take each peach and use a paring knife to cut a small “X” into the fruit’s bottom. Place the peaches into the rapidly boiling water and leave them there for about 30 seconds. Transfer them to the iced water bath to cool and to stop them from cooking. After a few minutes, simply peel off the skin beginning at the “X”. You may need a paring knife to trim a stubborn spot or two but, basically, that’s all there is to it.  And that’s the last of any possible problems you might run into.

*     *     *

*     *     *

Peach Ice Cream Recipe

Ingredients

  • 1½ pounds peaches — about 4 large fruit
  • ½ cup water
  • ⅔ cup sugar
  • ½ cup sour cream
  • 1 cup whipping cream
  • ¼ tsp vanilla extract
  • ⅛ tsp cinnamon
  • pinch salt

For Serving

  • 1 peach. peeled & sliced — more depending upon the number of servings
  • sugar
  • toasted chopped pecans

Directions

  1. Once the peaches are peeled, cut each into chunks, removing the pit in the process.
  2. Place the peaches and water into a non-reactive sauce pan and cook over a medium heat until the peaches are soft — about 10 minutes.
  3. Remove from heat, add the sugar, stir well, and set aside to cool.
  4. When the peach mixture has reached room temperature, place it in a food processor or blender, along with the sour cream. whipping cream, vanilla extract, cinnamon, and salt. Purée until blended but still a little chunky.
  5. Place the peaches & cream mixture into the fridge until thoroughly chilled — about 4 hours, more or less depending upon your fridge.
  6. Add the chilled peaches & cream to your ice cream machine and follow the manufacturer’s instructions to create your peach ice cream.

To Serve

Peaches are in season and we shouldn’t let this opportunity slip away. About 45 minutes before you serve your peach ice cream, peel and slice a ripe peach, more depending upon how many servings are to be prepared. Place the slices in a bowl, sprinkle with sugar, stir gently, and set aside. When ready to serve, divide the peach slices and juice among the servings of ice cream. Garnish with toasted chopped pecans.

Inspired by David Lebovitz, “The Perfect Scoop”

*     *     *

By any other name …

“Bella’Roma”

*     *     *

A Tale of Two Recipes

During the recent heat wave, I really didn’t leave the house very much. Sure, I had errands to run and a dog to walk but that was pretty much all I did outdoors for much of 2 weeks. Well, except for watching fireworks on the 4th. Yay! It was a golden opportunity to watch some cooking shows as they were broadcast, as well as a number that I’d recorded but never watched.

*     *     *

*     *     *

One show, Lidia’s Italy, has been a long time favorite and I must have at least a dozen of her episodes recorded and saved. So, you can well imagine my astonishment when one afternoon, while watching a recorded episode of her newest show, Lidia’s Italy in America (episode 16, original airdate 12/24/11), there she was, standing in the produce department of my Italian market. Lidia Bastianich. In my market! Later she was in front of the very deli counter where I buy my prosciutto, my sopressata, and my mortadella. Do you realize what this means? I have walked on the very floor tiles upon which Lidia has walked. We’ve spoken to the same people, breathed the same air. I know. It kinda makes you weak-kneed just thinking about it. All I can say is that if you live in the Greater ChicagoLand area, you should head over to Caputo’s in Elmwood Park now, before word gets out and people begin making pilgrimages. It won’t be long before “La Via Lidia” is roped off and you’ll no longer be able to literally follow in her footsteps, as I have done. But I digress …

One show that I watched live was The Chew and on that particular day, Carla Hall made a cherry, blueberry, and sour cream pie. A pie with 2 of my favorite things? I vowed to bake one as soon as normalcy returned to our daily weather. A few days later, a Saturday, Max & I were on our way to the farmers market, where I bought sweet cherries, blueberries, and assorted other fruits & vegetables. On the way home, I stopped at a grocery and bought the sour cream needed for my pie. It wasn’t even 9:00 am and things were going very well. This all changed by 10:00 am, for that was the time I looked up the recipe on The Chew’s website.

The problem was that the printed recipe was not the recipe I recalled Carla preparing. I soon found the video of her making her pie on their website — and I was right. On the video, she uses 4 eggs, while the printed version used 3. Neither version indicates where the egg white is to come from nor the type of cherry to be used. Lastly, the video shows Michael Symon adding 2 tbsp of honey to the filling while the printed version states ⅓ cup is to be used. I was on my own.

My first attempt recreated the pie I watched Carla prepare. I used 4 eggs, the white of one being used to prepare the pie shell. The cherry question had been answered earlier that morning when I found sweet cherries at a good price at the market and bought a quart. And when it came to the honey, I followed Michael’s lead and used 2 tbsp. From that point forward, I followed the directions exactly and the pie was pretty good. For me, though, pretty good wasn’t what I wanted. With blueberries and cherries in season, I want my pie to scream “SUMMER!” This pie said “Eggs.” Yes, eggs. It certainly wasn’t a bad pie and I’m sure that it would be enjoyed by many. It just wasn’t what I’d expected. A week passed during which I ate all that pie, sometimes with home-made vanilla ice cream, sometimes with whipping cream, sometimes plain. But I ate it all because of all the sins one can commit, the gods most frown upon those who waste pie.

Another Saturday came and with it a return of the heat wave in the forecasts. Again Max and I headed to the farmers market. Again I bought blueberries and cherries, although this time I went for the tart. And again, on the way home, we stopped at a grocery to pick up sour cream. This time around, I didn’t just exchange cherries. I, also, cut the eggs in half, using only 2, and I increased the honey to ⅓ cup as the written version had indicated. Because I wanted my new pie to take full advantage of its seasonal ingredients, I increased the amount of both tart cherries and blueberries to 2 full cups apiece. This pie was not going to even whisper “eggs”. Once the filling was made, I prepared the pie as I did the first. And the verdict? I liked this rendition so very much more than the first. As I had hoped, this one was more custard and less egg-y. Adding more cherries & berries paid off, while using tart cherries worked better with the blueberries.

But you needn’t take my word for it.

Below I’ve listed the ingredient lists for both pies. The first uses a filling with sweet cherries and most closely resembles the televised recipe. The second uses tart cherries and fewer eggs in its filling and is more closely aligned with the printed version. The directions for preparing the pie are listed once because they are the same, no matter which filling you wish to use. Make one or make them both. All I ask is that you come back here and tell us what you think or any improvements you might suggest.

*     *     *

Sweet Cherry, Blueberry, and Sour Cream Pie Recipe

Ingredients 

  • A single pie crust large enough for a 9 inch deep dish pie.
  • 4 eggs, 1 divided
  • ½ cup superfine sugar, divided (see Notes below)
  • 1½ cups sweet cherries, pitted
  • 1½ cups blueberries
  • ½ tsp cinnamon
  • ¼ tsp salt
  • pinch of Nutmeg
  • 1 cup sour cream
  • 2 tbsp honey

*     *     *

Tart Cherry, Blueberry, and Sour Cream Pie Recipe

Ingredients

  • A single pie crust large enough for a 9 inch deep dish pie.
  • 2 eggs, 1 divided
  • ½ cup superfine sugar, divided
  • 2 cups tart cherries, pitted
  • 2 cups blueberries
  • ½ tsp cinnamon
  • ¼ tsp salt
  • pinch of Nutmeg
  • 1 cup sour cream
  • ⅓ cup honey

*     *     *

Directions

  1. For the pie crust. 
    1. Pre-heat oven to 400˚F.
    2. Roll out pastry dough into a 12 inch circle and place it in a pie dish, crimp edges, and blind bake, filling the pie with pie weights or beans beforehand. After 10 minutes, remove pie crust from oven. Set aside. Lower oven temp to 350˚F.
    3. When crust is cool enough to handle, remove the pie weights/beans. Whisk together 1 egg white with 2 tablespoons of the fine sugar. Using a pastry brush, coat the pie crust before returning it to the oven. Bake for another 15 minutes or until the crust is golden. Remove from oven and cool.
  2. For the pie filling. 
    1. In a bowl, combine 2 tbsp of the fine sugar, salt, cinnamon, and nutmeg.
    2. In a larger bowl, combine the blueberries and cherries.
    3. Add the sugar combination to the berries and gently mix.
    4. In a 2nd larger bowl, combine the remaining fine sugar & eggs, sour cream, and honey. Whisk until fully blended before adding to the berry mixture.  Stir to combine.
  3. Pour the filling into the pre-cooked pie shell and bake for 1 hour at 350˚F.
  4. Pie may be served warm.

*     *     *

Notes

There’s no need to buy the superfine sugar called for in the recipe, for you can make it yourself. Just place ½  cup of regular sugar into a food processor or spice grinder and give it a go. In a minute or two you’ll have superfine sugar.

Inspired by Carla Hall’s Blueberry Cherry Pie With Sour Cream

*     *     *

By any other name …

“Stainless Steel”

*     *     *

Flat Ruthie: Miracle Worker (Part 2)

Welcome back. To recap Part 1, friends and I have, at this point, attended 3 Cubs games, with Flat Ruthie joining us for 2 of them. The Cubs won the games when Flat Ruthie was in attendance and lost the game she missed.

The next game that we attended was against the New York Mets on June 26th. With temperatures soaring well into the 90’s at game time, surprisingly, we spoke little of the weather. Our focus was on Flat Ruthie. Would she bring another victory to this most beleaguered of all ball clubs?

Well, the most amazing thing happened.  Here’s Flat Ruthie posing for me. Please take note of the Man in the bottom left corner.

  *     *     *

Remember that Man!

  *     *     *

Yes, the Cubs won that game, 3 – 1, but for once that wasn’t the amazing thing.

  *     *     *

  *     *     *

As I was attempting, unsuccessfully, to get a photo of both Flat Ruthie and the Cubs score board, the Man in the photo revealed himself. With devoted fans singing the last of “Go, Cubs, Go!”, this Man reached deep, deep into his pant pocket to retrieve his very large … Flat! You see, this Man seated before us was the Keeper of the New York Mets’ Gnome of Defeat — and that’s not even the miracle! Agog, I watched as he photographed The Gnome, trying to capture both Gnome and some significant sight within Wrigley Field. When he was finished, I asked if The Gnome wouldn’t mind posing with Flat Ruthie. Demonstrating that unique camaraderie that exists between all Flats, The Gnome graciously agreed. I took the picture, bid Gnome and Keeper farewell, and we headed for the exit. Flat Ruthie had just witnessed a 3rd victory. Someone pinch me. I must be dreaming!

It wasn’t until later that night, after I uploaded the photos, that I first caught glimpse of it — or did I? There, in the photo with The Gnome of Defeat, Flat Ruthie was sporting a … a … well, look for yourself. Do you see it?

*     *     *

 *     *     *

Skeptic that I am, I thought this some sort of fluke. Perhaps I’d inadvertently captured a ring toss game in progress or some such thing. Needless to say, I put the photo aside, vowing never to mention its existence to anyone. Tell me you wouldn’t have done the same.

It wasn’t long before we found ourselves once again passing through the turnstiles of Wrigley Field to witness a game against the Arizona Diamondbacks. On this day, July 15th, not only did Flat Ruthie join us but so did another Friend, one who would never be considered a fan of America’s Pastime.

*     *     *

*     *     *

Although you cannot see it in the above picture, the Cubs jumped to an early lead and fought hard to maintain it. Sometime during the 6th inning, my-less-than-fanatical fan Friend left to stretch his legs. As he walked around the park, the rest of us wondered if Flat Ruthie was behind these Cubs victories. You see, we’ve been to plenty of games, mostly losses, and it would be absurd to think that skill or even blind luck was behind this recent string of wins. Something else was at work here. I said nothing of the photo.

We were now into the top of 7th inning. Suddenly, the batter knocked a foul ball high into the Upper Deck on the other side of the stadium. I watched in amazement as it bounced directly in front of our Friend and landed right into the palm of his outstretched hand!!!! Unwilling to believe my own eyes, I turned to the others and asked if that was, indeed, our-less-than-fanatical fan Friend. Once Cynthia, who only moments before had fainted dead away, was revived, all agreed that it was, in fact, our Friend.

Try to understand the enormity of this. The rest of us have been going to Wrigley for decades. We’ve sat in virtually every section of that ballpark, and that includes a few of the rooftops across Sheffield Ave. We’ve gotten sunburned, drenched, and, on one memorable Opening Day, snowed upon. We’ve attended many a season’s first game, as well as its last, and far too many games in-between to count. We’ve sat stunned as we watched opportunity slip away and partied with the throngs on Clark St when the Cubs clinched a Playoff berth. We’ve done all that, and more, but never has a ball come within 50 feet of any one of us. Never!

So, my-less-than-fanatical fan Friend returned to us, souvenir ball in hand. Of course, Flat Ruthie insisted upon having her picture taken with them both. All the while, the rest of us groped for answers. How could this be? Are we on the verge of the Apocalypse? Do we walk into the Light or run from it? Was it too late to buy another round of beer? (One can question and still be thirsty.) Despite so many questions demanding answer, I shot my photograph.  Seconds later, when I checked the photo, there it was for all to see.

*     *     *

*     *     *

Flat Ruthie’s Halo had re-appeared — and this time for good. There was no ring toss game in the background. (No beer vendor either.) This was Flat Ruthie, Miracle Worker, pure and simple. She delivered unto my-less-than-fanatical fan Friend a foul ball, thus revealing her powers for all to see. I never should have doubted the first Halo sighting.

*     *     *

*     *     *

Yes, the Cubs won that game but, given the circumstances, the win did seem a bit anti-climactic. Still, a win is a win and, lest you’ve forgotten, the Cubs have won each game with Flat Ruthie in attendance. That’s 4 out of 4 victories thus far this season.

Now that her true self has been revealed, will Flat Ruthie continue to help the Cubs or will she see fit to punish me for doubting her after the Mets game? There’s only 1 way to find out. We’ve tickets for more games this season. I will let you know.

In the meantime, to learn more of Flat Ruthie, the indefatigable World Traveller, Bonne Vivante, and now Miracle Worker, please click HERE to go to her website.

*     *     *