Mom’s Strawberry-Banana Pie

Strawberry Pie 1

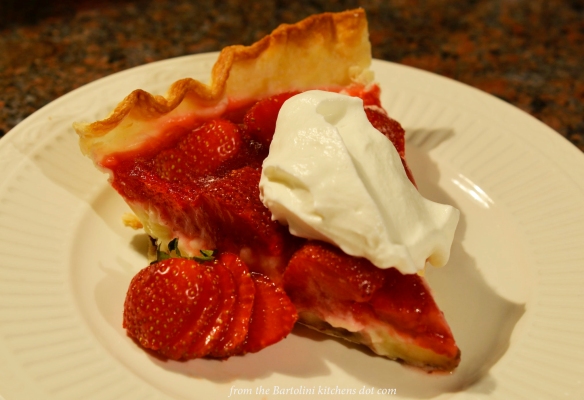
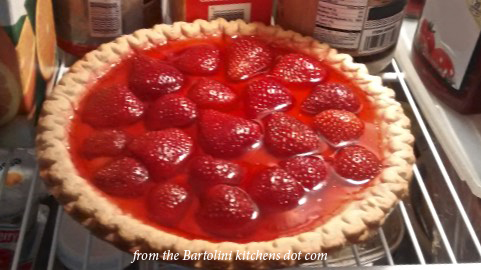
I really cannot explain why this recipe was overlooked for so long. Granted, it wasn’t one that Mom prepared frequently — we were a strawberry shortcake family — but she did make this pie at least once a year. And how I loved it! I was walking around the farmers market, looking at all the fresh strawberries, when I remembered this treat. After buying a quart of strawberries, I rushed home, stopping along the way at a grocery to buy the rest of the ingredients. It wasn’t very much later that I had a strawberry-banana pie chilling in my fridge. A few weeks more and I prepared another while visiting Zia. Now, several months later and with my birthday looming in the near future (it’s Sunday, you know), I thought this the perfect time to share the recipe for Mom’s strawberry banana pie — and my personal favorite. Happy birthday to me!

The recipe I’m sharing is memory-based, for there is nothing written to follow. As you’ll soon see, however, the recipe is easy enough to reconstruct, although I did make a couple of changes. In the first place, I believe Mom used a pudding mix — sometimes vanilla, other times banana — and I do not recall her make pudding from scratch for this pie. The recipe I initially followed was printed in the recipe book that came with my first microwave, bought after I moved to Chicago in 1980. Never throw away a cookbook.

Then again, there are times when maybe you should toss a cookbook. When I prepared its vanilla pudding recipe, it was far too thick and not nearly as creamy as remembered and, therefore, not worthy of Mom’s pie. So, I made a couple of adjustments. I cut the amount of cornstarch, used 3 egg yolks instead of 2 whole eggs, and used less vanilla. The result was a pudding fit for Mom’s pie, just thick enough not to be runny yet creamy enough to wash over your palate. I, like the pudding, was all set.

I could not recall what, if any, glaze Mom used with the strawberry topping. I chose strawberry flavored gelatin, thinking it would both set the berries in place and prolong their shelf life. I did consider making the pie without the strawberry topping, using fresh berries to garnish each piece when served. If you prefer to do that, you should cover the pie with plastic wrap to prevent a film forming on the pudding.

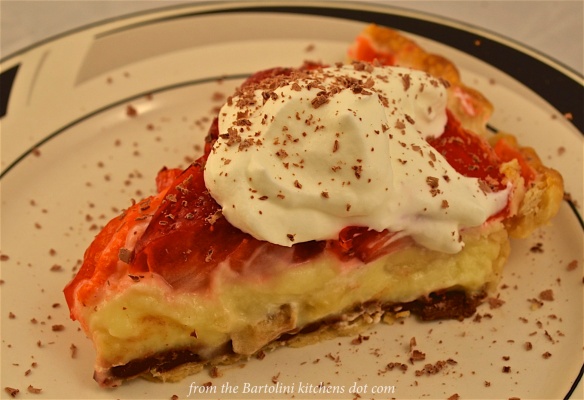
It’s my idea to add a thin coating of chocolate to the pie crust. Living alone, my pie will not “disappear” as quickly as Mom’s did. The chocolate coating will prevent the pie crust from getting soggy as the pie sits. (I can say, with some certainty, that from my earliest days I have never liked a soggy bottom.)

*     *     *

Strawberrhy Banana Pie

Dessert at Zia’s

*     *     *

Strawberry-Banana Pie Recipe

Ingredients

for the pie

  • 1 pastry crust large enough to cover a deep, 9″ (23 cm) pie dish – store-bought may be substituted
  • ⅓ cup semi-sweet chocolate chips
  • 2 tbsp whole milk
  • 1 banana, sliced
  • vanilla pudding, recipe follows
  • 12 oz (340 g) fresh strawberries, cleaned, hulled, and halved or sliced
  • strawberry flavored gelatin, instructions follow
  • whipping cream for serving
  • shaved chocolate for garnish (optional)

for the vanilla pudding

  • ⅔ cup sugar
  • 3 tbsp cornstarch
  • ¼ tsp salt
  • 2 cups whole milk
  • 3 egg yolks, slightly beaten
  • 2 tbsp butter
  • 1 tsp vanilla

*     *     *

This slideshow requires JavaScript.

*     *     *

Directions

to prepare the vanilla pudding

  1. Whisk together the sugar, cornstarch, and salt before adding ½ cup of milk. Continue whisking until fully combined.
  2. Add remaining milk and microwave on high for 5 or 6 minutes, stirring occasionally. Pudding should be smooth and thick.
  3. Temper the eggs by adding a few ounces of the hot liquid to the eggs, stirring all the while. Begin stirring the hot liquid as you add the egg mixture to it.
  4. Microwave on high until the pudding just begins to boil, about 1 minute.
  5. Add the butter and vanilla to the pudding, stir well, cover with plastic wrap (see Notes), and set aside to cool.

to prepare the pie crust

  1. Pre-heat oven to 450˚ F (230˚ C).
  2. Use whatever type of pasty crust that you prefer — homemade or store-bought — and use it to cover a deep, 9 inch (23 cm) pie plate/pan.
  3. Use a fork to puncture the pie crust before baking for 10 to 12 minutes in the pre-heated oven. Crust should be golden brown. Remove to cool.
  4. Once the crust has cooled somewhat, melt the chocolate chips and warm the milk.
  5. Add the milk to the melted chocolate and whisk to create a ganache (see Notes.)
  6. Use a pastry brush to lightly coat the bottom of the pie crust with the melted chocolate.

to prepare the gelatin

  1. Follow the package directions to quickly prepare the gelatin using both boiling water and ice cubes.
  2. Once the gelatin is dissolved and the ice cubes have melted, add the halved/sliced strawberries and gently stir.
  3. Refrigerate for 30 minutes.

to assemble the pie

  1. Once the pie crust has set and the chocolate coating hardened, coat the chocolate with a bit of pudding.
  2. Evenly space the sliced bananas across the pie’s bottom.
  3. Use as much pudding as is necessary to coat the sliced bananas. Be sure to leave room on top of the pudding for the strawberries. Use an offset spatula to even the top of the pudding.
  4. Use a slotted spoon to place the strawberries atop the pudding. Carefully pour the gelatin to cover the pudding and coat the strawberries.
    • Place excess gelatin and strawberries into serving bowls. Once set they may be served to those poor unfortunates who do not like pie.
  5. Refrigerate at least 2 hours to let the pie fully set. The longer the better.
  6. Serve garnished with freshly whipped cream and shaved chocolate (optional).

*     *     *

Strawberry Banana Pie 6

*     *     *

Notes

You can make this pie any number of ways, from the very simple — use store-bought pastry and instant pudding mix — to the more involved — make your own pastry, pudding, and strawberry glaze. No matter how you choose to prepare it, you’ll find this pie makes a fine dessert.

I bet that a few of you gasped and clutched your pearls when you read that I had prepared the pudding in the microwave. Release the pearls! Martha Stewart’s vanilla pudding recipe is a good one and is prepared in a more traditional way.

Whatever type of pudding you prepare, be sure it is on the firm side so that the pie doesn’t collapse as the runny pudding fills the empty place left when you serve a piece of the pie.

Although I like the chocolate coating for the pie’s crust, you’ll create new problems if the chocolate is rock-hard when solid. Remember you’ll have to cut through it to serve the pie. Use enough milk to make a ganache that will stiffen without getting too hard. Either that or make the chocolate coating as thin as possible.

*     *     *

It’s déjà vu all over again …

Blueberry-Lemon Slice copy

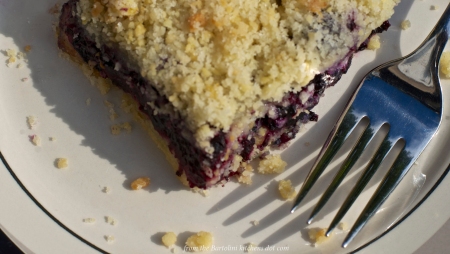
Since today’s recipe was a dessert, why not end this post with another? This Blueberry-Lemon Slice is the perfect combination of tart and sweet and not at all difficult to prepare. It’s also a tasty way to use some of those blueberries if, like me, you freeze a couple quarts every summer. You will see the recipe when you click HERE.

*     *     *

Coming soon to a monitor near you …

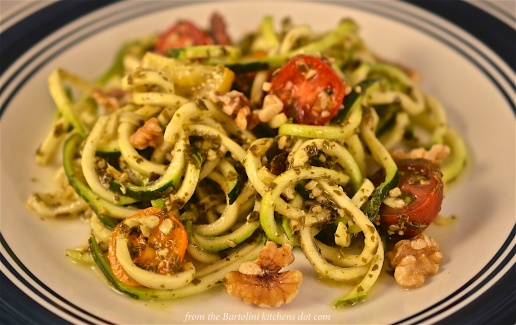
Zucchini Pesto Pasta Preview

Zucchini “Noodles” with Walnut Pesto

*     *     *

A Tale of Two Recipes

During the recent heat wave, I really didn’t leave the house very much. Sure, I had errands to run and a dog to walk but that was pretty much all I did outdoors for much of 2 weeks. Well, except for watching fireworks on the 4th. Yay! It was a golden opportunity to watch some cooking shows as they were broadcast, as well as a number that I’d recorded but never watched.

*     *     *

*     *     *

One show, Lidia’s Italy, has been a long time favorite and I must have at least a dozen of her episodes recorded and saved. So, you can well imagine my astonishment when one afternoon, while watching a recorded episode of her newest show, Lidia’s Italy in America (episode 16, original airdate 12/24/11), there she was, standing in the produce department of my Italian market. Lidia Bastianich. In my market! Later she was in front of the very deli counter where I buy my prosciutto, my sopressata, and my mortadella. Do you realize what this means? I have walked on the very floor tiles upon which Lidia has walked. We’ve spoken to the same people, breathed the same air. I know. It kinda makes you weak-kneed just thinking about it. All I can say is that if you live in the Greater ChicagoLand area, you should head over to Caputo’s in Elmwood Park now, before word gets out and people begin making pilgrimages. It won’t be long before “La Via Lidia” is roped off and you’ll no longer be able to literally follow in her footsteps, as I have done. But I digress …

One show that I watched live was The Chew and on that particular day, Carla Hall made a cherry, blueberry, and sour cream pie. A pie with 2 of my favorite things? I vowed to bake one as soon as normalcy returned to our daily weather. A few days later, a Saturday, Max & I were on our way to the farmers market, where I bought sweet cherries, blueberries, and assorted other fruits & vegetables. On the way home, I stopped at a grocery and bought the sour cream needed for my pie. It wasn’t even 9:00 am and things were going very well. This all changed by 10:00 am, for that was the time I looked up the recipe on The Chew’s website.

The problem was that the printed recipe was not the recipe I recalled Carla preparing. I soon found the video of her making her pie on their website — and I was right. On the video, she uses 4 eggs, while the printed version used 3. Neither version indicates where the egg white is to come from nor the type of cherry to be used. Lastly, the video shows Michael Symon adding 2 tbsp of honey to the filling while the printed version states ⅓ cup is to be used. I was on my own.

My first attempt recreated the pie I watched Carla prepare. I used 4 eggs, the white of one being used to prepare the pie shell. The cherry question had been answered earlier that morning when I found sweet cherries at a good price at the market and bought a quart. And when it came to the honey, I followed Michael’s lead and used 2 tbsp. From that point forward, I followed the directions exactly and the pie was pretty good. For me, though, pretty good wasn’t what I wanted. With blueberries and cherries in season, I want my pie to scream “SUMMER!” This pie said “Eggs.” Yes, eggs. It certainly wasn’t a bad pie and I’m sure that it would be enjoyed by many. It just wasn’t what I’d expected. A week passed during which I ate all that pie, sometimes with home-made vanilla ice cream, sometimes with whipping cream, sometimes plain. But I ate it all because of all the sins one can commit, the gods most frown upon those who waste pie.

Another Saturday came and with it a return of the heat wave in the forecasts. Again Max and I headed to the farmers market. Again I bought blueberries and cherries, although this time I went for the tart. And again, on the way home, we stopped at a grocery to pick up sour cream. This time around, I didn’t just exchange cherries. I, also, cut the eggs in half, using only 2, and I increased the honey to ⅓ cup as the written version had indicated. Because I wanted my new pie to take full advantage of its seasonal ingredients, I increased the amount of both tart cherries and blueberries to 2 full cups apiece. This pie was not going to even whisper “eggs”. Once the filling was made, I prepared the pie as I did the first. And the verdict? I liked this rendition so very much more than the first. As I had hoped, this one was more custard and less egg-y. Adding more cherries & berries paid off, while using tart cherries worked better with the blueberries.

But you needn’t take my word for it.

Below I’ve listed the ingredient lists for both pies. The first uses a filling with sweet cherries and most closely resembles the televised recipe. The second uses tart cherries and fewer eggs in its filling and is more closely aligned with the printed version. The directions for preparing the pie are listed once because they are the same, no matter which filling you wish to use. Make one or make them both. All I ask is that you come back here and tell us what you think or any improvements you might suggest.

*     *     *

Sweet Cherry, Blueberry, and Sour Cream Pie Recipe

Ingredients 

  • A single pie crust large enough for a 9 inch deep dish pie.
  • 4 eggs, 1 divided
  • ½ cup superfine sugar, divided (see Notes below)
  • 1½ cups sweet cherries, pitted
  • 1½ cups blueberries
  • ½ tsp cinnamon
  • ¼ tsp salt
  • pinch of Nutmeg
  • 1 cup sour cream
  • 2 tbsp honey

*     *     *

Tart Cherry, Blueberry, and Sour Cream Pie Recipe

Ingredients

  • A single pie crust large enough for a 9 inch deep dish pie.
  • 2 eggs, 1 divided
  • ½ cup superfine sugar, divided
  • 2 cups tart cherries, pitted
  • 2 cups blueberries
  • ½ tsp cinnamon
  • ¼ tsp salt
  • pinch of Nutmeg
  • 1 cup sour cream
  • ⅓ cup honey

*     *     *

Directions

  1. For the pie crust. 
    1. Pre-heat oven to 400˚F.
    2. Roll out pastry dough into a 12 inch circle and place it in a pie dish, crimp edges, and blind bake, filling the pie with pie weights or beans beforehand. After 10 minutes, remove pie crust from oven. Set aside. Lower oven temp to 350˚F.
    3. When crust is cool enough to handle, remove the pie weights/beans. Whisk together 1 egg white with 2 tablespoons of the fine sugar. Using a pastry brush, coat the pie crust before returning it to the oven. Bake for another 15 minutes or until the crust is golden. Remove from oven and cool.
  2. For the pie filling. 
    1. In a bowl, combine 2 tbsp of the fine sugar, salt, cinnamon, and nutmeg.
    2. In a larger bowl, combine the blueberries and cherries.
    3. Add the sugar combination to the berries and gently mix.
    4. In a 2nd larger bowl, combine the remaining fine sugar & eggs, sour cream, and honey. Whisk until fully blended before adding to the berry mixture.  Stir to combine.
  3. Pour the filling into the pre-cooked pie shell and bake for 1 hour at 350˚F.
  4. Pie may be served warm.

*     *     *

Notes

There’s no need to buy the superfine sugar called for in the recipe, for you can make it yourself. Just place ½  cup of regular sugar into a food processor or spice grinder and give it a go. In a minute or two you’ll have superfine sugar.

Inspired by Carla Hall’s Blueberry Cherry Pie With Sour Cream

*     *     *

By any other name …

“Stainless Steel”

*     *     *

Apple Pie with a Cheddar Cheese Crust

I’ll be the first to admit that serving apple pie with a slice of cheddar cheese is not necessarily a common thing to do and it certainly wasn’t a family tradition. In fact, I was a young adult when Uncle first told me about it. Since then, I’ve enjoyed apple pie with cheddar cheese several times although, to be honest, I’ll take vanilla ice cream before cheddar cheese any day. (I am my Mother’s son, after all.) Still, I was happy with my apple pie adorned with the occasional slice of cheddar until one day a few months ago. I was busy doing whatever and, in the background, there was a Food Network program on the TV. It was one of those shows I’ve grown to dislike, with people talking about how great some dish is at this diner or that restaurant without ever telling how it’s made. Well, I watch these programs to learn new techniques, to get recipes, to see a dish prepared. If I want to hear people talk about how good a dish is, I’ll go to a diner and survey the people eating at the counter. Anyway, a restaurant was mentioned that was known for its pie and which featured an apple pie with cheddar cheese in the crust. Aside from that comment and seeing some grated cheddar dumped into a commercial mixer, the actual recipe was left a mystery. Did I mention how much I dislike these shows? Anyway, my quest began that very day …

In the weeks that followed, I baked a number of test pies. I varied the amount of grated cheddar cheese in the crust from 2 to 6 ounces per crust. I adjusted the amount of fat in the crusts and even swapped spices in the filling. And left in my wake was a trail of apple pies that stretched from the shores of Lake Michigan to those of Lake Huron, not to mention devoted taste testers in both locales. In the end, I settled on using 4 ounces of grated, sharp cheddar cheese and 7 tbsp of fat per crust while, in the pie filling, I replaced nutmeg with cardamom. The result was a pie with a crust that was manageable when raw and, when baked, was relatively light with the distinctive — but not overpowering — taste of cheddar. Success!

With the cheddar question out of the way, let’s talk filling. Just like with our Thingamajig, I use both tart and sweet apples. For the sweet, I find that Fuji work best because they, like Granny Smiths, hold up well during baking. I prefer the apples in my pie filling to be in chunks rather than thinly sliced and that way they remain somewhat firm when baked. Once the apples are peeled, cored, and chopped, I heat them in a saucepan with some butter. All I’m doing is heating them through; I take them off the heat when their juices first begin to appear in the pan. I’ve found that this helps to prevent a finished pie that has a gap of over an inch between the apple pie filling and the crust “dome” above it. It’s important, though, to pull the apples off of the heat as soon as they start to render their juices and to cool them completely before assembling the pie. Cook them too long or fill the pie while they’re still hot and your apples will not be at all crisp when the pie has finished baking.

*     *     *

No pie dome here!

*     *     *

The Apple with a Cheddar Cheese Crust Recipe

Ingredients

  • For Apple Pie Filling
    • 6 Granny Smiths (or similar, tart apples) peeled, cored, and sliced evenly
    • 2 Fuji (or similar, sweet apple) peeled, cored, and sliced evenly
    • 3 tbsp lemon juice
    • 2 tbsp butter
    • 1/4 cup raisins, soaked in hot water and drained (optional)
    • 1/2 cup sugar
    • 1/4 cup dark brown sugar
    • 1/4 cup AP flour
    • 3/4 tsp cinnamon
    • 1/4 tsp cardamom (or nutmeg)
    • 1/2 tsp salt
    • 1 egg, beaten
    • sugar
  • For Each of 2 Pie Crusts
    • 1 1/2 cups AP flour
    • 1/4 tsp salt
    • 3 tbsp vegetable shortening, cut into cubes and well-chilled
    • 4 tbsp unsalted butter, cut into cubes and well-chilled
    • 4 oz. sharp cheddar cheese, grated
    • 3 tbsp ice water, plus 1 tbsp, if needed
    • 1 tbsp cider vinegar

Directions

  • For apple pie filling
    1. In a large mixing bowl, combine the apple slices and lemon juice. Stir to coat the apples.
    2. In a sauce pan large enough to hold the apples, melt the butter over medium heat.
    3. Add the apples and sauté just until the apples begin to give up their liquid. Do not cook until the apples grow soft.
    4. Meanwhile, in a small bowl, mix together the sugar, brown sugar, flour, cinnamon, cardamom, and salt.
    5. Return heated apple pieces to large mixing bowl.
    6. Add the raisins, if using, and spice mixture to the apples and gently stir until the apples are coated evenly.
    7. Set aside to cool completely and until the pie crusts are ready.

  • For Pie Crust – Best if each crust is made individually in the food processor.
    1. Add flour, cheddar cheese, and salt to the processor. Pulse it a few times to combine the 3 ingredients.
    2. Add the very cold butter & shortening cubes.
    3. Pulse the machine 3 times, with each pulse lasting a 3-count. Your ingredients will now be lightly mixed. If need be, pulse again.
    4. With the machine running, add the vinegar and then slowly add the ice water. Do not add so much that a ball of dough forms. Remove the lid and, with your hands, test the dough to see if a ball of dough can be formed.
      1. If so, turn the dough until a very lightly floured service, form a ball, wrap it in plastic wrap, and refrigerate for 30 minutes.
      2. If a dough ball will not form, add a little more water, pulse the machine a couple of times, and test it again. When you can form a ball of dough, follow step A above.
    5. While the dough rests in the fridge, prepare the 2nd crust.
  • Assembly, to occur only after filling is cooled completely and pie crusts rested
    1. Pre-heat oven to 400.
    2. After 30 minutes, remove the dough from the fridge and roll it until large enough to completely cover the bottom of a 9 inch pie pan. Place the dough into the pan, trim any access, and return the crust and pan to the fridge until needed further.
    3. Roll out the 2nd crust, though slightly smaller, it must be large enough to cover the pie with a little excess.
    4. Retrieve the pie’s bottom crust from the fridge, fill it with the apple pie mixture, and cover it with the 2nd pie crust.
    5. Seal the pie by gently lifting the bottom crust’s edge while placing the top crust’s edge behind it. Work you way around the entire pie.
    6. Again, working your way around the pie, crimp the edge to further seal the pie.
    7. Use the egg to coat the top crust. Sprinkle with sugar. Use a sharp knife to create steam vents in the pie’s upper crust.
    8. Bake in a pre-heated 400* oven for 15 minutes. Without opening the door, lower the heat to 375* and continue baking for 40 – 45 minutes.
    9. After a total time of 30 minutes, and 15 minutes thereafter, check to see if the crust’s edge is too dark. If so, cover with aluminum foil and continue baking.
    10. When top is golden brown, remove pie from oven and place on a cooling rack. I always allow my apple pie to cool at least 2 hours before serving.

*     *     *

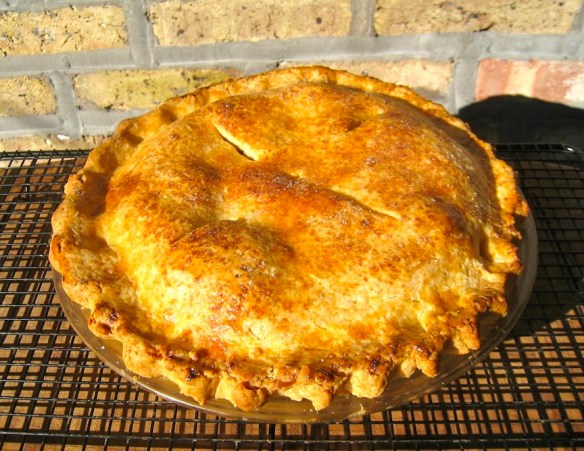
Fresh from the oven

*     *     *

Variations

This recipe is more concerned about the crust than it is the pie filling. So, if you prefer sweet apples, walnuts, or currants, use them. If you hate raisins, ditch them. If you don’t like or haven’t any cardamom, use nutmeg. In short, change the filling to suit your tastes. The same goes with the crust. If you find that adding cheddar to your favorite pie crust recipe makes a better pie, then please come back here and tell us about it.

*     *     *

Notes

One last thing about the crust. Add too little cheddar and you won’t taste it; too much and the pastry dough is rendered unmanageable. And even under the best of circumstances, the cheddar cheese will affect the crust’s flakiness. So, it’s basically a trade-off. The trick is to add as much cheddar cheese flavor as you can without sacrificing too many of the crust’s better qualities. My taste testers and I agree that this recipe “works.” If you try it, I hope you feel the same way.

*     *     *

The Apple Thingamajig

I’d planned to start this post by extolling the apple and its many uses but it’s hard to sing a fruit’s praises when there’s a thingamajig dangling atop your blog, metaphorically speaking, of course.  So, I might as well explain the name of this dish and get it over with — in a minute or two.

I’ve been busy elsewhere the past few days, so, these acknowledgements are a tad late. Last Friday, Kristy, of Eat, Play, Love was kind enough to pass me the Versatile Blogger Award, as did Eva of Kitchen Inspirations the very next day. Kristy’s blog is a family affair, featuring 2 gourmands-in-the-making, Mr. N and Miss A. Her recipes come from around the World and the blog’s stars are adorable. 4 spoons all the way! Eva’s blog is a treat, as well. Visit her blog and you may find yourself having brunch in a Montreal café or sharing a Moroccan feast that she researched and prepared herself. And every post is beautifully photographed. If you haven’t already done so, do yourself a favor and visit these 2 wonderful blogs. And as for the award itself, I am very thankful for the honor but, having just received this award a week ago, I won’t be passing it along. (As I mentioned to Kristy, I fear putting us all into some sort of infinite loop.) I will, however, refer you to my post of a week ago. Now, about that thingamajig …

Several years ago, at about this time of the year, my cooking shows were all featuring apple pies. Now, I love apple pie but had shied away from making them because my pie crusts were terrible and the poor apples turned to mush. That Fall, I decided to teach myself how to bake a pie and, every week to 10 days, I baked an apple pie. Well, with parents who were children of the Great Depression, we learned very early on that one  never wastes food. Period. So, if I made a pie, I ate a pie. True, eventually my pies got better and I was confident enough to share them with friends — but I ate a whole lotta pie before then. Still, even though I eventually settled on recipes for both crust and filling, one pie is a lot if you live alone, as Zia and I often commiserated. As a result, neither of us baked apple pie because we didn’t want to be greeted by the same pie every time we entered our kitchens for the next week or so. That was until 2 years ago. It was about that time that we both saw cooks on television prepare apples in a form that was part pie and part tart. They called them “open-faced” pies or tarts but, to our minds, they’re neither. So, we started calling them apple “thingamajigs” and the confusion ended, at least between the two of us. Best of all, an apple thingamajig is half the size of a pie and, therefore, better suited to our swinging single lifestyles.

Now, there are plenty of recipes around for thingamajigs and mine is based upon my apple pie recipe, with one notable exception. I include cheddar cheese in my apple pie crust but not here. Being a thingamajig has only one crust, the cheddar cheese flavor is too mild to be noticed and adding more cheese to the recipe only serves to make the crust unmanageable. So, the cheddar is reserved for double-crusted pies and it’s probably just as well. (My apple pie recipe with a cheddar crust is forthcoming.) A thingamajig, being open-faced, is less “runny” than a normal pie due to evaporation during baking. (See Notes.) As you’ll see and much to my liking, the apple slices remain firm and more apple flavor retained. As for the apples themselves, I always use tart apples, preferably Granny Smith, but I also add a sweet one — Fuji or Honeycrisp — to the filling, usually in a 3 tart to 1 sweet apple ratio. That way, you get an occasional taste of sweet among the sour. Raisins or currants will do the same. To that end, I don’t use a lot of sugar nor a number of spices in my apple filling. Why use tart apples if you’re going to add a ton of sugar and spice to the filling? For me, when it comes to apple filling, less is more.

*     *     *

The Apple Thingamajig Recipe

Ingredients

  • For Pie Crust
    • 1 1/2 cups AP flour
    • 1/4 tsp salt
    • 5 tbsp vegetable shortening, cut into cubes and well-chilled
    • 4 tbsp unsalted butter, cut into cubes and well-chilled
    • 3 tbsp ice water
    • 1 tbsp cider vinegar

  • For Apple Filling
    • 3 Granny Smiths (or similar, tart apples) peeled, cored, and sliced evenly
    • 1 Fuji (or similar, sweet apple) peeled, cored, and sliced evenly
    • 2 tbsp lemon juice
    • 1/4 cup sugar
    • 2 tbsp dark brown sugar
    • 2 tbsp AP flour
    • 1/2 tsp cinnamon
    • 1/8 tsp nutmeg
    • 1/4 tsp salt
    • 1 egg, beaten
    • sugar
    • butter

Directions

  • For Pie Crust
    1. Add flour and salt to the processor. Pulse it a few times to mix the 2 ingredients.
    2. Add the very cold butter & shortening cubes.
    3. Pulse the machine 3 times, with each pulse lasting a 3-count. Your ingredients will now be lightly mixed. If need be, pulse again.
    4. With the machine running, add the vinegar and then slowly add the ice water. Do not add so much that a ball of dough forms. Remove the lid and, with your hands, test the dough to see if a ball of dough can be formed.
      1. If so, turn the dough until a very lightly floured service, form a ball, wrap it in plastic wrap, and refrigerate for 30 minutes.
      2. If a dough ball will not form, add a little more water, pulse the machine a couple of times, and test it again. When you can form a ball of dough, follow step A above.
    5. While the dough rests in the fridge, prepare the filling.

  • For Apple Filling
    1. In a large mixing bowl, combine the apple slices and lemon juice. Stir to coat the apples.
    2. In a small bowl, mix together the sugar, brown sugar, flour, cinnamon, nutmeg, and salt.
    3. Add the spice mixture to the apples and gently stir until the apples are coated evenly.
    4. Set aside until the pie crust is ready.


  • Assembly
    1. Roll the dough as if making a bottom crust for a 9 inch pie.
    2. Place the apples in the center of the dough circle, leaving a 2 inch border around the filling. Creative types may wish to carefully place the apples in a circular design. (That is soo not me.)
    3. Carefully lift the border, working your way around the filling, crimping as needed. You are creating the crust for your open-faced thingamajig.
    4. Dot the top of the apple filling with small bits of butter.
    5. With a pastry brush, lightly coat the exposed crust with the beaten egg. Sprinkle the sugar.
    6. Place in a pre-heated 375* oven and bake for 40 to 45 minutes or until golden brown.
    7. Should not be served piping hot but may be served warm.

*     *     *

Variations

Just like its cousins the tart and pie, you can add ingredients to the filling to suit your own tastes. In the past, I’ve added raisins, currants, and chopped walnuts to the filling and enjoyed each. And, of course, you can change this dessert completely by selecting different apples. I like tart; you may prefer sweet. Lucky for us, there are plenty of apples to choose from.

*     *     *

Notes

Because there are fewer pie juices to contain, this pie crust can be rolled thinner than you would for a pie and, as a result, you can easily make 2 thingamajigs — as I often do and did today. I keep one for myself and give the other to a friend.  I believe it was Confucius who said, “It is easier to give someone a thingamajig than it is to give half a pie.”

*     *     *

My Cherry Amour, Reprise (Bigger, better, badder!)

Having professed my love of tart cherries last week, I’m sure you can understand my remorse now that cherry season has come to an end. Rather than mourn their passing, however, I’ve decided to celebrate their sour little lives by baking one last cherry pie. (Put another way, I’ve got a freezer full of cherry muffins and there’s still another quart of pitted cherries in the fridge.)

I’ve used both of these recipes for several years now. The first, for pastry dough, uses a food processor to mix the dough. That alone makes it a winner in my book. The recipe, however, makes only enough pastry dough for one 9 inch pie crust. I’ve found that I get better results if I make 2 batches of dough, rather than doubling the recipe for a double-crusted pie. Don’t ask me why but that’s just the way it works. The recipe for the pie filling is about as simple as can be. Flour, not cornstarch or tapioca, is the thickening agent and there’s no need to pre-cook the fruit filling mixture before placing it into the pie shell. So, if you’re good working with pastry dough, you can have a pie in the oven pretty quickly. Me? It’s an afternoon project, often including wailing, the gnashing of teeth, and the rending of garments.

There is one last thing to consider, especially if you, like me, tend to throw common sense out the window when you see all the pretty quarts of tart cherries lined up in the market or at some farmer’s stand. I mean, how can you not buy a few quarts? It all makes perfect sense until you arrive home and realize that you have to pit them all before you can do anything else with them. Well, there is hope for us. I’ve found a website that should be called “How to deal with the fruit and stuff that result from ChgoJohn going to a farmers’ market.com?” It has been called, instead, Kraft Foods something or other and it explains how to freeze a variety of baked goods. You can reach it by clicking here and I recommend that you bookmark the site. It’s one of those web pages that you probably won’t need today, you may not need tomorrow, but you are going to need it some day.

*     *     *

Food Processor Pie Crust Recipe

Yield: One 9 inch pie crust

For best results:

  • Do not over-process the dough.
  • Use only enough water to create a crumbly texture.
  • Do not run the processor long enough to form a dough ball. Use your hands to do that.

Ingredients

  • 1 1/2 cups flour
  • 4 tbsp unsalted butter, chilled/frozen, cubed
  • 5 tbsp shortening, chilled/frozen, cubed
  • 1/2 tsp salt
  • 3 tbsp ice water

Directions

  1. Add flour and salt to the processor. Pulse it a few times to mix the 2 ingredients.
  2. Add the very cold butter and shortening cubes.
  3. Pulse the machine 3 times, with each pulse lasting a 3-count. Your ingredients will now be lightly mixed.
  4. With the machine running, slowly add the ice water. Do not add so much that a ball of dough forms. Remove the lid and, with your hands, test the dough to see if a ball of dough can be formed.
    1. If so, turn the dough until a very lightly floured service, form a ball, wrap it in plastic wrap, and refrigerate for 30 minutes.
    2. If a dough ball will not form, add a little more water, pulse the machine a couple of times, and test it again. When you can form a ball of dough, follow step A above.
  5. After 30 minutes, remove the dough from the fridge and roll it until large enough to completely cover the bottom of a 9 inch pie pan. Place the dough into the pan, trim any access, and return the crust and pan to the fridge until needed further.
  6. I usually postpone handling the 2nd pie crust, the “top,” until just before it is needed. The colder the dough going into the oven, the flakier the crust coming out.

*     *     *

Pie Eyed

*     *     *

Cherry Pie Recipe 

Ingredients

  • Pastry for 1 double-crust 9 inch pie.
  • 4 cups fresh, tart cherries, pitted
  • 1 1/3 cups sugar
  • 1/3 cup ap flour
  • 1/4 tsp salt
  • 1/4 tsp almond extract
  • 2 tbsp butter, cut into small cubes
  • 3 tbsp milk
  • sugar

Directions

  1. Pre-heat oven to 425*.
  2. Use half of the pastry dough to line the pie plate. Place it in the refrigerator to chill until needed.
  3. Gently combine the cherries, sugar, flour, salt, and almond extract.
  4. Roll out the other half of the pastry and prepare for use. If covering the entire pie, leave as is. If creating a lattice, cut the strips. If, as I did, you’re creating leaves, use a stamp to form them all, place on a baking sheet lined with parchment paper, and refrigerate until needed.
  5. Pour the cherry mixture into the chilled pie shell and dot the pie with the cubes of butter.
    1. If covering the entire pie, spread the top portion of the pastry dough, seal its edge with the bottom’s dough, crimp the edge, and create slits in the top to allow steam to vent.
    2. For a lattice cover, retrieve the strips and, starting at one end of the pie, weave a lattice across the pie’s top. (See Notes below.)
    3. For a leaf top, place the dough leaves across the top,  being careful to leave enough openings for steam to vent.
  6. Use a pastry brush to coat the upper crust with milk. Sprinkle the top with a light dusting of sugar.
  7. Bake on a baking sheet — in case of overflow — in a pre-heated 425* oven for 35 to 40 minutes until golden.
  8. Allow to cool before serving so that the filling sets properly.

*     *     *

"... And let's have another piece of pie."

*     *     *

Notes

The reason one sees so many lattice-topped cherry pies is because a woven top allows the pie’s juices to evaporate somewhat during the baking process, making for a better pie. Cook’s Illustrated Magazine’s book, Baking Illustrated (p. 148), suggests creating the lattice on parchment paper and not atop the pie. Once woven, place both the lattice and parchment paper in the freezer. When the lattice is firm, gently transfer it from the paper to the pie’s top and carefully connect it to the bottom crust. Brush it with milk, sprinkle with sugar, and bake as directed above.

And so ends this year’s journey down Cherry Lane, where pitting is such tart sorrow.

*     *     *