Peach and Bing Cherry Cobbler

Well, it certainly took me a while to get here but this is it, the end of this year’s peach recipes. And, as far as this blogger is concerned, I saved the best for last. You see, I happen to really like peach cobbler. I make them with a batter that rises through the peaches, creating a cake-like top. I make them with a biscuit placed on top and baked.  I eat them as they are, still warm from the oven. I eat them with a scoop of vanilla ice cream or a large spoonful of whipped cream. And there lies the problem. I eat them. All of them. Every last morsel of every last one of them. There just aren’t many recipes for peach cobbler for one. So, I make a cobbler and for the next week, my snacks and desserts are all servings of peach cobbler.  I know, poor me! Well, this time around, I decided to try something different. I divided the cobbler among 6 smaller dishes and froze all but the one I tested for “quality control”. (Thank you, Tanya.)  See Variations below to see what I did.

Oh, yes. I almost forgot about the cherries. Most will recall that a few weeks ago I shared 2 recipes for a blueberry and cherry pie. The final pie was so good that I’ve been thinking of combining other fruit in other pies. Well, this being peach cobbler season, why not  experiment? Last week at the farmers market, I purchased what would turn out to be the last of the season’s Bing cherries and a plan was born. Upon my return home, Google gave me the recipe.

Today’s cobbler combines Bing cherries with fresh peaches and is crowned by a biscuit, of sorts. There’s nothing complicated about it, though pitting the cherries can be a bit tiresome. Even so, once the fruit is prepared, the rest of the recipe is a snap. And once you taste this cobbler, you won’t remember anything about pitting cherries — unless you wore a white t-shirt. When will I learn?

 *     *     *

 *     *     *

This post was written prior to my departure for Michigan and scheduled to post now. The trip went as planned, Zia’s freezer is filled, and we took turns cooking dinner. I hope to have a “vacation” post written by the weekend. Internet service was deplorable and, as a result, it will take me a while to get caught up with all of your posts and comments but I’ll get there. Thanks for your patience.

 *     *     *

Peach and Bing Cherry Cobbler Recipe

Ingredients

  • 3½ lbs peaches, peeled and sliced or chopped  (about 6 large peaches)
  • 2 lbs Bing cherries, pitted
  • ¾ cup sugar
  • ¼ cup cornstarch
  • 3 tbsp lemon juice

for the biscuit topping

  • 2 cups all-purpose (AP) flour
  • ⅓ cup plus 2 tbsp sugar, divided
  • 2½ tsp baking powder
  • ½ tsp salt
  • ½ cup unsalted butter, chilled and cubed
  • ¾ cup plus 2 tbsp whipping cream, divided
  • ¼ tsp ground cinnamon
  • ice cream for serving (optional)

Directions

  1. Liberally grease a 9 X 13″ baking dish. Pre-heat oven to 425˚ F (218˚ C)
  2. In a large saucepan over high heat, combine peaches, cherries, and sugar. Stir carefully, bring to a boil, and simmer for 1 minute.
  3. Remove filling from heat and pour into prepared baking dish.
  4. In a mixing bowl, whisk together the AP flour,  ⅓ cup of sugar, baking powder, and salt.
  5. Using knives or a pastry blender, cut the butter into the dry ingredients until a very coarse mixture results. Stir in ¾ cup whipping cream and knead only enough to create a dough. DO NOT OVER-WORK THE DOUGH.
  6. Place dough on a floured surface and roll to a ½ inch thickness. Use cookie or biscuit cutters to cut shapes in the dough. Place the shapes on the filling in any pattern you wish.
  7. Combine cinnamon with remaining sugar and whipping cream. Use a pastry brush to coat the tops of all the pasty cutouts.
  8. Bake in a 425˚ F (218˚ C) pre-heated oven for 20 to 25 minutes. Filling should be hot and bubbling.
  9. Serve warm with optional ice cream.

 *     *     * 

*     *     *

Variations

As I mentioned, I used 6 small baking dishes for this recipe rather than 1 large dish. 4 of these dishes each held 500 ml while the other 2 were a little smaller at about 400 ml. I greased and filled each one, using biscuit cutters for the topping. Once they were baked and cooled completely, I wrapped each in plastic wrap before sealing them again in aluminum foil. They were placed on a baking sheet and frozen. To serve, remove the plastic wrap and recover using the foil before placing it in an oven pre-heated to 350˚F (177˚C). After 30 minutes, remove foil and continue heating until filling is bubbly, about another 15 minutes. Cooking time will depend upon size/amount frozen.

I think next year I’m going to try this recipe using tart cherries instead of Bing and with a little almond extract in the biscuit instead of the cinnamon. It’s not that there is anything wrong with this cobbler, I just happen to prefer tart cherries and want to see if they’d be at least as good.

*     *     *

It’s déjà vu all over again …

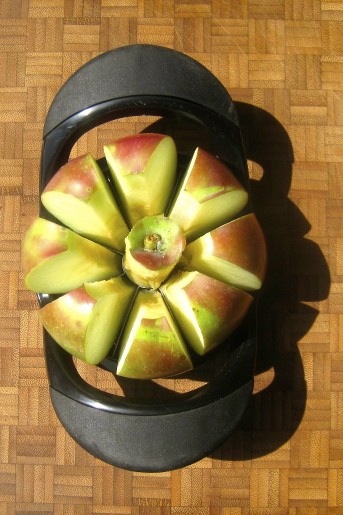
Peaches are all but gone from our farmers markets and though a few berries, plums, and pears remain, apples have started to take over the vendors’ stalls. It’s the time of year for apple pies, muffins, crumbles, and sauce. If you choose your apples wisely, your pie will be as tart, and your apple sauce as sweet, as you like.  As proof of the latter, last year I shared a recipe for apple sauce that does not call for any sugar whatsoever. You can see the recipe by clicking HERE.

*     *     *

And another thing or three …

Aside from the recipes I’ve posted, the Kitchens have been busy trying out recipes from two great blogs. Thanks to David, The Gastronomic Gardener, I have jars of brandied figs and 2 kinds of pickled peppers on my shelf. And thanks to Richard, REMCooks, my tasters and I all have jars of  peach preserves with jalapeños and cardamom. Both guys have great blogs and I hope you take some time to check them out.

*     *     *

Advertisement

Peach Ice Cream – Revisited with Custard and Nectar


Yes, I know it’s getting a little late for ice cream recipes and peaches are all but gone from the farmers markets, but I just couldn’t let this one sit around until next year. My previous peach ice cream used sour cream for its base. Today’s recipe uses custard for a base but it, also, uses peach nectar for added flavor.  That peach nectar also affects the ice cream’s texture. One of my tasters said it was like a cross between sorbet and ice cream. Despite its great taste, though, you may prefer a more traditional, custard only, ice cream. Lucky for us all, Betsy has already shared her recipe for peach ice cream on her blog, Bits & Breadcrumbs. (Do take a few minutes to check out both her recipe and her blog. You won’t be disappointed.)  So, you now have 3 peach ice creams from which to choose but if you think I’m done with peaches, you’d be mistaken. Next week I’ll share a recipe for peach cobbler, with a twist.

This ice cream will have a better “mouth feel” if you fully purée the peaches.  Although you can process the peaches until merely chunky, I find it better if they are puréed until completely smooth. This recipe will make 3 quarts of ice cream. That’s quite a bit if you’ve a smaller machine like mine. The saving grace of my machine is that I purchased it on Amazon during a sale in which I received an additional freezing canister for free. That additional canister means that I can get all 3 quarts made and put away in one night. To see how it’s done, be sure to check out the Notes section below.

Now, I’m already in Michigan, where Zia and I have plans to stock her freezer with ravioli and sausage, that is if we can keep Max occupied elsewhere. So, I’ll keep the posts for today and next week on the short side. Given the sorry state of that area’s internet coverage, I hope you’ll understand if I’m not quick to respond to your comments or to leave a remark on your blogs.

 *     *     *

 *     *     *

Peach Ice Cream Recipe

Ingredients

  • 4 cups peeled and chopped peaches (about 3 lbs or 6 large peaches)
  • 1 cup nectar
  • ½ cup sugar
  • 4 egg yolks
  • 4 cups milk
  • 1 cup half-and-half
  • 1 tbsp lemon juice
  • ¼ tsp cinnamon
  • pinch of salt
  • sliced fresh peaches and toasted pecans for garnish (optional but strongly advised)

Directions

  1. In a large bowl, combine peaches, sugar, and nectar. Mix thoroughly.
  2. Working in batches, use a food processor or blender to fully purée the peach mixture until smooth. Refrigerate.
  3. In a mixing bowl, whisk together egg yolks and milk until fully blended. Add the egg mixture to a heavy-bottomed pan or double boiler (my favorite). Heat over a med-high heat, stirring constantly, until it thickens and a custard forms, about 20 to 25 minutes. DO NOT ALLOW TO BOIL.
  4. Once thick enough to coat the back of a wooden smooth, remove from heat and pour the custard through a fine mesh strainer into the reserved peach purée. Add the half-and-half, lemon juice, cinnamon, and salt, whisking until fully combined.
  5. Cover and place in the refrigerator for at least 4 hours.
  6. Make your ice cream using this peach custard and following your machine’s instructions. Place in freezer until frozen to your liking.
  7. When ready to serve, garnish with sliced peaches and toasted pecans. (See Variations)

 *     *     *

Variations

This is a good ice cream recipe but it is so much better when served with sliced fresh peaches and toasted pecans. To prepare the peaches, just peel and slice a ripe peach, putting the slices in a resealable container. Sprinkle a little sugar on top, seal the container, and place in the fridge for at least 30 minutes, giving the fruit a chance to macerate. In the meantime, toast the pecan chips in a small frying pan over medium heat. Be attentive or they’ll burn before you know it. Add a little of both to your ice cream cup for a dessert that is just about perfect.

Notes

As I’ve mentioned, this recipe will make enough peach custard to make 3 quarts of ice cream. That is 2 quarts too many for a single machine like mine and even though I’ve got a 2nd canister, that still leaves me with one quart of custard too many. Since it takes a full 24 hours to freeze my canister, this recipe could stretch out over 2 days, at least. Here’s what I do to get around the problem.

Once the custard is chilled and ready to be put into the machine, I put it into the canister and refrigerate the excess.  When it’s ready, after about 25 minutes, I quickly dump the newly formed ice cream into a container, place it in the freezer,  and quickly refill the canister with more custard. If there’s leftover ice cream in the canister, all the better. After 25 minutes, I will not have ice cream but I will have a thicker, chilled custard.  I then pour this custard into the unused frozen canister, which I’ve kept in the freezer until now. No need to let the machine process for all the 25 minutes, 15 minutes will do. Quickly remove the ice cream, use it to fill another quart container, and place it in the freezer. I then pour the remainder of the custard into the same canister and let her rip! Surprisingly, after about 30 minutes, I’ll have another quart of ice cream ready to be frozen. And what do I do with 3 quarts of ice cream? I give 2 quarts to my tasters and keep one for me.

Adapted from Southern Living, July 2005

*     *     *

It’s déjà vu all over again …

Well, with today’s recipe being an ice cream, what better recipe to pull from the past than the one for pickles, Bread & Butter Pickles? These are not preserved but are kept in the refrigerator, where they will keep for weeks. You needn’t worry about that, though. These pickles will disappear long before freshness is an issue. You can read the recipe by clicking HERE.

*     *     *

The parting shot …

For the past 13 weeks, I’ve ended each blog entry with a photo. Well, I’ve no more roses to share but I didn’t think it right to abruptly stop the practice. So, I give you this last photo and, although this may have nothing to do with roses, it is, in its own way, every bit as memorable. With thanks to Chris.

*     *     *

The Kitchens have a Peach of a Jam

*     *     *

Peaches in this area are just passing their peak season and the farmers markets are filled with them. Over the next few weeks, peaches will disappear and the pears and apples will supplant them. For now, though, they seem to be calling to me, just as the tart cherries, blueberries, and strawberries did before them. So, I’ve answered their call and bought some each time I’ve gone to the market. Admittedly, the first purchases were eaten as-is. How could I not?  After that, I made ice cream and posted a recipe in honor of Mom’s birthday last week. Having made a few quarts of peach ice cream, it was time to move on.

Several weeks ago, when strawberries were at their peak for this area, I posted a strawberry jam recipe made with Balsamic vinegar and black pepper. In the Comments section of that post, Betsy, of Bits and Bread Crumbs, and Elaine, of Le Petit Potager, discussed making peach jam.  Betsy wondered about using balsamic and black pepper. Hmm …

After my last trip to the farmers market, I had what I thought was enough peaches to make a small-ish batch of peach jam — with a little balsamic vinegar. The recipe enclosed within the pectin packaging called for 4 cups of cleaned fruit. Incredibly, I somehow ended up with 7½ cups. I decided to use 6 cups here and to save the rest for a custard-based ice cream. (Recipe to come.) This recipe is very similar to the one used to make the strawberry jam, except I used white balsamic so that the peaches wouldn’t discolor; I used both lemon juice and zest; and, I didn’t add any pepper — maybe next time. Because I used so many more peaches than I had intended, I followed a tip from the Pick Your Own website. The author always adds an additional 20% of pectin than what the recipe calls for, just to ensure a good set. So, rather than add 49 g (1 envelope) I added 60 g to the peach mixture. My jam set perfectly although, next time, if I use 6 cups of peaches, I’ll increase the amount of white balsamic by another tablespoonful or two.

What if you’re not a balsamic lover? What if you just want to make some really good peach jam? Well, then, waste no time and click this link to go to Barb’s Just a Smidgen blog, where you’ll be treated to a fantastic recipe for making peach jam, not to mention a thorough, step by step, description of the canning process.

*     *     *

*     *     *

Peach with Balsamic Vinegar Jam Recipe 

yield: 7 – 8 cups

Ingredients

  • 6 cups fresh peaches, cleaned, peeled, sliced or chopped
  • 4 cups sugar – separated
  • 1 envelope + 20% more low-sugar pectin (60 g  total pectin)
  • 1 tsp butter (optional)
  • pinch of salt
  • juice & zest of one medium-sized lemon
  • ½ cup white balsamic vinegar

Directions

To Prepare

  1. Sterilize the jars and wash the jar lids and bands in hot, soapy water. Place lids and bands in a deep bowl and pour near-boiling water over them.
  2. Start bringing to boil a large, deep canning kettle of water to be used for the canning process and a second, smaller pot of water to be used to replenish water that may boil away during the canning process.
  3. Mix the pectin with ¼ cup of the sugar. Set aside.
  4. Working in batches, add sliced/chopped peaches into a large bowl and use a potato masher to smash them as much as you like. I skipped this step; my slices were thin and needed no further handling.

To Make the Jam

  1. Place the peaches and the pectin-sugar mixture into a heavy-bottomed pot over a med-high heat. A Dutch oven works nicely. Add butter, if desired, to limit foam.
  2. Stirring frequently, you are heating the peaches until a rolling boil is achieved at about 220˚F. A rolling boil is one that will not dissipate when the pot’s contents are stirred.
  3. Add the remaining sugar and stir well. Stir frequently while you wait for the pot to return to a rolling boil.
  4. Once a rolling boil has returned, keep stirring for exactly one minute before removing the pot from the heat.
  5. With a large spoon, carefully skim the surface to remove any foam.
  6. Add balsamic vinegar, lemon juice, and zest. Stir well to thoroughly combine.

To Preserve

  1. Using a funnel and large ladle, fill each jar to ¼ inch from the rim. Wipe the rim to make sure no jam has spilt, place a lid on each jar, and then the band, tightening until “finger tight” but not as tight as you can make it. Act quickly, filling and capping all the jars.
  2. Jars placed directly on the kettle’s bottom might burst, so, a rack of some sort must be put into the canning kettle to cover the bottom. Many large pots have one, as do many pressure cookers. (I use a rack from an old pot that has long since been discarded.)
  3. Keep each jar level as you place them, one by one, into the canning kettle filled with now boiling water. The jars should not touch each other, nor should they be allowed to tip over. Depending upon the size of the kettle and number of jars, you may need to work in batches.
  4. Once the jars are in the kettle, make sure that there is at least one inch of water over the top of the tallest jar(s). If not, add boiling water from the smaller pot mentioned in Step 2 of  To Prepare.
  5. Cover the pot and begin timing when the water returns to the boil. The jars must be boiled, “processed”, for 10 minutes.
  6. Meanwhile, place a baking sheet on a level surface and line it with a clean kitchen towel.
  7. Once 10 minutes have passed, carefully remove each jar and place it on to the towel-lined baking sheet. Leave about an inch separating the jars.
  8. Once all the jars have been processed and placed on the baking sheet, remove the baking sheet & jars to a place that is draft-free and where they will remain undisturbed for 24 hours.
  9. After 24 hours have passed, check each jar to insure it’s sealed and then store on a shelf in a cool, dark place, where it will stay fresh for months.

*     *     *

It’s déjà vu all over again …

This time of year, our farmers markets are filled with fresh fruits and vegetables, and with Labor Day barbecues quickly approaching, there’s no better time to make a batch of Chicago-style giardiniera. This colorful condiment is a great way to add some crunch, and a little heat, to your burgers, dogs, wurst, and sandwiches. The recipe was shared last August and you can find it by clicking  HERE.

*     *     *

By any other name …

“Sunset Celebration”

 *     *     *

It’s Mom’s Birthday and I’ve Got a Peach of an Idea!

As you may, or may not, recall, August is the birthday month for a number of people in my life, with today, August 15th, being Mom’s birthday as well as that of her Mother, Grandma Bartolini. Zia’s husband, “Uncle”, was born on the 11th  — and we’re just getting started. My Friend, one of the Kitchens’ tasters, had a birthday on the 7th, while another, my Friend the Entertainer, will be celebrating on the 20th.  And we mustn’t forget the kids. My Grand-Nephew’s birthday was the 1st, my not-quite-a-nephew Nephew will be blowing out candles on the 24th, and the Oldest of the Boys Upstairs has a birthday this Saturday, on the 18th. That’s a lot of birthdays!

So to celebrate, last August I posted 3 separate ice cream recipes that I combined for the finale. The first was taken from a recipe book that Mom gave me shortly after I moved to Chicago in 1980.

*     *     *

Pistachio Nut Ice Cream

*     *     *

Next on that month’s agenda was an ice cream based on Mom’s own chocolate recipe.

Chocolate-Chocolate Chip Hazelnut Ice Cream

*     *     *

Then came the third recipe. Again, using Mom’s recipe as a base, I created this “pretty in pink” ice cream.

Maraschino Cherry Ice Cream

*     *     *

Well, with those 3 recipes laying the ground work, I had little choice but to put them together.

Spumoni Ice Cream (It’s da Bomba!)

*     *     *

Now, having mentioned those 3 ice cream recipes and a Bombe, I might as well finish off this little round-up by sending you to the hands-down favorite ice cream recipe of all the Kitchens’ tasters, family, and friends. It may not be a frozen custard nor traditional ice cream but, I have to say, it’s damn good!  (Pssst! It’s the crumbled graham cracker crust.)

Blueberry Cheesecake Ice Cream

*     *     *

As great as that all sounds, this year I was in quite a pickle. What should I do for this year’s Birthday Month? How could I possibly top a Spumoni Bombe? Well, I can’t and won’t even try. What I will do, however, is share a recipe for an ice cream flavor that Mom loved. Yes, when it came to ice cream, Mom had a number of favorites. Frankly, I doubt that Mom ever tasted an ice cream that she didn’t like — and we haven’t even mentioned sherbet yet.

So, with that monkey off my back, I decided to take full advantage of the bounty in this area’s farmers markets. Today’s recipe will be for peach ice cream. It’s a simple recipe that results in a peachy frozen delight.  It’s Mom’s birthday, however, and “peachy” just won’t do. Directly following the recipe is a serving suggestion that Mom would have surely enjoyed. I hope you will, too.

Now, if you’ve no experience working with peaches, this paragraph is for you. In the first place, you may not be able to find fruit that are perfectly ripe, even in your farmers market. Just place the best you can find in a paper bag, place it on a counter, and check them every morning. In a couple of days, your peaches will be exactly how you like them. So, once your peaches are ripe, how do you peel them? Bring a large pot of water to boil. In the meantime, fill a large bowl with iced water. Take each peach and use a paring knife to cut a small “X” into the fruit’s bottom. Place the peaches into the rapidly boiling water and leave them there for about 30 seconds. Transfer them to the iced water bath to cool and to stop them from cooking. After a few minutes, simply peel off the skin beginning at the “X”. You may need a paring knife to trim a stubborn spot or two but, basically, that’s all there is to it.  And that’s the last of any possible problems you might run into.

*     *     *

*     *     *

Peach Ice Cream Recipe

Ingredients

  • 1½ pounds peaches — about 4 large fruit
  • ½ cup water
  • ⅔ cup sugar
  • ½ cup sour cream
  • 1 cup whipping cream
  • ¼ tsp vanilla extract
  • ⅛ tsp cinnamon
  • pinch salt

For Serving

  • 1 peach. peeled & sliced — more depending upon the number of servings
  • sugar
  • toasted chopped pecans

Directions

  1. Once the peaches are peeled, cut each into chunks, removing the pit in the process.
  2. Place the peaches and water into a non-reactive sauce pan and cook over a medium heat until the peaches are soft — about 10 minutes.
  3. Remove from heat, add the sugar, stir well, and set aside to cool.
  4. When the peach mixture has reached room temperature, place it in a food processor or blender, along with the sour cream. whipping cream, vanilla extract, cinnamon, and salt. Purée until blended but still a little chunky.
  5. Place the peaches & cream mixture into the fridge until thoroughly chilled — about 4 hours, more or less depending upon your fridge.
  6. Add the chilled peaches & cream to your ice cream machine and follow the manufacturer’s instructions to create your peach ice cream.

To Serve

Peaches are in season and we shouldn’t let this opportunity slip away. About 45 minutes before you serve your peach ice cream, peel and slice a ripe peach, more depending upon how many servings are to be prepared. Place the slices in a bowl, sprinkle with sugar, stir gently, and set aside. When ready to serve, divide the peach slices and juice among the servings of ice cream. Garnish with toasted chopped pecans.

Inspired by David Lebovitz, “The Perfect Scoop”

*     *     *

By any other name …

“Bella’Roma”

*     *     *