Squid Ink Pasta with Clams and Bottarga

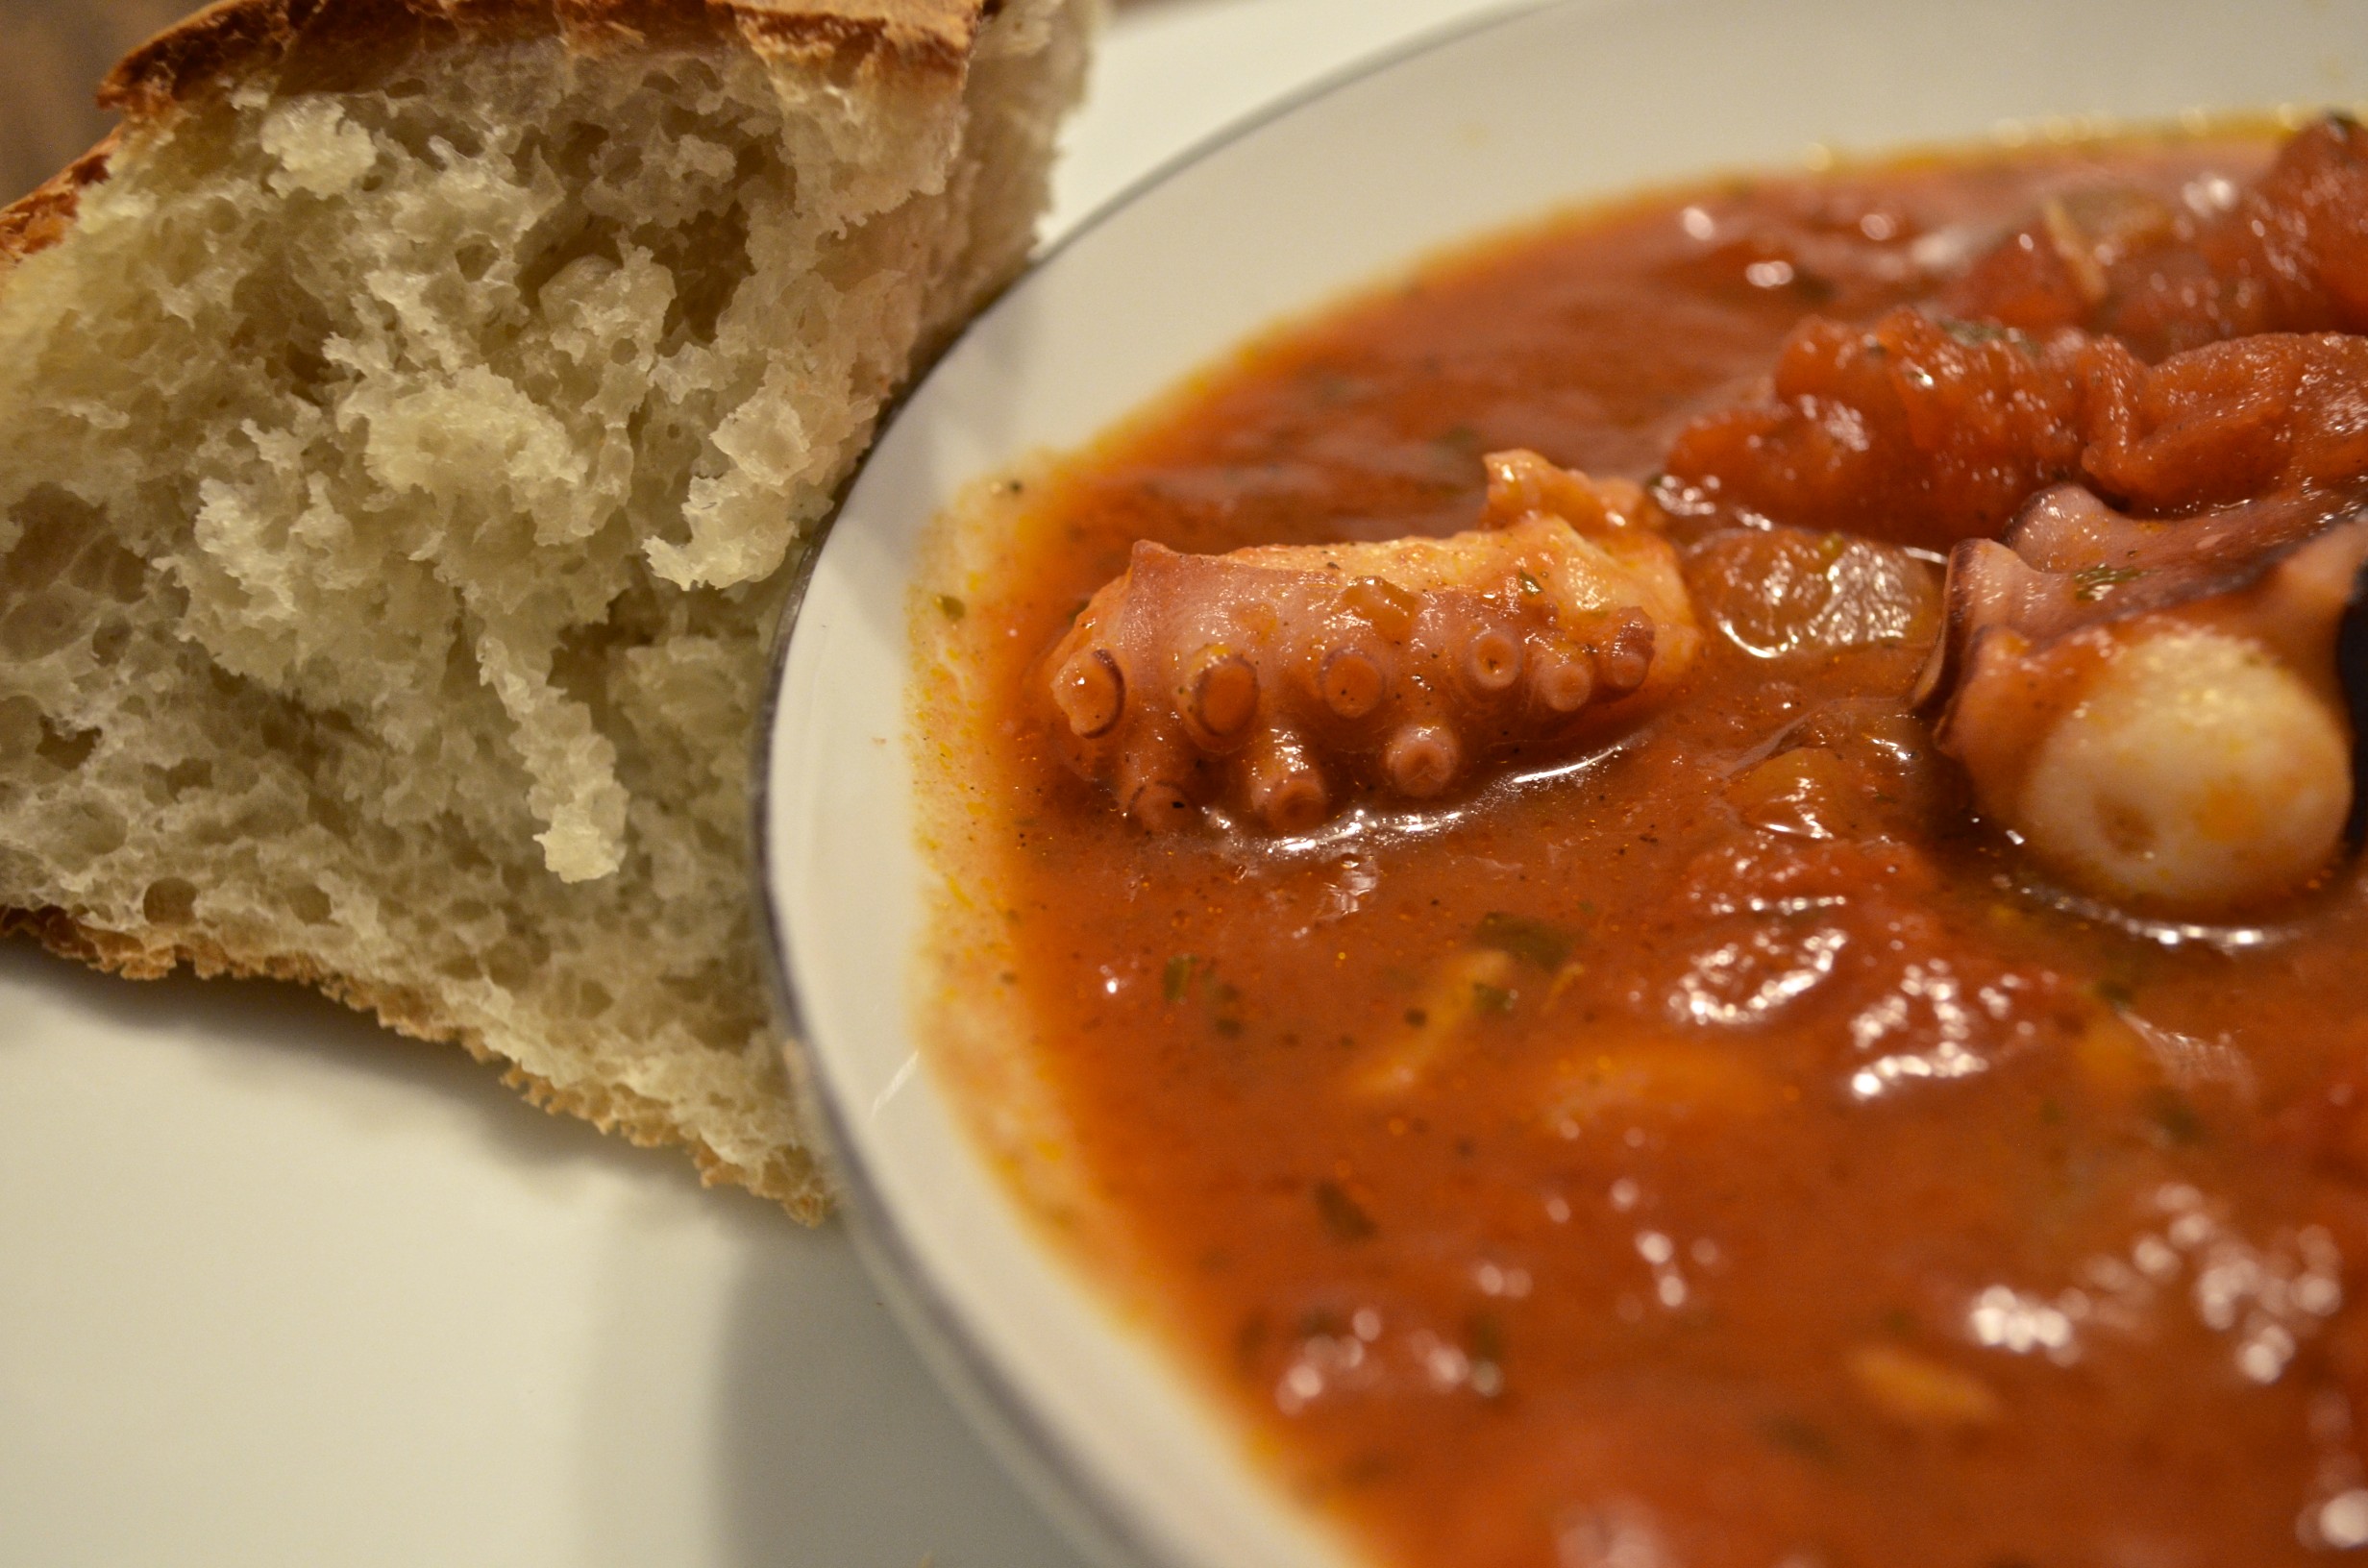
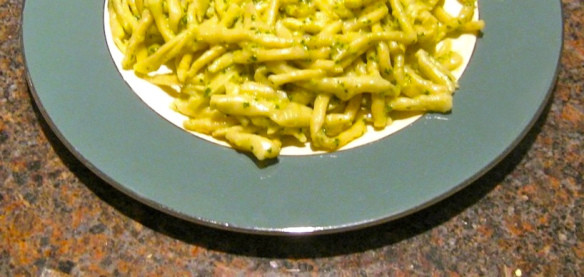
Linguine al Nero di Calamari con Vongole e Bottarga

Santa School - Korea

(With thanks to the folks at Colored Mondays)

We Bartolini are an ecumenical lot. Whether you celebrate Hanukkah, Kwanzaa, Christmas, or even Festivus, we hope your holidays are of the most memorable kind.

*     *     *

Although this is my 4th Christmas Eve on WordPress (I know! FOURTH!?!?!), this is the 3rd time I’ve used the occasion to highlight seafood. In the past, I shared a tongue-in-cheek tale of how Italian Catholics prepared a Feast of the Seven Fishes to get around the Church’s rule of not eating meat on Christmas Eve. To be sure, the Church’s original intent was to keep that day, the last of Advent, a day of refection and sacrifice in preparation for the Christ Child’s imminent arrival. Some of the faithful, however, couldn’t wait to get the party started, so, instead they prepared a seafood feast. To avoid the Church’s wrath, they prepared 7 different dishes, 1 fish for each of the Seven Holy Sacraments. With their Church leaders appeased — many of whom were enjoying their own, even more lavish, seafood feasts — a tradition was born. Today, feasts of 10, 11, and even 12 seafood dishes may be prepared and served.

Last week I shared my family’s recipe for garbanzo soup, the type of simple dish that I’m sure the Church had originally intended Catholics prepare on the last day of Advent. Today I’ll share a recipe that is far removed from last week’s simple, unadorned minestra, Squid Ink Pasta with Clams and Bottarga. I’ll get to the recipe soon enough but 1st, I’ve “got some ‘splaining to do.”

 *     *     *

Squid Ink Pasta 3

 *     *     *

I think it was Mom who told me about Nonna (Zia’s Mother-in-law) cleaning cuttlefish, sepia. A cousin of squid, sepia are often prepared in very much the same ways. (Those who have owned parakeets, “budgies”, often hang cuttle bones in their cages to be used by the birds for beak maintenance. These “bones’ are removed from large cuttlefish during cleaning.) Nonna’s sepia were quite fresh and had to be gutted and cleaned. As I recall, if she was lucky enough to come upon a sepia’s ink sack, Nonna reserved it and used it to make black pasta noodles.

The story stuck with me and, over the years, I’ve searched high and low for the illusive ink. I wasn’t picky. It didn’t matter whether I found squid or sepia ink. As my search criss-crossed Chicago’s ethnic neighborhoods, I cannot tell you how many dead ends I reached, having followed the advice of some well-meaning people who were sure that it could be found at this place or that. Dejected, I’d give up the search, only to begin it anew when some TV chef used squid ink to make pasta. Once, last year, I even purchased ready-made black pasta noodles. What a disappointment!

This all changed about 3 months ago. Armed with a gift card given to me by Cynthia and Nigel for my last birthday, I went shopping at Chicago’s newest Italian market. (Cynthia Squid Ink
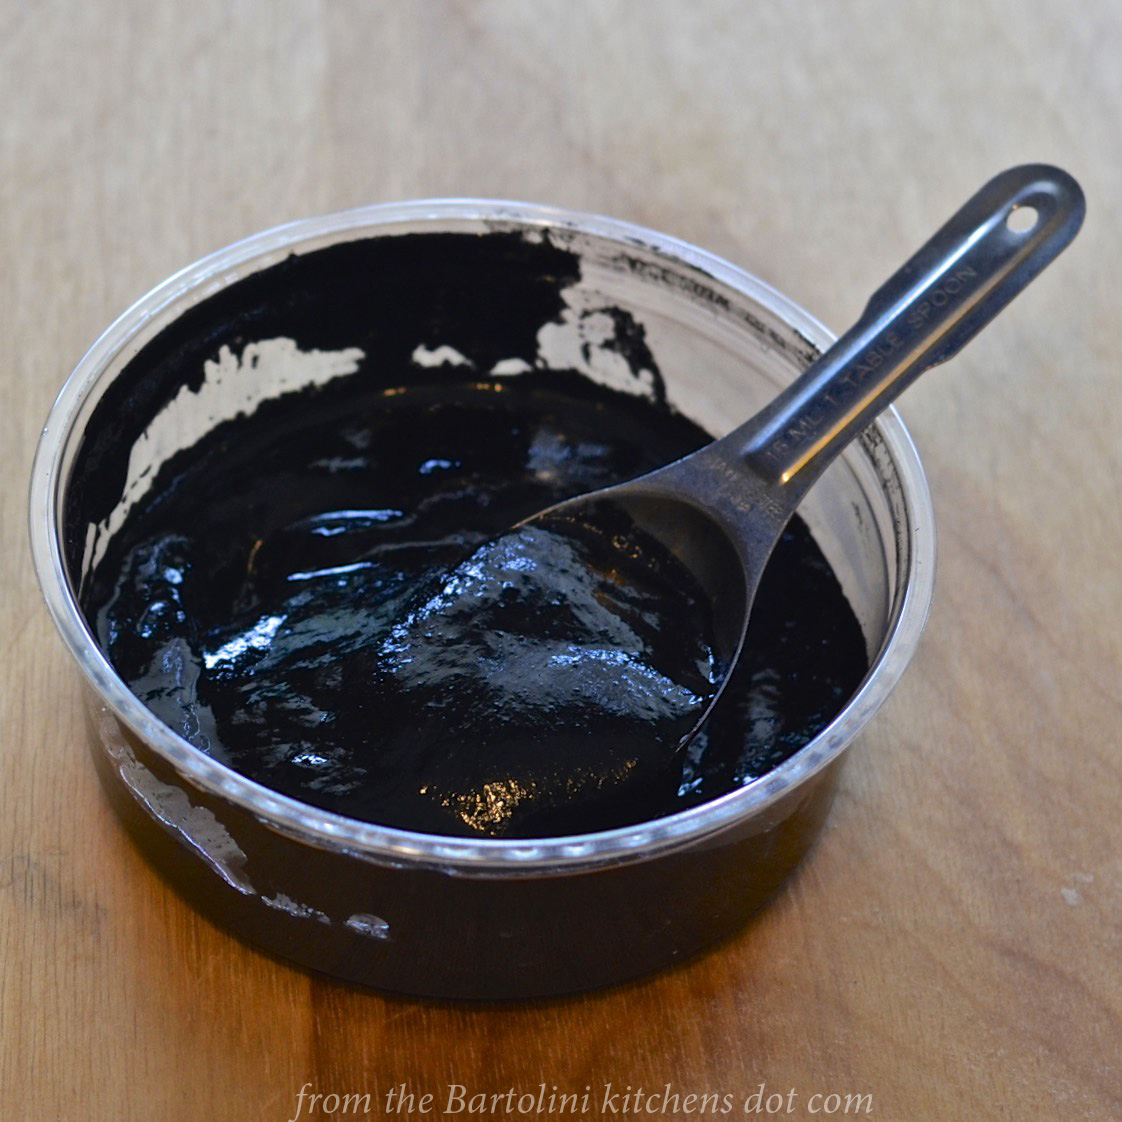
and Nigel are the friends with whom I shared the flats in Florence and Rome.) As I passed the fresh pasta counter, I noticed they were selling black pasta. Upon asking, the clerk directed me to the fishmongers and, lo and behold, they had squid ink! Not only that but they had 2 kinds: 1, a large jar of thick paste, and, the other, a much thinner liquid, in packaging that would remind you of those ubiquitous soy sauce packets found at the bottom of every bag of Chinese take-away. After the fishmonger assured me that it would “last forever”, I bought the paste, thinking I could better control the amount used. On the way home, I decided that this would be the dish I would serve Zia for our Christmas dinner.

What I haven’t mentioned is that, months before, I had ordered some bottarga online, intending to serve it to Zia some day. Bottarga is the dried and cured eggs of mullet fish. Thought to have Greek or Arabic origins, bottarga is a Mediterranean product and can be found from Portugal and Spain to North Africa. In Italy, it is most closely identified with Sardinia and Sicily, while here in the States, bottarga is now produced in Florida. (If Bottarga 1interested, “locally” produced Bottarga is usually available this time of year.) Bottarga can be bought dried in the original egg sacks, or sealed in wax, or both. Once purchased, if kept dry, it will last quite some time in the fridge. While its scent has been described as the “breath of the sea”, bottarga is bursting with umami, lending both salty and fishy flavors to your dish. To serve, some may shave thin slices which are then used to top off bruschetta or salads. Using a microplane or similar utensil, others will grate bottarga over pasta, risotto, grilled vegetables, broiled/baked/grilled fish, and even eggs. There is one thing about bottarga, though, that you should consider before rushing off to purchase some. Not everyone likes the stuff. Very much like anchovies, you either love it or hate it. Lucky for us, we all love it.

It took no time to decide what would be the 3rd and final ingredient for our Christmas Eve pasta. Both Zia and I love pasta with clams, vongole. Now, I always go to the Italian markets the day before I depart for Zia’s, buying her a few Italian staples that just aren’t available in her area. In the past, if the fishmonger has fresh clams — especially vongole from Italy — I’ll buy some, pack them in ice, and warn Zia that clams will be on the menu. That’s what I did just prior to my last visit, though the clams were the manila variety. I left the next day knowing that there was a great dinner in our immediate future.

I served this pasta to Zia as our early Christmas Dinner. It was a complete surprise to her and to her son, my cousin the Max Whisperer, who was also seated at the table. Both thoroughly enjoyed the dish, as will you and your guests when you serve it.

*     *     *

Squid Ink Pasta

*     *     *

To make squid ink pasta 

It is far easier to make black pasta than you might assume. Gather the ingredients required to make a batch of Mom’s Pasta Dough. Once you’ve placed 4 whole eggs + enough water to equal 1 cup of liquid in a measuring cup, add 1½ tbsp of squid ink. Lightly beat the mixture to fully incorporate the ink. (See Notes) Proceed as your would when making normal pasta dough, cutting it, once dry, to make whichever sized noodles you prefer. (I made trenette because it most closely resembles the pasta that Mom would cut by hand.) Cook as you would normal pasta, removing it from the water just before reaching al dente. Reserve a cup of pasta water.

 *     *     * 

 *     *     *

To prepare the clams

(See Notes for help with cleaning clams)

Heat 1/4 cup olive oil over medium-high heat in a large fry pan with cover. Once hot, add 2 cloves minced garlic and sauté for about a minute. Add 1/4 cup water, 1/4 cup white wine, and about 3 dozen vongole. (Cockles, little neck, or manilla clams may be substituted.) Cover the pan and allow the clams to open, about 5 to 8 minutes. Do not overcook and discard any clams that have not opened by the end of the cooking time. Add about 3 tbsp of chopped fresh parsley.

*     *     *

To assemble the dish and serve

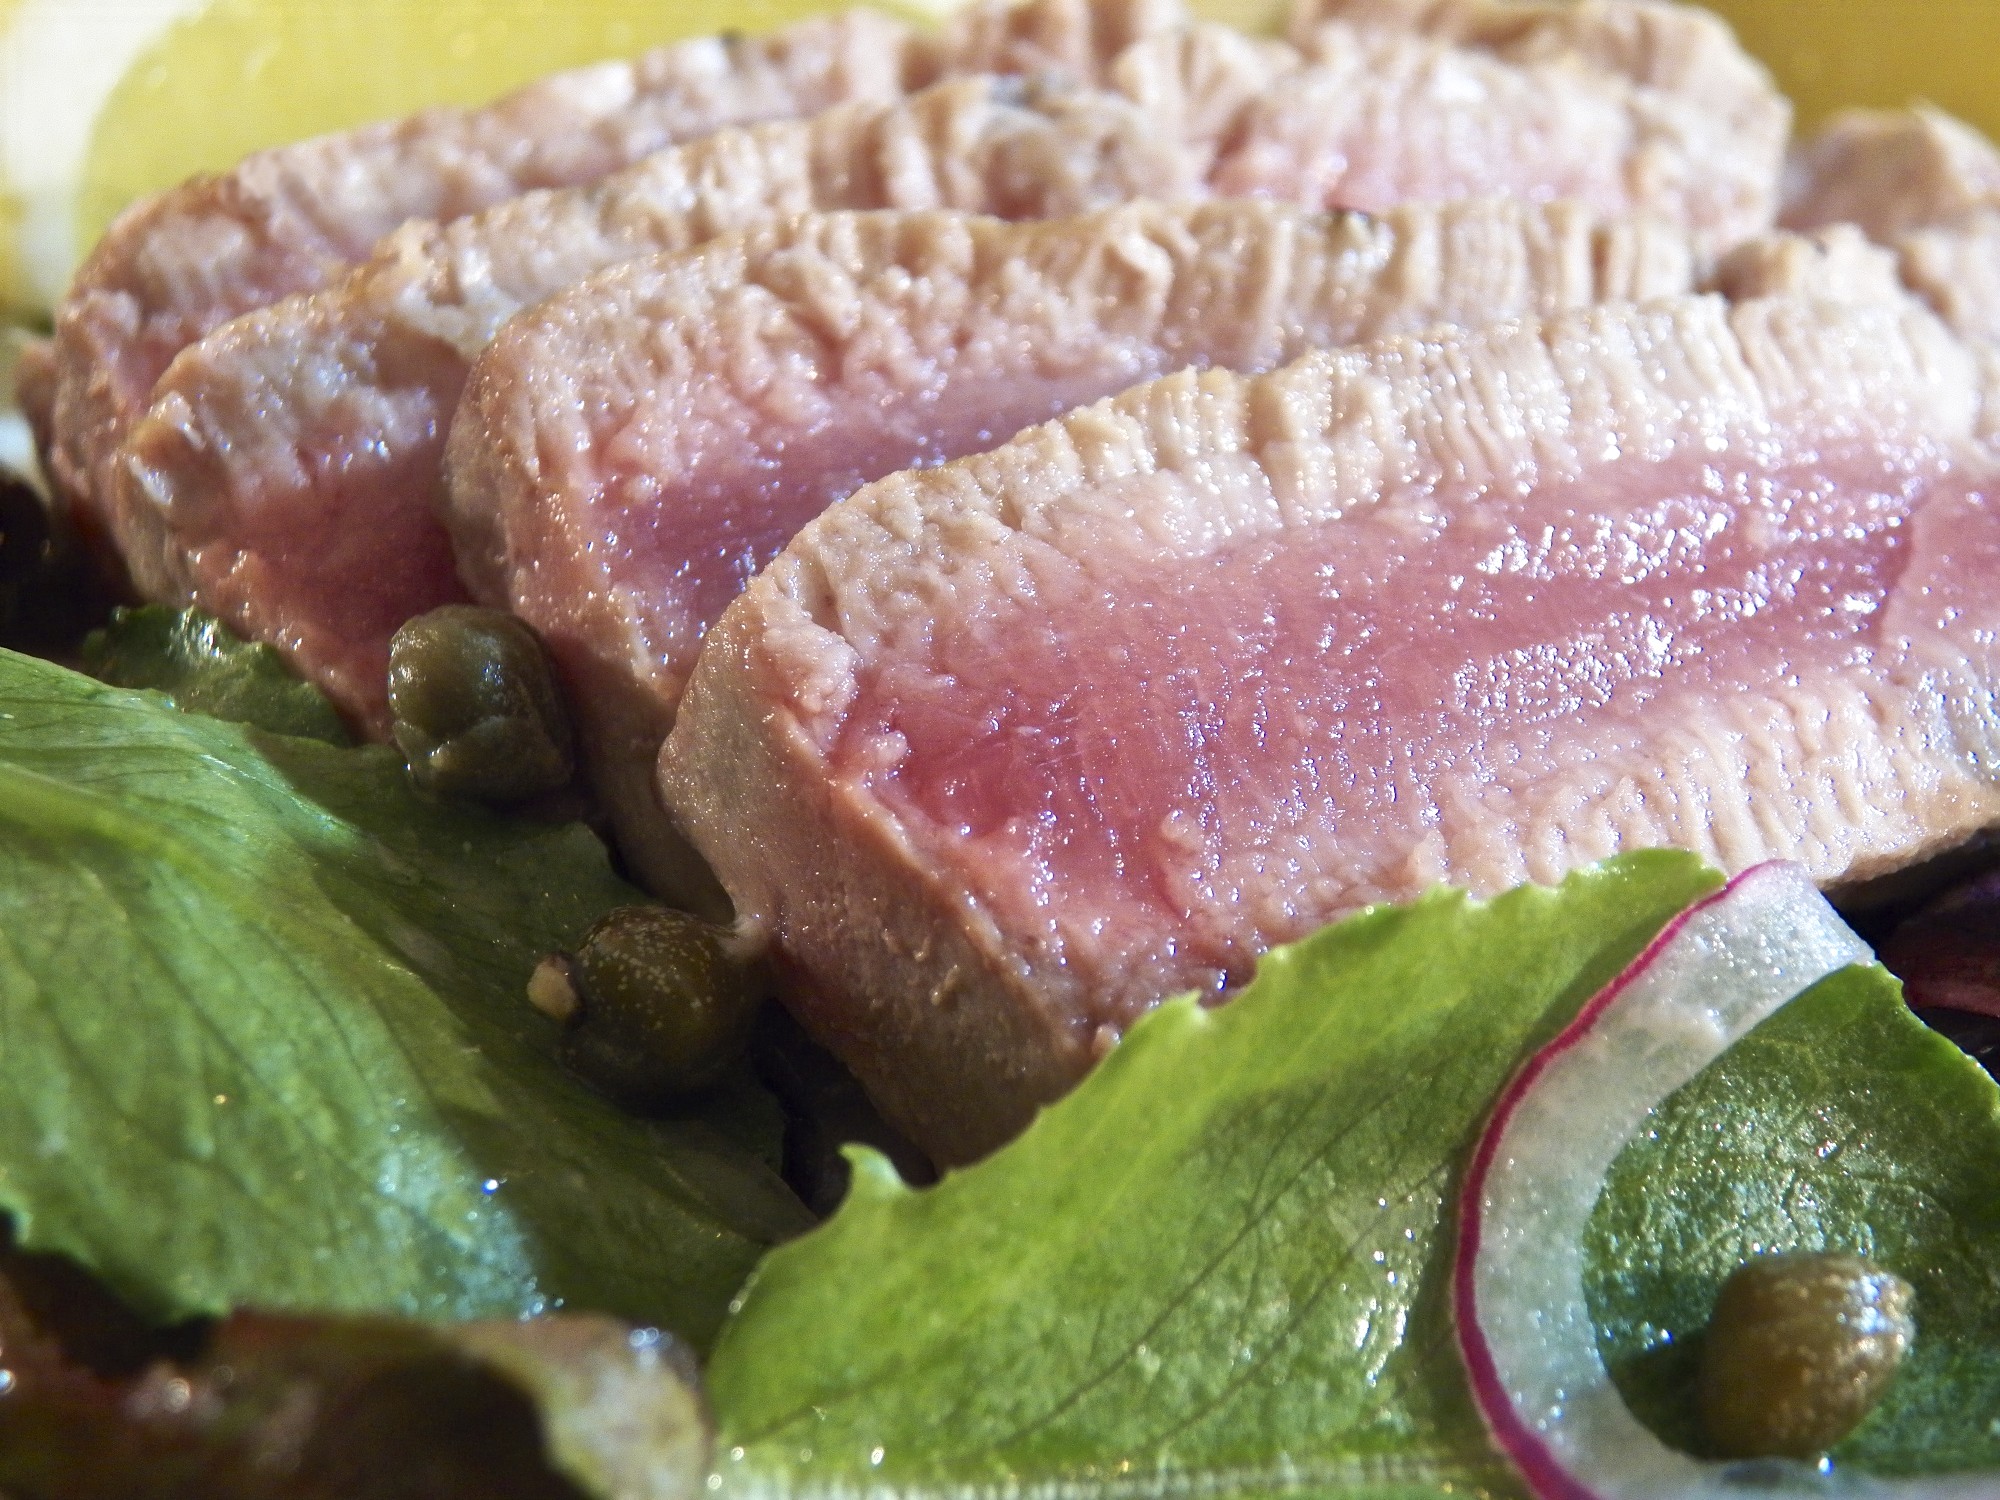
Once the unopened clams have been removed, place the newly drained pasta into the fry pan and toss to coat with the clams and pan juices. Add a little of the reserved pasta water if needed. Pour the pan’s contents on to a serving platter. Drizzle a little of your best extra virgin olive oil on top of the pasta, followed by some chopped parsley. Grate, as you would a garnish, a bit of bottarga on top of the pasta and serve. Once your guests have received their serving, be sure that each receives another sprinkling of bottarga, whether you do the grating or they handle it themselves.

*     *     *

Squid Ink Pasta 2

*     *     *

Notes

Blending the squid ink with the eggs ensures that it will be evenly dispersed throughout the pasta dough much more quickly than if added directly to the flour.

If, when handling the dough, your notice your fingers or work surface blackening, it’s a sign that your dough needs a bit more flour. Perfectly mixed flour will not “bleed” black.

Clams must be inspected and cleaned before use.

  1. Examine your clams, discarding any with cracked or broken shells. Also, discard any that are open, even slightly, and that will not close when tapped on a counter top.
  2. Clams bought at most markets today usually have been purged of sand prior to purchase. You must purge the clams if you harvest them yourself or buy them directly from the fishermen. To purge the clams of sand, place them in a deep bowl and cover with room temperature water. Soak for 30 minutes, empty the water and, repeat the process at least another time.
  3. Once purged, use a small brush to scrub the shells. Again, discard any that remain open — even a wee bit — during the scrubbing process.
  4. Clams are now ready for cooking.

The Italian custom of avoiding cheese with most seafood pastas is not some “silly” or “ridiculous” decree. The suggestion is based on the fact that many forms of seafood are quite mildly flavored. Use of Pecorino Romano or Parmigiano Reggiano would easily overpower the seafood, rendering it almost “invisible” to the palate. In today’s recipe, cheese would most certainly mask the delicate flavors of the squid ink pasta and clams, as well as obliterate all of the bottarga’s scent and much of its flavor. Of course, you can eat whatever you like but if you take the time to seek out and purchase fresh seafood, often at premium prices, why hide it under a blanket of cheese?

*     *     *

It’s déjà vu all over again …

linquine ai frutti-di mare al cartocci

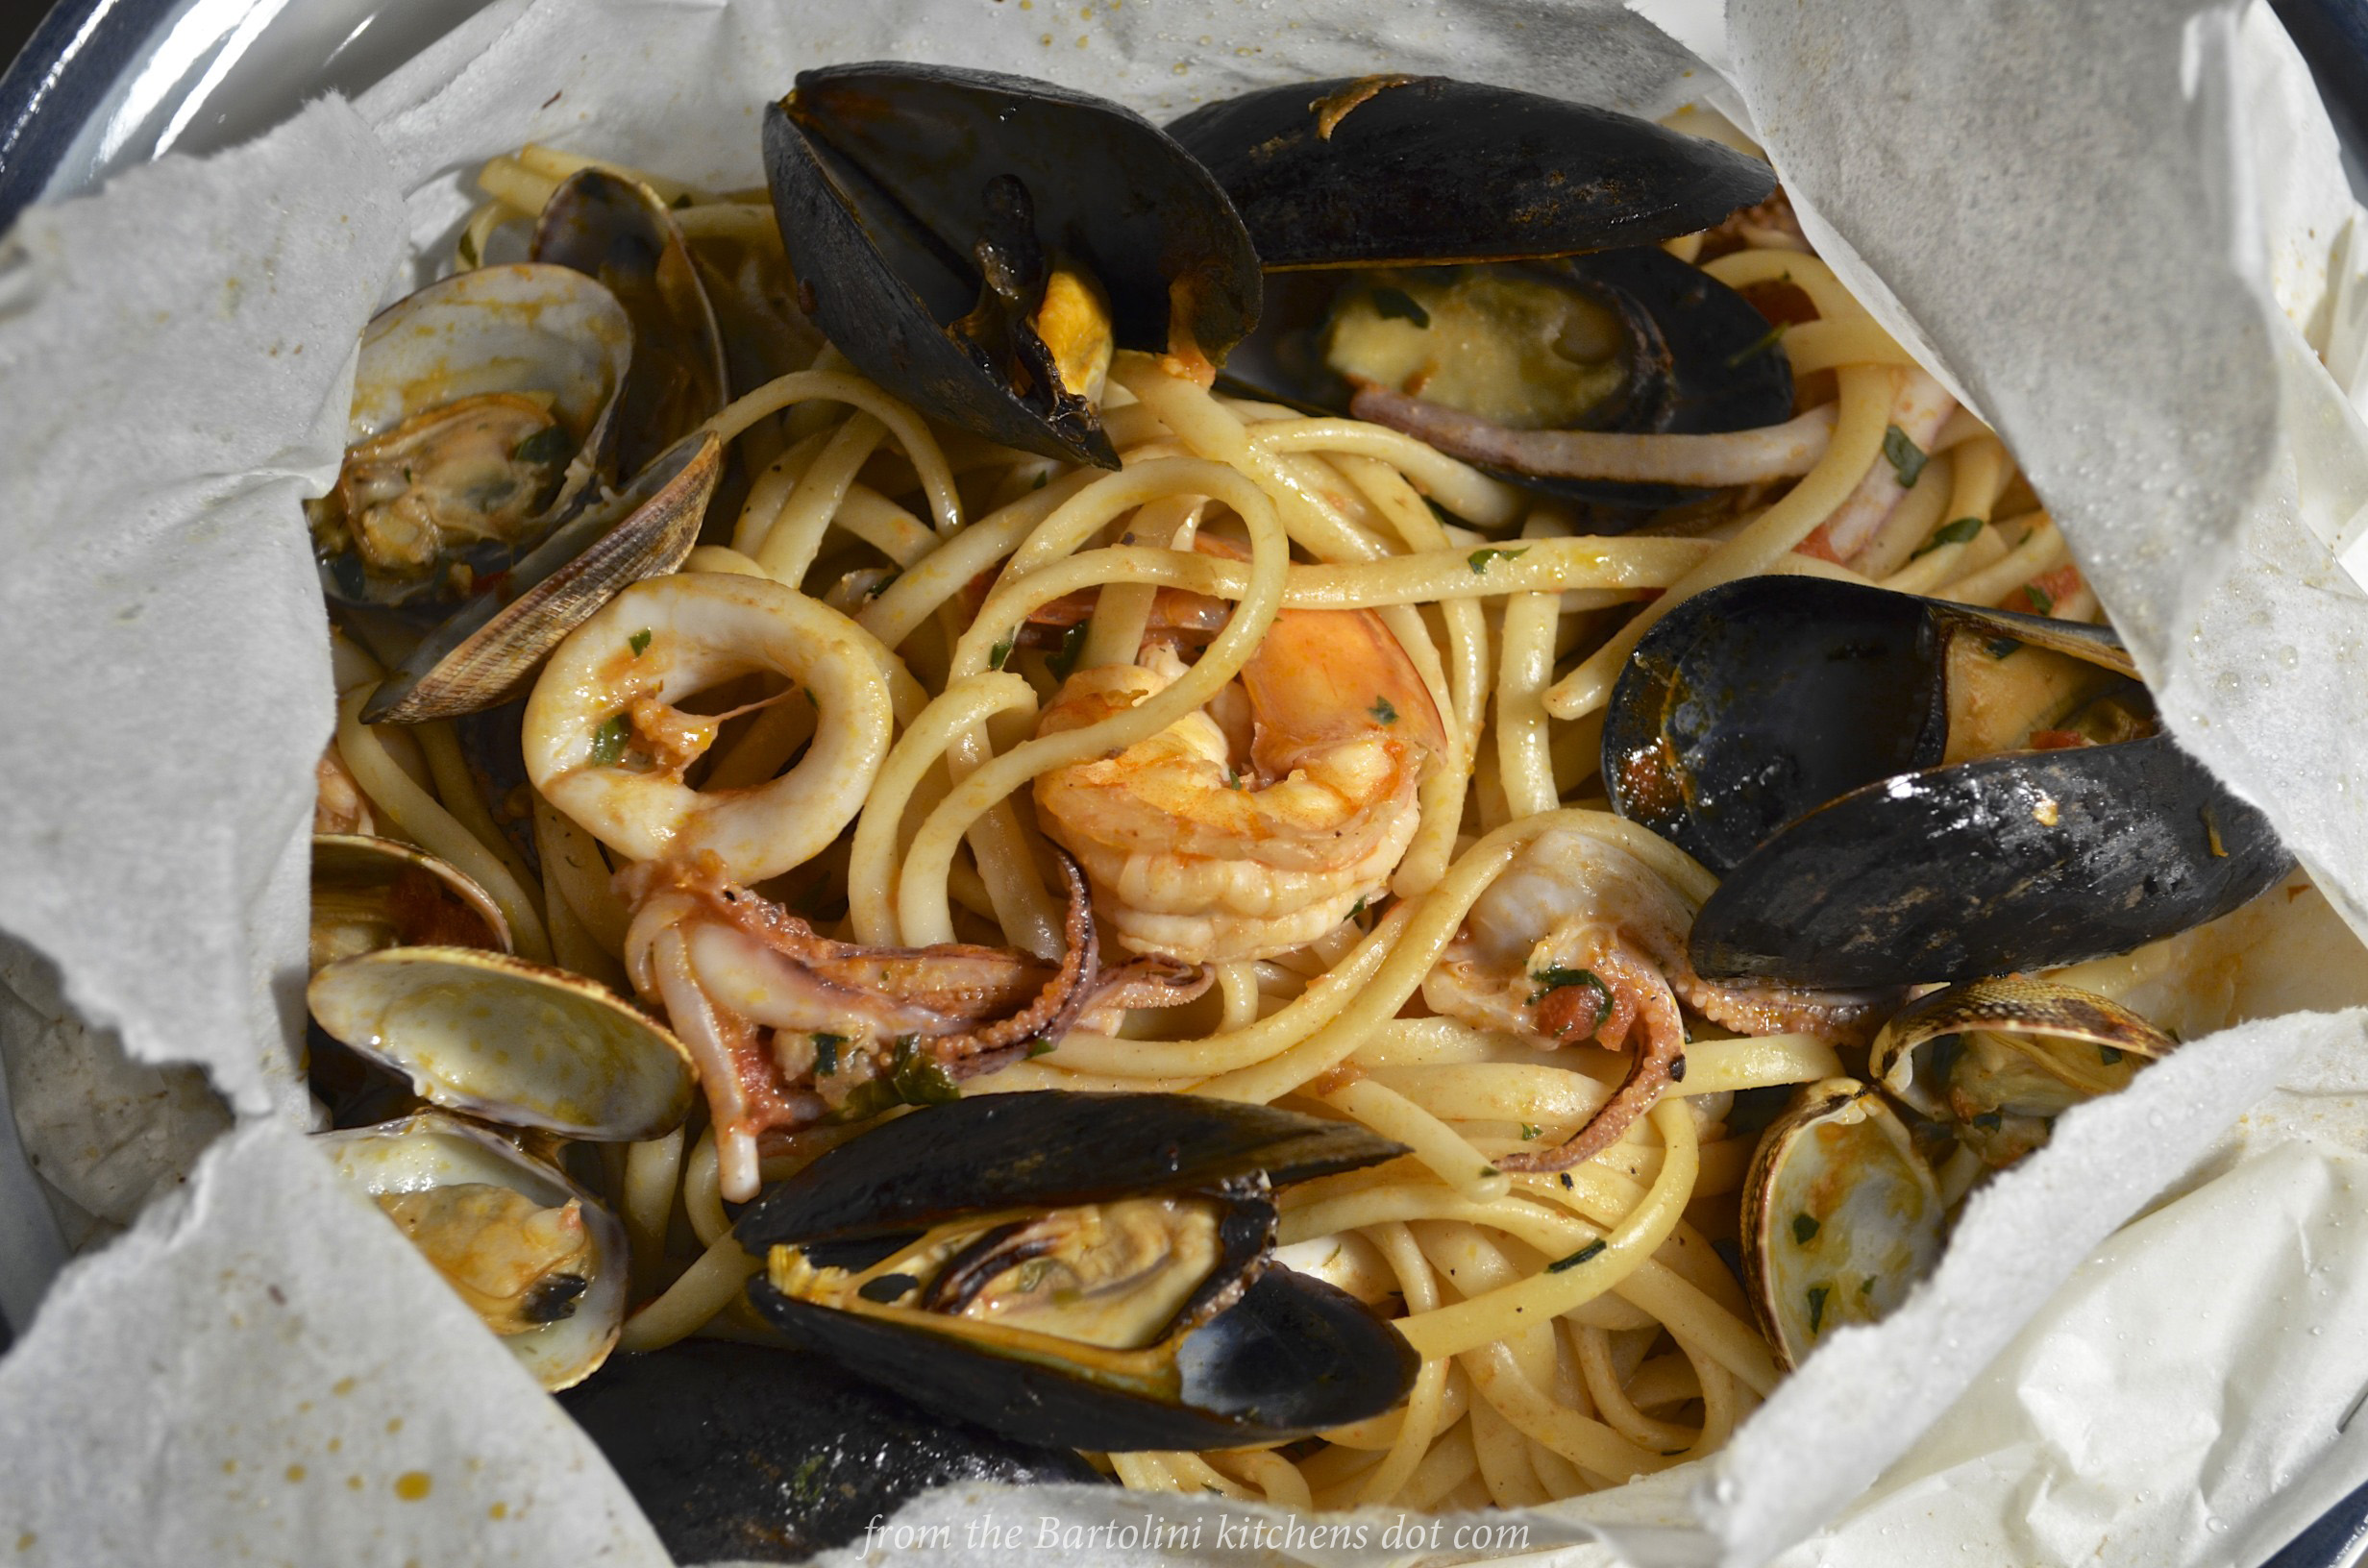
It was but a year ago when I shared another seafood dish worthy of any Christmas Eve celebration. In that dish, clams, mussels, shrimp, calamari, and scallops were combined with linguine in a mildly spiced tomato sauce and sealed in parchment before being baked. It is a very special dish for a very special night. You can learn how to prepare it by clicking HERE.

 *     *     *

Coming soon to a monitor near you …

Eggs in Purgatory Preview

Eggs in Purgatory

*     *     *

Buon Natale a Tutti!

*     *     *

Advertisement

A Souvenir from Florence: Fried Sage

Salvia Fritti

Fried Sage 2I’m usually not one to bring home many souvenirs from my trips abroad. There were exceptions, of course, but these days I’m more prone to bring home recipes or ideas for enhancing my own. Last week’s garganelli post was one such souvenir. This past trip was no exception.

Just like here now, Italy was at the end of the Spring pea season when we arrived. Still, though, I was served a number of dishes in which fresh peas were an ingredient. Whereas I cook peas fully whenever I add them to pasta, these were served relatively al dente. The result was a much fresher tasting pea, giving the pasta that Primavera flavor. Since returning home, I’ve been buying fresh peas every week and doing little more than heating them before serving. Try it next time you make pasta with peas and let me know what you think.

*     *     *

On our first night together in Florence, we went to a nearby restaurant for dinner. The menu offered an antipasto called “Salvia Fritti”. We knew that it was fried sage but that didn’t seem like anything special. After all, we’ve all used fried sage leaves for a garnish. When asked, the waiter explained that the sage leaves were used to enclose anchovies before being dipped in batter and fried. Get outta here! I immediately placed my order, as did my fellow anchovy lover sitting across from me. His wife chose something else; a decision she would soon regret.

This dish was just incredible. It was so good that the next night, when we discovered our preferred restaurant was unexpectedly closed, we high-tailed it over to the previous night’s restaurant to enjoy another round of fried sage.

Salvia Fritti

The restaurant version

Happy to get a table and eager to taste these delightful treats, we could hardly wait to place 3 orders for Salvia Fritii. That’s when it happened. Our waiter told us that they had just served the last of the tasty delicacies. The 3 of us gasped so loudly that the restaurant’s other diners must have thought we had just received terrible news. Well, in fact we had. To be sure, we enjoyed our dinner but, all the while, we knew that we wouldn’t be served salvia fritti again during our holiday. That’s when I decided to make them at home. So, I asked the waiter how they were made and, this trip, along with a change in my pea cooking ways, I brought home today’s recipe for fried sage.

*     *     *

This is such an easy recipe that It’s hardly worth its own post and if it weren’t for the photos I’ll be sharing, I would have combined this dish with another. You see, to make this dish, all you need do is place some anchovies between 2 sage leaves and coat them with batter before deep frying until golden brown. The only thing to consider is the thickness of the batter. As you can see in the photo, we were served sage that was coated with a thick batter. My batter, however, was a bit thinner and, therefore, crisper after frying. The choice is yours. If you’re unsure, start with a thicker batter, fry a couple, sample, and then adjust with more sparkling water, if needed. Don’t worry about the sampling. Just like when cooking bacon, sampling is to be expected.

*     *     *

Fried Sage 1*     *     *

Fried Sage Recipe

Ingredients

  • Large fresh sage leaves
  • anchovies (see Notes)
  • 3/4 cup AP flour
  • 1/4 corn starch (see Notes)
  • 1 tsp salt
  • 1 large egg, slightly beaten
  • sparkling/carbonated water
  • olive oil or a substitute for frying

Directions

  1. Prepare the batter:
    • In a large mixing bowl, whisk together the flour, cornstarch, and salt.
    • Add the egg and then the water, whisking until a smooth batter results.
    • Set aside until needed.
  2. Pre-heat frying oil to 350˚ F (180˚ C).
  3. Pair the sage leaves according to size.
  4. Place anchovy fillet(s) in-between the 2 paired leaves. Use the palm of your hand to press the leaves together.
  5. Dip the sage “packets” into the batter and gently shake off the excess before placing in the hot oil. Repeat for the other packets though be careful not to overcrowd the pan.
  6. Fry until golden brown on both sides, turning each over once in the process.
  7. Remove from hot oil and drain on paper towels. Season lightly with salt. If working in batches, keep warm in a pre-heated 200˚ F (95˚ C) oven.
  8. Serve immediately.

*     *     *

Salted AnchoviesSalt-packed anchovies, anyone?

*     *     *

Notes

Anchovies are the biggest concern for this recipe. If you can find fresh, by all means use them. They will give this dish the best flavor possible. If, like me, you cannot find fresh anchovies — and believe me I’ve tried — your next best option is salt-packed anchovies. Though not the same as fresh, they are a very good second choice. Just be sure to rinse them very well before using. Whether you use fresh or salt-packed anchovies, be sure to clean them, removing the head if necessary, and to check for and remove the spine. If unable to find fresh or salt-packed anchovies, by all means use tins of anchovies packed in olive oil. The bottom line is that you really have to taste anchovies sandwiched between sage leaves, battered, and fried. It’s a simple as that.

You’ll notice I used cornstarch in my batter. I find that it makes things more crisp, Omit it if you disagree.

*     *     *

What if you don’t like sage?

Fried AnchoviesWell, not very long ago, a group of us went to a restaurant owned by a winner of America’s Top Chef. While there, we were served deep-fried anchovies. Can I get a “YUM!”? That dish is recreated here, using the same batter that was used for the sage. Just batter the fillets and fry them. Be sure to make extra, though. The kitchen elves love them and tend to snack on a few during the cooking process.

*     *     *

Now, on to the Republic of San Marino

After a far too brief stay in Bologna, I rented a car and drove to Rimini before turning towards the Apennines and the Republic of San Marino. Founded in 301 CE and only 24 sq mi (64 km2), San Marino lays claim to being the world’s oldest republic. {In comparison, Chicago is 228 sq mi (591 km2).} The city of San Marino is located atop Mount Titan, Monte Titano, offering beautiful views of the surrounding countryside and, to the East, Rimini and the Adriatic Coast. I truly regret losing those photos but feel very lucky that the most valuable ones, those of my family, were saved

San Marino

San Marino’s Municipalities,                             I Castelli del San Marino,                             (Source: Wikipedia)

As small as it is, the country is divided into 9 districts called castelli, castles, including the city and capital, San Marino. My Zia lives in the municipality called Domagnono and our family owned a farm in the Castello di Montegiardino. Don’t let what appears to be relatively short distances between the locales fool you. The country sits atop the Apennines and the terrain is hilly, at best. My cousins, and especially my Zia, were fearless behind the wheels of their cars, day or night. I, on the other hand, white knuckled it on the way into — or was it “up to”? — and out of — “down from”? — the Republic. (Have I mentioned my fear of heights?) They all did their best to show me all the country’s sites, as well as those places having special meaning for my family. We even managed to spend an afternoon at the beach, having dinner with my cousin and her family at their beach-front restaurant in the coastal village of Riccione, a suburb of Rimini.

Before I knew it, I was packing up the car and driving to Florence. (Unbeknownst to my family, the flat owners were already calling me for an estimated arrival time.) I did promise them all, however, that I would be returning, hopefully with a sibling or two in tow. Guaranteed, it won’t take another 40 years to do it!

Here, then, are a few of the photos from this leg of the journey. Forgive the poor quality but these are quite literally some of the only photos of the countryside that I have.

(Click to enlarge any/all photos)

*     *     *

*     *     *

The government occupies part of the old fortress atop Monte Titano, and there’s a walk that will take you up along the old wall to the tower, giving you spectacular views of the countryside. Along with the castle, you’ll also find a church and a museum on the mountaintop, while much of the surrounding area is devoted to the tourist trade. At one time, collectors the World-over flocked to San Marino to purchase the Republic’s postage stamps. With the advent of email and social media, however, the stamp market and its tourist industry have fallen on hard times. Looking around town — and ignoring the fantastic views — there’s not much to distinguish this tourist area from dozens around the globe except for one thing: the incline. These photos do not do it justice and I cannot imagine making my way around town when the streets are snow-covered in Winter.

By the way, see those 2 beige awnings in the lower left of the photo on the right? That was once a leather goods shop that my Zia and Zio owned and operated. When they retired, the hotel bought the space and, after some renovations, it now serves as the hotel’s main entrance.

S. Marino Tourist Area*     *     *

During WW2, as the Allies worked their way up the Italian peninsula, the people of the region took refuge in the area’s railroad tunnels that had been dug through the mountains. Here is one such tunnel in which a couple thousand people lived, along with their farm animals for months until the War had moved further North and they could safely return home. Midway through, this tunnel has a large opening, providing the people back then some much-needed fresh air, and today, a beautiful view to Rimini and the Adriatic coast.

Tunnel and View*     *     *

Now for a bit of family history. Towards the end of San Marino’s participation in WW2, an Italian pilot was shot down over my Grandparents’ farm. They gave him shelter in a pit they dug under a large wood pile. (I was taught that it was under a chicken coop.) Using a rope, my Nonna would lower food and drink to him through a hole, at about 1:00 AM every night, until it was safe for him to come out of hiding — well over a month later. This picture shows what was once part of my family’s farmland. In the distance, on the left, is a white building. Before it is where the wood pile once was.

Zio's HideawayI bet you’re wondering what happened to the pilot. After the War, he stayed on at the farm and later married my Dad’s Sister. They eventually immigrated to New York City, where they raised their 3 children.

Next stop: Florence

*     *     *

It’s déjà vu all over again …

couscous 2They sure took their time getting here but Summer temperatures have finally arrived. For me that means my stove and oven are used less as the temps rise. Today we’ll look back to a no-cook salad that has couscous as its base. Whether you serve it for a light lunch or tasty side, you won’t be disappointed. You can see the recipe by clicking HERE.

*     *     *

Coming soon to a monitor near you …

Spaghetti alla ChitaraSpaghetti alla Chitarra all’Amatriciana

*     *     *

Roasted Mackerel with Potatoes and Tomatoes

Scombro Arrostito con Patate e Pomodori

Mackerel ServedI’m back and the Kitchens are open! Thank you all for the birthday and well-wishes. I had a wonderful birthday and, though there’s more to come, I’ll leave that reveal for a later date. As for my much neglected projects, though not all are done, I’ve made good progress and am very pleased.

Some of you may be interested to learn that I’ve added a “Translation” page to the blog. You can find it listed above, between the “Home” and “Welcome” pages, or, if you’re on my blog’s homepage, there’s a translate button on the right. Click on either link and you’ll go to a page that will offer you a translation of my blog in your choice of 52 languages. Note that less than perfect results my be returned, especially when colloquialisms and slang are encountered, as is the case with most universal-type translators. Considering that I am barely fluent in English, I’ve no way of knowing whether an individual translator is working properly. Should you find that a particular language isn’t translated clearly, please let me know and, if need be, I’ll remove that translator from the list.

*     *     *

Today’s recipe is another that resulted from a walk around the Italian market. My walk started at the fish counter, as it always does, where the monger pointed out his “very fresh” mackerel. That’s code for “buy it” and I did without a second thought. While he cleaned my fish, I walked over to the produce area and bought some potatoes and tomatoes. A few minutes later, having grabbed some olive salad and herbs, my dinner for that night was all set. Unfortunately, I still had a full shopping list to buy but a fresh mackerel is one impulse buy that I don’t mind purchasing.

This dish couldn’t be easier to prepare. Stick some potatoes on a baking sheet, roast them for a spell, add some vegetables, put the fish on top, and bake until done. In the meantime, prepare a salad, slice some bread, and open a bottle of wine — if you haven’t already. Not many dinners are easier to prepare than this one.

*     *     *

Raw Mackerel*     *     *

Roasted Mackerel with Potatoes and Tomatoes Recipe

Ingredients

  • 1.5 lbs (680 g) mackerel, cleaned and scaled
  • 1.5 lbs (680 g) new potatoes, halved or quartered for uniform size
  • olive oil
  • 1 red onion, cut into eighths
  • 1 lb (455 g) cherry tomatoes
  • 6 oz (170 g) olive salad (misc olives, carrots, celery, peperoncini), roughly chopped
  • 1 sprig of fresh rosemary
  • 2 to 3 sprigs of fresh thyme
  • salt & pepper, to taste

*     *     *

M - Veggies 2*     *     *

Directions

  1. Pre-heat oven to 450˚ F (230˚ C).
  2. Place potatoes and onions in a large bowl, sprinkle with olive oil, and gently mix till evenly coated.
  3. Place on baking sheet, season with salt & pepper, and roast on center rack in pre-heated oven for 20 minutes.
  4. Meanwhile place tomatoes and olive salad into same bowl used for potatoes and onions. Drizzle with a little more olive oil and season with salt & pepper.
  5. Place rosemary and thyme into the fish’s cavity.
  6. After 20 minutes, reduce oven to 375˚ F (190˚ C). Remove potatoes from oven, stir, and add tomatoes & olive salad to the tray. Place mackerel on top of vegetables, drizzle with olive oil, season with salt & pepper, and place in oven.
  7. Roast until fish is cooked, 20 to 30 minutes depending upon the thickness of the fish. When done, fish flesh should flake and be opaque when cut.

*     *     *

Baked Mackerel *     *     *

Notes

I had originally intended to use lain olives in this recipe but that marinated olive salad looked too good to pass up. You may prefer to use just the olives or, for that matter, neither option.

I like my tomatoes to be a little firm when served. If you like them cooked more fully, add them to the roasting pan earlier.

I’ve prepared this dish using one, two, or three dressed mackerel. Although the preparation is the same, cooking times may vary and will usually be a few minutes less for the smaller fish.

*     *     *

It’s déjà vu all over again …

Nonna2

Mine wasn’t the only birthday celebrated at the end of last month. My Cousin shared her birthday, the 26th, with our dear Nonna. Although we all have wonderful memories of her, one of my most favorite involves her in the kitchen — imagine that! — preparing me something very special. The dish was tripe, trippa, and you can learn how to prepare and serve it, as well as a little bit about this dear woman, by clicking HERE.

*     *     *

Coming soon to a monitor near you …

Quail PreviewStewed Quail

Linguine with Seafood in Parchment

Linguine ai Frutti di Mare al Cartoccio

Linquine ai Frutti di Mare al Cartocci - 1

Yes, everyone, it’s Christmas Eve and, as many of you who’ve been with me for at least one Christmas already know, it’s a night of great anticipation and luscious seafood for many of us Italians. In fact, more than a few households will celebrate tonight with the Feast of the Seven Fishes. In the past, I shared a rather tongue-in-cheek story of the origins of this Feast but, instead of sending you there, I thought I’d reprint it for you here. What’s this? You already know the tale? Well, just skip the paragraph that follows and head straight to the video. That should keep you occupied until the others catch up. So, here is one version of how the Feast of the Seven Fishes came about …

Prior to the changes brought by Vatican Council II in the 1960′s, Christmas Eve was a “fast & abstain” day, meaning only 1 main meal could be consumed and no meat was to be eaten all day. For most Catholics around the World, it was a day of contemplation and that one meal was nothing special. With Christmas coming within hours, all eyes — and appetites — were focused on the big day — and dinner — soon to come. Not so the Italians.  If tomorrow’s a big holiday and today you can only have one meal, why not make that meal special? And so they did. Can’t have any meat? No problem. With Italy being both peninsula and island, fish was very often more readily available than many meat products. And so it became a seafood banquet. Wait a minute! The Church may frown upon so grand a celebration on the eve of the birth of the Christ Child. Again, no problem. They made a point of serving seven fish, each one representing one of the Seven Sacraments of the Christian Faith. In one masterstroke, their seafood feast became an Act of Faith. What priest, bishop, or even Pope would dare interfere with these devout Catholics as they used the day’s only meal to commemorate the Seven Sacraments? (The fact that the clergy themselves were probably dining on an even more spectacular seafood supper didn’t hurt “the cause” either.) And so the Feast of the Seven Fishes was born and survives to this day wherever Italians call home.

*     *     *

*     *     *

OK then. Is everybody here? Let’s continue …

I first saw this dish prepared almost 20 years ago. An Italian chef, Nick Stellino, hosted a cooking show on PBS. That one episode not only showed me how to cook seafood pasta, Pasta dei Frutti di Mare, but it introduced me to the wonders of using parchment paper to envelope a dish. Since then, although I’ve made this dish a few times, I’ve made seafood pasta often and baked fish and/or vegetables in parchment or foil even more frequently.

*     *     *

Now, this one dish will give you 5 of the 7 fish needed for your feast. Please resist the urge to go for broke and add 2 more fish to the pot. All that will do is muddle the flavors or, worse yet depending on the seafood chosen, completely overpower the others. If you’re looking for suggestions, how about oysters on a half-shell, a nice octopus salad, a small salad with seared tuna, or a bit of baccalà salad. (A serving of baccalà in some fashion being the overwhelming choice of many Italian families.) Still not happy? Then do what I once did. Late one Christmas Eve afternoon, I was among the horde in a grocery store when I realized I was 2 fish shy of the required 7 for my own little feast. Not willing to spend any more time in the store while I weighed options, I went to the sushi counter and picked up a spicy tuna roll, before heading to the deli section to get a jar of pickled herring.  Fish are fish, after all.

*     *     *

Speaking for my Zia and the rest of the Bartolini Clan,

We wish you a very Merry Christmas!

*     *     *

Frutti di Mare - Crudo

*     *     *

Linguine with Seafood in Parchment Recipe

yield: 3 servings (See Notes)

Ingredients

  • 1/2 lb (225 g) fresh linguine, spaghetti, or tagliatelle — dried pasta may be substituted
  • 4 tbsp olive oil, divided
  • 1 small onion, finely chopped
  • 1/4 tsp red pepper flakes
  • 4 garlic cloves, minced or grated, divided
  • 4 tbsp chopped parsley, divided
  • 2 tbsp basil, chopped
  • 1 small can (14.5 oz; 400 g) diced tomatoes
  • 1/2 c white wine, divided
  • 1/2 cup clam juice or shrimp stock (see Notes)
  • 1 tsp dried marjoram (2 tsp if fresh)
  • 6 mussels, (see Notes)
  • 6 cherry-stone or manila clams, (see Notes)
  • 6 scallops, cut in half (see Notes)
  • 9 shrimp (see Notes)
  • 3 calamari (see Notes)
  • salt and pepper, to taste
  • chopped parsley and basil for garnish

*     *     *

(Click any photo to enlarge)

*     *     *

Directions

  1. At least 30 minutes before you are to begin preparing the sauce, place the clams in a bowl filled with cold water. Change the water at least once and be sure to brush the clam shells before cooking them.
  2. Prepare a simple tomato sauce:
    1. Place 2 tbsp olive oil in a small sauce pan over med-heat. Once hot, add the onion, the red pepper flakes, season with salt & pepper, and sauté until translucent, about 5 minutes.
    2. Add 2 cloves of garlic and 2 tbsp of parsley, stir, and continue to sauté for another minute or so.
    3. Add 1/4 c wine, the tomatoes, 1 tbsp basil, season with marjoram, salt & pepper, and bring to a boil before lowering heat to a simmer.
    4. Allow to simmer until sauce has deepened in color and thickened, about 30 to 40 minutes. Taste for seasoning and adjust, if necessary.
    5. Put aside 1/2 cup for the recipe and reserve the rest for another day.
  3. Pre-heat oven to 375˚ F (190˚ C).
  4. In a large pot of salted boiling water, cook the pasta until 2 minutes before the package indicates it will be al dente. (See Notes)
  5. In a large, deep fry pan with a lid, add remaining olive oil over med-high heat. Add remaining oil, garlic, and parsley to the pan and sauté until fragrant, about a minute or so. Add the clams and mussels, cover the pan, and sauté for 2 minutes.
  6. Add the squid, shrimp, scallops, clam juice, tomato sauce, and the remaining basil and wine to the pan. Cover, increase the heat to high, and boil the ingredients for about 2 more minutes.
  7. Using a slotted spoon, remove the seafood from the pan, and place in a covered bowl. Reduce the sauce by half,
  8. By now, the pasta should be drained. Add it to the boiling sauce, stir to evenly coat, and sauté for a minute.
  9. Add the reserved seafood to the pan, mix, and heat till warmed throughout. At this point, discard any shellfish that have yet to open.
  10. Meanwhile, take a large piece of parchment paper — or aluminum foil — fold in half and place on a large serving platter.
  11. When the seafood and pasta are ready, place them along the fold of the parchment paper. Garnish with parsley and basil. Working quickly, use interlocking folds to join the top and bottom halves of the parchment paper. (See Notes)
  12. Alternately:
    1. Use separate sheets of folded parchment paper, one per serving.
    2. Split the pasta and seafood evenly among the sheets. Garnish with parsley and basil. Fold each, as indicated in Step 11 above.
  13. Place the parchment packet(s) on a baking sheet and place in the middle of a pre-heated oven.
  14. Bake for 5 minutes and remove to a large serving platter or individual plates. Do not pierce the parchment until at the table.
  15. Serve immediately and watch as your dinner guests open their parchment presents and get a whiff of that steam. This is why you go through the trouble of putting seafood pasta in parchment.
  16. Do not serve with grated cheese for it will overpower rather than enhance most of the dish’s seafood components.

Inspired by Nick Stellino, “Cucina Amore”, Pasta al Cartoccio di Mare

*     *     *

Linquine ai Frutti di Mare al Cartocci - 2

*     *     *

Notes

To store the fresh seafood

If you are to prepare this on Christmas Eve, the last place you want to be that afternoon is standing in line at the fishmonger. Fresh seafood will easily keep in your fridge for 24 hours if treated properly. I would not recommend storing beyond 24 hours.

  • Remove the clams and mussels from their packaging and place in a colander. Cover with damp — not sopping wet — paper towels. Place the colander in a bowl in which some ice as been set. Do not use so much ice that it will immerse any of the colander’s contents when it melts or the mollusks may drown. Place the bowl with colander into your refrigerator until needed.
  • Leave the shrimp, squid, and mussels in their packaging and store in the coldest part of your refrigerator. Do not freeze.

To prepare the seafood:

  • The Clams: At least 30 minutes before they are to be used in the recipe, place in a bowl of cold water and soak. (Some believe adding a couple tbsp of corn meal to the water will cause the clams to eliminate any sediment.) Change the water at least once before the clams are needed. Just before use, scrub clean the shells with a small brush. Discard any that are open and that won’t close on their own power.
  • The Mussels: Before use, remove the beard (a thread mass on one side) and use a brush to clean the shells. Discard any that are open and that won’t close on their own power.
  • The Shrimp: remove the shell including the tail section, if desired. Save the shells to be used to make shrimp stock. Use a sharp paring knife to slit the top of each shrimp. This will reveal a dark-colored vein that should be removed.
  • The Scallops: these may be sold with a muscle attached to one side. It is about an inch long and /14 inch wide. This should be removed as it is tough and unpalatable.
  • The Squid: Use a sharp knife to cut each tube, creating rings that are a half-inch wide. If using the tentacles, cut them in half or quarters.

*     *     *

Homemade Linguine Cut Two Ways

*     *     *

You may find it easier to enclose your seafood in aluminum foil rather than parchment paper. The choice is yours to make.

Do not forget — as I did — to add a garnish of parsley and basil to each packet just before you seal them. Their presence adds to the aroma upon tearing the parchment.

Timing is everything with this dish. The seafood cannot be kept waiting for the pasta to be cooked lest it become tough and rubbery. If you feel that you cannot properly time the dishes together, go ahead and cook the pasta so that it finishes within a few minutes of starting the sauce. Pasta should be cooked about 2 minutes shy of al dente, as indicated on the package’s instructions. Drain the pasta, return it to the now-empty pot, coat very lightly with olive oil, and cover until needed.

You needn’t be an origami expert to fold and seal the parchment packets. That’s why the gods gave us staplers and don’t be afraid to use one.

As written, this recipe will give you 3 nice servings. If you wish, it will yield 4 primo piatto-sized servings, though you may want to adjust the amounts of seafood used.

The keen-eyed among you may have noticed that there seemed to be more seafood in the photos than was required by the recipe. You’d be correct. I usually buy a couple extra clams and mussels to account for any that may be spoiled and must be discarded. Not knowing that I had already done so, the fishmonger added a couple more, for the same reason. When I joked that the scallops looked “bad”, he agreed and added another 2 scallops to their previously weighed container. He then added 2 shrimp and another squid to their respective containers. This is how you earn life-long customers.

If you like, you can skip the parchment packets altogether and use this recipe to prepare a very good frutti di mare pasta. To do so, follow the recipe but cook the pasta for another minute before draining. Place the drained pasta into the sauce, as before, but cook it for only a minute before adding the seafood. Stir to combine, heat everything through, and serve immediately. Garnish with chopped parsley and basil.

This dish does not make good leftovers. None of the seafood will re-heat well at all. Try to prepare just enough to ensure your dinner guests are satisfied without having anything left on the serving platter.

As you may have noticed, I used a pastry brush to lightly coat the sealed parchment before placing it in the oven. There was no discernible effect to the parchment paper by doing this. Perhaps it’s because the oven temp was relatively low and the packet was in the oven so briefly. Whatever the reason, I won’t do it again for this recipe and excluded it from the recipe’s directions.

*     *     *

It’s déjà vu all over again …

Zuppa Inglese - 1No series looking back at my family’s traditional Christmas dishes would be complete without including our recipe for Zuppa Inglesi. This highly anticipated dessert consisted of lady fingers that were “lightly flavored” with alcohol before being covered in lemon-flavored custard. There’s even an alcohol-free version so that no one seated at the table need go without. You can take a look at the recipe for this family favorite just by clicking HERE.

*     *     *

Coming New Year’s Eve to a monitor near you …

Two Cellos and a Cherry

Booze

*     *     *

What I Did During My Fall Vacation

On the Road

I’m back from what was, for the most part, another wonderful visit with my Zia. We cooked, we talked, we talked about cooking, and, as one might expect, I’ve a few recipes to share in the weeks to come.

First, having located the surprisingly illusive 1 lb. octopus, I revisited the recipe posted a couple of weeks ago and prepared “Polipo in Umido“, Stewed Octopus. Although I won’t create a new post for the recipe, I’ve added the recipe to the end of this post and have added a link to the original post. I will not include the recipe for the bread I baked that afternoon simply because I evidently failed to bookmark the webpage’s address.

RIccetteOn another night, I reached into the box of Bartolini pastas that our ever-so-thoughtful friend, Lidia, had sent us, and prepared a Pasta alla Verdure, Pasta with Vegetables. It’s a delicious vegetarian dish — if you’re willing to overlook the guanciale that was rendered in the first step.

Since I’ll be unable to visit Zia for her birthday at the end of this month, I prepared a birthday dinner for the two of us. Our primo piatto was L’Uova da Ravioli, Egg-Filled Ravioli.  Our secondo was Osso Bucco, Braised Veal Shanks, while our dessert was a Pear Tarte Tartain. I do not plan on sharing the tart recipe for it wasn’t my finest hour. Knowing that a number of you had recently posted recipes, I attempted to find one of them but the 10 minute/post load time wore me out, so I sought help from the Almighty, the one and only Martha Stewart. Her recipe produced a tasty dessert but my “flip” was a matter of great disappointment and resulted in a presentation that was anything but “a good thing.” So, we took off our eyeglasses and enjoyed it immensely.

*     *     *

*     *     *

One thing you may not know about my Zia is that she enjoys a bit of jam every now and Strawberry-Cranberry Jamagain. Well, recently, our good friend BAM, of Bam’s Kitchen fame, shared her recipe for Bammer’s Jammers. Made with cranberries, strawberries, and ginger, this quick jam is delicious. The mix of tart and sweet is a winning combination, if ever there was one, and Zia loved it. Be sure to check out her recipe and, while you’re there, have a look around BAM’s blog. Guaranteed, it will be time well-spent. And a big “Thank You!” to BAM for the recipe.

*     *     *

Unfortunately, all was not good food and talk during my visit. While I was with Zia, we received word that my Dad’s remaining Brother, Uncle Leo, “Zio Leo”, passed away in a suburb of Detroit. Zia and I travelled to the wake later that week. You may recall that the Apple Cake recipe that I shared 2 weeks ago belonged to his Wife, my Aunt Mary, “Zia Mariolla”.  He was a kind, wonderful man, as was Dad’s other Brother, Uncle Dominic, “Zio Mingo”, who passed away just 5 weeks earlier in his home in San Marino. Both men will be missed terribly. May they rest in peace.

*     *     *

I hope to resume posting recipes next week. I live in a two-flat and the back porches and stairwell needed repair and a fresh coat of paint. I soon learned that, though repairs could be performed, our building codes have changed recently. It would be best to replace it all now, rather than in a couple years. As I type, workers are removing the old structure, just beyond the wall behind me. Max, thankfully, is in doggy daycare for the day — but he’ll be here tomorrow. Admittedly, this is nowhere near the scope of the construction projects some of you have endured over the past few months. Even so, there are foundations to be dug, cement to be poured, and a structure to be built, with a couple of inspections along the way. Whether I post the Green Tomato Relish recipe next week will depend on how the re-build progresses and Max’s reaction to seeing workers in his yard.

*     *     *

Stewed Octopus Recipe

(Polipo in Umido) 

Ingredients

  • 1 one pound (500 g) octopus
  • reserved blanching water
  • 3 tbsp extra virgin olive oil
  • 1/4 tsp red pepper flakes (more or less to taste)
  • 1 medium onion, diced
  • 3 cloves garlic, minced or grated
  • 1/3 cup chopped parsley
  • 1 large can, 28 oz (800 g), whole tomatoes – hand-torn
  • 1 small can, 14 oz (400 g) whole tomatoes – hand-torn
  • 1/2 tsp dried marjoram (2 tsp fresh)
  • 3 to 4 oz dry white wine
  • fresh, crusty bread for serving

*     *     *

Polipo in Umido

*     *     *

Directions

  1. In a medium saucepan over med-high heat, bring to boil enough water to cover the trimmed octopus. Add the octopus and allow to simmer for 2 minutes after the pot returns to the boil. (Small octopi should boil for 1 minute. Larger should be allowed to boil closer to 2 minutes.) Remove the octopus and place in an ice bath to stop the cooking process and reserve. Reserve the blanching liquid, too. (See Notes) (Refer to Strangozzi post for further details on prepping the octopus.)
  2. Place the blanching liquid back into the sauce pan and, over med-high heat, reduce it by half.
  3. Over med-high heat, add olive oil in a medium sauce pan.
  4. Add red pepper flakes, onion, garlic, and parsley. Season with salt and pepper before sautéing until the onion is translucent and garlic fragrant — about 6 to 8 minutes.
  5. Add the tomatoes, wine, and marjoram, stir to combine. Bring to a boil before reducing to a soft simmer.
  6. After the sauce has thickened and darkened a bit — about 30 minutes — add the chopped octopus and reduced blanching liquid before continuing the simmer.
  7. Taste a piece of octopus after another 15 minutes to test for doneness and to check the seasoning. If necessary, continue to simmer another 5 minutes before tasting again.
  8. Serve immediately, accompanied with crusty bread. Alternately, some prefer to ladle the octopus over a slice of bread in the bottom of each bowl.
  9. Like all mildly flavored seafood dishes, grated cheese is not recommended for it will overpower the dish.

*     *     *

Notes

As mentioned above, more complete instructions for cleaning and chopping the octopus may be found HERE, the only difference being the size of the chopped pieces of octopus. For an in umido preparation, we prefer the pieces to be from 1.5 to 2 inches (3.5 to 5 cm). That means the octopus you buy should be about 1 lb. in weight. Anything less will require a smaller chop and, in our estimation, won’t be as suitable for an in umido preparation.

The idea for reserving and reducing the blanching liquid came from a suggestion from our blogging buddy, Stefan. It worked like a charm, adding additional flavor to the sauce. Thanks, Stefan! You can find out what other good things Stefan has to offer by visiting his fantastic blog, Stefan’s Gourmet Blog.

*     *     *

Roasted Arctic Char with Fennel, Onions, and Potatoes

Salmerino Alpino Arrostito con Finocchio, Cipolle, e Patate

Arctic Char 1

I think the fishmongers have learned my shopping habits and display their “wares” accordingly. Oh, I enter the store with a list in-hand but, unlike for most, my list is merely the starting point. I need to walk around the store before the real buying begins — and that’s where my fishmongers enter the picture. Knowing that I will come their way, they never fail to have something on display that is sure to catch my eye, and then they simply reel me in. One week it might be a collection of the smallest and sweetest of clams. Another time, it could be merluzzo so fresh I expect them to flap around in the display case. Not so surprisingly, last week, after writing that I was on a mission to find a 1 lb. octopus, I saw the octopus of my dreams perched atop its smaller, inferior brethren and I swear one of its arms motioned for me to come over and have a look. Coincidence? I think not.

It should come as no surprise, therefore, that when I walked up to the counter recently, there, in the center of the display, where only the week before rested snow-white fillets of cod, was today’s arctic char. With flesh more red than salmon (see Notes), these fillets were farm-raised, most likely in tanks on land. (Thank you, Seafood Watch.) Of course, I bought a nice fillet, just like the fishmonger knew I would.

Stepping away from the counter, I realized I didn’t know what to do with my purchase. My only experience with the fish, if you can call it that, was to watch it prepared on “Iron Chef.” The one thing I did know for certain was that I should cook it that night. What’s the point of buying fresh fish if it’s going to sit in the fridge or, worse yet, the freezer, waiting to be called into duty? Moments later with phone in-hand, I googled “arctic char recipes” and, lo and behold, one of the search results was a recipe from Seafood Watch. That is the dish I’m sharing today, with a couple of modifications to suit my tastes.

*     *     *

Ingredients

*     *     *

Roasted Arctic Char with Fennel, Onions, and Potatoes Recipe

Ingredients

  • 12 oz (340 g) arctic char fillet
  • 1 large bulb of fennel, sliced thick
  • 1 medium red onion, sliced thick
  • 12 new/fingerling potatoes, halved and quartered to make them equally sized
  • 1 orange, juice and zest, divided
  • 1/4 cup balsamic vinegar
  • 1/4 cup orange juice
  • 2 tsp brown sugar
  • 1/4 cup olive oil, divided
  • salt & pepper
  • fennel fronds, chopped
  • orange slices, garnish

*     *     *

Veg Cooked

*     *     *

Directions

  1. Pre-heat oven to 450˚ F (235˚ C). Place 1 oven rack in the upper third of the oven, and, another rack in the lower third.
  2. Place potatoes in a baking dish, season with salt, pepper, and 2 tbsp olive oil. Stir to evenly coat. Place on upper rack in the pre-heated oven and roast for 20 minutes.
  3. Place fennel and onion into a bowl. Add half of the orange zest, the rest of the olive oil, and season with salt and pepper. Gently mix to evenly coat the ingredients.
  4. Lightly oil and season both sides of the arctic char. Place on a lightly oiled baking sheet.
  5. After 20 minutes, add the fennel and onion to the potatoes and stir to combine. Return to oven for 15 minutes.
  6. After 15 minutes, place the baking sheet with the arctic char on the lower rack of the oven. Stir the roasting vegetables and return to the oven’s top shelf. Continue to roast for another 10 to 12 minutes, depending upon the thickness of the fish fillet. The fillet is cooked when the flesh flakes easily and is opaque in the center, not translucent.
  7. Meanwhile, place remaining orange zest, balsamic vinegar, orange juice and brown sugar into a small sauce pan over med-high heat. Bring to a boil, lower the heat, and reduce sauce to the consistency you desire.
  8. When fish is cooked, remove to a plate and serve with the roasted vegetables. Drizzle sauce over both fish and vegetables and garnish with a sprinkling of fennel fronds. Place orange slices on the plate, the juice of which may be squeezed on the fillet.

Inspired by a recipe found on the Monterey Bay Aquarium: Seafood Watch site.

*     *     *

Roasted Arctic Char 2

*     *     *

Notes

As mentioned, the flesh of arctic char can be more red than salmon — usually indicating the fish has been farm-raised — but it can be a lighter hue, as well. It is said to taste like a cross between salmon and trout, and not quite as strong as salmon. For this reason, some may feel it tastes a bit more like trout. As a general rule, prepare arctic char as you would salmon and you will not be disappointed.

The Monterey Bay Aquarium created and maintains the Seafood Watch site and App. The App is free and can be loaded into your Apple or Android smart phone and tablet. It is meant to encourage us, the consumers, to purchase seafood that is “fished or farmed in ways that don’t harm the environment.” The App rates seafood as “Best Choice” and “Good Alternatives”, as well those which we should “Avoid.”  Whether at the market or in a restaurant, I use the App to guide my seafood purchases. Unfortunately, Seafood Watch only covers the United States and Hawaii, though there may be a similar App for your corner of the World.

*     *     *

It’s déjà vu all over again …

Homemade dog jerky

Recently, “hits” on my dog jerky post have soared and it has become this blog’s most popular post for each day since dog treats came back into the news. Once again, something in store-bought jerky treats is causing dogs to become ill and far too many have died. (TIME: The FDA has No Idea Why Jerky Treats Are Killing Hundreds of Dogs.) Every dog that I have owned has loved these treats but they are hardly worth the risk, especially when it is so easy to make jerky at home. Before you buy another bag of jerky for your dog, please click HERE to see how easy — and inexpensive — it is to make your own beef & chicken jerky for your pupster.

*     *     *

Coming soon to a monitor near you …

Apple Cake Preview

Aunt Mary’s Apple Cake

*     *     *

This Recipe has Legs: Strangozzi Pasta with Octopus

Strangozzi al Polipi

Recentlyour good friend Tanya, of Chica Andaluza fame, shared a recipe for Carpaccio of Octopus. (Do check out that recipe and, while you’re at it, take a few minutes to explore the rest of her fantastic blog.) I’d not thought about octopus in years and that post reminded me that my family once cooked octopus, polipo. I spoke to Zia about it and we decided to prepare it the next time I visited her. That visit took place last month and, with Monday having been Columbus Day, I thought octopus would make a fine way to commemorate his voyage across the Atlantic. After all, there were those that believed his ships would be sunk by a giant octopus long before they fell off the edge of the Earth.

*     *     *

Strangozzi al Polipi

Strangozzi al Polipi

*     *     *

It’s been quite some time since an octopus was given the place of honor at a Bartolini dinner — more than half a century, but who’s counting? We really have no reason for it not being served since then. The dish is delicious, reminiscent of calamari in umido, and it isn’t at all difficult to prepare. No matter. The dish was prepared by my family at one time and thereby has earned a page on this blog.

Back in the day, we would have prepared the octopus in umido, which in this case means stewed in a tomato sauce. Served in bowls with a chunk of good, crusty bread, the dish is delicious and, in some homes, is one of the dishes on the menu for the Feast of the Seven Fishes on Christmas Eve. Originally, I had planned to prepare today’s recipe in umido until reality intervened.

As of now, I know of only one place to buy octopus and that’s at my Italian market. Unfortunately, they only sell very small or very large octopi and each poses a problem for us. When you cook something in umido, it is best that the protein be in large pieces. This is not a soup but a stew, after all, and the pieces should reflect that. Well, the small octopi are so small that it would take 4 to equal a pound (450 g). When chopped, the

Octopus over Polenta

Octopus over Polenta

pieces are far too small for in umido presentation. In fact, Zia and I attempted to serve them over polenta and, though tasty, all but a few pieces were too small even for that. On the other end of the spectrum, the market sells frozen octopi that are 4 and 5 lbs. apiece. Though that would be wonderful to prepare for a Bartolini family dinner, an octopus that size is far too large for a meal for Zia and I. So, although we had to change the dish to suit the circumstances, the search is on now for an octopus weighing 1 pound. When I find one, I’ll either create a separate Polipo in Umido post or amend this one to include that recipe. Bear in mind, though, that the ingredients used in the in umido recipe are the same as those used here for this sauce. Differences, if there are any, will be in the amounts listed. I’ll only be sure of that once I find an octopus in the right size.

Since we couldn’t serve the octopus as we had originally intended, in umido, Zia and I served it over polenta. As I mentioned earlier, that dish didn’t quite work as well as we Bartolini Strangozzi Pastathought it would. Again the octopus pieces needed to be larger. Once home, I bought 3 more small octopi and decided to serve them over pasta. As luck would have it, a few weeks earlier my blogging friend, Lidia, had noticed something while shopping and sent her discovery to me. (Not only does she share the name of one of my favorite chefs, Lidia has a wonderful blog, Oh Lidia, and I hope you take time to have a look.) You can imagine my surprise when I opened the carton and found 3 pastas manufactured by a company called “Bartolini”. I can’t think of a better pasta to serve with this old family recipe than one that shares our family name. So, of the 3 sent, I chose to prepare strangozzi.

In an earlier post, I demonstrated how to make strozzapreti pasta and gave an account of how it got its name. (See It’s déjà vu all over again … ) Strozzapreti, you see, means priest choker and one legend states that this pasta was so delicious that priests choked when eating it for the first time. What does this have to do with strangozzi? Well, it is thought that the word strangozzi is derived from the Italian word for shoelaces, stringhe, yet this pasta has come to mean priest stranglers. Huh?  Stay with me. Centuries ago, in Umbria, the clergy was not looked upon kindly by the villagers. Legend says that they chased down the worst of the clergy and those that were caught were strangled with their shoelaces. These long pasta ribbons are thought to resemble those shoelaces. Death by shoelace immortalized in pasta. Ya gotta love it!

In reality, strangozzi are about the size of what we would call linguine, the only difference being in their thickness. Our linguine are cut from thin pasta sheets; strangozzi is cut from sheets twice as thick. The result is a hearty pasta that is perfect for heavier or meat-based sauces.

*     *     *

Before beginning the recipe, the octopus must be cleaned and readied. The head is actually a hood and the contents of its interior need to be removed. It is easy enough to do and you can slice its side to make it even easier. Next, the eyes must be removed. Make a small slice on either side of each eye, creating a small wedge. Remove each wedge and the eye with it. Since these octopi were so small, I sliced the octopus just above both eyes and again below, creating a ring. I then cut the eyes off of the ring. One last thing to be removed is the beak. Turning the octopus upside-down, you’ll notice a small whole at the center of the 8 legs. With your fingers, carefully feel the beak and note its size. With a sharp knife, cut around the beak and remove. Now that it’s cleaned, cut the legs section in half, creating 2 parts with 4 legs apiece. Cut those pieces in half again, and then again. In the end, you will have separated all 8 legs. Do not chop them but leave them whole and proceed with the recipe.

*     *     *

Click to see any/all photos enlarged.

*     *     *

Strangozzi Pasta with Octopus Recipe

Ingredients

  • octopus (See Notes)
  • 3 tbsp extra virgin olive oil
  • 1/4 tsp red pepper flakes (more or less to taste)
  • 1 small onion, diced
  • 2 cloves garlic, minced or grated
  • 1/3 cup chopped parsley
  • 1 large can, 28 oz (800 g), whole tomatoes – hand-torn
  • 1/2 tsp dried marjoram (2 tsp fresh)
  • 3 to 4 oz dry white wine
  • 1 lb  (450 g) cooked Strangozzi pasta — or whatever pasta you prefer — cooked al dente
  • reserved pasta water

Directions

  1. In a medium saucepan over med-high heat, bring to boil enough water to cover the octopus. Add the octopus and allow to simmer for 1 to 2 minutes after the pot returns to the boil. Small octopus should boil for 1 minute. Larger should be allowed to boil closer to 2 minutes. Remove the octopus and place in an ice bath to stop the cooking process and reserve. Once cooled, see Notes for chopping considerations.
  2. Over med-high heat, add olive oil in a medium sauce pan.
  3. Add red pepper flakes, onion, garlic, and parsley. Season with salt and pepper before sautéing until the onion is translucent and garlic fragrant — about 6 to 8 minutes.
  4. Add the tomatoes, wine, and marjoram, stir to combine. Bring to a boil before reducing to a soft simmer.
  5. After the sauce has thickened and darkened a bit — about 30 minutes — add the chopped octopus and continue to simmer.
  6. If using small octopi, it should be finished cooking in about 20 minutes. Taste a piece after 15 minutes to test for doneness and to check the seasoning. If necessary, add some of the reserved pasta water. (See Notes)
  7. Meanwhile, the pasta should have been cooked al dente and strained. Be sure to reserve some of the pasta water.
  8. In a large bowl or serving platter, combine the octopus sauce with the cooked pasta and mix. If the pasta seems too dry, add some of the reserved pasta water.
  9. Serve immediately.
  10. Like all mildly flavored seafood pastas, grated cheese is not recommended for it will overpower the dish.

*     *     *

*     *     *

Notes

The dish will determine the size of the pieces when chopping the octopus.

  • For pasta dishes, I would suggest chopping small octopi into pieces about 3/4 inches (2 cm). These pieces will shrink a little during cooking and will be easily managed no matter what pasta you choose.
  • For in umido, a larger octopus should be used and, when chopped, the pieces should be larger. Ultimately, the size will depend upon how comfortable you are dealing with the pieces while eating. Even so, I would suggest that all pieces be no less than an inch (2.5 cm) long. (Since this recipe was posted, I did find and prepare a 1 lb. octopus in umido. You can see that recipe by clicking HERE.)

No matter the preparation or the size of the pieces, do try to keep them all the same size. Doing so will ensure that all the octopus is evenly cooked.

Understandably, the larger the octopus, the longer it should simmer in the tomato sauce. A small octopus should take 15 to 20 minutes, as was stated in the recipe above. Larger octopi will take up to 30 minutes, maybe more. Be careful not to overcook lest the octopus become rubbery. If in doubt, taste a piece to see if it is cooked to your liking.

For reasons unknown to me, we’ve always discarded the water used to blanch the octopus. Even though the octopus is in it only briefly, the water does darken in color.

*     *     *

It’s déjà vu all over again …

Strozzapreti with Pesto

Strozzapreti with Pesto

With all of this talk of strangling priests, it’s only logical that today’s look back would be to the strozzapreti post. Not only will you learn how to make the pasta by hand, you’ll also learn how a few of the common pastas got their names. All this can be yours just by clicking HERE.

*     *     *

Coming soon to a monitor near you …

Damson Plum Jam Preview

Damson Plum Jam

*     *     *

Salted Cod Salad

Insalata del Baccalà For some, the timing of today’s post may seem rather odd. A salted cod salad is very often served in Italian households as part of the Feast of the Seven Fishes on Christmas Eve — but not in our house. We Bartolini prepared this salad virtually any time throughout the year except during the holidays. On Christmas Eve, we served our salted cod stewed in tomato sauce, baccalà in umido. Frankly, I prefer it this way, with a stew served in Winter and a salad served in the warmer months.

This is the third recipe I’ve shared that features salted cod. The first, Baccalà alla Marchigiana, is the stew that we served on Christmas Eve. In the second post, the cod was barbecued, although the same preparation could be used to bake the fish. Today’s recipe is a salad and a snap to make, once you’ve re-hydrated and rinsed the cod.

Briefly, in the days long before refrigeration, cod was dried and salted as a means of preservation. To make it suitable for cooking, the cod must be soaked in cold water for at least one day and no more than three. During that time, the water should be changed three times daily. The longer the soak, the less salty the taste. It is up to you to decide what level of salinity is acceptable.

With the cod re-hydrated, the dish, like most green salads, is really quite simple to prepare. Though the ingredients may have varied from one salad to the next, we always dressed our salad with a bit of red wine vinegar and olive oil. You, like many, may prefer to use lemon juice in place of the vinegar. Even so, with absolutely no cooking involved, you can easily see how this salad would make a perfect meal during Summer’s dog days.

*     *     *

Salted Cod Salad Recipe

Ingredients

  • 1lb (455 g) of baccalà (See Variations)
  • pickled bell peppers, chopped (See Notes)
  • 1/2 yellow bell pepper, chopped
  • 1 celery stalk, chopped
  • red onion chopped
  • nonpareil capers, rinsed
  • Kalamata olives, halved
  • 1/4 cup fresh parsley, chopped
  • extra virgin olive oil
  • red wine vinegar — lemon juice may be substituted
  • salt & pepper, to taste

*     *     *

*     *     *

Directions

  1. To ready the baccalà: Place the fish in an oblong glass dish or pan. Add enough water to cover, dump the water, and repeat a few times. Add enough water to cover and set aside. Change the water 3 times daily for at least 1 day and no more than 3. When ready, the cod will be considerably thicker than when your started and will taste far less salty. (See Notes)
  2. Remove any bones and skin before proceeding,
  3. Bring a large pot of water to the boil.
  4. Meanwhile, cut the re-hydrated baccalà into chunks from 3 to 4 inches apiece.
  5. When the water is boiling hard, add the baccalà and, when the water returns to the boil, reduce the heat to a soft simmer.
  6. Simmer until the baccalà can be easily flaked, usually about 5 to 8 minutes.
  7. Using a slotted spoon or small strainer, remove the baccalà from the water and set aside.
  8. Once cool, carefully flake baccalà and place in another bowl.
  9. To that bowl, add the peppers, celery, onion, capers, olives, and parsley. Gently toss the ingredients until combined.
  10. Add enough of the olive oil to lightly coat the salad, followed by the vinegar/lemon juice to taste. Season with pepper but be sure to taste before adding any salt.
  11. If not to be served immediately, cover and refrigerate until you’re ready to do so.

*     *     *

Variations

This recipe used raw salted cod, baccalà, to make the salad. The salad could also be made using left-over baked, broiled, or grilled baccalà, as well. When using left-over cod, there’s no need to boil or cut it up into chunks. Skip those steps and start flaking the pieces.

You can vary the salad ingredients to suit your own tastes. Carrots, shallots, garlic, etc., can be added or used to substitute for any of the ingredients listed.

*     *     *

*     *     *

Notes

You’ll note that I used bell peppers twice in this recipe. The first were miniatures, “Tulip Bells”, that I pickled last August. They added color and a vinegar element. The yellow bell was added for both color and crunch. Neither pepper brings any heat to the salad. If you like, you can add cherry bomb peppers, jalapeños, or Serranos, raw or pickled, to kick up the heat.

One sure way to know whether the baccalà is ready to be cooked is to taste a very small piece of it, once it seems fully hydrated. If it is still too salty, keep soaking the fish until it reaches the level of salinity that you prefer, bearing in mind that it will be boiled once it passes your inspection.

Do not add any salt to the dish until the very end.

This salad will keep for 2 days if refrigerated, though we’ve rarely had left-overs.

*     *     *

It’s déjà vu all over again …

Today’s post featured a recipe tailor-made for Summer’s hottest days, when we’re all loathe to turn on the stove. The same can be said for today’s blast from the past. Two years ago I shared a recipe for a couscous salad that requires not one bit of cooking. Just put the ingredients in a bowl, give them a toss, and set your salad in the fridge while you sip Long Island iced tea on the patio. A few hours later you’ll have a tasty salad for lunch or dinner without ever touching a pot or pan. You can see how it’s prepared by clicking HERE.

*     *     *

Coming soon to a monitor near you …

Pickles

*     *     *

Baked Haddock

Eglefini al Forno

Today’s recipe once again calls upon my family’s breading mixture to keep the fish fillet moist as it adds flavor to the dish. There really is no need for me to explain the breading much more than that for fear of boring you to tears. And I wish I had a great story to tell about haddock but, the truth is, I had originally planned to use baccalà for this post. Then I saw fresh haddock on sale and, well, that piece of salted cod will be used to make a fine salad.

Haddock is a popular fish on both sides of the Atlantic. Having once been over-fished, its numbers have increased and it is now considered a success story here in the US. In our Northeast, specifically the Boston area, young haddock may also be called scrod. That’s a bit of a misnomer, however, because that name is used for both young cod and young haddock. Needless to say, haddock is very similar to cod in both taste and texture, with haddock having a slightly stronger flavor. Like cod, it flakes when cooked so be careful if you try to grill haddock. If you do, it’s probably best to use a grilling basket.

*     *     *

This slideshow requires JavaScript.

*     *     *

As I’ve mentioned in other posts, this breading mixture is used in a number of the Bartolini dishes. To be honest, I never realized how many until I started documenting my family’s recipes. Depending upon its use, it can be more/less moist and with/out lemon juice. Combine bread crumbs, diced garlic, chopped fresh parsley, and salt & pepper in a bowl. In this case, I used the juice of a half-lemon and then enough olive oil to moisten the mixture but not to the point that it’s sopping wet. How much of each ingredient you need will depend upon how many fillets there are to cook and whether you’ve plans for the excess breading. (See Notes.) Under normal circumstances, you’ll want enough breading to adequately cover each fillet, as well as to form a thin layer underneath each piece of fish so that there’s little chance of it sticking while baking. And what if you make too much? Spread it on the baking dish/sheet and roast it along with the fish. Excess breading can be frozen for later use with pasta.

Once the fillets have been breaded and placed on a baking sheet, place them in the center of a pre-heated 375˚ (190˚ C) oven. Your fish should be ready in about 15 minutes, maybe 20 depending upon the thickness of the pieces.  Haddock fillets will be opaque white and flake easily when fully cooked, very much like cod. Remove the baked fillets to a serving dish, garnish will lemons slices, and serve. In the photo, the haddock was accompanied by sautéed artichokes.

*     *     *

Notes

Normally, my family would only put a small amount of bread crumbs under the fish to prevent the fillets from sticking while baking. Here I placed the haddock on a bed that was about 1/3 inch (.85 cm) thick because I had use for those bread crumbs. Once the fish was removed to a serving platter, I used the now-roasted bread crumbs left on the baking sheet to garnish a side dish of pasta aglio e olio instead of cheese.

*     *     *

An Update

I telephoned a 5th company today to inquire about getting the vine removed. Within an hour, they were here and removed the vine within the next hour. They will be back to haul it away at the end of the week. The only real damage sustained was to a single rosebush but it is early enough in the season that it should recover without a problem. Thank you all for your concern and well-wishes.

*     *     *

It’s déjà vu all over again …

Though the weather may not be cooperating, it is definitely grilling season here in the US & Canada. If you’re at all like me, a burger just isn’t a burger if there aren’t pickles on top. Now, as much as I love a good kosher dill, for my burgers and sandwiches, I crave Bread & Butter pickles. Easier to make than you might think, my original recipe didn’t require canning and the pickles were stored in the refrigerator. I’ve since added instructions for canning them. Either way, I think you’ll agree that a few of these tasty slices is the only way to top a burger. Click HERE to learn how to make these great tasting pickles.

*     *     *

Coming soon to a monitor near you …

“Jack BRICKhouse CHICKEN”

*     *     *

Grandpa’s Tuna Salad gets a Makeover

Due Insalate di Tonno 

Ah, Spring! Who can forget the sights and aromas of a glorious Spring morning? Well, try as we might, none of us who called the two-flat home will ever forget a few not so glorious Spring days — and I imagine our neighbors would say the same.

As I’ve mentioned in prior posts, Grandpa’s retirement years revolved around his garden, although he always had various maintenance jobs to perform around the building, too. As a young boy, and later teen, one learned to make oneself scarce early in the morning or become part of the work crew. This was especially true in early Spring.

Grandpa sowed his seeds after consulting the lunar calendar and the Old Farmers Almanac. He needed no help with this and the process remains shrouded in mystery to this very day. No, Grandpa only called upon one or more of us boys when he needed muscle. In the Fall, we helped him clear all the old tomato plants and their support stakes before we turned over the soil. The only parts of the garden to escape this tilling were the lettuce and parsley patches. Those he covered in straw and it wasn’t unusual for us to have a bit of both with our Thanksgiving dinner.

Come the following year and the Spring Thaw, Grandpa would find one of us and, again, we tilled the garden, though this time no patch was left unturned. That was the easy part. You see, Grandpa was a firm believer in the power of manure to grow gigantic tomato plants.  (To his credit, there may be some truth to this. How many gardeners do you know that use old hockey sticks to support their tomatoes?) About the time of the tilling, he would ask if you wanted to go out to the farm with him. Grandpa had a farmer friend and how we kids loved going there.  After all, this was the same farm that had adopted our dogs, though they were always out running in the fields when we came to visit. Well, by the time we were old enough to till the garden, the jig was up as far as the dog tales were concerned.  We were, also, fully aware of why we were roped into offered the chance to accompany Grandpa on this particular trip to the farm.

*     *     *

*     *     *

The fact was that the garden needed manure and not just any manure. Grandpa’s tomato crop depended upon this farm’s sheep manure. So, once each Spring, we drove out to the farm and, after a few pleasantries, we drove off with a large metallic tub of sheep manure in the trunk, making us very popular at traffic lights if the wind shifted just the right way. Once home, we hauled the tub to the yard but it didn’t end there. Oh, if only it ended there!

As it turns out, sheep manure, in its natural state, is too strong for young tomato plants and, even if it wasn’t, there was no way we could haul enough manure in a car’s trunk to cover Grandpa’s ever-expanding garden. Grandpa had a solution, all right, and it’s lucky that he was so loved by our neighbors.  Using a very large metallic bucket and a hose, Grandpa made “soup” — his label not mine — which was then spread over the tilled earth. A couple of days later, one of us would be called upon to till the garden again. Don’t think we didn’t try to avoid that call to action but we were on our own. Our parents had their eyes on the prize: a wealth of tomatoes come August. Any inkling that we didn’t want to help Grandpa was met with a  reminder that “work never hurt anyone” and suddenly we found ourselves asking Grandpa if he needed help.

All facts considered, it was one bad afternoon, leaving 364 pretty good ones. Thankfully, it was early enough in the year that the Spring rains helped to quite literally clear the air, much to everyone’s relief. Most fortunately, since the boys’ bedrooms were closest to the garden, rain and cold temperatures prevented anyone from even considering opening a window “to let in some fresh air.”  And the tomatoes? Grandpa’s plants were huge and the crop large enough for 2 families. Sheep manure soup. Who knew?

*     *     *

At noon on any given Friday, save those that fell in Winter or manure week, you could find Grandpa in his patio enjoying his lunch. It was usually a simple dish and, being Catholic, it was, also, meat-free. A favorite of Grandpa, and later my own, was this simple tuna salad. Believe me, it could not get any more simple and no further introduction is required. 

*     *     *

*     *     *

Grandpa’s Tuna Salad Recipe

Ingredients

  • 1 can (5 oz; 142 g) tuna, packed in olive oil, drained 
  • a bit of red onion, sliced or chopped
  • 2 whole anchovy fillets, more if desired
  • olive oil 
  • red wine vinegar
  • salt & pepper, to taste

Directions

  1. Place the tuna on a serving plate. it can be flaked or left in a ring shape.
  2. Top with onion and anchovies.
  3. Sprinkle with olive oil and red wine vinegar.
  4. Season with salt, & pepper, to taste
  5. Serve with crusty bread and a glass of homemade white wine.

*     *     *

That’s it. Quick and easy but surprisingly satisfying. I enjoyed this dish as a boy and continue to enjoy it today. Even so, nothing remains the same forever. As much as I enjoy Grandpa’s tuna salad, I wanted to try something a little different and, so, I gave Grandpa’s version a makeover. Enter tuna salad number 2.

Whereas Grandpa’s tuna rested on a plate, the foot of my salad rests on a bed of mixed salad greens. Rather plainly dressed, Grandpa’s tuna was clothed with just onion, salt, pepper, and oil & vinegar. My new tuna salad is adorned with capers, onion, salt, pepper, olive oil, and freshly squeezed lemon juice. Most importantly, Grandpa’s tuna came to him by way of a can. My tuna skipped the middleman, taking a more direct route to my plate via a grill pan.

Now, to many, it isn’t really a makeover if there is no reveal. Not wanting to disappoint, here’s mine. On the right, you’ll see Grandpa’s original tuna salad and, on the left, may I present the new and “refreshed” tuna salad.

*     *     *

*     *     *

It wouldn’t benefit anyone if I didn’t explain how this transformation took place. Here, then, is how the makeover specialists of the Bartolini Kitchens performed this miracle.

*     *     *

Grandpa’s New & Improved Tuna Salad Recipe

Ingredients

  • 1 tuna steak per serving
  • mixed salad greens
  • 1 tsp capers per serving, more if desired
  • red onion, thinly sliced
  • olive oil
  • lemon juice
  • salt & pepper, to taste
  • lemon wedges for serving
  • whole anchovy fillets (optional)

*     *     *

*     *     *

Directions

  1. Place salad greens in a large bowl. Add onion & capers, dress with olive oil and fresh lemon juice, season with salt & pepper, and toss to combine. Set aside.
  2. Heat the grill pan over med-high heat. Lightly coat the tuna steak with olive oil and season with salt and pepper on both sides.
  3. When the grill is hot, moisten a (paper) towel with vegetable oil and use it to lightly coat the grill surface.
  4. Add the tuna steak to the grill pan. After 90 seconds, use a fish turner to give the steak a quarter turn.
  5. Cook for 60 to 120 seconds and then flip the steak over.
  6. After cooking for 60 seconds, give the steak a quarter turn. Continue cooking the steak for 60 to 90 seconds and remove from heat.
  7. Move tuna steak to a cutting board. Cutting with the grain, carve slices no less than 1/4 inch (2/3 cm) thick.
  8. Place salad on the serving plate and arrange tuna slices atop the salad. Garnish plate with lemon wedges and optional anchovy fillets.
  9. Serve with crusty bread and a white wine of your choosing.

*     *     *

Variations

Although my tuna steak rested atop a bed of baby salad greens, you may choose whatever greens you prefer — baby spinach, baby kale, and rocket come to mind.

I chose to dress my tuna salad with a simple dressing of lemon juice and olive oil, reserving a little juice for the tuna, as well. You may wish to use another dressing, such as the lemon-caper sauce I shared within my grilled sturgeon recipe post.

*     *     *

Notes

I used a grill pan here but you could just as easily use your barbecue, broiler, or skillet to cook your tuna steak. Just resist the urge to move the steak until it’s time to turn it.

Cooking times, as you’ve probably noted, are anything but precise. The pan, the heat, and/or the tuna steak’s thickness all play a role. Remember, too, that the steak will continue to cook once it has been removed from the fire, as well as while you fiddle with a camera, trying to take photos for a blog entry. (#%*@^#&$!)

100_3954Whether you call it tinned or canned, whether it’s packed in oil or water, and whether it’s chunk or whole, please make sure that the tuna you’re about to purchase was harvested in ways that will not harm dolphin populations. The symbol located to the right, or something similar, should be found on the can. If it’s not there, please do not purchase that tuna.

*     *     *

It’s déjà vu all over again

freshly-made

Freshly made mascarpone

A little over a year ago, I was in the middle of my cheese-making series when I shared the recipe for making mascarpone. Though widely known as the star ingredient in tiramisu, mascarpone is so much more than that, Whipped and flavored, this creamy cheese makes a wonderful dessert topping, while adding it to pasta gives new meaning to the words “cream sauce.” Best of all, mascarpone is a snap to make with results far better than you can imagine. But don’t take my word for it. You can see how it’s done by clicking HERE.

*     *     *

 Coming soon to a monitor near you … 

Frittata

*     *     *