Try This One For Thighs

Coscie di Pollo con Harissa

Harissa Thighs 1Little did I know when I used harissa to braise goat last October that I would become obsessed with the spicy sauce. Initially, I bought harissa from a Middle Eastern bakery that prepares the sauce on-site and provides it to a number of restaurants here in Chicago. Celia, though, suggested I make my own. Now, if you’ve been to her amazing blog, Fig Jam and Lime Cordial, you know that Celia makes just about everything and does so with a deft hand. Still, I was hesitant.

The truth is that many recipes say to use red or green chiles. Well, being a chile neophyte, I never know which ones to use and it’s not like there’s a big selection here. Then I came upon Mimi’s harissa recipe. (Take some time to get to know her blog, the Chef Mimi Blog, too, for some incredibly delicious recipes.) Her recipe took a different tack and I decided to give it a try.

Well, as luck would have it, when I went shopping for ingredients, there they were, a large display of red Fresno peppers. I bought a dozen, deciding I would take inspiration from both of their recipes, and since that afternoon, I’ve made several batches of harissa.

Over time, I’ve adjusted the spice mix to get to a flavor profile I prefer and now I’m working on the heat level. Right now, this sauce has a nice even heat when raw — there’s a roasted vegetable salad post in the works — but it dissipates a bit when cooked. Those with a higher tolerance for chiles may wish to include the peppers’ ribs and seeds, or, add another Habanero to the recipe below.

Like my harissa sauce, today’s chicken recipe is a work in progress, although I have prepared it in much the same manner 4 or 5 times now. In some ways, it reminds me of a cacciatore with a North African twist. I think you’ll find the recipe easy enough to follow without experiencing any problems.

*     *     *

*     *     *

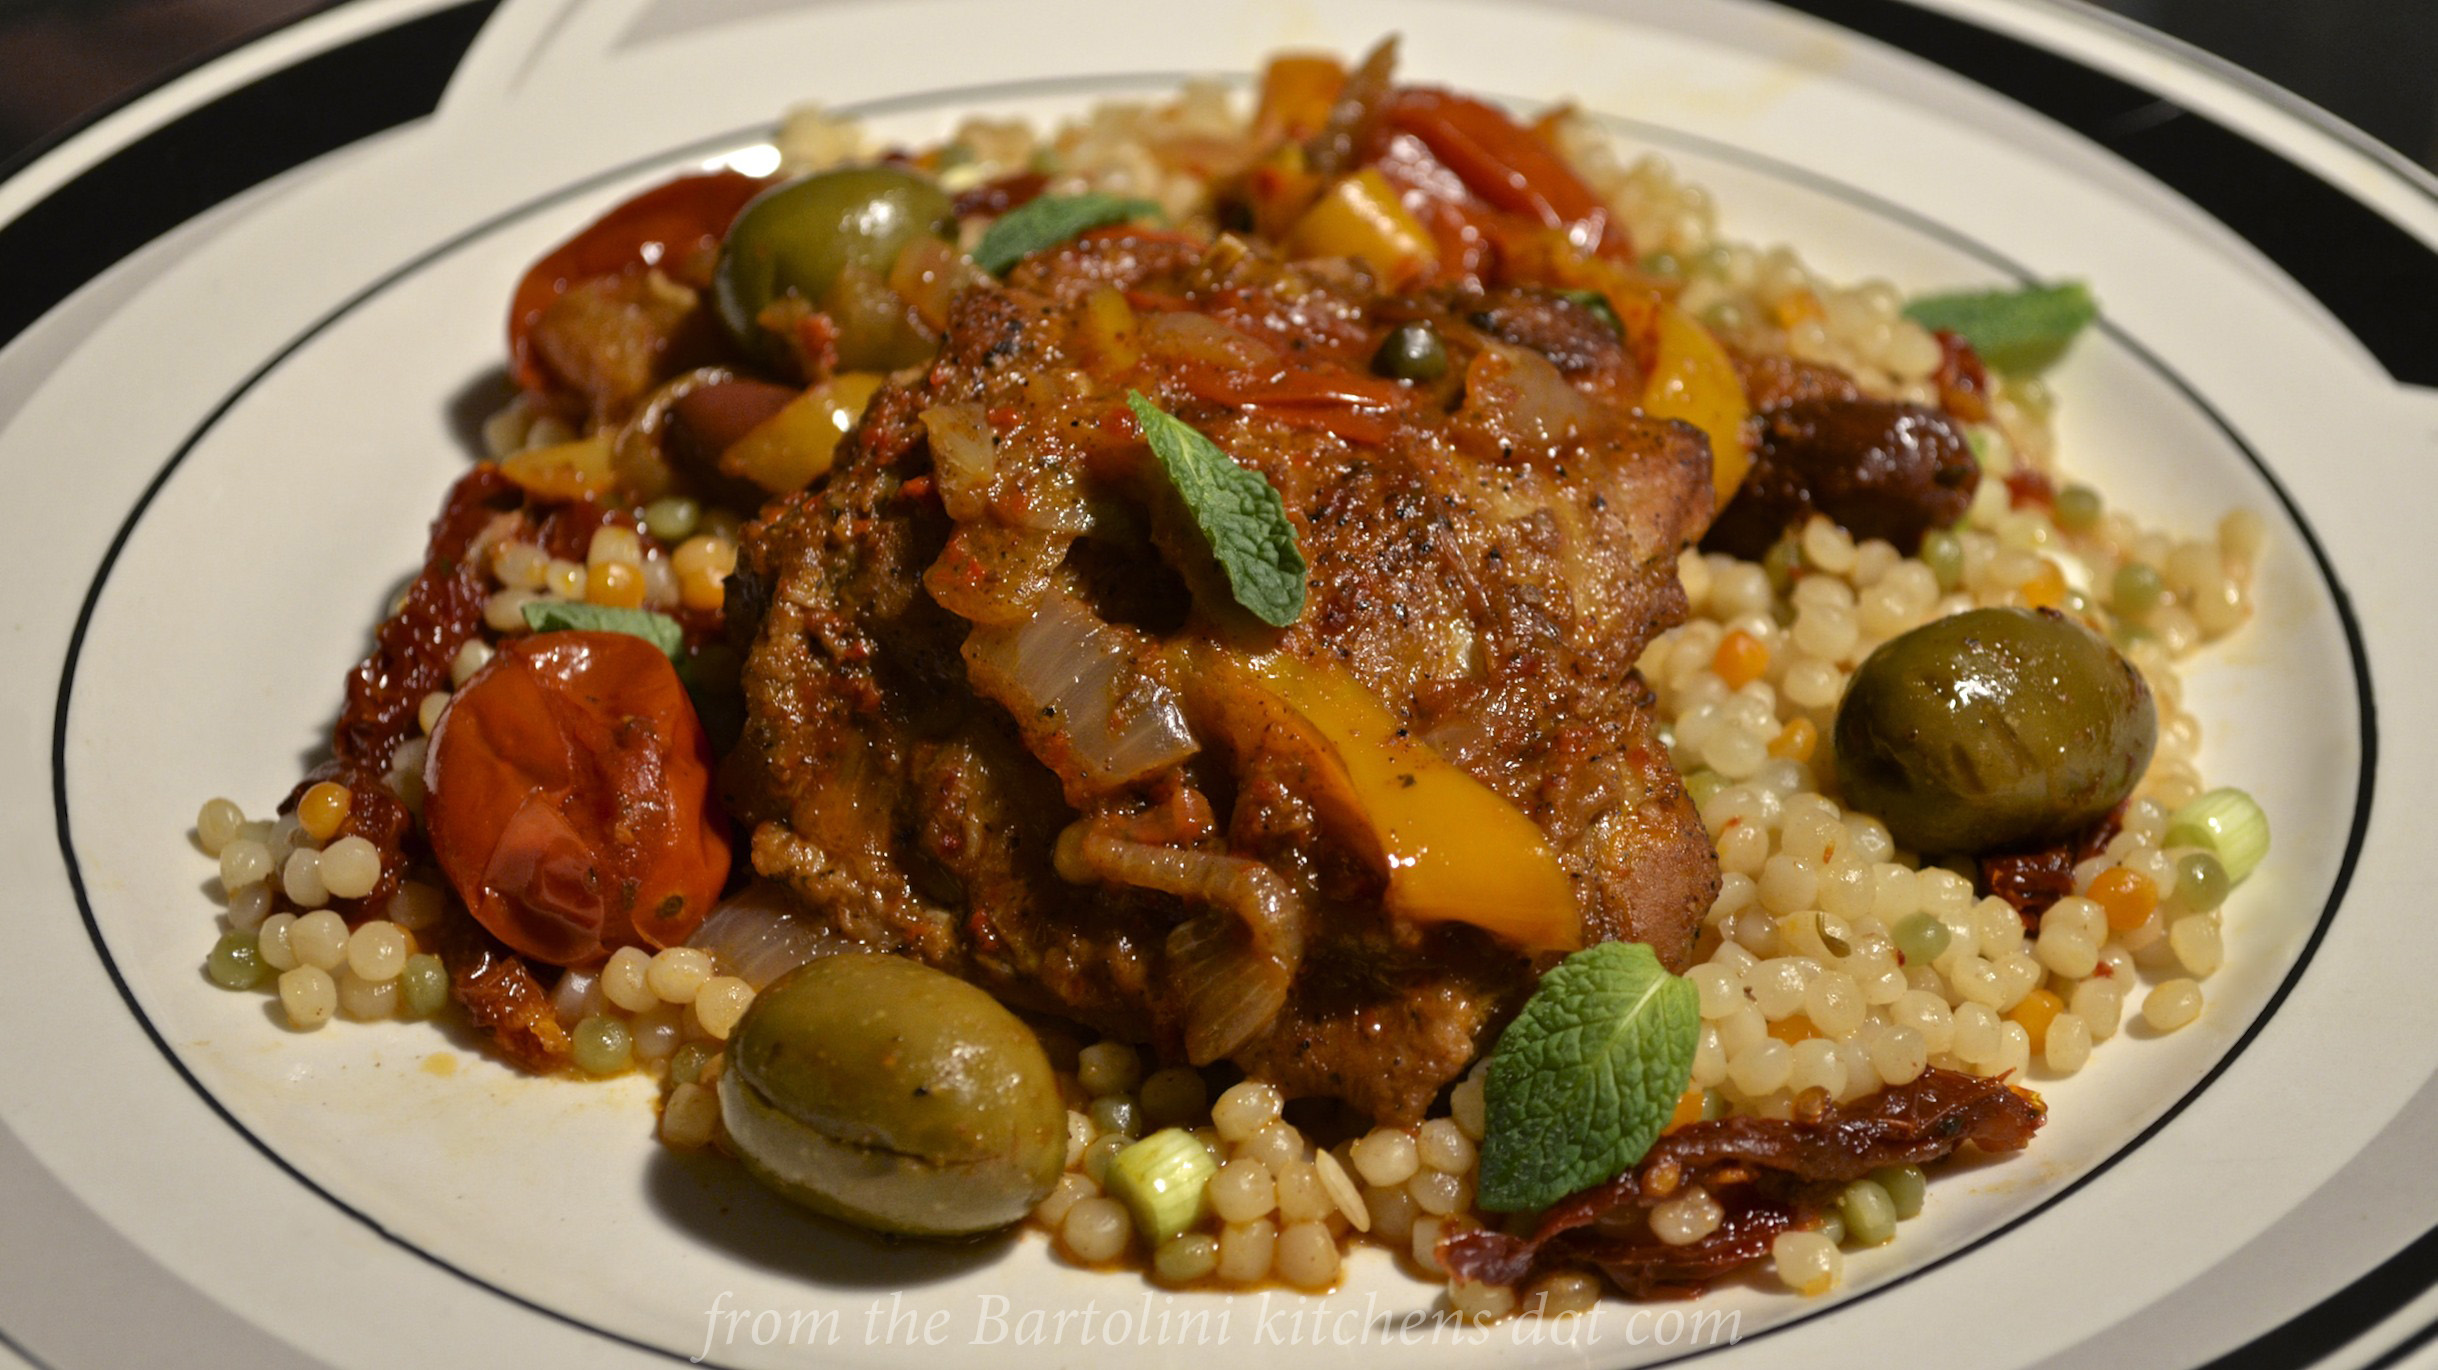
Chicken Thighs with Harissa

Ingredients

  • 4 chicken thighs with skin and bones
  • 3 tbsp harissa sauce – recipe follows
  • 1/2 c chicken stock
  • 1/4 tsp cinnamon
  • 2 tbsp olive oil
  • 1 onion, sliced
  • 1 orange bell pepper/capsicum, sliced
  • 3 cloves garlic, sliced
  • 2 sprigs fresh rosemary
  • about 12 oz (340 g) olive salad (See Notes)
  • 12 cherry tomatoes
  • 1/2 preserved lemon, chopped
  • salt & pepper
  • lemon zest
  • mint leaves for garnish – optional

Directions

  1. Combine harissa, cinnamon, and chicken stock in a small bowl and set aside.
  2. Heat olive oil in a large frying pan with a cover over med-high heat.
  3. Season chicken thighs with salt and pepper and add to frying pan, skin-side down. Sauté until brown, 6 to 8 minutes, before turning over and browning the other side. Remove thighs from the pan.
  4. Remove all but 2 tbsp of fat from the pan. Add onions and peppers to the pan and sauté until onions are translucent, about 8 minutes. Add garlic for the final minute.
  5. Add olive salad and harissa sauce mix, stir, and heat through.
  6. Add thighs back to the pan, skin-side down, before adding the cherry tomatoes and preserved lemon. Cover the pan and reduce heat to medium.
  7. After 15 minutes, turn over the thighs so that they’re skin-side up. Do not cover the pan, giving the sauce a chance to thicken while the chicken finishes cooking.
  8. After the thighs have cooked for a total of 30 minutes, insert an instant read thermometer into the thickest part of the largest thigh. When the temperature reaches 165˚ F (75˚ C) the thighs are done.
  9. Remove to serving platter, sprinkle with lemon zest, and garnish with torn mint leaves, if desired.
  10. Serve immediately.

*     *     *

Harissa Thighs 7

Someone forgot the mint leaves.

*     *     *

Notes

I prefer to use a variety of olives here. Most of the groceries in this area offer olive salads, some even have more than 1 type. When they’re available, I’ll use the Mediterranean or Spanish olive salad. In today’s recipe, I combined both. Use whatever combination of olives you prefer and that are available. Use as little or as much as you like.

The chicken was served over tri-color “pearl” couscous that had been tossed with chopped scallions (spring onions) and sun-dried tomatoes.
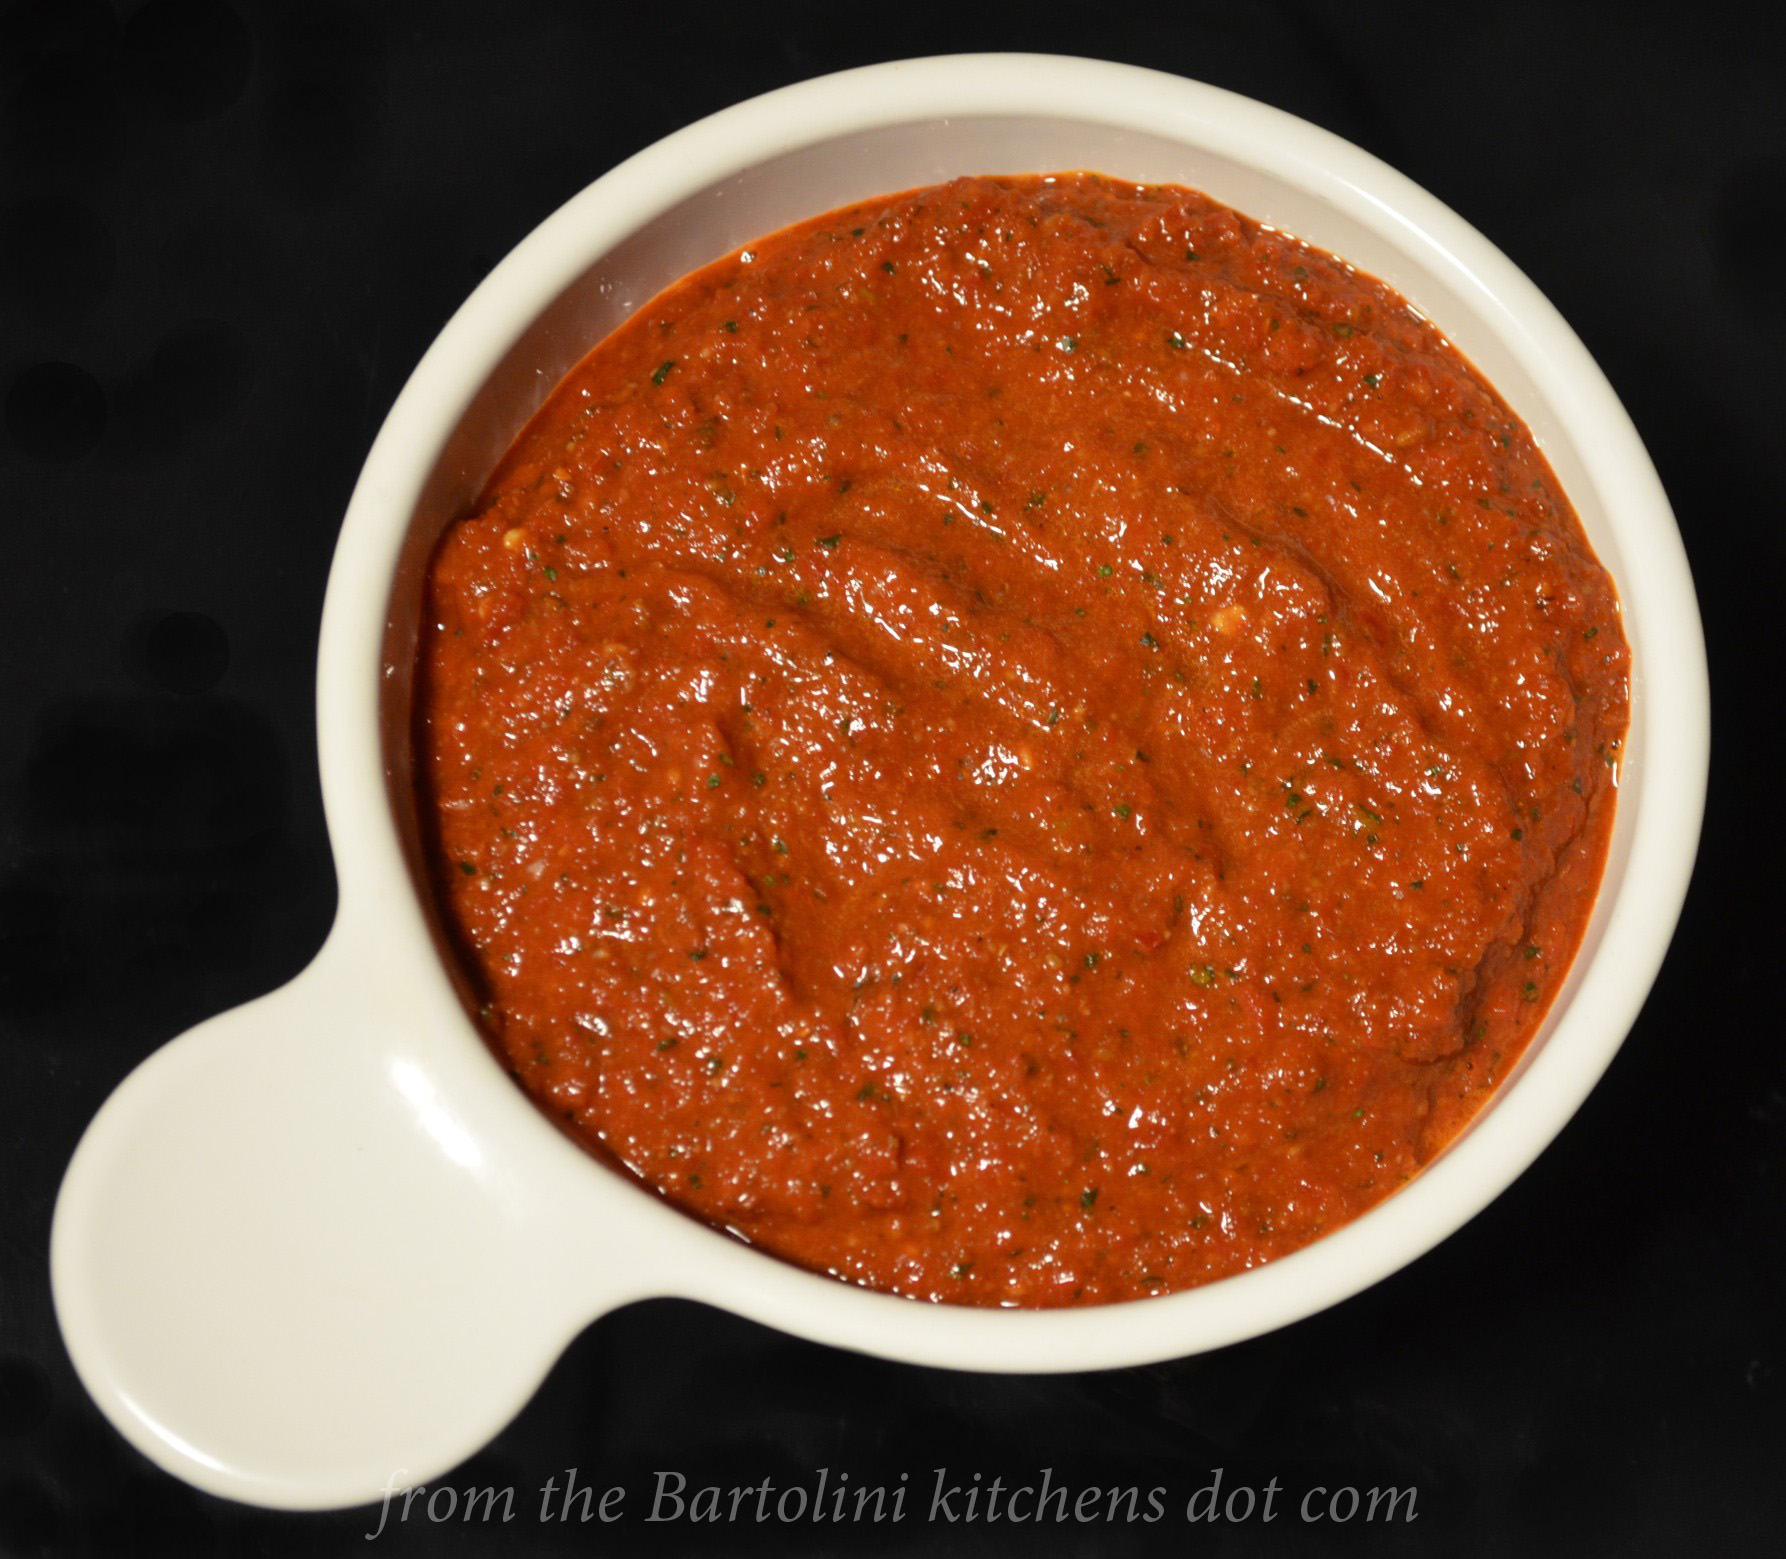
*     *     *

Homemade Harissa*     *     *

Harissa Recipe

yield: 2 cups

Ingredients

  • 12 Fresno peppers, seeds removed
  • 3 whole roasted red peppers — well-drained if store-bought
  • 1 Habanero chile, seeds removed
  • 2 tsp caraway seeds
  • 1 tbsp whole cumin seed
  • 1 tbsp whole coriander seed
  • 2 tsp paprika
  • 1/2 tsp kosher salt
  • 1 tbsp tomato paste
  • 10 garlic cloves, smashed
  • 30 mint leaves, more or less to taste
  • 1/4 c extra virgin olive oil
  • water

Directions

  1. Place cumin seeds in a small frying pan over med-high heat. Keep the pan moving and toast the seeds until uniformly brown and fragrant — no more than 2 minutes. Immediately remove from pan and reserve.  Repeat with coriander seeds and then the caraway. Once all are cool, place in spice mill or mortar and grind. (See Notes)
  2. Place the ground spices. Habanero and Fresno chiles, paprika, and salt into the bowl of a food processor and run until a thick paste has formed.
  3. Add the mint leaves and pulse the contents until mixed.
  4. Add the oil and process. If you prefer your harissa sauce to be thinner, add water until it reaches the consistency you like.
  5. Harissa is ready to use as-is, though it will be better after a few days, once the flavors have a chance to blend a bit.

Refrigerate in an airtight container. Celia recommends adding a thin coat of olive oil before storing. Harissa should be used within a couple of weeks.

With special thanks to Celia, Fig Jam and Lime Cordial, and Mimi, Chef Mimi Blog

*     *     *

Notes

It is best to toast seeds of varying sizes separately. When toasted together, the smallest seeds will likely burn while you wait for the larger ones to toast.

*     *     *

It’s déjà vu all over again …

Swordfish 1Today’s blast from the past, swordfish served with salsa verde, carries with it a message. See those grill marks, Old Man Winter? We want to start grilling but can’t so long as you stick around. Take the hint, vacate the North, and head to the Southern Hemisphere, where they eagerly await your cooler temps and much-needed rain. The rest of you can click HERE to learn how to prepare this dish.

*     *     *

Coming soon to a monitor near you …

Pasta e Fagioli 2Pasta and Beans

*     *     *

We’re Celebrating St. Joseph’s Feast Day with a Sicilian Strata

Oh, happy day! As some of you already know, today, March 19th, is the feast day of the Christ Child’s earthly Father, St. Joseph. Celebrated in towns and villages throughout Italy, the life of this humble carpenter is especially commemorated in Sicily, where it is believed his intercession saved the island’s inhabitants from a drought-induced famine during the Middle Ages. Today, in the States, his feast day is remembered wherever an Italian community calls home. Here in the Bartolini kitchens, we celebrate St. Joseph with music. In years past, we assembled a band and sang a song. All that’s left to do is dance.

*     *     *

*     *     *

Since today we celebrate Sicily’s Patron Saint, why not feature a dish from that beautiful island? That’s a great idea, though I doubt that this dish is actually Sicilian in origin. Chances are it’s an American-Italian creation, if that. Well, at least half of its name is Italian, strata being derived from the Italian word for layer, strato.

As its name suggests, a strata consists of layers of ingredients and these are held together with a custard-type mixture. Strata come in many flavors. When Zia’s youngest Son’s family comes for a visit, ofttimes 3 of her Grandsons will work together to serve brunch. One mans the smoker while the other 2 bake a strata and prepare a few side dishes. They perform like a well-oiled machine and no one leaves that table hungry.

With a Sicilian strata, it’s all about the sausage, so, be sure to use your favorite Italian sausage, or homemade if you have it. You’ll find that today’s recipe is relatively benign but you can spice it up as much as you like. This can be easily accomplished by using “hot” Italian sausage, sautéing diced hot peppers with the vegetables, and/or seasoning the vegetables with red pepper flakes.

Your strata may be served hot or at room temperature, making it perfect brunch fare. Assemble it the night before and bake it anytime before your guests are seated at the table. Add a salad, some jam for bread/toast/bagels, perhaps some fruit, and brunch is served. Best of all, instead of being stuck in the kitchen playing short-order cook, you’ll be sipping Bloody Marys with your guests.

*     *     *

Sicilian Strata 1*     *     *

Sicilian Strata Recipe

Ingredients

  • 1 lb Italian sausage meat, from links or patties (See Notes)
  • extra virgin olive oil
  • 6 mushrooms, sliced
  • 1 orange bell pepper, chopped
  • 6 Spring onions (scallions) chopped
  • 1 loaf Italian bread, sliced
  • 1/2 cup Pecorino Romano cheese, divided – Parmigiano Reggiano may be substituted
  • 8 oz (225 g) ball of fresh mozzarella, grated, divided (See Notes)
  • 1 dozen cherry/grape tomatoes, sliced, divided (See Notes)
  • 9 large eggs
  • 3 cups whole milk
  • salt and pepper, to taste (See Notes)
  • chopped parsley for garnish

*     *     *

Sicilian Strata 2*     *     *

Directions

  1. In a large frying pan over med-high heat, sauté sausage meat until browned. Remove to a dish and reserve.
  2. In the same pan, sauté mushrooms until just about cooked through, about 5 minutes. If needed, add some additional olive oil.
  3. Add the onions and peppers to the pan and sauté until soft, another 5 minutes.
  4. Return sausage to the pan, mix, and heat through. Remove from heat and reserve.
  5. In a large mixing bowl, whisk together the eggs, milk, salt, and pepper until well-combined.
  6. Use oil spray, vegetable oil, or butter to lightly grease a large baking dish.
  7. Build the strata:
    1. Cover the bottom of the dish with a layer of bread slices.
    2. Sprinkle half of the sausage mixture over the bread.
    3. Add half of the tomatoes.
    4. Sprinkle half of the grated Pecorino Romano cheese on top.
    5. Finish this layer by adding half of the mozzarella cheese.
    6. Add another layer of sliced bread.
    7. Cover this layer with the remaining sausage mixture and tomatoes.
    8. Carefully pour the egg mixture over the top of the entire dish.
    9. Finish the strata by sprinkling the rest of the Pecorino Romano and mozzarella on top.
  8. Cover and refrigerate for at least one hour or overnight.
  9. Pre-heat oven to 350˚ F (175˚ C).
  10. Remove cover and bake in the center of the pre-heated oven until the eggs are set and the top is lightly browned, about 40 to 50 minutes. It should have a reading of no less than 165˚ F (74˚ C) on an instant-read thermometer. (See Notes)
  11. Allow to rest for 5 to 10 minutes before garnishing with parsley and cutting into squares for serving.

*     *     *

This slideshow requires JavaScript.

*     *     *

Still not quite what you had in mind?

Then head on over to my blogging friend Nancy’s blog, Feasting with Friends. Just days ago she posted a recipe for a strata with Ham & Asparagus and it sounds delicious.

*     *     *

Notes

Use whatever sausage you like, though Italian is suggested. It is a Sicilian strata, after all. I use our family sausage though you might prefer something a little sweeter or a bit more spicy. If using links, be sure to remove the sausage meat from the casings before cooking.

If using fresh mozzarella, it will be much easier to grate if you place it in your freezer for 30 to 45 minutes before grating.

As you may have seen in the photos, 8 oz of fresh mozzarella, when grated, will not result in enough mozzarella to completely cover each layer. Use more if that is what you prefer.

In Summer, I use a couple of “regular” tomatoes that I chop before adding to the strata. Being this is Winter, good tomatoes are practically impossible to find here, so, I use cherry or grape tomatoes that I slice in half. Use the best tomatoes you can, given the season.

The amount of salt you use will depend greatly upon the sausage and cheese you’ve chosen. Both can add quite a bit of salt to your strata.

Allowing the strata to come up to room temperature before baking will reduce baking time. As a precaution since you’re using raw egg, do not let the raw strata sit unrefrigerated for more than a half-hour, especially if you’ve a warm kitchen.

*     *     *

It’s déjà vu all over again …

Bartolini Cannelloni 1Since we’re in a celebratory mood, I thought today’s blast from the past should take us back  to a recipe that was shared to commemorate a previous St. Joseph’s Feast Day. It was just about a year ago that I showed you all how to make Bartolini cannelloni, affectionately labeled a crown jewel of the Bartolini family recipe book. For a refresher course, all you need do is click HERE.

*     *     *

Coming soon to a monitor near you …

Harissa Thighs 3Harissa Chicken

*     *     *

This Pork Tenderloin is Plum Tasty

Pork Tenderloin - Plums  5Long-time subscribers to this blog know that I didn’t exactly jump at the chance to start canning. The word “reluctant” comes to mind, though “stubborn” might be more appropriate. Well, in August, 2011, I did start preserving foods, with most of my attention focused upon jams and jellies. It wasn’t long before I was awash in jams and jellies of every kind, as were many of my tasters, located both near and far alike.

At the time, I didn’t realize that there’s much more to jelly besides toast or peanut butter. The day I used fig preserves to stuff a pork loin changed the way I viewed my jams. So, when I made Damson plum jam last year, I was already thinking of pork roasts. I knew I was on the right track when my friend, Betsy, author of the wonderful Bits and Breadcrumbs blog, mentioned the very same thing in that post’s comments. Betsy, it took me a while to get here but I finally made it!

There is nothing complicated about this recipe. I’d guess that the toughest part of it will be finding plum jam, depending upon where you live. You could aways make some yourself but, if you live in the Chicago area, you’re likely to have a harder time finding Damson plums this Summer. You see, I plan on buying as many as I can find, all the while dreaming of future pork roasts. Speaking of which, there’s a pork roast with cherries in the works, as well.

*     *     *

Some have noticed and mentioned that I’ve not been around the blogosphere as much as I once was. The fact is that I now have over 1100 followers, far more than I ever dreamt possible, yet I’ve continued to administer the blog as I did when you numbered only 100. As you can well imagine, this cannot continue and I’m imposing a limit on the amount of time I commit to blogging every day. I certainly hope that no one takes offense if I miss a post or fail to reply to a comment, for that’s the very last thing intended. I simply need to devote time to other matters. Thank you for your understanding. I’m very grateful for your ongoing support and encouragement.

*     *     *

Pork Tenderloin - Plums 2

*     *     *

Pork Tenderloin with Plum Sauce

Ingredients

  • 1.5 lb. (680 g) pork tenderloin
  • 2 tbsp butter
  • 1 tbsp olive oil
  • 4 oz (120 ml) white wine — I used a Riesling
  • 1 tsp grated ginger — a little less than 1/2 inch piece
  • 2 tbsp balsamic vinegar
  • 4 oz (115 g) plum jam  — Damson plum jam recipe
  • 2 sprigs fresh rosemary
  • salt and pepper, to taste

*     *     *

Pork Tenderloin - Plums 4*     *     *

Directions

  1. Heat butter and olive oil in a large frying pan, with cover, over med-high heat.
  2. Season pork tenderloin with salt and pepper before browning it on all sides in the pan — about 8 minutes. Remove the tenderloin from the pan.
  3. Use the white wine to deglaze the pan.
  4. Reduce the heat to medium before adding the ginger, balsamic vinegar, and plum jam, stirring until the jam melts and all are well-combined.
  5. Add the rosemary and return the tenderloin to the pan. Use a spoon to coat the pork with the plum sauce. Cover the pan.
  6. Continue to cook the pork, periodically basting it with the sauce, until it reaches your preferred temperature. Remove from pan and tent with foil while it rests for at least 10 minutes. (I removed mine from the heat when it reached 150˚ F (65˚ C).)
  7. Remove the rosemary sprigs and reserve the sauce. (See Notes.)
  8. Slice the roast and serve with the reserved plum sauce.

*     *     *

Pork Tenderloin - Plums X*     *     *

Sides

This tenderloin is really so quick and easy to prepare that I didn’t want to spend time with complicated side dishes.

Shredded Brussels Sprouts with Pancetta:Shredded Brussels Sprouts

  • This inspired recipe combines shredded Brussels sprouts, pancetta, garlic, stock, and white balsamic to create a truly special dish. To see the full recipe, be sure to check out my friend Eva’s sumptuous blog, Kitchen Inspirations.

Roasted Fingerling Potatoes with Rosemary and Pecorino Romano Cheese:

  • Roasted FingerlingsPre-heat oven and baking sheet to 425˚ F (220˚ C). Wash then cut fingerling potatoes to equal size. Season with crushed dried rosemary, salt, pepper, and coat with olive oil. Carefully oil baking sheet, add potatoes in a single layer, and roast until potatoes can be pierced easily, 20 to 30 minutes depending on size and quantity. Remove to serving platter, garnish with grated Pecorino Romano cheese, and serve immediately.

*     *     *

Leftovers?

Pork and Plum Sammich

No problem

*     *     *

Notes

I used plum jam, not jelly. As a result, the sauce may not be as smooth as some may prefer. If that’s you, while the tenderloin rests, I would suggest deglazing the pan with a bit of stock, wine, or water before straining the sauce through a fine mesh sieve. Once strained, place the sauce in a small pan and reduce it over med-high heat until it reaches the desired thickness. Taste for seasoning before serving.

Not all fingerling potatoes are created equal and they’re likely to require varying times to roast. Cut the potatoes into even-sized pieces and all should cook evenly without any problems.

If plums are in season, you could add a few plum halves to the pan and sauté them for as long, or short, as you like. Serve them alongside the roast.

*     *     *

It’s déjà vu all over again …

Pappardelle 5Hard to believe that it was two years ago when I was in the middle of my series on making cheese at home. When I demonstrated how easy it was to make mascarpone, I promised that I’d publish some recipes that would use your freshly made cheese. Today’s blast from the past is one of those recipes, combining pappardelle, spinach, Pecorino Romano, and, of course, mascarpone. It’s a delicious recipe and one you won’t want to miss. You can learn all about it by clicking HERE.

*     *     *

Coming soon to a monitor near you …

Sicilian Strata 3A Sicilian Strata

*     *     *

Gettin’ Cheeky with Beef – And in a Slow Cooker, No Less

Guance di Manzo Brasato

Let me say from the onset that this is not a Bartolini family recipe. In fact, I can say with some certainty — feel free to back me up, Zia — that beef cheeks never graced a Bartolini dinner table. This all changed the last weekend of last October. That was the weekend the vendor with certified organic meats returned to the farmers market.

*     *     *

Beef Cheeks 1*     *     *

You may recall that I had been waiting for him to return because he sold goat and, even though I’d found some at a nearby market, I prefer to buy organic when its available. As it is, I buy chickens from him all Summer long. It had been weeks since he last set up his stall and I was, frankly, surprised to see him. The following weekend was to be the market’s last for the year and I thought him gone until 2014.

His stall, for lack of a better word, is a set of folding tables arranged in a “U” shape. On them he’s places about 6 ice chests in which he keeps the week’s frozen inventory. That week there wasn’t any goat meat but I was surprised to find a package labeled “beef cheeks.” I bought it, along with a chicken, and placed both in the freezer when I returned home.

Well, as this Winter unfolded, I exhausted my repertoire of comfort foods. Last week’s tuna noodle casserole was proof that I’d run out of options. It was about that time that I remembered that there were beef cheeks in the freezer, though they had somehow managed to work their way to a back corner. Another Sunday braise was suddenly in the offing.

Although still below freezing, that Sunday turned out to be the warmest day of the month to date. Since there was no real need to heat the kitchen, I switched gears a bit and opted for using the slow cooker rather than the Dutch oven. Best of all, with a fridge well-stocked with braising vegetables, there would be no last-minute trip to the grocery that morning — until I realized that I’d need side dishes. Curses!

*     *     *

This braise is like most, with one minor exception. I started by making a form of battuto, an Italian soffrito. In our part of Italy, a battuto consists of finely diced onion, parsley, garlic, and salt pork. Battuto is the first thing into the pan, after the olive oil is heated, and will flavor the dish as its aroma fills your kitchen. Here, I made my battuto with guanciale, parsley, and garlic. (Yes, this recipe mixes the cheeks of both pork and beef. Shocking!) The onions were added with the other braising vegetables, once the battuto was cooked. The rest of the recipe is easy enough to follow and you should have no problems.

*     *     *

Beef Cheeks Braising*     *     *

Braised Beef Cheeks Recipe

Ingredients

  • 2 beef cheeks, approximately 1.2 lbs (540 g)
  • 2 tbsp olive oil
  • 4 oz guanciale, chopped – pancetta or bacon may be substituted
  • 3 cloves garlic, chopped
  • 1/4 c parsley, chopped
  • 1 medium onion, chopped
  • 2 stalks celery, leaves included, roughly chopped
  • 2 carrots, roughly chopped
  • 3 sprigs fresh thyme
  • 2 sprigs fresh rosemary
  • 3 tbsp tomato paste
  • 3/4 c red wine
  • 3/4 c Madeira
  • 1.5 c beef stock
  • salt and pepper
  • lemon zest

*     *     *

Battuto*     *     *

Directions

  1. Combine chopped guanciale, parsley, and garlic on your cutting board and chop them together until uniform. This is the battuto.
  2. Warm oil in a sauté pan over med-high heat. Add the battuto and sauté until the guanciale’s fat is rendered, about 5 – 7 minutes. Do not allow to burn.
  3. Add onion, carrots, and celery to the pan and sauté until the onion is translucent.
  4. Add the rosemary and thyme to the pan. Continue sautéing until both begin to wilt.
  5. Use a slotted spoon to remove the pan’s contents and place all into the slow cooker. Do not drain the oil.
  6. Season beef cheeks with salt and pepper before placing into the hot pan. Turn when brown, about 5 minutes. Remove when both sides have been browned. Place into the slow cooker atop the other ingredients.
  7. Add the tomato paste to the pan and sauté until fragrant, about 1 minute.
  8. Use wine to deglaze the pan.
  9. Add the Madeira and beef stock and bring to a boil to burn off the alcohol.
  10. Add the liquid to the slow cooker. (See Notes)
  11. Cook on high for one hour before reducing to low for another 6 hours. Turn over the meat occasionally, about once every 90 minutes, or so. (See Notes)
  12. Remove meat and cover while the liquids are strained and the sauce prepared. (See Notes)
  13. Just before serving, garnish with a bit of lemon zest.

*     *     *

Beef Cheeks 2*     *     *

Sides

As pictured, there were 2 sides served, neither of which is complicated nor difficult to prepare.

  • Mashed Potatoes and Parsnips with Roasted Garlic:Parsnip-Potato Mash
      Prepare mashed potatoes as you would normally, substituting 1/3 of the potatoes with peeled, chopped parsnips. Once boiled and drained, mash before adding warmed heavy cream into which butter and roasted garlic cloves have been added. Serve.
  • Sautéed Broccoli Rab (Rapini) with Pancetta and Garlic:Rapini with Pancetta
      Sauté chopped pancetta in a bit of olive oil to render its fat and until it’s not quite fully cooked. Add garlic and, after about a minute, add the broccoli rab, season with salt & pepper, and sauté until cooked to your satisfaction. Serve.

*     *     *

Notes

The braising liquid should not be so deep that the meat is totally submerged like you would do for a stew or soup. When using a slow cooker. the liquid should come about half-way up the side of the beef cheeks. When using a Dutch oven, I use enough liquid so that it comes up 2/3 of the side of the protein to allow for evaporation. Use more or less liquid to arrive at the recommended level. Just maintain the same ratio of the braising liquid’s ingredients: 2 parts beef stock to 1 part each of Madeira and red wine.

A slow cooker works by applying a low, even temperature over a long period of time. Do not uncover the cooker unless necessary or you’ll run the risk of extending the cooking time.

Parsnips are a bit more firm than potatoes. When preparing them, chop the parsnips in pieces that are slightly smaller than the potatoes to insure that all will finish cooking at the same time.

Once you’ve strained the liquids and removed the fat, you can:

  • serve the sauce as-is;
  • reduce it and serve; or,
  • use a thickening agent — flour, corn starch, or arrowroot — to make gravy.

No matter how you finish the sauce, be sure to taste and adjust the seasoning as needed.

*     *     *

When blogs collide

On the very day that I was cooking my beef cheeks, Phil, of “Food, Frankly“, posted his recipes for preparing an ox cheeks dinner. Do yourself a favor and take a few minutes to check out the delicious meal that he prepared.

*     *     *

And finally

In the Comments for last week’s post, my Cousin mentioned that there’s a recall of beef that was processed by a California company and sold across the US. Though the beef I purchased was locally grown and processed, that is hardly the case everywhere. You can read about the recall and the reasons behind it in this USDA News Release, dated February 18th, 2014.

*     *     *

It’s déjà vu all over again …

Tricolor Risotto 4It won’t be long now before we are once again celebrating St. Joseph’s Feast Day. Today’s look back will show you how to prepare a risotto of 3 colors, each of which, not so coincidentally, corresponds to one of the colors of the Italian flag. You needn’t be Italian to make this expression of Italian pride and you can learn how to do it by clicking HERE.

*     *     *

Coming soon to a monitor near you …

Chocolate Torte Preview 2 Gluten-Free Chocolate Torte

*     *     *

Mom’s Tuna Noodle Casserole

As most of you well know, we North Americans are facing a Winter unlike any seen in decades. With severe drought in the West and Arctic cold, record snows, and ice storms to the East, you’re either praying for rain or cursing the cold. Whether this Winter is truly one for the record books remains to be seen but it sure is a great excuse for making comfort food.

*     *     *

Tuna Casserole 2*     *     *

These past few weeks, I’ve said good-bye to any thoughts of post-holiday dieting and broke out the Dutch oven and stock pot. I’ve made soups, tomato sauce, chili, stew, braised short ribs, baked pastas, and pulled pork. Not only that, I’ve baked more bread these past few weeks than I have in ages. In short, I’ve done all that I can to warm both me and my kitchen which, for reasons known only to my home’s previous owner, has no heating element other than the oven. Heaven bless that oven.

Since you really cannot make beef stew for one, soup by the bowl, or pulled pork for a single sandwich, you can well imagine that my fridge and freezer have been well-stocked with leftovers, not that there’s anything wrong with that. Even so, after my third dinner of beef stew or fourth lunch of a bowl of chili, and with temps still in negative territory, I began to crave something different and searched for some long-forgotten comfort food recipes. Enter tuna noodle casserole.

Before going any further, I need to mention this recipe’s origins. After all, I did call today’s post “Mom’s Tuna Noodle Casserole”. Although there is no direct link to Mom, I think there’s plenty of evidence to support my claim.

First off, I found it in the oldest recipe file that I own, one that I created on my first PC back in the 90’s. That file has survived a short-circuited motherboard, head crash, my conversion to Apple, and a transfer to my second iMac. Though forgotten until now, it contains a few gems from Mom but, I admit, this bit of evidence is highly circumstantial.

Perhaps the most convincing evidence can be found within the recipe itself. Although all the ingredients are listed, the amounts required for some of them are missing. This is a hallmark of the Bartolini family recipes and a major reason for this blog being created. I could only be more certain of this recipe’s provenance if an amount or two was listed as “a handful of” this or “a good pinch of” that. Members of the jury, there is no doubt in my mind that this is Mom’s recipe. I rest my case.

Now, a word of warning. This is an old recipe and some may not appreciate it. First of all, it contains mayonnaise and there are those who cannot abide the stuff. I don’t like cilantro, so, I’d say we’re even. It, also, contains a can of condensed soup, the bane of many a modern-day foodie. Well, I’m guessing this recipe comes from the 60’s and we didn’t have foodies back then. We had gourmands — and the Galloping Gourmet but never mind him. Lastly, the final two ingredients, though optional, are listed as frozen. In this part of the continent, when it’s casserole season, there are few, if any, fresh peas to be found, and, for those of us living in the Corn Belt, buying what passes for corn in the off-season is sacrilege. If, however, you’ve access to tasty, fresh peas and sweet corn in Winter, by all means use them instead of frozen.

*     *     *

Tuna Casserole 1*     *     *

Mom’s Tuna Noodle Casserole Recipe

Ingredients

  • cooked noodles, buttered
  • olive oil
  • 1 large can ( 12 oz, 340 g) water-packed tuna fish, drained & flaked
  • 1 small onion, chopped
  • fresh mushrooms, sliced
  • 1 can (10¾ oz, 305 g) cream of mushroom soup (I use cream of celery)
  • 1 package ( 8 oz, 226 g) cream cheese
  • 1/3 c mayonnaise
  • 1/3 c milk
  • cheddar cheese, grated
  • 1 c bread crumbs
  • 4 tbsp butter
  • frozen corn (optional)
  • frozen peas (optional)

Directions

  1. Pre-heat oven to 375˚ F (190˚ C).
  2. In a large mixing bowl, combine cooked noodles, tuna, cheddar cheese, corn, and peas.
  3. Sauté onions and mushrooms in a little olive oil until onions are translucent. Add to the mixing bowl and stir to combine.
  4. In a medium saucepan over medium heat, combine the milk, soup, and cream cheese, stirring until hot and well-mixed. Add to the mixing bowl and stir to combine again.
  5. Meanwhile, melt the butter in a sauté pan over medium heat. Add the bread crumbs and toast until golden brown. Immediately remove from heat.
  6. Pour the tuna mixture into the baking dish, top with the toasted bread crumbs, and cover with aluminum foil.
  7. Bake, covered, for 45 minutes before removing the foil. Bake another 10 to 15 minutes to further crisp the topping.
  8. Allow to sit at least 5 minutes before serving.

*     *     *

Tuna Casserole*     *     *

Notes

The amounts for some of the ingredients will depend upon the volume of noodles you’ve prepared. I’ve found that if I use a full pound (450 g) of noodles, for example, a single large can of tuna fish may not be enough. You’ll find that the “cream sauce” is rather thick and can overpower the rest of the ingredients. More tuna is needed to compensate.

Be sure to brown the bread crumbs before sprinkling them atop the casserole. If you rely on the oven to fully brown them, you’ll run the risk of drying out the casserole.

Any broad noodle may be used here, though shorter ones work best. I happened to have a bag of farfalle, butterflies, and used it.

I think you could easily substitute chopped, roasted chicken in place of the tuna.

*     *     *

It’s déjà vu all over again …

Steak PizzaiolaOne common theme running throughout this blog is my love of pasta. I’ve certainly made no effort to hide it. With temperatures so terribly frigid, today’s Blast from the Past is particularly welcome in my kitchen, for it involves both a lengthy braise in the oven and a large pot of boiling pasta water on the stove top. Combined, they are just what’s needed to warm my kitchen and keep it that way well into the evening. Best of all, I end up with a great pasta for dinner. You can learn how to prepare Steak Pizzaiola by clicking HERE.

*     *     *

Coming soon to a monitor near you …

Beef Cheeks Preview Beef Cheeks

*     *     *

Stewed Quail

Quaglia in Umido

Quail with PappardelleThis is a dish that Zia and I prepared during my last visit home but it requires a bit of an explanation. I originally had intended to share my family’s recipe for preparing pigeon back in the day. The only problem was that I couldn’t source them, except for one place not far from here. Unfortunately, I was there once when an order for pigeons was placed and witnessed their “preparation”. Their handling was beyond rough and I could never purchase a pigeon there. Now, I’m fully aware of how meat comes to be displayed in our markets and, over the years, have watched more than my fair share of poultry “prepared” for our dinners. Hard as it may be for some to believe, there are comparatively humane ways to do this and when I see evidence to the contrary, I find another place to shop and something else to eat.  So, with quail more readily available, we substituted it for the pigeon in today’s recipe. Besides, you’ll probably find the tale I’m about to tell much more enjoyable if you know that we won’t be cooking pigeon later.

*     *     *

Although pigeon was prepared for dinner at the old two-flat, it certainly wasn’t served frequently or with any regularity.  It was simply a matter of supply, for it wasn’t every day that you could find enough pigeons to prepare and serve. The family did have its sources, though. One, a workmate of Uncle, bred pigeons and often gave us young birds that didn’t meet his standards. Of course, there was the farmers market and I often watched as Grandpa haggled with the vendor over an amount as little as a quarter. In reality, this was all a game and I had a front row seat. It’s not like there were dozens of vendors selling young pigeons, nor were there throngs of people queuing at their stalls demanding the birds. Grandpa and the vendor haggled a bit but both knew all along that the deal had been struck the moment Grandpa walked up to the vendor’s stall. For me, it was part of the fun of going with Grandpa to the market. The third source for pigeon was from Grandpa’s farmer friend. You may recall that this was the farm where our dogs went, never to be seen again. As luck would have it, they were always out in the fields playing when we visited the farm.

I must have been about 7 years old when Grandpa brought home a single, very young pigeon. Today, the source of this bird is a point of debate. There are those who think it came from Uncle’s friend while others believe it came from the farmer. No matter whence it came, this bird, being a loner, wasn’t destined for the table. “Duke” would become one of the most memorable pets that ever shared the two-flat with us.

Though it may sound odd to have a pigeon as a pet, Duke was only one of many animals that found their way to our home. There were dogs, fish, rabbits, turtles, chameleons, frogs, birds, Chinese pheasants, and even a snake, though the snake’s stay was quite brief before being set free in the yard. Our neighbor, Mrs. A, wasn’t happy about that and, for years, whenever she spotted a snake in her garden, it was ours that she saw. It was just our luck to have found and let loose the Methuselah of snakes. Poor, long-suffering Mrs. A. She was a wonderful woman who treated us kids very kindly. This despite our snake taking up residence in her garden, and, Duke roosting outside her bedroom window every night. That window ledge would never be the same.

Now, Duke was no ordinary pigeon nor pet, for that matter. First of all, Duke was actually a Duchess — having laid an egg under Zia’s sofa. It didn’t seem to mind having a masculine name so Duke she remained. She was ever-present. If you were in the backyard, Duke was sure to appear, swooping down from above. If you were eating a snack somewhere outside, Duke would find you quicker than the dog and wait for a piece of whatever it was you were eating. Even so, she was most closely attached to Grandpa and Nonna.

*     *     *

Parish School*     *     *

Pictured above is St. Juliana’s parish school and, for a time, church. In between the two entrances on the right is a row of 9 rather tall windows, indicating where the parish church was once located. (It was replaced in the early 1960’s.) Missing from this more recent photo are the large sconces, one of which was placed on either side of each entrance.

As you can see, the building was rather small and, with 16 classrooms, so was the church. Although there were several services on Sunday mornings, the 9:00 mass was meant for us kids and the service and sermon were more child-friendly. The 10:15 service was the one that Nonna, Grandpa, and Duke attended. Every Sunday morning at 10:00, Nonna and Grandpa would walk down the street to the church, with Duke circling overhead. When it was warm, Duke would wait for them from her perch atop the building. On cold or wet days, she’d take refuge in one of the sconces, its damaged pane allowing the bird access. Once mass was finished, Duke waited for Nonna and Grandpa to reappear and, again, circled overhead as they walked home. We often hear tales of dogs following children to school or church but a pigeon?

My most vivid memory of Duke, though, involves Grandpa and her. (Big surprise, eh?) As I’ve mentioned, Grandpa was an active retiree and was often behind the wheel on his way to visit friends or run errands. Duke would join him, at least for a couple of blocks, and ride on the car’s hood — “bonnet” for some of you — like an ornament. Of course, Grandpa drove very slowly, allowing Duke to play hood ornament for as long as possible. It was truly something to see, with children and adults alike pausing to watch them pass. More often than not, the children laughed and pointed while the adults smiled and shook their heads. When Grandpa approached a busy street, he’d rev the engine a bit, signaling to Duke that it was time for her to return home, and off she went.

Unfortunately, Duke was taken out late one evening and, in the dark, never made it back home. Although we often asked for another pigeon to raise, none was ever available. In retrospect, I think Grandpa knew that Duke was one of a kind and that no other bird could ever replace her. And today, mention Duke to any of the two-flat’s residents and you’re sure to get a smile in reply.

*     *     *

Today’s recipe can be used for either quail or pigeon and the main caution when preparing the birds is the same for both: do not over-brown. Quail are relatively small and if they are browned as one would beef, for example, they will be dry by the time they’re fully cooked. The same is true for pigeon, though they are larger and can be browned for a little while longer. In either case, you just want a little bit of color on the birds’ bodies.

*     *     *

Quail Simmering*     *     *

Stewed Quail Recipe

Ingredients

  • cooked pasta
  • 4 whole quail, dressed
  • 3 tbsp olive oil
  • 1 small – medium onion, chopped
  • 3 tbsp parsley, chopped
  • 3 cloves garlic, diced
  • 1 large can (28 oz, 794 g) tomatoes
  • 1/2 tsp marjoram
  • 4 oz white wine
  • salt & pepper
  • Pecorino Romano cheese, grated

*     *     *

*     *     *

Directions

  1. Heat oil in a large, heavy-bottomed pot over med-high heat.
  2. Add onions and sauté for about 5 minutes before adding garlic and parsley. Continue to sauté until fragrant, about a minute.
  3. Add quail to the pot and LIGHTLY brown on all sides.
  4. Remove quail and add remaining ingredients to the pot. Mix well and bring to the boil.
  5. Return quail to the pot and return to the boil before reducing the heat to a soft simmer. Cook until done, about 30 to 45 minutes. (See Notes)
  6. Remove quail to a serving dish.
  7. Use sauce to dress the pasta, reserving some for use at the table.
  8. Garnish the pasta with grated cheese and place both pasta and quail on a large serving platter.
  9. Serve immediately.

*     *     *

Quail 2*     *     *

Notes

It cannot be overstated: do not over-brown the birds.

Cooking times will vary depending upon whether you use quail or pigeon. Being larger, pigeon will take longer to stew. Use a fork to test each bird to see whether it is fully cooked. The meat should not be “falling off the bone”.

*     *     *

It’s déjà vu all over again …Passatini in Brodo

This time of year, there’s nothing quite like a steaming bowl of soup to warm you up. Easy to make and with ingredients every pantry is sure to have, passatini is a delicious soup and comforting meal, whether it’s served for lunch or dinner. You can see Mom’s recipe for passatini by clicking HERE.

.*     *     *

Coming soon to a monitor near you …

Tuna CasseroleMom’s Tuna Noodle Casserole

*     *     *

Braised Goat in the Moorish Style

Capra Basata nello Stile di Moresco

Braised Goat with Harissa

I’m back and the Kitchens are once again open. Zia and I thank you all for your kind words and well wishes. She sends her warm regards. She, also, sent me home with a few new recipes — octopus and quail are at the top of that list — and I’ll be sharing them in the weeks to come.

Of course, we did buy our share of honey, over 4 gallons between the two of us. Although I brought home 2.25 gallons (8.5 l), almost all went to my neighbors for distribution among their family members. The “Honey Man”, Mr. Falkenberg, has about 100 hives and they produce enough honey for him to sell it in some of that area’s markets, as well as during not one but two weekends this year. He also sold apples, grapes, and black walnuts.  I bought a 5 pound bucket of grapes for $2.00 and used them to make grape jelly yesterday. The apples were used to make apple sauce and my Zia Mariolla’s apple cake. That recipe will be shared in the near future.

*     *     *

(Click to enlarge any photo)

*     *     *

I’ve mentioned in the past that my family prepared goat, very often at Easter. As the years past, we relied more upon lamb for that holiday meal and I cannot tell you the last time I enjoyed goat in any form. Worse yet, I had no idea where I might purchase some. Well, that all changed a few weeks ago. I didn’t realize it but the vendor at the farmers market from whom I buy organic chicken also sells a variety of meats, goat being among them. Although I couldn’t buy any at the time, I knew I’d be back to purchase some. And that’s the last I’ve seen of that vendor. For whatever reason, they are no longer at the farmers market. Not only did I lose my long sought-after source for fresh goat meat but I lost my organic chicken vendor, too.

Well, returning home after the third week of the vendor’s absence, I decided to take matters into my own hands. I pulled the car to the curb and googled, “Where to buy goat in Chicago?” Lo and behold! Just about a half-mile from my home, there’s a Middle Eastern grocery and butcher. It’s one block West of the Indian market where I buy spices and I’ve walked past it any number of times. Within minutes, I was on my way with a goat shoulder wrapped in brown paper.

Once home and after a quick web search, I settled upon a great recipe. Unfortunately, it required harissa and I didn’t have a recipe for the sauce nor did I feel like experimenting. So, I did what I often do. I went to the Middle East Bakery & Grocery, a little gem of a store located in my old neighborhood. As luck would have it, they make their own harissa on-site and it’s good enough to be used in a number of the restaurants in town.

So, with a goat shouder on the counter, harissa in-hand, and a jar of preserved lemons hiding out in the back of my fridge, I set about making braised goat — but with one major difference. The original recipe uses a dutch oven to braise the roast, slowly, in the oven. When I finally bought the meat, Summer had returned to this area with a vengeance, I wasn’t about to turn on my oven for anything, let alone a long and slow braise. Instead, I pulled out the slow cooker and my kitchen kept its cool. This is the version described in the recipe below.

Oh! One more thing. I will be bringing some goat with me to Michigan next time so that I can learn and share my family’s recipe for roasting it. Get ready, Zia!

*     *     *

Raw Goat Shoulder

*     *     *

Goat in the Moorish Style Recipe

Ingredients

  • 1 cup harissa for marinade
  • 2 – 3 tbsp extra virgin olive oil
  • 2 carrots, chopped
  • 1 large onion, sliced
  • 6 cloves garlic, smashed
  • 2 bay leaves
  • 1 cinnamon stick
  • 3 cilantro stems – that’s right, I’m using cilantro
  • 2 cups low/no sodium chicken stock
  • 1/2 cup dry white wine
  • 1 tbsp honey
  • the rind from half of a preserved lemon, finely chopped
  • salt and pepper
  • harissa for serving
  • Greek yogurt for serving

*     *     *

Goat ready to be cooked

*     *     *

Directions

  1. With a very sharp knife, remove gray skin from the meat. Season with salt & pepper.
  2. Place meat in a large, seal-able plastic bag, add the harissa and completely coat the meat. Place the bag and contents in the fridge overnight. Turn bag over every couple of hours. Remove from fridge 1 hour before cooking is to begin.
  3. Heat oil over med-high heat in a medium sauté pan. Add onions, carrot, garlic, bay leaves, and cinnamon stick, sautéing until soft and fragrant. Season with salt and pepper.
  4. Meanwhile, place stock, white wine, and honey in a small sauce pan, bring to a boil, and then keep warm over a very low flame.
  5. Once the vegetables have been sautéed, dump that pan’s contents into the slow cooker. Add the cilantro and stir.
  6. Place the goat meat atop the vegetables, Be sure to include any remaining harissa left in the bag.
  7. Pour the wine mixture around the roast in the slow cooker. Cover and set to “Low”.
  8. Turn the roast after 1 hour, and then again every 2 hours after. Roast will be cooked in 8 hours.
  9. After 8 hours, remove roast to a dish and cover. Strain the pan juices, discarding the braising vegetables. Set aside to allow the fat to separate and then remove.
  10. See Serving Suggestions below

Inspired by a recipe in the NY Times.

*     *     *

Goat Plated

*     *     *

Serving Suggestions

1) Once cooked, the roast can be carved and served as-is. Sprinkle with the preserved lemon. Suggested accompaniments would be rice, yogurt, and a bit of harissa on the side. The sauce can be reduced to the thickness of your choice. Check for seasoning before serving on the side.

2) Debone the cooked roast and treat it as you would pulled pork. Return in to the slow cooker. Add the preserved lemon and mix thoroughly. Reduce the sauce to the desired thickness and either add it to the pulled goat or serve on the side.

*     *     *

Goat Sandwich on Baby Arugula with Greek Yogurt and Harissa

Pulled Goat Sandwich on Baby Arugula with Greek Yogurt and Harissa

*     *     *

It’s déjà vu all over again …

About a year ago, I posted a recipe for plum cobbler that I jokingly called “magical.” What I didn’t know, but learned while I was visiting Zia, was that the recipe contained a typo. Instead of listing “1 TBSP baking powder”, I had written “1 TSP baking powder.” Big difference, no? I’ve since corrected the recipe  and please make sure you do the same if you’ve made a copy for yourself.

*     *     *

Coming soon to a monitor near you …

_DSC0001 2

Blueberry-Lemon Slice

*     *     *

Grilled Rack of Spring Lamb

Carré di Abbacchio alla Griglia

As a boy, I was aware that Mom was a good cook. I’d been to enough of my friends’ homes for dinner to know that few shared Mom’s skill in the kitchen. Judging by their response, my friends came to the same conclusion when they stayed for dinner at our home. In fact, a Mom called mine one evening asking how she prepared spinach. To her surprise, upon returning home after dinner with us, my friend couldn’t stop raving about the spinach, something he refused to eat at his own home. Apparently, she had only served her family canned spinach. Over the phone, Mom gave her instructions for sautéing fresh spinach in garlic-flavored olive oil. Decades before Jamie Oliver, Mom was changing how America ate, one dinner table at a time. Incidentally, to this day, I’ve never eaten canned spinach, no matter what Popeye said or did.

*     *     *

*     *     *

Knowing that Mom was a good cook was one thing, realizing the authenticity of her cooking was something else. During my first trip to Florence, I followed a tour book’s suggestion and dined at a family owned restaurant. Just as the book described, we were greeted by the owner/chef, taken to our table, and then he disappeared, returning a few minutes later with menus and a list of the specials. In the kitchen, just as the book stated, Mamma could be seen helping to get the orders out to the diners. I followed our host’s suggestion and ordered lamb chops. A few minutes later, I glanced into the kitchen and there was Mamma, just beyond the restaurant’s back door, grilling my chops. When I was served, I was surprised to learn that they tasted exactly — not similarly but exactly — as if my own Mom had prepared them. That was the day I realized just how authentically Italian Mom and Zia cooked. That was quite a souvenir to bring back home.

Although a recipe is listed below, today’s post is more about the method used than anything else. This was how all of our chops and steaks were prepared, no matter who manned the barbecue. This is not an exact science nor will it ever be. The only difference in method when cooking the various meats is that a little lemon juice might be added when cooking lamb. Otherwise, a simple combination of olive oil, garlic, rosemary, salt, and pepper are used to marinate the meats. It really is that simple but don’t take my word for it. Karen has shared her own flavorful version of this simple recipe for grilled lamb in her wonderful blog, Back Road Journal.

As for today’s lamb, a couple of days after Easter, I was pleasantly surprised to see 2 small racks (a 3 rib & a 4 rib) of Spring lamb in the meat display. I asked the butcher about them and learned that they have been trimmed to  fulfill special orders for the holiday. I bought them — at half price! — and stored them in the freezer, bringing them with me when I last visited Michigan. Believe me, after every future holiday I will be sure to check every meat counter within reason, looking for a similar deal.

*     *     *

*     *     *

Grilled Rack of Spring Lamb Recipe

Ingredients

  • 2 portions of Spring rack of lamb, 7 ribs in total, french cut
  • 1 to 3 cloves garlic, chopped
  • rosemary, roughly chopped
  • olive oil
  • 1 to 2 tbsp fresh lemon juice (optional)
  • salt and pepper
  • parsley for garnish (optional)

Directions

  1.  A couple of hours before you are to roast the lamb, remove it from the refrigerator and place on a pie plate or similar dish.
  2. Season with garlic, rosemary, salt, and pepper before sprinkling with optional lemon juice and enough olive oil to lightly coat everything. The lamb is already dead. No need to drown it in oil.
  3. Set aside to marinate until you’re ready to cook. If your kitchen is warm, place the rack in the fridge until 30 minutes before you intend to cook it.
  4. Pre-heat your barbecue on high. Wrap the chop tips with aluminum foil, something I forgot to do.
  5. Place the rack directly over the heat and sear the meat for a couple of minutes before moving it to an area on the grill away from the heat.
  6. Using an instant read thermometer, we pulled the racks off of the grill when the temperature reached 120˚ F (49 C).
  7. While the racks rested, covered, I grilled the asparagus while Zia dressed the salad.
  8. The racks were served, garnished with a bit of parsley (optional).

*     *     *

Notes

The olive oil marinade is not one that is left on the meat overnight. At most, the meat was left to marinate for 3 hours, with 1 to 2 hours the norm.

As you can see in the photo, the rosemary wasn’t chopped before being used.  Most, if not all, will be lost during grilling. The same is true for the garlic, so, don’t be overly concerned with chopping/dicing everything evenly.

The racks could just as easily be broiled if a barbecue or grill pan is not available. As always, do not forget about them lest your return to find Spring rack of lamb flambé.

*     *     *

It’s déjà vu all over again …

Cherries JammedI mentioned last week that tart cherries are now in season. In my opinion, these cherries make the best pies, muffins, and jams. Yes, it can be a bit tedious pitting the little red devils but the end result certainly makes it all worthwhile. If you’re interested, you can see my recipe for making this delicious jam by clicking HERE.

*     *     *

Coming soon to a monitor near you …

Fried Zucchini Blossoms 

*     *     *

The Bartolini Have Hit The Road!


Going for a Ride

If there’s one thing we Bartolini enjoy as much as a dish of pasta, it’s a good old-fashioned road trip. So, when one such opportunity presented itself, I shut down the Kitchens, packed up the car, and headed out — to Washington D.C.

Now, I just didn’t pick D.C. as a destination out of thin air. No, the Kitchens’ good buddy and fellow blogger, Jed, recently invited me to guest host at his blog, sports-glutton.com. There he leads a team of sportswriters that covers the world of sports, offering ego-free commentary and well-reasoned conclusions. With every post, each of these gentlemen offers true insight into his respective field of expertise. Sounds pretty good, huh? Yeah? Well, wait! There’s more.

Jed and his wife, Liz, share recipes that are sure to appeal to the latent glutton in each of us. From appetizers to desserts, and all dishes in-between, these two know their way around a stove — and campfire.  And just when you think sports-glutton.com couldn’t get any better, Thursday arrives. That’s the day that Jed reviews, one bottle at a time, a wide variety of beer and wine. Whether you’re in the mood for a Japanese ale or a Chilean Pinot Noir, not to mention a Wyoming micro brew or whiskey from Utah, this is the place to check before you go shopping for spirits.  Drat! I’ve gotten ahead of myself. You see, every Monday Jed starts off the week with a bit of humor. Think of it as you would a refreshing sorbet, preparing you for his posts to come.

How’s that for a blog? There’s quite literally something for everyone.

So, as you can well imagine, when asked to take part in his  MLB Recipe Series, I could hardly refuse the honor and jumped at the chance. Now, for the uninformed, every Wednesday of the Major League Baseball season, Jed celebrates a different team by offering a recipe that, in some way, is connected to that team. Being a Cubs fan, I contributed my recipe for Jack Brickhouse Chicken, for reasons that will become clear when you follow me to Jed’s place by clicking here to read my guest post. Once you’ve checked out my recipe, be sure to take a look around. You’re sure to find something of interest.

Thanks, Jed, for the honor of participating in your series, allowing me to share a recipe commemorating our Cubs. One of these years …

*     *     *

Regular programming will resume at the Bartolini Kitchens next week, once I figure out a way to explain to Max that we’re not really going anywhere.

Coming soon to a monitor near you …

Asparagus Ravioli made with Duck Egg Pasta

*     *     *

You Say Frittatas and I Say Frittate

For a time, I was Mom’s Chief Cook & Bottle Washer. Living just next door, Zia possessed a standing invitation, so, it was 3 for dinner most nights. Now, I may be able to cook a nice dinner, as surely we all can, but what I cannot do is estimate portion size. One of my dinners could just as easily feed 6 as it would 2 or 3. It’s not a problem here at home for I don’t mind eating leftovers at all. If I make enough for 6 servings, I’ll eat all of them over the course of the next few days and not think twice about it. I really couldn’t do that when cooking for Mom and Zia, however, and as a result, after a few days her fridge was brimming with leftovers. And if you think I could waste food in that kitchen, well, as Mom would say, “You’ve got another thing comin’!” Enter the frittata.

*     *     *

*     *     *

A frittata is an egg-based dish, the ingredients of which are only limited by one’s imagination. I assume there are probably thousands of recipes for frittate on the web, though I’ve yet to search for one. When I was a boy, Mom often used her leftover caponata to make me a frittata for lunch on Fridays. Once I was on my own, I continued to make them for I found them easier to make than a fancy folded-over omelet but still better looking than a mish-mash of eggs scrambled with a bunch of ingredients. 

So, with a fridge full of leftovers, deciding to make a frittata back then was a no-brainer. In recent weeks, I found myself in the same predicament, having roasted a ham for Easter and then, unfortunately, having to prepare pasta with burrata a few times due to camera difficulties. (That’s my story and I’m sticking to it.) As much as I enjoy ham sandwiches and as frequently as I reheat pasta, I needed a change and again I turned to frittate.

There are a few things common to any frittata that I’ve ever made. There are eggs, of course, and there’s always some form of starch, be that either pasta or potatoes. Onions, mushrooms, tomatoes, and virtually any other vegetable, both raw and previously cooked, could find their way into the skillet. I almost always add grated cheese of some sort and meat is often included, as well. Once everything is in the skillet and the eggs begin to set, the pan and its contents are placed in a pre-heated oven where the frittata bakes until ready. It’s removed from the oven, flipped onto a serving platter, garnished, and served with a piece of bread and soup or salad.

For the frittate presented here, I used an 8 inch cast iron skillet. For a pan this size, I probably should have used 9 eggs, rather than 6, and the dish would have raised a bit more. Cooking for myself, though, I felt 6 eggs to be enough. As I mentioned, I normally add fresh tomatoes but, this time of year, flavorful fresh tomatoes are almost impossible to find. I skipped them but, in the past, I’ve used sun-dried tomatoes instead. Lastly, very often frittate are finished off under the broiler. Although I’ve prepared them that way, I’ve also forgotten about them in there and pulled out something that had more in common with a roasted marshmallow than a frittata. For me, the oven is a safer bet but the broiler is still an option for you folks with any kind of short-term memory. Just cook the frittata atop the stove a few minutes longer and — here’s the tricky part — check on it frequently once it has been under the broiler for 5 minutes.

*     *     *

You say potatoes and I say patate.

*     *     *

Frittata with Pasta, Broccolini, and Smoked Mozzarella Recipe

Pre-heat your oven to 375˚ F (190˚ C). Into a hot skillet over med-high heat, place a few tablespoons of the cooking fat of your choice. I used bacon fat. Once hot, add some chopped onion, sliced mushroom, and chopped raw broccolini stems. Season lightly with salt and pepper and sauté until the onions are translucent, the mushrooms have a little color, and the broccolini stems are soft. Add the broccolini florets and continue to sauté for another 3 or 4 minutes. Add the pasta, mix well, and sauté until heated through. Add a bit more oil if needed. Meanwhile, crack the eggs in a large bowl, and whisk. Add a few ounces of grated cheese — I used smoked mozzarella — and mix well. Once the pasta is heated, pour the egg and cheese mixture into the pan and, working quickly, use a flat spoon to make sure it’s evenly distributed. Lower the heat to medium and cook until eggs just begin to set. Remove from the stove top and place in the middle of the pre-heated oven. Frittata is ready when all traces of raw egg are gone from the now-coloring surface — usually about 20 minutes but begin checking at 15. Remove from oven, cover with a platter larger than the pan’s circumference, and quickly turn the skillet’s contents onto the platter. Garnish with more grated cheese and serve.

*     *     *

Serve immediately
*     *     *

Frittatas, frittate … 

*     *     *

Frittata with Ham, Potatoes, Asparagus, and Swiss Cheese Recipe

Pre-heat your oven to 375˚ F (190˚ C). Into a hot skillet over med-high heat, place a few tablespoons of the cooking fat of your choice. I used bacon fat but you can use vegetable oil, olive oil, or butter, if you like. Once hot, add some chopped onion and sauté briefly before adding 1 raw potato cut into a 1/2 inch (1.3 cm) dice. Season lightly with salt and pepper. Once the potato is just about fully cooked, add the cubed, cooked ham. Once heated through, add the chopped asparagus spears. Meanwhile, add the eggs into a large bowl and whisk. To that bowl, add a few ounces of grated cheese — I used Swiss — and mix well. When the asparagus is cooked al dente, add the egg and cheese into the pan and, working quickly, use a flat spoon to evenly distribute the mixture across the pan. Lower the heat to medium and cook until eggs just begin to set. Remove from the stove top and place in the middle of the pre-heated oven. Frittata is ready when all traces of raw egg are gone from the now-coloring surface — usually about 20 minutes but begin checking at 15. Remove from oven, cover with a platter larger than the pan’s circumference, and quickly turn the skillet’s contents onto the platter. Garnish with more grated cheese and serve.

*     *     *

*     *     *

Serve immediately

*     *     *

Potatoes, patate.

*     *     *

Variations   

As I mentioned, everything about a frittata is subject to change, so, the variations are unlimited. In that case, the only variation worthy of mention is whether of not to flip your frittata onto a serving platter. Now, if you’re leery, you can increase the odds of a good outcome by running a knife along the frittata’s edge, separating it from the pan, before the flip. After that, you’re on your own. Honestly? Both frittate photographed here flipped flawlessly. Had there been my friends or family seated at the table, I can guarantee that a good portion of the frittata would have remained in the pan as if held by Super Glue — but that’s why they’re seated at the table. Whether the bruschette are aflame, Max couldn’t wait for leftovers, or the frittate won’t flip, we’re still going to have an enjoyable evening.

*     *     *

Notes

Always add firm, raw vegetables to the skillet first. Once partially cooked, add the more fragile raw and/or pre-cooked/leftover vegetables. If using leftover pasta, it should be the last thing added before the egg and cheese mixture hits the skillet.

Season lightly with salt & pepper, keeping in mind that some of the ingredients may be (heavily) salted already. Beware of salty cheeses.

*     *     *

 It’s déjà vu all over again … 

The signs of Spring’ are all around us. There are Spring lambs in the fields, crocuses have given way to daffodils in many gardens, and local-grown asparagus are beginning to flood the markets. For the Bartolini, Spring also means it’s dandelion season and Dad, even though not a Bartolini, enjoyed them every bit as much. Now, I could go on but that might spoil the story.  Click HERE to learn a bit about Dad and his love of dandelion salad.

*     *     *

Coming soon to a monitor near you …

Split Pea Soup

*     *     *

Let’s call the whole thing off.

*     *     *