Mom’s Calamari Salad


Insalata dei Calamari

Prior to the changes brought by Vatican Council II in the 1960′s, Christmas Eve was a “fast & abstain” day, meaning only 1 main meal could be consumed and no meat was to be eaten all day. For most Catholics around the World, it was a day of contemplation and that one meal was nothing special. With Christmas coming within 24 hours, all eyes — and appetites — were focused on the big day — and dinner — soon to come. Not so the Italians. If tomorrow’s a big holiday and today you can only have one meal, why not make that meal special? And so they did.  Can’t have any meat? No problem. With Italy being both peninsula and island, fish was very often more readily available than many meat products. And so it became a seafood banquet. Wait a minute! The Church may frown upon so grand a celebration on the eve of the birth of the Christ Child. Again, no problem. They made a point of serving seven fish, each one representing one of the Seven Sacraments of the Christian Faith. In one masterstroke, their seafood feast became an Act of Faith. What priest, bishop, or even Pope would dare interfere with these devout Catholics as they used the day’s only meal to commemorate the Seven Sacraments? (The fact that the clergy themselves were probably dining on an even more spectacular seafood supper didn’t hurt “the cause” either.) And so the Feast of the Seven Fishes was born and survives to this day wherever Italians call home.

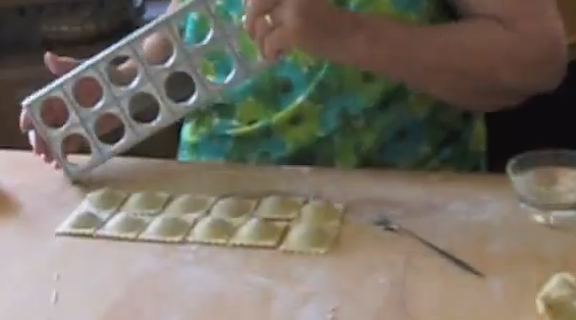
It’s funny but I don’t recall hearing anything about the Feast of the 7 Fishes when I was growing up. This, despite our having a large seafood meal every Christmas Eve. Dad, working in a restaurant, would come home early in the evening of Christmas Eve, bearing gifts of clams, oysters, and red snapper, at the very least. This would be added to the shrimp and crabmeat that Mom was preparing as appetizers and the calamari she was using to make a salad. As Dad shucked, he helped Mom with the recipes for clams casino and oysters Rockefeller. (Yes, Dad could cook but it was a skill he successfully kept under wraps except on the most rare of occasions.) There was, of course, a big platter of home-made linguine with tuna — or possibly clams — to be served along with the red snapper that Mom had broiled. It was, by any measure, quite a feast of seafood — we just never counted the “participants”.

Although today I do not maintain this family tradition, I do, however, make sure that my plans for Christmas Eve include a meal of seafood, no matter what. Since I’ve posted a number of seafood recipes over the past several months, I thought I’d post links to them all for anyone planning a Feast of the 7 Fishes but who may be missing a fish or two. Before doing that, however, I’ll share Mom’s recipe for Calamari Salad because, well, you should have it; she said so. And, next week, I’ll share the Bartolini recipe for what is the traditional main course in many Italian homes on Christmas Eve, Baccalà (salted cod), which, by the way, is also one of the 7 Fishes.

*     *     *

The Real McCoy

*     *     *

Now, there are a few things to consider with the recipe I’m about to share. First off, when cooking calamari, it’s been said to either cook it for 1 minute or 45. Anything in between and you’ll be eating something akin to rubber. So, use a big pot, bring it to a rolling boil, and get those squid into, and out of, the pot quickly. Beyond that, this recipe is typical of most of my family’s in that it features a few ingredients with relatively few spices. It is all about balance, that’s why there are no amounts given. Yes, Mom listed 1 green and 1 red pepper but I omitted the quantities. It all depends upon how much calamari you use and you’ll note that Mom didn’t list the amount of calamari needed in her recipe. Chop and mix as much bell pepper, red and green, as your eye tells you. (For 1 1/2 lbs calamari, I used about 2/3 each green & red bell pepper.) Taste the onion and let that determine how much to use. If you feel it’s too strong, feel free to give it a quick rinse under cold water after you’ve chopped it. Still not liking the onion? Try a shallot or 2 instead. Lastly, if you’re not comfortable adding the dressing ingredients directly onto the calamari & peppers, then mix it first in a small bowl, taste it, adjust if necessary, and then dress your calamari with it. Bear in mind that most homemade vinaigrettes call for 3 parts oil (olive) for every one part acid (vinegar or, in this case, lemon juice).

*     *     *

Mom’s Calamari Salad Recipe

Ingredients

  • squid, cleaned and cut into rings (halve tentacles, if using)
  • green bell pepper, diced
  • red bell pepper, diced
  • red onion, diced
  • extra virgin olive oil
  • lemon juice
  • fresh parsley
  • salt & pepper, to taste

Directions

  1. Fill a large saucepan with water and bring to a rolling boil over high heat.
  2. Add the calamari, stir, and turn off the heat.
  3. After one minute remove from water and place in an ice bath to chill. (Calamari may be “held” here for a couple of hours until ready to be served.)
  4. Once fully chilled, drain, place calamari on paper towels, and pat dry before dressing immediately with lemon juice, olive oil, parsley, salt and pepper.
  5. Toss and serve.

*     *     *

This couldn’t be easier to prepare and, best of all, you can cook the calamari, make the dressing, and chop the peppers, onion, & parsley ahead of time and store it all separately in the fridge. Just before serving, mix the ingredients, season with salt & pepper, and bring it to the table. Who wants to be stuck in the kitchen when there are unattended gifts to shake?

*     *     *

All righty! That’s 1 recipe down and 11 more to go. As promised, here are the seafood recipes that I’ve shared during the past year.

Tomato Sauce with Tuna

*

Fried Calamari

*

Pasta with Clams (“White Sauce”)

*

Pasta al Salmone

*

Grandpa’s Barbecued Shrimp

*

 Pasta with Clams (“Red Sauce”)

*

Salmon en Papillote — on the grill

*

Pasta with Shrimp

*

Brodetto

*

Lumache alla Bartolini

*

Puttanesca Sauce

*

*

*     *     *

As you can see, of the 11 dishes presented, 7 involve pasta. I’m afraid that’s a bit too much pasta for a Feast of the 7 Fishes, even for me. So, I’ve got a plan. For your primo piatto, prepare my Brodetto. That’s 5 fish in one dish! Clear the table and serve today’s calamari salad alongside next week’s Baccalà and you’ll have all 7 fishes, present and accounted for, in only 2 courses. That wasn’t so hard, was it?

Oh! About dessert. Yes, you may have dessert but, keeping in mind that it is a day of fasting and in the spirit of the Feast of the 7 Fishes, go easy on the whipped cream and chocolate sauce. Besides, you’ll need room for the fruit & cheese platter that you’ll be  serving while the chestnuts are roasted.

*     *     *

Quadretti Pasta

Most of us have warm and fuzzy memories of being nursed back to health by a loving caregiver, usually Mom, who served us a cup or bowl of soup. And you parents reading this are sure to have equally warm memories — some pretty recent — but from the other side of the covers. I’d be willing to bet that most of us were served soup made with a chicken-based stock or broth. What went into that broth, however, varied widely from house to house. In ours, Mom used either of 2 pastas, one of which is today’s recipe, quadretti.

Generally speaking, Mom relied upon 3 dishes to get me up-and-about. Breakfast would be a 3-minute egg, with or without buttered toast depending upon my stomach’s attitude.  My meals would be pasta in bianco. Aside from it being a traditional cure served to bambini with stomach ailments, Mom knew that I could’ve been at Death’s door and I would have agreed to at least try a little pasta in bianco. Between meals, though, there was a constant supply of broth which, as the recovery progressed, contained more and more pastina. Ask my Sister what Mom served her when ill and she’ll mention, without hesitation, Acini de Pepe, a tiny bead-like pasta. As for my Brother and me, it was quadretti all the way.

“Feeling better?”

Quadretti are square-shaped pastina that, as you’ll soon see, are quite easy to make. Whenever Mom made pasta of any kind, she would roll out the left-over dough and use it to make quadretti. (In true Italian tradition, absolutely nothing was wasted.) This she stored in a container, adding to it with each new batch of home-made pasta. Because she was always adding to her stash, she rarely had to devote a batch of pasta dough to making quadretti. When combined with the quart or 2 of chicken stock she was sure to have on-hand for risotto,  Mom was always prepared when one of us was feeling under the weather.

One more thing before getting to the directions and this is for soup novices. You will get better results if you only make enough soup with quadretti for as many bowls as will be served in 1 meal. If you make a large batch of soup with quadretti and store it in the fridge, when you bring it out of the fridge, you may be surprised to find that the noodles have absorbed a great deal of the broth. Not only that but, depending upon how much quadretti you put into the soup, you my have very little broth left at all. So, before you add the quadretti to your soup, take into consideration that the noodles will swell a bit during cooking and later in storage. Better to make just enough soup for one meal and store the raw quadretti separately from the broth/stock.

Don’t let any of this deter you from making this pasta. Just as you cannot compare a dish of home-made linguine with store-bought, you will not find a mass-produced pasta that comes close to the taste of home-made quadretti. It just ain’t gonna happen!

*     *     *

How To Make Quadretti

A half batch of Mom’s Pasta Dough will give you about 2/3 to 3/4 lb of fresh pasta dough. That should be more than enough for most soup recipes. Once the dough has rested, you must roll it out, either manually or by machine. If doing it by hand, roll it until it is as thin as you would when making ravioli. If using a machine that, like mine is at its widest when the setting is number “1,” then pass the dough through the rollers, repeatedly, advancing the setting with each pass, up-to-and-including the number “6” setting. If your rollers, like Zia’s, work the opposite of mine and their widest setting is number “10,” then pass the dough repeatedly through the rollers, decreasing the setting with each pass, down-to-and-including the number “5” setting. Once you’ve attained the proper thickness, cut the dough strip into sheets 2 to 3 feet long, and follow the steps outlined in the images below. Be sure to allow the dough sheets to dry sufficiently. If the sheets are too moist, the quadretti will stick together when you cut them. If too dry, the dough sheet will crack and break as you try to fold it to create the sfoglia.

*     *     *

Fold dough sheet in half,

*     *     *

Continue to fold in half repeatedly until a sfoglia of about 2 to 4 inches wide is created.

*     *     *

Starting at one end, begin cutting sfoglia into strips, no thicker than the width of linguine.

*     *     *

Carefully turn a number of the noodles 90* and begin cutting, again as if cutting linguine.

*     *     *

Gently separate the freshly cut quadretti.

*     *     *

Spread out to dry before freezing or refrigerating in an airtight container until use.

*     *     *

See? A pasta cannot be easier to make by hand and, if you’ve never enjoyed home-made pasta in your broth, you’re in for a real treat. Keep a container of quadretti in the back of your freezer and if, heaven forbid, you’re feeling under the weather, a mug of your home-made broth with a sprinkling of quadretti is just what my “Doctor Mom” would have ordered.

*     *     *

Lumache alla Bartolini

This is another within the series of posts which, quite frankly, is not for everyone, not even the intrepid tourist to the left. Truth be told, snails weren’t exactly popular among members of my generation at the old two-flat either. (If you wish to exit, you may do so HERE.) I am probably the only one to have eaten lumache back then and certainly am the only one willing to go back to that well again today. Still, if I’m going to record the family’s recipes for Posterity, I’m not about to start filtering them. Besides, the look on Zia’s face when I unveiled the lumache and announced my plans for dinner was priceless. This blog delights in ways I never dreamt possible!

As I recall, lumache, or babbaluci as they are known in Sicily, was not at all a common dish at our dinner table nor, for that matter, at Zia’s. I only remember them being served 2, maybe 3, times. That’s probably because of the amount of work involved in preparing them for the table. They had to be soaked to rouse them from dormancy, scrubbed, boiled, scrubbed again, and either removed from their shells or left intact for further cooking. As you can imagine, this was no 1 day job. Mom would put water, vinegar, and the dormant lumache into her largest pot; place a colander atop the pot, weighted with a heavy book or pan; and, set it aside to let the lumache come out of their shells. As they came to life, they would leave the water and head up into the colander — hence the reason for the weight. Unfortunately, that weight wasn’t heavy enough to prevent me from snatching a pet when I was about 6 years old. It was, however, too heavy for me to replace properly before I returned to bed, my new pet snail in a water glass at my bedside. Mom was just a tad upset when she woke me the next morning. Her kitchen cupboards and counters were covered with lumache on the lam. Even my pet (the little tattle-trail!) was well on its way to my bedroom’s ceiling by that time. Funny thing. I don’t recall ever having a pet snail after that.

*     *     *

*     *     *

I’ve chosen to share this recipe today because of Mario Batali. On a recent rebroadcast of Molto Mario, he mentioned that lumache was one of several dishes that the people of Le Marche (the Marchigiani) prepare on All Souls Day. Well, with the Bartolinis being Marchigiani and today being All Soul’s Day, what choice do I have? So, the recipe I’m going to share is the very recipe the Bartolini Girls cooked those many years ago — with 1 exception. There was no way on Earth that I was going to start with dormant lumache. With Max in the house, that is surely a disaster waiting to happen. I can just see him running around my home, trying to lure me into a game of keep-away with some unlucky snail in his mouth, while I’m on a ladder retrieving the rest off of my kitchen’s walls. No, no, no! So, I did a little googling — and it paid off. On Amazon (of course!), I found canned lumache that were cleaned, shelled, trimmed, and ready for stewing. What was once a multi-day, very messy affair suddenly became as easy as preparing a tomato sauce. I ordered them and, once delivered, I packed them up and brought them to Zia for one most memorable dinner.

*     *     *

Lumache alla Bartolini Recipe 

Ingredients

  • 1 can (15 oz, 48 count) very large size lumache
  • 2 tbsp extra virgin olive oil
  • 1 large onion, chopped
  • 3 garlic cloves, diced
  • 1 can (14 oz) crushed tomatoes
  • 1 can (14 oz) diced tomatoes
  • 4 oz dry white wine
  • 3 tbsp parsley
  • 1 tsp marjoram
  • salt & pepper, to taste
Directions

  1. Heat olive oil in medium-sized sauce pan over med-high heat. Add onions and sauté until translucent, about 5 minutes. Season lightly with salt & pepper.
  2. Add garlic and sauté for another minute before adding the tomatoes, wine, marjoram, and parsley.
  3. Bring to a boil, reduce to a simmer, and continue cooking for about 45 minutes or until the tomatoes are cooked and the sauce has darkened.
  4. Add the lumache with the canning liquid and continue to simmer for about 30 minutes more. The sauce should be dark and thick.
  5. Season with salt & pepper, to taste, and serve.

*     *     *

Serving Suggestions

                                  *                         When she cooked lumache in their shells, Mom served them in deep soup bowls with a chunk of crusty bread on the side. When removed from their shells, lumache may, also, be served as a dressing for pasta or atop polenta.

*     *     *

Notes

Back in the days preceding Vatican Council II, when eating meat was forbidden on Fridays and other “days of abstinence,” Catholics were allowed to eat lumache because they were considered seafood. Well, in classic Italian cuisine, cheese is very rarely used in a dish featuring seafood and if the Church labels something as seafood, who are we to argue? The use of cheese, therefore, in a dish with lumache is frowned upon. On the other hand, what you serve in your own home is your own business. (Was that thunder?)

*     *     *

Filling for Ravioli dei Bartolini

The Bartolini Girls made 2 versions of filling for their pasta. One, used in cappelletti, was served in soup while the other was for ravioli and dressed in sauce. A couple of years ago, I decided to try my hand at making sausage ravioli, using our family sausage recipe. The results were good enough to serve Zia, gain her approval, and now the Bartolini Clan has 3 ravioli fillings made with meat. Today I’m going to share the “saucy” filling; we’ll get to the “soupy” and sausage fillings in later posts.

I have 2 versions of Mom’s recipe. The original, which is little more than a few notes, and the one that’s part of a recipe book she gave to me after I moved to Chicago. Both are pictured below and, for obvious reasons, I follow the more complete version of the two. This is the same recipe that Zia follows when we have Ravioli Day. Similar to Sausage Day, once or twice a year we’ll devote a day to making ravioli so that she’ll have plenty for her family when they visit. We work well together as a team and that night’s dinner is always a good one. Never one to wait for dinner, however, Max has been known to steal a few errant ravioli that may have wandered too close to the pasta board’s edge. On one memorable Ravioli Day, he managed to inhale 35 of the pasta pillows. That was about 10% of that afternoon’s production and, not so coincidentally, the last ravioli that Max has enjoyed, to date.

*     *     *

*     *     *

When you look at the recipe, you’ll note that in the original version, Mom used nutmeg but cloves is used in the version she gave me. I’ve no idea why or when she modified the recipe, only that she gave me the book in the early ’80’s.  As is the case with any of our ravioli fillings, the meat is cooked before being ground in a meat grinder. I once tried using a food processor but did not like the results at all. The filling became a thick purée without any real texture, and I definitely prefer some texture. The recipe, also, calls for ground pork and veal but if Mom couldn’t find veal, she often substituted chicken or turkey. Living here, I’ve no problem finding any of the ingredients but it’s good to know that there are alternatives should you run into problems or be averse to using veal. The rest of the recipe is easy enough. The “fun” part will come when we make the ravioli and you can see how we do that HERE.

*     *     *

Filling Recipe for Ravioli dei Bartolini

Yield: Enough filling to be used with 8 eggs of pasta dough. Recipe found here.

Ingredients

  • 1 1/2 lbs. ground pork
  • 1 1/2 lbs. ground veal (chicken or turkey may be substituted)
  • 2 – 3 tbsp butter
  • 1 pkg (10 oz) chopped spinach (cooked and well-drained)
  • 1 pkg (8 oz) cream cheese
  • 1 cup grated romano or parmesan cheese – your choice
  • 2 or 3 eggs slightly beaten
  • dash of cloves (optional)

Directions

  1. Sauté meat in butter. Season lightly with salt.
  2. Use meat grinder to process the meats. Add all the ingredients into a mixing bowl and mix until well-combined.
  3. Cover the filling and refrigerate for a few hours or overnight.
  4. Once the filling has rested, you can begin making your ravioli.

*     *     *

*     *     *

Notes

Pictured above  is ravioli filling pre-formed into “balls.” Sometimes, while the pasta dough rests, Zia & I will use the time to create some, giving us a jump on the day’s production.

Mom and Zia used this filling exclusively for ravioli. I’ve used it in a few other dishes – i.e., stuffed shells, cannelloni, and, on occasion, a rotello. We’ll get to these recipes, too.

*     *     *

Ravioli dei Bartolini

Happy Columbus Day everyone! And what better way to celebrate the Holiday than to share one of the Bartolini Clan’s favorite holiday recipes. Say the word “ravioli” to any of the old 2-flat’s former residents and you’re sure to conjure up memories of holidays past, specifically Christmas, New Year’s, and Easter. No matter which of the 2 dinner tables you visited on those evenings, there would be a large platter of ravioli taking center stage. (It was present on Thanksgiving, too, but The Bird was the star of that show.) As a kid, my attention was pretty much focused on that platter of pasta pillows — and dessert, of course — and I think the same would have been said by everyone at the tables, save Mom and Zia. Their perspectives would have been entirely different.

One must remember that in those days, the only freezer available to most households was a small compartment above the fridge. Consequently, if you wanted to serve your family ravioli, you made it the same day it was served. Well, there was absolutely no way that Mom and Zia were going to start making ravioli on a holiday afternoon. That meant that most holiday mornings, they were up at 5:00 am making ravioli for that evening’s holiday dinner. And then there was Christmas. We were allowed to get up during the night to discover what Santa had brought us and to play with our toys. It wasn’t until years later that we learned how our parents no sooner got the gifts wrapped and under the tree when we came charging out of our bedrooms. Mom and Zia were lucky to get a couple of hours of sleep before they started making ravioli. And they weren’t making just a few ravioli. They made enough for everyone at each of the two holiday tables, which often included guests as well as each family. For Mom, that meant ravioli for as many as 12 people. To this day, I don’t know how they did it.

It really is a shame that there are no pictures of these women making pasta and ravioli, for it really was something to see. Mom would make the filling the night before and store it in the fridge. (Woe be the child caught snatching filling from the fridge!) The next day, she would make 8 eggs worth of pasta dough using the “mound” method. (Mound the flour on a large pasta board, make a crater in the center, pour the eggs into the center, and use a fork to slowly bring the flour into the egg mass, being careful not to break the flour wall and allow the eggs to spill out.) Once the dough was made, kneaded, and rested, Mom used her 3+ foot long “rolling-pin” to create thin, circular pasta sheets, 3 – 4 feet in diameter. They were laid to dry by hanging them off the edge of the dining room table, the backs of chairs, even on sheets covering a bed, if one was “open.” Once dry enough, the sheet would be hung off the pasta board’s edge, half on the board and half off. The filling balls were then laid out on the pasta half-sheet in a grid, each equidistant from its neighbors. When they were all positioned, maximizing the surface area, the bottom half of the sheet was  brought up and over, enclosing the filling-covered top half. The long handle of a spoon or spatula was used to seal the pillows. The ravioli were then cut using a pastry cutter, moved to trays, and the next pasta wheel was moved into place. This continued until all the filling was used. The remaining dough, if any, would be hand-cut to form linguine or quadretti. (More about the latter in another post.) Just about the time she was finished cutting the last of the pasta, we kids would come bounding into the kitchen. “Merry Christmas, Mom! What’s for breakfast?”

The purchase of a pasta machine changed all that. Unable to make the large pasta wheels, Mom turned to ravioli dies to make her ravioli. Pictured just below is my collection.  The 2 dies on top are used for ravioli. The one on the top-left makes ravioli that are 2 inches square. That’s just about the size The Sisters were taught to make by hand. The ravioli form on the top-right makes ravioli that are 1.25 inches square. That’s about the size The Sisters made by hand once we kids came into the picture. (Kid-friendly ravioli. Who knew?)  The remaining 3 are used for soup ravioli, which Mom called cappelletti, “little hats.” Though normally rounded, some look similar to tortellini,  the die Mom used (lower left) was .75 inches square. As a result, the word “cappelletti” in our house wasn’t used to describe the pasta’s shape but its use — and that was in soup. Mom gave me her cappelletti die years ago but it’s too small for me to use in any way. (I’ve tried several times but, being ham-fisted, I cannot make the filling “balls” small enough to fit the die.) So, I bought the die on the lower-right. It makes raviolini that are 1 inch square and I use it to make my cappelletti. In the center is a press that makes traditional-looking cappelletti, each 1.25 inches in diameter. I, also, have 2 more ravioli makers, both not shown, but they don’t work very well. One attaches to my pasta machine and the other to my stand mixer. In both cases, they require that the dough sheets be about twice as thick as I am accustomed to using. The result is ravioli that is a bit more chewy than I prefer. What can I say? Mom spoiled us. 

*     *     *

Tools of the Trade

*     *     *

When it come to the pasta dough’s final thickness, let your own palate lead the way. Our pasta machines are calibrated from 1 through 10, with 1 being the thickest setting. Zia prefers to roll her dough up to and including the number 6 setting. I will use the same setting for large ravioli but for the smaller ravioli and cappelletti, I’ll roll the dough one more time, using the number 7 setting.

Once you’ve made the filling and pasta dough, creating the ravioli is easy enough, though time-consuming. Here’s Mom’s Pasta Dough recipe and, on Wednesday, I’ll share the recipe for their ravioli filling. (Future posts will share the filling recipes for sausage ravioli and cappelletti, as well as a few others we’ve tried along the way.) The pictures that follow will guide you through the ravioli making process far better than I ever could describe. Of course, it helps that they feature that world-renowned still photo model, “Zia,” in a sequence of never seen before shots taken where she lives, along the fabulous Michigan Riviera.  Ah, the life of the octogenarian super-model!

*     *     *

How to Make Ravioli

Step One: Cut dough strips into die-sized sheets

*     *     *

Step Two: Cover the die with a dough sheet

*     *     *

Step Three: Place filling across the die

*     *     *

Step Four: Use dampened fingers to moisten ravioli “walls.”

*     *     *

Step Five: Cover filled die with another dough sheet

*     *     *

Step Six: Use a rolling-pin to seal the ravioli

*     *     *

Step Seven: Trim the excess dough

*     *     *

Step Eight: Flip the filled die

*     *     *

Step Nine: Unmold the ravioli

*     *     *

Step Ten: Lightly puncture the ravioli, meat-filled only

*     *     *

To Cook

  1. Bring a large pot of salted water to a rolling boil.
  2. Add the ravioli, return to boil, then reduce and simmer gently. (If boiled too hard, the ravioli may burst.)
  3. Ravioli normally take 5 – 8 minutes to cook, a couple of minutes more if frozen. Cooking times may vary depending upon the thickness of your dough, the filling, the size of the pot, etc. Taste one to insure they are done to your liking.
  4. Once the ravioli are cooked, carefully drain using a colander or sieve. You can use a Bolognese-style sauce or go meatless.

*     *     *

Variations

The method I’ve described is by no means the only way to make ravioli at home. Check out the Rufus’ Food and Spirit Guide to see Greg make ravioli completely by hand, similar to the method Mom employed but on a smaller scale. You can also see a slightly more modern approach by going to Sweet Caroline’s Cooking. With Thanksgiving just around the corner, her recipe for butternut squash ravioli couldn’t be better timed. Lastly, in an upcoming post, I’ll show you yet another method for making stuffed pasta.

Notes

You’ll note that Step Ten instructs that only meat-filled ravioli should be lightly punctured. This should be done if you intend to freeze the pasta. Doing so will allow any air sealed within each raviolo to escape during the cooking process. Too much trapped air will cause the raviolo to, in effect, balloon and it may burst before the filling can thaw and cook. We use the tines of a cocktail fork to do this but we don’t puncture cheese-filled ravioli. The cheese filling will often leak through the puncture holes. Try to fill each pillow with as much cheese filling, and as little air, as possible. This “balloon effect” should not be a problem if the ravioli are fresh (not frozen) when cooked.

Although not especially difficult, this is a time-consuming process. I’d recommend that you make enough for a couple of dinners and that you freeze what you won’t be using immediately that day. It’s easy enough. Place your freshly made ravioli in a single layer on lined baking sheets and into your freezer. 2 to 3 hours later, place the now frozen ravioli into bags or containers and return to the freezer. When needed, do not thaw before placing into boiling water, reduce to soft simmer, and cook till done to your liking, normally a few minutes longer than if freshly made.

And for heaven’s sake, keep an eye on Max at all times!

*     *     *

Chicken gizzards? No way!

Admittedly, dishes featuring chicken gizzards are a hard sell and some of you will go no further than the picture above (Just click HERE, Cynthia.) and that’s fine.  Believe me, the majority of my family will be going with you. Since this blog was conceived as a means of recording and sharing my family’s recipes, however, I’d be remiss if I failed to mention these two. Who knows? Some future Bartolini Clan member may wish to know how to cook chicken gizzards and they won’t need to look any further than right here.

Mom and Zia were little girls when the Great Depression struck and our family, like so many others, was hit hard. By all accounts, these were lean times and our Grandparents struggled to put food on the table and keep a roof over their heads. Both Bartolini Girls marvel(ed) at how Grandma could make a single chicken last a full week, feeding a family of four in the process. Well, that’s when she could get a chicken. Both of today’s recipes come from that time. Mom often served us the first, a side dish of peas with gizzards, when I was growing up. No need to explain why it wasn’t an especially popular dish with my siblings. The second is a pasta dish that I “created” on my own. I remember telling Mom about it and, somewhat surprised, she recalled that Grandma used to make the same dish. Zia has mentioned that, as well. Since neither had ever mentioned or served me this pasta, I think it’s a sign that Grandma wants this dish prepared and, by sharing it here, I’m just doing my part to see that her wish is carried out.

I can’t speak of packaging during the Depression but, in today’s markets, one can usually find chicken gizzards and hearts sold together in 1 pound containers. Once cleaned and trimmed, I’ll divide them, with a quarter being reserved for the peas dish and the rest for pasta. One of the 2 portions will be set aside, even frozen, for later use. Cooking these meats can be a little tricky. To brown them like one would, say, beef chunks for stew, will render them nearly inedible. That shouldn’t be a problem if you follow the steps outlined in the recipes that follow.

*     *     *

Peas alla Nonna Recipe (aka Chicken Gizzards with Peas)

Ingredients

  • 5 or 6 oz chicken gizzards & hearts, cleaned and trimmed
  • 1/2 small onion, divided in halves
  • water
  • 1 tbsp olive oil
  • 2 tbsp butter
  • 1 plum tomato, chopped
  • 2 cups frozen or fresh peas
  • pinch of cloves
  • salt and pepper, to taste

Directions

  1. Place gizzards, half of the onion, and enough lightly salted water to cover into a medium saucepan, Cover, bring to a boil over med-high heat, and reduce to a soft simmer. Cook for 1 hour, checking periodically to ensure enough water remains. At the end of an hour, pour the pan’s contents through a strainer, discarding the onion and stewing liquid.
  2. Slice the remaining onion portion and roughly chop the stewed meat.
  3. In the same pan, heat oil and butter over medium high heat. Return gizzards to the pan, along with the sliced onion, and sauté until the onion is soft and translucent.
  4. Add tomato and sauté for a minute before adding peas, cloves, and a few tbsp of water to the pan. Season with salt and pepper, cover, and cook about 5 minutes or until peas are done to you liking.
  5. Serve immediately.

*     *     *

Pasta with Chicken Gizzards Recipe

Ingredients

  • 12 – 16 oz chicken gizzards & hearts, cleaned & trimmed
  • 2 tbsp extra virgin olive oil
  • 1/2 onion, chopped
  • 3 cloves garlic, minced
  • 1/2 cup dry white wine
  • 2 to 3 tbsp tomato paste
  • 1 large (28 oz) can tomatoes, whole or diced
  • 3 tbsp fresh parsley, chopped
  • 1 lb pasta, cooked to not quite al dente
  • grated parmesan cheese
  • salt and pepper, to taste

Directions

  1. Heat oil in a deep skillet over medium heat. Add gizzards and cook for 5 minutes. Do not allow to burn.
  2. Add onion, season with salt and pepper, and cook until translucent.
  3. Add garlic and sauté for 1 minute before adding the wine. Cook until almost all the wine has evaporated.
  4. Add the tomato paste and sauté for 1 to 2 minutes. Add parsley and tomatoes. If using whole tomatoes, tear them apart before adding to the pan. Season with salt and pepper.
  5. Bring to a boil, cover partially, and reduce to a soft simmer.
  6. The sauce should cook for 45 minutes. Check the pasta’s package directions and time its cooking so that the pasta is about 2 minutes shy of being al dente when the sauce is ready.
  7. Reserve some of the pasta water before adding the pasta to the frying pan. Mix well and continue cooking until the pasta is done to your liking. Add some of the reserved pasta water to the pan if the pasta becomes dry during this last step of the cooking process.
  8. Serve immediately, garnished with the grated parmesan cheese.

*     *     *

Notes

And so ends our treatment of chicken gizzards and hearts. Oh, don’t you worry. We’ll be coming back to these ingredients when the Bartolini Family Risotto recipe is shared. That won’t be for a while, however, so, all you chickens out there can rest easy. Your giblets are safe — for now.

*     *     *

Spumoni Ice Cream (It’s da Bomba!)

As you already know, a number of people in my life have birthdays in August. Mom, Grandma, Uncle, my Friend the kitchens’ Taste Tester, my Friend the Entertainer, my Grand-Nephew, and the Oldest of the Boys Upstairs were all born in August. Well, in their honor, and since this is the last day of their collective birthday month, why not go out with a bang? Today’s recipe is the Spumoni Bomba.

These past few Fridays, I shared recipes for pistachio, chocolate, and cherry ice cream. Not so coincidentally, these are the 3 flavors used to create spumoni ice cream, Mom’s favorite. Dad often brought home boxes of spumoni from the restaurant, with each individual serving conveniently wrapped in paper. Klondike bars? Who needed ice cream sandwiches when we had boxes of spumoni in the freezer? Anyway, if we’re going to celebrate the end of Mom’s birthday month, spumoni is the only way to go.

Before offering instructions for creating the Bomba, as well as the traditional “loaf,” a few things should be mentioned. First off, I knew all along that I would be making spumoni ice cream and that’s why I chose to use the same base for all 3 flavors. I wanted all 3 ice cream layers to have the same creamy texture on the palate. Using a custard-based chocolate layer with a yogurt-based cherry layer and Mom’s pistachio layer, for example, just wouldn’t work. Secondly, “authentic” spumoni recipes call for a variety of candied fruit pieces to be added to the cherry layer. For me, these chunks do not freeze well and consequently ruin the texture of the ice cream. So, I dropped ’em! Moving beyond the rejected candied fruit, this recipe will use 3 batches of home-made ice cream, with each batch equaling 1 1/2 quarts. Of course, the amount of ice cream required will depend upon the size of the bowls you use to create the bomba. If you don’t wish to make home-made ice cream, store-bought can be substituted. You’ll need to let the ice cream soften a bit before you add any fruits or nuts, if desired, and before you use it to make either the loaf or bomba. Lastly, unless you have 3 canisters for your ice cream maker, this is going to take more than 1 day to create.

*     *     *

Magic happens when you slice into a bomba!

*     *     *

Spumoni Bomba Recipe

Special equipment: a set of 3 nested mixing bowls, each decreasing in size. Mine were approx. 10″, 8″, and 6″ in diameter, and/or 1 bread loaf pan.

Ingredients

Directions

  1. While the chocolate-chocolate hazelnut ice cream is being made, cover the exterior of the middle-sized bowl with plastic wrap, place it in the largest bowl, and place both in the freezer until needed.
  2. When the ice cream has been made, reserve 1 cup of it and pour the rest into the largest bowl. Place the plastic-covered middle bowl into the first and press down, causing the ice cream to flow upwards between the 2 bowls. Stop applying pressure when the ice cream reaches the top of the outer bowl. Place both bowls back into the freezer for a few hours.
  3. Remove the middle bowl and plastic wrap. With an offset spatula, use the reserved ice cream to fill any cracks that the plastic wrap may have created in the surface of the chocolate layer. Cover the ice cream-covered bowl with plastic wrap and return it to the freezer.
  4. As soon as the ice cream maker’s canister is ready, begin making the pistachio ice cream.
  5. Cover the exterior of the smaller bowl with plastic wrap and place in the freezer.
  6. Once the pistachio ice cream has been made, reserve 1 cup and pour the rest into the chocolate ice cream-covered bowl. Place the smallest bowl into the semi-frozen pistachio and press down, causing the ice cream to flow upwards between the 2 bowls. Stop applying pressure when the ice cream reaches the top of the chocolate-covered bowl. Place both bowls back into the freezer for a few hours..
  7. Remove the small bowl and plastic wrap. With an offset spatula, use the reserved ice cream to fill any cracks that the plastic wrap may have created in the surface of the pistachio layer. Cover with plastic wrap and return it to the freezer.
  8. As soon as the ice cream maker’s canister is ready, begin making the Maraschino cherry ice cream.
  9. When completed, use the cherry ice cream to fill the remaining cavity. Cover with plastic wrap and place in the freezer until fully frozen.
  10. To serve, place the bowl in a hot water bath briefly while running an offset spatula or knife along the outer edge of the molded ice cream.
  11. Quickly invert the ice cream bomba onto a chilled serving plate, sprinkle with the chopped nuts, top off with cherries, and serve. (See Notes below.)

*     *     *

*     *     *

Variations

If you wish to go the more traditional route and create a spumoni loaf, use a bread pan as your ice cream mold. Fill to 1/3 with chocolate ice cream and place in freezer until firm. Next, fill another 1/3 with pistachio ice cream and return to freezer until firm. Lastly, use cherry ice cream to fill the rest of the bread pan, cover with plastic wrap, and return to freezer until firm. When ready to serve, follow the same instructions for unmolding the bomba.

*     *     *

*     *     *

Notes

Looking at the pictures, you may have noticed that the bomba’s cherry ice cream center is larger (thicker) than the other 2 layers. If you want your layers to be more consistent, you can either use a set of smaller bowls or make/buy more chocolate ice cream to form the outer layer. As it was, I used the entire quart-and-a-half batch made by my ice cream maker.

As you also may have noticed, serving a bomba in a heat wave does have its risks and unless you’ll be dining in a walk-in freezer, you can expect some melting to occur. If possible, unmold the bomba onto an ice-cold serving platter and place it back in the freezer for a short while before serving.

Pictured was a “surprise birthday bomba, ” the recipient of which, my Friend the Entertainer, didn’t mind “the thaw” one bit and even waited patiently for the pictures to be taken.

*     *     *

The Kitchens’ Strawberries be Jammin!

I know, I know. I do not can. The threat of giving my friends & loved ones the gift of botulism has pretty much kept me away from this age-old method of food preservation. Not only that, I’ve no room for the canning gear nor for the canned goods.  So, why then am I suddenly canning?

To begin with, last week’s canning experiment with cherry jam went very well. It jelled properly and the jars all sealed without using a water bath. Those who have tasted it liked it, and, most importantly, survived. Family, friends, and a few fellow bloggers were all quite positive, some even encouraging me to continue canning. One friend was particularly enthusiastic, although methinks the promise of freshly made grape jelly may have been the cause. You see, I had confided to him that I wanted to make grape jelly but that Concord grapes weren’t easy to come by. This isn’t exactly Napa Valley. I told him I would be going to the farmers’ market this morning to find grapes and, if all else failed, I might try canning some Michigan strawberries, if they were still available. What he didn’t know was that I had found Mom’s strawberry jam recipe in the recipe book she had given me years ago. All thus time I had ignored it because, as we all know, I do not can. Well, with no grapes to be found anywhere at the market, I bought 3 containers (pints?) of strawberries. I followed Mom’s recipe, with 1 exception. Remembering David Lebovitz’s recommendation of using lemon rind as well as lemon juice, I added the zest of 1 lemon to the fruit and sugar. Beyond that and as Mom had suggested, I used a potato masher to crush the hulled berries, which yielded a little more than 4 cups of smashed fruit. The fact that there was no need for store-bought pectin was a big plus; I didn’t have any. From there, the rest of the recipe is easy enough that I had no problems following it. An experienced canner and jammer should be able to do this in her/his sleep.

*     *     *

*     *     *

Mom’s Strawberry Jam Recipe        

Ingredients

  • 2 pounds fresh strawberries, hulled (4 cups smashed)
  • 4 cups sugar
  • 1/4 cup lemon juice
  • zest of 1 lemon

Directions

  1. In a heavy bottomed saucepan, mix together the strawberries, sugar, lemon and lemon juice & zest. Stir over low heat until the sugar is dissolved. Increase heat to high, and bring the mixture to a full rolling boil.
  2. Boil, stirring often, until the mixture reaches 220 degrees F (105 degrees C).
  3. Transfer to hot sterile jars, leaving 1/4 to 1/2 inch head space, and seal.
  4. Process in a water bath, allow to sit in boiling water for 10 minutes.
  5. After 10 minutes, carefully remove jars from boiling water and place on rack covered with a towel to prevent jars from shattering due to quick temperature change.
  6. Leave, untouched, for 12 to 24 hours to insure proper sealing.
  7. Store in cool, dark place for up to 1 year.
  8. If the jam is going to be eaten right away, don’t bother with processing and just refrigerate.

*     *     *


*     *     *

Notes

If unsure whether the jam will jell properly, you can test it. Just before you start preparing the strawberries, place a plate in your freezer. After your jam has reached 220*, take about 1/4 tsp of the hot jam, place it on the chilled dish, and return both to the freezer. After a couple of minutes, use your finger to “push” through the jam on the plate. If the jam wrinkles before your finger and does not flow to refill the path your finger took, the jam is ready to be placed in jars.

Oh! All evidence to the contrary notwithstanding, I do not can.

*     *     *

Pasta with Clams (“Red Sauce”)

Blessed to be living on a peninsula or neighboring island, Italians enjoy a ready supply of seafood of all kinds — and their diet is all the better for it. A favorite dish of mine, whether I’m visiting Italy or at home, is pasta prepared with clams. Here in Chicago, the selection of fresh clams can be limited to cherry stones, with little necks and manila clams available sporadically. Cherry stones and little necks are actually same species of clam. The only difference is their size, with cherry stones being the larger of the two. I find little necks do taste sweeter, however, and I’ll use them whenever I can. If, however, only cherry stones are available, I’ll remove them from their opened shells during the cooking process, give them a quick chop, and then return the chopped clams and any juices to the pot. When all else fails, I have used, with some success, frozen clams and cockles purchased from a few of the area’s Asian markets. These same stores, by the way, can be a relatively cheap source for flash-frozen, vacuum-packed calamari, in any size you could possibly want.

As you can tell by this posting’s title, today’s recipe features clams cooked in a tomato sauce. In this recipe, I find that the sweet, delicate tasting clams can be overpowered by the tomatoes. So, in order to bolster the clam flavoring — and unlike the “white” version of the recipe — I’ll add a can of whole or minced clams to the sauce. It’s listed as “optional” within the recipe’s ingredients and the choice is yours to make. By the same token, whether you add any canned clams, be sure to use herbs and spices sparingly. They, too, can overwhelm the clams. It’s a tricky balance you’re trying to achieve but one definitely worth the effort.

*     *     *

Pasta with Clams (“Red Sauce”) Recipe

total time: under 2 hours (includes time to prep clams)

Ingredients

  • at least 2 doz. little neck or manila clams
  • 1 can (7 oz) whole or minced clams (optional)
  • 3 tbsp olive oil
  • 1/8 to 1/4 tsp red pepper flakes (optional)
  • 1 medium sweet onion, chopped
  • 2 cloves garlic, minced
  • 3 tbsp fresh parsley, chopped
  • 2 tbsp tomato paste
  • 1/3 cup dry white wine
  • 1 large can (28 oz) diced tomatoes
  • salt & pepper, to taste
  • 3 tbsp fresh basil, chopped
  • 1 lb cooked pasta (tagliatelle pictured above)
  • 1 cup reserved cooked pasta water
  • chopped parsley for garnish

Directions

  1. At least an hour before dinner, use a brush to individually scrub each clam before  rinsing and placing it in a large bowl of cold freshwater. Rinse them a second time just before proceeding with the recipe.
  2. Heat oil over med-high heat in a large frying pan with a lid. (If using red pepper flakes, add them now and sauté for 1 minute before proceeding.) Add onion, season lightly with salt & pepper, and sauté until translucent, about 5 minutes. Add garlic and parsley and sauté for another minute.
  3. Add tomato paste, sauté for one minute, add the wine, and then add the tomatoes. Season with salt & pepper, bring to a boil before reducing heat and  simmering for 30 minutes.
  4. Meanwhile, your pasta should be cooking, with an eye toward being drained just as the clams are opening.
  5. Increase heat to medium high, add the basil, and stir. (Add the canned clams now, if you choose to use them.)
  6. Add the clams and cover tightly.
  7. In about 5 to 8 minutes, the clams should be open & steamed. Discard any unopened clams. Replace cover and remove from heat.
  8. Combine the clams & tomato sauce with the drained pasta. If too dry, add some of the reserved pasta water.
  9. Serve immediately, garnished with chopped parsley.

Variations

Tired of tomatoes? Try the “white sauce” version of this recipe.

*     *     *

Grandpa’s Barbecued Shrimp

I’ve just returned from a week-long visit with Zia in Michigan, where Spring has finally sprung — even if it is much wetter and colder than most would like. The arrival of Spring in Michigan’s Thumb means that Summer is just about here for the rest of the country. And with Summer comes barbecue season, but hold onto your skewers. First, a little history …

The old two-flat had a great barbecue in the backyard that Grandpa built during the Summer of 1959. Pictured on the right is the construction site and below, to the left, the finished monolith. Grandpa was a master at masonry and he created the arch over the grilling area. (It wasn’t until I was much older that I appreciated the skill involved in doing that.) The grilling area had 3 sections: the top was the grill surface; the middle was where the fire burned; and the lowest section was where the ashes collected. The doors of the lower 2 sections had vents with which you could limit and direct the airflow to the fire, and thereby control the grill’s heat. The flue system practically guaranteed that there would be no smoke to bother the eyes of the barbecue’s many users. To the left of the grilling area was a large, flat surface that served as a work station and, under that, an area for storing wood. He’d thought of everything.

Once it was finished, that barbecue was often a center of activity for both households, regardless of the weather. In Winter, our yard was turned into an ice skating rink and the grill helped to warm us as it heated our hot chocolate. In warmer weather, I clearly remember seeing Dad, the High Priest of Grilling, standing in front of his altar, umbrella in his left hand & struggling with the wind, as his right hand tended to the sacrificed beast that would become our meal. Once Summer came, there were many Sundays when both families feasted together on some main course that was char-broiled to perfection. As for Grandpa, he could often be found “out back” on Fridays grilling shrimp, his specialty and today’s recipe. Somehow, I always found myself at his side as he grilled and, lo and behold, he would give me 1 or 2 shrimp just for “keeping company.” I think I got the better part of that deal. Not only did I get a couple of shrimp back then but now, years later, whenever I lay skewers of shrimp on a grill, my thoughts inevitably turn to the times spent standing next to my Grandpa in front of his master work — and I smile.

Back now, to the Present. Many stores today offer shrimp that have been cleaned but with the shells still on. These shrimp are definitely preferable to those that have been peeled simply because the shells offer some protection during grilling and so the shrimp are less likely to burn. Not only that but the opening left from the de-veining process makes a perfect home for stuffing. When buying shrimp destined for the grill, I’ve found that bigger is better. Large shrimp aren’t so quick to burn and they make a more memorable presentation. As for the stuffing, the amount of olive oil you need will vary depending upon the bread crumbs you use — i.e., fresh, store-bought, or panko. The goal is a stuffing that’s rather wet, though not “soupy.” You want it wet enough to survive the heat of the grill without drying out completely and yet dry enough so that  you do not see stuffing and oil pooling on your serving platter. For the grilling, you can use a webbed grill basket, the kind with 2 sides that can be opened and that will hold the shrimp in place while grilling. This type of basket will allow you to turn over all the shrimp with ease. Lacking a grilling basket, thin bamboo skewers can be used after they’ve been soaked to prevent being burned on the grill. I use 2 skewers per set of shrimp and this, too, makes turning them over much easier.

*     *     *

Grandpa’s Barbecued Shrimp Recipe

Ingredients

  • 1 lb extra-large shrimp (no smaller than 21 – 25-ct), de-veined but not peeled
  • 1/3 – 1/2 cup bread crumbs
  • 1 clove garlic, minced
  • 2 tbsp fresh parsley, chopped
  • 1/3 – 1/2 cup olive oil
  • salt & pepper, to taste
  • thin bamboo skewers, soaked in water for at least 1 hour before grilling
  • lemon wedges for serving

*     *     *

*     *     *

Directions

  1. In a mixing bowl, combine the bread crumbs, garlic, parsley, salt & pepper and mix well.
  2. Add enough olive oil to the mixture to produce a wet, but not soupy, stuffing. Mix well.
  3. Place the shrimp into the bowl with the bread crumbs and mix well. Cover the bowl and refrigerate for at least 30 minutes.
  4. In the meantime, arrange the coals, if used, to enable the “indirect cooking method.” Start the grill or fire up the coals so that the fire is ready when the shrimp are.
  5. Use 2 skewers to hold the shrimp. Place one skewer near the shrimp’s tail and the other skewer near its opposite end. Grab a second shrimp and do the same, using the same 2 skewers so that this shrimp is on top of the first one that you skewered. Be sure to include a little stuffing between the shrimp. Repeat the process until the skewers are full, keeping in mind the size or your grilling area. You may only be able to skewer 3 jumbo shrimp or 5 – 6 large shrimp per set of 2 skewers.
  6. Repeat step 5 until all the shrimp are skewered.
  7. With the grill very hot, clean the grates and use a wad of paper towels dipped in vegetable oil to coat the grilling surface. (No need to coat the grates if using a grilling basket.)
  8. If using the indirect method, the shrimp should take no more than a total of 5 minutes to cook both sides, depending upon the size and temperature of the grill. The time will be less if the shrimp are peeled and even less if they are grilled directly above the flames. Stay near the grill and watch them closely.
  9. Once cooked, the shrimp may be served as-is, on the skewers, or off of the skewers and arranged on a platter.
  10. Serve immediately with lemon wedges on the side.

Notes

With minor changes, you will see this bread crumb mixture, the Bartolini breading mixture, used again and again throughout this blog. The Bartolini Girls used it to stuff a number of vegetables, from artichokes to zucchini, not to mention seafood preparations from stuffed calamari to baked tilapia. Learn to make it, and to adjust the moisture level to suit the dish being prepared, and you will be amazed at how many uses you’ll find for it. Just please don’t forget to come back here and tell us about it.

*     *     *