Farmers Market Pasta

Pasta Primavera

It happens every Spring. After having spent the Winter avoiding most fresh vegetables because they’ve seemingly spent more time in transit than in some distant fields, the farmers markets open and I can barely contain myself. I go with a general idea of what I’d like to buy and return home with two bags full of produce and a loaf of bread. As I unpack Saturday’s harvest, I begin to plan my meals.

In the past, I’ve commented on a couple of blogs that I’m amazed at how we all could look at the same ingredients and “see” different dishes. Nazneen, for example, could take these ingredients and have no trouble creating a tasty pullao. BAM, on the other hand, could easily prepare a flavorful GF stir fry. Then, of course, there’s Katherine and Greg. Heaven only knows the dish they’d create but I guarantee it would be delicious and I wouldn’t be the only one to bookmark the recipe. Me? Every week I break out the flour and start making pasta. The only question in my mind is what vegetables to use for which pasta. And when all is said and done, on Thursday or Friday night, I use leftovers and whatever vegetables remain to make a fresh egg frittata. Come Saturday, with a newly cleaned-out refrigerator, I head back to the market and start the process all over again. Today’s recipe is one of these farmers market pastas.

*     *     *

Primavera is the Italian word for Spring. Pasta Primavera is a dish that celebrates the freshest of ingredients. It is a true marriage of flavors, with no single taste dominating  the rest. To dress the pasta, the “sauce” can be cream-based, oil or butter-based, and even include tomatoes. In short, a pasta primavera can be whatever you would like it to be, so long as the ingredients are fresh.

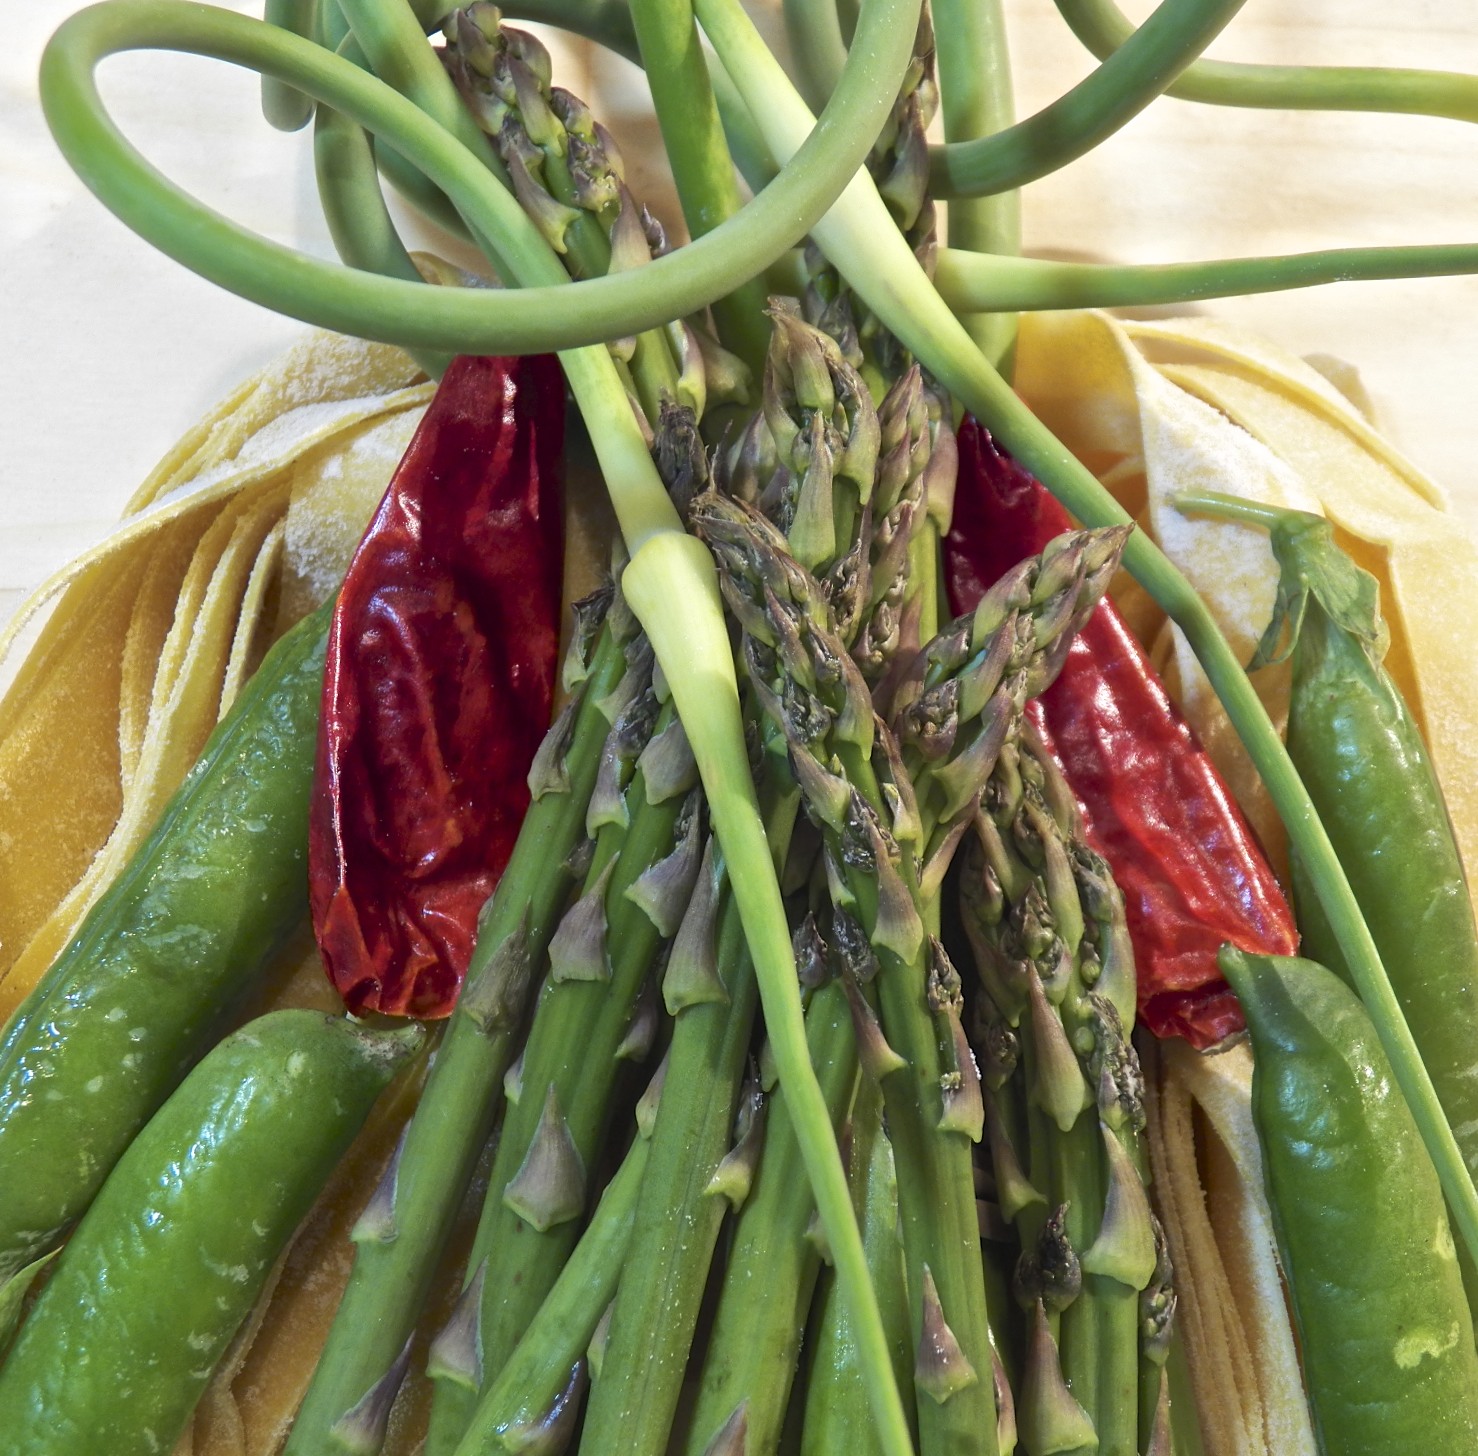
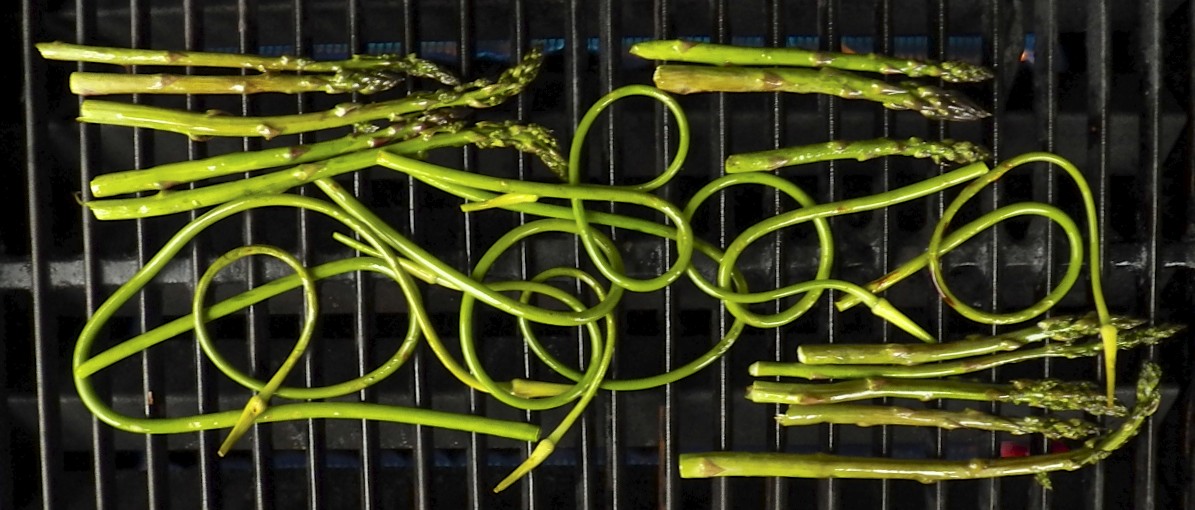
For today’s recipe, I rendered some guanciale and used the resulting fat as the base of my sauce. Since I was adding scapes, there was no need for garlic but I did add a couple dried red peperoncini to add some heat to the dish. Beyond that, fresh peas, asparagus, and a few mushrooms were added, with a splash of white wine to round out the dish. And just to make sure that they didn’t get “lost”, I grilled the scapes and asparagus spears before adding them to the pasta. Then, after adding a sprinkle of cheese, dinner was served.

And to my fellow Americans, have a happy and safe 4th of July.

*     *     *

Farmers Market Pasta Recipe

Ingredients

  • 3/4 lb (340 g) cooked trenette — any “ribbon” pasta can be used
  • 6 to 9 garlic scapes
  • 9 to 12 asparagus spears
  • 3 oz (113 g) guanciale, chopped — pancetta, prosciutto, bacon, or ham can be used
  • dried peperoncini (optional)
  • 1/2 lb ( 227 g) fresh peas
  • 8 to 12 small mushrooms, halved or quartered depending upon size
  • white wine
  • salt & pepper
  • Pecorino Romano cheese, grated, for serving — Parmigiano Reggiano can be substituted.

*     *     *

100_4649

*     *     *

Directions

  1. Clean and heat the barbecue or grill pan
  2. Lightly coat scapes and asparagus with olive oil
  3. Place the scapes and asparagus atop the hot grill surface. Cook each vegetable to your liking before removing from heat. When cool, roughly chop both vegetables.
  4. Meanwhile, bring a large pot of salted water to the boil.
  5. Add the guanciale to a large frying pan over med-high heat. Continue to cook until the fat has rendered and the guanciale is not quite fully cooked.
  6. Crumble the dried peperoncini by hand before adding to the pan.
  7. Add the mushrooms and continue to sauté for a few minutes.
  8. Lower the heat to medium, add a couple of ounces of wine and the peas. Continue to sauté.
  9. Time the pasta to be just shy of al dente at about the time that the peas are cooked to your satisfaction.
  10. Drain the pasta, reserving a cup of the pasta water, and add the pasta to the frying pan.
  11. Add the chopped scapes and asparagus, mix well, and continue to cook until the pasta has reached al dente. Add pasta water if the pan’s contents are too dry.
  12. Remove to a serving platter, garnish with grated cheese, and serve.

*     *     *

*     *     *

Notes

Be careful not to use too much guanciale. If you do, the taste will become predominant and you’ll be unable to taste much else. I’ve made that mistake and although it is still a very flavorful pasta, it’s also a waste of garlic scapes.

I like a little heat in the dish so I crumbled 2 dried peperoncini that came from the heart of Italy’s peperoncini region, Calabria. You could easily substitute red pepper flakes or skip them entirely, if you like.

Before using the scapes, I trim an inch or two off the bottom of each scape and, because they can get hard and unpalatable when grilled, I trim off each top just above the flower bulge.

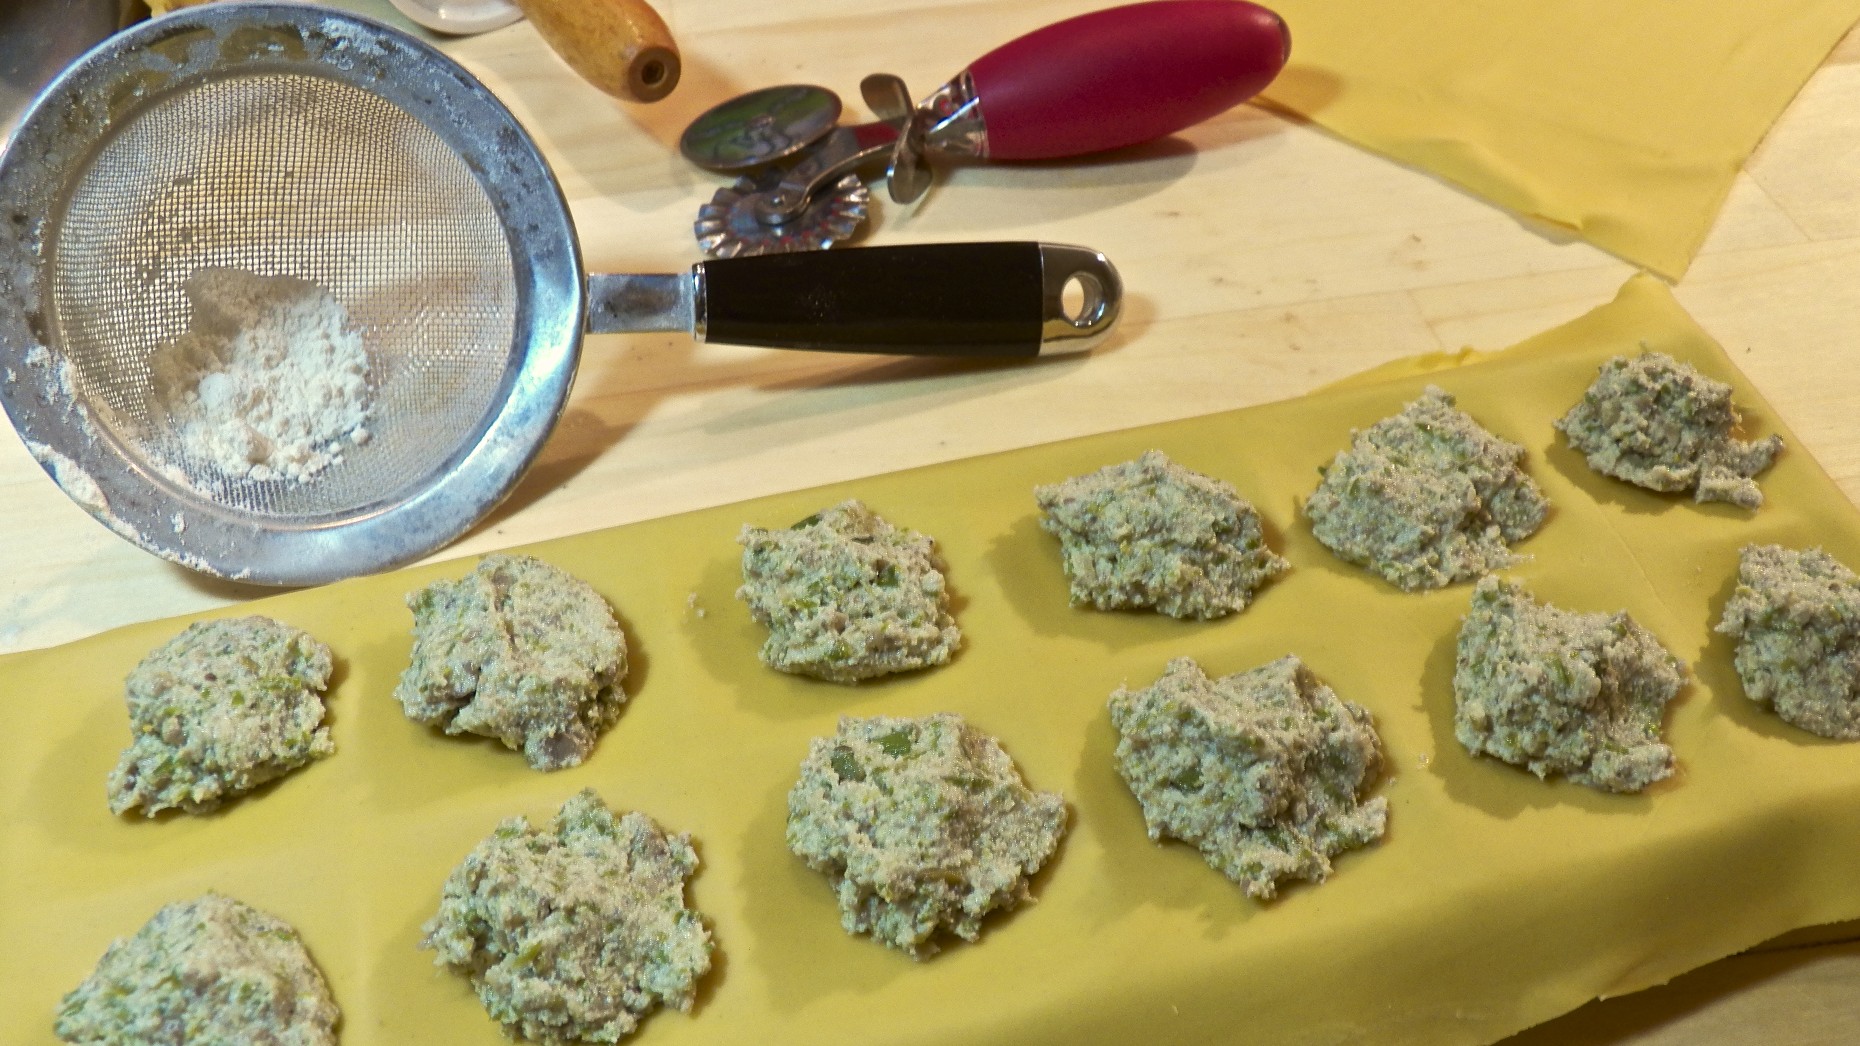
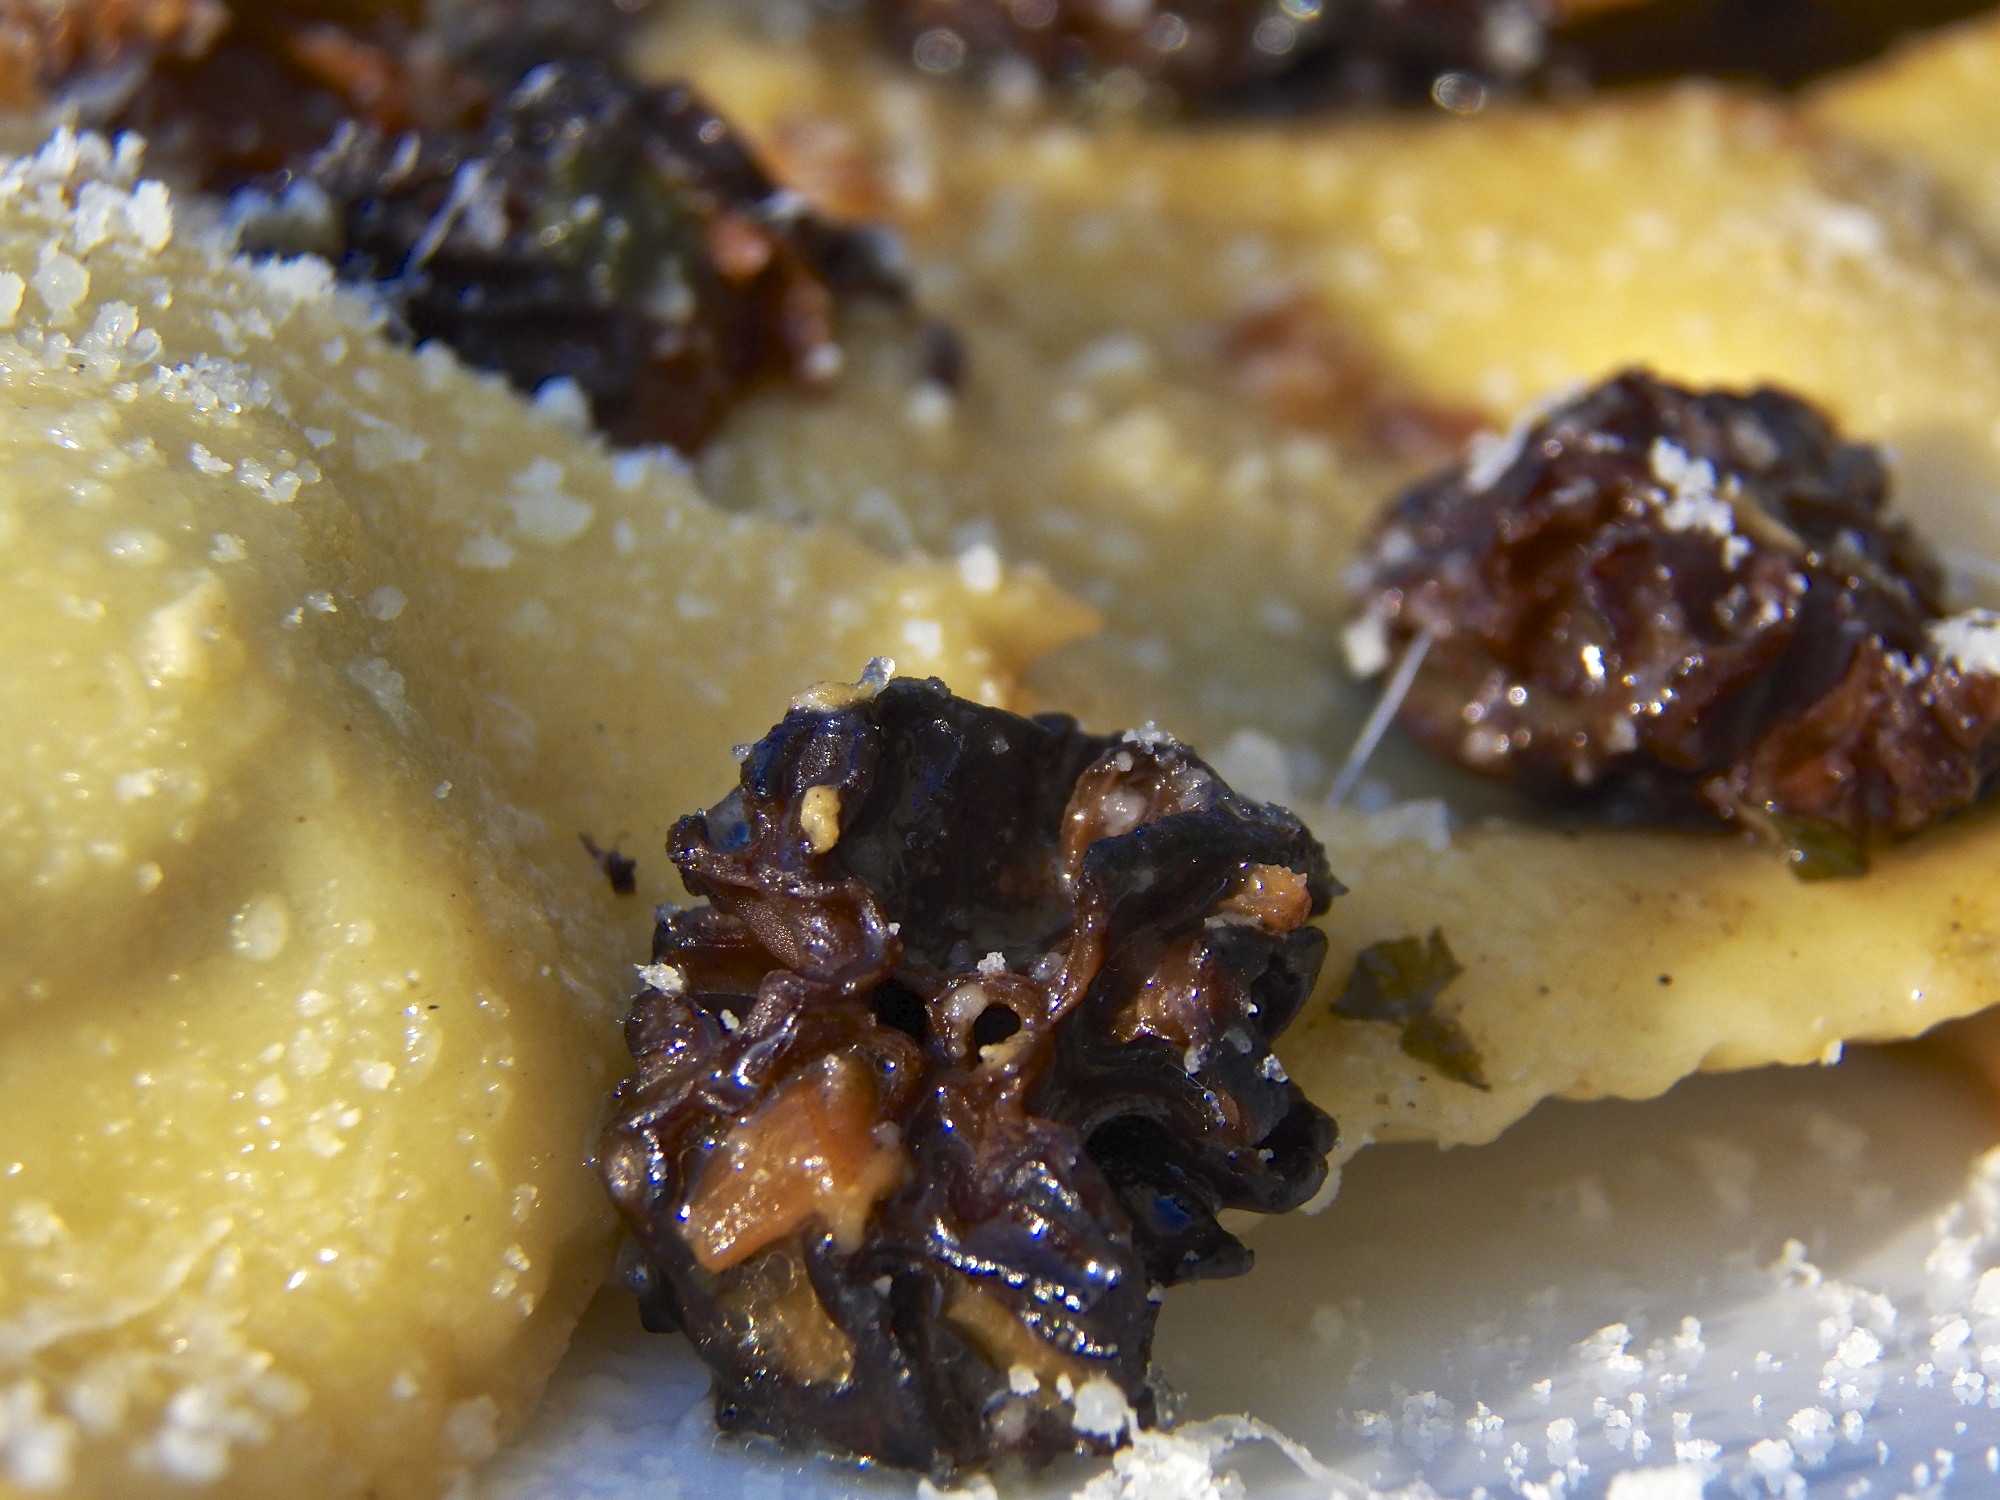
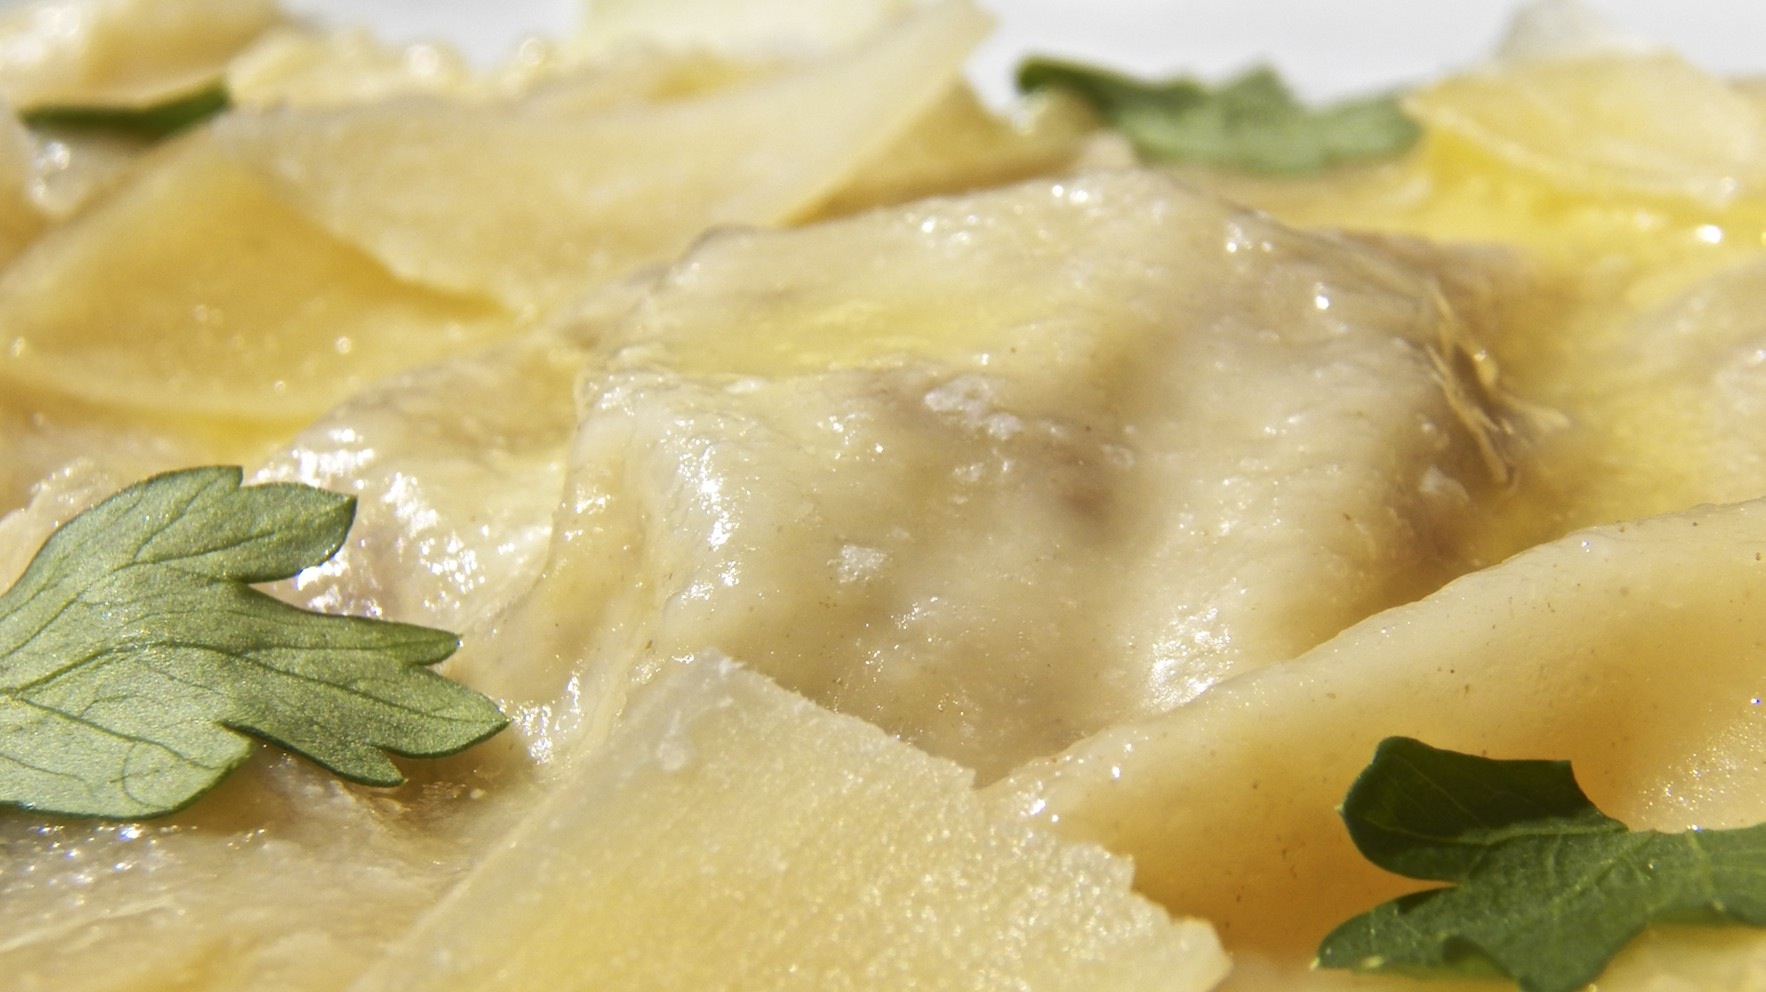
I used 3/4 lbs. of trenette pasta because that’s the amount of dough I had left over when I made last week’s ravioli. Use as much, or as little, pasta as you like. The same holds true for the rest of the ingredients.

As the Summer progresses  the ingredients will change to include broccoli, chard, cauliflower, and/or whatever else catches my eye as I walk around the market. You can and should do the same with your pasta primavera.

*     *     *

A word about the pasta …

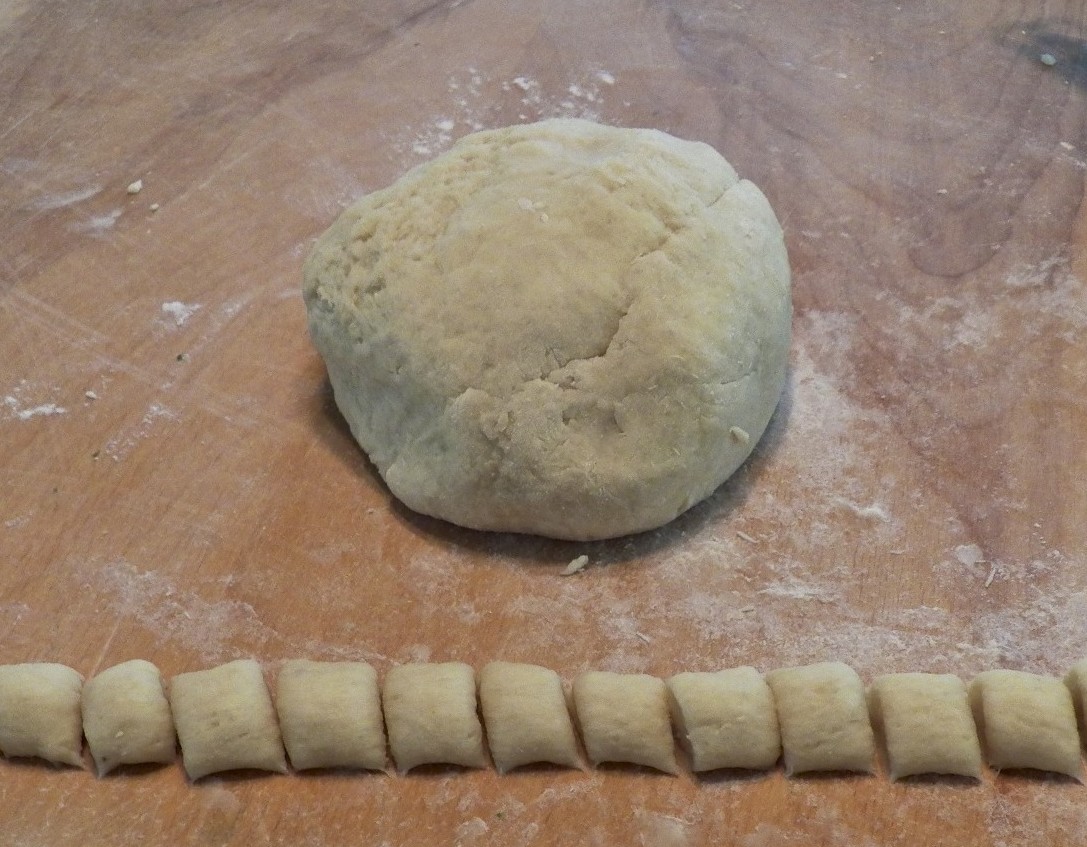
I have an attachment for my pasta machine that will cut trenette pasta. Used throughout Genoa and Liguria, trenette — not to be confused with trennette — are one of the flat, “ribbon” pastas, this one being about “a silly millimeter thinner” than linguine. Although trenette is traditionally dressed with Pesto Genovese, I like the pasta because it most closely resembles the pasta Mom & Zia cut by hand when I was a boy. I can almost hear Mom’s knife as she quickly cut the rolled sheet of pasta, sfoglia, all the while having a conversation with whomever was in the room or seated at the table. The speed of that blade was truly a marvel, at a rate easily 5 or 6 times my best. And the noodles were all uniformly cut, something I cannot do even when working at a snail’s pace. So I cheated. I bought myself a trenette pasta machine attachment — and one for Zia — and now we can enjoy a dish of pasta just like back in the day.

*     *     *

Cheaters do prosper sometimes …

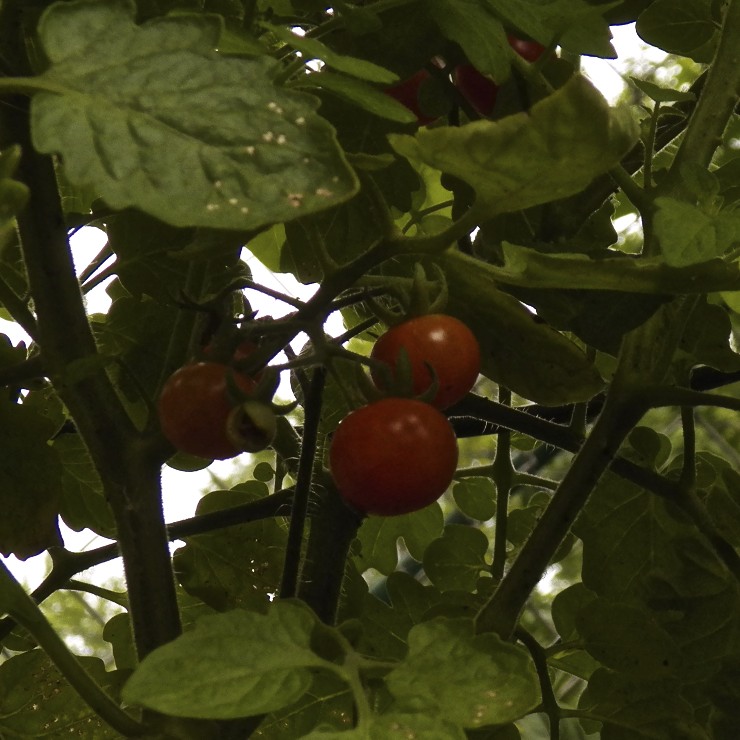
When this year’s seedlings didn’t fare so well, I bought heirloom tomato plants from the farmers market. Lo and behold! For the first time in years, I’ll be eating home-grown  tomatoes, even if only the tiniest of cherries, on the 4th of July.

*     *     *

It’s déjà vu all over again …

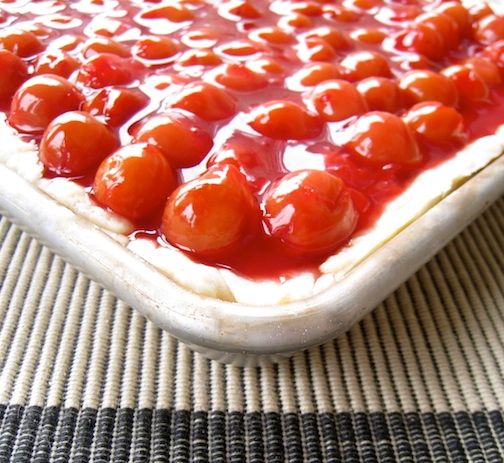
Lucky for us, all is not vegetable at the markets. We are now in cherry season and this year I’m twice blessed. Not only are Michigan’s tart cherries hitting the markets but I’ve a friend that surprised me with enough cherries to make a fantastic pie. Now, I can eat sweet Bing cherries by the fistful but these tart red beauties are meant for pies, muffins, and jam.  Pictured on the right is a bit of the pie I made with my friend’s gift. You can see the recipe I followed by clicking HERE.

*     *     *

Coming soon to a monitor near you …

Rack of Spring Lamb

*     *     *

Asparagus, Crimini Mushroom, and Ricotta Ravioli Filling

Yes, it’s another ravioli filling recipe, though not the one I had originally intended to post. Today’s filling recipe was to include ramps, a dish Zia and I developed during my last visit home. Well, ramp season has passed and I doubt that any of the wild onions are to be found anywhere. Asparagus, on the other hand, is still around, though it’s numbers have greatly decreased over the last 2 weekends. (The ramps post is written and will be published soon.) Seeing that asparagus season is also fleeting, I thought it best to post a recipe using the spears now, while you can still get some that are locally grown. In fact, all 3 recipes presented in today’s post will take advantage of the current harvest. The “Déjà vu” recipe will feature strawberries, while “Coming soon” is a pasta recipe that includes a number of fresh ingredients. 

Today’s post will only detail how to make asparagus ravioli filling. If you’re interested in seeing how to use ravioli molds/dies to create the stuffed pasta pillows, you can see step-by-step instructions by clicking HERE. For serving suggestions, see Notes below.

*     *     *

*     *     *

Asparagus, Crimini Mushroom, & Ricotta Ravioli Filling Recipe

Yield: See Notes below. 

Ingredients

  • 1 tbsp olive oil
  • 1 tbsp butter
  • 8 oz (228 g) fresh asparagus, chopped
  • 8 oz (228 g) fresh crimini mushrooms, chopped
  • 3 oz (86 g) Spring onions, chopped
  • 2 garlic cloves, minced or grated
  • 1/2 tsp kosher salt
  • 1/8 tsp white pepper
  • 3/4 cup (12 oz, 340 g) ricotta, well-drained
  • 1/2 cup Pecorino Roman cheese, grated

Directions

  1. Clean and roughly chop the asparagus (see Notes), mushrooms, onion, & garlic
  2. Heat olive oil and butter over med-high heat. Add asparagus, mushroom, and onion, lower heat to medium, and sauté until mixture just begins to change color — about 6 or 7 minutes.
  3. Add garlic, salt, and pepper, and continue to sauté until liquids are gone. Do not allow to burn.
  4. Remove from heat and allow to cool fully before proceeding.
  5. If using a food processor:
    1. Place the asparagus mixture into the processor, add the ricotta and Romano cheeses, and process until uniformly smooth.
  6. If not using a food processor:
    1. Chop the asparagus mixture as finely as possible.
    2. Add the cheeses and stir to thoroughly combine.
  7. Filling may now be used with your favorite stuffed pasta recipe.

*     *     *

*     *     *

Notes

Using this recipe and my large, 2 inch (5 cm), ravioli die/mold , I made 90 ravioli. You might make more or less, depending upon the size of the die or stamp used.

Whether you use homemade or store-bought ricotta, place the cheese in a clean coffee filter, where it can drain for at least a few hours to remove the excess liquid.  The drier the better. 

You can serve your asparagus ravioli in a number of ways. I’ve found that a brown butter and sage sauce works very well, as do cream and “light” tomato sauces. For those who really enjoy asparagus, simply sauté a few chopped asparagus spears in butter and use that to dress freshly cooked ravioli. A bit of lemon zest on top works very well. In all the examples given, grated cheese should be sprinkled atop the dressed ravioli.

*     *     *

Testing, testing, 1, 2, 3

I’ve made this and a couple other ravioli fillings over the course of the past couple of  months and it gave me an opportunity to experiment with a few things.

  1. All Purpose V Double 0 Flour. Last Fall I, finally, located a source for “00” flour, doppio 0. This is the finely ground durum flour used to make pasta and pizza dough in Italy. Although it’s roughly twice as expensive as AP flour, both Zia and I agree that using it creates pasta dough with a great feel. When cooked al dente, the pasta has a good bite, just as it should, and I’ll continue to buy and use it. Decisions have consequences, however, and I now have yet another container of flour in my kitchen. For those keeping track, that makes  6 — AP, bread, wheat, spelt, semolina, and now 00.  
  2. Attachment V Ravioli Die/Mold. I decided to pull out the KitchenAid ravioli maker and give it another shot. In the past I’ve found it less than perfect and, frankly, more trouble than it’s worth. All along, I thought that the fault may lie with the fillings I used, that the attachment would work best if a softer filling was in the hopper. Today’s asparagus ravioli filling was used to test my theory. I must admit that the ravioli maker worked better than it ever has and waste — which was a big problem with earlier trials — was minimal. Even if a bit cumbersome to operate, probably due to my inexperience, it did produce row after row of perfect ravioli. All’s not well, though. In order to get perfect ravioli, the dough sheets must be thick, more than double the thickness that we normally would use. That means you need to make at least twice the amount of pasta dough than would normally be required when using ravioli molds/dies. It, also, means the ratio of filling to pasta is different from the ravioli to which I’m accustomed. (Yes, my generation of Bartolini are a spoiled lot.)  In short, the ravioli attachment is back on the shelf, waiting for me to give it another go, probably in 2015 sometime.
  3. Chicken V Duck Eggs. Recently, while waiting to buy eggs at the farmers market, the customer before me bought a half-dozen duck eggs. Prior to this, I thought they were only sold by the dozen. So, I 86’ed the chicken and went duck. A couple of days later, I used them to make the pasta dough used in the ravioli pictured throughout this post. For those unfamiliar, Mom’s pasta dough recipe calls for 4 eggs and enough water to make a cup of liquid. Because they’re larger, only 3 duck eggs plus less than a tbsp of water will yield the required cup of liquid. Once made, the dough was much more yellow than normal but, to be fair, that may be due to the eggs’ freshness more than anything else. As for taste, I really could not detect a difference but, then again, without side-by-side taste tests, I should really say that I don’t “remember” a difference. Given that duck eggs are twice the price of chicken eggs, I’m not sure that I’ll be a regular customer for them anytime soon.

*     *     *

It’s déjà vu all over again …

As was mentioned, we’re just about at the end of asparagus season here in the Chicago area. The tables upon tables of the tasty spears have been replaced — by strawberries! Pictured on the right is just one vendor’s berries at the Evanston farmers market. Believe me, there are many more and I defy anyone, save those with allergies, to walk around that market without buying at least one quart. So, what will you do with these sweet & juicy red gems? Why, make strawberry jam, of course! You can see Mom’s recipe by clicking HERE.

*     *     *

Coming soon to a monitor near you …

Farmers Market Pasta

*     *     *

Homemade Gnocchi in Gorgonzola Sauce

Gnocchi in Salsa di Gorgonzola

“The future ain’t what it used to be” and today’s post is the proof. You may have noticed last week’s “Coming Soon …” photograph depicted a recipe called “Jack BRICKhouse CHICKEN” and, as a result, you may have deduced that was to be today’s recipe. Well, guess again. That recipe is scheduled for next week — has been all along — and cannot be rescheduled for reasons that will become apparent in the post. I must admit that it came as a surprise for me to learn that I cannot read a calendar and my newly found malady did leave me in a bit of a lurch for this week’s post. All’s not lost, though, since I’ve a bagful of recipes from my recent visit with Zia from which to choose. Because so many of you were interested in my family’s risotto, I set to work writing that recipe and blog entry. All was going swimmingly until Saturday morning when I noticed that Stefan, of Stefan’s Gourmet Blog, posted his recipe for Risotto with Peas & Mint. The very next day, Nick, of Frugal Feeding, posted his recipe for Tomato and Basil Risotto. That’s when I began to rethink my post. The third and final blow was struck when Paul, of That Other Cooking Blog, posted his recipe for Risotto al Nero di Seppie (squid ink risotto). Deciding that my post could be postponed a bit, I went back to the bag of recipes from my visit home and pulled out today’s gnocchi recipe. Even so, if all of this talk of risotto has you yearning for the creamy rice dish, be sure to check out those 3 recipes and, while you’re at it, spend a little time looking around each blog. You will not be disappointed.

One of the first things we kids were allowed to help make in the kitchen were gnocchi. Mom and Zia would make the dough and then hand us a piece to roll into a log, though we called them snakes. With a butter knife we were taught how to cut the snake and, depending upon the gnocchi’s use, we might even have been allowed to try to roll them across a fork’s tines to make the grooves. By “use” I mean whether dinner guests or family were to dine on the fruit of our labor. Mom always put her best gnocchi forward for company and she took charge of the groove-making, reshaping any malformed gnocchi along the way. Unlike today’s recipe, however, Mom’s gnocchi were always served with her meat sauce.

Although I’ve enjoyed gnocchi with gorgonzola at restaurants, I never thought about replicating the recipe at home until several years ago. My Entertainer Friend mentioned how much he enjoyed gnocchi with bleu cheese and I thought I’d come up with a recipe and treat him. Over the years, I’ve tried a number of variations, using several spices and herbs, and eventually switched from bleu cheese to gorgonzola, but I always came back to the simple recipe I’ll share today. It’s yet another example of “Less is More.” As for my Entertainer Friend, now that I’ve reminded him, I’d better start planning that gnocchi dinner.

*     *     *

*     *     *

Gnocchi in Gorgonzola Sauce Recipe

yield: roughly 1.5 lbs (680 g)

Ingredients

  • 2 large russet potatoes, once cooked, peeled, & riced = 18 oz (510 g) (See Notes.)
  • 2 cups (10.2 oz; 290 g) all-purpose flour
  • 1 large egg, slightly beaten
  • corn meal or additional flour for dusting surfaces
  • 5 oz (142 g) gorgonzola, crumbled, more or less to taste (See Notes)
  • 1/2 cup (118 ml) heavy cream, more or less to taste
  • salt and pepper, to taste
  • grated or flaked Pecorino Romano cheese for garnish — Parmigiano Reggiano may be substituted

Directions

To make the gnocchi

  1. Pre-heat oven to 400˚ F (204˚ C). Use a fork to pierce the potatoes numerous times.
  2. Place potatoes on center rack and bake until cooked, from 50 to 60 minutes, depending upon potato size.
  3. Meanwhile gather the other ingredients. Allow the egg to come to room temperature.
  4. Once cooked, remove potatoes and set aside until they can be safely handled.
  5. Slice each potato in half, lengthwise, and use a spoon to scoop out all of potato, reserving the skin for some other purpose.
  6. Run cooked potatoes through a ricer or food mill. (See Notes.)
  7. Use the riced potatoes to create a mound on a floured work surface. Make a well in the center of the mound, as you would when making pasta dough.
  8. Sprinkle the top of the well’s walls with 3/4 cup of flour. Place the egg in the center well after the potato has cooled enough so that the egg won’t cook.
  9. Using a fork, slowly combine the potato & flour with the egg. Once the dough renders the fork useless, continue mixing the dough with your hands.
  10. The dough should come together within 4 to 5 minutes. It will be ready when it is firm and a little moist-to-the-touch without being tacky. Add more flour as needed but remember: the less flour used, the better.
  11. Form a ball with the dough and divide it into fourths.
  12. Take one-quarter and divide it in half. Roll one of the sections into a log with a width of your preference. We normally roll them about an inch (2.5 cm) thick — the width of an index finger.
  13. Use a sharp knife or board scraper to cut the log into segments, each 1/2 (1.3 cm) to an inch (2.5 cm) long.
  14. If grooves are desiredFlour the back of a dinner fork, place a segment at the top of the tines, use your finger to roll it over the tines, creating gnocchi with grooves on one side and a dimple where your finger rolled it.
  15. If grooves aren’t wanted: Use a finger to push and roll each segment across the work surface, creating smooth surfaced gnocchi with dimples where you’d placed your fingers.
  16. Place the gnocchi on a lined baking sheet that’s been dusted with flour or corn meal.
  17. If not going to be cooked within a few hours, place the gnocchi-covered baking sheet in a freezer and once the gnocchi are frozen solid, place them in containers/bags suitable for freezer storage.

*     *     *

*     *     *

To cook the gnocchi

  1. Bring a large pot of salted water to the boil over high heat.
  2. Once the water boils, add the gnocchi and stir gently.
  3. When the water resumes boiling, reduce the heat to a simmer and notice when the gnocchi begin to float. This should only take a couple of minutes when fresh and a few more when the gnocchi are frozen. Gnocchi will be ready about 1 minute after the last start floating. If in doubt, taste one.

*     *     *

To prepare the gorgonzola sauce

  1. While waiting for the water to boil, heat the cream in a small sauce pan over medium heat.
  2. Once the cream is hot, add the gorgonzola and stir until melted. Taste and adjust, adding more cream or gorgonzola to suit your own taste. If you prefer, you can add a bit of the water used to cook the gnocchi to thin the sauce without adding more cream.
  3. Don’t forget to taste and season with salt & pepper, if required.

*     *     *

To assemble and serve

  1. Use a hand strainer — “Spider” strainer — to remove the gnocchi from the boiling water and place in the serving bowl. Add the gorgonzola sauce and mix gently until all are coated.
  2. Serve immediately, garnished with grated/flaked Pecorino Romano cheese.

*     *     *

Variations

Like most Italian dishes, there are many recipes around for making gnocchi. No matter which recipe you choose to follow, 2 rules will apply. 1) The fluffier the smashed/riced potato the better, and, 2) the less flour the better. Keep those 2 rules in mind and you’ll be well-rewarded with a most palatable platter of puffy potato pillows rather than the much less than spectacular spud scuds.

One popular variation for preparing gnocchi is to bake them before serving. Follow the directions above for making and cooking the gnocchi, as well as making the gorgonzola sauce. Use all the sauce to dress the gnocchi and place in a baking dish. Top with grated cheese or bread crumbs that have been moistened by olive oil or butter. Bake in a 375˚ F (190˚ C) pre-heated oven for 20 to 25 minutes or until hot & bubbly with a golden brown topping.

Even after being reduced, some may want a thicker sauce. (Bear in mind it will thicken once taken off the heat and begins to cool.) If you want a very thick sauce, you can start by making a roux. Melt 2 tbsp of butter in a small sauce pan. Add an equal amount of AP flour and whisk until fully blended. Allow to cook for 2 to 3 minutes. Do not let the roux darken or it will color your cheese sauce. Add the half the cream and whisk till incorporated. Add the remaining cream and keep whisking as it heats and begins to thicken. Once thickened, about 5 minutes, add the gorgonzola and keep whisking until melted. If too thick, you can adjust by adding more cream or some of the water used to cook the gnocchi.

*     *     *

If they’re all identical, no one will believe you made them.

*     *     *

Notes

Much like making pasta, making gnocchi is not an exact science. The moisture in the potatoes, the size of the egg, the humidity, and even the brand of flour can all affect the amount of flour required. As was mentioned, use as little flour as possible to create a firm, slightly moist-to-the-touch dough that isn’t at all tacky.

I used 2 large russet potatoes that weighed 26.8 oz (760 g). Once baked, peeled and riced, they weighed a total of 18 oz (510 g). For accuracy I weighed the flour, starting with 2 cups or 10.2 oz (290 g). When I was finished, the remaining flour weighed 4 oz (114 g), meaning I used a little over 1 cup of flour for a little over a pound of riced potatoes. Lastly, to determine the yield, I weighed the frozen gnocchi before bagging. Your yield may vary due to the above-mentioned factors.

Not everyone has a potato ricer or food mill and I seriously doubt that my Nonnas had either one. They used a large fork to smash the potatoes and there’s no reason you can’t do the same. You can, also, use a potato masher or a box grater, if need be. Just be sure to use a fork to fluff the smashed potatoes as much as possible before proceeding.

It had been some time since I last made this dish when I prepared it for Zia. As a result, I misjudged and used a full cup (236 ml) of heavy cream with 5 oz (142 g) gorgonzola. That resulted in a very runny sauce. Thankfully, gnocchi was to be our primo piatto so I was able to reduce the sauce to the consistency I wanted without affecting the rest of the dinner. Today’s recipe uses half the amount of cream I used for that dinner.

It’s not a bad idea to have extra gorgonzola and cream on-hand the first time you make this sauce, just in case your idea of the perfect gorgonzola sauce differs from mine. You can add more cheese or cream, as required.

*     *     *

It’s déjà vu all over again … 

Blueberry

I don’t care what the weatherman says. The calendar says it’s June and that means it’s ice cream season. Time to dust off the ice cream machines and get those canisters into the freezer. Now I’ve shared several ice cream recipes but this one, blueberry swirl cheesecake, is Number One among family, friends, friends of family, and families of friends — but don’t take our word for it. Try it for yourself. You can find the recipe by clicking HERE.

*     *     *

Coming soon to a monitor near you … 

Jack BRICKhouse CHICKEN

*     *     *

What I did on my Spring Vacation. (The short answer: I ate.)

Formal introductions are forthcoming

*     *     *

Home again! 

After an all-too-brief visit, Lucy, Max, and I returned home to find things not quite the way we left them. (More about that later.) My time spent with Zia was wonderful, though the weather, much like that area’s like the internet service, wasn’t at all cooperative. One had me wishing I’d brought my Winter coat and the other had me seriously considering driving the 30 miles to get access to free WiFi at the nearest McDonald’s. As a result, there were no walks on the beach with Max and I only showed Zia a couple of your blog posts. I couldn’t get them to load on my iPad and this was the first time I brought my iPhone to Michigan. My experience with WP on the device is really quite limited. Even so, I wouldn’t necessarily consider an iPhone’s displays “Zia friendly” and I did much of my reading alone. And before anyone thinks I’m picking on my Cara Zia, I wouldn’t call the displays “John friendly” either. You should have seen me trying to “Pin” or “Like” one of your posts. (I don’t know how you do it, Eva!)

You may be wondering, with it cold and damp when it wasn’t flat-out raining, what does one do in rural Michigan? Well, I can’t speak for others but we cooked … and we cooked … and we cooked again. True, I did take my daily walk looking for morel mushrooms and ramps but returned home empty-handed each time. (Not to worry, I came prepared.) So, with several great meals prepared and, as the title suggests, devoured, I thought I’d share a couple of the recipes today, with a promise to post the rest in the weeks to come.

*     *     *

I can count on two things whenever I arrive at Zia’s home. Once I’ve unpacked the car, there will be a Manhattan waiting for me. (Zia is the original “Hostess with the Mostest”.) With my thirst quaffed, Zia will then get to work on the traditional Bartolini risotto.

*     *     *

*     *     *

Made with fresh mushrooms and chicken gizzards, this dish has long been a family favorite. In fact, there were relatives that traveled hundreds of miles and, upon each and every arrival, asked for a risotto dinner. Of course, not everyone likes chicken gizzards, so, just tell them that the offending bits are nothing but a few dried mushrooms. More about that, and the risotto recipe, will be shared in a future post.

*     *     *

Although most lunches were simple sandwiches made with the Italian lunch meats and bread I brought with me, there were 2 notable exceptions. On Sunday, like always, we had brunch after Mass with a few of Zia’s neighbors and fellow choir members. (Yes, Zia is a member of her church’s choir.) The 2nd time was when I prepared Asparagus in the style of Milan, Asparagi alla Milanese.

*     *     *

*     *     *

There will be no future recipe for this dish because it is so very simple to prepare. Season fresh asparagus spears with salt, pepper, and a bit of olive oil. Place the spears on a heated barbecue, hot grill pan, or baking sheet that’s placed in a hot (425˚ F, 218˚ C) oven. Meanwhile, fry an egg or two per serving and season with salt & pepper. If, like us, you like your yolks runny, the eggs should be prepared sunny-side up or over easy. And that’s it. When both the asparagus and eggs are cooked to your liking, arrange a serving of asparagus spears on a dinner plate, place the eggs on top, and, if you like, garnish with a bit of grated Pecorino Romano or Parmigiano Reggiano cheese. It couldn’t be easier but it sure is a great tasting light lunch or fantastic primo piatto.

*     *     *

Now, we just didn’t spend all of our time eating lunch. We did work for our suppers, too. In fact, Zia’s pasta board got quite a bit of use over the course of my visit. One day, we made ravioli and linguine.

*     *     *

*     *     *

Using a filling of ramps, fresh spinach, and goat’s cheese, Zia and I spent the afternoon making pasta pillows. That night, we feasted on these very same ravioli, prepared with morel mushrooms in a white wine sauce.

*     *     *

*     *     *

Those recipes will be coming your way.

*     *     *

Another day brought out the pasta board again and we spent the afternoon making gnocchi.

*     *     *

*     *     *

That night’s dinner was probably the best of my entire visit. Our primo piatto was gnocchi dressed in a rich gorgonzola cream sauce.

*     *     *

*     *     *

That night’s secondo was grilled rack of Spring lamb, while contorni of grilled asparagus and a tossed salad rounded out the meal.

*     *     *

*     *     *

Later that night, I surprised Zia with cannoli that I’d brought from my Italian market. Recipes for the gnocchi, gorgonzola cream sauce, and lamb will soon be posted, too.

*     *     *

Lastly, I could hardly go home for a visit without bringing something from the fish monger. This visit I brought whiting, merluzzo, with me.

*     *     *

*     *     *

Rather than risk ruining them on a grill with which I’ve had little experience, these little fishies were prepared with the Bartolini breading mixture and baked, with excess breading mixture placed on the baking sheet, roasted, and used to garnish a platter of hand-cut linguine aglio e olio with baby artichokes, spinach, and ramps. The merluzzo recipe was already shared HERE

*     *     *

*     *     *

To make the pasta dish, place 1/3 cup olive oil in a hot pan over med-high heat. Add red pepper flakes, to taste, along with chopped ramps. Sauté till ramps are soft, add 2 to 4 bulbs of diced Spring or new garlic, and continue cooking for another minute. Add the trimmed and quartered fresh artichokes, a half cup of white wine, bring to a boil, and reduce to a soft simmer. Allow the artichokes to braise until soft and the sauce has reduced, about 15 minutes. Meanwhile, cook pasta until two minutes shy of package directions or, if using fresh, until the pasta is a bit firmer to the bite than your prefer. Reserve a cup of the pasta water, drain the pasta, and add to the frying pan along with  a handful or two of fresh spinach. Toss to coat the pasta and continue to sauté the pan’s contents until the pasta is cooked to your liking, adding pasta water as needed to maintain the sauce. To serve, garnish with breading mixture that remains on the baking sheet that was used to roast the merluzzo. Of course, if merluzzo isn’t on that night’s menu, your pasta may be garnished with grated cheese or bread crumbs toasted in a bit of olive oil.

*     *     *

So, there you have it. We cooked, we chatted, we worked out the kinks in a recipe or two, and we spent a very nice time together. And, best of all, there are recipes to share for anyone that’s interested. Would that I could end this post here and now but, alas, there’s a bit more to tell.

Late on the night of my arrival in Michigan, I received a telephone call telling me of some storm damage at my home. Thankfully no one was hurt and there wasn’t any structural damage. Since a picture is worth a thousand words and our friend Celi has challenged us all to post a view from our back porches, here’s mine.

*     *     *

"This is as close to indoor plumbing as I'm ever going to get!"

With the exception of a potted palm that died under the most suspicious of circumstances in the living room, this is about as close to indoor plumbing as Max will ever get.

*     *     *

That green thing is not some prop from a 50’s sci-fi thriller. It’s a trumpet vine that the wind knocked down, blocking the path to the garage and alley, not to mention landing atop a few roses. (Hopefully the dog run’s fence took the brunt of the force from the falling vine.) Here’s the view from the porch landing above.

*     *     *

Believe it or not, buried within that tangled mess are the remnants of a wooden trellis.

*     *     *

As you can see, mine is a typical city yard here in Chicago, made even smaller because of the 2 car garage and dog run … um … and the now-fallen vine. As of this writing, I’m waiting to hear from a few landscapers for bids to remove the vine and haul it away. On the plus side, once it’s removed, there’ll be space for a clematis vine and another rose.

The Kitchens are open again, with a new recipe, Baked Haddock, coming this Wednesday.

*     *     *

Porcini Mushroom, Leek, and Goat Cheese Ravioli Filling

Last week I demonstrated how easy it is to make ravioli, tortelloni, and manicotti using wonton wrappers. Now that you know what to do with the wrappers, today I’ll show you how to make a filling.

Given the stated purpose of these two posts, it wouldn’t make much sense to use a filling that was overly complicated to prepare or that required a dozen ingredients. Using only dried porcini mushrooms, leeks, garlic, and goat cheese, this filling could not be easier to make and yet packs a great deal of flavor into each pasta. With the longest step in the process being the wait for the mushroom-leek mixture to cool after being sautéed, you can easily make enough wonton wrapper ravioli in an afternoon for that evening’s dinner. Yes, you can do this.

Thursday I’ll be leaving for Michigan, where the Dial-Up Modem is King. As a result, the Kitchens must close temporarily and there can be no post next Wednesday. My next entry is scheduled for Wednesday, June 5th.

*     *     *

Porcini Mushroom, Leek, & Goat Cheese Ravioli Filling Recipe

Ingredients

  • 1 tbsp olive oil
  • 1 tbsp butter
  • .7 oz (20 g) dried porcini mushrooms
  • 3 oz (85 g) leeks, chopped fine
  • 1 garlic clove, minced or grated
  • 10.5 oz (298 g) goat cheese
  • 1/2 tsp kosher salt
  • 1/8 tsp white pepper

*     *     *

*     *     *

Directions

  1. Bring 2 cups of water to boil, remove from heat, and add mushrooms. Allow mushrooms to soak for at least 20 minutes. Remove mushrooms to paper towels, being careful not to disturb sediments in liquid. (Reserve mushroom liquid. See Notes.) Use another paper towel to blot the mushrooms dry before chopping them to a small dice. Put aside.
  2. Heat olive oil and butter over med-high heat. Add leeks and mushrooms, lower heat to medium, and sauté until mixture just begins to change color — about 6 or 7 minutes.
  3. Add garlic, salt, and pepper, and continue to sauté until liquids are gone. Do not allow to burn.
  4. Remove from heat and allow to cool fully before proceeding.
  5. Once cooled, combine mushroom-leek mixture with goat cheese and stir to thoroughly combine.
  6. Filling may now be used to fill you favorite pasta.

*     *     *

Variations

This recipe is not set in stone. Don’t have any leeks? Use half the amount listed in sweet onions. Don’t like goat cheese? Use ricotta. No porcini? Use 3 to 4 oz (85 to 113 g) fresh crimini mushrooms. Don’t like this filling at all? Don’t worry. You may prefer to use either of these 2 fillings: the traditional Bartolini ravioli filling or the Bartolini sausage ravioli filling. Still not quite what you’re looking for? In a few weeks I’ll be posting an asparagus-based filling recipe.

*     *     *

Notes

There’s really no way of determining how much pasta you’ll be able to fill with today’s recipe. That will depend upon the type and size of the pasta you wish to make. Because of this, I wouldn’t invite 10 guests to dinner the first time you make a homemade stuffed pasta, whether or not you use wonton wrappers. Better to wait until your 2nd attempt or at least wait to make your guest list until after the pasta is made.

When making this filling, I allowed the goat cheese to warm a bit so that it would be easier to combine with the other ingredients. Depending upon the pasta to be filled, you may find it easier to chill it again before using it to stuff your pasta.

Do not discard the liquid used to rehydrate the porcini mushrooms. Once the sediments have settled, pour off the liquid, leaving those sediments behind. The liquid can then be stored/frozen for later use in soups, sauces, risotto, or pasta dishes, to name a few.

Although you can use any sauce yo wish to dress pasta using this filling, I chose to, again, keep it simple. Once it was cooked and drained, I gently tossed the raviolo in some melted butter and garnished it with flaked Parmesan cheese, as seen in this post’s opening photo.

*     *     *

It’s déjà vu all over again …

BBQ Shrimp

Gamberetti alla Griglia

This weekend is a 3-day weekend and start of the grilling season. I thought it only fitting to feature Grandpa’s Barbecued Shrimp as this week’s blast from the past. Easy to prepare, whether you serve them as a snack, appetizer, or main course, you and your guests will love them. You can learn how Grandpa did it by clicking HERE.

*     *     *

Coming soon to a monitor near you …

Baked Haddock

*     *     *

Where East Meets West: Wonton Wrapper Pastas

Today’s entry is the fulfillment of a promise that I made to Norma in the Comments section of the Bartolini Cannelloni recipe post of last March. (Norma, by the way, is a cookbook author whose wonderful blog, Garden to Wok, is filled with tasty recipes and gardening tips.) She asked if egg roll skins could be used in place of pasta dough to make cannelloni. Well, Norma, it took 2 months and I used wonton wrappers but here’s the promised post.

Back before I started buying ravioli molds but after I learned I was unable to use Mom’s tiny cappelletti mold, I saw someone on a cooking show use wonton wrappers to make ravioli. That’s all I needed to see. Before long I was making ravioli and tortelloni using the wrappers without any problems. In fact, I’d probably still be using wrappers if I hadn’t seen another TV cook use a large ravioli mold one day. Soon I was making ravioli and cappelletti of all sizes and I never bought another wonton wrapper.

When I’ve shared our ravioli recipes, some have mentioned that the process seemed difficult and time-consuming. Using wonton wrappers eliminates one of the more difficult elements, that of making and rolling out the pasta dough. With that out-of-the-way, the rest of the process is a snap and this post will show you just how easy it is to use wonton wrappers to make stuffed pasta. Along the way, we’ll make round ravioli, manicotti, square ravioli, and tortelloni, all of which are pictured in the unfortunate photo above. It’s a long post but the method for preparing each pasta will “stand on its own” so that you need only reference the section(s) that interest you.

*     *     *

How to make Jumbo Ravioli (Ravioloni)

  1. Place one wonton wrapper on a floured work surface.
  2. Place about a tbsp of filling in the center of the wrapper.
  3. Use your fingers or a brush to moisten the 4 edges on the wrapper.
  4. Place another wrapper on top.
  5. Use your fingers to remove as much air as possible while pressing to seal the edges.
  6. Use a pastry wheel or sharp knife to trim uneven edges.
  7. Use a fork’s tines to press and further seal the 2 wrappers.
  8. Reserve on a lined baking sheet for later cooking or freezing.

*     *     *

This slideshow requires JavaScript.

These ravioli are about 3.25 inches (8.9 cm) square, after trimming. Remember that when cooked, they will expand a bit more.

*     *     *

How to make Ravioli

  1. Place one wonton wrapper on a floured work surface.
  2. Use a pastry wheel or sharp knife to cut the wrapper in half.
  3. Place about a tsp of filling in the bottom half of each part.
  4. Use your fingers or a brush to moisten the top half of each part.
  5. Fold the top half and cover the bottom half of each.
  6. Use your fingers to remove as much air as possible while pressing to seal the edges.
  7. Use a fork’s tines to press and further seal the 2 ravioli.
  8. Reserve on a lined baking sheet for later cooking or freezing.

*     *     *

This slideshow requires JavaScript.

These ravioli are about 1.6 inches (4.0 cm) square.

*     *     *

How to make Large Round Ravioli

  1. Place one wonton wrapper on a floured work surface.
  2. Place about 2 tsp of filling in the center of the wrapper.
  3. Use your fingers or a brush to moisten the wrapper area around the filling.
  4. Place another wrapper on top.
  5. Use your fingers to remove as much air as possible while pressing to seal the edges.
  6. Carefully place a large biscuit cutter over the covered filling. Make sure that the cutter surrounds the filling without touching it.
  7. Press down on the biscuit cutter hard enough to sever the wrappers.
  8. Remove excess wrapper from around the cutter.
  9. Remove the raviolo from the cutter and reserve on a lined baking sheet for later cooking or freezing.

*     *     *

This slideshow requires JavaScript.

These ravioli have a diameter of 2.5 inches (6.4 cm).

To make Small Round Ravioli use a smaller biscuit cutter. Mine was 2 inches (5 cm) in diameter.

*     *     *

How to make Tortelloni

  1. Place one wonton wrapper on a floured work surface.
  2. Use your fingers or a brush to moisten 2 adjoining sides of the wrapper.
  3. Place a little more than a tsp in the corner opposite the moistened sides.
  4. Fold the moistened half of the wrapper to cover the other.
  5. Use your fingers to remove as much air as possible while pressing to seal the edges.
  6. Use a fork’s tines to press and further seal the 2 sides.
    1. At this point, you’ve created a triangular-shaped raviolo. You can stop here or continue and make a tortelloni. 
  7. Use you finger to make an indentation in the center of the triangle’s hypotenuse. (And you once thought you’d never use geometry in real life, didn’t you?) 
  8. Bring the two opposing corners together, moisten one, and press together to seal.
  9. Bend backwards the remaining corner.
  10. Reserve on a lined baking sheet for later cooking or freezing.

*     *     *

This slideshow requires JavaScript.

Although it’s not possible to give the exact size of your tortelloni, it’s safe to assume that these would be too large to be used in soup. Any stuffed pasta used in soup should be bite-sized so that the diner needn’t cut them before eating.

*     *     *

How to make Manicotti/Cannelloni

  1. Place one wonton wrapper on a floured work surface.
  2. Place about 1.5 tbsp of filling along the bottom edge of the wrapper.
  3. Use your fingers or a brush to moisten the opposite or top edge of the wrapper.
  4. Carefully and tightly roll the wrapper and filling towards the moistened edge.
  5. Place the finished manicotto/cannellono, sealed-side down, on a lined baking sheet for later baking or freezing.

*     *     *

This slideshow requires JavaScript.

In my family, cannelloni are meat-filled and manicotti are cheese-filled. These manicotti/cannelloni are about 3.5 inches (8.9 cm) wide, perfect for creating a double row in many baking dishes.

*     *     *

Variations

The size and shape of your pasta is limited only by the size of the wonton wrapper. If you haven’t a biscuit cutter in the size you want, try using a glass or jar to cut your pasta. I’ve never used egg roll wrappers but imagine that the processes would be the same, only much larger. Frankly, I’d never use an entire egg roll wrapper to make a single stuffed pasta. Instead, I’d cut it into halves or quarters before using.

*     *     *

*     *     *

Notes

No matter what size or shape of ravioli that you make, be sure that there is no filling along the edge where the dough is to be sealed. It will only interfere with the seal and the pasta will probably open up during cooking. Equally important is to make sure that the pasta edges being sealed are moistened with water. Mom, Zia, Lidia Bastianich, and Mario Batali all agree: egg or egg wash is never used to seal pasta for it can harden during the cooking process, making the edges of your pasta pillows unpalatable.

As you may have noticed in the photos, I used a cheese-based filling when making each stuffed pasta. The recipe for that filling, porcini mushroom, leek, and goat cheese can be found HERE. If you don’t wish to use that filling, you may prefer to use either of these 2 fillings: the traditional Bartolini ravioli filling or the Bartolini sausage ravioli filling.

At the very beginning of this post I stated that my objective was to show how simple it is to make wonton wrapper pasta. As you’ll see next week, the filling I used here is flavorful yet, also, uncomplicated and easy to prepare. The same holds true for dressing the cooked pasta. Although you can certainly use any sauce you wish to dress your ravioli or tortelloni, you needn’t complicate matters. The large ravioli pictured above were dressed with melted butter and garnished with Parmesan flakes and fresh parsley. You could just as easily use olive oil in place of the butter, and, grated cheese in place of the Parmesan flakes. By keeping it simple I hoped I’ve demonstrated just how easy it is to prepare a homemade stuffed pasta dinner using wonton wrappers. In short, yes, you can do this!

*     *     *

 It’s déjà vu all over again … 

Fazzoletti PastaSince today’s post used square wonton wrappers, I thought I’d stick with the theme and send you back to the post where we made fazzoletti, little handkerchiefs, pasta. Nothing more than pasta squares, these are among the easiest of pastas to make at home. You can see how they’re made simply by clicking HERE.

*     *     *

Coming soon to a monitor near you …

Porcini mushroom, leek, and goat cheese ravioli filling.

*     *     *

Split Pea Soup

With Mother’s Day but a few days away, I’ve read a number of posts featuring recipes for a variety of dishes, running the full gamut from savory to sweet. Not to take anything away from these beautiful posts, but I’ve chosen a different path. You see, so far I’ve shared a number of soup-related posts. Each was often described in terms of its use for members of my family. This soup nursed me back to health, that one nursed Sis; this was our New Year’s Day lunch, these took turns as lunch on cold Winter’s days; and, always, Dad was there to enjoy the salad Mom prepared using the boiled meats, similar to a bollito misto. Notice that Mom was never mentioned, other than as cook for these fantastic dishes. Sure, she enjoyed each soup but none were her favorite. No, Mom’s favorite, not so coincidentally, is today’s featured soup, split pea.

*     *     *

*     *     *

As much as she enjoyed split pea soup, Mom rarely prepared it. If my memory is correct — something that becomes less likely with each passing day — Mom and I were the only ones to like this soup. The rest, at best, endured it. Not only that but we rarely had baked ham for dinner. As I’ve mentioned in previous posts, our holiday meals were pretty much decided and ham just didn’t make the cut. Besides, I don’t think that Dad was at all interested in baked ham, for I cannot remember it ever being served on a Sunday or any other night that Dad was home for dinner. So, with ham being served so rarely, there were no ham leftovers and, consequently, no split pea soup. I know my vegan and vegetarian friends will take issue with what I’m about to write but here it is. You must have ham to make good split pea soup. Mom said so.

Though it’s true that we might not have had it often, Mom and I still did enjoy our split pea soup. She usually served it when it was just the two of us for lunch and it became something of a special treat. Later, after I moved away, whenever I told her that I was going to roast a ham — or had just done so — she would ask if I was going to make split pea soup, asking for each and every detail of the recipe. And more than once I brought a frozen ham bone home to Michigan with me, made a pot of split pea soup, and left it for her, safely stored in her freezer. So, this Sunday, while many will honor their Mom with a homemade breakfast in bed or a fantastic brunch at a favorite restaurant, I’ll remember mine with a bowl of split pea soup for lunch.

*     *     *

Like so many of the recipes I post, today’s is a work in progress. Over the years it has evolved into a two-step process. In the first, a stock is prepared that becomes the base for the second step. It’s not at all complicated but it does take a bit more time than the standard way of preparing split pea soup. I think you’ll find, though, that the additional flavor in the soup is well worth the extra time required.

*     *     *

Split Pea Soup Recipe

Ingredients

For the ham stock

  • 1 ham bone, some meat left on
  • 2 partially cooked, smoked ham hocks
  • 2 onions, quartered
  • 4 carrots, quartered
  • 4 celery stalks leaves attached, quartered
  • parsley stems
  • 2 bay leaves
  • 4 quarts (3.8 l) water

For the split pea soup

  • 2 lb (908 g) dried split peas
  • 3 to 4 quarts (2.85 to 3.8 l) ham stock
  • 3 or 4 carrots, diced or sliced, as preferred
  • 8 oz (227 g) roasted ham, cubed — more or less, to taste
  • ham removed from bone, trimmed & chopped
  • meat from ham hocks, trimmed & chopped
  • salt & pepper, to taste
  • croutons for serving (see Notes)

Directions

  1. For the stock
    1. Put all the stock’s ingredients into a large, heavy bottomed pot, bring to a boil, and then reduce to a low simmer.
    2. Continue simmer for 2 hours, skimming surface foam occasionally, as needed.
    3. After 2 hours, remove meat from pot and reserve. Pour stock through a fine mesh sieve to remove remaining vegetables and other bits, resulting in a clean stock. Reserve.
    4. When cool enough to handle, trim the meat from the bones and chop into bite-sized pieces. Cover and reserve.
  2. For the soup:
    1. Add all the soup’s ingredients to a slow cooker. If you did not create enough stock in the previous step, add water to augment.
    2. Set on “low” and cook for 8 hours or set on “high” and cook for 4 hours.
    3. Check for seasoning and serve garnished with croutons. (See Notes.)

*     *     *

*     *     *

Variations

This can just as easily be made on the stove top as it can in a slow cooker. Create the stock as indicated and place all the ingredients into a stock pot rather than a slow cooker. Bring to a boil over a med-high heat and then reduce to a soft simmer. Soup will be ready once the peas are soft and the carrots cooked, about 30 to 45 minutes.

If you want the smokey flavor but not the pork, try using a bit of smoked turkey instead of the ham hocks.

 *     *     *

Notes

From what I’ve seen, split peas are sold in 1 lb. (454 g) packages. When I made today’s soup, I made a “double batch” that resulted in a little over 4 quarts (3.8l) of soup.  I wanted some for my dinner, to be sure, but also some for the freezer. As you may have already gathered, a bowl of split pea soup makes a fantastic lunch. Still, you can easily halve the recipe, if you like.

You’ll note that I do not use salt and pepper until the very end. There’s no way to estimate the amount of salt in the ham or hocks. Wait until the end of the cooking process, give a taste, and then add whatever you feel is needed.

To make croutons:

  • Heat equal amounts of olive oil and butter in a frying pan over medium heat.
  • Add 1 smashed clove of garlic and sauté.
  • Meanwhile, cube a few slices of thickly sliced bread.
  • When oil is hot and garlic fragrant, place bread cubes in the pan and toast, turning frequently.
  • When browned to your satisfaction, remove to paper towels, and reserve.

*     *     *

It’s déjà vu all over again … 

Pasta al Salmone

Pasta al Salmone

When I travel to Italy, there are 2 dishes that I request every time and very often more than once: pasta with clams and pasta with salmon. The first is a dish I’ve made for some time using a family recipe, while a recipe for the latter eluded me for years. You can well imagine my excitement when I finally stumbled upon the secret to this fantastic dish. Click HERE to see this secret revealed.

*     *     *

Coming soon to a monitor near you … 

Wonton wrapper pastas

*     *     *

Burrata Returns and This Time It’s Packin’ Fusilli

Fusilli Corti Bucati alla Bolognese con Burrata

These days, I never know from where my next recipe idea will come.  Beyond my family’s treasure trove, there’s the Cooking Channel & Food Network; Saturday afternoons on PBS are Must See TV; mustn’t forget Julia, Lidia, Mary Ann, Biba, and Mario, whether new episodes or rebroadcasts I’ve seen a dozen times; and most recently The Chew — and that’s only television sources. What about cookbooks, magazines, newspapers, and foodie websites? And where would we be without WordPress, Blogger, Pinterest, Facebook, Twitter, and, StumbleUpon? I must admit that some days — like when I’m on my 5th attempt at remembering a password — I wonder if all of this is really necessary. Yes, there are those days but there are, also, days when I’m rewarded with a gift like today’s recipe.

Back in January I posted a pasta recipe featuring spinach, lemon, and burrata cheese. The recipe was well-received and a number of you have since tried and liked it. In the Comments Section, Celia, whose wonderful blog Fig Jam and Lime Cordial is what I hope mine will become when it grows up, mentioned that Down Under burrata is served atop pasta, broken open to allow the cream and stracciatelle (torn curds) to soak into the pasta, and served. Well, that’s all I needed to hear. I got right on it!

My first attempt was just as Celia has said. I dressed the pasta with my tomato sauce with meat, placed the burrata on top, and served myself a portion. That plate was just incredible and I couldn’t wait to have a 2nd helping. And that’s when it happened. You see, leaving the burrata on top of the pasta, though great for the first servings, isn’t so great for a 2nd helping. WIth the cream now soaked into the pasta, the burrata sitting atop the cooling pasta also cools. Soon, instead of being a warm, gooey cheese, it’s more like a block of lumpy cheese –still very tasty but a hardened block nonetheless. Leftovers were no better because by then the cheese was more pasta death mask than gooey delight. How does one re-heat this?  I eventually did reheat it in a covered pan with a bit of water and butter over a low heat. This was not what I had expected. Undaunted, I bought more burrata,

Cheese issues aside, I realized that this is no normal pasta dish and I needed to step it up. That’s why last week my Sugo alla Bolognese was posted. I had planned to share the recipe this Fall but I wanted everyone to have the recipe should they decide to make today’s pasta. So, when I made this dish for the 2nd time, I used my Sugo all Bolognese and did everything the same, save one big exception. In the first test, I served the burrata right after I spread it atop the pasta. Not this time. Since I was again dining alone, once it was spread, I used two large spoons to stir the cheese and cream into the pasta, garnished it with grated cheese, and served. Though the presentation wasn’t as impressive as having a chunk of burrata on each plate being served, by mixing the bowl’s contents, each serving had an even amount of burrata within, and most importantly, the cheese and pasta left in the serving bowl remained warm and manageable. Second helpings were a delight as were leftovers.

So, my advice for preparing this dish depends upon the number of dinner mates being served. If dining alone or serving one other, you can break the burrata and spread it across the top of the pasta. Then you can either serve the pasta first and then mix the cheese into the remainder in the pasta bowl, or, just go ahead and mix the cheese before serving. If you’re serving a number of guests, then just spread the burrata across the top of the pasta and serve. Once everyone has been served, you may wish to mix the remaining burrata into the remaining pasta to avoid the hardened blob of cheese.

Since that first burrata post, I’ve been asked several times whether I plan to make burrata. The answer is an unequivocal no. Making mozzarella is difficult enough. Forming it into a pouch, stuffing it with shredded curds, and then filling it with cream is a bit much for me to handle. Still, some of you may wish to try making burrata at home. Here, then, is a video of burrata being made. Enjoy!

*     *     *

*     *     *

The last thing worth mentioning is the pasta I chose Fusilli Corti Bucati for the dish . The word fusilli means “little spindles” and it’s a twisted pasta. Corti in the name means small or short, as opposed to lunghi which means long. Bucati refers to the fact that each fusillo has a hollow center. I chose them because their shape would hold onto both the sauce and the cheese very well. Feel free to use whatever pasta you like.

*     *     *

*     *     *

Fusilli Corti Bucati with Burrata Cheese Recipe

Ingredients

  • 1 lb (453 g) fusilli corti bucati — maccheroni molle (pasta springs) may be substituted
  • 1 quart tomato sauce with meat — vegetarians may substitute meatless sauce
  • 1 lb (453 g) Burrata “pouch”
  • grated/shaved Pecorino Romano cheese — Parmigiano Reggiano may be substituted

Directions

  1. Cook pasta following package directions.
  2. Heat tomato sauce in a sauce pan.
  3. Drain pasta, return to pan, and mix with 2/3 of the heated tomato sauce.
  4. Place the dressed pasta in serving bowl.
  5. Place remaining 1/3 sauce on top of pasta.
  6. Place burrata pouch on top of pasta with sauce.
  7. Use 2 knives to slice through the pouch, releasing the curds & cream.
  8. Continue slicing until the burrata is evenly spread.
  9. At this point you can:
    1. Garnish with grated and/or shaved cheese
    2. Serve immediately.

                                      —  or  —

    1. Thoroughly combine the burrata & cream with the pasta & sauce.
    2. Garnish with grated/and or shaved cheese.
    3. Serve immediately

*     *     *

This slideshow requires JavaScript.

*     *     *

Notes … 

Whether the sauce you use is bought, homemade, and with or without meat, make sure it is your favorite. This is no ordinary pasta and deserves no less than your best.

*     *     *

It’s déjà vu all over again … 

I first shared the recipe for Cherry Cheesecake Pizza 2 years ago, in the days leading up to Easter. The recipe was given to Mom by the wonderful woman who lived across the street from us. A great little dessert, this “pie” has also been served, in some form, at countless parties and barbecues,  Easy to prepare, you’ll quickly see why this remains a family favorite. Click HERE to see the recipe.

*     *     *

Coming soon to a monitor near you …

Old Meets New

Old Meets New

Grandpa’s Tuna Salad Gets A Makeover

*     *     *


Spaghetti with White Anchovies & Capers

Spaghetti con Acciughe Bianche e Capperi

Spaghetti with White Anchovies and Capers

We’re back to fish recipes this week and today I’ll share the long-anticipated spaghetti with white anchovies recipe. This is not a family recipe but, I have to admit, it should be. There’s no doubt in my mind that all the adults in my family would have really enjoyed this pasta. And like so many of the pastas they served, it’s easy to make, requires few ingredients, and is ready in minutes. What’s not to like?

This recipe came about clearly by chance. Last Fall, I happened to overhear a cooking program in which Michael Symon used white anchovies in a pasta dish. Never having seen white anchovies, I didn’t think much of it. Then, around Christmas, I found a two-pack of white anchovies at one of the big box  stores. I bought them, went home and started working with them, using my aglio e olio recipe as a base. It really was that simple. As you’ll see later when you read the recipe, this is another dish you can have on your dinner table in 30 minutes, tops. And if you’re at all like me, it will find its way to your table more often than you now think possible.

The anchovies I found that day — and continue to use — are not only white but are far less salty and “fishy” tasting than the anchovies one finds in the small tins. These differences make them perfect for this dish and, as you can see in the photo bellow, white anchovies actually look like fish. Imagine that! The recipe calls for 6 whole anchovies but, truth be told, I normally use 8 or 10 of the little fishies when I make this dish. Yes, I really do enjoy them. I suggest that you taste one upon opening the package to see how it tastes before you decide how many to use for a pound of pasta.

As is the case with any of these aglio e olio pastas, time is of the essence. You want to time it so that the anchovies, garlic, and oil “sauce” is ready when the pasta is 2 minutes shy of being al dente. Don’t worry. It’s easy enough to do. And remember: whenever you prepare a pasta, always reserve at least a cup of the water used to cook the pasta. It has saved many a dish for me.

*     *     *

That's a lot of achovies!

Packed in vegetable oil, wine, vinegar, & parsley.   7.1 oz (200 g)    (That’s a lot of anchovies!)

*     *     * 

Spaghetti with White Anchovies and Capers Recipe 

Ingredients

  • 1 lb spaghetti
  • 1/2 cup + 2 tbsp extra virgin olive oil, divided
  • 6 whole white anchovies, drained & roughly chopped – more to taste
  • 4 cloves of garlic, diced or grated – more to taste
  • 1/8 tsp red pepper flakes – more to taste
  • 2 tbsp nonpareil capers
  • 1/2 cup Panko bread crumbs
  • zest of 1 lemon
  • 3 tbsp fresh parsley, chopped
  • salt & pepper
  • reserved pasta water

*     *     *

Directions

  1. Make the bread crumb topping:
    1. In a small mixing bowl, combine bread crumbs, lemon zest, and 2 tbsp of olive oil. Season lightly with salt & pepper. Mix thoroughly.
    2. In a small frying pan over med-high heat, lightly toast the bread crumb mixture. Do not allow to get too dark or it will ruin the dish. Remove from heat and set aside.
  2. Bring a large pot of heavily salted water to boil. Add the pasta and stir.
  3. In a large frying pan over med heat, add the remaining olive oil. Once hot, add garlic and red pepper flakes. Sauté for 1 minute.
  4. Add the anchovies to the pan and continue sautéing until the pasta has cooked 2 minutes less than the package’s cooking instructions indicate for al dente. If you’ve timed everything correctly, the anchovies should be sautéed for just a few minutes before the pasta is ready.
  5. Drain the pasta, reserving 1 cup of the pasta water.
  6. Add capers and pasta to the pan containing the anchovies. Gently toss to evenly coat the pasta with the anchovy & oil mixture. If too dry, add enough pasta water to create a sauce. Continue to sauté until the pasta is al dente, 1 to 2 minutes more.
  7. Remove from heat, add 2/3 of the bread crumb mixture, and toss.
  8. Place on a serving platter and garnish with remaining 1/3 of the bread crumb mixture.
  9. Serve immediately.

*     *     *

*     *     *

Variations

This recipe is so basic and with so few ingredients that there’s little room for variations — or so I thought. In a comment written after last week’s cannelloni post, the Kitchens’ good friend and fellow ravioli maker, Spree, mentioned adding bits of preserved lemon to this dish. Though I’ve yet to try it — still working on corned beef sandwiches here —  I will soon, no doubt about it. What’s this? You don’t know how to preserve lemons? Well, neither did I until I saw Spree’s post of January, 2012. Now I use it exclusively to make preserved lemons and you can learn how to do it, too, by going to Spree’s wonderful blog, Cooking-Spree. While you’re there, be sure to look around. You’re in for a treat!

Notes

I have yet to find white anchovies in packaging smaller than shown in the image above. In fact, it was while trying to do so that I mistakenly bought the sardines that led to my sardine and pickled pepper recipe of a few weeks ago. I have seen an anchovy salad at one of the groceries but, now that I want to buy it, the salad has disappeared from their “fish/seafood bar.” If I do find some in more convenient packaging I’ll mention it in a post and come back here to announce it.

Be very careful when toasting the bread crumb mixture. If too well-browned, your pasta will have a burnt toast flavoring that isn’t at all desirable. Take the crumbs off of the heat as soon as they begin to have a golden glow.

I used homemade spaghetti with this dish but you can use any of the similar pastas — i.e., linguine, fettuccine, trenette, tagliatelle, etc.

*     *     *

It’s déjà vu all over again … Stracciatella

I’ve mentioned that we ate lunch at home throughout the school year, a consequence of living so close to the parish school. I also said that when the weather turned cold, we would often find a bowl of soup waiting for us to walk through the door. One of those soups Mom prepared and today’s Blast from the Past is Stracciatella. Requiring few ingredients and ready in minutes, this soup is just about as easy to prepare as that stuff in a can — but, oh, so much better. You can see the recipe by clicking HERE.

*     *     *

Coming soon to a monitor near you …

Broiled Halibut with Mushrooms 

*     *     *

Another of the Bartolini Crown Jewels: Cannelloni

Cannelloni dei Bartolini Serve Cannelloni

With St. Joseph’s Feast Day fast approaching, I’m going to take a break in our fish recipe series and share yet another of the Bartolini Crown Jewels, Cannelloni. St. Joe, after all, deserves no less.

Cannelloni are another of Italy’s stuffed pastas, though these are more in the style of manicotti (see Notes) rather than ravioli or agnolotti. As much as we all loved them — we kids called them “cigars” — cannelloni weren’t served for dinner very often. Unlike ravioli or cappelletti, which were “assigned” holidays, cannelloni were served when Mom or Zia found the time to make them. Remember. There were no freezers so a cannelloni dinner meant that they would have been up at dawn, rolling out pasta dough. As a result, though it wasn’t a holiday, a cannelloni dinner was a special occasion, to be sure.

Now, when you look at the recipe, something may seem a bit familiar. Déjà vu, perhaps? No, that’s not until the end of this post. It’s the filling. We use the same filling here that we used when we made cappelletti a few weeks ago. It is not unusual for Italian households to use the same fillings, condiments, marinades, etc., in a number of dishes. Our breading mixture is the perfect example of this. There are other examples but I’ll save those for another day. No sense spoiling the surprise.

Although the filling recipe is rather straight-forward, preparing the dough needs some explaining. As many of you know, I use either a hand-cranked pasta machine or a roller attachment for my stand mixer to roll my pasta dough. The result is a long sheets of pasta, about 2 to 3 feet long and about 6 inches wide Before doing anything else, you Cannelloni Sheetsneed to determine how wide each of the cannelloni will be. Ours are usually about 4 inches long, allowing 2 rows to be placed down the full length of the baking dish. Some prefer larger cannelloni. No matter which size you like, measure the inside width of your baking dish’s bottom. To allow the pasta to expand during cooking (see image for comparison), subtract at least half an inch from the measurement. If you want large cannelloni, this is the width of the dough sheet you’ll need. For smaller cannelloni, divide the measurement by 2. Keep this measurement in mind. (For example. My baking dish is 8 inches square, though, at the bottom, it is 7.5 inches. I wanted to place 2 rows of cannelloni into the dish so I cut my dough sheets at 3 inches.)

Once you’ve made the dough and allowed it to rest, roll it into long sheets. If your machine or rollers are at their widest when set to no. 1, roll and re-roll the dough up to and including no. 5. If your machine or rollers are at their widest at no. 10, then roll and re-roll the dough up to and including no. 6. Once the dough sheet is rolled to the specified thickness, lay it flat on a lightly floured surface. Using a straightedge, move down the full length of the dough sheet, marking it according to the measurement gained above. Use a pastry cutter or sharp knife to cut the sheet into smaller sections. (My sheets were all 3 X 6 inches.) Lay the newly cut sheets separately. Do not stack.

This is where things get interesting. It has been quite sometime since either Zia or I made cannelloni. So, when I asked if we par-boiled the pasta before filling it, she drew a blank. Obviously, so had I or I wouldn’t have asked the question. After some discussion, she leaned toward the side of no par-boiling was required, while I thought it was. I was left with little choice, so, off to the test kitchens I went. That afternoon I made side-by-side dishes of cannelloni, one with noodles that had been boiled and the other with noodles that were raw. Once finished baking, a taste test ensued. After all that, the difference was minimal. Yes, I could tell the difference, tasting them one right after the other. I’m not so sure, however, that I could identify one if eaten alone — although I’d have a 50-50 chance if I guessed. Even so, there was a difference,  no matter how slight, and I preferred the cannelloni prepared with par-boiled dough sheets. I guess I’ll be doing that from now on.

*     *     *

Cannelloni Bite

*     *     *

So, if you chose to par-boil your noodles, place them, in batches, into rapidly boiling salted water. Remove after 60 to 90 seconds, and place in an ice bath. Treat carefully because the noodles are delicate and may tear while being moved or handled. Continue with batch after batch until done. When you’re ready to fill them, you may find it easier if you pat dry each sheet before attempting to fill and roll them.

If you choose to use raw noodles, you must work quickly lest the dough sheets dry. This will cause them to crack when you attempt to roll them. To avoid this problem, once you’ve measured and cut the individual sheets, fill them all and put them aside before starting another piece of dough through the rollers. Follow this method and you’ll have no problems with cracking dough sheets.

Be sure to read the Notes section below for freezing suggestions.

*     *     *

Bartolini Cannelloni Recipe

Ingredients

for the filling

  • 1 1/2 lbs. ground pork
  • 1 1/2 lbs. ground veal (chicken or turkey may be substituted)
  • 2 – 3 tbsp butter
  • 1 pkg (10 oz, 283 g) frozen chopped spinach (cooked and well-drained)
  • 1 pkg (8 oz, 227 g) cream cheese
  • 1 cup grated Pecorino Romano — Parmigiano may be substituted
  • 2 or 3 eggs slightly beaten — depending on size
  • ¼ tsp ground nutmeg
  • zest of 1 lemon, more if you like

for the cheese sauce

  • 2 – 3 oz (57 to 85 g) cream cheese, softened 
  • 2 – 3 oz (59 to 89 ml) milk

for the cannelloni

  • Mom’s pasta dough
  • 1 quart tomato sauce, with meat or without (See Notes)
  • cheese sauce
  • an 8 oz ball of fresh mozzarella
  • 1/2 cup grated Pecorino Romano cheese

*     *     *

*     *     *

Directions

for the filling

  1. Sauté meat in butter. Season lightly with salt.
  2. Use meat grinder to process the meats. Add all the ingredients into a mixing bowl and mix until well-combined.
  3. Cover the filling and refrigerate for a few hours or overnight.
  4. Once the filling has rested, you can begin making your cannelloni.

for the cheese sauce

  1. Combine equal amounts of cream cheese with milk.
  2. Whisk and set aside. 

to make the cannelloni

  1. Shape 2 to 3 tbsp of filling into a small log, about as thick as your index finger. More or less filling may be required depending upon the size of your cannelloni. Do not over-stuff. Filling should leave a 1/4 inch (.6 cm) border on either side of the dough sheet.
  2. Place the filling on the edge of the dough sheet and roll as one would if making a cigar.
  3. Set aside, seam-side down.
  4. Repeat Steps 1 through 3 until all the filling or dough sheets have been used.

assemble the dish and bake

  1. Pre-heat oven to 350˚ F ( 177˚ C).
  2. Liberally butter a baking dish.
  3. Coat the bottom of the dish with 1 to 2 cups (237 to 473 ml) of tomato sauce
  4. Place cannelloni, seam side down, in 2 rows, until dish is filled. Do not over-crowd.
  5. Spoon cheese sauce over all the cannelloni.
  6. Add enough of the remaining tomato sauce to completely cover the dish’s contents.
  7. Sprinkle the top with the grated mozzarella and Pecorino Romano cheeses.
  8. Spray one side of a sheet of aluminum foil with cooking spray and use it to cover the baking dish, sprayed side down.
  9. Bake in pre-heated 350˚ oven for 20 minutes. Remove foil and continue baking until cheese topping is cooked to your satisfaction. Over-cooking may result in dry cannelloni.
  10. Allow to rest 10 minutes before serving.

*     *     *

Cannelloni 7

*     *     *

Variations

If you have a favorite ravioli filling, you can easily use it here. In fact, I’ve used our ravioli filling to make cannelloni several times. The truth is, you may find it easier to make cannelloni than it is to make ravioli, at least initially, so, why wait? Go ahead and use these instructions to make cannelloni with whatever filling you prefer. There’s sure to be a great dinner in store for you, if you do.

Although never served in my family, there is a version of cannelloni that uses crespelle (crêpes) rather than pasta dough sheets. One day I’ll give them a try — once I learn how to make crespelle, that is.

Notes

If you choose not to par-boil the dough sheets, add about a 1/3 cup (80 ml) of water to the tomato sauce before using and stir well. The extra water will be needed by the raw sheets as the cannelloni bake.

I recently made a half-batch of filling with a whole batch of Mom’s pasta dough. Combining the 2, I made 32 cannelloni, enough for several dinners. Your results may vary, however, depending upon how large you make your cannelloni. If you make an entire batch of filling, you could use half to make cannelloni on Day 1, as I did, and use the rest of the filling on Day 2 to make cappelletti. On Day 3, open your freezer and smile, secure in the knowledge that there are some very good dinners in your future.

Cannelloni can be frozen easily.  

  1. Once fully assembled, cover the baking dish with foil and freeze. To heat, leave covered with foil and bake in a pre-heated, 350˚ F (177˚C), oven for 45 minutes. Remove foil and continue baking until cheese is to your liking.
  2. I find it easier and more convenient to freeze the cannelloni individually on a baking Cannelloni for the Freezersheet covered with foil or parchment paper. Once frozen, place them into a hard-sided container and store in your freezer. When it’s time to serve them, you can use as many as needed to assemble your dish, rather than cook a dish you prepared the week before. Follow the same instructions for baking as in the preceding step.
  3. Even if you follow my cooking instructions for frozen cannelloni, you’ll need to test for doneness before removing them from the oven. To do this, place the tip of a metal skewer or sharp knife into one of the cannelloni in the center of the dish. Hold it there for 5 to 10 seconds. Remove and use it to touch the inside of your wrist or just beneath your lower lip. Continue baking until tip is hot to the touch.

If you can, try to use fresh mozzarella to top off this dish, for it tastes so much better. I prefer not to use slices here, though. Since the slices take longer to melt and brown, you run the risk of drying out the cannelloni while it bakes. Fresh mozzarella will melt faster but it can be a mess to grate at home. To make it a bit easier, open its packaging and place it all in your freezer for about 30 minutes before needed. You’ll find the cheese to be firmer and, therefore, easier to grate. If it is too firm, just leave on the counter for a few minutes.

I’m not certain if these definitions are “official”, but in our family, cannelloni were meat-filled and manicotti were filled with a ricotta cheese mixture. You now have our cannelloni recipe. Soon you’ll have our manicotti recipe, too.

It’s déjà vu all over again … 

tricolor-risottoFor today’s Blast from the Past, we’re going to continue to celebrate St. Joseph’s Feast Day with risotto, a dish that’s Italian, through and though.  This is no ordinary dish of risotto, however, as you can see on the right, for its colors are those of the Italian flag. You can learn how to prepare this dish by clicking HERE.

*     *     *

Coming soon to a monitor near you …

Spaghetti with White Anchovies and Capers

Spaghetti with White Anchovies and Capers

 *     *     *