My Grandmas’ Garbanzo Bean Soup

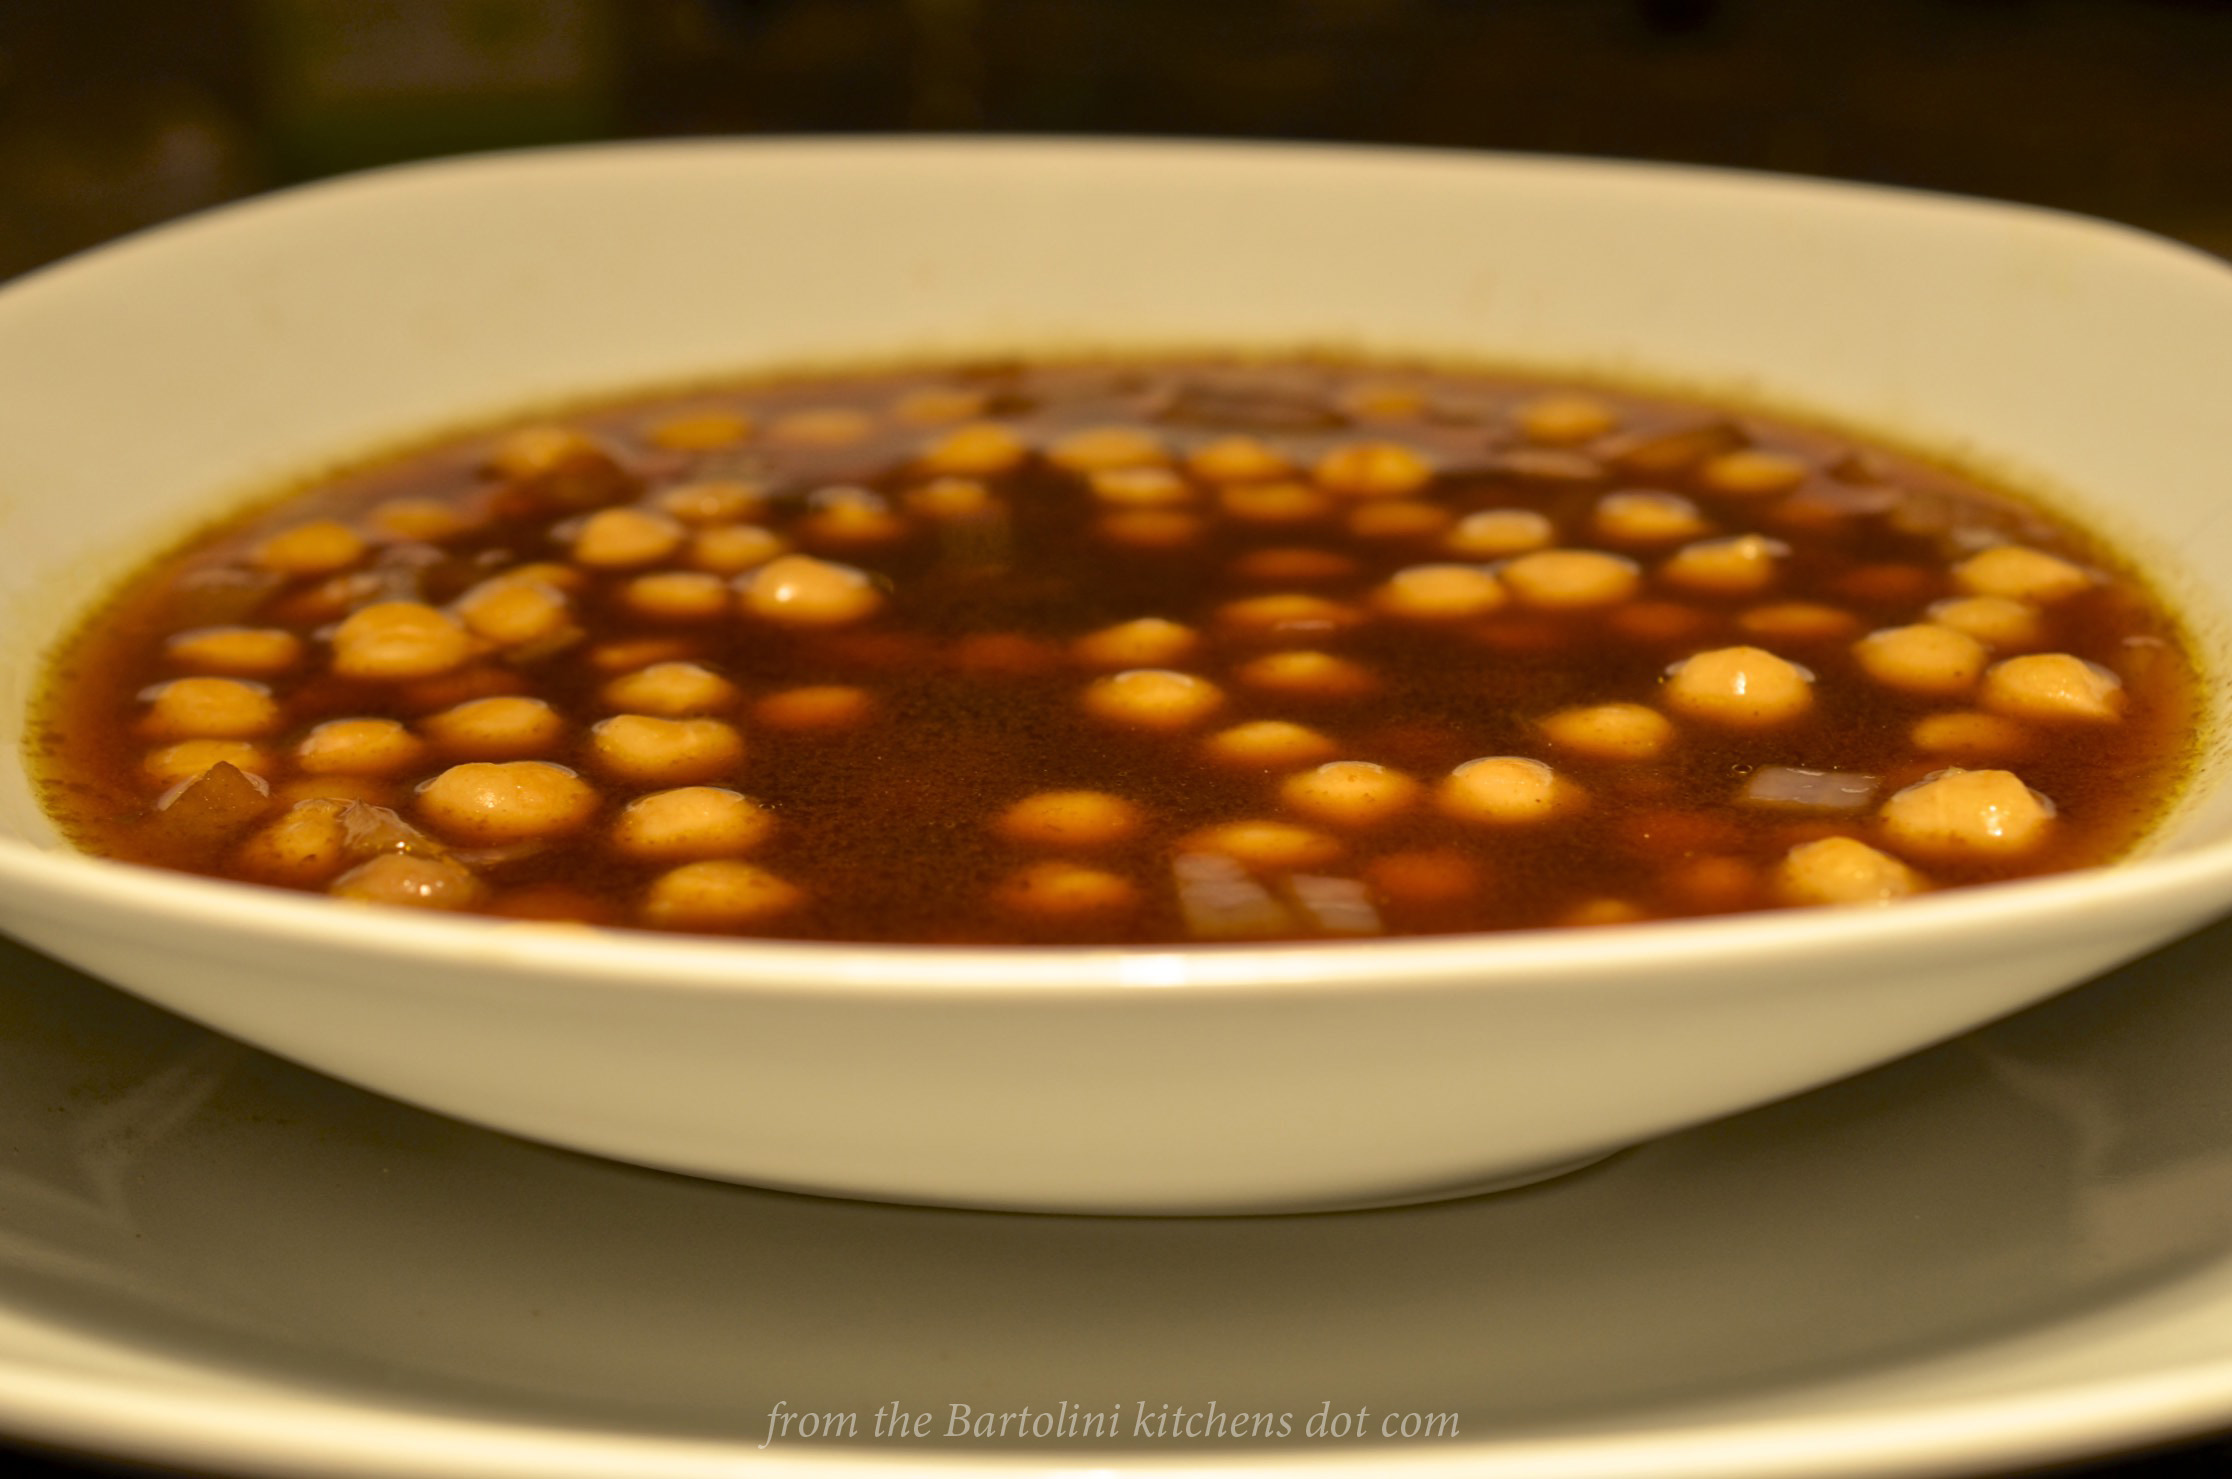
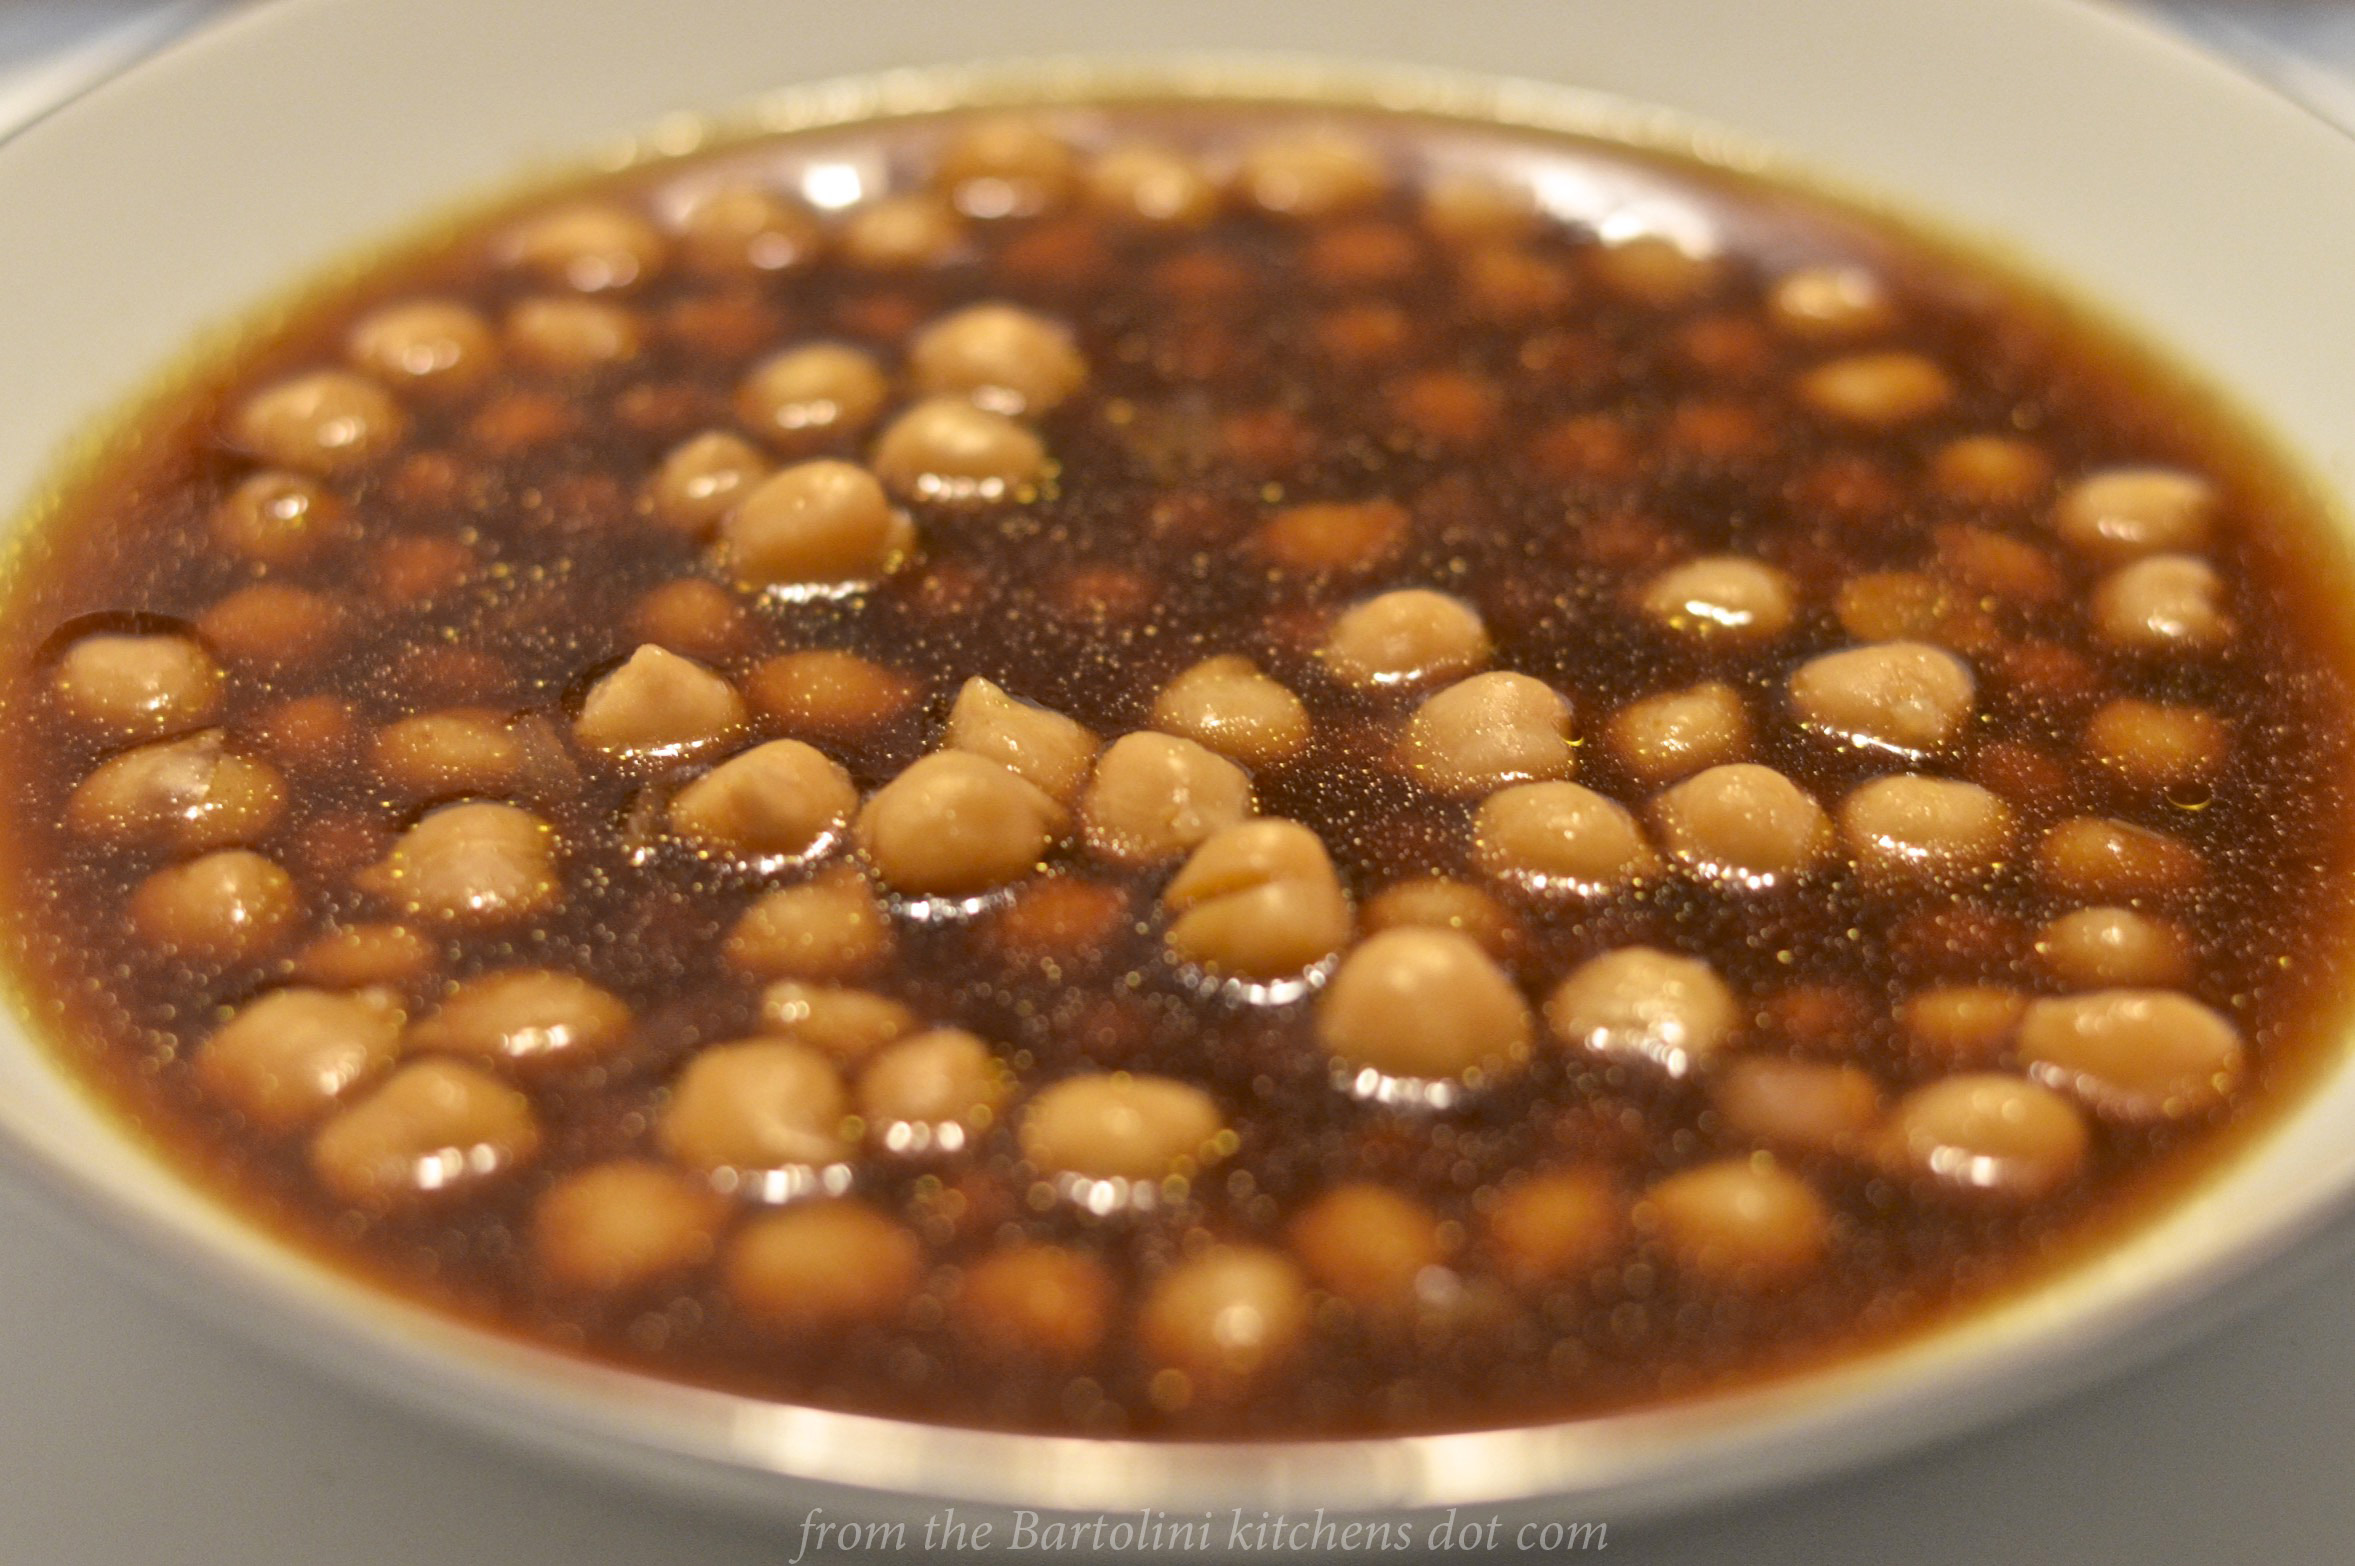
Minestra del Ceci delle Mie Due Nonne

Minestra del Cece 2*     *     *

Every year, just before Christmas Eve, I’ve shared a recipe for seafood, often mentioning the Feast of the Seven Fishes when doing so. To that end, next week’s post will feature another such dish. (See Coming soon to a monitor near you.) Not all Italian families, however, prepare a feast on Christmas Eve. We certainly didn’t when I was very young. My family’s tradition of enjoying a seafood feast didn’t start until a few years later, when Dad would leave the restaurant early, bringing the seafood with him. Prior to that time, our Christmas Eve dinner was nothing special, although always meatless because, being Catholic, meat was not allowed. “Upstairs”, in Zia’s home, baccalà was the main course, with “Nonna”, also, serving today’s soup, garbanzo bean.

Whether you call them garbanzos, chickpeas, or ceci, this bean is a good one to have in your pantry. Very low in fat and high in protein, garbanzos are becoming more popular as gluten-free and vegetarian diets become more common. Most readily available dried or in cans, garbanzos can be used in any number of ways and, when ground, the resulting flour is a viable substitute for gluten flours. In a country where meat was reserved for special occasions, garbanzos were one of several beans Italians used to supply protein to their diets.

*     *     *

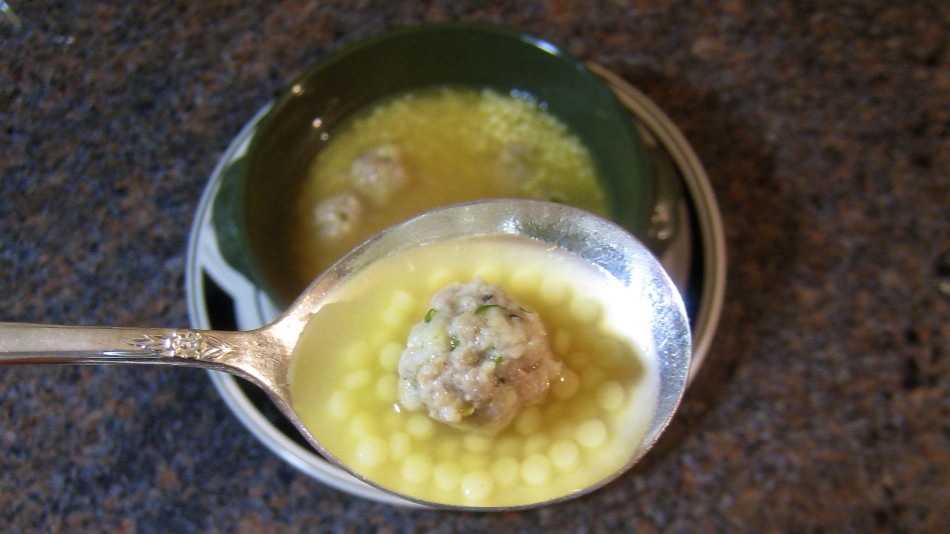
Today’s soup was 1 of the 4 dishes that I prepared for Zia during my last visit. To be honest, she was the dish’s mastermind and I her dutiful sous chef. As you’ll soon see, mine was an easy job. At some point she mentioned that “Grandma”, Mom and Zia’s Mother, also cooked garbanzo bean soup and in the same way as did her Mother-in-Law, “Nonna”. This recipe is a gift from both women, “due nonne“. I’m not certain, however, if this soup is a traditional Marchigiani dish. Yes, both women were from Marche but this soup is quite basic and could very well have originated anywhere in Italy — if not somewhere else. (Perhaps our friend and expert of all things Marchigiani, Mariano Pallottini, will be able to shed some light on this for us.)

As is the case with most of the Bartolini recipes from back in the day, this soup is simple to prepare and relies on a few, commonplace ingredients. As you can imagine, the most important thing you’ll put in your stockpot, therefore, is the stock itself. Here, because the soup was served on Christmas Eve, a day when Catholics were forbidden to eat meat, a vegetable stock is used. Feel free to use whatever type of stock you prefer, though you’ll want to use a rich, full-flavored stock for a soup you’ll be serving on so special a night.

*     *     *

Minestra di Ceci*     *     *

My Grandmas’ Garbanzo Bean Soup Recipe

Ingredients

  • 2 cups dried garbanzo beans/chickpeas, inspected to remove stones and the like (see Notes)
  • 2 quarts vegetable stock (see Notes)
  • 1 onion, chopped
  • 1 tbsp butter
  • 1 tbsp olive oil
  • salt & pepper to taste
  • grated Pecorino Romano cheese for serving – omit if vegan

Directions

  1. At least 8 hours or the night before, place the beans in a large bowl and cover with water that is at least 2 inches above the beans. Before use, pour off the water, rinse, and set aside to drain. Do not allow to dry out.
  2. Heat the oil and butter in a large, heavy-bottomed pot over med-high heat. Add the onion and sauté until translucent — about 5 minutes. Do not allow it to brown. Season lightly with salt and pepper.
  3. Add the stock and chickpeas to the pot and stir. Bring to a boil before reducing to a simmer.
  4. Continue to simmer until the beans are as tender as you like. (See Notes)
  5. Check for seasoning before serving with plenty of grated cheese at the table. (Omit or use soy cheese if vegan.)

*     *     *

Garbanzo Bean Soup*     *     *

Notes

The homemade stock used here was prepared using vegetable odds & ends that I’d been keeping in my freezer. The ingredient list will vary each time the stock is made.

  1. In a large stockpot over med-high heat, add 2 tbsp each of butter and olive oil.
  2. When hot, add broccoli stems, cauliflower cores, carrot peelings, and asparagus stalk trimmings, as well as a quartered large onion, 3 roughly chopped carrots, 3 roughly chopped celery stalks (leaves included), and a few cloves of smashed garlic. Sauté until the vegetables begin to color.
  3. Add a handful of parsley, a quartered tomato (“for color”), and 1 bay leaf before adding enough water to fill the pot. Bring to a boil and then reduce to a simmer.
  4. Continue to cook for at 2 hours, allowing the stock to reduce and the flavors to intensify. Occasionally skim the stock of the film that may coat the its surface. If the stock reduces too much, add water to compensate.
  5. Season with salt and pepper if you intend to use the stock to make vegetable soup. If the stock is to be used in other recipes, best to leave it salt-free and season it when used.
  6. Once cooled, refrigerate for no more than a few days or store, frozen, for up to 1 month.

When using dry beans, you must take a few minutes to inspect them, looking for small stones and/or beans that are discolored or otherwise spoilt. Discard them.

We’ve found that 1 cup (200 g) of dried beans per quart (950 ml) of stock will yield a soup with just the right “beans to stock ratio” in every bowl. You may wish to add more or less stock to suit your own tastes.

Cooking times will depend upon the type of bean — canned or dried — that you use.

  • If dried, the longer they are allowed to soak, the less time needed to cook. Even so, they will take at least 60 minutes — more like 90 — to cook fully.
  • If canned, rinse before using and they should be ready to eat once they are heated through. Taste before serving to ensure that they meet your preferences.

*     *     *

It’s déjà vu all over again …

 Eel in the Style of Le Marche
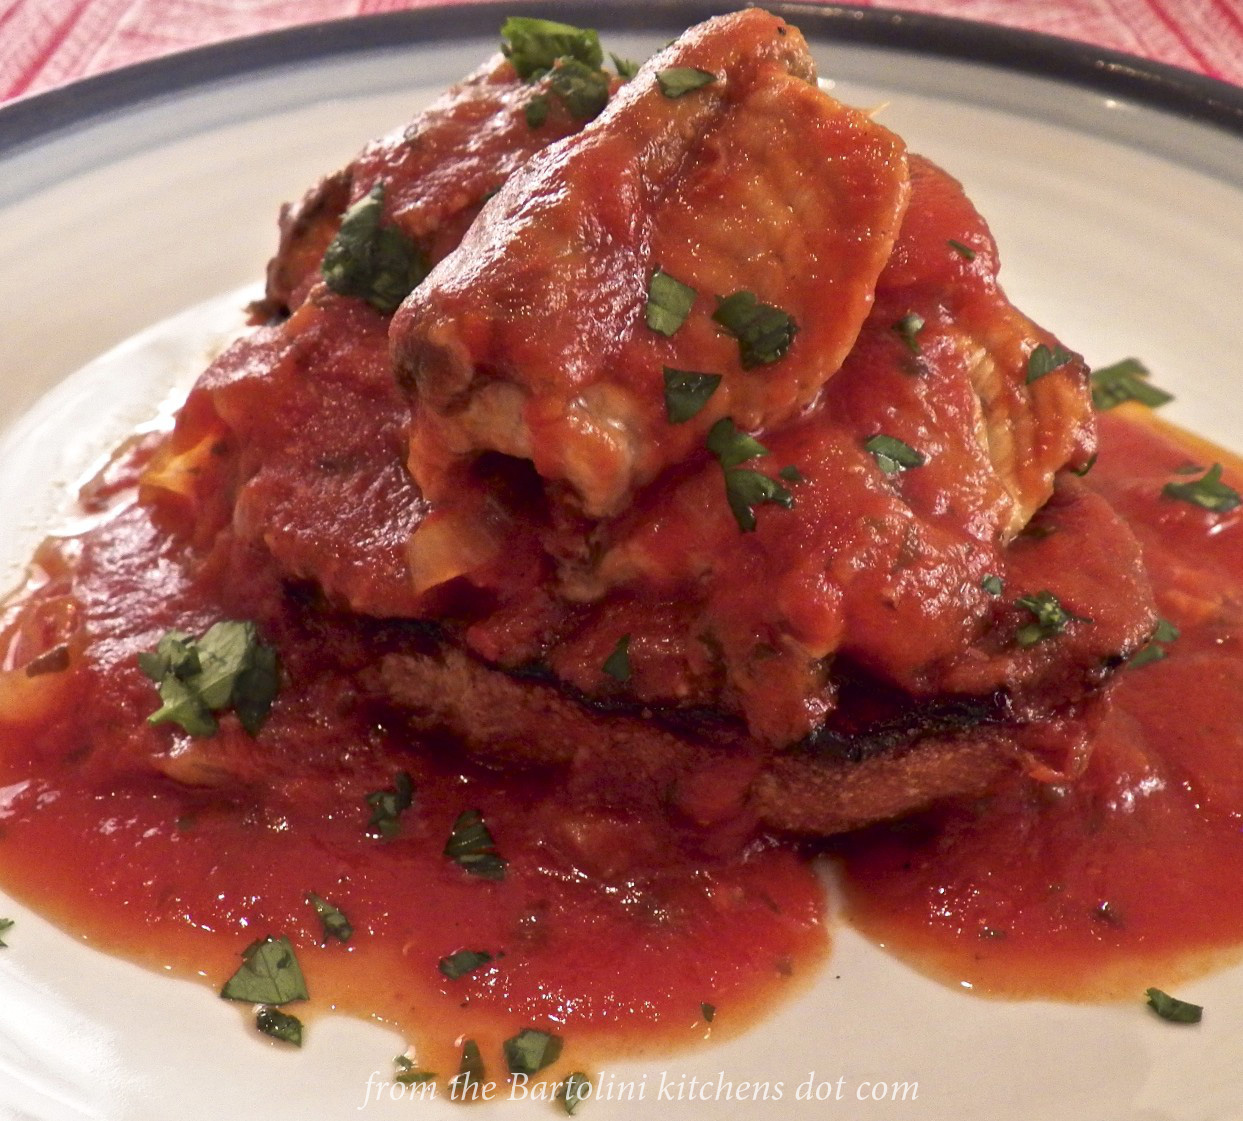
No listing of traditional Italian dishes served on Christmas Eve would be complete without mentioning eel. Yes, eel. Served on Christmas Eve almost exclusively, live anguille, eels, can be found in tanks at the largest and best-equipped Italian markets beginning around December 15th.  You can learn how my family prepared the slippery devils by clicking HERE.

 *     *     *

Coming soon to a monitor near you …

Squid Ink Pasta Preview
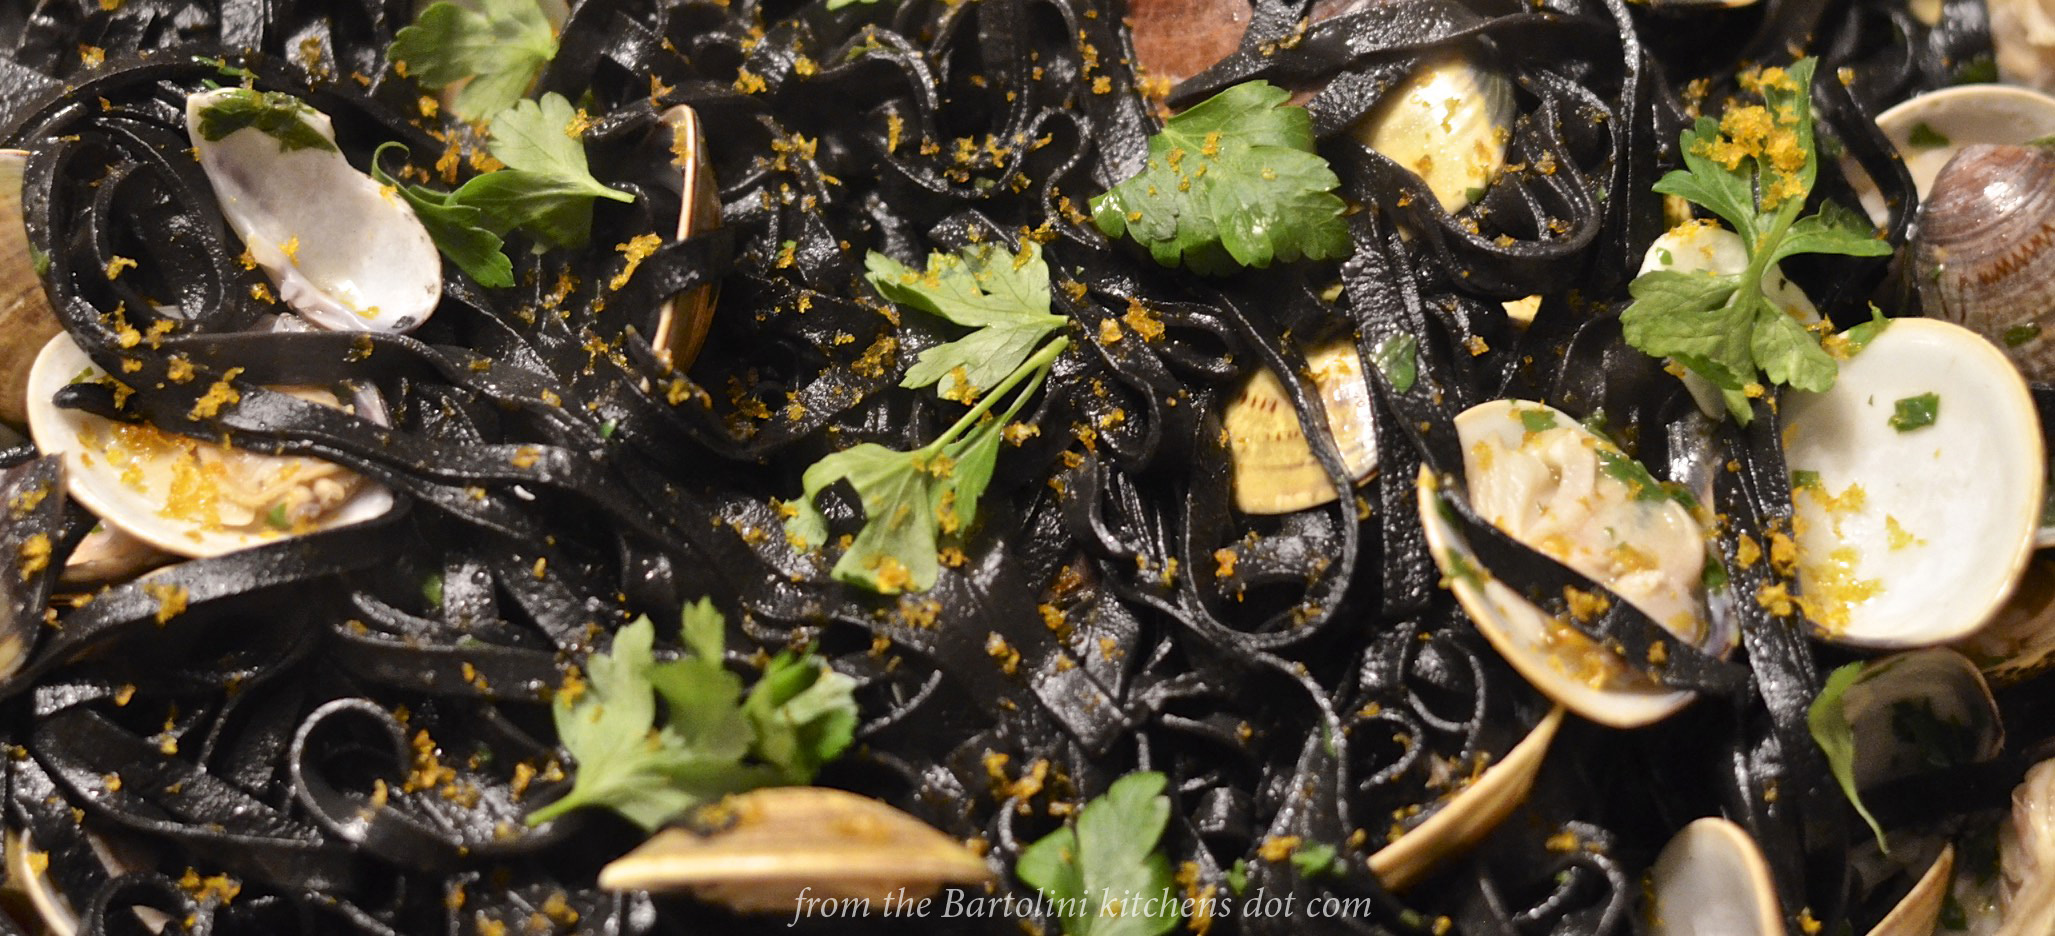
Squid Ink Pasta with Clams and Bottarga

*     *     *

Advertisement

Pasta and Beans Soup

Zuppa di Pasta e Fagioli 

Pasta e Fagioli 3Beans, fagioli, are grown throughout the Italian peninsula and Sicily, with most regions having their favorites. With such a good source of protein so readily available, beans form a substantial part of the traditional Italian diet and you’ll find them served in every way imaginable — raw, stewed, baked, steamed, you name it. As one might expect, each of Italy’s regions adds its own distinctive flair to the many basic recipes and that’s certainly true of today’s recipe.

Now, having said that, I must confess that this dish, Pasta e Fagioli, was never served back in the old two-flat. I’ve no idea why but it just wasn’t part of the Bartolini playbook. So, how did I come to prepare it?

The first Christmas after I moved out of my parent’s home, Zia and Uncle gave me a cookbook, “The Romagnoli’s Table”. It was the first cookbook I owned and it remains a cherished possession. What sets this book apart, aside from how it came to be mine, is that it’s the only one that I’ve found that contains recipes that begin with a battuto, just like so many of the Bartolini recipes from back in the day. (You may recall that battuto is a type of Italian soffritto consisting of onion, parsley, garlic, and salt pork.) Well over a dozen years ago, I followed their recipe to make Pasta e Fagioli for the first time and, though I’ve made a few minor changes along the way, I still follow it today.

Like so many wonderful Italian recipes, this is not a complicated dish to prepare nor are the ingredients hard to find, save one. I’ve mentioned before that “good” salt pork is very hard to find. In fact, I’ve given up the search. Here, I’ve chosen to use guanciale. If you cannot find it, you can substitute pancetta or bacon, just so long as it isn’t smoked. A smoked pork product could very well overpower the dish.

Lastly, you may be wondering why I’ve chosen to share this recipe now, at the beginning of Spring, and not during the dead of Winter. There are two reasons for that. In the first place, it’s the beans. While we can get dried beans year-round, fresh beans are only available in the Summer months. Using them to make Pasta e Fagioli adds a wonderful flavor to the dish and should definitely be tried. Secondly, our friends in the Southern Hemisphere are heading into their cooler months and this dish will be welcomed. For them, I’m right on time.

*     *     *

Pasta e Fagioli 5*     *     *

Pasta and Beans Recipe

Ingredients

  • 1 celery stalk
  • 1 small onion
  • 1 or 2 garlic cloves
  • about 1/4 c fresh parsley
  • 2 oz (57 g) guanciale (salt pork, pancetta, or non-smoked bacon may be substituted)
  • 3 tbsp olive oil
  • 4 plum tomatoes, peeled and chopped
  • 2 quarts water
  • 8 oz (230 g) dried Borlotti beans (See Notes)
  • rind from a chunk of Pecorino Romano cheese (Parmigiano Reggiano rind may be substituted)
  • 2 cups pasta (see Notes)
  • grated Pecorino Romano cheese (Parmigiano Reggiano may be substituted)

*     *     *

*     *     *

Directions

  1. The night before, place the beans in a container and add enough water to cover them by 3 inches. The next morning, pour off the liquid and rinse. The beans will be ready for use.
  2. Make the battuto:
    • Coarsely chop the onion, celery, garlic, and parsley. Add to the guanciale.
    • Heat the blade of a very sharp knife using the burner of your stove.
    • Once hot, begin chopping the mixture of meat and vegetables. Keep chopping/dicing/mincing until a relatively smooth paste results.
  3. Heat olive oil in a heavy-bottomed pot.
  4. Add battuto and sauté until very lightly browned and fragrant.
  5. Add the tomatoes and continue to cook for a few minutes until they begin to soften.
  6. Add the water, beans, and cheese rind, raise the heat to med-high, and bring to a boil. Once boiling, reduce heat to medium and cook until beans are softened and thoroughly heated. (See Beans)
  7. Add the raw pasta and continue to cook until done. Stir frequently to prevent scorching.
  8. Add hot water if too thick.
  9. Taste and season with salt & pepper, as needed.
  10. Remove the cheese rind and discard.
  11. Serve immediately, garnished with grated Pecorino Romano cheese.

*     *     *

Pasta e Fagioli 1*     *     *

Beans

Beans can be purchased 3 ways.

  1. Canned only require rinsing before use. In this recipe, they will only need to be thoroughly heated as they are already soft.
  2. Fresh can be added to the pot as you would canned beans. They should be cooked within 20 to 30 minutes.
  3. Dried beans can be prepared in two ways. No matter which method you choose, they will take about 90 minutes to cook.
    1. Place the beans in a large bowl and add enough water to cover by about 3 inches. Leave overnight, When ready, rinse before using in the recipe. Alternately,
    2. Place dried beans in a pot with enough water to cover, bring to a boil, simmer for 2 minutes, and then turn off the heat. Beans will be ready in one hour. Drain before use.

*     *     *

Notes

Pssst. Don’t tell Zia that I used a mini-chopper to prepare the battuto.

Because this battuto uses celery, it is a far lighter shade than normal.

I used Borlotti beans in this recipe. You may know them as Roman or cranberry beans. You could, also, use red, kidney, or even cannellini beans, if you like. In short, use whichever beans are available. No Nonna is going to run to the store for Borlotti beans when she has cannellini beans in the pantry.

This recipe used 2 cups dried Borlotti beans. 1 can of beans may be substituted or, if you’re lucky enough to find fresh beans, use about 1.5 pounds (680 g).

Water, not stock, is used here because the battuto will add a great deal to the dish, whereas stock may muddle the flavors.

No need to treat the beans gingerly. Those damaged during the cooking process will only serve to thicken the final dish.

Any small pasta, pastina, will work here. I used ditalini here but have even used a combination of small paste.

*     *     *

It’s déjà vu all over again …

Sack o' Little NecksOne of my all-time favorite ways to serve pasta is to prepare it with clams. It is a tasty dish, one that I cannot resist when I see fresh clams at the fishmonger’s. I’ve shared 2 recipes for pasta with clams, one with a “white” sauce and the other “red”. Today I’ll send you back to the white sauce recipe post, which you can see just by clicking HERE.

*     *     *

Coming soon to a monitor near you …

Maltagliati PreviewMaltagliati Pasta with Pistachio Pesto

*     *     *

Split Pea Soup

With Mother’s Day but a few days away, I’ve read a number of posts featuring recipes for a variety of dishes, running the full gamut from savory to sweet. Not to take anything away from these beautiful posts, but I’ve chosen a different path. You see, so far I’ve shared a number of soup-related posts. Each was often described in terms of its use for members of my family. This soup nursed me back to health, that one nursed Sis; this was our New Year’s Day lunch, these took turns as lunch on cold Winter’s days; and, always, Dad was there to enjoy the salad Mom prepared using the boiled meats, similar to a bollito misto. Notice that Mom was never mentioned, other than as cook for these fantastic dishes. Sure, she enjoyed each soup but none were her favorite. No, Mom’s favorite, not so coincidentally, is today’s featured soup, split pea.

*     *     *

*     *     *

As much as she enjoyed split pea soup, Mom rarely prepared it. If my memory is correct — something that becomes less likely with each passing day — Mom and I were the only ones to like this soup. The rest, at best, endured it. Not only that but we rarely had baked ham for dinner. As I’ve mentioned in previous posts, our holiday meals were pretty much decided and ham just didn’t make the cut. Besides, I don’t think that Dad was at all interested in baked ham, for I cannot remember it ever being served on a Sunday or any other night that Dad was home for dinner. So, with ham being served so rarely, there were no ham leftovers and, consequently, no split pea soup. I know my vegan and vegetarian friends will take issue with what I’m about to write but here it is. You must have ham to make good split pea soup. Mom said so.

Though it’s true that we might not have had it often, Mom and I still did enjoy our split pea soup. She usually served it when it was just the two of us for lunch and it became something of a special treat. Later, after I moved away, whenever I told her that I was going to roast a ham — or had just done so — she would ask if I was going to make split pea soup, asking for each and every detail of the recipe. And more than once I brought a frozen ham bone home to Michigan with me, made a pot of split pea soup, and left it for her, safely stored in her freezer. So, this Sunday, while many will honor their Mom with a homemade breakfast in bed or a fantastic brunch at a favorite restaurant, I’ll remember mine with a bowl of split pea soup for lunch.

*     *     *

Like so many of the recipes I post, today’s is a work in progress. Over the years it has evolved into a two-step process. In the first, a stock is prepared that becomes the base for the second step. It’s not at all complicated but it does take a bit more time than the standard way of preparing split pea soup. I think you’ll find, though, that the additional flavor in the soup is well worth the extra time required.

*     *     *

Split Pea Soup Recipe

Ingredients

For the ham stock

  • 1 ham bone, some meat left on
  • 2 partially cooked, smoked ham hocks
  • 2 onions, quartered
  • 4 carrots, quartered
  • 4 celery stalks leaves attached, quartered
  • parsley stems
  • 2 bay leaves
  • 4 quarts (3.8 l) water

For the split pea soup

  • 2 lb (908 g) dried split peas
  • 3 to 4 quarts (2.85 to 3.8 l) ham stock
  • 3 or 4 carrots, diced or sliced, as preferred
  • 8 oz (227 g) roasted ham, cubed — more or less, to taste
  • ham removed from bone, trimmed & chopped
  • meat from ham hocks, trimmed & chopped
  • salt & pepper, to taste
  • croutons for serving (see Notes)

Directions

  1. For the stock
    1. Put all the stock’s ingredients into a large, heavy bottomed pot, bring to a boil, and then reduce to a low simmer.
    2. Continue simmer for 2 hours, skimming surface foam occasionally, as needed.
    3. After 2 hours, remove meat from pot and reserve. Pour stock through a fine mesh sieve to remove remaining vegetables and other bits, resulting in a clean stock. Reserve.
    4. When cool enough to handle, trim the meat from the bones and chop into bite-sized pieces. Cover and reserve.
  2. For the soup:
    1. Add all the soup’s ingredients to a slow cooker. If you did not create enough stock in the previous step, add water to augment.
    2. Set on “low” and cook for 8 hours or set on “high” and cook for 4 hours.
    3. Check for seasoning and serve garnished with croutons. (See Notes.)

*     *     *

*     *     *

Variations

This can just as easily be made on the stove top as it can in a slow cooker. Create the stock as indicated and place all the ingredients into a stock pot rather than a slow cooker. Bring to a boil over a med-high heat and then reduce to a soft simmer. Soup will be ready once the peas are soft and the carrots cooked, about 30 to 45 minutes.

If you want the smokey flavor but not the pork, try using a bit of smoked turkey instead of the ham hocks.

 *     *     *

Notes

From what I’ve seen, split peas are sold in 1 lb. (454 g) packages. When I made today’s soup, I made a “double batch” that resulted in a little over 4 quarts (3.8l) of soup.  I wanted some for my dinner, to be sure, but also some for the freezer. As you may have already gathered, a bowl of split pea soup makes a fantastic lunch. Still, you can easily halve the recipe, if you like.

You’ll note that I do not use salt and pepper until the very end. There’s no way to estimate the amount of salt in the ham or hocks. Wait until the end of the cooking process, give a taste, and then add whatever you feel is needed.

To make croutons:

  • Heat equal amounts of olive oil and butter in a frying pan over medium heat.
  • Add 1 smashed clove of garlic and sauté.
  • Meanwhile, cube a few slices of thickly sliced bread.
  • When oil is hot and garlic fragrant, place bread cubes in the pan and toast, turning frequently.
  • When browned to your satisfaction, remove to paper towels, and reserve.

*     *     *

It’s déjà vu all over again … 

Pasta al Salmone

Pasta al Salmone

When I travel to Italy, there are 2 dishes that I request every time and very often more than once: pasta with clams and pasta with salmon. The first is a dish I’ve made for some time using a family recipe, while a recipe for the latter eluded me for years. You can well imagine my excitement when I finally stumbled upon the secret to this fantastic dish. Click HERE to see this secret revealed.

*     *     *

Coming soon to a monitor near you … 

Wonton wrapper pastas

*     *     *

Cappelletti in Brodo, The Super Bowl of the Bartolini

When I shared the recipe for Mom’s Brodo several weeks ago, it was with today’s post in mind. While it may be true that her broth was used in a number of recipes, from chicken cacciatore to risotto, for many of us, it was at its best when served with Cappelletti, yet another jewel in the Bartolini Crown of Recipes. Traditionally served at Christmastime, cappelletti are a type of stuffed pasta said to resemble small hats. Search the internet and you’ll see them made much like the making of tortellini. I’ve watched cooking shows touring Bologna and have been mesmerized at the sight of women quickly fashioning cappelletti by hand. As the camera moves back offering a wider shot, it is really quite impressive to see all the freshly made little hats prepared that morning. That is not what you’re going to see here today.

*     *     *

*     *     *

Forming those little hats is a most time-consuming practice unless you’ve enough experience to become proficient. The women I’ve watched will make more cappelletti in one day than a Bartolini would have made all year — and then some. There is just no way Mom or Zia could devote the time to make enough little hats to serve their families later that day. You read that right, later that day.

When I was a boy, few families, if any, owned freezers other than the small compartment atop their refrigerator. As a result, there simply was no place to store freshly made ravioli or cappelletti. This meant that Mom and Zia got to work making pasta at 5:00 AM on every holiday. As such, either ravioli or cappelletti were made on any given holiday and never both. So, in our home, Mom served ravioli for our Christmas Day dinner, while cappelletti was served for lunch on New Year’s Day. There were days, however, when the cappelletti lunch was nixed in favor ravioli that night. It wasn’t until a large freezer was bought and placed in the basement that it became possible for ravioli and cappelletti to be made ahead of the actual holiday — allowing Mom and Zia to get some much-needed rest on those holiday mornings. Not only that, but it, also, became possible to have cappelletti for lunch AND ravioli for dinner on the same holiday. What joy!

Yet, even though they could now prepare their pasta in advance, there was still no way that either Sister could afford the time to make little hats. Initially, they made cappelletti as they did ravioli, rolling out large sheets of dough, covering half will little balls of filling, and then covering them with the “free” half of the dough sheet. Using a spoon handle, the mound in the dough were sealed and then cut using a pastry wheel. Remember that cappelletti are served in soup and shouldn’t need to be cut before being eaten. Each must be small enough to fit comfortably on a soup spoon, making this a time-consuming process in its own right. There was — and is — no need for hats. Speaking of which and just to be clear, although we call our pasta cappelletti, they actually are small ravioli, raviolini.

Everything changed again when Mom started using dies (moulds) to make her ravioli and cappelletti. Her cappelletti became miniaturized, smaller than any she’d made before. I have that die and, unfortunately, I’ve yet to be able to master it. The compartments for the filling are far too small for my hands to fill. I never saw Mom use the die and I must be missing some secret trick to its use. Now, Mom’s die made 40 cappelletti, each ¾ inch (1.9 cm) square, while my die will make 48 cappelletti, each 1 inch (2.5 cm) square. That ¼ inch may not seem like a lot but it’s enough to separate success from failure on my pasta board. Even so, I know that I’m not done trying to learn how to use that die if for no other reason than self-satisfaction.

This post will not be as detailed as previous posts when depicting the use of a ravioli die. You can find more complete instructions in my Ravioli dei Bartolini post. No matter the size of the die or the resulting pasta, the steps required are the same. Cover the die with a sheet of dough; place a small amount of filling in each indentation; lightly moisten another dough sheet before placing it atop the first; use a rolling-pin to seal the 2 sheets; remove the now-joined sheets from the die; and, separate the individual raviolo. Sometimes, a pastry wheel will be required to cut and separate them.

When using any die, the most important thing to remember is not to overstuff each compartment. Look again at the 2 dies in the photo above. One has compartments that are open while the other’s compartments have a back and are closed. When using a die that is open, the dough sheet will stretch a little to compensate if you’ve used too much filling. Even so, use too much filling and the dough sheet will stretch to the point of tearing, a very disheartening sight. If you place too much filling on to a die that is closed, that has a back, the excess filling has nowhere to go other than out that compartment’s sides, possibly affecting the seal of not just that one raviolo but all of its neighbors, as well. All is not lost, though, for some of these poorly sealed ravioli.

Ravioli are first boiled in water before being drained and dressed with your favorite sauce. Poorly sealed ravioli will dump their contents during the boiling or draining stage. Little can be done to save them and their tasty filling. Cappelletti, though, are a different matter altogether. As you’ll soon see, these are cooked in brodo and should any split during cooking, the contents aren’t lost but will serve to flavor the soup. It may not be pretty but it will be one tasty bowl of soup.

The recipe for the cappelletti filling is easy to follow and lacks exotic ingredients, a hallmark of Bartolini recipes. It can be made as much as 2 days in advance so long as it is kept covered and refrigerated. Longer than that, it may be frozen and used within a few weeks. In preparation for this post, I made about 500 cappelletti with one batch of filling — and still had enough filling left over to use in another recipe. That dish will be shared sometime in the weeks ahead.

*     *     *

*     *     *

Filling Recipe for Bartolini Cappelletti

Yield: Enough filling to be used with 8 eggs of pasta dough. Recipe found here.

Ingredients

  • 1 1/2 lbs. ground pork
  • 1 1/2 lbs. ground veal (chicken or turkey may be substituted)
  • 2 – 3 tbsp butter
  • 1 pkg (8 oz) cream cheese
  • 1 cup grated Pecorino Romano — Parmigiano may be substituted
  • 2 or 3 eggs slightly beaten — depending on size
  • ¼ tsp ground nutmeg
  • zest of 1 lemon, more if you like

Directions

  1. Sauté meat in butter. Season lightly with salt.
  2. Use meat grinder to process the meats. Add all the ingredients into a mixing bowl and mix until well-combined.
  3. Cover the filling and refrigerate for a few hours or overnight.
  4. Once the filling has rested, you can begin making your cappelletti.

*     *     *

Variations

Our cappelletti are served alone in brodo. Adding other ingredients, aside from a garnish of grated cheese, might serve to overpower the hint of nutmeg or touch of lemon zest flavors within the cappelletti.  My blogging buddy, Stefan, serves his tasty Tortellini in Brodo the same way. Ours is not the only way, however.

Recipes abound that feature tortellini served in brodo with a variety of ingredients. Last October, my friend Linda, of Savoring Every Bite, shared her tasty recipe for one such preparation, a hearty Tortellini Soup. And, not to be outdone, my friend Tanya, over at Chica Andaluza, just last week posted her delicious recipe featuring Tortellini with Leeks and Bacon Broth.  You certainly cannot go wrong with any of these recipes.

*     *     *

*     *     *

Notes

As mentioned earlier, cappelletti are cooked in the broth in which they are served. Bring your broth to the boil over med-high heat before adding the cappelletti. Once the boil returns, reduce the heat to a soft simmer. Too hard a boil may damage the cappelletti. Actual cooking times will vary, depending upon the cappelletti’s size and whether they’re freshly made or frozen. Once the cappelletti begin to float in the broth, they are usually just about ready for serving. I’ll wait another 1 or 2 minutes before tasting one for doneness. Serve immediately with plenty of grated cheese at the table.

Not everyone has the time to make homemade brodo and most of us will turn to store-bought stock occasionally.  Whether you use your own broth or buy one at your local market, make sure it is low sodium. The cheeses within the cappelletti both contain salt and, if you’re not careful when preparing/selecting your brodo, your bowl of cappelletti may be too salty to enjoy. You can always add salt, should the soup need it, just prior to serving.

*     *     *

It’s déjà vu all over again … 

I shared the recipe for Steak Pizzaiola about 2 years ago and, since that time, it has become one of the most popular recipes on my site. Easy to prepare, this is one dish sure to please all members of your family — well, except for the vegetarians. Not to worry. We’ll be sharing recipes for our non-carnivore friends in the weeks to come. In the meantime, you can check out the recipe for steak pizzaiola by clicking HERE.

*     *     *

Coming soon to a monitor near you …

Grilled Sturgeon with Lemon-Caper Sauce

*     *     *

Tomato with Bread Soup

Pappa al Pomodoro

Columbus Day is right around the corner and I can think of no better way to commemorate the day than to share a recipe that typifies traditional Italian cooking. I’ve mentioned in the past that very little goes to waste in an Italian kitchen, bread being a perfect example. Like elsewhere in Europe, bread is baked or bought daily and seldom, if ever, is it discarded because it’s stale. Day old bread is used to make everything from bread crumbs to a delicious Tuscan salad known as Panzanella. {That recipe features Michigan heirloom tomatoes (What else?) and is from Bam’s Kitchen, a wonderful blog whose author currently lives in Hong Kong and offers recipes from around the world.}  Today’s recipe, Pappa al Pomodoro, is another that takes advantage of not just day old bread but, also, the glut of home-grown tomatoes that many experience during Summer. It is a simple dish to prepare but, oh, so very satisfying.

I cannot speak for everyone but I will say that the majority of us, growing up in Italian households, at one time or another experienced the simple pleasure of eating a piece of bread that had just been dipped in Mom’s or Nonna’s simmering pot of tomato sauce. As a boy, Mom would dunk a piece of crusty bread into the pot, blow on it a few times to cool the sauce, and then hand it to me with a warning to be careful because it was still hot. As I got older, I became an expert at sneaking a piece of bread into the pot and then my mouth in one fell swoop without her noticing. (Yeah, right!). Unfortunately, the sauce was every bit as hot as it was years before and a burned mouth was very often punishment for my devious ways. Even so, the reward of a piece of sauce-soaked bread made the risks worth while. And today, far too many years later to mention, my favorite way of checking the seasonings of my tomato sauce is with a chunk of bread, though I’ve grown a little more patient and a burned palate is rare.

Understanding that bit of my personal history may help you understand why I so enjoy Pappa al Pomodoro. Often described as having the consistency of baby food, one might wonder why ever would anyone like this soup. Well, one taste and you’re once again standing next to Mom or Nonna, eagerly waiting for her to blow on a sauce drenched tidbit. Here, though, instead of just having a crust of bread, you have an entire bowl to savor. Better still, the fresh basil and grated cheese gives this dish a wonderful aroma. I’m telling you, if you liked pieces of sauce-dipped bread as a child, you’re going to really enjoy this soup as an adult.

When making this soup, be sure to use the ripest tomatoes you can find. In fact, if they’re a little over-ripe, that’s just fine. As for the bread, it’s best to use day old bread with a good crust; fresh bread just won’t do. I use a small loaf of ciabatta and it works perfectly. If you’ve no day old bread, you can use fresh if you slice it and put it into a warm oven for a few minutes. You’re not trying to toast the bread, merely dry it somewhat, mimicking the feel of bread that’s just past being fresh. This is necessary because dried bread will receive the sauce much more readily than fresh. Think back to when you were a child. The best “samples” resulted from bread that had been fully drenched in the sauce. The same is true here. Lastly, be sure to garnish each serving with olive oil, freshly grated cheese, and a hand-torn leaf or two of fresh basil, the aromas of which will add so much to the dish.

*     *     *

Pappa al Pomodoro Recipe

Ingredients

  • 3 tbsp olive ol
  • 1 onion, chopped
  • 2 garlic cloves, minced or grated
  • 2½ lbs of tomatoes, preferably plums, peeled, cored, seeded, and chopped
  • 2 cups vegetable stock – water may be substituted
  • about 9 oz of day old, crusty Italian bread, cut into cubes (I use a small ciabatta loaf.)
  • 1 cup fresh basil leaves
  • salt & pepper, to taste
  • olive oil, grated Pecorino Romano cheese, and whole basil leaves for garnish

Directions

  1. Heat oil in a saucepan over medium heat. Add onions and sauté until translucent, about 5 – 8 minutes. Add garlic and continue cooking for another minute. Season lightly with salt and pepper.
  2. Add tomatoes, bring to a boil, and then reduce to a simmer. Cook until tomatoes begin to break down, about 5 minutes.
  3. Add the bread and stock to the pot, stirring until the bread is fully coated with the tomato mixture. Continue to simmer until the soup begins to have the consistency of  baby food.
  4. Hand tear the basil leaves, add to the pot, stir, and continue a low simmer for about 10 more minutes. Add more stock or water if it becomes too dry.
  5. Serve immediately, garnished with grated Pecorino Romano cheese, a drizzle of olive oil, and a leaf or two of fresh basil.

*     *     *

Notes

What if you live here, in Chi-town, and you want a bowl of Pappa al Pomodoro but it’s January. Fear not! Although fresh, vine ripened tomatoes are always preferable, you can make this soup with canned tomatoes just as easily. Instead of using the 2½ lbs. of tomatoes listed in the recipe’s ingredients, substitute one large can of San Marzano tomatoes, crushing them by hand before you add them to the pot.

Speaking of San Marzano tomatoes, shopping for a can of the real thing can be a daunting task. Many cans will claim to be filled with San Marzano tomatoes but, after close inspection of the labels, you’ll learn that they are mere plum tomatoes and not their more famous — and expensive — cousins. How do you tell the difference? Like authentic balsamic vinegar, San Marzano tomato sales and distribution are tightly controlled. Click HERE to learn what must be on a can’s label for all San Marzano tomatoes. By the way, if the canned tomatoes are crushed, chopped, or puréed, they are not true San Marzanos. See? Click on the link.

*     *     *

Coming soon to a monitor near you …

Italian Mozzarella!

*     *     *

It’s déjà vu all over again …

With Columbus Day fast approaching, I thought it appropriate to take a look at not one but two posts from the past. The first will share my family’s recipe for a ravioli filling that consists of veal, pork, spinach, cheeses, and seasonings. The second will show you how to use a ravioli die to make the pasta pillows. Click HERE to see the ravioli filling recipe and  HERE to learn how to make the ravioli.

*     *     *

Sis’s Soup with Little Meatballs (Minestra con Polpettine)

You might recall that last December, I demonstrated how to make quadretti, a small, square-shaped pasta. At some point, I mentioned Mom using this pasta in soup to nurse me back to health but that my Sister remembered differently. She recalled Mom serving broth filled with Acini di Pepe, “sick soup”, whenever she was ill. Well, since Monday was Sis’s birthday, why not share the recipe for her sick soup?

Soup made with Acini di Pepe is not a Bartolini tradition. Oh, sure, it was served plenty of times at the old two-flat but it wasn’t made from a recipe that had been handed down from one generation to the next. It came to us, oddly enough, from the Mother of my 5th grade teacher. Mr. D was from Upstate New York and my class was his first in Detroit. In fact, he arrived in my hometown barely 1 week before school started that September. Mr. D wanted to introduce himself to the parish and to our parents so, once classes started, he visited the home of each of his students. He chose the families alphabetically, making mine the second home he entered. And as was so often the case with newcomers who entered the two-flat, he hung around for a number of years — make that decades — afterwards. (There was a similar phenomenon in our backyard that involved Grandpa, our neighbors, and the Parish priests but I’ll save that for another post.) Eventually, Mr. D migrated upstairs, becoming good friends of Zia and Uncle.  At some point, and I do not recall how much time had transpired, his Mother and Aunt came to Detroit for a visit. It wasn’t long before they, too, became ensnared in the two-flat’s web of conviviality. Well, as luck would have it, both women were good cooks and during subsequent visits, recipes were traded. One of the very few recipes to survive is today’s minestra, Acini di Pepe with meatballs. (It took a while but I got us here.)

Acini di Pepe is a small, bead-like pasta that expands during the cooking process, much like couscous. Mom served it to Sis when her tummy was upset, just as she served me quadretti. As was her way, Doctor Mom started with broth only and gradually added increasing amounts of Acini di Pepe to the broth as Sis’s condition improved. The meatballs, polpettine, were never used for medicinal purposes. No, they were served when everyone was well and seated at the dinner table. And did we ever enjoy them. The lemon zest in the polpettine, when mixed with a hint of nutmeg, take this simple soup to an entirely different level. Now, if Acini di Pepe isn’t “your thing,” I strongly suggest you make the polpettine and use them with whatever pastina you prefer. Trust me. You won’t be disappointed.

Oh, yeah. Happy Birthday, Sis!

*     *     *

Acini di Pepe with Meatballs Recipe

Ingredients

For the polpettine

  • 1/2 lb ground veal
  • 1/4 cup grated cheese, pecorino romano preferred
  • 1/2 cup plain bread crumbs
  • 1 large egg, slightly beaten
  • 1/8 tsp nutmeg
  • zest from 1/2 lemon
  • 2 tbsp fresh parsley, chopped
  • salt & pepper, to taste

For the minestra

  • 2 quarts homemade chicken stock (low-sodium store-bought may be substituted)
  • 1 cup Acini di Pepe, uncooked
  • additional grated pecorino romano

*     *     *

*     *     *

Directions

To make polpettine

yield : approx. 100 polpettine, divided, half to be frozen for later use

  1. Place all the ingredients into a bowl and mix until combined. Do not over-work.
  2. Use a melon baller or small scoop to fashion small meatballs. (See Notes below.)
  3. Divide all the polpettine into 2 halves and place each on separate baking sheets.
  4. Place one baking sheet into the freezer and, once frozen, place the polpettine in a container, return to the freezer for use on a later date.
  5. Use the other half as indicated below.

To make the minestra

  1. Bring the stock to a rapid boil.
  2. Add the Acini di Pepe, stir, and then add the remaining half of the polpettine.
  3. When stock returns to the boil, reduce to a medium simmer and cook for about 10 minutes. Stir often but gently so that the polpettine remain intact.
  4. At the end of 10 minutes, taste the minestra to see if the pasta is cooked to your liking and to adjust seasoning, if necessary.
  5. Serve immediately. Have plenty of grated pecorino romano cheese available at the table.

*     *     *

Notes

Polpettine are meant to be relatively small. One polpettino should easily fit upon a soup spoon with plenty of room left for pasta and broth. Although this recipe yields about 100 meatballs, I prefer to use only about half that amount in a 2 quart pot of soup. Of course, you may use more or less depending upon your own preference.

*     *     *

And Now for the Awards Portion of  Today’s Presentation

Over the past few weeks, I’ve been lucky enough to have received a few awards from members within our blogging community. And lest anyone think that I do not appreciate these wonderful gifts, I wanted to make sure that each was acknowledged.

*     *     *

So, to Marie, of My Little Corner of Rhode Island, I say thank you for generously nominating me for the Kreative Blogger Award.

*

*

*     *     *

To Kathryn, of kiwsparks, and Eva, of Kitchen Inspirations, I say thanks for your thoughtfulness in granting me The (Red) Educational Shoe Award. (And to Greg: You’ll just have to wait before you get to see me in stilettos, be they red or some other color.)

*

*     *     *

Finally, to Roger, of Food, Photography, & France, mere words cannot express the depth of emotion that I experienced upon learning you had nominated me for the Sunshine Award.

*

*

*

*     *     *

OK, I know that I’m supposed to answer a variety of questions or volunteer some facts about myself and I must admit to enjoying reading others’ replies. The truth of the matter is, however, that I’m not all that interesting. I am no onion with many layers to be pulled back revealing inner truths. There is no art in this choke. What you see is what you get — and what you get is pretty boring, at that. Besides, what little there is to tell is fodder for my future posts. If I tell you everything about myself now, whatever will I write about next time or the time after that?  And so, to those who truly wish to learn more about me, I say “Stay tuned … “

The next part of any award acceptance is to pass the award along to deserving individuals. Well, there are 3 awards to pass along and I don’t even know how many bloggers, in total, I am to name. I do know, however, that no matter how many good people I nominate, I will surely forget one person and, in all probability, quite a few more. I have been treated kindly by everyone I’ve met here and encouraged in more ways than I could ever enumerate.  I’d sooner quit blogging than hurt or offend any of those who have treated me so graciously. So, rather than nominate many, I shall only nominate one.

A relative newcomer, this blogging friend has taught me a great deal. By her example, I’ve learned that less is more. That silence is truly golden. That to just be yourself and the World will be yours to conquer. And so it is that I nominate, for the Kreative Blogger, The (Red) Educational Shoe, and Sunshine awards, none other than …

*

*

*

*

*

*

*

*

*

*

*

*

*

*

FLAT RUTHIE !!!!!

As soon as word of the awards became known, her friends carried her off to an impromptu party at Chicago’s Fondue Stube. Pictured above, Flat Ruthie is seen with one of her dearest of friends, Thing, as they await the arrival of the fondue pots. Oh, what a night!

So, congratulations Flat Ruthie! I for one, cannot wait to read your acceptance speech. (No fair helping her, 3D Ruth.)

And to Marie, Kathryn, Eva, and Roger, all joking aside, I am both honored and grateful for the awards you’ve sent my way. Mille grazie!

*     *     *

Stracciatella Soup

Stracciatella is an Italian egg drop soup that is common to San Marino and Le Marche, as well as Rome and Emilia-Romagna. The name is derived from the Italian word that means “torn apart” or “rags” and that’s an apt description for the dish. The eggs look like tiny torn rags in the broth. A tasty soup, this easy-to-prepare dish makes a perfect lunch or first course.

The foundation of any good bowl of soup is the broth. Sunday mornings, from late Fall through early Spring, it was fairly common to find a large stock pot, simmering atop Mom’s stove, filled with vegetables, chicken, and a piece of beef.  The resultant broth, brodo, formed the basis of that week’s soup and the occasional batch of risotto. Stracciatella, being so relatively plain, needs that kind of rich, full-bodied broth. I highly recommend making your own stock — be it vegetable or meat-based — for this soup but I, also, realize that not everyone has the time to do so. As a result, if you do use store-bought stock, be sure it’s low-sodium. Once you’ve added the egg and cheese mixture to the broth, you can taste the soup and add salt, if need be.

*     *     *

Stracciatella Soup Recipe

total time: approx.  15 minutes

Ingredients

  • 8 cups (2 quarts) chicken stock (vegetable stock may be substituted for a vegetarian diet)
  • 3 large eggs
  • 1/4 cup grated parmesan cheese
  • 1 tbsp fresh parsley, chopped
  • a pinch of freshly ground nutmeg
  • salt & pepper, to taste
  • grated parmesan cheese for serving

Directions

  1. Combine eggs, cheese, parsley, and nutmeg in a bowl or container with a pouring spout and mix well.
  2. Place stock into a sauce pan and heat over a med-high heat.
  3. When it begins to boil, reduce heat to medium-low, use one hand to gently stir the stock in a circular motion and, with the other hand, slowly pour the egg mixture into the pan.
  4. When all the egg mixture has been added, stop stirring and continue simmering for another minute or so.
  5. Taste the soup and season with salt & pepper, if needed.
  6. Serve immediately with additional grated parmesan cheese.

Variations

I’ve seen stracciatella prepared with spinach several times by television cooks and, in fact, I’ve prepared it this way, too. Strictly speaking, it is not a “true” stracciatella but it is a tasty alternative and just about as easy to make as the original. Take either frozen chopped spinach or fresh spinach that’s been chopped and add it to the simmering stock. Let the stock cook the spinach for a few minutes before stirring and adding the egg mixture. Whether or not you include spinach, with so few ingredients, a delicious bowl of stracciatella is only minutes away.

*     *     *
Stracciatella (soup)

*     *     *

Passatini

Passatini Soup

Let me start this post by stating that, when I was a boy, my Mom was the coolest Mom on the block. After I’d spent a morning hard at play, manufacturing Creepy Crawlers with my Mattel Thingmaker, guess what she served for lunch? Worms. That’s right, WORMS! How cool was that? Granted, we didn’t have actual worms for lunch but we did have passatini, a far more appetizing and tasty alternative. Sometimes called passatelli, passatini are noodles, of a sort, made with bread crumbs & cheese instead of flour and lightly flavored with lemon rind and nutmeg. The noodles themselves are extruded using a special press, a large-holed ricer, or a meat grinder. Once made, they can be added immediately to a pot of boiling stock or placed in single layers on baking sheets to be frozen. After a couple of hours, the now-frozen passatini may be gently placed into a container and stored in an area of the freezer where they won’t be disturbed. As you may have guessed, these noodles are more delicate than most and care needs to be taken when storing them. On the other hand, this recipe can be halved easily, thereby eliminating the need for freezing altogether. Whether freshly made or previously frozen, a steaming bowl of passatini is a meal fit for the coldest of Winter’s days. And if you happen to be serving children of a certain age, you, too, can be as cool as my Mom.

*     *     *

Passatini Recipe

total time: approx.  30 minutes

Ingredients

  • 4 large eggs
  • 2 cups bread crumbs
  • 1 to 1 1/2 cups grated cheese (parmesan or romano)
  • 1/2 tbsp lemon rind
  • 1/2 tsp ground nutmeg
  • chicken stock (vegetable stock may be substituted for a vegetarian diet)
  • grated cheese for serving

Freshly Pressed

Directions

  1. Combine dry ingredients in a large bowl.
  2. Add eggs and mix until a dough is formed. (I use my stand mixer and paddle attachment.)
  3. Form into a ball, cover, and let dough rest for 10 minutes.
  4. Using a large-holed potato ricer or meat grinder, extrude the passatini and place in a single layer on baking sheets, to be used immediately or frozen for later use, as explained in my comments above.
  5. Bring a pot of stock to boil, add the passatini, and reduce to a medium simmer. When the passatini begin to float, cook for 3 to 4 minutes more and serve.
  6. Be sure to have grated cheese available for you and your dinner companions.

Variations

I’ve seen recipes for passatini that include ground meat and even bone marrow, although I’ve never tasted them prepared in that way. I like my worms just the way they are.

*     *     *