Mom was a great lover of ice cream. In the Summer, it was she, far more often than the 3 of us kids, who suggested going out for ice cream after dinner. Dad rarely, if ever, refused her and, so, we’d pile into the car and off we went. Many years later, she and I would be in the car, returning to her home, when she would mention ice cream. The next thing I knew, we’d be standing at some counter waiting for our single scoop cones. Well, Mom’s birthday — as well as that of her Mother — was August 15th; Uncle’s birthday, Zia’s husband, was August 11th; the birthday of my Friend the kitchens’ Taste Tester was on the 7th; and my Friend the Entertainer’s birthday is August 20th — but wait, there’s more. In the Children’s Division, my Grand-Nephew’s birthday is the 1st and the Oldest of the Boys Upstairs has a birthday on the 18th. Well, with so many birthdays to honor, I’m going to post ice cream recipes for the next 3 Fridays of this, their “birthday month.” (My Friend the Entertainer believes that one’s birthday should be celebrated the entire month.) And whether you choose to make any of these 3 ice creams, make sure that on at least one of August’s warm nights, you get yourself a single scoop cone. You’ll soon discover what Mom knew all along: it’s a great way to end a day.
Today’s recipe, pistachio ice cream, is pretty much the same one that Mom gave to me in a recipe book years ago. It’s not a complicated recipe and there’s no custard to make. Still, there are a couple of things to consider. First, and most importantly, the recipe calls for 1 raw egg. Now, I am certainly not advocating the use of plain, raw eggs in this, or any, recipe. When a recipe calls for raw egg, I use eggs with pasteurized shells. You can find them in the egg case at your grocery and using them will eliminate any worry you might have when serving raw egg. Yes, they may cost more but the peace of mind is well worth it. With the “egg question” out-of-the-way, all that’s left is how to deal with the pistachio nuts. First off, I use roasted, unsalted nuts that I shell myself. It is much easier to remove the “paper” off of the nuts if you shell them yourself, and the less paper, the greener your ice cream. Still, even with every bit of paper removed, your pistachio ice cream will not be as green as store-bought. For that, you’ll need to add a few drops of food coloring. Whether to use food coloring is a decision for you to make. Secondly, while half of the pistachio nuts are ground in the blender, I freeze the other half in my freezer, based upon a comment by my Trusty Traveling Companion. Although he likes chopped pistachio nuts in his ice cream, he doesn’t like that they’re often a touch on the soggy side. By adding them to the ice cream already frozen, the problem is avoided.
* * *

* * *
Pistachio Nut Ice Cream Recipe
yield: 1.5 quarts
- 2/3 cup pistachio nuts, shelled & roughly chopped – divided in half
- 1 egg
- 1 cup half & half
- 3/4 cups sugar
- 2 cups whipping cream
- 1 tsp vanilla extract
- 1/8 – 1/4 tsp almond extract
- pistachio nuts, for garnish when serving
Directions
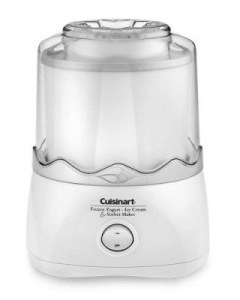
My Baby
- Place half of the pistachio nuts, the egg, and half & half into a blender and “Chop” until nuts are fully ground.
- Add everything but the reserved pistachio nuts to the blender and “Stir” until well-blended.
- Refrigerate for at least a few hours or overnight.
- Pour cream mixture into an ice cream maker and process according to manufacturer’s instructions.
- About 5 minutes before completion, pour the remaining pistachio nuts into the canister. (See Notes)
- When completed, remove the ice cream from the canister for serving or transfer to a sealable container and placed in the freezer.
Variations
There are plenty of pistachio ice cream recipes on the internet offering far too many variations to list here. One particularly interesting method can be found on the Brown Eyed Baker’s website. In addition to adding chopped nuts to the cream mixture, he begins by steeping some of the pistachios in milk, extracting as much flavor as possible from the nuts. If you’re googling pistachio ice cream recipes, be sure to check his out.
Notes
Your machine may not recommend adding nuts to the cream while the machine is running. If that’s the case, process the ice cream per the manufacturer’s instructions. When finished, add the nuts to the semi-frozen cream, stir to fully combine, and either garnish & serve it or transfer it to a sealable container and place in the freezer.
* * *