
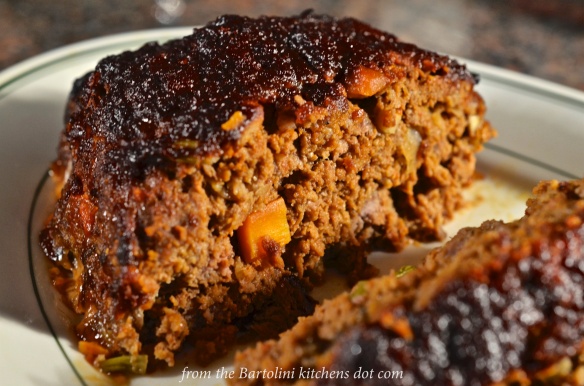
Here it is, the very much delayed meatloaf recipe. Taa-daa!
My love affair with meatloaf goes back more decades than I care to say. I was a boy and didn’t think much about this dish, wondering why we weren’t having hamburgers instead. Then I tasted Zia’s meatloaf. She and Mom were great cooks but Zia’s meatloaf was heaven-sent. I was perennially trying to steal away from our dinner table so that I could have a taste of her meatloaf when she was serving it. Mom caught on quickly enough but rather than get annoyed, she tried to make a better meatloaf. Although hers did, in fact, improve, Zia’s remained the best in my book.
Now move ahead many years. Zia and I have decided to create this blog and we’re making a preliminary list of recipes to include for our family. Well, very early in the process, I added her meatloaf to the list. You can imagine my horror when she confessed that she no longer had the recipe nor could she remember it. All she knew was that she added oats (see above) and nothing else. At that point, I resigned myself to eating mediocre meatloaf for the rest of my days. And let me tell you. I was responsible for many a mediocre meatloaf in those days. (It also drove home the point that these recipes needed to be put to paper and preserved.)
* * *
* * *
About 2 years later, I came upon a post by my now good blogging friend, Tanya. (You may know her as Chica Andaluza. If you don’t, get over to her site for some tasty dishes and to learn of life on her beautiful Mountain in Spain.) She’d shared a recipe for ketchup, and, once I made it, I was instantly converted. I no longer buy ketchup and use this homemade version exclusively. It’s also a permanent member of my Christmas gift baskets, the recipients of which — friends and family — cannot get enough.
At some point — I don’t remember exactly when — I was preparing what would become another mediocre meatloaf when I experienced a true epiphany. Why not use the homemade ketchup? It was a life changing moment … well, meatloaf changing. My meatloaf reached a new level of excellence and, best of all, consistency. No need to worry about which and how much spice to use. The ketchup had everything I would have added. Best of all, during her last visit here, I prepared a meatloaf dinner for Zia and she declared that mine reminded her of her long forgotten recipe. She could not have pleased me more. That’s the day I decided to share the recipe — it’s also the last time I served sliced meatloaf for dinner.
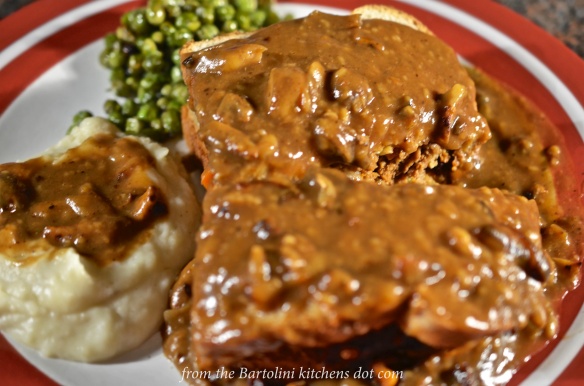
You see, I’m a mid-western boy and we love our meat and gravy sandwiches. It was a special treat on a cold winter’s evening when Mom placed before me a plate containing a meat sandwich and mashed potatoes smothered in gravy. Oh, boy! Over the years, even when serving a mediocre loaf, I dreamt of the next day’s smothered sandwich. Once that craving was satisfied, there would be meatloaf sammiches. These would be gravy-free but would instead contain lettuce, a slice of tomato, and a bit of horseradish sauce. I mentioned it to Zia and learnt that she, too, loved both sandwich and sammich. I’ve not served sliced meatloaf since. Make note of this post’s opening photo. It is the last of its kind in my home.
* * *
This is a very easy recipe to follow but it does result in plenty of meatloaf. I usually fill 2 small foil loaf pans first, and then use the rest of the meat mixture to create a larger loaf. I rarely place this loaf in a pan, preferring to create a free-form loaf by hand. The smaller loaves will eventually find a home in the freezer and, I must say, I get a certain amount of satisfaction knowing that I’ve got a meatloaf in the freezer. I feel the same about its neighbor in there, the tray of lasagna. This brings up another issue …and an invite. If ever you hear of a major power outage lasting for days/weeks in Chicago, rent a car, catch a train, hop a bus, take a flight, pirate a ship, or do whatever you need to get here. My guests and I will be eating mighty fine for the duration — or at least until everything melts.
* * *
* * *
Meatloaf Recipe
Ingredients
- 2 – 3 tbsp olive oil
- 1.5 lb (680 g) ground beef (See Notes)
- 1.5 lb (680 g) ground pork
- 1 medium onion
- 1 carrot
- 1 celery stalk, leaves included
- 2 cloves garlic, grated
- 1 cup oats (I use good old Quaker Oats for “Nothing is better for thee…”)
- 2 eggs, slightly beaten
- 1 cup homemade ketchup, divided (See déjà vu)
- salt and pepper to taste
Directions
- Pre-heat oven to 350˚ F (175˚ C)
- Chop the carrot, celery, and onion to equal size.
- Heat the olive oil in a frying pan over med-high heat. Add the chopped vegetables and cook until soft – about 8 to 10 minutes. Add the garlic midway through.
- Set aside to cool until safe to handle.
- In a large mixing bowl, add the meats, eggs, oats, sautéed vegetables, and 2/3 of the ketchup. Mix to combine but do not over-mix. (See Notes)
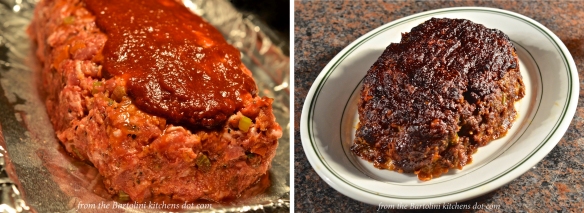
- Use part of the meat mixture to fill 1 or 2 small loaf pan(s). The rest will be used to fill a large loaf pan or to create a free-form loaf on a foil-covered baking pan.
- Use the remaining 1/3 of the ketchup to lightly coat the tops of the loaves.
- Place the loaves in the pre-heated oven.
- Bake for 60 to 75 minutes. Each loaf is cooked when its internal temperature reaches 160˚ F (70˚ C).
- Once cooked:
- For the larger loaf:
- If using a loaf pan, allow to rest 10 minutes, drain the liquids from the pan, removing the meatloaf and placing on a serving platter.
- If not using a loaf pan, allow to rest 10 minutes and place on a serving platter.
- Serve immediately.
- For the smaller loaves:
- Set aside to fully cool. Completely cover with plastic wrap before tightly wrapping in aluminum foil. It can now be frozen for up to 6 months. When ready to serve, unwrap the plastic wrap, replace the foil, and thaw in the fridge overnight. Once thawed, place in a pre-heated 300˚ F (150˚ C) and cook until heated through. (See Notes)
- For the larger loaf:
- If you’re like me, forego the platter and use the liquids to prepare a gravy with cornstarch, a cup of beef stock or low sodium bouillon, and a little milk (optional). Meanwhile, create a sandwich using 2 slices of bread and a generous slice of meatloaf. On the same dish, serve some mashed potatoes with a well in the center. Use the hot gravy to smother the sandwich and fill the mashed potato well. Buon appetito!
* * *

* * *
Notes
At one time, I used equal amounts of ground veal, beef, and pork to make meatloaf. I prefer not to use veal these days unless I can be sure it’s been humanely raised.
If you do not have — or do not want to use — oats, an equal amount of bread crumbs may be substituted.
Overworking the meat mixture will result in a meatloaf that’s too dense. Mix until al of the ingredients are combined but no more than that.
You needn’t thaw the meatloaf before re-heating but I find the results much more reliable. I never seem to get the timing right and dinner is just about always delayed when I stick a frozen meatloaf into the oven. Remember: it’s already been fully cooked so there’s no worry of serving raw meat — just really cold.
* * *
It’s déjà vu all over again …

As I mentioned, the secret to this meatloaf is the ketchup, although the recipe I shared is about as close to the ketchup we all knew as kids as is salsa. Thanks to a recipe derived from one posted by the Kitchens’ good friend, Tanya, the one and only Chica Andaluza, the flavor of my meatloaf has improved greatly. The fact is that I always have a few jars in reserve and am lost without it. (Sorry, Heinz.) You can see my recipe HERE.
* * *
Coming soon to a monitor near you …

Curried Soft Shell Crab
* * *


