Roasted Arctic Char with Fennel, Onions, and Potatoes

Salmerino Alpino Arrostito con Finocchio, Cipolle, e Patate

Arctic Char 1

I think the fishmongers have learned my shopping habits and display their “wares” accordingly. Oh, I enter the store with a list in-hand but, unlike for most, my list is merely the starting point. I need to walk around the store before the real buying begins — and that’s where my fishmongers enter the picture. Knowing that I will come their way, they never fail to have something on display that is sure to catch my eye, and then they simply reel me in. One week it might be a collection of the smallest and sweetest of clams. Another time, it could be merluzzo so fresh I expect them to flap around in the display case. Not so surprisingly, last week, after writing that I was on a mission to find a 1 lb. octopus, I saw the octopus of my dreams perched atop its smaller, inferior brethren and I swear one of its arms motioned for me to come over and have a look. Coincidence? I think not.

It should come as no surprise, therefore, that when I walked up to the counter recently, there, in the center of the display, where only the week before rested snow-white fillets of cod, was today’s arctic char. With flesh more red than salmon (see Notes), these fillets were farm-raised, most likely in tanks on land. (Thank you, Seafood Watch.) Of course, I bought a nice fillet, just like the fishmonger knew I would.

Stepping away from the counter, I realized I didn’t know what to do with my purchase. My only experience with the fish, if you can call it that, was to watch it prepared on “Iron Chef.” The one thing I did know for certain was that I should cook it that night. What’s the point of buying fresh fish if it’s going to sit in the fridge or, worse yet, the freezer, waiting to be called into duty? Moments later with phone in-hand, I googled “arctic char recipes” and, lo and behold, one of the search results was a recipe from Seafood Watch. That is the dish I’m sharing today, with a couple of modifications to suit my tastes.

*     *     *

Ingredients

*     *     *

Roasted Arctic Char with Fennel, Onions, and Potatoes Recipe

Ingredients

  • 12 oz (340 g) arctic char fillet
  • 1 large bulb of fennel, sliced thick
  • 1 medium red onion, sliced thick
  • 12 new/fingerling potatoes, halved and quartered to make them equally sized
  • 1 orange, juice and zest, divided
  • 1/4 cup balsamic vinegar
  • 1/4 cup orange juice
  • 2 tsp brown sugar
  • 1/4 cup olive oil, divided
  • salt & pepper
  • fennel fronds, chopped
  • orange slices, garnish

*     *     *

Veg Cooked

*     *     *

Directions

  1. Pre-heat oven to 450˚ F (235˚ C). Place 1 oven rack in the upper third of the oven, and, another rack in the lower third.
  2. Place potatoes in a baking dish, season with salt, pepper, and 2 tbsp olive oil. Stir to evenly coat. Place on upper rack in the pre-heated oven and roast for 20 minutes.
  3. Place fennel and onion into a bowl. Add half of the orange zest, the rest of the olive oil, and season with salt and pepper. Gently mix to evenly coat the ingredients.
  4. Lightly oil and season both sides of the arctic char. Place on a lightly oiled baking sheet.
  5. After 20 minutes, add the fennel and onion to the potatoes and stir to combine. Return to oven for 15 minutes.
  6. After 15 minutes, place the baking sheet with the arctic char on the lower rack of the oven. Stir the roasting vegetables and return to the oven’s top shelf. Continue to roast for another 10 to 12 minutes, depending upon the thickness of the fish fillet. The fillet is cooked when the flesh flakes easily and is opaque in the center, not translucent.
  7. Meanwhile, place remaining orange zest, balsamic vinegar, orange juice and brown sugar into a small sauce pan over med-high heat. Bring to a boil, lower the heat, and reduce sauce to the consistency you desire.
  8. When fish is cooked, remove to a plate and serve with the roasted vegetables. Drizzle sauce over both fish and vegetables and garnish with a sprinkling of fennel fronds. Place orange slices on the plate, the juice of which may be squeezed on the fillet.

Inspired by a recipe found on the Monterey Bay Aquarium: Seafood Watch site.

*     *     *

Roasted Arctic Char 2

*     *     *

Notes

As mentioned, the flesh of arctic char can be more red than salmon — usually indicating the fish has been farm-raised — but it can be a lighter hue, as well. It is said to taste like a cross between salmon and trout, and not quite as strong as salmon. For this reason, some may feel it tastes a bit more like trout. As a general rule, prepare arctic char as you would salmon and you will not be disappointed.

The Monterey Bay Aquarium created and maintains the Seafood Watch site and App. The App is free and can be loaded into your Apple or Android smart phone and tablet. It is meant to encourage us, the consumers, to purchase seafood that is “fished or farmed in ways that don’t harm the environment.” The App rates seafood as “Best Choice” and “Good Alternatives”, as well those which we should “Avoid.”  Whether at the market or in a restaurant, I use the App to guide my seafood purchases. Unfortunately, Seafood Watch only covers the United States and Hawaii, though there may be a similar App for your corner of the World.

*     *     *

It’s déjà vu all over again …

Homemade dog jerky

Recently, “hits” on my dog jerky post have soared and it has become this blog’s most popular post for each day since dog treats came back into the news. Once again, something in store-bought jerky treats is causing dogs to become ill and far too many have died. (TIME: The FDA has No Idea Why Jerky Treats Are Killing Hundreds of Dogs.) Every dog that I have owned has loved these treats but they are hardly worth the risk, especially when it is so easy to make jerky at home. Before you buy another bag of jerky for your dog, please click HERE to see how easy — and inexpensive — it is to make your own beef & chicken jerky for your pupster.

*     *     *

Coming soon to a monitor near you …

Apple Cake Preview

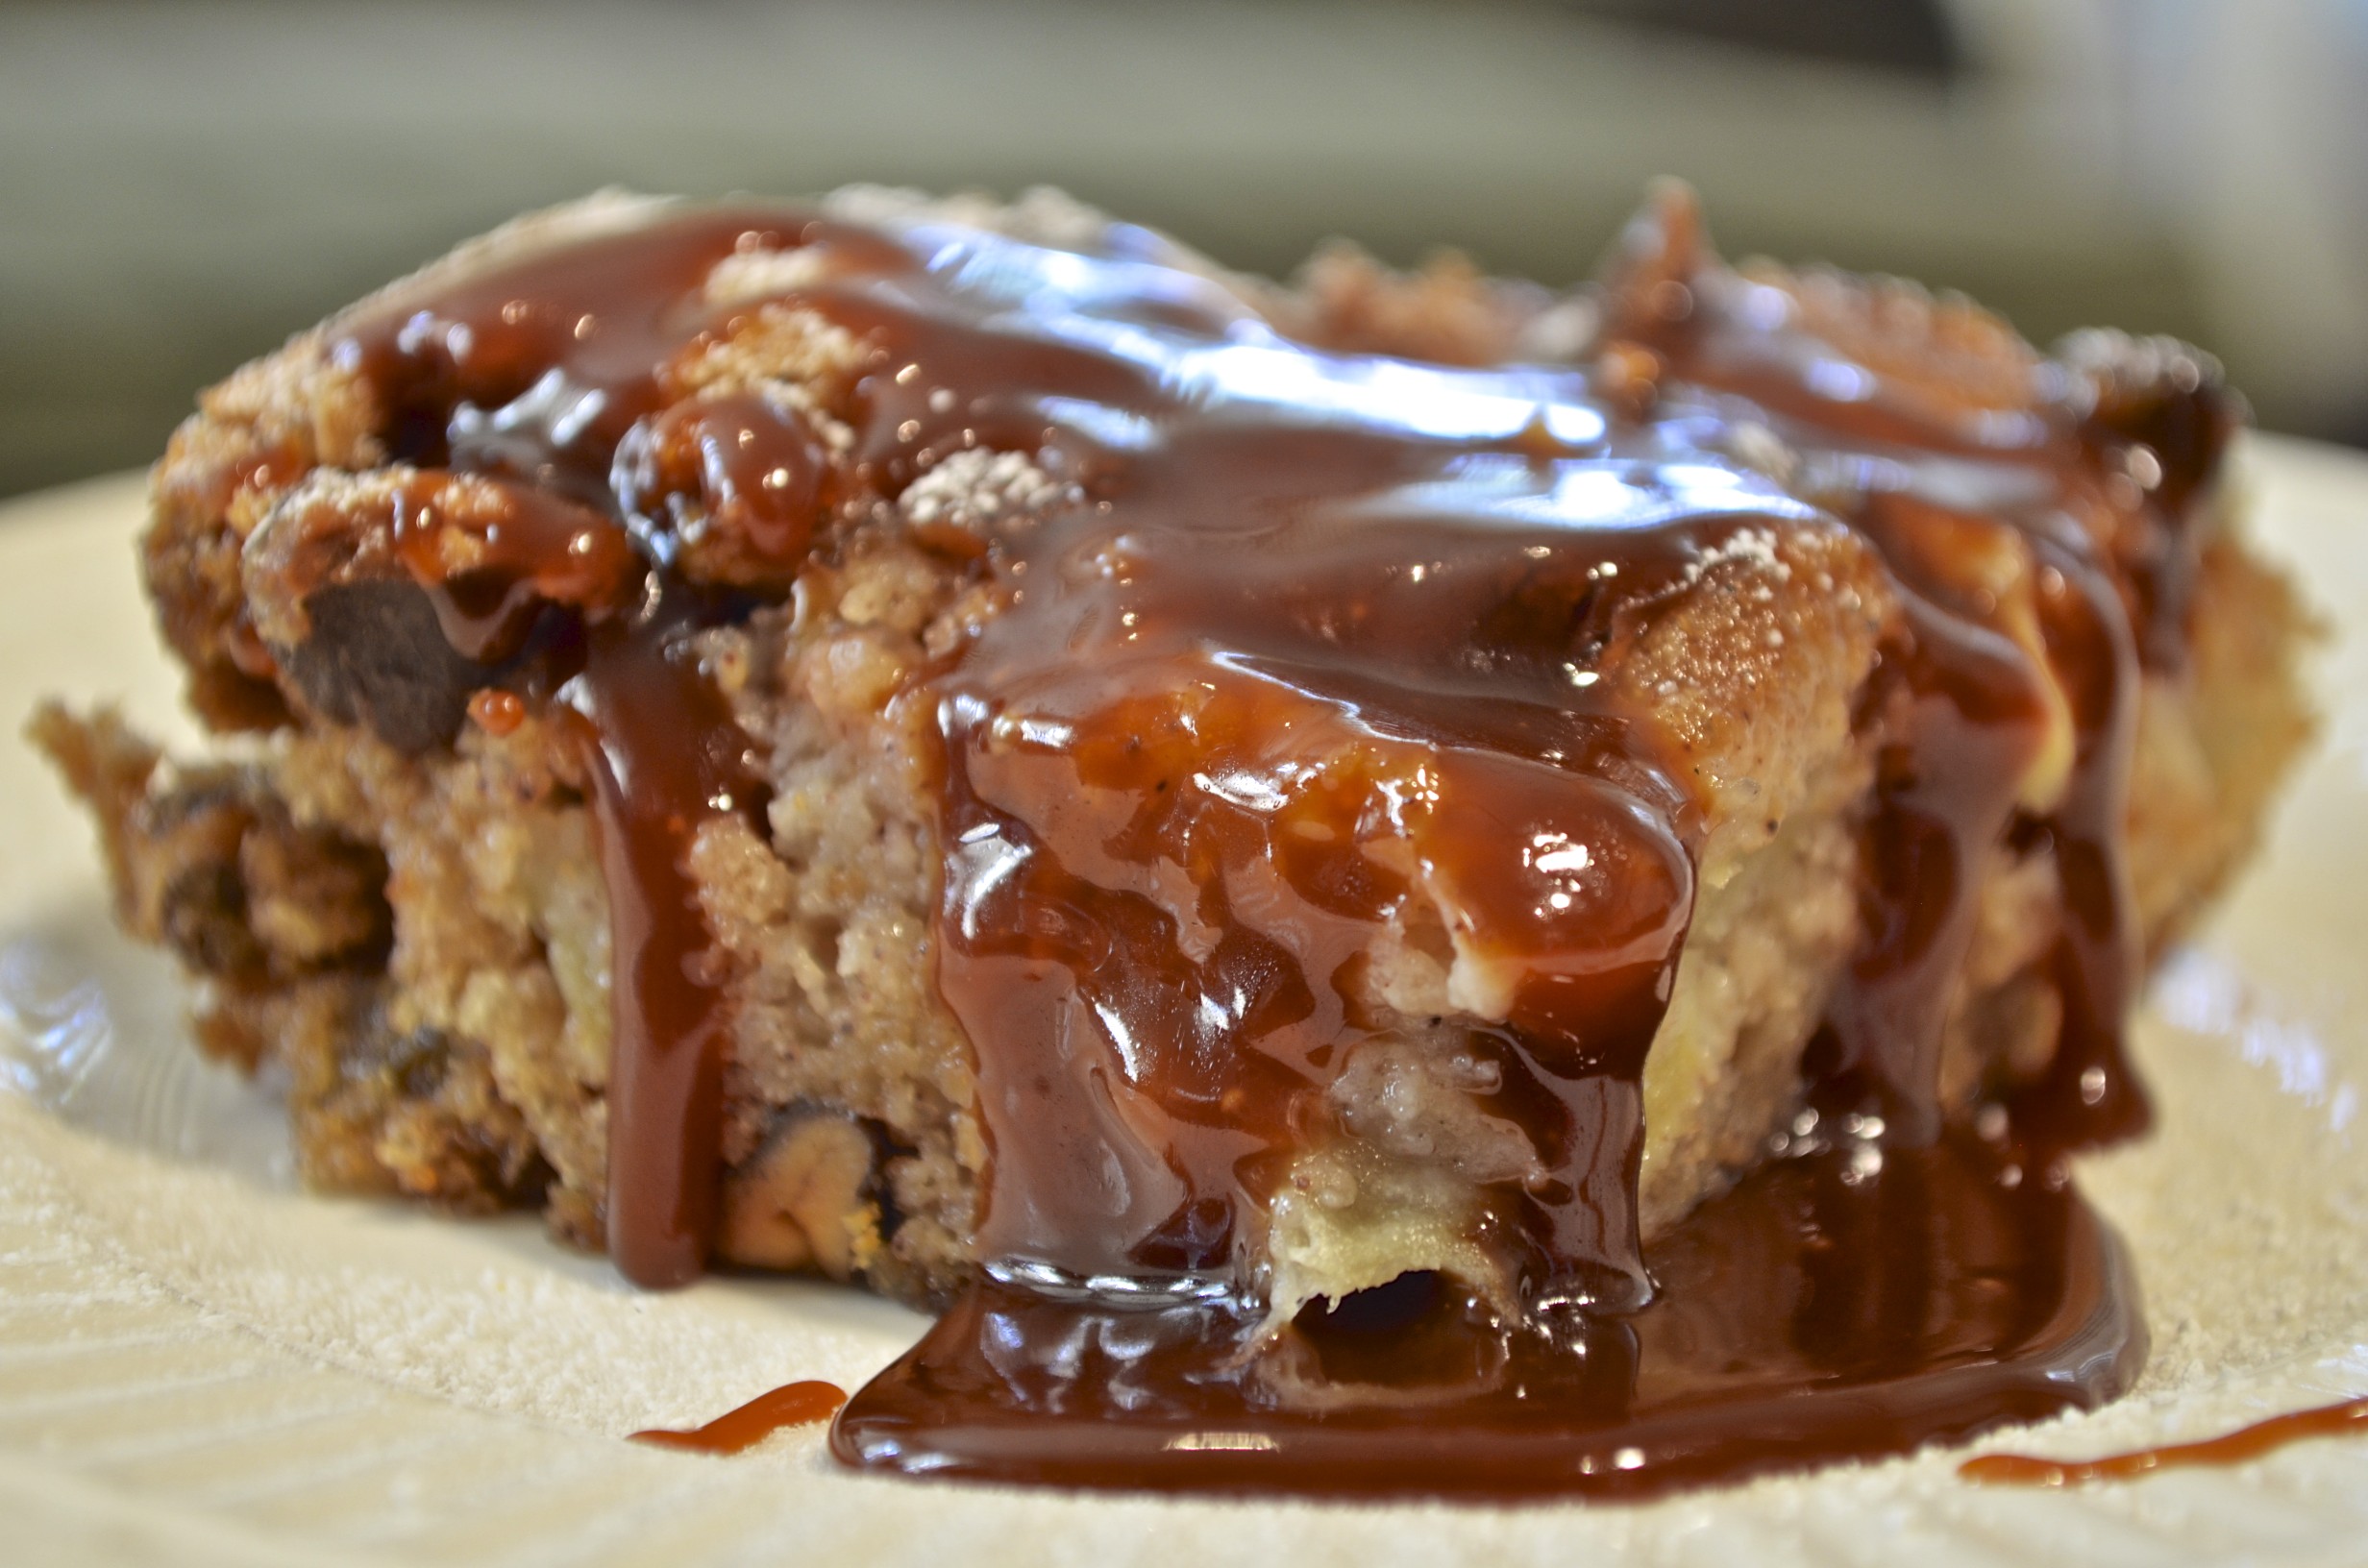
Aunt Mary’s Apple Cake

*     *     *

Today’s Jam is a Real Plum, Damson Plum with Cardamom

My poor Damson plums. Way back in September, I bought 2 overflowing quarts of the diminutive beauties, planning to make and freeze cobblers. Yum, right? Well, this was the Saturday before I was to leave for Michigan and, as luck would have it, there was no time for making cobbler before I left. No problem. I’d bring them to Michigan with me and make cobblers for Zia. The night before I was to leave, I placed the bag of plums on my dining table, along with some of the parts to my ice cream machine. A few hours later, I finished loading the car and left for Michigan. Once there, I realized I had left everything on the table. Poor Zia. She got neither cobbler nor ice cream during my last visit.

*     *     *

Damson Plum Jam 2

*     *     *

Upon my return home, as I unpacked the car I passed by that bag of plums a few times. I really wasn’t in any hurry to look inside, figuring it would be an unsightly mess, at best. So, once everything was unpacked, and with my laundry going, I decided to brave the bag and have a peek. Unbelievably, they were pretty much as I had left them. I dumped them into a colander and, though a few were smashed, none were spoilt. I discarded those that were smashed and rinsed the rest. Now, what to do with them?

Sadly, the cobbler idea had lost its appeal. Having brought home plenty of apples, there were pies and apple cake (recipe forthcoming) in my future and I just wasn’t interested in making cobbler anymore. (A decision I’m sure to regret this Winter.) That meant my long-neglected plums would be used to make jam.

Damson plums are smaller than others and their peel ranges from dark blue to black, some with a hint of deep purple. (Sorry, I forgot to photograph them fresh. See? Neglected.) The flesh is greenish-yellow and the pits adhere to that flesh, something you’ll need to consider when using them in a recipe. When it comes to taste, the flesh is somewhat sweet while the skin is a bit tart. For me, this makes Damson plums perfect for jam. Use a little sugar for a tart jam, more for a sweeter taste.

Today’s recipe is a basic jam and no pectin is required. The only questionable part is the addition of the cardamom pods. If you want, you can just toss them into the pot and fish them out of the plums when you remove the pits. Personally, I don’t like that method. It’s far too likely for one to slip past me and, guaranteed, it will be in a jar that I give to a friend or family member. I much prefer to tie the pods in cheesecloth before placing them in the pot. Depending upon how much cardamom flavor you like, the pod package can be put back into the pot after the plum pits have been removed, an option not available if your use the pods alone. Other than the use of the cardamom pods, you’ll find the recipe to be straight-forward.

*     *     *

Damson Plum Jam - 1

*     *     *

Damson Plum with Cardamom Jam Recipe

Ingredients

  • 36 oz. (1 kg) damson plums
  • 3 c sugar
  • 1 c water
  • 5 cardamom pods (refer to above commentary and Notes)
  • pinch of salt

Directions

  1. Rinse the plums, removing any stems in the process.
  2. Place the plums, cardamom pods, and water in a thick-bottomed pot over medium-high heat and bring to a boil. Reduce heat to low and simmer for about an hour. Remove from heat and allow to cool to touch.
  3. Using your hands, squeeze each plum to remove the pit. Discard the pits as well as all the cardamom pods. Reserve everything else.
    1. Alternately, a food mill may be used to remove the pits and pods.
  4. Place the broken down plums back into the thick-bottomed pot. Add sugar, salt, and cook over medium to med-high heat until a temperature of 320˚ F (160˚ C) is reached.
  5. Test to see if jam is ready (See Notes).
  6. If your plums are jamming, place in sterile jars and seal.
    1. They may be refrigerated and will keep for about a month.
    2. They may be frozen and will keep up to a year. Once thawed, use within 3 weeks.
    3. If preserved/canned (see Notes), jam will keep up to a year if stored in a cool, dark place. Once opened, use within a month.
    4. Source: Home Center For Home Food Preservation
  7. Serve as you would your favorite jam and may be used to flavor roasts, particularly pork.

*     *     *

Damson Plum Jam 4

*     *     *

Notes

According to a number of sites, 5 cardamom pods would equal about 3/4 tsp of ground cardamom. I have not prepared this jam using ground cardamom, so, I’ve no idea whether it will have a stronger taste.

Though there are a few methods of testing to see if your fruit is jammin’, I prefer to use the plate test. While the fruit/berries are boiling on the stove top, place a dish in your freezer. When you think the jam is ready, take about a half-teaspoon of jam and place it on the now chilled plate. Allow the jam to rest a few minutes before using another spoon or your fingertip to see if the jam has set or is still too runny. If the latter, continue to simmer the jam while returning the plate to the freezer to await the next test.

Canning this jam is simple and not unlike other jams & jellies. Once the jam is ready, fill the sterilized jars, leaving 1/2 inch head space. Place lids on top of each jar, tightening until not quite as tight as possible. (I tighten mine fully and then unscrew the lid slightly.) Place each jar on a rack in a large pot of boiling water. Jars must not sit directly on the kettle bottom. Once the pot returns to the boil, begin timing. This jam will need to be processed (boiled) for 10 minutes, if using half-pint or smaller jars (235 ml or smaller). After 10 minutes, remove jars to a cloth-covered counter or baking sheet, away from any drafts. Do not move for at least 12 hours — 24 hours is best — so that the jars fully seal and the jam sets.

*     *     *

It’s déjà vu all over again …

Roast Loin of Pork

Roast Loin of Pork

When our temperatures start to drop, I begin to think of preparing roasts for dinner. The oven brings welcome warmth to the kitchen and my house soon fills with the heavenly aroma of a roast in that oven. About a year ago, I posted a recipe for roast loin of pork that was butterflied, slathered with fig preserves and wrapped in pancetta before roasting. The result was a dinner fit for a holiday. You can see the recipe, along with step-by-step instructions, by clicking HERE.

*     *     *

Coming soon to a monitor near you …

Roasted Arctic Char 3

 Roasted Arctic Char

*     *     *

This Recipe has Legs: Strangozzi Pasta with Octopus

Strangozzi al Polipi

Recentlyour good friend Tanya, of Chica Andaluza fame, shared a recipe for Carpaccio of Octopus. (Do check out that recipe and, while you’re at it, take a few minutes to explore the rest of her fantastic blog.) I’d not thought about octopus in years and that post reminded me that my family once cooked octopus, polipo. I spoke to Zia about it and we decided to prepare it the next time I visited her. That visit took place last month and, with Monday having been Columbus Day, I thought octopus would make a fine way to commemorate his voyage across the Atlantic. After all, there were those that believed his ships would be sunk by a giant octopus long before they fell off the edge of the Earth.

*     *     *

Strangozzi al Polipi

Strangozzi al Polipi

*     *     *

It’s been quite some time since an octopus was given the place of honor at a Bartolini dinner — more than half a century, but who’s counting? We really have no reason for it not being served since then. The dish is delicious, reminiscent of calamari in umido, and it isn’t at all difficult to prepare. No matter. The dish was prepared by my family at one time and thereby has earned a page on this blog.

Back in the day, we would have prepared the octopus in umido, which in this case means stewed in a tomato sauce. Served in bowls with a chunk of good, crusty bread, the dish is delicious and, in some homes, is one of the dishes on the menu for the Feast of the Seven Fishes on Christmas Eve. Originally, I had planned to prepare today’s recipe in umido until reality intervened.

As of now, I know of only one place to buy octopus and that’s at my Italian market. Unfortunately, they only sell very small or very large octopi and each poses a problem for us. When you cook something in umido, it is best that the protein be in large pieces. This is not a soup but a stew, after all, and the pieces should reflect that. Well, the small octopi are so small that it would take 4 to equal a pound (450 g). When chopped, the

Octopus over Polenta

Octopus over Polenta

pieces are far too small for in umido presentation. In fact, Zia and I attempted to serve them over polenta and, though tasty, all but a few pieces were too small even for that. On the other end of the spectrum, the market sells frozen octopi that are 4 and 5 lbs. apiece. Though that would be wonderful to prepare for a Bartolini family dinner, an octopus that size is far too large for a meal for Zia and I. So, although we had to change the dish to suit the circumstances, the search is on now for an octopus weighing 1 pound. When I find one, I’ll either create a separate Polipo in Umido post or amend this one to include that recipe. Bear in mind, though, that the ingredients used in the in umido recipe are the same as those used here for this sauce. Differences, if there are any, will be in the amounts listed. I’ll only be sure of that once I find an octopus in the right size.

Since we couldn’t serve the octopus as we had originally intended, in umido, Zia and I served it over polenta. As I mentioned earlier, that dish didn’t quite work as well as we Bartolini Strangozzi Pastathought it would. Again the octopus pieces needed to be larger. Once home, I bought 3 more small octopi and decided to serve them over pasta. As luck would have it, a few weeks earlier my blogging friend, Lidia, had noticed something while shopping and sent her discovery to me. (Not only does she share the name of one of my favorite chefs, Lidia has a wonderful blog, Oh Lidia, and I hope you take time to have a look.) You can imagine my surprise when I opened the carton and found 3 pastas manufactured by a company called “Bartolini”. I can’t think of a better pasta to serve with this old family recipe than one that shares our family name. So, of the 3 sent, I chose to prepare strangozzi.

In an earlier post, I demonstrated how to make strozzapreti pasta and gave an account of how it got its name. (See It’s déjà vu all over again … ) Strozzapreti, you see, means priest choker and one legend states that this pasta was so delicious that priests choked when eating it for the first time. What does this have to do with strangozzi? Well, it is thought that the word strangozzi is derived from the Italian word for shoelaces, stringhe, yet this pasta has come to mean priest stranglers. Huh?  Stay with me. Centuries ago, in Umbria, the clergy was not looked upon kindly by the villagers. Legend says that they chased down the worst of the clergy and those that were caught were strangled with their shoelaces. These long pasta ribbons are thought to resemble those shoelaces. Death by shoelace immortalized in pasta. Ya gotta love it!

In reality, strangozzi are about the size of what we would call linguine, the only difference being in their thickness. Our linguine are cut from thin pasta sheets; strangozzi is cut from sheets twice as thick. The result is a hearty pasta that is perfect for heavier or meat-based sauces.

*     *     *

Before beginning the recipe, the octopus must be cleaned and readied. The head is actually a hood and the contents of its interior need to be removed. It is easy enough to do and you can slice its side to make it even easier. Next, the eyes must be removed. Make a small slice on either side of each eye, creating a small wedge. Remove each wedge and the eye with it. Since these octopi were so small, I sliced the octopus just above both eyes and again below, creating a ring. I then cut the eyes off of the ring. One last thing to be removed is the beak. Turning the octopus upside-down, you’ll notice a small whole at the center of the 8 legs. With your fingers, carefully feel the beak and note its size. With a sharp knife, cut around the beak and remove. Now that it’s cleaned, cut the legs section in half, creating 2 parts with 4 legs apiece. Cut those pieces in half again, and then again. In the end, you will have separated all 8 legs. Do not chop them but leave them whole and proceed with the recipe.

*     *     *

Click to see any/all photos enlarged.

*     *     *

Strangozzi Pasta with Octopus Recipe

Ingredients

  • octopus (See Notes)
  • 3 tbsp extra virgin olive oil
  • 1/4 tsp red pepper flakes (more or less to taste)
  • 1 small onion, diced
  • 2 cloves garlic, minced or grated
  • 1/3 cup chopped parsley
  • 1 large can, 28 oz (800 g), whole tomatoes – hand-torn
  • 1/2 tsp dried marjoram (2 tsp fresh)
  • 3 to 4 oz dry white wine
  • 1 lb  (450 g) cooked Strangozzi pasta — or whatever pasta you prefer — cooked al dente
  • reserved pasta water

Directions

  1. In a medium saucepan over med-high heat, bring to boil enough water to cover the octopus. Add the octopus and allow to simmer for 1 to 2 minutes after the pot returns to the boil. Small octopus should boil for 1 minute. Larger should be allowed to boil closer to 2 minutes. Remove the octopus and place in an ice bath to stop the cooking process and reserve. Once cooled, see Notes for chopping considerations.
  2. Over med-high heat, add olive oil in a medium sauce pan.
  3. Add red pepper flakes, onion, garlic, and parsley. Season with salt and pepper before sautéing until the onion is translucent and garlic fragrant — about 6 to 8 minutes.
  4. Add the tomatoes, wine, and marjoram, stir to combine. Bring to a boil before reducing to a soft simmer.
  5. After the sauce has thickened and darkened a bit — about 30 minutes — add the chopped octopus and continue to simmer.
  6. If using small octopi, it should be finished cooking in about 20 minutes. Taste a piece after 15 minutes to test for doneness and to check the seasoning. If necessary, add some of the reserved pasta water. (See Notes)
  7. Meanwhile, the pasta should have been cooked al dente and strained. Be sure to reserve some of the pasta water.
  8. In a large bowl or serving platter, combine the octopus sauce with the cooked pasta and mix. If the pasta seems too dry, add some of the reserved pasta water.
  9. Serve immediately.
  10. Like all mildly flavored seafood pastas, grated cheese is not recommended for it will overpower the dish.

*     *     *

*     *     *

Notes

The dish will determine the size of the pieces when chopping the octopus.

  • For pasta dishes, I would suggest chopping small octopi into pieces about 3/4 inches (2 cm). These pieces will shrink a little during cooking and will be easily managed no matter what pasta you choose.
  • For in umido, a larger octopus should be used and, when chopped, the pieces should be larger. Ultimately, the size will depend upon how comfortable you are dealing with the pieces while eating. Even so, I would suggest that all pieces be no less than an inch (2.5 cm) long. (Since this recipe was posted, I did find and prepare a 1 lb. octopus in umido. You can see that recipe by clicking HERE.)

No matter the preparation or the size of the pieces, do try to keep them all the same size. Doing so will ensure that all the octopus is evenly cooked.

Understandably, the larger the octopus, the longer it should simmer in the tomato sauce. A small octopus should take 15 to 20 minutes, as was stated in the recipe above. Larger octopi will take up to 30 minutes, maybe more. Be careful not to overcook lest the octopus become rubbery. If in doubt, taste a piece to see if it is cooked to your liking.

For reasons unknown to me, we’ve always discarded the water used to blanch the octopus. Even though the octopus is in it only briefly, the water does darken in color.

*     *     *

It’s déjà vu all over again …

Strozzapreti with Pesto

Strozzapreti with Pesto

With all of this talk of strangling priests, it’s only logical that today’s look back would be to the strozzapreti post. Not only will you learn how to make the pasta by hand, you’ll also learn how a few of the common pastas got their names. All this can be yours just by clicking HERE.

*     *     *

Coming soon to a monitor near you …

Damson Plum Jam Preview

Damson Plum Jam

*     *     *

Blueberry-Lemon Slice

Blueberry-Lemon Slice

As many of you know, I spend some of my spare time watching a variety of cooking shows. (Note that I didn’t say the Food Network. Since they’ve gone to the dark side of broadcasting — a.k.a. “reality” TV — I watch that network far less.) Since I can not always watch them when broadcast, many of these programs end up recorded on my DVR. Then, on some rainy day or sleepless night, I’ll clear my DVR of these recordings, zipping through the programs hoping that something will catch my eye. That’s how I found today’s recipe and it was quite a catch, even if I do say so myself.

If you’re at all like me, you enjoy the combination of blueberry and lemon flavors. After all, a blueberry muffin without a hint of lemon is just a muffin. These slices have an abundance of both ingredients and the result is one delicious treat. It’s ridiculously easy to prepare and there are no exotic nor hard-to-find ingredients. If you don’t have fresh blueberries, go ahead and use frozen. In fact, I always buy and freeze blueberries at the peak of their season, so, that I can enjoy blueberry pie when the cold weather hits. This Winter I’ll have a slice, too. If you try this recipe, I bet I won’t be the only one.

*     *     *

Blueberry-Lemon Slice Recipe

Ingredients

  • 2 cups all-purpose (AP) flour
  • 1 cup sugar, divided
  • 1 tbsp baking powder
  • 2 tsp salt
  • 1 egg yolk mixed with 1 tbsp water
  • zest & juice of 1 lemon
  • 10 tbsp butter, cubed and placed in freezer for about 30 minutes
  • 3 cups blueberries, fresh or frozen may be used
  • 1 tbsp cornstarch
  • pinch of salt

 *     *     *

This slideshow requires JavaScript.

*     *     *

Directions

  1. Pre-heat oven to 350˚ F (177˚ C)
  2. Place flour, sugar, baking powder, salt and lemon zest in a food processor. Process the ingredients till thoroughly mixed. Add the egg mixture and continue to whirl until combined.
  3. Place the very chilled butter cubes into the food processor. Pulse the ingredients, repeatedly, until the mixture looks like little pearls,
  4. Reserve 2 cups of the crumble mixture and use the rest to cover a greased 9 X 9″ baking dish. Press it down to form a crust.
  5. Meanwhile, place the blueberries, remaining sugar, lemon juice, corn starch, and a pinch of salt into a large bowl. Gently stir until everything is evenly coated.
  6. Once the bottom crust has been formed in the baking dish, pour the blueberries into the baking dish, covering the crust.
  7. Use the reserved crumble to cover the blueberries.
  8. Bake in a pre-heated oven for 35 to 45 minutes. Blueberries should be soft and the crumble browned to your satisfaction.
  9. Allow to cool and set before cutting into squares.
  10. Serve as-is or with optional Lemon Cream & Limoncello Syrup. (See Notes)

Inspired by Clinton Kelly’s Blueberry Pucker Bars, on The Chew

*     *     *

Blueberry-Lemon Slice

*     *     *

Notes …

The sharp-eyed among you may notice that I used an 8 X 8″ baking dish and not the 9 X 9″ dish indicated in the recipe. My 9 X 9″ dish met an untimely end when it crashed into the floor. It was empty, thankfully.

Although I’ve never done so, it’s suggested these slices be served with a Lemon Cream & Limoncello Syrup. Here’s that recipe, also from The Chew:

Ingredients

1 cup limoncello
1/2 cup heavy cream
1 tablespoon granulated sugar
1/4 cup lemon curd

Directions

  1. In a small sauce pan over medium heat, reduce limoncello by half. Refrigerate until well-chilled.
  2. Meanwhile, whip together heavy cream with sugar until stiff peaks form. Fold in lemon curd.
  3. When ready to serve, place a dollop of the lemon cream mixture atop each slice, accompanied by a drizzle of the limoncello reduction.

*     *     *

It’s déjà vu all over again …

PuffballBack in our part of Michigan, it’s puffball season. Well, it’s supposed to be but you never really know until your find them. Sometime during October, these large, oblong-shaped funghi appear in areas that are mostly shaded from the sun. Up until a few years ago, 1 to 3 of them could be found behind Zia’s garage. Now, for reasons known only to Mother Nature, they’ve moved to its side. You needn’t worry about that, though, for you can find some, as well as learn how to prepare them,  by clicking HERE.

*     *     *

Coming soon to a monitor near you …

Preview

Something Special to Commemorate Columbus Day

Octopus

*     *     *

Braised Goat in the Moorish Style

Capra Basata nello Stile di Moresco

Braised Goat with Harissa

I’m back and the Kitchens are once again open. Zia and I thank you all for your kind words and well wishes. She sends her warm regards. She, also, sent me home with a few new recipes — octopus and quail are at the top of that list — and I’ll be sharing them in the weeks to come.

Of course, we did buy our share of honey, over 4 gallons between the two of us. Although I brought home 2.25 gallons (8.5 l), almost all went to my neighbors for distribution among their family members. The “Honey Man”, Mr. Falkenberg, has about 100 hives and they produce enough honey for him to sell it in some of that area’s markets, as well as during not one but two weekends this year. He also sold apples, grapes, and black walnuts.  I bought a 5 pound bucket of grapes for $2.00 and used them to make grape jelly yesterday. The apples were used to make apple sauce and my Zia Mariolla’s apple cake. That recipe will be shared in the near future.

*     *     *

(Click to enlarge any photo)

*     *     *

I’ve mentioned in the past that my family prepared goat, very often at Easter. As the years past, we relied more upon lamb for that holiday meal and I cannot tell you the last time I enjoyed goat in any form. Worse yet, I had no idea where I might purchase some. Well, that all changed a few weeks ago. I didn’t realize it but the vendor at the farmers market from whom I buy organic chicken also sells a variety of meats, goat being among them. Although I couldn’t buy any at the time, I knew I’d be back to purchase some. And that’s the last I’ve seen of that vendor. For whatever reason, they are no longer at the farmers market. Not only did I lose my long sought-after source for fresh goat meat but I lost my organic chicken vendor, too.

Well, returning home after the third week of the vendor’s absence, I decided to take matters into my own hands. I pulled the car to the curb and googled, “Where to buy goat in Chicago?” Lo and behold! Just about a half-mile from my home, there’s a Middle Eastern grocery and butcher. It’s one block West of the Indian market where I buy spices and I’ve walked past it any number of times. Within minutes, I was on my way with a goat shoulder wrapped in brown paper.

Once home and after a quick web search, I settled upon a great recipe. Unfortunately, it required harissa and I didn’t have a recipe for the sauce nor did I feel like experimenting. So, I did what I often do. I went to the Middle East Bakery & Grocery, a little gem of a store located in my old neighborhood. As luck would have it, they make their own harissa on-site and it’s good enough to be used in a number of the restaurants in town.

So, with a goat shouder on the counter, harissa in-hand, and a jar of preserved lemons hiding out in the back of my fridge, I set about making braised goat — but with one major difference. The original recipe uses a dutch oven to braise the roast, slowly, in the oven. When I finally bought the meat, Summer had returned to this area with a vengeance, I wasn’t about to turn on my oven for anything, let alone a long and slow braise. Instead, I pulled out the slow cooker and my kitchen kept its cool. This is the version described in the recipe below.

Oh! One more thing. I will be bringing some goat with me to Michigan next time so that I can learn and share my family’s recipe for roasting it. Get ready, Zia!

*     *     *

Raw Goat Shoulder

*     *     *

Goat in the Moorish Style Recipe

Ingredients

  • 1 cup harissa for marinade
  • 2 – 3 tbsp extra virgin olive oil
  • 2 carrots, chopped
  • 1 large onion, sliced
  • 6 cloves garlic, smashed
  • 2 bay leaves
  • 1 cinnamon stick
  • 3 cilantro stems – that’s right, I’m using cilantro
  • 2 cups low/no sodium chicken stock
  • 1/2 cup dry white wine
  • 1 tbsp honey
  • the rind from half of a preserved lemon, finely chopped
  • salt and pepper
  • harissa for serving
  • Greek yogurt for serving

*     *     *

Goat ready to be cooked

*     *     *

Directions

  1. With a very sharp knife, remove gray skin from the meat. Season with salt & pepper.
  2. Place meat in a large, seal-able plastic bag, add the harissa and completely coat the meat. Place the bag and contents in the fridge overnight. Turn bag over every couple of hours. Remove from fridge 1 hour before cooking is to begin.
  3. Heat oil over med-high heat in a medium sauté pan. Add onions, carrot, garlic, bay leaves, and cinnamon stick, sautéing until soft and fragrant. Season with salt and pepper.
  4. Meanwhile, place stock, white wine, and honey in a small sauce pan, bring to a boil, and then keep warm over a very low flame.
  5. Once the vegetables have been sautéed, dump that pan’s contents into the slow cooker. Add the cilantro and stir.
  6. Place the goat meat atop the vegetables, Be sure to include any remaining harissa left in the bag.
  7. Pour the wine mixture around the roast in the slow cooker. Cover and set to “Low”.
  8. Turn the roast after 1 hour, and then again every 2 hours after. Roast will be cooked in 8 hours.
  9. After 8 hours, remove roast to a dish and cover. Strain the pan juices, discarding the braising vegetables. Set aside to allow the fat to separate and then remove.
  10. See Serving Suggestions below

Inspired by a recipe in the NY Times.

*     *     *

Goat Plated

*     *     *

Serving Suggestions

1) Once cooked, the roast can be carved and served as-is. Sprinkle with the preserved lemon. Suggested accompaniments would be rice, yogurt, and a bit of harissa on the side. The sauce can be reduced to the thickness of your choice. Check for seasoning before serving on the side.

2) Debone the cooked roast and treat it as you would pulled pork. Return in to the slow cooker. Add the preserved lemon and mix thoroughly. Reduce the sauce to the desired thickness and either add it to the pulled goat or serve on the side.

*     *     *

Goat Sandwich on Baby Arugula with Greek Yogurt and Harissa

Pulled Goat Sandwich on Baby Arugula with Greek Yogurt and Harissa

*     *     *

It’s déjà vu all over again …

About a year ago, I posted a recipe for plum cobbler that I jokingly called “magical.” What I didn’t know, but learned while I was visiting Zia, was that the recipe contained a typo. Instead of listing “1 TBSP baking powder”, I had written “1 TSP baking powder.” Big difference, no? I’ve since corrected the recipe  and please make sure you do the same if you’ve made a copy for yourself.

*     *     *

Coming soon to a monitor near you …

_DSC0001 2

Blueberry-Lemon Slice

*     *     *

Making A Beeline for Honey

Honey

By the time most of you read this, I will be well on my way to Michigan. It’s Honey Time in Zia’s neck of the woods and the Kitchens will be closed this week and next. Sorry for the short notice but the Honey Man is only open for business one weekend every year and once again my calendar comprehension skills failed me. Anyway, Zia and I will be buying a few gallons of honey, enough to keep our family and friends sweet for the next 12 months — we hope.

With no recipe to share, I thought I’d take this opportunity to introduce the newest member of my rose garden, a Floribunda Rose, Iceberg Burgundy.

*     *     *

Iceberg Burgundy

“Iceberg Burgundy”

*     *     *

Although it’s doing quite well since being planted in May, there’s a Chicago Winter looming in the distance. If it makes it through this first test, it should do very well after that. Like any new rose to my garden, it will get an extra thick layer of mulch this Fall and I’ll keep my fingers crossed until March.

See you all in 2 weeks.

*     *     *

My Tomatoes Are In A Jam

With today’s post another short one, I thought I’d share a bit more about my Grandpa. When we last left him, he had just finished painting the trim on the two-flat’s peak and had invited the neighbors to come into the backyard to “see my tomatoes” …

(Those interested can read the painting story by clicking HERE.)

*     *     *
Tomato Jam 2

*     *     *

Grandpa was well-known throughout our neighborhood and he could often be seen strolling about, his hands behind his back, with his right hand holding the index and middle fingers of his left hand. The little boy across the street took note and would often mimic Grandpa as they walked together or on opposite sides of the street. For Grandpa, this was the highest form of flattery.

He did more than just stroll about, however. If he heard the rumble of heavy equipment or the whir of power tools, he would be at the job site or backyard within minutes. Having once owned a contracting company, Grandpa knew and understood quite a bit about building and repair work. It wouldn’t be long before he’d be advising the worker(s) and oftentimes he’d pitch in, showing them how whatever it was should be done. His opinion was respected and very often sought out by our neighbors and the parish.

For example, the front of our church was a massive, floor-to-ceiling mosaic depicting a number of Grandpa & Cookiesaints and religious symbols. As the church settled, a large crack began to appear in the center of the mosaic at its base, stretching upward like some leafless tree. Grandpa was called in to repair the crack and to replace the tiny colored tiles. Not long after that, following a lightning strike, Grandpa’s knowledge of masonry was required to help with the repairs to the school. As I said, Grandpa was well-known and respected.

Well, once the heavier garden work — the tilling, fertilizing, and planting — was done for the season and with no repair projects to tackle, Grandpa had time to relax. You could often find him sipping a beer while resting in his hammock under the grape arbor, listening to George Kell announce the play-by-play for the games of his beloved baseball team, the Detroit Tigers. Sometimes he watered the garden from the hammock, using a sprinkler to get those places beyond his reach. Eventually the game would end and that was cause for concern for some of the wives in the neighborhood, for Grandpa would go for a walk.

It didn’t matter who you were — neighbor, passer-by, parish priest, mail carrier, etc. — if Grandpa saw you, he would strike up a conversation and, at just the right moment, invite you to “see my tomatoes.” Within minutes, there you were, looking at his 2 dozen tomato plants, tied to their hockey sticks in neat little rows. He’d show you the brick barbecue, his very much prized Chinese pheasants, the lettuce patch, the grape vines, the potted lemon tree, and his latest attempt at growing a fig tree. Within minutes you’d be invited into the patio and he’d have a cold one in front of you before your rear end settled into your chair. What’s this? You don’t like beer? Not to worry. There was a jug of red wine under the table. Oh? You prefer white wine? There just so happened to be a jug of white wine next to the red. Well, that first beer or glass of wine led to another and another and then another. Somewhere along the line, shot glasses would appear and whiskey was introduced into the conversation. Although the length of these backyard tours varied, they usually ended in the same way, with his guest leaving the yard, though quite a bit more wobbly than when the tour first began. In fact, there were a few times when one of us kids was asked to walk his guest home.

These visits did not go unnoticed by the wives in the neighborhood and a few men refused Grandpa’s subsequent invitations. Others would accept but leave abruptly after Come Into My Parlor ...the first beer. Of course, there were a couple who, for whatever reason, accepted the invitation with no apparent qualms at all. It was after one such visit that a neighbor approached Mom, angry because her husband had ignored her wishes and had returned home moments before, more wobbly than usual. I don’t recall whether she wanted Mom to control Grandpa, her husband, or both but Mom, recognizing a no win situation, did nothing of the kind, The husband, perhaps wisely, kept his distance and I don’t recall ever seeing him in the backyard again.

That’s too bad because he missed one of the greatest parties held in our yard. It was Grandpa’s birthday, though neither Zia nor I can remember the exact one. As was the case for each of his birthdays, all 13 of us ate dinner together in the patio, with a couple of family friends seated at the table as well.  Once the dinner was finished, neighbors and friends joined the party just in time for cake and liquid refreshments. As I said, Grandpa was well-known and you never really knew who’d show up. This year, even the parish Pastor stopped by. The poor man didn’t stand a chance, for the wine, beer, and whiskey flowed freely. I’ve no idea how much time had transpired but I do know that my Dad was seated on our front porch as Grandpa walked the priest back to the rectory. (You may recall the rectory was located at the opposite end of our block.) Dad was still on the porch when the two returned a while later. Apparently, when they finally reached the rectory, the priest kindly offered to walk Grandpa home, he accepted, and so they returned. Realizing that this could go on for hours, Dad offered to walk the good priest home and sent Grandpa to bed. Oddly enough, although he was invited, our Pastor was a no-show at Grandpa’s next birthday party. That was OK, however, for another priest, a recent transfer from Wisconsin, unknowingly took his place …

*     *     *

I first became aware of tomato jam last year through my blogging friend, Marie, when she posted a link to a recipe for tomato jam that used Sungold cherry tomatoes. When I mentioned it to Zia, she remembered that Grandma had made tomato jam when both she and Mom were little girls. The way I saw it, I had little choice but to make a batch, which I enjoyed very much.

This year, my tomato plants did much better than they have in recent years but the weather was far from cooperative. Though Summer started quite warmly, the sun and high temperatures soon departed, not to return until late August. Up until that time, my tomatoes grew but never got the sun and heat needed to ripen. Then, as September started, so did the ripening and soon I had more tomatoes than I could handle. That’s when I decided to revisit tomato jam, making two batches within days of each other.

Unlike last year, however, my tomatoes weren’t Sungolds. In the first batch, I used only heirloom plum tomatoes. In the second, I used an even mix of tiny cherry tomatoes and more heirloom plum tomatoes. Since my tomatoes weren’t as sweet as Sungolds, I referenced Mark Bittman’s recipe for tomato jam, as well as the one suggested by Marie.

*     *     *

_DSC0006 3

*     *     *

Tomato Jam Recipe

Ingredients

  • 3.5 lbs (1590 g) tomatoes, cored, and roughly chopped (peeling optional)
  • 2 1/3 cups sugar
  • 3 green Thai chiles chopped, seeds and veins removed (see Notes)
  • juice and zest of 2 limes
  • 2 tbsp fresh ginger, grated
  • 2 tsp cumin, ground
  • 1 cinnamon stick
  • 1/4 tsp cloves, ground
  • 2 tsp salt

Directions

  1. Place sugar, chiles, and tomatoes in a thick bottomed, non-reactive pot. Stir and allow to sit for 1/2 hour.
  2. Using medium heat, add the remaining ingredients, and bring to a boil, before reducing to a simmer. Stir often to prevent scorching.
  3. Continue to simmer until the mixture resembles jam. This could take as little as 90 minutes or as long as 3 hours, maybe longer. If unsure whether your jam is ready, perform a plate test. (See Notes.)
  4. Once your tomatoes are jammin’, fill sterilized jars to 1/4 inch of the rim. Place the lid on each jar and process in a boiling water bath for 15 minutes. Remove from the boiling water, place on a towel lined baking sheet, and place them all in a draft-free area where they will remain undisturbed for at least 12 to 24 hours.
  5. Check to make sure each jar is properly sealed and store them in a cool, dark place. Those not sealed should be refrigerated and eaten within two weeks.

*     *     *

*     *     *

Notes

When researching the amount of time required to process these jars in a hot water bath, I came across 3 different time requirements; 5, 10, and 15 minutes. Preferring to err on the side of caution, I processed my jam for 15 minutes in a boiling water bath.

Although I peeled the tomatoes in the first batch, it was virtually impossible to peel the dozens of cherry tomatoes, so, I didn’t. I was surprised to find there was no detectable difference in texture between the two batches and I won’t be peeling tomatoes for jam in the future.

After cooking for an hour or so, I used a potato masher to crush any of the cherry tomatoes that remained whole. This released their liquid into the pot and, I believe, shortened the cooking process.

In the first batch, I used 3 green Thai chiles, removing both seeds and veins, thinking they would be too hot if used whole. Well, I could not detect them at all. In the second batch, I used one green Thai chile, leaving seeds and veins intact as I chopped it. It’s heat was barely detectable. I’ve yet to figure out what I’ll do next time but I’ve a feeling there’s one batch of very spicy tomato jam in my future.

There are a few ways to test whether your jam will set. I use the plate test. While your jam is boiling on your stove top, place a dish in your freezer. When you think your jam is ready, take about a half-teaspoon of jam and place it on the now chilled plate. Allow the jam to rest a few minutes before using another spoon or your fingertip to see if the jam has set or is still too runny. If the latter, continue to simmer the jam while returning the plate to the freezer to await the next test.

The cherry tomatoes that I used are an heirloom variety called “Mexican Midget”. One plant will produce a great deal of fruit, though smaller than “normal” cherry or grape tomatoes. The largest of these tomatoes are no bigger than my thumbnail, with many as small as the nail of my little finger. Up until I used them to make jam, I tossed a handful of them into each of my dinner salads — and still dozens remained on the plant.

*     *     *

Tomato Jam 3

*     *     *

It’s déjà vu all over again …

Black FigsSince this is a jammin’ post, we might as well be consistent. Today’s blast from the past is a recipe that I shared last year, Fig Preserves with Balsamic Vinegar and Black Pepper. Not only is this jam great when served with toast and, say, goat cheese, but it works beautifully when used to stuff a pork roast. WIth figs now filling our markets, this is one jam you won’t want to miss. Just click HERE for the details.

*     *     *

Coming soon to a monitor near you …

Braised Goat over RIce

Goat in the Moorish Style

*     *     *

Peanut Butter for Your Pupster

Peanut Butter for Dogs

*     *     *

Today’s recipe is a simple one and the post brief, so, I though I’d take the opportunity to share another Grandpa story. If you’re not interested, just scroll down until you reach the peanut photo. That’s where the recipe begins.

*     *     *

Grandpa was, by all accounts, a Jack of all Trades. Having owned a contracting business, few maintenance and repair jobs around the old two-flat fell outside of his skill set. At any given time, especially in the Summer, he could usually be found performing any one of a number of jobs around the building: cement work, carpentry, tile setting, painting, roof repair, and the occasional electrical project.

As children, we were often enlisted to help him with these projects. When very little, our main duty was to stay out-of-the-way. We soon graduated to beer fetchers and water bearers. “Go-fer” was the next position and, depending on the project and number of men involved, we could be kept running. Soon we were allowed to water the The Old Wheelbarrowdry ingredients to make cement, under supervision of course. Not long thereafter, we were permitted to use the hoe with 2 holes to mix the cement, as well as a variety of small jobs. You might, for example, fill buckets with cement, haul them, maybe cut a board or two, hammer a few nails, etc. And then, one day, you were deemed old enough and big enough to push a loaded wheelbarrow. That was the pinnacle of success for us laborers, for it meant that you big enough and strong enough to do man’s work. Make no mistake, pushing a wheelbarrow full of cement was certainly man’s work. especially under the watchful eyes of the adults present. You did not want it to tip over and there were plenty of opportunities, for every Summer there was at least one job that involved cement. To be sure, though, not all jobs required cement or even a work crew. For those jobs, Grandpa flew solo, like the time he painted the trim of the house.

Unlike bungalows and ranch-style homes, painting a two-flat’s trim was no easy task. As you can see in the photo below, much of the trim is about 25 feet above the ground, with the peak another 8 or so feet higher. To further complicate matters, there were 2 aluminum awnings attached to the front of the house, a small one over Zia’s living room, while a much larger awning shielded our windows and the entire porch minus the entryway. (The photo is current, the awnings having been removed sometime after we left in 1985.) When Grandpa decided the trim needed painting, he was about 71 years of age. This was long before “70 is the new 50”; 70 was 70. I was about 15.

One Summer afternoon, Grandpa called for me to give him a hand. By the time I got to the front of the house, Grandpa had already started up the ladder and was waiting for me. The ladder, however, was not long enough to reach the top, or even near the top, of the peak. Not only that but the awnings prevented it from resting against the building. Instead, it was on a bit of an incline as it laid across both awnings, its top-end suspended a little more than a foot from the wall.

When he saw me, I was instructed to stand on the bottom of the ladder. Grandpa then began to climb higher. In his hand was a hockey stick with a paint brush lashed to the end. I started pleading with him to stop. He ignored me and further up he went. I The Old Two Flatdidn’t know it but he had already placed a bucket of paint on top of the second awning. When he reached the end of the ladder, and with his left arm acting as a brace against the side of the building, he started painting the building’s peak, dipping his hockey stick brush into the paint can below him and then swinging it over his head. Whether because he heard my voice or just by luck, a neighbor came out and, horrified, ran to help me steady the ladder, all the while yelling, “Bart, get down!” Grandpa, of course, ignored him, as well. There was a job to be done, after all. Within minutes, more neighbors came, all pleading with him to stop. All for naught.

As I’ve mentioned in other posts, the parish school was across the street and at the end of the block. At the time, Mom worked there as the school’s secretary. That day, being it was Summer, Mom left her office at 4:00 pm. She didn’t walk far before she noticed a crowd gathering on our lawn and quickened her pace. When she got close enough, she noticed Grandpa on the ladder, swinging a hockey stick. Now running, and a few doors away, Mom was yelling, “Pa! Get Down!” Unperturbed, Grandpa kept painting.

When he had finished, the entire episode having lasted about 30 minutes, Grandpa calmly came down the ladder, handed his hockey stick to someone, went back up for the paint can, and came back down again for the last time. Mom and the neighbors demanded that he stop painting and he complied. In reality, his compliance was by no means submission. The peak was the last of the trim to be painted. His work was done.

The men helped Grandpa put away the ladder and paint supplies. For that, he invited them back to “see my tomatoes.” The invitation had little to do with tomatoes but that’s better left for another post. For now, there’s peanut butter to make.

*     *     *

When I first decided to make peanut butter for Max, he was still a puppy. Then, like now, he loved peanut butter over all other treats. Well, when I read the label of a jar of peanut butter, I decided to make my own. It’s easy enough, as you’ll soon see.

I’ve chosen to remove the shells, roast the peanuts, and then remove most of the “paper skins” before making the butter. You must remove the shells but whether you roast and/or remove the skins is up to you, although I did read that roasting peanuts increases their anti-oxidant effects. That’s about all there is to the recipe. Yes, it really is that simple and your pooch can enjoy a treat without any additives whatsoever.

*     *     *

100_4769

*     *     *
Roasted Peanut Butter Recipe

Ingredients

yield: 1 pint

  • 3 cups unsalted, raw peanuts, shelled (use organic if you can find them)

Directions

  1. Pre-heat oven to 350˚ F (175˚ C)
  2. Place peanuts, single layer, on a baking sheet and roast for 20 minutes. Stir midway through for even roasting.
  3. Remove from oven and set aside until cool enough to handle.
  4. Once cooled, take the baking sheet & peanuts outdoors. Rub a handful of peanuts between your palms. The clean nuts will drop and their “paper skins” will float away on the breeze. (See Notes)
  5. Once cleaned to your liking, place the nuts in a food processor and run.
  6. The peanuts will go through stages:
    1. The nuts will go from coarse to finely chopped in a couple of minutes.
    2. Soon a “dough ball” will form.
    3. A couple of minutes more and a creamy peanut butter will develop. The longer you process it, the more fluid it will be.
  7. Place in an airtight container and store in the refrigerator.

*     *     *

*     *     *

Variations

If using peanuts in the shell, roast for 25 minutes. Once cooled, remove shells and as much of the “paper skins” as you prefer.

If your pooch prefers chunky-style peanut butter — very helpful if this is to be used to hide pills — remove up to 1/2 cup of the nuts after they’ve been coarsely chopped. Add them back to the peanut butter once it has reached the preferred consistency. Stir by hand to combine.

To make peanut butter for the two-legged members of your household, follow the same method as dictated above. When the peanuts are first added to the food processor, you may wish to add salt, and/or a sweetener like honey or sugar, to taste. If you prefer your peanut butter to be more smooth, add a teaspoon or two of a neutral-tasting oil.

Notes

I’ve seen no documentation that states the “paper skins” are harmful or should be removed from the peanuts, whether the peanut butter is intended for use by humans or dogs. Nonetheless, I remove the majority of them, though I’m nowhere near having them 100% cleaned.

As I’ve mentioned, Max loves peanut butter. He has 2 hollow bones that I bought him years ago from a pet store. I put a couple of tablespoons of peanut butter in each and put them in the freezer. If I have to crate him, I give him one of these bones and it keeps him occupied.

Dogs do not sweat as we do. They cool themselves by panting, sending cooler air over the tongue. Giving your dog a frozen treat on the hottest of Summer’s days will help him to keep his cool. With that in mind, I reward my puppy with ice cubes. When fully grown and Summer’s heat is at its worst, I give my dog an ice cube “treat”. He loves it and it will cool him off.

*     *     *

It’s déjà vu all over again …

In my part of the country, the farmers markets are at their peak. Sure, some fruits and A Penne for your Zucchiniberries are gone for the year but the vendor stalls are bursting with many other fruits and vegetables. Judging by what I’ve seen, my use of zucchini blossoms earlier this season didn’t affect their harvest in the slightest. There’s enough zucchini and Summer squash left to go around — and then some. If you’re looking to use some of these squash, while cutting back on carbs, you might wish to check out this recipe for penne with zucchini and Summer squash.

*     *     *

Coming soon to a monitor near you …

Preview Tomato Jam

Tomato Jam

*     *     *

Tart Cherry Frozen Yogurt

Those of you who have followed my blog for some time know that August is Birthday Month for many of my friends and family. Mom and her Mother, Uncle and his Sister, Friends and Tasters, Nephews and a Boy Upstairs, and too many more to mention were all born in the 8th month. You might, also, recall, that Mom loved ice cream and to commemorate her birthday, I normally post ice cream recipes in August. Note the word “normally.”

*     *     *

Tart Cherry Frozen Yogurt

*     *     *

This year I though I would switch things up a bit. You see, about 20 years ago, I bought a fancy schmancy gelato maker and it broke long before the investment paid for itself in tasty frozen treats. Its recipe book survived, however, and one day I made a batch of “frozen yogurt.” Everyone loved it and marveled at the creaminess of this low-fat dessert. The only problem was that, just like the old Seinfeld episode, it wasn’t at all low-fat. There was just as much heavy cream in it as I use in normal ice cream. Yes, there was a little yogurt in the mix but nowhere near enough to justify it being called “frozen yogurt,” let alone “low-fat.” That was about 7 years ago and I’ve never attempted to make frozen yogurt again — until now.

With Birthday Month already underway, I turned to another recipe book for inspiration. I soon found it in the form of a tart cherry frozen yogurt. You see, on my return home following my last visit with Zia, I stopped at a farm and purchased 20 pounds of frozen, pitted tart cherries. (You may be interested to learn that Michigan produces as much as 70% of our country’s tart cherries.) Once home, I delivered some to a neighbor and the rest of the tarts are sitting pretty in my freezer.

So, with recipe and cherries in hand, I made my first batch of frozen yogurt. Unfortunately, it wasn’t at all what I had expected. Sure, the flavor was outstanding but its texture was very much like a sorbet rather than a creamy, frosted confection. Worse, I had doubled the recipe and now had 6 cups (1400 ml) of the stuff to eat — and eat it I did. Waste a frozen dessert in Mom’s Birthday Month? Never! Convinced I had made a mistake — not at all an uncommon occurrence in my kitchen — I tried it again, though this time I made a single batch. The result was the same and I had another 3 cups of frozen yogurt/sorbet to eat.  All the while, Birthday Month marched on.

Last week, having eaten 9 cups of the stuff during what had to have been the coolest August on record, I decided to try again. This time, I put aside the recipe book and borrowed a page from the old gelato maker’s recipes. I added heavy cream. That’s right, heavy cream and I played around with the other ingredient amounts, as well. The result? A frozen yogurt with a texture far closer to ice cream than sorbet and a tart cherry flavor that is oh, so very good. Not only that but since I made this dessert, Summer has returned and our temperatures have soared at least 10˚ F above normal for this time of year. Message received, Mom.

*     *     *

Tart Cherries - 1

*     *     *

In retrospect, I think the poor texture was due to the amount of liquid contained in the bags of frozen cherries. I bet if I had drained much of the liquid, the texture probably would have been less icy. It may have, also, been less flavorful. I guess the World will have to wait for the answer because I don’t think I’ll be making tart cherry yogurt again for quite some time — well, at least until next August, anyway.

*     *     *

Tart Cherry Frozen Yogurt

Ingredients

  • 1 lb (455 g) of tart cherries, pitted
  • 2/3 cup (135 g) sugar
  • pinch of salt
  • a few drops almond extract
  • 1 cups (245 g) whole-milk Greek yogurt
  • 4 oz (118 ml) heavy cream — the more the merrier

Directions

yield: a little less than 1 quart

  1. Place cherries and sugar in a medium sauce pan over med-high heat. Cover, bring to a boil, reduce heat, and simmer for 5 minutes.
  2. Remove from heat and allow to come to room temperature.
  3. Add the almond extract and place the cherries and juice into a food processor or blender. Process until smooth.
  4. Place mixture in a bowl, cover with plastic wrap, and chill in the refrigerator for at least 2 hours.
  5. Once fully chilled, stir to combine the cherries, heavy cream, and Greek yogurt.
  6. Add the mixture to your ice cream maker and process according to the manufacturer’s directions.
  7. Serve or freeze until the yogurt is frozen to your satisfaction.

Originally inspired by David Lebovitz, “The Perfect Scoop”

*     *     *

To make the chocolate sauce:

Melt 4 oz (110 g) in the top of a double boiler. Once melted, add 2 oz (60 ml) warmed heavy cream, a pinch of salt, and mix to combine. Take the chocolate off of the heat and add an 1/8 tsp of vanilla. Stir and serve.

*     *     *

*     *     *

Variations

While I was in the throes of trying to eat all of this sorbet masquerading as yogurt, Sally, creator of the enchanting Bewitching Kitchen blog, posted a recipe for blackberry-cherry yogurt, In it, she used banana to smooth the texture. Not heavy cream but banana! I had intended to follow her lead but Birthday Month was coming to an end faster than was my supply of substandard frozen yogurt. Not only that but there was heavy cream in the fridge but no bananas on the counter. I will, however, keep her “solution” in mind the next time I attempt to freeze yogurt.

Notes

Nothing goes better together than cherries and almonds. Even so, too much almond extract will totally overpower the tart cherry flavor. Use almond extract sparingly, tasting as you go.

This recipe will yield just under a quart of frozen yogurt. Let’s face it, one scant quart of any frozen dessert is hardly worth the effort to make it. Double the recipe and be happy.

*     *     *

It’s déjà vu all over again …

Nothing says "Happy Birthday!" like una bomba!

Nothing says “Happy Birthday!” like una bomba!

If we’re going to take a look back at the end of a frozen dessert post, there really is only one post deserving of mention, especially in August. For today’s blast from the past, I’m going to send you to the granddaddy ice cream post of them all. Yes, it’s the Spumoni Bomba. With layers of cherry, pistachio, and chocolate ice creams, this is one frozen treat your guests will never forget. All you need do is click HERE for the frosty details.

*     *     *

Coming soon to a monitor near you …

Pupster Peanut Butter

Pupster Peanut Butter

*     *     *

Ramps Ravioli with Morel Mushrooms

Ravioli della Cipolle Selvatiche con i Funghi della Spugnola Ramps Ravioli with Morel Mushrooms

You may recall that I visited my Zia last May and returned to Chicago with a number of recipes to share. Though it may have taken a while, today’s post is the last of those recipes, even if not quite what I had planned.

I had a devil of a time finding ramps this past Spring. My normal vendor didn’t harvest any and I was always just a bit late with my other sources. (Evidently ramps, like porcini mushrooms, are in big demand by the area’s restaurants.) Surprisingly, at the very end of the season, my fishmonger had some for sale. I bought up what he had, hoping that they would “keep” the 4 days before I left for Michigan and they did — kinda. Upon my arrival at Zia’s, I unwrapped the ramps, only to find the leaves to be a wilted, soggy mess. I quickly discarded them and kept the bulbs. This meant I would need something green for my ravioli and Zia and I decided fresh spinach would make a nice substitute. My attention now focused on the morels.

Known to but a few, there is a place near Zia’s home where morel mushrooms grow. Living 400 miles away, it is purely a matter of luck for me to be present when the pock Old Morelmarked fungi appear. Nonetheless, everyday I trotted out to the morel patch to see if anything had sprouted and everyday I returned home empty-handed. On the 4th day I gave up. Having had an inkling that this might happen, I had brought a package of dried morels with me to Michigan and used them in today’s dish. By the way, I continued to check the patch everyday until I left and none ever appeared. I did find one morel, however, far past its “use by” date, growing right next to Zia’s porch. I left it alone so that its spores could work their magic. I’ll be back next Spring.

Now, I know that it’s a little late in the year to be posting this recipe, both ramps and morels being out of season, but I did promise to post it. If you wish to prepare this now, you can follow my lead and use dried morels — a far cheaper substitute — and you can use shallots instead of the ramps. No, shallots and ramps are not the same thing but the shallots are readily available year-round and you won’t be at all disappointed with the ravioli.

*     *     *

Ramps Ravioli with Morel Mushrooms 2

*     *     *

Ramps Ravioli and Morel Mushroom Sauce Recipes

Ingredients

For the Ravioli Filling

  • 1/2 tbsp butter
  • 1/2 tbsp extra virgin olive oil
  • 2 cups packed, chopped fresh spinach
  • 1/2 cup ramps diced
  • 1/4 tsp nutmeg
  • 1/2 tsp sea/kosher salt, or to taste
  • 1/8 tsp pepper, or to taste
  • 1/4 cup Pecorino Romano cheese, grated
  • 8 oz (226 g) ricotta cheese, well-drained

For the Sauce

  • 1/2 oz (14 g) dried morels, re-hydrated, liquid strained and reserved
  • 1 tbsp butter
  • t tbsp extra virgin olive oil
  • 1 new garlic bulb, diced
  • 1 to 3 oz of dry white wine
  • 1 cup mushroom soaking liquid
  • 3 thyme stems
  • 1 tbsp butter
  • salt & pepper

*     *     *

Ramps Ravioli

*     *     *

Directions

For the Ravioli Filling

  1. In a frying pan, heat the butter and olive oil over med-high heat. Add the spinach and sauté until cooked through.
  2. Use a slotted spoon to remove the spinach to cool.
  3. Using the same pan, sauté the diced ramps until translucent, remove from heat, and allow to cool.
  4. Once cooled, place the spinach in a clean kitchen towel and wring out as much liquid as possible.
  5. In a mixing bowl, add the spinach, ramps, nutmeg, ricotta cheese, Pecorino Romano, salt, and pepper. Mix thoroughly.
  6. Refrigerate for a few hours or overnight to allow the flavors to meld and the cheese to firm, making it easier to work with later on.

To make ravioli using ravioli dies/molds, please click HERE to see an expert at work. There you’ll, also, find directions for cooking the pasta pillows.

*     *     *

Three morels

*     *     *

For the Morels “Sauce”

  1. In a frying pan, add the butter and olive oil over med-high heat. Add the garlic and sauté until fragrant, about 90 seconds.
  2. Add the morels and sauté for a few minutes, just long enough to give them a little color.
  3. Add the wine and sauté until all but gone.
  4. Add the mushroom soaking liquid and thyme and reduce until the consistency you like for the ravioli.
  5. Add the remaining butter and season with salt & pepper to taste.
  6. Use to lightly dress the ravioli prepared above.
  7. Serve immediately garnished with grated Pecorino Romano cheese.

*     *     *

Ramps Ravioli with Morel Mushrooms 3

*     *     *

Notes

Be aware that there are 2 types of mushrooms, known as false morels, that resemble morels but that are inedible. Do not go foraging for morels unless you know exactly what you are looking for. As is the case with all mushrooms, if in doubt, throw it out.

Morels should not be eaten raw. Stomach distress may result if they are not fully cooked before being eaten. Soaking them is not cooking them.

To re-hydrate morels, soak them in lukewarm water for 30 to 60 minutes before needed. Unlike most mushrooms, it wouldn’t hurt to first briefly hold them under running water to clear any grit that may be in the dimples.

*     *     *

It’s déjà vu all over again …

Tomato and Bread Soup

Tomato and Bread Soup

This is the time of year when gardens in this area are producing tomatoes of all shapes, sizes, and colors. If you don’t stay on top of the situation, you’ll soon be swamped with ripe tomatoes — and that’s true even if you’ve an Evil Squirrel to battle. Today’s blast from the past is a delicious way to utilize the excess. In fact, the more ripe the tomatoes, the better the dish. Pappa al Pomodoro, is a delicious soup that could not be easier to prepare. Just click HERE to learn all about it.

*     *     *

Coming soon to a monitor near you …

Tart Cherry Frozen Yogurt

Tart Cherry Frozen Yogurt

*     *     *