See Quince? Make Jam First Then Jelly

OK. I’ll admit it. I didn’t know a thing about quince. I certainly didn’t hear about them while growing up, let alone see any of them. When I finally did see one, not all that long ago, I thought it to be a very odd-looking apple — and expensive, at that.

Things began to change, however, once I started blogging. Every Fall, quince jelly recipes began to circulate. Then, last August, my friend Celia posted her recipe for making quince jelly on her wonderful blog Fig Jam And Lime Cordial. (If you’re not familiar with her posts, this is your chance. Celia’s blog is one that has a little something for everyone and all of it good.) At the time, I told her that I wanted to make some and would let her know when I did. So, “Hey, Celia! I made quince jam & jelly!”

*     *     *

Quince 1

*     *     *

Once I purchased the quince, I searched for a recipe. Since quince has a high level of pectin within it, I decided to go without adding any more. This, unfortunately, ruled out Celia’s recipe. (Sorry, Celia.) I soon learned that the web is full of quince recipes, all pretty much the same. Quince, sugar, lemon juice, and water combine to eventually produce jelly. Well, I like jelly but I prefer jam. Looking a little further, I came upon a recipe that suited my needs. I settled on a Greek recipe for quince jam called Marmalatha Kythoni. Unlike all others, this one had 2 things going for it.

In the first place, the recipe gave a ratio of quince to sugar (2:1). This is so much more convenient than stating that 1 quart of quince is required. Just how many quince does it take to make a quart? With this ratio, you just buy the quince, peel, core, chop, and then weigh them. Whatever the weight, you’ll need half that amount in sugar. (You’ll note that in the recipe, I stated the quince amount in ounces (grams) to make the math easier.)

Secondly, water used to boil the quince in this recipe may be used to make quince jelly. Granted, you won’t be making a lot but you will get a little over a cup for your efforts. The same ratio (2:1) applies when making jelly, too. The difference being in this case, you use measures and not weight. So, I had 4 cups of quince liquid and used 2 cups of sugar to make a pint of jelly. It could not be easier.

The amount of lemon juice to be used is up to you. I like things a little tart, so, I added both lemon juice and zest when making the jam. For the jelly, I used lemon juice only. It’s my “control” and I’ll taste the jelly to determine whether I overdid the lemon when making the jam.

*     *     *

Quince Jam 3

*     *     *

Quince Jam Recipe

Ingredients

  • 52 oz (1474 g) quince, peeled, cored, and chopped (see Notes)
  • 26 oz (737 g) sugar
  • 1.25 cups (300 ml) water, divided
  • zest of 1 lemon
  • juice of 1/2 lemon

*     *     *

Quince Jam 2

*     *     *

Directions

  1. Place chopped quince in a large pot with a lid and add enough water to cover (see Notes). Place the lid on the pot and bring to a hard boil over high heat. Reduce to medium heat and continue to simmer for 30 minutes. Keep covered, shut off the heat, and let sit for another 30 minutes.
  2. Strain, reserving the liquid for the Quince Jelly Recipe, and place the chunks in a food processor, along with 1/4 cup (60 ml) of water.  Process until the quince is the consistency you prefer.
  3. Place the now-processed quince in a thick bottomed sauce pan along with the sugar, lemon juice, and lemon zest. Bring to a boil over med-high heat before reducing to medium and simmer, stirring almost constantly to prevent scorching.
  4. Continue to simmer and stir until the jam is the consistency you prefer, from 30 to 60 minutes, maybe longer.
  5. Place jam in still hot, sterilized jars, place lids and seal — though not quite as tight as you can.
  6. Place jars on a rack in a boiling water bath deep enough so that there’s at least 1 inch of water over the top of the tallest jar. When the boil returns, process for 10 minutes.
  7. Remove jars from the pot and place on a baking sheet or counter, out of drafts. Be sure to cover the surface with a cloth to prevent the hot jars from shattering when they touch a cold surface. Do not move for at least 12 hours, though 24 is best, to give the jars a chance to seal and the jam to fully set.
  8. Preserved quince jam will keep for one year, though some degradation of taste and color may begin to occur after 6 months.  Best to enjoy your jam before that. (Source: Pick Your Own)

*     *     *

Quince Jelly 3

*     *     *

Quince Jelly Recipe

Ingredients

  • 4 cups (1000 ml) quince water reserved when making quince jam, recipe above.
  • 2 cups sugar
  • 1 tbsp lemon juice

*     *     *

Quince Jelly 1

*     *     *

Directions

  1. Place the reserved liquid, sugar, and lemon juice in a medium saucepan over high heat.
  2. Stir constantly until the liquid reduces by about 2/3, developing a syrupy consistency. (it took mine about 40 minutes.)
  3. Use a large spoon to quickly remove any foam before filling the still-hot, sterile jars to 1/4 inch from the top. Follow canning instructions listed in the Quince Jam Recipe above, processing this jelly for 5 minutes in the hot water bath.
  4. Store jelly on a cool, dark shelf.

*     *     *

Quince & Queso Manchego

Crostini with Quince Jam & Queso Manchego

*     *     *

Notes

It took 8 quince that, after peeling, coring, and chopping, rendered the 26 oz used in the Jam recipe.

It is best to use ripe quince for this recipe. To check for ripeness, sniff either end of the fruit. Ripe quince will have a floral scent.

When cut, quince will brown. To prevent this, place the pieces in a large bowl of water. When ready to start cooking the quince, I used this water to cover the pieces in the pot, as indicated in step 1 of the Jam recipe.

If you plan to make jelly using the cooking liquid, you will need to strain it through a few layers of cheesecloth or, if none is available, muslin or coffee filters will work, too.

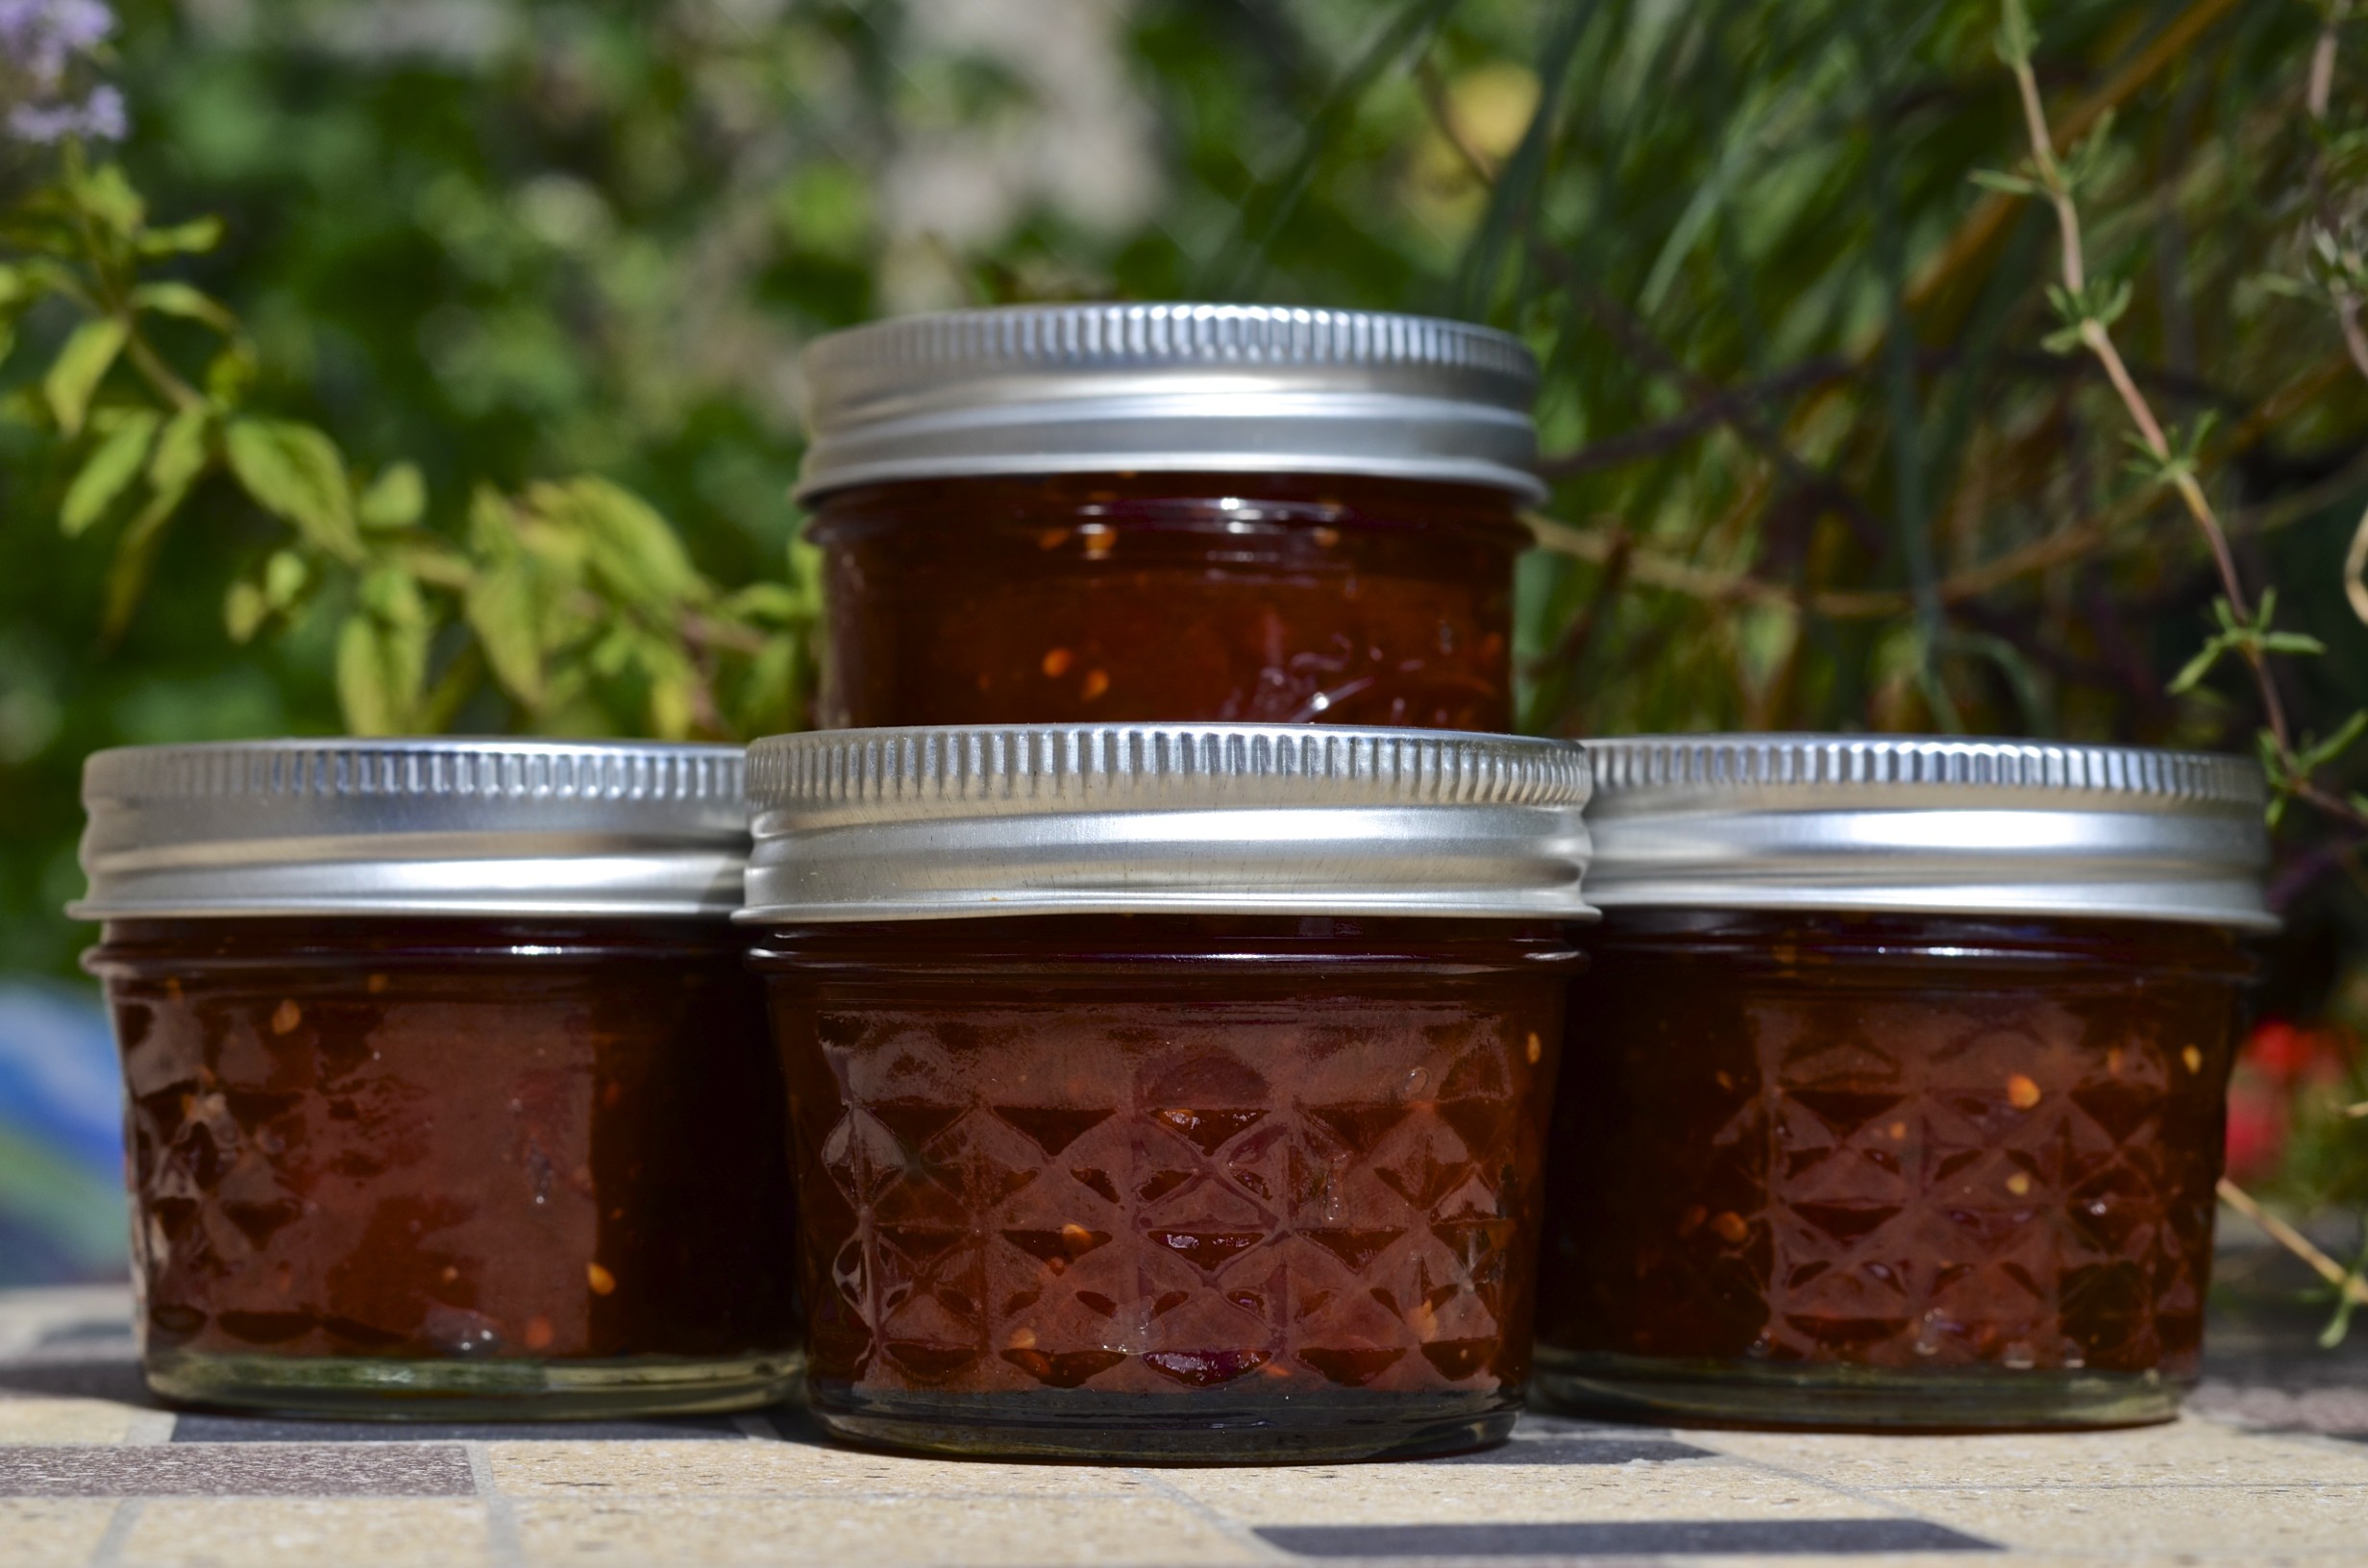
As you can see in the pictures, my jam is lighter than most. Granted, it darkened a bit as it cooked but never reached the deep color that I associate with quince jam. I was a bit concerned until I compared mine to the photos accompanying the original recipe. In that light, mine is quite similar to the original. Whew! My guess is that this jam recipe doesn’t cook the quince as long as the others, and that deep pink color needs a long cooking time to develop. As it was, my jam was thick enough that I had no choice but to pull it off the heat.

*     *     *

It’s déjà vu all over again …

Baccalà

With Christmas approaching fast, for the next few weeks I’ll devote this section to some of our favorite holiday recipes. To kick things off, I thought we’d take a look back to our traditional Christmas Eve dish, Baccalà alla Marchigianna. In this preparation baccalà, once rinsed and rehydrated, is cooked in a tomato sauce with potatoes. Serve it with a chunk of bread and you’ll forget all about Santa’s coming in a few hours — well, at least until you’ve cleaned your plate. You can learn how to make this flavorful dish just by clicking  HERE

*     *     *

Coming soon to a monitor near you …

Uova da Raviolo - Preview

Uova da Raviolo

*     *     *

Advertisement

Green Tomato Relish

Thanks to all who sent their condolences during the past week. My family reads this blog and I know that they were as touched by your thoughtfulness as was I.

*     *     *Green Tomato Relish 2

*     *     *

This has been quite a month and I hope you’ll understand if I’ve not been as frequent a visitor or commenter on your blogs as I have been in the past.

*     *     *

This was the first year that I tried my hand at making green tomato relish. The sad fact is that, for the last few years, my tomato harvest has been anything but bountiful. From blight, to cracked containers, to damaging winds, it seemed The Fates had conspired against me. Add the daily, early morning raid by my nemesis, Squirrel, and I was lucky to get one pot of sauce in all of August, though I did manage to prepare a few BLTs. Things got so bad last year that I tossed both plants and containers into the trash in mid-August. (Take that, Squirrel!)

Determined to return to the good old days, when I was rewarded with quarts of tomato sauce, last Winter I bought new planters. When, in the Spring, my seedlings looked pathetic, I bought heirloom plants from the farmers market, some of which were the same as my under-achieving seedlings. And then I waited patiently. Lo and behold, I was richly rewarded. My Brandywine supplied me the “T” for all Summer’s BLTs. My cherry tomato, Mexican Midget, insured my salads never went tomato-less and still yielded enough for me to make tomato jam. Finally, my plum tomatoes, San Marzano, kept me awash in tomato sauce. Grandpa would have been proud.

As October drew to a close, I went out and picked the San Marzano plants clean of green tomatoes. The other vines had all but given out at that point. Setting aside some to ripen on a window sill, I chopped the rest, rendering about 1 of the 2 quarts needed for the relish. I then bought 4 large green tomatoes at the farmers market. 3 were needed for the relish and the 4th, destined for BLTs, joined the others on the window sill.

Searching the web for a recipe wasn’t as easy as I had thought. Most that I ran across required a number of large tomatoes without giving an associated weight or volume. As you can see in the photo, my tomatoes were varied in size and I had no idea how many would equal, say, “24 large green tomatoes”.  The recipe I finally chose gave the ingredients in quarts required —  equivalent metric units were, also, provided — and could be adjusted to suit the volume of tomatoes on-hand. It wasn’t long before my relish was underway.

Not having much experience with green tomato relish, I cannot say how this compares with other recipes. I do know that the night following “relish day”, my kitchen smelled like a condiment station at Wrigley Field. Needless to say, this relish is the perfect accompaniment for a hot dog or even the “best of your wurst.”  

*     *     *

Today, Wednesday, the Jewish Faith celebrates the start of Hanukkah, while tomorrow we in the States celebrate Thanksgiving. Whether you celebrate the holidays, I hope your day is a good one. Have a Wonderful Hanukkah & Happy Thanksgiving!

*     *     *

Green Tomatoes 1

Relish, we are your father.

*     *     *

Green Tomato Relish Recipe

yield: 5 to 6 pints

Ingredients

  • 2 quarts chopped green tomatoes (see Notes)
  • 2 large onions, chopped (next time I’ll use one)
  • 1 green pepper, chopped
  • 1 red pepper, chopped (I used red for color; green may be substituted)
  • 2 jalapeños, chopped
  • 4 tbsp canning/pickling salt
  • 2 cups sugar
  • 2 tbsp prepared mustard (yellow mustard seed may be substituted)
  • 2 tsp celery seed (if celery salt is used, do not add additional kosher salt)
  • 1/2 tsp kosher salt
  • 8 whole cloves wrapped in cheesecloth
  • 2 cups white vinegar (5% acidity)

*     *     *

Green Tomato Relish 1

NOOOOOOOOO!

*     *     *

Directions

  1. Place tomatoes, onions, peppers, and jalapeños a large bowl and sprinkle with salt. Stir to mix and set aside for 1 hour. After the hour has passed, drain the liquid before placing the mixture into a large, heavy-bottomed pot.
  2. Add the sugar, mustard, celery seed, cloves, and vinegar to the pot and stir to combine. Heat the mixture over med-high heat until it boils. Reduce heat and simmer for 20 minutes.
  3. Place relish into sterile jars and fill to 1/4 inch of top and cover. Once cool, store in the fridge where it will keep for 2 weeks.
  4. For canning instructions, see Notes.

Inspired by a recipe on Food.com

*     *     *

Relish & Dog

A destiny fulfilled.

*     *     *

Notes

It took about 6 large tomatoes to make 2 quarts chopped. Sizes vary and you may need more or less tomato to fill 2 quarts.

Even though you can store this relish in the fridge, 5 or 6 pints is an awful lot of relish to use within 2 weeks. I prefer to can the relish, giving me a supply that will keep for up to one year. To can:

  1. This should be done while relish and jars are still hot.
  2. Bring a large kettle of water to the boil over high heat. Place a rack or towel in the bottom of the pot so that no jar will come in contact with the bottom of the pot.
  3. Seal each jar a little less than fully tightened.
  4. Place jars in the boiling water. Do not allow them to touch each other and the water should cover the tallest jar by at least 1 inch (2.5 cm).
  5. When the water returns to the boil, process the jars for 10 minutes.
  6. Remove the jars to a cloth-covered counter or baking sheet, away from any drafts. (The cloth will prevent the jars from shattering should they come in contact with a cold surface.) Do not move for at least 12 hours, though 24 hours is best.
  7. Relish stored in a cool, dark place should keep for about a year.

*     *     *

Forget Moose. Must get Squirrel!

One day last Summer, after listening to me yet again bemoan Squirrel’s daily raids on my tomato plants, my friend Cynthia mentioned that she’d heard that squirrels steal tomatoes for the moisture they provide. The squirrels will take a bite and a drink from each one that they pilfer. If you want to reduce the thievery, the theory goes, leave a dish of water for them to drink. I didn’t experiment with this because I had stumbled upon my own way of dealing with Squirrel — and a shot-gun wasn’t even involved. Every day or so, I walk around my plants’ containers, picking up tomatoes that have fallen due to the wind, Squirrel, or a passing Max. (He has a yard to patrol yet insists on circling each container.) One afternoon, while on my way out, I gathered up the tomatoes on the ground, placing them on a table on the deck — and promptly forgot all about them. The next morning, much to my surprise, a couple of the tabled tomatoes were stolen by Squirrel but those on the vine were left alone. From that day on, like my Roman ancestors of long ago, I paid a tribute of fallen tomatoes to my enemy, a four-legged barbarian, and my wealth, my tomato harvest, was spared. Only time will tell whether this arrangement will work next season.

*     *     *

It’s déjà vu all over again …

Fall is typically when a Bartolini’s thoughts turn to sausage making. The cooler temperatures make it far less likely to run into the spoilage problems that you might Bartolini Sausageencounter in Summer’s heat. Not only that but years ago my family hung the freshly made sausage in their screened, back porches to dry/cure in the chilled air. Once cured, the sausages were sliced and eaten like salami. Well, despite all that — and the photo, for that matter — I no longer make sausages, preferring to make patties instead. No matter your preference, you can learn how to make sausage like a Bartolini by clicking HERE.

*     *     *

Coming soon to a monitor near you …

Quince Preview 2

Quince: The end of the year’s canning

*     *     *

Today’s Jam is a Real Plum, Damson Plum with Cardamom

My poor Damson plums. Way back in September, I bought 2 overflowing quarts of the diminutive beauties, planning to make and freeze cobblers. Yum, right? Well, this was the Saturday before I was to leave for Michigan and, as luck would have it, there was no time for making cobbler before I left. No problem. I’d bring them to Michigan with me and make cobblers for Zia. The night before I was to leave, I placed the bag of plums on my dining table, along with some of the parts to my ice cream machine. A few hours later, I finished loading the car and left for Michigan. Once there, I realized I had left everything on the table. Poor Zia. She got neither cobbler nor ice cream during my last visit.

*     *     *

Damson Plum Jam 2

*     *     *

Upon my return home, as I unpacked the car I passed by that bag of plums a few times. I really wasn’t in any hurry to look inside, figuring it would be an unsightly mess, at best. So, once everything was unpacked, and with my laundry going, I decided to brave the bag and have a peek. Unbelievably, they were pretty much as I had left them. I dumped them into a colander and, though a few were smashed, none were spoilt. I discarded those that were smashed and rinsed the rest. Now, what to do with them?

Sadly, the cobbler idea had lost its appeal. Having brought home plenty of apples, there were pies and apple cake (recipe forthcoming) in my future and I just wasn’t interested in making cobbler anymore. (A decision I’m sure to regret this Winter.) That meant my long-neglected plums would be used to make jam.

Damson plums are smaller than others and their peel ranges from dark blue to black, some with a hint of deep purple. (Sorry, I forgot to photograph them fresh. See? Neglected.) The flesh is greenish-yellow and the pits adhere to that flesh, something you’ll need to consider when using them in a recipe. When it comes to taste, the flesh is somewhat sweet while the skin is a bit tart. For me, this makes Damson plums perfect for jam. Use a little sugar for a tart jam, more for a sweeter taste.

Today’s recipe is a basic jam and no pectin is required. The only questionable part is the addition of the cardamom pods. If you want, you can just toss them into the pot and fish them out of the plums when you remove the pits. Personally, I don’t like that method. It’s far too likely for one to slip past me and, guaranteed, it will be in a jar that I give to a friend or family member. I much prefer to tie the pods in cheesecloth before placing them in the pot. Depending upon how much cardamom flavor you like, the pod package can be put back into the pot after the plum pits have been removed, an option not available if your use the pods alone. Other than the use of the cardamom pods, you’ll find the recipe to be straight-forward.

*     *     *

Damson Plum Jam - 1

*     *     *

Damson Plum with Cardamom Jam Recipe

Ingredients

  • 36 oz. (1 kg) damson plums
  • 3 c sugar
  • 1 c water
  • 5 cardamom pods (refer to above commentary and Notes)
  • pinch of salt

Directions

  1. Rinse the plums, removing any stems in the process.
  2. Place the plums, cardamom pods, and water in a thick-bottomed pot over medium-high heat and bring to a boil. Reduce heat to low and simmer for about an hour. Remove from heat and allow to cool to touch.
  3. Using your hands, squeeze each plum to remove the pit. Discard the pits as well as all the cardamom pods. Reserve everything else.
    1. Alternately, a food mill may be used to remove the pits and pods.
  4. Place the broken down plums back into the thick-bottomed pot. Add sugar, salt, and cook over medium to med-high heat until a temperature of 320˚ F (160˚ C) is reached.
  5. Test to see if jam is ready (See Notes).
  6. If your plums are jamming, place in sterile jars and seal.
    1. They may be refrigerated and will keep for about a month.
    2. They may be frozen and will keep up to a year. Once thawed, use within 3 weeks.
    3. If preserved/canned (see Notes), jam will keep up to a year if stored in a cool, dark place. Once opened, use within a month.
    4. Source: Home Center For Home Food Preservation
  7. Serve as you would your favorite jam and may be used to flavor roasts, particularly pork.

*     *     *

Damson Plum Jam 4

*     *     *

Notes

According to a number of sites, 5 cardamom pods would equal about 3/4 tsp of ground cardamom. I have not prepared this jam using ground cardamom, so, I’ve no idea whether it will have a stronger taste.

Though there are a few methods of testing to see if your fruit is jammin’, I prefer to use the plate test. While the fruit/berries are boiling on the stove top, place a dish in your freezer. When you think the jam is ready, take about a half-teaspoon of jam and place it on the now chilled plate. Allow the jam to rest a few minutes before using another spoon or your fingertip to see if the jam has set or is still too runny. If the latter, continue to simmer the jam while returning the plate to the freezer to await the next test.

Canning this jam is simple and not unlike other jams & jellies. Once the jam is ready, fill the sterilized jars, leaving 1/2 inch head space. Place lids on top of each jar, tightening until not quite as tight as possible. (I tighten mine fully and then unscrew the lid slightly.) Place each jar on a rack in a large pot of boiling water. Jars must not sit directly on the kettle bottom. Once the pot returns to the boil, begin timing. This jam will need to be processed (boiled) for 10 minutes, if using half-pint or smaller jars (235 ml or smaller). After 10 minutes, remove jars to a cloth-covered counter or baking sheet, away from any drafts. Do not move for at least 12 hours — 24 hours is best — so that the jars fully seal and the jam sets.

*     *     *

It’s déjà vu all over again …

Roast Loin of Pork

Roast Loin of Pork

When our temperatures start to drop, I begin to think of preparing roasts for dinner. The oven brings welcome warmth to the kitchen and my house soon fills with the heavenly aroma of a roast in that oven. About a year ago, I posted a recipe for roast loin of pork that was butterflied, slathered with fig preserves and wrapped in pancetta before roasting. The result was a dinner fit for a holiday. You can see the recipe, along with step-by-step instructions, by clicking HERE.

*     *     *

Coming soon to a monitor near you …

Roasted Arctic Char 3

 Roasted Arctic Char

*     *     *

My Tomatoes Are In A Jam

With today’s post another short one, I thought I’d share a bit more about my Grandpa. When we last left him, he had just finished painting the trim on the two-flat’s peak and had invited the neighbors to come into the backyard to “see my tomatoes” …

(Those interested can read the painting story by clicking HERE.)

*     *     *
Tomato Jam 2

*     *     *

Grandpa was well-known throughout our neighborhood and he could often be seen strolling about, his hands behind his back, with his right hand holding the index and middle fingers of his left hand. The little boy across the street took note and would often mimic Grandpa as they walked together or on opposite sides of the street. For Grandpa, this was the highest form of flattery.

He did more than just stroll about, however. If he heard the rumble of heavy equipment or the whir of power tools, he would be at the job site or backyard within minutes. Having once owned a contracting company, Grandpa knew and understood quite a bit about building and repair work. It wouldn’t be long before he’d be advising the worker(s) and oftentimes he’d pitch in, showing them how whatever it was should be done. His opinion was respected and very often sought out by our neighbors and the parish.

For example, the front of our church was a massive, floor-to-ceiling mosaic depicting a number of Grandpa & Cookiesaints and religious symbols. As the church settled, a large crack began to appear in the center of the mosaic at its base, stretching upward like some leafless tree. Grandpa was called in to repair the crack and to replace the tiny colored tiles. Not long after that, following a lightning strike, Grandpa’s knowledge of masonry was required to help with the repairs to the school. As I said, Grandpa was well-known and respected.

Well, once the heavier garden work — the tilling, fertilizing, and planting — was done for the season and with no repair projects to tackle, Grandpa had time to relax. You could often find him sipping a beer while resting in his hammock under the grape arbor, listening to George Kell announce the play-by-play for the games of his beloved baseball team, the Detroit Tigers. Sometimes he watered the garden from the hammock, using a sprinkler to get those places beyond his reach. Eventually the game would end and that was cause for concern for some of the wives in the neighborhood, for Grandpa would go for a walk.

It didn’t matter who you were — neighbor, passer-by, parish priest, mail carrier, etc. — if Grandpa saw you, he would strike up a conversation and, at just the right moment, invite you to “see my tomatoes.” Within minutes, there you were, looking at his 2 dozen tomato plants, tied to their hockey sticks in neat little rows. He’d show you the brick barbecue, his very much prized Chinese pheasants, the lettuce patch, the grape vines, the potted lemon tree, and his latest attempt at growing a fig tree. Within minutes you’d be invited into the patio and he’d have a cold one in front of you before your rear end settled into your chair. What’s this? You don’t like beer? Not to worry. There was a jug of red wine under the table. Oh? You prefer white wine? There just so happened to be a jug of white wine next to the red. Well, that first beer or glass of wine led to another and another and then another. Somewhere along the line, shot glasses would appear and whiskey was introduced into the conversation. Although the length of these backyard tours varied, they usually ended in the same way, with his guest leaving the yard, though quite a bit more wobbly than when the tour first began. In fact, there were a few times when one of us kids was asked to walk his guest home.

These visits did not go unnoticed by the wives in the neighborhood and a few men refused Grandpa’s subsequent invitations. Others would accept but leave abruptly after Come Into My Parlor ...the first beer. Of course, there were a couple who, for whatever reason, accepted the invitation with no apparent qualms at all. It was after one such visit that a neighbor approached Mom, angry because her husband had ignored her wishes and had returned home moments before, more wobbly than usual. I don’t recall whether she wanted Mom to control Grandpa, her husband, or both but Mom, recognizing a no win situation, did nothing of the kind, The husband, perhaps wisely, kept his distance and I don’t recall ever seeing him in the backyard again.

That’s too bad because he missed one of the greatest parties held in our yard. It was Grandpa’s birthday, though neither Zia nor I can remember the exact one. As was the case for each of his birthdays, all 13 of us ate dinner together in the patio, with a couple of family friends seated at the table as well.  Once the dinner was finished, neighbors and friends joined the party just in time for cake and liquid refreshments. As I said, Grandpa was well-known and you never really knew who’d show up. This year, even the parish Pastor stopped by. The poor man didn’t stand a chance, for the wine, beer, and whiskey flowed freely. I’ve no idea how much time had transpired but I do know that my Dad was seated on our front porch as Grandpa walked the priest back to the rectory. (You may recall the rectory was located at the opposite end of our block.) Dad was still on the porch when the two returned a while later. Apparently, when they finally reached the rectory, the priest kindly offered to walk Grandpa home, he accepted, and so they returned. Realizing that this could go on for hours, Dad offered to walk the good priest home and sent Grandpa to bed. Oddly enough, although he was invited, our Pastor was a no-show at Grandpa’s next birthday party. That was OK, however, for another priest, a recent transfer from Wisconsin, unknowingly took his place …

*     *     *

I first became aware of tomato jam last year through my blogging friend, Marie, when she posted a link to a recipe for tomato jam that used Sungold cherry tomatoes. When I mentioned it to Zia, she remembered that Grandma had made tomato jam when both she and Mom were little girls. The way I saw it, I had little choice but to make a batch, which I enjoyed very much.

This year, my tomato plants did much better than they have in recent years but the weather was far from cooperative. Though Summer started quite warmly, the sun and high temperatures soon departed, not to return until late August. Up until that time, my tomatoes grew but never got the sun and heat needed to ripen. Then, as September started, so did the ripening and soon I had more tomatoes than I could handle. That’s when I decided to revisit tomato jam, making two batches within days of each other.

Unlike last year, however, my tomatoes weren’t Sungolds. In the first batch, I used only heirloom plum tomatoes. In the second, I used an even mix of tiny cherry tomatoes and more heirloom plum tomatoes. Since my tomatoes weren’t as sweet as Sungolds, I referenced Mark Bittman’s recipe for tomato jam, as well as the one suggested by Marie.

*     *     *

_DSC0006 3

*     *     *

Tomato Jam Recipe

Ingredients

  • 3.5 lbs (1590 g) tomatoes, cored, and roughly chopped (peeling optional)
  • 2 1/3 cups sugar
  • 3 green Thai chiles chopped, seeds and veins removed (see Notes)
  • juice and zest of 2 limes
  • 2 tbsp fresh ginger, grated
  • 2 tsp cumin, ground
  • 1 cinnamon stick
  • 1/4 tsp cloves, ground
  • 2 tsp salt

Directions

  1. Place sugar, chiles, and tomatoes in a thick bottomed, non-reactive pot. Stir and allow to sit for 1/2 hour.
  2. Using medium heat, add the remaining ingredients, and bring to a boil, before reducing to a simmer. Stir often to prevent scorching.
  3. Continue to simmer until the mixture resembles jam. This could take as little as 90 minutes or as long as 3 hours, maybe longer. If unsure whether your jam is ready, perform a plate test. (See Notes.)
  4. Once your tomatoes are jammin’, fill sterilized jars to 1/4 inch of the rim. Place the lid on each jar and process in a boiling water bath for 15 minutes. Remove from the boiling water, place on a towel lined baking sheet, and place them all in a draft-free area where they will remain undisturbed for at least 12 to 24 hours.
  5. Check to make sure each jar is properly sealed and store them in a cool, dark place. Those not sealed should be refrigerated and eaten within two weeks.

*     *     *

*     *     *

Notes

When researching the amount of time required to process these jars in a hot water bath, I came across 3 different time requirements; 5, 10, and 15 minutes. Preferring to err on the side of caution, I processed my jam for 15 minutes in a boiling water bath.

Although I peeled the tomatoes in the first batch, it was virtually impossible to peel the dozens of cherry tomatoes, so, I didn’t. I was surprised to find there was no detectable difference in texture between the two batches and I won’t be peeling tomatoes for jam in the future.

After cooking for an hour or so, I used a potato masher to crush any of the cherry tomatoes that remained whole. This released their liquid into the pot and, I believe, shortened the cooking process.

In the first batch, I used 3 green Thai chiles, removing both seeds and veins, thinking they would be too hot if used whole. Well, I could not detect them at all. In the second batch, I used one green Thai chile, leaving seeds and veins intact as I chopped it. It’s heat was barely detectable. I’ve yet to figure out what I’ll do next time but I’ve a feeling there’s one batch of very spicy tomato jam in my future.

There are a few ways to test whether your jam will set. I use the plate test. While your jam is boiling on your stove top, place a dish in your freezer. When you think your jam is ready, take about a half-teaspoon of jam and place it on the now chilled plate. Allow the jam to rest a few minutes before using another spoon or your fingertip to see if the jam has set or is still too runny. If the latter, continue to simmer the jam while returning the plate to the freezer to await the next test.

The cherry tomatoes that I used are an heirloom variety called “Mexican Midget”. One plant will produce a great deal of fruit, though smaller than “normal” cherry or grape tomatoes. The largest of these tomatoes are no bigger than my thumbnail, with many as small as the nail of my little finger. Up until I used them to make jam, I tossed a handful of them into each of my dinner salads — and still dozens remained on the plant.

*     *     *

Tomato Jam 3

*     *     *

It’s déjà vu all over again …

Black FigsSince this is a jammin’ post, we might as well be consistent. Today’s blast from the past is a recipe that I shared last year, Fig Preserves with Balsamic Vinegar and Black Pepper. Not only is this jam great when served with toast and, say, goat cheese, but it works beautifully when used to stuff a pork roast. WIth figs now filling our markets, this is one jam you won’t want to miss. Just click HERE for the details.

*     *     *

Coming soon to a monitor near you …

Braised Goat over RIce

Goat in the Moorish Style

*     *     *

The Kitchens are in a Pickle

This post is really little more than a comedy of errors. I had another recipe in mind for today but that was before forces beyond my control intervened. You see, I was at the farmers market, minding my own business when I came upon the radishes, French breakfast radishes, no less. So, I bought them. Never mind that I was already lugging around a full shopping bag. Exiting the vendor’s stall, I literally bumped into the beets display. WIth my shirt now sporting a mixture of mud and beet juice, I thought it a sign and bought a bunch of large red beets. On the way out of the market, I bought a few more things, filling a 2nd bag, and headed for home.

*     *     *

*     *     *

Once home, I unpacked my bounty, dreaming of following Roger’s suggestion for buttery radishes and re-creating Mom’s beet salad. And that’s when it hit me. I’d be leaving for Michigan in a few days. I should be subtracting from my refrigerator’s shelves, not adding to them. WIth no possible way to clear my fridge before I was to leave, Plan B was put into effect: food preservation. I’d freeze some and the rest? Well, that’s how today’s pickling post was born and first up were the radishes.

Googling pickled radish recipes, I came upon one from David Lebovitz and looked no further. I’ve had very good luck with his recipes. Unfortunately, I didn’t have any white vinegar — this was a spur of the moment pickle, after all — so I married what I had until I reached the required amount. The radishes turned out great and, subsequently having earned Zia’s seal of approval, I see no reason to change things. The “married” amounts are the ones listed in the recipe’s ingredients.

Next were the beets. I didn’t have my own recipe, so, I again I turned to google. After checking a number of them out, I decided to wing it. The recipe below is the result. There’s one critical error, however. I had intended to use these beets in a salad but I included whole cloves in jars of red shoestring beets. How could anyone find those cloves when it’s time to serve the beets? With 2 jars already filled, I had little choice but to continue with the recipe, adding whole cloves to the remaining jars, watching them disappear into the beets. Since I had promised beets to some friends, I knew I would have to make more. These wouldn’t do.

The Saturday following my return from Michigan, I once again returned to the farmers market and bought 2 bunches of beets. This time I bought Chioggia beets, an Italian variety of heirloom beets with alternating red & white rings when cut. There was no way any cloves could hide among these beauties. Still, I wasn’t going to take any chances. These beets would be sliced rather than shredded. While the beets were roasting, I surfed the web looking at pickling recipes. I stumbled upon a USDA site and their recipe for pickled beets. With some changes, that’s the recipe I used and have shared below.

*     *     *

Shoestring Beets

Pickled Red “Shoestring” Beets Recipe

Ingredients

  • 1 bunch (4 or 5) large red beets, washed and greens removed
  • olive oil
  • 1 cup (235 ml) cider vinegar
  • 1 cup water (237 ml)
  • 1/2 cup (100 g) sugar
  • 1 tsp kosher salt
  • 2 cinnamon sticks, halved
  • 3 whole cloves per jar

Directions

  1. Pre-heat oven to 400˚ (205˚ C).
  2. Place washed beets on a foil line baking sheet, cover lightly with olive oil, and use another sheet  of foil to enclose the baking sheet and beets.
  3. Place beets in oven and bake for 45 minutes or until a knife can be inserted into a beet with little resistance.
  4. Uncover the beets and set aside until cool enough to handle.
  5. Beet skins should peel off, though a paring knife may be needed for some spots.
  6. Using a food processor with blade inserted, shred the beets created “shoestrings.”
  7. Meanwhile, add vinegar, water, salt, and sugar in a small sauce pan and heat until both are dissolved. Keep hot though not boiling.
  8. Using 4, sanitized pint-sized jars, add 1 clove and 1/2 stick of cinnamon to each. Add some beets, another clove, enough beets to fill, and one more clove. Add enough of the hot pickling liquid to fill each jar to within 1/2 inch of the jar’s top.
  9. Seal each jar until “finger tight” and process in a boiling water bath for 30 minutes, Remove from water and set, undisturbed, on a kitchen towel covered baking sheet in a draft-free spot. Jars may be moved after 24 hours.

*     *     *

“Quick Pickle” Radishes Recipe

Ingredients

  • 9 oz (260 g) radishes, cleaned, trimmed, and sliced thin.  Peel where needed.
  • 2 oz (60 g) red onion, sliced thin
  • 1 1/3 cup (316 ml) red wine vinegar
  • 2/3 cup (157 ml) cider vinegar
  • 1 cup water (237 ml)
  • 1 tbsp sugar
  • 1 tbsp kosher salt
  • 2 garlic cloves, cut in half
  • 24 green peppercorns, divided
  • 24 red peppercorns, divided

Directions

  1. Add vinegar, water, salt, and sugar in a small sauce pan and heat until both are dissolved. Set aside to cool.
  2. Using 4, sanitized, pint-sized jars, add 1/2 garlic clove and 6 of each, red and green peppercorns.
  3. Divide the onion and radishes evenly among the jars.
  4. Once cooled, pour enough pickling liquid to fill each jar within 1/2 inch of the top. Seal each jar with a sterile lid and refrigerate.

Inspired by David Lebovitz

*     *     *

Chioggia Beets

Pickled Sliced Chioggia Beets Recipe


Ingredients

  • 2 bunches (9 or 10) medium Chioggia beets, washed and greens removed
  • olive oil
  • 1 medium onion, sliced thin
  • 4 cups (950 ml) cider vinegar
  • 2 cup water (475 ml)
  • 2 cups (400 g) sugar
  • 2 tsp kosher salt
  • 3 cinnamon sticks
  • 10 whole cloves

Directions

  1. Pre-heat oven to 400˚ (205˚ C).
  2. Place washed beets on a foil line baking sheet, cover lightly with olive oil, and use another sheet  of foil to enclose the baking sheet and beets.
  3. Place beets in oven and bake for 45 minutes or until a knife can be inserted into a beet with little resistance.
  4. Uncover the beets and set aside until cool enough to handle.
  5. Beet skins should peel off, though a paring knife may be needed for some spots.
  6. Slice the beets as thin as you prefer.
  7. Meanwhile, place cinnamon sticks and cloves into a small pouch or piece of cheese cloth and tie to secure.
  8. Place vinegar, water, salt, sugar, and spice bag into a sauce pan and bring to the boil.
  9. Add sliced beets and onion, simmering for 5 minutes.
  10. Remove the spice bag and fill each jar with enough beets, onion, and pickling liquid to within 1/2 inch of the top.
  11. Seal each jar until “finger tight” and process in a boiling water bath for 30 minutes, Remove from water and set, undisturbed, on a kitchen towel covered baking sheet in a draft-free spot. Jars may be moved after 24 hours.

Inspired by National Center for Home Food Preservation

*     *     *

Notes

The radishes should sit in the refrigerator for a few days before use and they will last about 3 to 4 weeks if kept in the fridge. Both beet pickles are processed and will last for months on a cool, dark shelf. If you like, you can skip the boiling water bath, put a sterile lid on each jar, and refrigerate them. They, too, will last about 3 to 4 weeks this way.

Although I used French breakfast radishes for this post, I’ll use the more common, globe-shaped radishes for future pickles. They’ll produce larger slices, which I prefer.

You needn’t roast the beets before pickling. Many recipes suggest boiling the beets for 20 to 30 minutes before peeling and continuing with the pickling.

*     *     *

It’s déjà vu all over again …

Giardiniera-topped Mount Burger

Giardiniera-topped Mount Burger

It’s Summer and people are googling season-appropriate recipes. Pesto was hot but now my giardiniera recipe has caught the internet’s eye. It’s probably because the ingredients are all readily available now, as are reasons for having a jar on-hand. It is barbecue & picnic season, after all, and neither can be a success without a jar of giardiniera handy. You can find out what so many others are googling by simply clicking HERE.

*     *     *

Coming soon to a monitor near you …

Risotto Preview

Risotto

Let’s try this again, shall we?

*     *     *

The Ketchup that Came Down the Mountain

I’ve mentioned it in the past and it bears repeating: blogging continues to surprise me in ways I never dreamt possible. One need look no further than my dining room table to see what I mean. There, in jars of all shapes and sizes, you’ll find preserves, jams. jellies, pickles, pickled peppers, brandied figs, apple sauce, corn relish, and ketchup. You may recall that I was the guy that swore he’d never can anything. Now it looks like I’m stocking a bunker for a nuclear holocaust. Look closely, however, and you’ll soon find the Belle of the Ball … well, Ball Jar. I’m talking about the ketchup and that’s the recipe I’ll share today.

Way back in September of 2011, my blogging friend Tanya, of Chica Andaluza fame, posted a recipe for “Up The Mountain Spicy Tomato Ketchup.” With this area’s farmers markets still flush with tomatoes, I bought a couple pounds and decided to give her recipe a try. Knowing how spicy things can get up that mountain, however, I did tweak the recipe to cool it down just a bit. And the result? This is one exceptional ketchup. In fact, it hardly seems right to call it ketchup for this isn’t at all like the bottle of red stuff on your grocer’s shelf — and that goes for all 57 varieties! Tanya’s sauce is so good that I actually felt like I was wasting money the last time I was without and needed to buy ketchup. But don’t just take my word for it. I’ve given jars of Tanya’s ketchup to friends and family alike, all of whom, without exception, sing its praises. And to all of my fellow Chicagoans, this ketchup is good enough to be served on a hot dog! Yes, it’s that good!

There’s only one possible issue worth mentioning. It is best to simmer this sauce slowly and to stir it frequently. If you don’t you could end up with a splattered mess or, worse yet, a scorched pan bottom. A splatter screen may help prevent the mess but a scorched bottom can ruin the entire batch of ketchup. If you suspect that the ketchup has begun to burn, do not use a spoon to scrape the bottom of the pan. That will only foul your ketchup. Better to dump the pot’s contents into a large bowl and clean the pan’s bottom before re-filling it with the ketchup and continuing the simmer. Bear in mind, the lower the simmer, the longer the time required to get a thick, rich ketchup. For me, this job will easily last a full afternoon.

 *     *     * 

Home-Made Ketchup Recipe

Ingredients

  • 8 lbs. (approx 3.5 kg) tomatoes, roughly chopped
  • 4 large onions (yellow, sweet, red, or any combination), chopped
  • 2 red bell peppers, chopped
  • 2 Serrano peppers, chopped
  • 1 jalapeño, chopped
  • 4 garlic cloves, peeled and smashed
  • 1 cup cider vinegar
  • ¾ cup dark brown sugar
  • ½ tsp dry mustard
  • 2 cinnamon sticks
  • 2 tsp whole cloves
  • 2 tsp whole allspice
  • 2 tsp mace
  • 2 tsp celery seeds
  • 2 tsp smoked paprika
  • 2 tbsp black peppercorns
  • 2 bay leaves
  • cayenne pepper, to taste
  • nutmeg, to taste
  • salt, to taste

Directions

  1. Use a piece of cheese cloth to form a pouch into which you’ll add the cinnamon sticks, allspice, cloves, mace, celery seeds, peppercorns, and bay leaves. Use butcher string to enclose and securely tie the herbs & spices. Set aside.
  2. Place the tomatoes, onions, peppers, and garlic into a heavy bottomed saucepan over med-high heat. Bring to a boil, reduce to a simmer, and cook until the ingredients are all soft, 30 to 45 minutes.
  3. Once the tomato mixture has softened, pass it through a food strainer, food mill, or fine meshed sieve to separate peel and seeds from the pulp.
  4. Return the strained pulp to the saucepan, along with the brown sugar, mustard, paprika, cider vinegar, and spice pouch. Stir to combine over med-high heat. Bring to a boil, reduce to a simmer, and continue for 45 minutes, stirring occasionally to prevent scorching. Remove the pouch.
  5. At this point, continue to simmer until the ketchup has reached the consistency you prefer. This could take anywhere from 30 minutes to several hours.
  6. Once it has reached the desired thickness, add cayenne pepper, ground nutmeg, and salt, to taste.
  7. Once the seasonings have been adjusted, you can either bottle it for storage in the refrigerator where it will keep for about a month, freeze it, or, you can process it in a boiling water bath for 35 minutes if using pint jars and 40 minutes if using quart-sized canning jars.

With thanks to: Chica Andaluza, “Up The Mountain Spicy Tomato Ketchup

 *     *     * 

Notes

You may have noticed that the spice pouch was removed after simmering for 45 minutes. That’s because the tomatoes will continue to reduce for some time afterward and that will serve to concentrate all the flavors in that pot. To leave the spice pouch in the tomato mixture for too long could render the ketchup inedible. You can always adjust the seasoning at the end of the cooking, just as one does with the cayenne, salt, and pepper.

Living as far North as I do, finding good tasting tomatoes from now until Spring is pretty much impossible. Even so, I’ll still use off-season, or even canned, tomatoes to make ketchup during the Winter and Spring months, adding tomato paste to boost the tomato flavor. Although this version may not quite equal the taste of ketchup made from Summer’s best, it is still leagues ahead of any ketchup you might buy at a store.

 *     *     *

Grilled Chicken with Tomato Jam Glaze

*     *     *

One last word about tomatoes …

In September, Marie posted a link to a recipe for tomato jam that used yellow heirloom tomatoes and basil. I spoke to Zia about my intention to try my hand at making the jam and that triggered a memory of Grandma making tomato jam when Mom & Zia were little girls. Grandma’s version didn’t use basil and, though the tomatoes she used would be considered “heirloom” by today’s standards, back then they were just “tomatoes.” Well, in an effort to bridge the gap between New and Old, I made tomato jam that weekend with yellow heirloom tomatoes but without the basil.  And the result? Like almost all the jams I’ve made, it goes very well with goat cheese. (Is there a jam or preserve that doesn’t go well with goat cheese?) Not only that but I was surprised to find out just how good it worked as a glaze for barbecued chicken. Next time, though, I’m adding a few red pepper flakes and a dash of hot sauce to the glaze. Of course, you can always serve it like my Grandma did for her girls: on a chunk of Italian bread.

*     *     *

It’s déjà vu all over again …

As a boy, vegetables were very much a part of my family’s diet. Whether picked fresh from Grandpa’s garden or selected at a grocery or market, you could count on a salad of fresh greens and at least one vegetable being served at every dinner.  Mom’s favorite, and frequent star at our supper table, was Swiss chard. Mom enjoyed it enough to commandeer a small patch of Grandpa’s garden so that she could grow her own.  Now that’s some serious chard love!  Very often, Mom would use a combination of chard & spinach to fill small pies, cacioni, from a recipe that came from Dad’s homeland, San Marino. Click HERE to check out the recipe for this family favorite.

*     *     *

Coming soon to a monitor near you … 

Sausage Ravioli

Sausage Ravioli

*     *     *

Fig Preserves with Balsamic Vinegar and Black Pepper

Argh! “The best laid schemes o’ Mice an’ Men”. It’s happened again. I have a schedule for these posts. I really do. Today’s entry, for example, was to have been an instructional post detailing how to make Italian mozzarella. The Fates, however, intervened. In the days preceding my trip to Michigan, I failed twice to make the cheese.  I thought I’d be able to try again once I returned home but soon there were peppers to pickle, figs to preserve, olives to cure, and a seemingly endless stream of posts to read and comments to write. So — and by stating my plans I’m taking a big risk with those pesky Fates —  I decided to schedule Italian mozzarella for October 10th.

Now, pushing mozzarella off into the future left me in a bind.  I had no post for today. Earlier I mentioned I had figs to preserve. Well, that recipe suddenly became today’s post, meaning I had some writing to do. As you can see, I got it done but, as for the backlog of posts & comments, I’m still working on them. Sorry for the delay.

 *     *     *

 *     *     *

A few weeks ago, chaiselongue1 posted Jamming, an entry about making fig jam. (If you’re not familiar with this beautiful blog, olivesandartichokes, now is as good a time as any to check it out.) I thought that jam sounded delicious but that’s about as far as it went — until a market last week had crates of Mission figs for half the price I’d previously seen. Next thing you know, I’ve got 2 crates (about 3 lbs) of figs in my cart. Once I got home, I checked the Jamming post again, as well as the Pick Your Own website, as I always do before I preserve anything. Once there, a sentence caught my eye. “If you like strawberry jam, you’ll love fig jam.” That got me to thinking. I went back to the recipe I’d shared for strawberry jam with balsamic vinegar (thanks, Sarah!) and decided to use it as a guide for these preserves.

Unlike the strawberry recipe – but like Jamming — this recipe doesn’t use pectin. It takes a bit longer to prepare but if you take your time, the preserves will set as nicely as if you used pectin. Just like the strawberry jam, however, I included cracked black pepper. I really enjoyed the “bite” it brought to the strawberries. Lastly, these figs were sweet enough, allowing me to use less sugar than was used with the strawberries. Besides, I’ve got plans for these preserves that don’t involve toast. Stay tuned …

 *     *     *

*     *     *

Fig Preserves with Balsamic Vinegar and Black Pepper Recipe 

yield: 5 – 6 cups

Ingredients

  • 4 – 5 cups fresh Mission figs, prepped & chopped (about 3 lbs.)
  • 3 cups sugar
  • ½ cup water
  • 1 tsp butter (optional)
  • pinch of salt
  • ⅔ cup balsamic vinegar
  • ¼ cup lemon juice
  • 1 tbsp cracked black pepper

Directions

To Prepare

  1. Sterilize the jars and wash the jar lids and rings in hot, soapy water. Place lids and rings in a deep bowl and pour near-boiling water over them.
  2. Start bringing to boil a large, deep canning kettle of water to be used for the canning process and a second, smaller pot of water to be used to replenish water that may boil away during the canning process.
  3. Trim stem and bottom of each fig before chopping. When finished, use a potato masher to smash them.

To Make the Jam

  1. Place a small plate in the freezer. Place the figs, sugar, and water into a sauce pan over high heat and bring to a boil. Reduce heat to medium, add the salt, optional butter, and stir occasionally until a rolling boil is achieved. (A rolling boil is one that cannot be stirred away. Using a candy thermometer, that’s about 220˚F (104˚ C).)
  2. Once a rolling boil has been achieved, place a small amount of the fig mixture on the now frozen plate. Once the cooked figs have returned to room temperature, check to see if it is jam-like. If too runny, continue cooking for 10 minutes and test again. When the right consistency is achieved, remove from heat and continue to the next step.
  3. With a large spoon, carefully skim the surface to remove any foam.
  4. Add the balsamic, black pepper, and  lemon juice. Stir well to thoroughly combine.

To Preserve

  1. Using a funnel and large ladle, fill each jar to ¼ inch from the rim. Wipe the rim to make sure no jam has spilt, place a lid on each jar, and then the ring, tightening until “finger tight” but not as tight as you can make it. Act quickly, filling and capping all the jars.
  2. Jars placed directly on the kettle’s bottom might burst, so, a rack of some sort must be put into the canning kettle to cover the bottom. Many large pots have one, as do many pressure cookers.
  3. Keep each jar level as you place them, one by one, into the canning kettle filled with now boiling water. The jars should not touch each other, nor should they be allowed to tip over. Depending upon the size of the kettle and number of jars, you may need to work in batches.
  4. Once the jars are in the kettle, make sure that there is at least one inch of water over the top of the tallest jar(s). If not, add boiling water from the smaller pot mentioned in Step 2 of  To Prepare.
  5. Cover the pot and begin timing when the water returns to the boil. The jars must be boiled, “processed”, for 5 to 10 minutes, depending upon the size of jar used.
  6. Meanwhile, place a baking sheet on a level surface and line it with a clean kitchen towel.
  7. Once the time has passed, carefully remove each jar and place it on to the towel-lined baking sheet. Leave about an inch separating the jars.
  8. Once all the jars have been processed and placed on the baking sheet, remove the baking sheet & jars to a place that is draft-free and where they will remain undisturbed for 24 hours.
  9. After 24 hours have passed, check each jar to insure it’s sealed and then store on a shelf in a cool, dark place, where it will stay fresh for months.

*     *     *

Notes

Once opened, the preserves should be refrigerated and fully used within a month.

*     *     *

Coming soon to a monitor near you …

Pancetta-Topped Roast Loin of Pork with Fig Preserves

*     *     *

It’s déjà vu all over again …

It’s that time of year again. Concord grape time, that is. In our farmers markets, groceries, and vegetable/fruit stands, the grapes are on full display. Although a sure sign of Summer’s end, they do mean that it’s time to start making some jelly — and I’ve got a few pounds of the blue beauties just waiting to be transformed.  I’ll be following a recipe that I used last year. If you’re interested in doing the same or just want to check it out, you can do so by clicking HERE.

*     *     *

The Kitchens have a Peach of a Jam

*     *     *

Peaches in this area are just passing their peak season and the farmers markets are filled with them. Over the next few weeks, peaches will disappear and the pears and apples will supplant them. For now, though, they seem to be calling to me, just as the tart cherries, blueberries, and strawberries did before them. So, I’ve answered their call and bought some each time I’ve gone to the market. Admittedly, the first purchases were eaten as-is. How could I not?  After that, I made ice cream and posted a recipe in honor of Mom’s birthday last week. Having made a few quarts of peach ice cream, it was time to move on.

Several weeks ago, when strawberries were at their peak for this area, I posted a strawberry jam recipe made with Balsamic vinegar and black pepper. In the Comments section of that post, Betsy, of Bits and Bread Crumbs, and Elaine, of Le Petit Potager, discussed making peach jam.  Betsy wondered about using balsamic and black pepper. Hmm …

After my last trip to the farmers market, I had what I thought was enough peaches to make a small-ish batch of peach jam — with a little balsamic vinegar. The recipe enclosed within the pectin packaging called for 4 cups of cleaned fruit. Incredibly, I somehow ended up with 7½ cups. I decided to use 6 cups here and to save the rest for a custard-based ice cream. (Recipe to come.) This recipe is very similar to the one used to make the strawberry jam, except I used white balsamic so that the peaches wouldn’t discolor; I used both lemon juice and zest; and, I didn’t add any pepper — maybe next time. Because I used so many more peaches than I had intended, I followed a tip from the Pick Your Own website. The author always adds an additional 20% of pectin than what the recipe calls for, just to ensure a good set. So, rather than add 49 g (1 envelope) I added 60 g to the peach mixture. My jam set perfectly although, next time, if I use 6 cups of peaches, I’ll increase the amount of white balsamic by another tablespoonful or two.

What if you’re not a balsamic lover? What if you just want to make some really good peach jam? Well, then, waste no time and click this link to go to Barb’s Just a Smidgen blog, where you’ll be treated to a fantastic recipe for making peach jam, not to mention a thorough, step by step, description of the canning process.

*     *     *

*     *     *

Peach with Balsamic Vinegar Jam Recipe 

yield: 7 – 8 cups

Ingredients

  • 6 cups fresh peaches, cleaned, peeled, sliced or chopped
  • 4 cups sugar – separated
  • 1 envelope + 20% more low-sugar pectin (60 g  total pectin)
  • 1 tsp butter (optional)
  • pinch of salt
  • juice & zest of one medium-sized lemon
  • ½ cup white balsamic vinegar

Directions

To Prepare

  1. Sterilize the jars and wash the jar lids and bands in hot, soapy water. Place lids and bands in a deep bowl and pour near-boiling water over them.
  2. Start bringing to boil a large, deep canning kettle of water to be used for the canning process and a second, smaller pot of water to be used to replenish water that may boil away during the canning process.
  3. Mix the pectin with ¼ cup of the sugar. Set aside.
  4. Working in batches, add sliced/chopped peaches into a large bowl and use a potato masher to smash them as much as you like. I skipped this step; my slices were thin and needed no further handling.

To Make the Jam

  1. Place the peaches and the pectin-sugar mixture into a heavy-bottomed pot over a med-high heat. A Dutch oven works nicely. Add butter, if desired, to limit foam.
  2. Stirring frequently, you are heating the peaches until a rolling boil is achieved at about 220˚F. A rolling boil is one that will not dissipate when the pot’s contents are stirred.
  3. Add the remaining sugar and stir well. Stir frequently while you wait for the pot to return to a rolling boil.
  4. Once a rolling boil has returned, keep stirring for exactly one minute before removing the pot from the heat.
  5. With a large spoon, carefully skim the surface to remove any foam.
  6. Add balsamic vinegar, lemon juice, and zest. Stir well to thoroughly combine.

To Preserve

  1. Using a funnel and large ladle, fill each jar to ¼ inch from the rim. Wipe the rim to make sure no jam has spilt, place a lid on each jar, and then the band, tightening until “finger tight” but not as tight as you can make it. Act quickly, filling and capping all the jars.
  2. Jars placed directly on the kettle’s bottom might burst, so, a rack of some sort must be put into the canning kettle to cover the bottom. Many large pots have one, as do many pressure cookers. (I use a rack from an old pot that has long since been discarded.)
  3. Keep each jar level as you place them, one by one, into the canning kettle filled with now boiling water. The jars should not touch each other, nor should they be allowed to tip over. Depending upon the size of the kettle and number of jars, you may need to work in batches.
  4. Once the jars are in the kettle, make sure that there is at least one inch of water over the top of the tallest jar(s). If not, add boiling water from the smaller pot mentioned in Step 2 of  To Prepare.
  5. Cover the pot and begin timing when the water returns to the boil. The jars must be boiled, “processed”, for 10 minutes.
  6. Meanwhile, place a baking sheet on a level surface and line it with a clean kitchen towel.
  7. Once 10 minutes have passed, carefully remove each jar and place it on to the towel-lined baking sheet. Leave about an inch separating the jars.
  8. Once all the jars have been processed and placed on the baking sheet, remove the baking sheet & jars to a place that is draft-free and where they will remain undisturbed for 24 hours.
  9. After 24 hours have passed, check each jar to insure it’s sealed and then store on a shelf in a cool, dark place, where it will stay fresh for months.

*     *     *

It’s déjà vu all over again …

This time of year, our farmers markets are filled with fresh fruits and vegetables, and with Labor Day barbecues quickly approaching, there’s no better time to make a batch of Chicago-style giardiniera. This colorful condiment is a great way to add some crunch, and a little heat, to your burgers, dogs, wurst, and sandwiches. The recipe was shared last August and you can find it by clicking  HERE.

*     *     *

By any other name …

“Sunset Celebration”

 *     *     *

A Blogger’s Relaxing Day Leads To A Jam-Filled One For Me

You may recall, two weeks ago my mascarpone post contained three recipes, one of which paired strawberries with balsamic vinegar. What some of you may not know is that the day before, my blogging buddy, Sarah, whose blog Sarah’s Place, is one worth checking out, had a “relaxing” day that included starting and making a great deal of progress on a knitting project; preparing strawberry balsamic and black pepper jam from a recipe that she found on another worthwhile blog, Sydney’s Kitchen; and baking a rosemary-herbed focaccia studded with cherries. Did you notice the part about the jam? It sure did catch my eye, particularly arriving when it did, just before my own post featuring those same flavors. Suddenly, I was thinking about making jam.

Well, coincidentally, that Friday, a 2nd blogging friend, Michael, whose blog Oishi is another that I enjoy, posted a salad recipe featuring — you guessed it — strawberries with balsamic … and this time bleu cheese, too. It was then that I decided to make jam and, as I wrote to Michael, I would buy enough berries to make his salad, too. The very next morning at the Evanston farmers market, once Max had his much-anticipated rendezvous with Debra, the crossing guard, I found myself standing before 3 long tables covered with quarts of Michigan strawberries, over which hung a giant sign, “Last Chance.” Whatever doubts I may have had were quickly vanquished. I bought 3 quarts and moved on to the Egg Ladies’ stall.

Once home, I began to have second thoughts. No, not about making the jam; that and the salad were “done deals.” It was the timing. The forecast was for another day with a high well into the 90’s, hardly jam-making weather. So, remembering a link I found on Pinterest, I soaked my berries in a 10% vinegar solution for 10 minutes, to prevent mold, and refrigerated the red beauties. One would think that this would be where this tale ends. Yes, one would think …

Crostini of Goat Cheese with Strawberry Balsamic & Black Pepper Jam

You see, the original recipe would make only 1 jar of jam and it wasn’t processed, meaning it had to be refrigerated and used within 3 to 4 weeks. Well, I need to make enough jam to give jars to an entire team of tasters, as well as my Zia, and this recipe just wouldn’t do. So, I went looking for a canning recipe that remained true to the original, while making enough for each of my devoted tasters. Luckily, I found two. The first recipe, from Canadian Living Magazine, gave me canning instructions but the amount of balsamic required was quite a bit less than the amount used in the original. Not being an experienced canner, I didn’t know whether increasing the amount of balsamic would ruin the “set” of my jam. I had no choice, therefore, but to look for another recipe — and I and found one on Epicurious.com. With a balsamic amount proportional to that used in the original, a couple of commenters stated that they canned it without any problem. Eureka! Now armed with this new-found knowledge, I braved the heat and set pots of water to boil, as I cleaned and hulled my strawberries. So, to be fair, I’ll credit Sarah’s Place, Sydney’s Kitchen, Epicurious.com, and Canada for the inspiration for today’s recipe.

 *     *     *

Strawberry Balsamic Vinegar and Black Pepper Jam Recipe 

yield: approx 8 cups

Ingredients

  • 6 cups fresh strawberries, cleaned, hulled, quartered (approx. 2 quarts, whole)
  • 4½ cups sugar – separated
  • 1 envelope (49 g) low-sugar pectin
  • 1 tsp butter (optional)
  • pinch of salt
  • ½ cup + 1 tbsp balsamic vinegar
  • 1 tbsp cracked black pepper

Directions

To Prepare

  1. Sterilize the jars and wash the jar lids and rings in hot, soapy water. Place lids and rings in a deep bowl and pour near-boiling water over them.
  2. Start bringing to boil a large, deep canning kettle of water to be used for the canning process and a second, smaller pot of water to be used to replenish water that may boil away during the canning process.
  3. Mix the pectin with ¼ cup of the sugar. Set aside.
  4. Working in batches, add sliced berries into a large bowl and use a potato masher to smash them. Continue until all are equally smooshed.

To Make the Jam

Thanks, Sarah!

  1. Place the strawberries and the pectin-sugar mixture into a heavy-bottomed pot over a med-high heat. A Dutch oven works nicely. Add butter, if desired, to limit foam.
  2. Stirring frequently, you are heating the berries until a rolling boil is achieved at about 220˚F. A rolling boil is one that will not dissipate when the pot’s contents are stirred.
  3. Add the remaining sugar and stir well. Stir frequently while you wait for the pot to return to a roiling boil.
  4. Once a rolling boil has returned, keep stirring for exactly one minute before removing the pot from the heat.
  5. With a large spoon, carefully skim the surface to remove any foam.
  6. Add balsamic vinegar and pepper. Stir well to thoroughly combine.

To Can

  1. Using a funnel and large ladle, fill each jar to ¼ inch from the rim. Wipe the rim to make sure no jam has spilt, place a lid on each jar, and then the ring, tightening until “finger tight” but not as tight as you can make it. Act quickly, filling and capping all the jars.
  2. Jars placed directly on the kettle’s bottom might burst, so, a rack of some sort must be put into the canning kettle to cover the bottom. Many large pots have one, as do many pressure cookers. (I use a rack from an old pot that has long since been discarded.)
  3. Keep each jar level as you place them, one by one, into the canning kettle filled with now boiling water. The jars should not touch each other, nor should they be allowed to tip over. Depending upon the size of the kettle and number of jars, you may need to work in batches.
  4. Once the jars are in the kettle, make sure that there is at least one inch of water over the top of the tallest jar(s). If not, add boiling water from the smaller pot mentioned in Step 2 of  To Prepare.
  5. Cover the pot and begin timing when the water returns to the boil. The jars must be boiled, “processed”, for 10 minutes.
  6. Meanwhile, place a baking sheet on a level surface and line it with a clean kitchen towel.
  7. Once 10 minutes have passed, carefully remove each jar and place it on to the towel-lined baking sheet. Leave about an inch separating the jars.
  8. Once all the jars have been processed and placed on the baking sheet, remove the baking sheet & jars to a place that is draft-free and where they will remain undisturbed for 24 hours.
  9. After 24 hours have passed, check each jar to insure it’s sealed and then store on a shelf in a cool, dark place, where it will stay fresh for months.

Notes

According to several commenters on the Epicurious website, once canned, it is best to let the jam sit for a week before sampling it. The flavors blend and the pepper becomes more pronounced.

Once opened, the jam should be refrigerated and fully used within a month.

One last thing

I did make Michael’s salad and it was every bit as good as I had hoped.

*     *     *

By any other name … 

“Elizabeth Taylor”

*     *     *

Don’t sit under that apple tree. Make apple sauce!

I love this time of the year. Here in Chicago, Winter’s relentless, Spring’s nonexistent, Summer’s hot & humid, but Fall, beautiful, wonderful Fall is our reward for putting up with the rest of the year’s weather. The days are warm, the nights cool, the lakefront a thing of beauty and the Park, which borders the Lake for pretty much the full breadth of the City, gradually transforms from lush green to a multi-colored patchwork. As nice as that all sounds and is, truthfully, there’s but one thing missing and, surprisingly, it has little to do with my adoptive home but everything to do with the time of year. It’s apples. I love apples. Cook ’em, bake ’em, turn ’em into sauce. Give me a pie, a tart, a crisp, a cobbler. How about a muffin? A piece of cake? A slice of  bread? A stack of flapjacks? Or, if all else fails, just give one to me raw. Believe me, you cannot go wrong offering me apples in any way, shape, or form.

So, for years, when Fall rolled around, I set about making pies and cobblers, with an occasional loaf of bread or a baked apple thrown in for good measure. This all changed 2 Summers ago when I bought my Roma Sauce Maker. (Do you hear a harp? I always hear a harp when I mention that strainer.) I bought it to process my tomatoes before freezing but I quickly learned that it was good for making apple sauce. Well, that was a game changer around this place.

In prior posts, I’ve mentioned the two boys that live above me with their Mom. The oldest, like most kids, loves sweets of any kind. The youngest is his polar opposite and doesn’t like sweets. Period. This poses a problem for me. I’d love to bring them ice cream, cookies, or whatever it is I’m making in the kitchen but I shy away from it because I don’t want the little guy to feel left out. That, however, was before my Roma Sauce Maker came home. (C’mon! You had to have heard that!) The Li’l Guy, you see, loves apple sauce. So, this time of year, he gets all the apple sauce he wants. That was, until very recently. Now, I CAN, which means the apple sauce I make today can, and will, be given to him next May when I give his brother some cookies, or, in July when I make ice cream for the house. And, best of all, he can still have plenty of apple sauce now, too! There really is an upside to this canning business. Who knew!

Now, as for the sauce, I am by no means an expert but I have had some pretty good luck with it. To begin, I never use anything but apples, a few ounces of organic apple juice, and a pinch of salt. That’s it, no sugar whatsoever and, for that matter, no cinnamon either. I use about 4 kinds of apples, all sweet, for every batch of sauce. This week, as shown, I used Molly Delicious, McIntosh, Honey Crisp, and Regal Gala. Because they’re so small, I selected 7 Galas and 6 of each of the other varieties; their total weight being 10 and a half pounds (4.8 kg). Although there’s no need to core or peel the apples when you use a strainer or food mill,  you still need to cut up the apples. So, I used my corer/slicer and, in about 10 minutes, had all of these in the pot and ready to go. Since I don’t add sugar or cinnamon to my apple sauce, there really isn’t a recipe to share. Instead, I’ll give you the steps that I follow and, as you’ll soon find out, making apple sauce isn’t at all difficult.

First off, select apples known for their sweetness — i.e., Gala, Honey Crisp, McIntosh, Pink Lady, Fuji, Delicious, Macoun, and Golden Delicious, to name a few. Begin by washing all the fruit and, if you have a strainer or food mill, cut the apples into equal-sized slices or chunks. If no strainer, peel and core the apples before chopping the apples. Place the apple pieces into a heavy bottomed sauce pan over medium heat. Add 4 to 6 oz apple juice and simmer, stirring frequently. You want the apple slices to be soft when finished. This could take anywhere from 30 to 60 minutes, depending upon your stove, the pot, the amount of apples, and whether you’ve offended the gods that morning. Once soft, pass the apples through your food strainer or food mill, separating the peel, core, and seeds from the pulp. If you haven’t a strainer or food mill, once the apples are soft enough, you can mash them with a potato masher or force the pulp through a sieve. No matter which method you use, place the resultant pulp into a sauce pan. This is when I season it with a pinch of salt. You may wish to add sugar or cinnamon, to taste. If you’ve chosen your apples carefully, however, I think you’ll be surprised to learn just how sweet it is — and how totally unnecessary the sugar is. At this point, you can place it in your fridge where it will last about a week; cool it and freeze it; or can it.

If you chose to can it, according to the Pick Your Own website, you will need to re-heat the sauce; use clean, sterile jars that are still hot; use sterile tops and lids; and process in a boiling water bath for 15 minutes if using pint containers or 20 minutes if using quarts. Once removed from the boiling bath, place on a towel-covered baking sheet and place in a spot away from drafts where they will remain undisturbed for 12 to 24 hours.

My 10 and a half pounds of apples resulted in 6 pints of apple sauce. I canned 3 pints and froze the remainder in 6 single cup-sized containers. He doesn’t know it yet but there’s going to be one happy little boy living above me.

*     *     *

OK. One last time. Roma Sauce Maker! All right, this time I agree with you. I couldn’t hear the harp because the fanfare was blaring. You did hear the fanfare, right? Right?

*     *     *