Blueberry-Lemon Slice

Blueberry-Lemon Slice

As many of you know, I spend some of my spare time watching a variety of cooking shows. (Note that I didn’t say the Food Network. Since they’ve gone to the dark side of broadcasting — a.k.a. “reality” TV — I watch that network far less.) Since I can not always watch them when broadcast, many of these programs end up recorded on my DVR. Then, on some rainy day or sleepless night, I’ll clear my DVR of these recordings, zipping through the programs hoping that something will catch my eye. That’s how I found today’s recipe and it was quite a catch, even if I do say so myself.

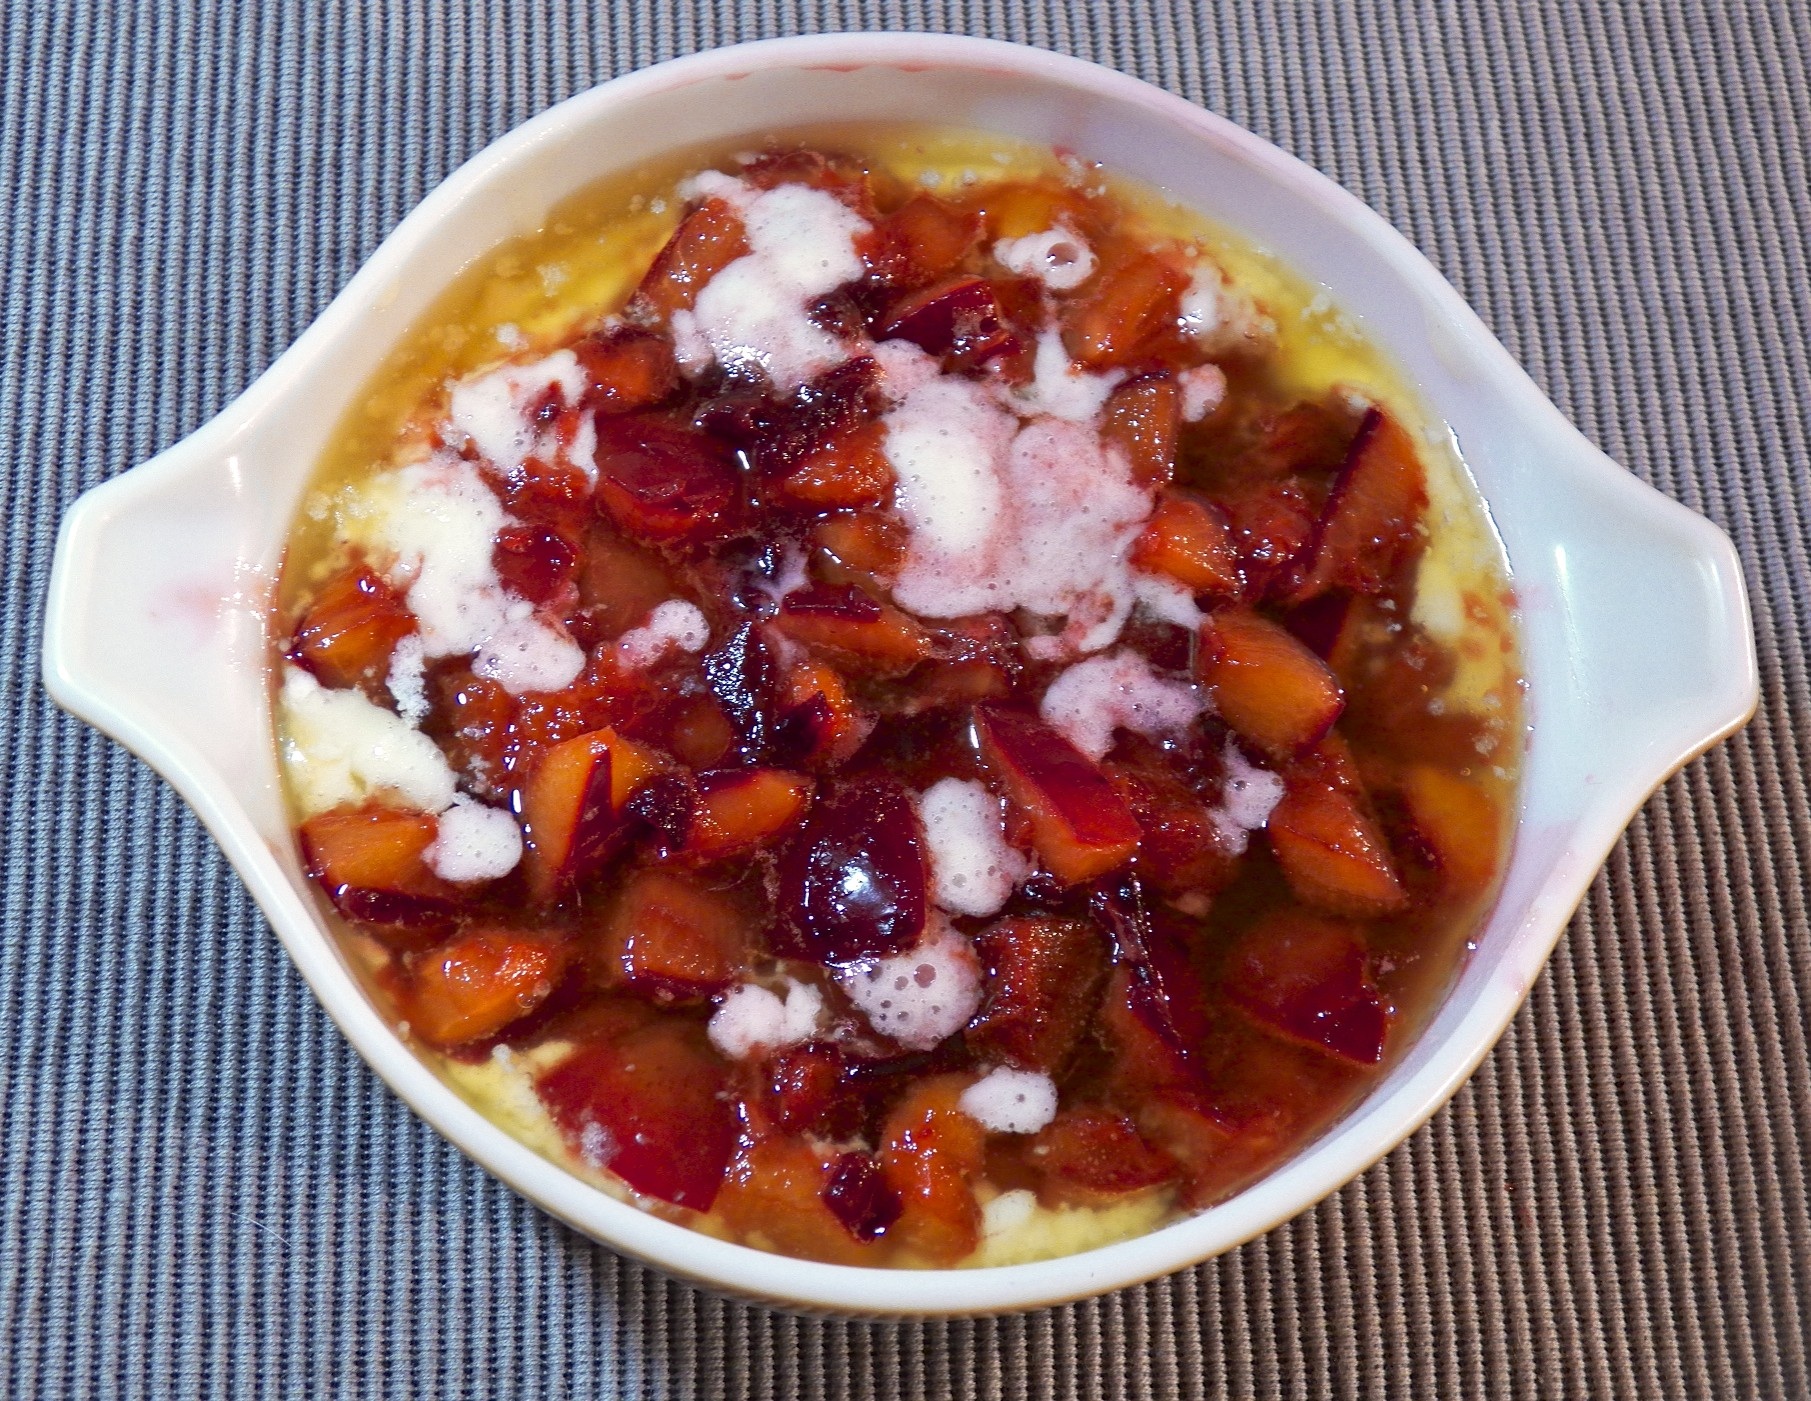
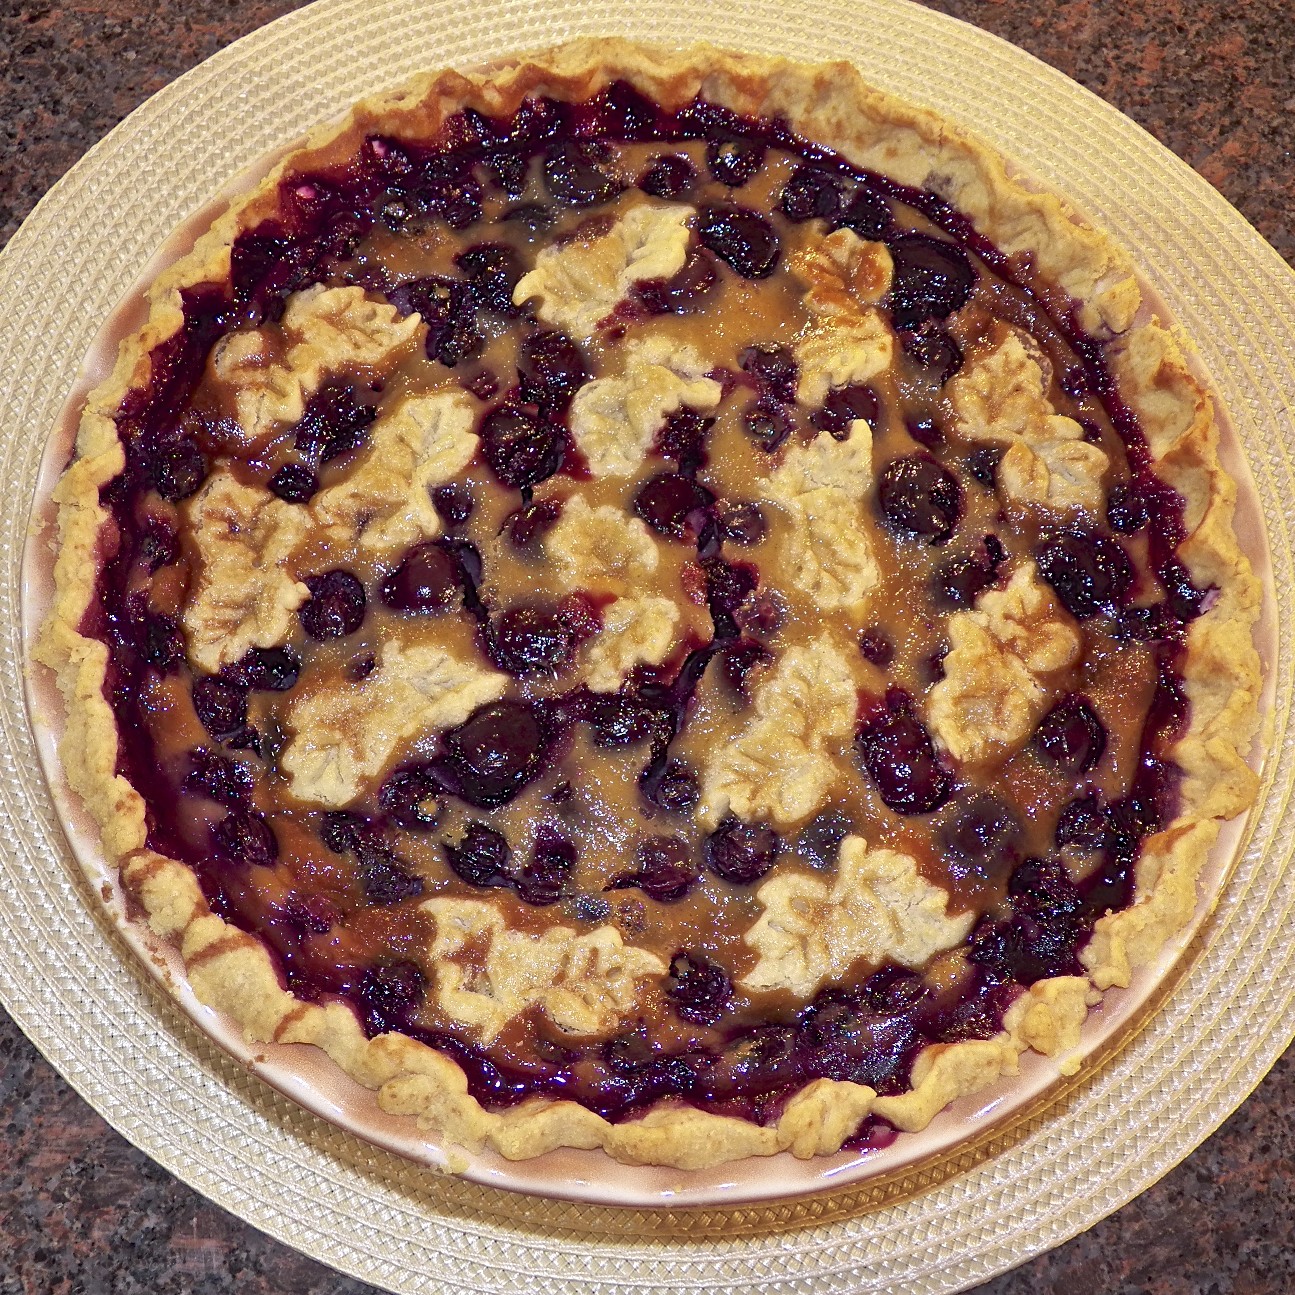
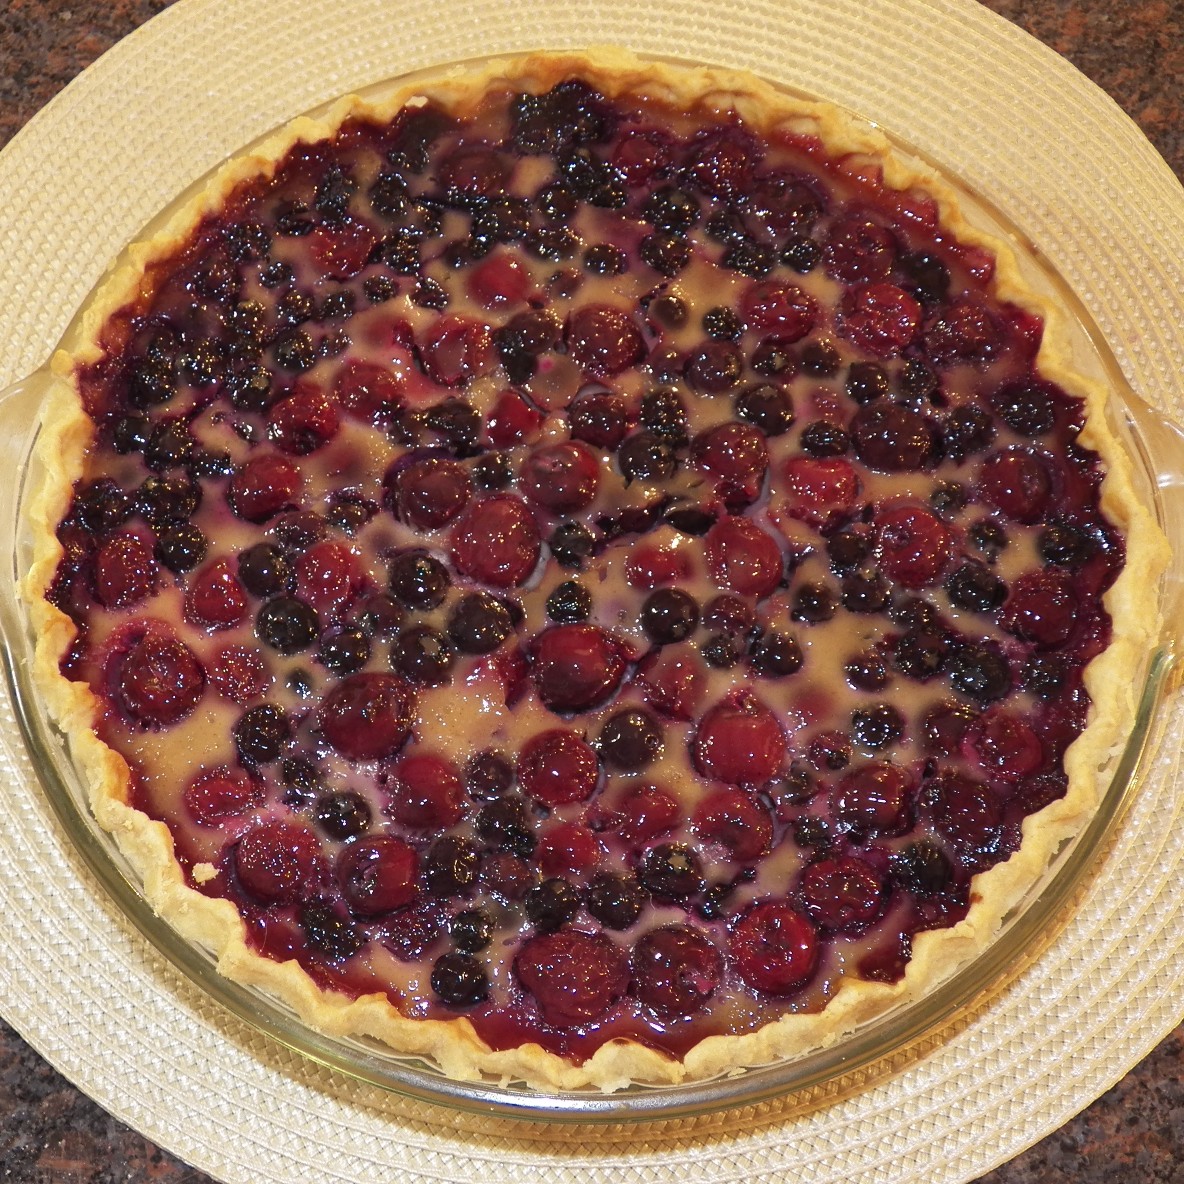
If you’re at all like me, you enjoy the combination of blueberry and lemon flavors. After all, a blueberry muffin without a hint of lemon is just a muffin. These slices have an abundance of both ingredients and the result is one delicious treat. It’s ridiculously easy to prepare and there are no exotic nor hard-to-find ingredients. If you don’t have fresh blueberries, go ahead and use frozen. In fact, I always buy and freeze blueberries at the peak of their season, so, that I can enjoy blueberry pie when the cold weather hits. This Winter I’ll have a slice, too. If you try this recipe, I bet I won’t be the only one.

*     *     *

Blueberry-Lemon Slice Recipe

Ingredients

  • 2 cups all-purpose (AP) flour
  • 1 cup sugar, divided
  • 1 tbsp baking powder
  • 2 tsp salt
  • 1 egg yolk mixed with 1 tbsp water
  • zest & juice of 1 lemon
  • 10 tbsp butter, cubed and placed in freezer for about 30 minutes
  • 3 cups blueberries, fresh or frozen may be used
  • 1 tbsp cornstarch
  • pinch of salt

 *     *     *

This slideshow requires JavaScript.

*     *     *

Directions

  1. Pre-heat oven to 350˚ F (177˚ C)
  2. Place flour, sugar, baking powder, salt and lemon zest in a food processor. Process the ingredients till thoroughly mixed. Add the egg mixture and continue to whirl until combined.
  3. Place the very chilled butter cubes into the food processor. Pulse the ingredients, repeatedly, until the mixture looks like little pearls,
  4. Reserve 2 cups of the crumble mixture and use the rest to cover a greased 9 X 9″ baking dish. Press it down to form a crust.
  5. Meanwhile, place the blueberries, remaining sugar, lemon juice, corn starch, and a pinch of salt into a large bowl. Gently stir until everything is evenly coated.
  6. Once the bottom crust has been formed in the baking dish, pour the blueberries into the baking dish, covering the crust.
  7. Use the reserved crumble to cover the blueberries.
  8. Bake in a pre-heated oven for 35 to 45 minutes. Blueberries should be soft and the crumble browned to your satisfaction.
  9. Allow to cool and set before cutting into squares.
  10. Serve as-is or with optional Lemon Cream & Limoncello Syrup. (See Notes)

Inspired by Clinton Kelly’s Blueberry Pucker Bars, on The Chew

*     *     *

Blueberry-Lemon Slice

*     *     *

Notes …

The sharp-eyed among you may notice that I used an 8 X 8″ baking dish and not the 9 X 9″ dish indicated in the recipe. My 9 X 9″ dish met an untimely end when it crashed into the floor. It was empty, thankfully.

Although I’ve never done so, it’s suggested these slices be served with a Lemon Cream & Limoncello Syrup. Here’s that recipe, also from The Chew:

Ingredients

1 cup limoncello
1/2 cup heavy cream
1 tablespoon granulated sugar
1/4 cup lemon curd

Directions

  1. In a small sauce pan over medium heat, reduce limoncello by half. Refrigerate until well-chilled.
  2. Meanwhile, whip together heavy cream with sugar until stiff peaks form. Fold in lemon curd.
  3. When ready to serve, place a dollop of the lemon cream mixture atop each slice, accompanied by a drizzle of the limoncello reduction.

*     *     *

It’s déjà vu all over again …

PuffballBack in our part of Michigan, it’s puffball season. Well, it’s supposed to be but you never really know until your find them. Sometime during October, these large, oblong-shaped funghi appear in areas that are mostly shaded from the sun. Up until a few years ago, 1 to 3 of them could be found behind Zia’s garage. Now, for reasons known only to Mother Nature, they’ve moved to its side. You needn’t worry about that, though, for you can find some, as well as learn how to prepare them,  by clicking HERE.

*     *     *

Coming soon to a monitor near you …

Preview

Something Special to Commemorate Columbus Day

Octopus

*     *     *

Tart Cherry Frozen Yogurt

Those of you who have followed my blog for some time know that August is Birthday Month for many of my friends and family. Mom and her Mother, Uncle and his Sister, Friends and Tasters, Nephews and a Boy Upstairs, and too many more to mention were all born in the 8th month. You might, also, recall, that Mom loved ice cream and to commemorate her birthday, I normally post ice cream recipes in August. Note the word “normally.”

*     *     *

Tart Cherry Frozen Yogurt

*     *     *

This year I though I would switch things up a bit. You see, about 20 years ago, I bought a fancy schmancy gelato maker and it broke long before the investment paid for itself in tasty frozen treats. Its recipe book survived, however, and one day I made a batch of “frozen yogurt.” Everyone loved it and marveled at the creaminess of this low-fat dessert. The only problem was that, just like the old Seinfeld episode, it wasn’t at all low-fat. There was just as much heavy cream in it as I use in normal ice cream. Yes, there was a little yogurt in the mix but nowhere near enough to justify it being called “frozen yogurt,” let alone “low-fat.” That was about 7 years ago and I’ve never attempted to make frozen yogurt again — until now.

With Birthday Month already underway, I turned to another recipe book for inspiration. I soon found it in the form of a tart cherry frozen yogurt. You see, on my return home following my last visit with Zia, I stopped at a farm and purchased 20 pounds of frozen, pitted tart cherries. (You may be interested to learn that Michigan produces as much as 70% of our country’s tart cherries.) Once home, I delivered some to a neighbor and the rest of the tarts are sitting pretty in my freezer.

So, with recipe and cherries in hand, I made my first batch of frozen yogurt. Unfortunately, it wasn’t at all what I had expected. Sure, the flavor was outstanding but its texture was very much like a sorbet rather than a creamy, frosted confection. Worse, I had doubled the recipe and now had 6 cups (1400 ml) of the stuff to eat — and eat it I did. Waste a frozen dessert in Mom’s Birthday Month? Never! Convinced I had made a mistake — not at all an uncommon occurrence in my kitchen — I tried it again, though this time I made a single batch. The result was the same and I had another 3 cups of frozen yogurt/sorbet to eat.  All the while, Birthday Month marched on.

Last week, having eaten 9 cups of the stuff during what had to have been the coolest August on record, I decided to try again. This time, I put aside the recipe book and borrowed a page from the old gelato maker’s recipes. I added heavy cream. That’s right, heavy cream and I played around with the other ingredient amounts, as well. The result? A frozen yogurt with a texture far closer to ice cream than sorbet and a tart cherry flavor that is oh, so very good. Not only that but since I made this dessert, Summer has returned and our temperatures have soared at least 10˚ F above normal for this time of year. Message received, Mom.

*     *     *

Tart Cherries - 1

*     *     *

In retrospect, I think the poor texture was due to the amount of liquid contained in the bags of frozen cherries. I bet if I had drained much of the liquid, the texture probably would have been less icy. It may have, also, been less flavorful. I guess the World will have to wait for the answer because I don’t think I’ll be making tart cherry yogurt again for quite some time — well, at least until next August, anyway.

*     *     *

Tart Cherry Frozen Yogurt

Ingredients

  • 1 lb (455 g) of tart cherries, pitted
  • 2/3 cup (135 g) sugar
  • pinch of salt
  • a few drops almond extract
  • 1 cups (245 g) whole-milk Greek yogurt
  • 4 oz (118 ml) heavy cream — the more the merrier

Directions

yield: a little less than 1 quart

  1. Place cherries and sugar in a medium sauce pan over med-high heat. Cover, bring to a boil, reduce heat, and simmer for 5 minutes.
  2. Remove from heat and allow to come to room temperature.
  3. Add the almond extract and place the cherries and juice into a food processor or blender. Process until smooth.
  4. Place mixture in a bowl, cover with plastic wrap, and chill in the refrigerator for at least 2 hours.
  5. Once fully chilled, stir to combine the cherries, heavy cream, and Greek yogurt.
  6. Add the mixture to your ice cream maker and process according to the manufacturer’s directions.
  7. Serve or freeze until the yogurt is frozen to your satisfaction.

Originally inspired by David Lebovitz, “The Perfect Scoop”

*     *     *

To make the chocolate sauce:

Melt 4 oz (110 g) in the top of a double boiler. Once melted, add 2 oz (60 ml) warmed heavy cream, a pinch of salt, and mix to combine. Take the chocolate off of the heat and add an 1/8 tsp of vanilla. Stir and serve.

*     *     *

*     *     *

Variations

While I was in the throes of trying to eat all of this sorbet masquerading as yogurt, Sally, creator of the enchanting Bewitching Kitchen blog, posted a recipe for blackberry-cherry yogurt, In it, she used banana to smooth the texture. Not heavy cream but banana! I had intended to follow her lead but Birthday Month was coming to an end faster than was my supply of substandard frozen yogurt. Not only that but there was heavy cream in the fridge but no bananas on the counter. I will, however, keep her “solution” in mind the next time I attempt to freeze yogurt.

Notes

Nothing goes better together than cherries and almonds. Even so, too much almond extract will totally overpower the tart cherry flavor. Use almond extract sparingly, tasting as you go.

This recipe will yield just under a quart of frozen yogurt. Let’s face it, one scant quart of any frozen dessert is hardly worth the effort to make it. Double the recipe and be happy.

*     *     *

It’s déjà vu all over again …

Nothing says "Happy Birthday!" like una bomba!

Nothing says “Happy Birthday!” like una bomba!

If we’re going to take a look back at the end of a frozen dessert post, there really is only one post deserving of mention, especially in August. For today’s blast from the past, I’m going to send you to the granddaddy ice cream post of them all. Yes, it’s the Spumoni Bomba. With layers of cherry, pistachio, and chocolate ice creams, this is one frozen treat your guests will never forget. All you need do is click HERE for the frosty details.

*     *     *

Coming soon to a monitor near you …

Pupster Peanut Butter

Pupster Peanut Butter

*     *     *

This Plum Cobbler is Magical!

You may recall that I shared a peach cobbler recipe a few weeks ago. Somewhere along the line, I mentioned having another recipe for cobbler, one where the topping starts in the bottom of the baking dish but rises to the occasion during baking, giving you a perfectly formed topping to the rich fruit/berry filling. How can this be?

**********

Do you believe in magic?

**********

I’ve made this cobbler more than a few times over the years. Peaches, plums, strawberries you name it, I’ve used them all. It’s an easy recipe, a fast recipe, and one that is sure to please everyone at your table. Just bear in mind that the topping of this cobbler, unlike the peach cobbler recipe I shared HERE, is more cake-like than biscuit. I happen to like them both and now you’ll have a choice.

The recipe is as easy as 1, 2, 3 …

*********

Melt Butter in Baking Dish

*********

Add Batter – Do Not Mix

*********

Add Par-Cooked Filling – Do Not Mix

**********

Bake while singing “Abracadabra!” and … Ecco!

*********

Plum Cobbler Recipe

Ingredients

  • 1/2 cup unsalted butter, melted
  • 1 cup all-purpose (AP) flour
  • 2 cups sugar – divided
  • 1 tbsp baking powder
  • pinch salt
  • 1 cup milk
  • 4 cups plums, pitted and chopped
  • 1 tbsp fresh lemon juice
  • ground cinnamon and/or nutmeg, to taste (optional)

Directions

  1. Pre-heat oven to 375 F (190 C).
  2. Pour melted butter into a 9 x 13 x 3″ baking dish.
  3. In a medium bowl, combine the flour, 1 cup sugar, baking powder, with salt and mix well.
  4. Add the milk, mixing until just combined. Pour this batter into the baking dish containing the melted butter. Do NOT mix.
  5. In a medium saucepan, combine the plums, lemon juice, with  remaining cup of sugar and bring to a boil over med-high heat. Stir constantly. Remove from heat and add optional cinnamon and/or nutmeg.
  6. Carefully pour the plum mixture into the baking dish. Do NOT mix.
  7. Bake on a baking sheet in the center of a pre-heated oven for 40 to 45 minutes or until the top is golden brown. Alternately, you can forget to set a timer and eventually find a cobbler in your oven resembling the one in the final picture above
  8. May be served warm or cold, garnished with ice cream or whipping cream.

**********

Variations

As mentioned, you can use whatever fruit or berry that you like for the filling. I’ve never used a thickening agent, like flour or cornstarch, for fear of it affecting the cake’s formation magic.

Although the recipe lists cinnamon and nutmeg as optional, I rarely use them. I find that they can easily overpower a dessert, so, I use them sparingly in my cobblers, if at all.

**********

It’s déjà vu all over again …

Today’s Blast from the Pasta, Spaghetti Aglio e Olio, is probably the most versatile of all pasta recipes. Prepared as written and you’ll be enjoying a delicious pasta dinner within minutes but that’s only part of the story. Saute some vegetables and you’ll have a great pasta primavera. Add some clams with a touch of white wine and you’ve got the classic pasta con vongole. The choices are endless and I prepare this dish, in one form or another, just about once a week. You can see the recipe by clicking HERE.

**********

Coming soon to a monitor near you …

Branzino al Cartoccio

**********

An Update

Although I’m the proud owner of some new, fancy schmancy equipment, I am still without a DSL. I have been promised, however, that service will be restored, better than ever, sometime this evening — and companies, especially very big companies, never ever lie.

Thanks for your comments and well-wishes.

*********

Peach and Bing Cherry Cobbler

Well, it certainly took me a while to get here but this is it, the end of this year’s peach recipes. And, as far as this blogger is concerned, I saved the best for last. You see, I happen to really like peach cobbler. I make them with a batter that rises through the peaches, creating a cake-like top. I make them with a biscuit placed on top and baked.  I eat them as they are, still warm from the oven. I eat them with a scoop of vanilla ice cream or a large spoonful of whipped cream. And there lies the problem. I eat them. All of them. Every last morsel of every last one of them. There just aren’t many recipes for peach cobbler for one. So, I make a cobbler and for the next week, my snacks and desserts are all servings of peach cobbler.  I know, poor me! Well, this time around, I decided to try something different. I divided the cobbler among 6 smaller dishes and froze all but the one I tested for “quality control”. (Thank you, Tanya.)  See Variations below to see what I did.

Oh, yes. I almost forgot about the cherries. Most will recall that a few weeks ago I shared 2 recipes for a blueberry and cherry pie. The final pie was so good that I’ve been thinking of combining other fruit in other pies. Well, this being peach cobbler season, why not  experiment? Last week at the farmers market, I purchased what would turn out to be the last of the season’s Bing cherries and a plan was born. Upon my return home, Google gave me the recipe.

Today’s cobbler combines Bing cherries with fresh peaches and is crowned by a biscuit, of sorts. There’s nothing complicated about it, though pitting the cherries can be a bit tiresome. Even so, once the fruit is prepared, the rest of the recipe is a snap. And once you taste this cobbler, you won’t remember anything about pitting cherries — unless you wore a white t-shirt. When will I learn?

 *     *     *

 *     *     *

This post was written prior to my departure for Michigan and scheduled to post now. The trip went as planned, Zia’s freezer is filled, and we took turns cooking dinner. I hope to have a “vacation” post written by the weekend. Internet service was deplorable and, as a result, it will take me a while to get caught up with all of your posts and comments but I’ll get there. Thanks for your patience.

 *     *     *

Peach and Bing Cherry Cobbler Recipe

Ingredients

  • 3½ lbs peaches, peeled and sliced or chopped  (about 6 large peaches)
  • 2 lbs Bing cherries, pitted
  • ¾ cup sugar
  • ¼ cup cornstarch
  • 3 tbsp lemon juice

for the biscuit topping

  • 2 cups all-purpose (AP) flour
  • ⅓ cup plus 2 tbsp sugar, divided
  • 2½ tsp baking powder
  • ½ tsp salt
  • ½ cup unsalted butter, chilled and cubed
  • ¾ cup plus 2 tbsp whipping cream, divided
  • ¼ tsp ground cinnamon
  • ice cream for serving (optional)

Directions

  1. Liberally grease a 9 X 13″ baking dish. Pre-heat oven to 425˚ F (218˚ C)
  2. In a large saucepan over high heat, combine peaches, cherries, and sugar. Stir carefully, bring to a boil, and simmer for 1 minute.
  3. Remove filling from heat and pour into prepared baking dish.
  4. In a mixing bowl, whisk together the AP flour,  ⅓ cup of sugar, baking powder, and salt.
  5. Using knives or a pastry blender, cut the butter into the dry ingredients until a very coarse mixture results. Stir in ¾ cup whipping cream and knead only enough to create a dough. DO NOT OVER-WORK THE DOUGH.
  6. Place dough on a floured surface and roll to a ½ inch thickness. Use cookie or biscuit cutters to cut shapes in the dough. Place the shapes on the filling in any pattern you wish.
  7. Combine cinnamon with remaining sugar and whipping cream. Use a pastry brush to coat the tops of all the pasty cutouts.
  8. Bake in a 425˚ F (218˚ C) pre-heated oven for 20 to 25 minutes. Filling should be hot and bubbling.
  9. Serve warm with optional ice cream.

 *     *     * 

*     *     *

Variations

As I mentioned, I used 6 small baking dishes for this recipe rather than 1 large dish. 4 of these dishes each held 500 ml while the other 2 were a little smaller at about 400 ml. I greased and filled each one, using biscuit cutters for the topping. Once they were baked and cooled completely, I wrapped each in plastic wrap before sealing them again in aluminum foil. They were placed on a baking sheet and frozen. To serve, remove the plastic wrap and recover using the foil before placing it in an oven pre-heated to 350˚F (177˚C). After 30 minutes, remove foil and continue heating until filling is bubbly, about another 15 minutes. Cooking time will depend upon size/amount frozen.

I think next year I’m going to try this recipe using tart cherries instead of Bing and with a little almond extract in the biscuit instead of the cinnamon. It’s not that there is anything wrong with this cobbler, I just happen to prefer tart cherries and want to see if they’d be at least as good.

*     *     *

It’s déjà vu all over again …

Peaches are all but gone from our farmers markets and though a few berries, plums, and pears remain, apples have started to take over the vendors’ stalls. It’s the time of year for apple pies, muffins, crumbles, and sauce. If you choose your apples wisely, your pie will be as tart, and your apple sauce as sweet, as you like.  As proof of the latter, last year I shared a recipe for apple sauce that does not call for any sugar whatsoever. You can see the recipe by clicking HERE.

*     *     *

And another thing or three …

Aside from the recipes I’ve posted, the Kitchens have been busy trying out recipes from two great blogs. Thanks to David, The Gastronomic Gardener, I have jars of brandied figs and 2 kinds of pickled peppers on my shelf. And thanks to Richard, REMCooks, my tasters and I all have jars of  peach preserves with jalapeños and cardamom. Both guys have great blogs and I hope you take some time to check them out.

*     *     *

Peach Ice Cream – Revisited with Custard and Nectar


Yes, I know it’s getting a little late for ice cream recipes and peaches are all but gone from the farmers markets, but I just couldn’t let this one sit around until next year. My previous peach ice cream used sour cream for its base. Today’s recipe uses custard for a base but it, also, uses peach nectar for added flavor.  That peach nectar also affects the ice cream’s texture. One of my tasters said it was like a cross between sorbet and ice cream. Despite its great taste, though, you may prefer a more traditional, custard only, ice cream. Lucky for us all, Betsy has already shared her recipe for peach ice cream on her blog, Bits & Breadcrumbs. (Do take a few minutes to check out both her recipe and her blog. You won’t be disappointed.)  So, you now have 3 peach ice creams from which to choose but if you think I’m done with peaches, you’d be mistaken. Next week I’ll share a recipe for peach cobbler, with a twist.

This ice cream will have a better “mouth feel” if you fully purée the peaches.  Although you can process the peaches until merely chunky, I find it better if they are puréed until completely smooth. This recipe will make 3 quarts of ice cream. That’s quite a bit if you’ve a smaller machine like mine. The saving grace of my machine is that I purchased it on Amazon during a sale in which I received an additional freezing canister for free. That additional canister means that I can get all 3 quarts made and put away in one night. To see how it’s done, be sure to check out the Notes section below.

Now, I’m already in Michigan, where Zia and I have plans to stock her freezer with ravioli and sausage, that is if we can keep Max occupied elsewhere. So, I’ll keep the posts for today and next week on the short side. Given the sorry state of that area’s internet coverage, I hope you’ll understand if I’m not quick to respond to your comments or to leave a remark on your blogs.

 *     *     *

 *     *     *

Peach Ice Cream Recipe

Ingredients

  • 4 cups peeled and chopped peaches (about 3 lbs or 6 large peaches)
  • 1 cup nectar
  • ½ cup sugar
  • 4 egg yolks
  • 4 cups milk
  • 1 cup half-and-half
  • 1 tbsp lemon juice
  • ¼ tsp cinnamon
  • pinch of salt
  • sliced fresh peaches and toasted pecans for garnish (optional but strongly advised)

Directions

  1. In a large bowl, combine peaches, sugar, and nectar. Mix thoroughly.
  2. Working in batches, use a food processor or blender to fully purée the peach mixture until smooth. Refrigerate.
  3. In a mixing bowl, whisk together egg yolks and milk until fully blended. Add the egg mixture to a heavy-bottomed pan or double boiler (my favorite). Heat over a med-high heat, stirring constantly, until it thickens and a custard forms, about 20 to 25 minutes. DO NOT ALLOW TO BOIL.
  4. Once thick enough to coat the back of a wooden smooth, remove from heat and pour the custard through a fine mesh strainer into the reserved peach purée. Add the half-and-half, lemon juice, cinnamon, and salt, whisking until fully combined.
  5. Cover and place in the refrigerator for at least 4 hours.
  6. Make your ice cream using this peach custard and following your machine’s instructions. Place in freezer until frozen to your liking.
  7. When ready to serve, garnish with sliced peaches and toasted pecans. (See Variations)

 *     *     *

Variations

This is a good ice cream recipe but it is so much better when served with sliced fresh peaches and toasted pecans. To prepare the peaches, just peel and slice a ripe peach, putting the slices in a resealable container. Sprinkle a little sugar on top, seal the container, and place in the fridge for at least 30 minutes, giving the fruit a chance to macerate. In the meantime, toast the pecan chips in a small frying pan over medium heat. Be attentive or they’ll burn before you know it. Add a little of both to your ice cream cup for a dessert that is just about perfect.

Notes

As I’ve mentioned, this recipe will make enough peach custard to make 3 quarts of ice cream. That is 2 quarts too many for a single machine like mine and even though I’ve got a 2nd canister, that still leaves me with one quart of custard too many. Since it takes a full 24 hours to freeze my canister, this recipe could stretch out over 2 days, at least. Here’s what I do to get around the problem.

Once the custard is chilled and ready to be put into the machine, I put it into the canister and refrigerate the excess.  When it’s ready, after about 25 minutes, I quickly dump the newly formed ice cream into a container, place it in the freezer,  and quickly refill the canister with more custard. If there’s leftover ice cream in the canister, all the better. After 25 minutes, I will not have ice cream but I will have a thicker, chilled custard.  I then pour this custard into the unused frozen canister, which I’ve kept in the freezer until now. No need to let the machine process for all the 25 minutes, 15 minutes will do. Quickly remove the ice cream, use it to fill another quart container, and place it in the freezer. I then pour the remainder of the custard into the same canister and let her rip! Surprisingly, after about 30 minutes, I’ll have another quart of ice cream ready to be frozen. And what do I do with 3 quarts of ice cream? I give 2 quarts to my tasters and keep one for me.

Adapted from Southern Living, July 2005

*     *     *

It’s déjà vu all over again …

Well, with today’s recipe being an ice cream, what better recipe to pull from the past than the one for pickles, Bread & Butter Pickles? These are not preserved but are kept in the refrigerator, where they will keep for weeks. You needn’t worry about that, though. These pickles will disappear long before freshness is an issue. You can read the recipe by clicking HERE.

*     *     *

The parting shot …

For the past 13 weeks, I’ve ended each blog entry with a photo. Well, I’ve no more roses to share but I didn’t think it right to abruptly stop the practice. So, I give you this last photo and, although this may have nothing to do with roses, it is, in its own way, every bit as memorable. With thanks to Chris.

*     *     *

It’s Mom’s Birthday and I’ve Got a Peach of an Idea!

As you may, or may not, recall, August is the birthday month for a number of people in my life, with today, August 15th, being Mom’s birthday as well as that of her Mother, Grandma Bartolini. Zia’s husband, “Uncle”, was born on the 11th  — and we’re just getting started. My Friend, one of the Kitchens’ tasters, had a birthday on the 7th, while another, my Friend the Entertainer, will be celebrating on the 20th.  And we mustn’t forget the kids. My Grand-Nephew’s birthday was the 1st, my not-quite-a-nephew Nephew will be blowing out candles on the 24th, and the Oldest of the Boys Upstairs has a birthday this Saturday, on the 18th. That’s a lot of birthdays!

So to celebrate, last August I posted 3 separate ice cream recipes that I combined for the finale. The first was taken from a recipe book that Mom gave me shortly after I moved to Chicago in 1980.

*     *     *

Pistachio Nut Ice Cream

*     *     *

Next on that month’s agenda was an ice cream based on Mom’s own chocolate recipe.

Chocolate-Chocolate Chip Hazelnut Ice Cream

*     *     *

Then came the third recipe. Again, using Mom’s recipe as a base, I created this “pretty in pink” ice cream.

Maraschino Cherry Ice Cream

*     *     *

Well, with those 3 recipes laying the ground work, I had little choice but to put them together.

Spumoni Ice Cream (It’s da Bomba!)

*     *     *

Now, having mentioned those 3 ice cream recipes and a Bombe, I might as well finish off this little round-up by sending you to the hands-down favorite ice cream recipe of all the Kitchens’ tasters, family, and friends. It may not be a frozen custard nor traditional ice cream but, I have to say, it’s damn good!  (Pssst! It’s the crumbled graham cracker crust.)

Blueberry Cheesecake Ice Cream

*     *     *

As great as that all sounds, this year I was in quite a pickle. What should I do for this year’s Birthday Month? How could I possibly top a Spumoni Bombe? Well, I can’t and won’t even try. What I will do, however, is share a recipe for an ice cream flavor that Mom loved. Yes, when it came to ice cream, Mom had a number of favorites. Frankly, I doubt that Mom ever tasted an ice cream that she didn’t like — and we haven’t even mentioned sherbet yet.

So, with that monkey off my back, I decided to take full advantage of the bounty in this area’s farmers markets. Today’s recipe will be for peach ice cream. It’s a simple recipe that results in a peachy frozen delight.  It’s Mom’s birthday, however, and “peachy” just won’t do. Directly following the recipe is a serving suggestion that Mom would have surely enjoyed. I hope you will, too.

Now, if you’ve no experience working with peaches, this paragraph is for you. In the first place, you may not be able to find fruit that are perfectly ripe, even in your farmers market. Just place the best you can find in a paper bag, place it on a counter, and check them every morning. In a couple of days, your peaches will be exactly how you like them. So, once your peaches are ripe, how do you peel them? Bring a large pot of water to boil. In the meantime, fill a large bowl with iced water. Take each peach and use a paring knife to cut a small “X” into the fruit’s bottom. Place the peaches into the rapidly boiling water and leave them there for about 30 seconds. Transfer them to the iced water bath to cool and to stop them from cooking. After a few minutes, simply peel off the skin beginning at the “X”. You may need a paring knife to trim a stubborn spot or two but, basically, that’s all there is to it.  And that’s the last of any possible problems you might run into.

*     *     *

*     *     *

Peach Ice Cream Recipe

Ingredients

  • 1½ pounds peaches — about 4 large fruit
  • ½ cup water
  • ⅔ cup sugar
  • ½ cup sour cream
  • 1 cup whipping cream
  • ¼ tsp vanilla extract
  • ⅛ tsp cinnamon
  • pinch salt

For Serving

  • 1 peach. peeled & sliced — more depending upon the number of servings
  • sugar
  • toasted chopped pecans

Directions

  1. Once the peaches are peeled, cut each into chunks, removing the pit in the process.
  2. Place the peaches and water into a non-reactive sauce pan and cook over a medium heat until the peaches are soft — about 10 minutes.
  3. Remove from heat, add the sugar, stir well, and set aside to cool.
  4. When the peach mixture has reached room temperature, place it in a food processor or blender, along with the sour cream. whipping cream, vanilla extract, cinnamon, and salt. Purée until blended but still a little chunky.
  5. Place the peaches & cream mixture into the fridge until thoroughly chilled — about 4 hours, more or less depending upon your fridge.
  6. Add the chilled peaches & cream to your ice cream machine and follow the manufacturer’s instructions to create your peach ice cream.

To Serve

Peaches are in season and we shouldn’t let this opportunity slip away. About 45 minutes before you serve your peach ice cream, peel and slice a ripe peach, more depending upon how many servings are to be prepared. Place the slices in a bowl, sprinkle with sugar, stir gently, and set aside. When ready to serve, divide the peach slices and juice among the servings of ice cream. Garnish with toasted chopped pecans.

Inspired by David Lebovitz, “The Perfect Scoop”

*     *     *

By any other name …

“Bella’Roma”

*     *     *

A Tale of Two Recipes

During the recent heat wave, I really didn’t leave the house very much. Sure, I had errands to run and a dog to walk but that was pretty much all I did outdoors for much of 2 weeks. Well, except for watching fireworks on the 4th. Yay! It was a golden opportunity to watch some cooking shows as they were broadcast, as well as a number that I’d recorded but never watched.

*     *     *

*     *     *

One show, Lidia’s Italy, has been a long time favorite and I must have at least a dozen of her episodes recorded and saved. So, you can well imagine my astonishment when one afternoon, while watching a recorded episode of her newest show, Lidia’s Italy in America (episode 16, original airdate 12/24/11), there she was, standing in the produce department of my Italian market. Lidia Bastianich. In my market! Later she was in front of the very deli counter where I buy my prosciutto, my sopressata, and my mortadella. Do you realize what this means? I have walked on the very floor tiles upon which Lidia has walked. We’ve spoken to the same people, breathed the same air. I know. It kinda makes you weak-kneed just thinking about it. All I can say is that if you live in the Greater ChicagoLand area, you should head over to Caputo’s in Elmwood Park now, before word gets out and people begin making pilgrimages. It won’t be long before “La Via Lidia” is roped off and you’ll no longer be able to literally follow in her footsteps, as I have done. But I digress …

One show that I watched live was The Chew and on that particular day, Carla Hall made a cherry, blueberry, and sour cream pie. A pie with 2 of my favorite things? I vowed to bake one as soon as normalcy returned to our daily weather. A few days later, a Saturday, Max & I were on our way to the farmers market, where I bought sweet cherries, blueberries, and assorted other fruits & vegetables. On the way home, I stopped at a grocery and bought the sour cream needed for my pie. It wasn’t even 9:00 am and things were going very well. This all changed by 10:00 am, for that was the time I looked up the recipe on The Chew’s website.

The problem was that the printed recipe was not the recipe I recalled Carla preparing. I soon found the video of her making her pie on their website — and I was right. On the video, she uses 4 eggs, while the printed version used 3. Neither version indicates where the egg white is to come from nor the type of cherry to be used. Lastly, the video shows Michael Symon adding 2 tbsp of honey to the filling while the printed version states ⅓ cup is to be used. I was on my own.

My first attempt recreated the pie I watched Carla prepare. I used 4 eggs, the white of one being used to prepare the pie shell. The cherry question had been answered earlier that morning when I found sweet cherries at a good price at the market and bought a quart. And when it came to the honey, I followed Michael’s lead and used 2 tbsp. From that point forward, I followed the directions exactly and the pie was pretty good. For me, though, pretty good wasn’t what I wanted. With blueberries and cherries in season, I want my pie to scream “SUMMER!” This pie said “Eggs.” Yes, eggs. It certainly wasn’t a bad pie and I’m sure that it would be enjoyed by many. It just wasn’t what I’d expected. A week passed during which I ate all that pie, sometimes with home-made vanilla ice cream, sometimes with whipping cream, sometimes plain. But I ate it all because of all the sins one can commit, the gods most frown upon those who waste pie.

Another Saturday came and with it a return of the heat wave in the forecasts. Again Max and I headed to the farmers market. Again I bought blueberries and cherries, although this time I went for the tart. And again, on the way home, we stopped at a grocery to pick up sour cream. This time around, I didn’t just exchange cherries. I, also, cut the eggs in half, using only 2, and I increased the honey to ⅓ cup as the written version had indicated. Because I wanted my new pie to take full advantage of its seasonal ingredients, I increased the amount of both tart cherries and blueberries to 2 full cups apiece. This pie was not going to even whisper “eggs”. Once the filling was made, I prepared the pie as I did the first. And the verdict? I liked this rendition so very much more than the first. As I had hoped, this one was more custard and less egg-y. Adding more cherries & berries paid off, while using tart cherries worked better with the blueberries.

But you needn’t take my word for it.

Below I’ve listed the ingredient lists for both pies. The first uses a filling with sweet cherries and most closely resembles the televised recipe. The second uses tart cherries and fewer eggs in its filling and is more closely aligned with the printed version. The directions for preparing the pie are listed once because they are the same, no matter which filling you wish to use. Make one or make them both. All I ask is that you come back here and tell us what you think or any improvements you might suggest.

*     *     *

Sweet Cherry, Blueberry, and Sour Cream Pie Recipe

Ingredients 

  • A single pie crust large enough for a 9 inch deep dish pie.
  • 4 eggs, 1 divided
  • ½ cup superfine sugar, divided (see Notes below)
  • 1½ cups sweet cherries, pitted
  • 1½ cups blueberries
  • ½ tsp cinnamon
  • ¼ tsp salt
  • pinch of Nutmeg
  • 1 cup sour cream
  • 2 tbsp honey

*     *     *

Tart Cherry, Blueberry, and Sour Cream Pie Recipe

Ingredients

  • A single pie crust large enough for a 9 inch deep dish pie.
  • 2 eggs, 1 divided
  • ½ cup superfine sugar, divided
  • 2 cups tart cherries, pitted
  • 2 cups blueberries
  • ½ tsp cinnamon
  • ¼ tsp salt
  • pinch of Nutmeg
  • 1 cup sour cream
  • ⅓ cup honey

*     *     *

Directions

  1. For the pie crust. 
    1. Pre-heat oven to 400˚F.
    2. Roll out pastry dough into a 12 inch circle and place it in a pie dish, crimp edges, and blind bake, filling the pie with pie weights or beans beforehand. After 10 minutes, remove pie crust from oven. Set aside. Lower oven temp to 350˚F.
    3. When crust is cool enough to handle, remove the pie weights/beans. Whisk together 1 egg white with 2 tablespoons of the fine sugar. Using a pastry brush, coat the pie crust before returning it to the oven. Bake for another 15 minutes or until the crust is golden. Remove from oven and cool.
  2. For the pie filling. 
    1. In a bowl, combine 2 tbsp of the fine sugar, salt, cinnamon, and nutmeg.
    2. In a larger bowl, combine the blueberries and cherries.
    3. Add the sugar combination to the berries and gently mix.
    4. In a 2nd larger bowl, combine the remaining fine sugar & eggs, sour cream, and honey. Whisk until fully blended before adding to the berry mixture.  Stir to combine.
  3. Pour the filling into the pre-cooked pie shell and bake for 1 hour at 350˚F.
  4. Pie may be served warm.

*     *     *

Notes

There’s no need to buy the superfine sugar called for in the recipe, for you can make it yourself. Just place ½  cup of regular sugar into a food processor or spice grinder and give it a go. In a minute or two you’ll have superfine sugar.

Inspired by Carla Hall’s Blueberry Cherry Pie With Sour Cream

*     *     *

By any other name …

“Stainless Steel”

*     *     *

The Return of Mascarpone!

Hard to believe that it’s already been 11 weeks since we made mascarpone together. At the time, I said that I would revisit the dishes used to illustrate that post and, to that end, I’ve already shared the recipe for Pappardelle with Spinach, Mascarpone, and Pecorino Romano Cheeses. Today we’re going to use mascarpone in two desserts and again to make jalapeño poppers.

When most hear the word “mascarpone”, they think of tiramisu, that quintessential Italian treat — and who would blame them?  I do plan to share our family recipe for tiramisu but at a later date. That dish deserves a post all its own. So, instead, I’ll share two easy confections that combine whipped mascarpone with fresh berries. To make the whipped mascarpone, take some whipping cream and beat until peaks form. Add icing/confectioner’s sugar, to taste, during the process. To the sweetened whipped cream, add at least an equal amount of mascarpone and beat the mixture until peaks again form. Taste midway through to see if more sugar is needed. Set aside for use in either of the following two recipes.

In the first case, fresh strawberries are hulled and quartered before being macerated with a little sugar and balsamic vinegar.  There is only one real concern about this dish and that involves the balsamic vinegar. In the past, when I made this, I took a couple of ounces of balsamic, added a little sugar & lemon juice, and then reduced it by half over a med-high heat. Once cooled, I used it to make my parfaits. Last Christmas, my friends, Cynthia & Nigel, gave me a bottle of aged balsamic and it’s perfect for this dessert without being reduced or sweetened. Whether your balsamic is good as-is or has been reduced and cooled, the parfaits are made the same from this point forward. Hull and quarter 4 or 5 strawberries per serving. Sprinkle them with a little sugar, more or less depending upon the sweetness of the berries. Add  a couple of tablespoons of the (reduced) balsamic vinegar, mix well, and set aside for about a half hour. (This would be a good time to make the whipped mascarpone.)  Once the berries are ready, begin building the parfaits. Start with the mascarpone and create alternating layers of the whipped cheese and the berries in each parfait cup. You’ll want to finish with berries on top. When all the cups have been filled, divide whatever berry/balsamic sauce is left among the servings. Garnish with a piece of basil, if you like.

This next recipe uses chocolate sauce instead of balsamic vinegar. As you’ve probably noticed in the picture, I like a thick chocolate sauce. Here I created a granache, of sorts, by melting 4 semi-sweet chocolate squares in a double boiler, adding 1 to 2 tablespoons of  heavy cream, and stirring until well combined. Once cooled, I used it to top my dessert, resulting in a thick mass of chocolate-y goodness. For a thinner sauce, add more cream, some butter, and sugar to the double boiler and stir thoroughly. As for the berries, you can wash and trim them, serving them as-is, or, once cleaned, you can put them all in a bowl, add a little sugar & lemon juice, and let sit for 30 minutes. When ready to prepare your dessert, place a large dollop of whipped mascarpone in the center of each dessert plate and spoon mixed berries on top of each dollop.  Add another, smaller, dollop on each dish and top off each with more berries. Finish each dessert with some chocolate sauce and serve.

 *     *     *

The last recipe for today uses mascarpone to make jalapeño poppers. Most of us have favorite popper recipes and mine involves cream cheese, garlic, onion, and grated cheeses to make a filling for the peppers. Mascarpone, though creamier, isn’t as flavorful as cream cheese and, as a result, I do not add garlic nor onion to the filling for fear of completely overpowering the mascarpone. I do add grated Monterey Jack and cheddar cheeses to the filling to give it more “body.” I use 2 parts mascarpone to 1 part cheddar and 1 part Monterey Jack. To prepare the peppers, take off the top of each, creating a boat-like vessel to hold the cheese. (Cutting them in half will allow the cheese filling to spill during baking.) With a spoon, clean out the seeds and ribs from inside each “boat.” Now, filling each pepper, as-is, will result in pretty mild poppers. For more heat, dice the trimmed tops with as much of the seeds & ribs that you like and add them to the cheeses. Once thoroughly mixed, fill each boat with the cheese but not to over-flowing. Next, place some Panko bread crumbs and a couple of tablespoons of grated Pecorino Romano cheese in a shallow dish and roll each filled pepper into the dish, coating the cheese filling with the bread crumb mixture. Spray a baking sheet with cooking spray, place each on the tray, and cook in a pre-heated 400˚ oven until topping begins to brown.  I start checking at about the 15 minute mark. If the peppers bake for too long, the pepper walls might collapse, spilling the hot cheese filling all over your baking sheet. Once baked to your satisfaction, remove to a serving platter and allow to cool for a couple of minutes before serving.

 *     *     *

Coming Attractions

Warn the dairies! Next week we’re making American Mozzarella.

 *     *     *

By any other name …

“Helen Hayes”

 *     *     *

Zuppa Inglese

Say the words “Zuppa Inglese” to my siblings and immediately their thoughts will turn to Christmas. Consisting of liquor “enhanced” lady fingers swimming in a lemon-flavored custard, this “English Pudding” was as much a part of my family’s Christmas Dinner tradition as was the platter of ravioli and the roasted chestnuts. To be sure, this is a dessert intended for adults but Mom didn’t forget us kids. She, also, made a non-alcoholic version which you can find in Variations below. (Even so, Dad always managed to sneak us a taste of his dessert when Mom wasn’t looking.)

The recipe I’m sharing is a version Mom gave me that calls for only 12 egg yolks. Before you think, “Only 12 egg yolks!?!?!” understand that the original recipe, a copy of which I also have, calls for 36 egg yolks. That’s a whole lotta Zuppa Inglese! In fact, making a batch of custard that large became a team sport, so to speak, with Mom, Zia, and Nonna suiting up against 3 dozen taunting yolks gathered menacingly in the bottom of an enamel pan. You see, when making so much custard on top of the stove — without a double boiler, mind you — it must be given constant attention and stirred non-stop for about 45 minutes. Leave it for a minute, unattended, and you’ll return to a lumpy mess. So, the Ladies of the 2-flat banded together on Christmas Eve, each taking a 10 to 15 minute turn stirring the pot, while her teammates played Briscola. I remember them moving the kitchen table close to the stove so that the “stirrer” could sit on the table’s edge while the other 2 Ladies kept the card game going at the other end of the table. Sipping a glass of wine all the while, the 3 chatted, laughed, played, and stirred until all agreed that the custard was done.  A few minutes later and there was enough Zuppa Inglese, both with and without alcohol, to serve anyone seated at the Christmas Dinner table.

As always, there are a couple of things to consider when preparing this dish. First off, I cannot stress enough that the custard must be stirred constantly, especially if you do not have a double boiler. Failure to do so and you may find yourself buying more eggs when you should be wrapping presents. (No need to run out and buy a double boiler. Place a couple of inches of water in a saucepan over low to med-low heat. Put the ingredients in a bowl large enough to lay on top of the saucepan without falling in. The boiling water should never touch the bottom of the bowl.) Make sure to keep clean the sides and bottom of the bowl as you stir. You’ll know the custard is ready (20 – 25 minutes for 12 eggs; about 45 minutes for 36 eggs) when it is noticeably thick and coats the back of a wooden spoon.

Custard aside, you can control how “spirited” you want your dessert to be. The recipe calls for equal parts whiskey, sweet vermouth, and grenadine. How much you use to “enhance” the lady fingers is your choice. Dip the lady fingers into a booze bath and you’ll have one very strong cocktail dessert. Use a pastry brush to “paint” the fingers and, depending on how thorough a painter you are, you may still have a pretty potent pudding. On the other hand, using your fingers to lightly sprinkle spirits across the lady fingers will result in a relatively zing-free zuppa. No matter which method you use, remember Italians waste nothing. So, use the left over liquor as the base of a nice cocktail, rewarding yourself for a job well-done.

*     *     *

This is the last of only 2 edible servings of Zuppa Inglese from the entire batch. While this very photo was being arranged, Max was busy “sampling” the rest.

*     *     *

Zuppa Inglese Recipe

yield:  one 9 x 9 x 2″ dish, filled with 3 layers of lady fingers in custard

Ingredients 

  • 12 egg yolks
  • zest of 1 lemon
  • 3/4 cup sugar
  • 1 cup heavy whipping cream
  • 1 cup half-and-half
  • lady fingers (thinly sliced pound cake may be substituted)

Directions

  1. Place all ingredients, except the lady fingers, in the top-half of a double boiler or in a mixing bowl as indicated above. Use a whisk to thoroughly combine.
  2. Place a couple of inches of water in the bottom-half of the boiler, reassemble the double boiler, and heat over a low to med-low heat.
  3. Stir constantly, making sure to scrape the bowl’s sides & bottom in the process.
  4. After 20 to 25 minutes, the custard should be thick enough to coat the back of a spoon.
  5. Remove from heat and pour the custard through a sieve to remove any bits of zest.
  6. Ladle enough custard to coat the bottom of a serving dish. Place on layer of lady fingers into the dish and dress with as much liquor as you prefer.
  7. Repeat the process, at least twice. Make sure to reserve enough custard to apply a final coating of custard to “top off” the dish.
  8. Refrigerate, covered, for several hours or overnight.

*     *     *

Variations

As noted earlier, Mom made a non-alcoholic dish of Zuppa Inglese for us kids and any adults who didn’t want to imbibe. To do so, she prepared a 2nd dish only this time she substituted grenadine for the spirits. Feel free to use some other flavoring, or nothing at all, to create an alcohol-free dessert for your table.

Up to this point, we’ve prepared the zuppa in a square baking dish. You can easily create a trifle, though depending on the size of the trifle dish, you may need to make a large batch (36 yolks) of custard. Just as was done in the baking dish, alternate layers of custard and “enhanced” lady fingers until near the top of the dish. Be sure to top-off the dish with a coating of custard. If you wish, you may encircle the stack with “treated” lady fingers that are standing on end, side by side, and pressed up against the trifle dish wall. And if you didn’t make enough custard or just want something a little different, you can alternate layers with one or 2 of whipping cream in place of the pudding. In fact, using whipping cream for the top-off will allow you to fill in any low spots that may result when the trifle settles. (Tip: Add a tbsp of (non-fat) powdered milk to the heavy cream as it is being whipped. The resulting whipped cream will have additional “staying power.”)

*     *     *

Sorry, Mom!

Mom would be disappointed if she found out that I posted today’s recipe AFTER Christmas! Zuppa Inglese, after all, was her Christmas Dinner dessert. Well, in my defense, I had intended to publish it last week, in plenty of time for the holiday. Unfortunately, my small kitchen appliances had other plans and a couple of them balked at the slightest of tasks. (One is now gone and I repaired the other. A Christmas miracle, to be sure!) My to-do list was thrown upside-down and, unfortunately, today’s post “took the hit.” Rest assured. Zuppa Inglese is every bit as tasty on New Year’s Day or “Little Christmas,” as it is on December 25th.

*     *     *

Zuppa Inglese

*     *     *

Apple Pie with a Cheddar Cheese Crust

I’ll be the first to admit that serving apple pie with a slice of cheddar cheese is not necessarily a common thing to do and it certainly wasn’t a family tradition. In fact, I was a young adult when Uncle first told me about it. Since then, I’ve enjoyed apple pie with cheddar cheese several times although, to be honest, I’ll take vanilla ice cream before cheddar cheese any day. (I am my Mother’s son, after all.) Still, I was happy with my apple pie adorned with the occasional slice of cheddar until one day a few months ago. I was busy doing whatever and, in the background, there was a Food Network program on the TV. It was one of those shows I’ve grown to dislike, with people talking about how great some dish is at this diner or that restaurant without ever telling how it’s made. Well, I watch these programs to learn new techniques, to get recipes, to see a dish prepared. If I want to hear people talk about how good a dish is, I’ll go to a diner and survey the people eating at the counter. Anyway, a restaurant was mentioned that was known for its pie and which featured an apple pie with cheddar cheese in the crust. Aside from that comment and seeing some grated cheddar dumped into a commercial mixer, the actual recipe was left a mystery. Did I mention how much I dislike these shows? Anyway, my quest began that very day …

In the weeks that followed, I baked a number of test pies. I varied the amount of grated cheddar cheese in the crust from 2 to 6 ounces per crust. I adjusted the amount of fat in the crusts and even swapped spices in the filling. And left in my wake was a trail of apple pies that stretched from the shores of Lake Michigan to those of Lake Huron, not to mention devoted taste testers in both locales. In the end, I settled on using 4 ounces of grated, sharp cheddar cheese and 7 tbsp of fat per crust while, in the pie filling, I replaced nutmeg with cardamom. The result was a pie with a crust that was manageable when raw and, when baked, was relatively light with the distinctive — but not overpowering — taste of cheddar. Success!

With the cheddar question out of the way, let’s talk filling. Just like with our Thingamajig, I use both tart and sweet apples. For the sweet, I find that Fuji work best because they, like Granny Smiths, hold up well during baking. I prefer the apples in my pie filling to be in chunks rather than thinly sliced and that way they remain somewhat firm when baked. Once the apples are peeled, cored, and chopped, I heat them in a saucepan with some butter. All I’m doing is heating them through; I take them off the heat when their juices first begin to appear in the pan. I’ve found that this helps to prevent a finished pie that has a gap of over an inch between the apple pie filling and the crust “dome” above it. It’s important, though, to pull the apples off of the heat as soon as they start to render their juices and to cool them completely before assembling the pie. Cook them too long or fill the pie while they’re still hot and your apples will not be at all crisp when the pie has finished baking.

*     *     *

No pie dome here!

*     *     *

The Apple with a Cheddar Cheese Crust Recipe

Ingredients

  • For Apple Pie Filling
    • 6 Granny Smiths (or similar, tart apples) peeled, cored, and sliced evenly
    • 2 Fuji (or similar, sweet apple) peeled, cored, and sliced evenly
    • 3 tbsp lemon juice
    • 2 tbsp butter
    • 1/4 cup raisins, soaked in hot water and drained (optional)
    • 1/2 cup sugar
    • 1/4 cup dark brown sugar
    • 1/4 cup AP flour
    • 3/4 tsp cinnamon
    • 1/4 tsp cardamom (or nutmeg)
    • 1/2 tsp salt
    • 1 egg, beaten
    • sugar
  • For Each of 2 Pie Crusts
    • 1 1/2 cups AP flour
    • 1/4 tsp salt
    • 3 tbsp vegetable shortening, cut into cubes and well-chilled
    • 4 tbsp unsalted butter, cut into cubes and well-chilled
    • 4 oz. sharp cheddar cheese, grated
    • 3 tbsp ice water, plus 1 tbsp, if needed
    • 1 tbsp cider vinegar

Directions

  • For apple pie filling
    1. In a large mixing bowl, combine the apple slices and lemon juice. Stir to coat the apples.
    2. In a sauce pan large enough to hold the apples, melt the butter over medium heat.
    3. Add the apples and sauté just until the apples begin to give up their liquid. Do not cook until the apples grow soft.
    4. Meanwhile, in a small bowl, mix together the sugar, brown sugar, flour, cinnamon, cardamom, and salt.
    5. Return heated apple pieces to large mixing bowl.
    6. Add the raisins, if using, and spice mixture to the apples and gently stir until the apples are coated evenly.
    7. Set aside to cool completely and until the pie crusts are ready.

  • For Pie Crust – Best if each crust is made individually in the food processor.
    1. Add flour, cheddar cheese, and salt to the processor. Pulse it a few times to combine the 3 ingredients.
    2. Add the very cold butter & shortening cubes.
    3. Pulse the machine 3 times, with each pulse lasting a 3-count. Your ingredients will now be lightly mixed. If need be, pulse again.
    4. With the machine running, add the vinegar and then slowly add the ice water. Do not add so much that a ball of dough forms. Remove the lid and, with your hands, test the dough to see if a ball of dough can be formed.
      1. If so, turn the dough until a very lightly floured service, form a ball, wrap it in plastic wrap, and refrigerate for 30 minutes.
      2. If a dough ball will not form, add a little more water, pulse the machine a couple of times, and test it again. When you can form a ball of dough, follow step A above.
    5. While the dough rests in the fridge, prepare the 2nd crust.
  • Assembly, to occur only after filling is cooled completely and pie crusts rested
    1. Pre-heat oven to 400.
    2. After 30 minutes, remove the dough from the fridge and roll it until large enough to completely cover the bottom of a 9 inch pie pan. Place the dough into the pan, trim any access, and return the crust and pan to the fridge until needed further.
    3. Roll out the 2nd crust, though slightly smaller, it must be large enough to cover the pie with a little excess.
    4. Retrieve the pie’s bottom crust from the fridge, fill it with the apple pie mixture, and cover it with the 2nd pie crust.
    5. Seal the pie by gently lifting the bottom crust’s edge while placing the top crust’s edge behind it. Work you way around the entire pie.
    6. Again, working your way around the pie, crimp the edge to further seal the pie.
    7. Use the egg to coat the top crust. Sprinkle with sugar. Use a sharp knife to create steam vents in the pie’s upper crust.
    8. Bake in a pre-heated 400* oven for 15 minutes. Without opening the door, lower the heat to 375* and continue baking for 40 – 45 minutes.
    9. After a total time of 30 minutes, and 15 minutes thereafter, check to see if the crust’s edge is too dark. If so, cover with aluminum foil and continue baking.
    10. When top is golden brown, remove pie from oven and place on a cooling rack. I always allow my apple pie to cool at least 2 hours before serving.

*     *     *

Fresh from the oven

*     *     *

Variations

This recipe is more concerned about the crust than it is the pie filling. So, if you prefer sweet apples, walnuts, or currants, use them. If you hate raisins, ditch them. If you don’t like or haven’t any cardamom, use nutmeg. In short, change the filling to suit your tastes. The same goes with the crust. If you find that adding cheddar to your favorite pie crust recipe makes a better pie, then please come back here and tell us about it.

*     *     *

Notes

One last thing about the crust. Add too little cheddar and you won’t taste it; too much and the pastry dough is rendered unmanageable. And even under the best of circumstances, the cheddar cheese will affect the crust’s flakiness. So, it’s basically a trade-off. The trick is to add as much cheddar cheese flavor as you can without sacrificing too many of the crust’s better qualities. My taste testers and I agree that this recipe “works.” If you try it, I hope you feel the same way.

*     *     *