Roast Pork with Fennel

Porchetta

My last few posts have been pretty much dedicated to dishes served over the Holidays. Today’s recipe, Porchetta con Finnocchio, is yet another of those dishes and was served not just around Christmas but whenever there was reason to celebrate. Similar in preparation to most pork roasts, this roast differs because of the cut of meat used and for the use of fennel, finnocchio, as seasoning.

Traditionally, porchetta meant the roasting of an entire pig. In fact, one such pig was roasted at a neighborhood bakery and served at the wedding reception of Zia & Uncle. (Imagine a time when “A”, there were neighborhood bakeries and, “B”, you could use their oven to roast a pig!) Now, that may be fine when feeding large groups but, for most families, a pig roast is out of the question. My family, like many, used the pig’s foreleg, the picnic ham, for the roast.  The meat was butterflied, removing the bone in the process, and then heavily seasoned with, among other things, fennel fronds which are similar to dill in both appearance and taste. The result was a juicy roast, with herbal flavoring throughout. Times have changed and picnic hams aren’t as readily available as they once were. My family switched to roasting bone-in pork loins initially but, as time passed, they, too, became less available and we began roasting boneless pork loins. Although still very good, the loin is a lean cut of meat and some will forever favor a porchetta made using  picnic ham over one made with pork loin.  In a future post, I’ll share a recipe for porchetta using a pork loin but, for today, we’re once again turning back the clock to roast a leg of pork.

This recipe differs from that used by my family in a couple of ways. First off, I wanted to make sure that I had a sauce to serve with my porchetta. To that end, I include roasting vegetables in the pan, adding stock & wine as a basting liquid. I, also, love roasted vegetables and add potatoes and carrots to the roasting pan about an hour after the roasting has begun. In contrast, the most my family put in the roasting pan was a few potatoes, and even that was a rarity. As a result, I don’t remember Mom ever serving a sauce with her porchetta. Lastly, and this is a big one, relatively speaking, I include sliced finnocchio as a roasting vegetable. This would never have been done back home, for fennel was always served raw, the fronds and smaller stems being frozen for later use in a porchetta. Whether served alone or among crudités, fennel was either served plain or with a small, ramekin-sized dish containing a simple dipping sauce of extra virgin olive oil, salt, pepper, and maybe a little red wine vinegar. (There is a name for this sauce but neither Zia nor I can remember it.) I broke with tradition when, about 15 years ago while they were visiting Chicago, I served Mom & Zia a whole sea bass that had been stuffed with, and roasted upon a bed of, fennel. That was the first time either had been served cooked fennel. So, for me to add fennel to the roasting pan is somewhat of a big deal. The flavor it brings to the sauce, however, is well worth the change. Still, should you wish to roast your porchetta in true Bartolini fashion, prepare the roast as indicated below, omitting all the roasting vegetables, and place the porchetta on a roasting rack centered in a roasting pan. No matter how you roast your porchetta, bear in mind you may need to adjust the amount of herbs needed depending upon the size of your roast.

*     *     *

Porchetta Recipe

Ingredients

    • 1 raw picnic shoulder ham, skin on, bone removed, butterflied
    • 4 tbsp fennel fronds, chopped
    • 4 tbsp fresh parsley, chopped
    • 8 – 10 garlic cloves, diced
    • 3 – 4 tbsp fresh rosemary, chopped
    • olive oil
    • 1 tbsp marjoram
    • 12 whole garlic cloves
    • 1 fennel bulb, thinly sliced
    • 1 onion, thinly sliced
    • 3 celery stalks, chopped
    • 3 carrots, cut into large pieces
    • fingerlings or new potatoes
    • 3 rosemary sprigs
    • 6 cups chicken stock, divided
    • 3 cups dry white wine, divided
    • 3 tbsp AP flour
    • butter
    • water

Directions

    1. About an hour before the porchetta is to go into the oven, combine the fennel fronds, parsley, chopped garlic, and rosemary. Add enough olive oil to make a paste, stir,  and set aside.
    2. Use a sharp knife to score the pork skin, making a checkerboard or diamond pattern. Try to avoid cutting deeply into the pork meat, if at all.
    3. Place the roast, skin-side down, and “open it,” revealing as much surface area inside the roast as possible.
    4. Evenly coat the exposed flesh with the herbal paste created in Step 1. Season with marjoram before liberally seasoning with salt & pepper.
    5. Use twine to tie the roast securely. Set roast aside while it loses its chill.
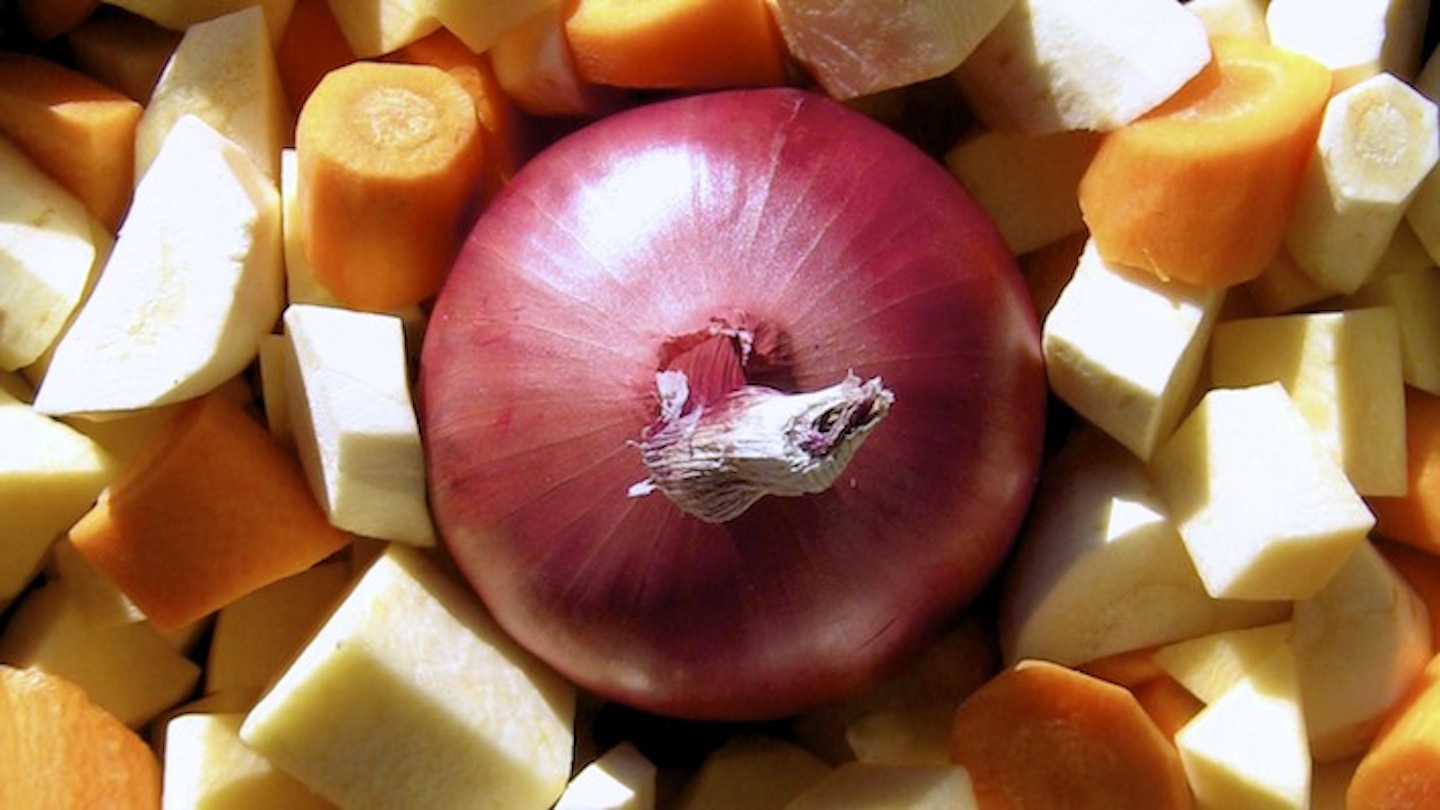
    6. In a roasting pan, add the sliced onions, fennel, celery, and whole garlic cloves. Season liberally with salt & pepper.
    7. Place the roast atop the bed of roasting vegetables. Pre-heat oven to 450˚.
    8. Coat the roast with olive oil, add 2 cups stock plus 1 cup wine to the roasting pan.
    9. Place roasting pan in pre-heated oven. Every 20 minutes, baste the roast with the pan juices, add more stock and wine to the pan, if needed.  (Be sure to reserve 2 cups of stock and 1/2 cup of wine for use later.)
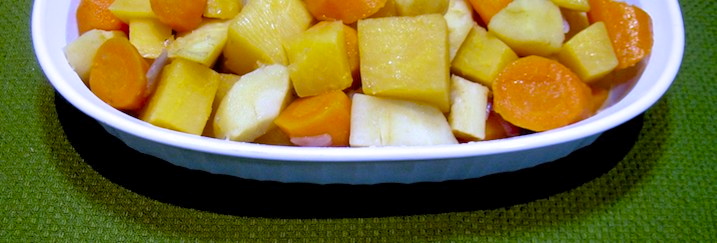
    10. Meanwhile, place potatoes and carrots into a large bowl, season with salt and pepper, some rosemary, and enough olive oil to coat. Mix well.
    11. After 60 minutes total time, reduce oven temperature to 325˚, baste the roast adding more liquid to the pan if needed, and place the seasoned carrots and potatoes into the roasting pan.
    12. From this point forward, continue to baste the roast every 30 minutes or so, replenishing the pan juices when necessary.
    13. If outer skin grows too brown, use aluminum foil to tent the porchetta.
    14. Roast will be finished when the internal temperature reaches 165˚. When ready, remove roast to a cutting board and tent with aluminum foil to rest for at least 15 minutes. Remove the carrots and potatoes to a covered bowl. Strain the pan juices from remaining stewing vegetables.
    15. Use the reserved 1/2 cup of wine to deglaze the roasting pan over high heat.
    16. Use a grease separator to remove all but 3 tbsp of grease from the strained liquid.
    17. Reduce heat to medium, add the 3 tbsp of grease to the roasting pan, and add 3 tbsp AP flour. Mix thoroughly and cook for a minute or so to create a roux.
    18. Add the remaining pan juice liquids and stir until the sauce begins to thicken.
    19. Begin adding the reserved of stock to the pan, stirring constantly, over medium heat.
    20. Once all the stock has been added and the sauce thickened, taste for seasoning, remove from heat, and add a tab of butter to finish the sauce.
    21. Before carving the roast, use a small knife to remove the skin (crackling), which may be served with the roast or left in the kitchen as the Cook’s reward.
    22. Slice and serve the roast, accompanied by the sauce and reserved roasted vegetables.

*     *     *

Notes

You’ll note the recipe calls for fennel fronds when, in reality, Mom also used the small, thin stems along with the fronds. I believe these stems bring  much flavor to the roast but no one wants to find a stem in their food. To get around this, I make sure any stems used are chopped as finely as possible.

*     *     *

Zuppa Inglese

Say the words “Zuppa Inglese” to my siblings and immediately their thoughts will turn to Christmas. Consisting of liquor “enhanced” lady fingers swimming in a lemon-flavored custard, this “English Pudding” was as much a part of my family’s Christmas Dinner tradition as was the platter of ravioli and the roasted chestnuts. To be sure, this is a dessert intended for adults but Mom didn’t forget us kids. She, also, made a non-alcoholic version which you can find in Variations below. (Even so, Dad always managed to sneak us a taste of his dessert when Mom wasn’t looking.)

The recipe I’m sharing is a version Mom gave me that calls for only 12 egg yolks. Before you think, “Only 12 egg yolks!?!?!” understand that the original recipe, a copy of which I also have, calls for 36 egg yolks. That’s a whole lotta Zuppa Inglese! In fact, making a batch of custard that large became a team sport, so to speak, with Mom, Zia, and Nonna suiting up against 3 dozen taunting yolks gathered menacingly in the bottom of an enamel pan. You see, when making so much custard on top of the stove — without a double boiler, mind you — it must be given constant attention and stirred non-stop for about 45 minutes. Leave it for a minute, unattended, and you’ll return to a lumpy mess. So, the Ladies of the 2-flat banded together on Christmas Eve, each taking a 10 to 15 minute turn stirring the pot, while her teammates played Briscola. I remember them moving the kitchen table close to the stove so that the “stirrer” could sit on the table’s edge while the other 2 Ladies kept the card game going at the other end of the table. Sipping a glass of wine all the while, the 3 chatted, laughed, played, and stirred until all agreed that the custard was done.  A few minutes later and there was enough Zuppa Inglese, both with and without alcohol, to serve anyone seated at the Christmas Dinner table.

As always, there are a couple of things to consider when preparing this dish. First off, I cannot stress enough that the custard must be stirred constantly, especially if you do not have a double boiler. Failure to do so and you may find yourself buying more eggs when you should be wrapping presents. (No need to run out and buy a double boiler. Place a couple of inches of water in a saucepan over low to med-low heat. Put the ingredients in a bowl large enough to lay on top of the saucepan without falling in. The boiling water should never touch the bottom of the bowl.) Make sure to keep clean the sides and bottom of the bowl as you stir. You’ll know the custard is ready (20 – 25 minutes for 12 eggs; about 45 minutes for 36 eggs) when it is noticeably thick and coats the back of a wooden spoon.

Custard aside, you can control how “spirited” you want your dessert to be. The recipe calls for equal parts whiskey, sweet vermouth, and grenadine. How much you use to “enhance” the lady fingers is your choice. Dip the lady fingers into a booze bath and you’ll have one very strong cocktail dessert. Use a pastry brush to “paint” the fingers and, depending on how thorough a painter you are, you may still have a pretty potent pudding. On the other hand, using your fingers to lightly sprinkle spirits across the lady fingers will result in a relatively zing-free zuppa. No matter which method you use, remember Italians waste nothing. So, use the left over liquor as the base of a nice cocktail, rewarding yourself for a job well-done.

*     *     *

This is the last of only 2 edible servings of Zuppa Inglese from the entire batch. While this very photo was being arranged, Max was busy “sampling” the rest.

*     *     *

Zuppa Inglese Recipe

yield:  one 9 x 9 x 2″ dish, filled with 3 layers of lady fingers in custard

Ingredients 

  • 12 egg yolks
  • zest of 1 lemon
  • 3/4 cup sugar
  • 1 cup heavy whipping cream
  • 1 cup half-and-half
  • lady fingers (thinly sliced pound cake may be substituted)

Directions

  1. Place all ingredients, except the lady fingers, in the top-half of a double boiler or in a mixing bowl as indicated above. Use a whisk to thoroughly combine.
  2. Place a couple of inches of water in the bottom-half of the boiler, reassemble the double boiler, and heat over a low to med-low heat.
  3. Stir constantly, making sure to scrape the bowl’s sides & bottom in the process.
  4. After 20 to 25 minutes, the custard should be thick enough to coat the back of a spoon.
  5. Remove from heat and pour the custard through a sieve to remove any bits of zest.
  6. Ladle enough custard to coat the bottom of a serving dish. Place on layer of lady fingers into the dish and dress with as much liquor as you prefer.
  7. Repeat the process, at least twice. Make sure to reserve enough custard to apply a final coating of custard to “top off” the dish.
  8. Refrigerate, covered, for several hours or overnight.

*     *     *

Variations

As noted earlier, Mom made a non-alcoholic dish of Zuppa Inglese for us kids and any adults who didn’t want to imbibe. To do so, she prepared a 2nd dish only this time she substituted grenadine for the spirits. Feel free to use some other flavoring, or nothing at all, to create an alcohol-free dessert for your table.

Up to this point, we’ve prepared the zuppa in a square baking dish. You can easily create a trifle, though depending on the size of the trifle dish, you may need to make a large batch (36 yolks) of custard. Just as was done in the baking dish, alternate layers of custard and “enhanced” lady fingers until near the top of the dish. Be sure to top-off the dish with a coating of custard. If you wish, you may encircle the stack with “treated” lady fingers that are standing on end, side by side, and pressed up against the trifle dish wall. And if you didn’t make enough custard or just want something a little different, you can alternate layers with one or 2 of whipping cream in place of the pudding. In fact, using whipping cream for the top-off will allow you to fill in any low spots that may result when the trifle settles. (Tip: Add a tbsp of (non-fat) powdered milk to the heavy cream as it is being whipped. The resulting whipped cream will have additional “staying power.”)

*     *     *

Sorry, Mom!

Mom would be disappointed if she found out that I posted today’s recipe AFTER Christmas! Zuppa Inglese, after all, was her Christmas Dinner dessert. Well, in my defense, I had intended to publish it last week, in plenty of time for the holiday. Unfortunately, my small kitchen appliances had other plans and a couple of them balked at the slightest of tasks. (One is now gone and I repaired the other. A Christmas miracle, to be sure!) My to-do list was thrown upside-down and, unfortunately, today’s post “took the hit.” Rest assured. Zuppa Inglese is every bit as tasty on New Year’s Day or “Little Christmas,” as it is on December 25th.

*     *     *

Zuppa Inglese

*     *     *

Baccalà alla Marchigiana

Wind drying and salting are among the oldest methods of preserving food known to Man. One application of these techniques, dried and salted cod, has been around for hundreds of years and is common throughout much of Europe. In Italy, it is called baccalà; in Portugal, bacalhau; and  you may have seen it in Spanish markets as bacalao. No matter what name is used, if you’ve ever seen it in its dried state, you certainly won’t forget it. Off-white and heavily salted, the preserved fish is sold in pieces about 18 inches long, 4 to 8 inches wide, as much as a half-inch thick, and stiff as a board. Well, except this last piece I bought, which required refrigeration and was actually soft, relatively speaking. (Who knew?) Dried stiff or soft-ish, the cod must be rinsed, again and again, before it can be cooked. (See Notes below.) Once re-hydrated and “de-salted”, you can treat it like you would any fresh fish.

Last week, I spoke of my family’s tradition of serving a seafood feast on Christmas Eve, made possible by Dad’s employment at the restaurant, and mentioned that baccalà was often one of the famed 7 Fishes in many Italian homes. Well, not in our home, much to my dismay. Whether it was because Mom or Dad didn’t like it, or, Mom wasn’t a fan of the prep work, baccalà was a dish served only in Zia’s home. Good thing, too, because although it wasn’t as convenient as having it served at my own dinner table, Zia and her Mother-in-law, Nonna, were masters of its preparation. As a result, as Zia recalls, I was forever trying to snag whatever leftovers I could from their meal. Although both women used the same ingredients, Nonna preferred to bake her baccalà, while Zia cooked hers atop the stove.  As one who “sampled” both preparations, I can attest that each method produced a delicious dish. As for our recipe today, Zia and I combined both methods, partially cooking the dish atop the stove before finishing it off in the oven. Although I wanted to name the dish Baccalà alla Zia, my ever-so-modest Aunt would have none of it. So, to honor both her and Nonna, the recipe is called Baccalà alla Marchigiana — but you and I know its real name.

*     *     *

Baccalà alla Marchigiana Recipe

Ingredients

  • 3 to 4 medium-sized potatoes, peeled and quartered
  • olive oil
  • salt & pepper, to taste
  • 3 tbsp olive oil
  • 1 medium onion, chopped
  • 2 cloves garlic, minced
  • 2 tsp marjoram
  • 3 tbsp fresh parsley, chopped
  • 1 large can (28 oz) tomatoes (whole or diced)
  • 1 lb baccalà, soaked, and cut into 3 inch chunks (See Notes below)
  • salt & pepper, to taste

Directions

  1. Pre-heat oven to 400˚.
  2. Season potatoes with salt & pepper, toss with a splash of olive oil, and roast on a baking sheet for 20 minutes at 400˚.
  3. Meanwhile, in a large frying pan, heat olive oil over med-high heat. Add the onion and sauté until translucent, about 5 minutes
  4. Add garlic & parsley and continue to sauté for another minute.
  5. Add tomatoes & marjoram, bring to boil, reduce to simmer, and cook, uncovered,  for 30 minutes. If sauce is “tight”, meaning too dry, add water.
  6. Add roasted potatoes and continue simmering for another 20 minutes. Add water if necessary.
  7. Add baccalà to the tomato sauce and place pan into the 400˚ oven. Bake for 20 minutes. Taste before seasoning with salt & pepper, if necessary.
  8. Serve immediately.

*     *     *

Variations

Whereas baccalà is cod that has been salted and dried, stoccafisso is cod that has been dried but not salted. Once properly prepared, both forms can be cooked in a variety of ways. The portions can be baked in a sauce as above, pan-fried, baked, grilled, or poached and served in a salad. Recently, I watched a re-broadcast of Molto Mario as he used baccalà to make “fish balls,” which he deep-fried. In other words, the only thing limiting how baccalà might be prepared is your own imagination. And for those who believe that fresh or frozen cod is just as good as baccalà, I caution against mouthing such heresy in the presence of Zia’s Youngest Son. A word to the wise is sufficient.

Notes

Baccalà must be thoroughly rinsed and soaked before you can cook it. If it is salted and fully dried (pic on left), it will take 2 days to get it re-hydrated and de-salted  (pic on right). This is readily  accomplished by placing it in a large baking  dish filled with cold water and changing the water occasionally over the course of the 2 days. I find it helps to let the water run gently into the dish a few times, as well. If, as was the case with my most recent purchase, your baccalà is not fully dried but refrigerated, you may be able to get away with a 1 day soak. You will know when the fish is ready by its appearance, feel, and, yes, its smell. Be careful, however, not to let it soak for too long or to run the water too forcefully. The fish could lose its firm texture and might even disintegrate.

No post about baccalà would be complete without mention of its “aroma.”  Certainly not as strong as stoccafisso, when first you begin to soak the cod, you will notice it that it smells like, well, dried fish. The smell quickly dissipates in the rinse water and soon its scent compares favorably with any other fish product. Stoccafisso, however, is not so easily rendered scentless and should only be attempted outdoors or in a well-ventilated room. To illustrate my point …

I was about 5 or 6 years old and shared a bedroom with my brother, who was about 10 or 11 years old at the time. Our bedroom, as well as the bedroom of my cousins’ directly above ours, was separated from the rest of the house by a stairwell that ran from the 2nd floor to the basement. One morning, Mom entered our bedroom in a cleaning frenzy, convinced that my brother or I had done, or left, something disgusting in the room. Angels that we were and despite our claims of Godliness, a foul stench had reached her kitchen, which was located on the other side of the stairwell, and our room declared a crime scene — ground zero, in today’s parlance. Lucky for the two of us, Mom found nothing untoward in our room and now, more determined than ever, she set out to find the source of the stench. It wasn’t long before her nose led her to the basement where, under the stairs, she found Grandpa’s stoccafisso, bathing innocently in a tub of water. Well, revenge is a dish best served cold, so Mom patiently bided her time. It wasn’t long before Grandpa left the house, as he did every morning like clockwork. Seizing the opportunity, Mom placed the tub of stoccafisso under his bed and closed his bedroom door as she left. Even Grandpa’s Old Spice, the scent of which permeated that room, proved to be no match for stoccafisso, as Grandpa learned when he opened that door a few hours later. To be sure, Mom and her Father “discussed” the matter but, being so young, I wasn’t privy to that conversation. I do know, however, that Grandpa never soaked stoccafisso under those stairs again.

*     *     *

Mom’s Calamari Salad


Insalata dei Calamari

Prior to the changes brought by Vatican Council II in the 1960′s, Christmas Eve was a “fast & abstain” day, meaning only 1 main meal could be consumed and no meat was to be eaten all day. For most Catholics around the World, it was a day of contemplation and that one meal was nothing special. With Christmas coming within 24 hours, all eyes — and appetites — were focused on the big day — and dinner — soon to come. Not so the Italians. If tomorrow’s a big holiday and today you can only have one meal, why not make that meal special? And so they did.  Can’t have any meat? No problem. With Italy being both peninsula and island, fish was very often more readily available than many meat products. And so it became a seafood banquet. Wait a minute! The Church may frown upon so grand a celebration on the eve of the birth of the Christ Child. Again, no problem. They made a point of serving seven fish, each one representing one of the Seven Sacraments of the Christian Faith. In one masterstroke, their seafood feast became an Act of Faith. What priest, bishop, or even Pope would dare interfere with these devout Catholics as they used the day’s only meal to commemorate the Seven Sacraments? (The fact that the clergy themselves were probably dining on an even more spectacular seafood supper didn’t hurt “the cause” either.) And so the Feast of the Seven Fishes was born and survives to this day wherever Italians call home.

It’s funny but I don’t recall hearing anything about the Feast of the 7 Fishes when I was growing up. This, despite our having a large seafood meal every Christmas Eve. Dad, working in a restaurant, would come home early in the evening of Christmas Eve, bearing gifts of clams, oysters, and red snapper, at the very least. This would be added to the shrimp and crabmeat that Mom was preparing as appetizers and the calamari she was using to make a salad. As Dad shucked, he helped Mom with the recipes for clams casino and oysters Rockefeller. (Yes, Dad could cook but it was a skill he successfully kept under wraps except on the most rare of occasions.) There was, of course, a big platter of home-made linguine with tuna — or possibly clams — to be served along with the red snapper that Mom had broiled. It was, by any measure, quite a feast of seafood — we just never counted the “participants”.

Although today I do not maintain this family tradition, I do, however, make sure that my plans for Christmas Eve include a meal of seafood, no matter what. Since I’ve posted a number of seafood recipes over the past several months, I thought I’d post links to them all for anyone planning a Feast of the 7 Fishes but who may be missing a fish or two. Before doing that, however, I’ll share Mom’s recipe for Calamari Salad because, well, you should have it; she said so. And, next week, I’ll share the Bartolini recipe for what is the traditional main course in many Italian homes on Christmas Eve, Baccalà (salted cod), which, by the way, is also one of the 7 Fishes.

*     *     *

The Real McCoy

*     *     *

Now, there are a few things to consider with the recipe I’m about to share. First off, when cooking calamari, it’s been said to either cook it for 1 minute or 45. Anything in between and you’ll be eating something akin to rubber. So, use a big pot, bring it to a rolling boil, and get those squid into, and out of, the pot quickly. Beyond that, this recipe is typical of most of my family’s in that it features a few ingredients with relatively few spices. It is all about balance, that’s why there are no amounts given. Yes, Mom listed 1 green and 1 red pepper but I omitted the quantities. It all depends upon how much calamari you use and you’ll note that Mom didn’t list the amount of calamari needed in her recipe. Chop and mix as much bell pepper, red and green, as your eye tells you. (For 1 1/2 lbs calamari, I used about 2/3 each green & red bell pepper.) Taste the onion and let that determine how much to use. If you feel it’s too strong, feel free to give it a quick rinse under cold water after you’ve chopped it. Still not liking the onion? Try a shallot or 2 instead. Lastly, if you’re not comfortable adding the dressing ingredients directly onto the calamari & peppers, then mix it first in a small bowl, taste it, adjust if necessary, and then dress your calamari with it. Bear in mind that most homemade vinaigrettes call for 3 parts oil (olive) for every one part acid (vinegar or, in this case, lemon juice).

*     *     *

Mom’s Calamari Salad Recipe

Ingredients

  • squid, cleaned and cut into rings (halve tentacles, if using)
  • green bell pepper, diced
  • red bell pepper, diced
  • red onion, diced
  • extra virgin olive oil
  • lemon juice
  • fresh parsley
  • salt & pepper, to taste

Directions

  1. Fill a large saucepan with water and bring to a rolling boil over high heat.
  2. Add the calamari, stir, and turn off the heat.
  3. After one minute remove from water and place in an ice bath to chill. (Calamari may be “held” here for a couple of hours until ready to be served.)
  4. Once fully chilled, drain, place calamari on paper towels, and pat dry before dressing immediately with lemon juice, olive oil, parsley, salt and pepper.
  5. Toss and serve.

*     *     *

This couldn’t be easier to prepare and, best of all, you can cook the calamari, make the dressing, and chop the peppers, onion, & parsley ahead of time and store it all separately in the fridge. Just before serving, mix the ingredients, season with salt & pepper, and bring it to the table. Who wants to be stuck in the kitchen when there are unattended gifts to shake?

*     *     *

All righty! That’s 1 recipe down and 11 more to go. As promised, here are the seafood recipes that I’ve shared during the past year.

Tomato Sauce with Tuna

*

Fried Calamari

*

Pasta with Clams (“White Sauce”)

*

Pasta al Salmone

*

Grandpa’s Barbecued Shrimp

*

 Pasta with Clams (“Red Sauce”)

*

Salmon en Papillote — on the grill

*

Pasta with Shrimp

*

Brodetto

*

Lumache alla Bartolini

*

Puttanesca Sauce

*

*

*     *     *

As you can see, of the 11 dishes presented, 7 involve pasta. I’m afraid that’s a bit too much pasta for a Feast of the 7 Fishes, even for me. So, I’ve got a plan. For your primo piatto, prepare my Brodetto. That’s 5 fish in one dish! Clear the table and serve today’s calamari salad alongside next week’s Baccalà and you’ll have all 7 fishes, present and accounted for, in only 2 courses. That wasn’t so hard, was it?

Oh! About dessert. Yes, you may have dessert but, keeping in mind that it is a day of fasting and in the spirit of the Feast of the 7 Fishes, go easy on the whipped cream and chocolate sauce. Besides, you’ll need room for the fruit & cheese platter that you’ll be  serving while the chestnuts are roasted.

*     *     *

Quadretti Pasta

Most of us have warm and fuzzy memories of being nursed back to health by a loving caregiver, usually Mom, who served us a cup or bowl of soup. And you parents reading this are sure to have equally warm memories — some pretty recent — but from the other side of the covers. I’d be willing to bet that most of us were served soup made with a chicken-based stock or broth. What went into that broth, however, varied widely from house to house. In ours, Mom used either of 2 pastas, one of which is today’s recipe, quadretti.

Generally speaking, Mom relied upon 3 dishes to get me up-and-about. Breakfast would be a 3-minute egg, with or without buttered toast depending upon my stomach’s attitude.  My meals would be pasta in bianco. Aside from it being a traditional cure served to bambini with stomach ailments, Mom knew that I could’ve been at Death’s door and I would have agreed to at least try a little pasta in bianco. Between meals, though, there was a constant supply of broth which, as the recovery progressed, contained more and more pastina. Ask my Sister what Mom served her when ill and she’ll mention, without hesitation, Acini de Pepe, a tiny bead-like pasta. As for my Brother and me, it was quadretti all the way.

“Feeling better?”

Quadretti are square-shaped pastina that, as you’ll soon see, are quite easy to make. Whenever Mom made pasta of any kind, she would roll out the left-over dough and use it to make quadretti. (In true Italian tradition, absolutely nothing was wasted.) This she stored in a container, adding to it with each new batch of home-made pasta. Because she was always adding to her stash, she rarely had to devote a batch of pasta dough to making quadretti. When combined with the quart or 2 of chicken stock she was sure to have on-hand for risotto,  Mom was always prepared when one of us was feeling under the weather.

One more thing before getting to the directions and this is for soup novices. You will get better results if you only make enough soup with quadretti for as many bowls as will be served in 1 meal. If you make a large batch of soup with quadretti and store it in the fridge, when you bring it out of the fridge, you may be surprised to find that the noodles have absorbed a great deal of the broth. Not only that but, depending upon how much quadretti you put into the soup, you my have very little broth left at all. So, before you add the quadretti to your soup, take into consideration that the noodles will swell a bit during cooking and later in storage. Better to make just enough soup for one meal and store the raw quadretti separately from the broth/stock.

Don’t let any of this deter you from making this pasta. Just as you cannot compare a dish of home-made linguine with store-bought, you will not find a mass-produced pasta that comes close to the taste of home-made quadretti. It just ain’t gonna happen!

*     *     *

How To Make Quadretti

A half batch of Mom’s Pasta Dough will give you about 2/3 to 3/4 lb of fresh pasta dough. That should be more than enough for most soup recipes. Once the dough has rested, you must roll it out, either manually or by machine. If doing it by hand, roll it until it is as thin as you would when making ravioli. If using a machine that, like mine is at its widest when the setting is number “1,” then pass the dough through the rollers, repeatedly, advancing the setting with each pass, up-to-and-including the number “6” setting. If your rollers, like Zia’s, work the opposite of mine and their widest setting is number “10,” then pass the dough repeatedly through the rollers, decreasing the setting with each pass, down-to-and-including the number “5” setting. Once you’ve attained the proper thickness, cut the dough strip into sheets 2 to 3 feet long, and follow the steps outlined in the images below. Be sure to allow the dough sheets to dry sufficiently. If the sheets are too moist, the quadretti will stick together when you cut them. If too dry, the dough sheet will crack and break as you try to fold it to create the sfoglia.

*     *     *

Fold dough sheet in half,

*     *     *

Continue to fold in half repeatedly until a sfoglia of about 2 to 4 inches wide is created.

*     *     *

Starting at one end, begin cutting sfoglia into strips, no thicker than the width of linguine.

*     *     *

Carefully turn a number of the noodles 90* and begin cutting, again as if cutting linguine.

*     *     *

Gently separate the freshly cut quadretti.

*     *     *

Spread out to dry before freezing or refrigerating in an airtight container until use.

*     *     *

See? A pasta cannot be easier to make by hand and, if you’ve never enjoyed home-made pasta in your broth, you’re in for a real treat. Keep a container of quadretti in the back of your freezer and if, heaven forbid, you’re feeling under the weather, a mug of your home-made broth with a sprinkling of quadretti is just what my “Doctor Mom” would have ordered.

*     *     *

Bartolini Sausage

Laws are like sausages,” wrote Bismarck. “It’s better not to see them being made.” Well, I know little of the backroom dealings that are integral to our legislative process but today I intend to pull back the veil on sausage making, at least my family’s sausage making, that is. And why today? Because Zia taught me how to make sausage and today is her 89th birthday!!!

Allora, buon compleanno, Cara Zia! Cent’ anni e tanti baci!

*     *     *

You'll have no beef with this burger!

*     *     *

For as long as I can remember, the Bartolini Girls made sausage and served them at any meal. They’d cut up a few, add some beaten eggs, and we had a frittata for breakfast. As kids, many is the time we had sausages instead of hot dogs for lunch while, for supper, the sausages were either served alone, roasted with veggies & potatoes, or cooked in a tomato sauce and served with pasta instead of meatballs. Truth be told, we were much more likely to have sausage than we were to have meat balls.  Even after I moved away, Mom always made sure I had at least one container of frozen sausage patties to enjoy once I got home. And to this very day, whenever I make sausage, that first whiff of the seasoned ground pork is a trip on the Wayback Machine to my youth, watching Mom at work. Sure, there are many kinds of sausage available at the local groceries and butchers, not to mention the ethnic markets, but not a one reminds me of home. That’s reason enough for me to keep making these.

Now, for you sausage novices, there is at least 1 reason for Bismarck’s comment. You see, pork sausage requires a certain amount of fat, with some recipes calling for as much as 25% fat content. This recipe doesn’t come near that percentage but fat content is an issue. If you buy a cut of meat that’s too lean, like the pork loin I purchased early in my sausage making career, you will be very disappointed with the result. Look for a good, not too lean, pork butt roast when you make sausage. Even then, you may find that you need to add pork fat to the ground meat, although it wasn’t always this way. Years ago, pork  products had a much higher fat content and one rarely, if ever, needed to add more fat to the mix. Then, without warning to our fellow sausage makers, hog breeders began to develop a leaner, healthier product and the “Other White Meat” campaign was born. Unfortunately, getting rid of the fat got rid of a good deal of flavor, so much so that Mom and Zia quit making sausage altogether! I eventually convinced Zia to try making it again so that I could learn the recipe and, at first, I bought some extra pork belly fat to compensate for today’s leaner pork. It worked, I learned the recipe, and all was well — or should have been. One fateful day, I attempted to make sausage on my own and over-compensated with the fat. What a greasy mess! After that, I quit using additional fat and switched to pancetta. For a 4 lb. pork butt, I use about a half-pound of pancetta. Not only does it add some much-needed fat without going overboard, it brings a nice flavor to our sausage, as well. Most importantly, Zia approved the addition. In fact, the picture to the left was taken at her home and that’s pancetta on top of the pork. (See Notes below for a tip on grinding the meat.)

When you look over our recipe, you’ll quickly notice that there is a surprising lack of spices used but, because it’s so simple, it can easily be modified to suit your tastes. Mom didn’t like fennel seed in her sausage but I don’t think she’d mind if you added some to yours. She, also, didn’t like her sausage spicy but I’m sure she’d look the other way if you wanted to add some red pepper flakes or a couple shakes of cayenne pepper. And I bet Zia would find it interesting if you were to, say, add a little ground sage or marjoram to the ground meat. As for me, I’m a garlic lover and have been known to add a couple of cloves of minced garlic, in addition to the garlic-flavored wine. And if none of those suggestions hit their mark, check out Greg’s recipe at the Rufus Guide. Just remember that no matter what spices you use and how much, be sure to start with less than you think necessary and cook a small amount of pork for a taste test. You can always add more if need be.

Now, one more thing probably should be mentioned. Some may be wondering where the sausages are, being this is a posting about sausage making. Well, you can blame me for that.  As I mentioned, Mom always sent me home with a container of sausage patties after I visited and I grew to prefer them. Cooked on the grill, they are a great alternative to hamburgers. Not only that, but a patty or 2 can be easily crumbled for addition to a tomato sauce, meatloaf, pizza, or some other dish. Well, during one of our Sausage Days, I convinced Zia to just make patties that afternoon and we haven’t made a sausage since. If you’re a sausage person, however, feel free to stuff those casings!

*     *     *

Bartolini Sausage Recipe

Ingredients

  • 4 lbs pork butt, coarsely ground
  • 1/2 lbs. pancetta, coarsely ground
  • 6 oz dry white wine
  • 3 cloves garlic, smashed
  • 1 1/2 tbsp salt, more or less to taste
  • 2 tsp ground black pepper, more or less to taste

Directions

  1. At least 2 hours before beginning, place garlic and wine into a glass and set aside.
  2. Once garlic and wine have “married,” combine ground meats and spread in an even layer, about 2 inches thick, on a work surface.
  3. Season the meat with salt and pepper. Use your fingertips to create dimples in the meat’s surface.
  4. Strain the garlic from the wine and discard. Sprinkle the now flavored wine evenly across the meat. Begin mixing the meat until the seasoning and wine are evenly distributed. Recreate the meat layer and let rest for at least 30 minutes so that the flavors meld. (Caution should be taken if you are doing this on a hot Summer’s day or in a very warm room.)
  5. Once rested, make a mini-patty and cook it in a small frying pan. After tasting, you may need to adjust your seasoning. If you do add seasoning, let it rest 15 minutes before tasting again.
  6. Once the sausage meat has passed your taste tests, begin making patties. Place them in single layers on baking sheets and into the freezer. Once frozen, you can bag them or place them into containers until needed.

*     *     *

Notes

Our preference is to grind the pork using the plate with the largest holes. This will create a coarse grind. When grinding meat for ravioli or cappelletti, use a smaller holed plate for a finer grind. No matter what size the end-result, you’ll find that your grinder, whether machine run or hand-cranked, will perform better and produce a more consistent result if the meat is cut into strips and partly frozen before you begin. Cut the pork butt into strips, layer them on baking sheets, and place them into the freezer for 30 to 45 minutes. Do not let them freeze solid or you will have to thaw them somewhat before grinding.

In a way, this recipe represents a milestone in the long and storied history of Bartolini sausage making. Never before were the wine, salt, and pepper measured so that they could be recorded in a recipe. It was always, “Grab some salt. Grab a little pepper. Put some wine in a glass. No, that’s too much. … ” To write this recipe, Zia worked her magic using wine and seasoning that I had pre-measured and placed in containers on her counter. When a mini-sausage patty passed her palate’s inspection, I simply measured the salt, pepper, and wine that remained. Still, as I cautioned earlier, start out with less spice than you think you’ll need. Be especially careful with the salt if you add pancetta to the ground pork, for its salt content can vary.

Just One Thing More

You didn’t think I would end this post without at least 1 picture of sausages, did you? This one is from the Bartolini Sausage Archives.

*     *     *

*     *     *

Garlic Mashed Potatoes

As I’ve mentioned in my last posts, I’m on a campaign to vary Thanksgiving dinners at my place. I do realize, however, that there is only so much leeway to be had. I wouldn’t swap out the turkey for some other fowl, nor would I replace the stuffing with wild rice, and I certainly wouldn’t serve dinner without preparing mashed potatoes — although serving the potatoes has proven to be a bit problematic. Over the years, I’ve tried a number of mashed potato recipes that, although not bad, were just not good enough to be the “go to” recipe for Thanksgiving. Then, about 6 years ago, I watched Alton Brown prepare these potatoes and it was love at first sight. Now this is the only way I make mashed potatoes and my dinner guests are very pleased that I do.

Before detailing the recipe, I feel the need to explain my statement about serving potatoes being problematic. (I apologize to those who may have already read a brief recounting of this story in a previous post’s comments.) The apartment I rented before buying my home was what they called “vintage.” The building itself contained three, 3 bedroom apartments, was Victorian in style, and each contained the original unpainted, woodwork, beamed ceilings, original leather wainscoting in the dining rooms,  and the original built-in china hutch in each dining room. Yes, the living rooms and dining rooms were really quite beautiful but, walk down the hall and you entered a kitchen nightmare. Saying that they wanted to “keep it vintage” — we tenants quickly learned that the landlords were just plain cheap — none of the kitchens had any counter space whatsoever. Each had a sink like the one pictured below and that drain board was the only “counter” to be found. There were only 2 small cupboards, as well, and they were located above the sink. To be fair, there was an adjoining pantry but it was of little use when pulling something out of the oven, unloading groceries or, I dunno, just pouring a cup of coffee in the morning.

I moved into that apartment in August and by the time Thanksgiving rolled around, I’d only found one table that I liked for the kitchen. It was an old kitchen work table with a flour bin drawer and underneath was enough space for my pots & pans. Best of all, it offered a tabletop surface that I so desperately needed. That first Thanksgiving was going swimmingly. My friends had already finished their pasta and were working on their salads. I was in the kitchen getting everything assembled for the final push. While clearing the salad plates, rather uncharacteristically, I actually remembered the rolls were in the oven and, with counter space at a premium, placed the hot baking sheet full of toasty rolls atop the bowl of mashed potatoes. I served the dinner and, by all accounts, it was very well-received. In fact, near the end of the main course, one friend mentioned that he didn’t even mind not having mashed potatoes. Huh? Sure enough, my potatoes were still in the kitchen, on the table with a now empty baking sheet covering them. Laughing, I served them, more to prove that I did make them than for any other reason. To their credit, my guests all did have some, although I wouldn’t say that they were especially thrilled to see mashed potatoes served so late in the game. Cheesecake, yes. Mashed potatoes, no.

That recipe was destined to be forgotten because once I saw today’s recipe prepared, I never made any other kind. It is certainly my kind of dish, easy to make with very little room for error — so long as you don’t lose ’em in the kitchen. All you do is steep some garlic in heavy cream and combine that cream with some boiled potatoes.  Add a little cheese & butter, and the result is a dish of mashed potatoes with a delicious garlic flavor throughout. Just be aware that when you add the last of the cream, it very well may look like there’s been too much added. Never fear. Just give it a good stir and let it rest. Within minutes, the cream is absorbed and you’ll end up with a beautiful dish of creamy, garlic mashed potatoes.

*     *     *

Garlic Mashed Potatoes Recipe

Ingredients

  • 3 1/2 lbs of potatoes (Yukon Gold)
  • 2 cups heavy cream
  • 6 garlic cloves, smashed
  • 1/2 cup grated parmesan cheese
  • 4 tbsp butter
  • 2 tbsp kosher salt

Directions

  1. Peel and evenly chop potatoes, place in a saucepan, cover with cold water, bring to a boil over med-high heat, add the salt, and then lower to a simmer.
  2. Continue to simmer potatoes until fork-tender, about 20 minutes. Remove from heat, strain the potatoes, and return to the now empty saucepan to sit for 5 minutes, allowing them to dry more fully.
  3. Meanwhile, place garlic and cream in a small saucepan and heat over medium heat until simmering. Remove from heat and set aside until needed. Just before use, pour the cream mixture through a sieve to strain out and discard the garlic.
  4. Once the potatoes have been boiled, drained, and rested,  begin mashing them.  Add some of the cream to make them easier to mash. Once mashed to your liking, add the remainder of the cream and mix well before adding the cheese and butter. Mix to combine.
  5. Let the mashed potatoes rest a few minutes on your stove top while the remaining cream and butter is fully absorbed. Mix well and serve.

*     *     *

Notes

Alton likes to leave his garlic in the cream and mash it along with the potatoes. I prefer to strain it out prior to mashing. I feel that I can better control the level of garlic flavor in the final dish and, also, ensure that no one is served a chunk of garlic masquerading as a potato lump. Whether or not you strain the cream, remember that the longer you allow the garlic to steep, the more garlic flavor will be infused into the cream.

If you look at Alton’s recipe, you may notice that he doesn’t add any butter. No butter in mashed potatoes? Perish the thought! I’ve corrected his oversight in my version of the recipe.

*     *     *

This will be my last post before the Holiday, so, I’d like to wish a happy Thanksgiving to you and all whom you hold dear. And for those not celebrating the Holiday, have a great day and an even better weekend.

*     *     *

Stovetop Braised Root Vegetables

Continuing my quest to bring a little variety to my Thanksgiving dinner, the year following the introduction of creamed corn, I served a medley of root vegetables. This dish was selected because it met 2 important criteria required of any dish to be deemed worthy of a spot on my roster of  Thanksgiving side dishes.

First, and most importantly, any new addition must be tasty — and this one was surprisingly delicious. I say surprisingly because I’d never sampled rutabaga prior to my finding this recipe on the web during yet another sleepless night. I added parsnips to the dish after enjoying them for the first time at a dinner prepared by the Neighbor Lady of my Trusty Traveling Companion. While some might find that surprising, in retrospect, it’s totally understandable why rutabaga and parsnip never made an appearance upon our dining table when I was growing up. Considering the cornucopia of vegetables that graced our table, there just wasn’t any room for these 2 on the menu. Add one more vegetable and Mom may have had to cut a pasta dish out of her repertoire. Cut a pasta? I can feel my heart racing!

The second requirement is that the potential dish be easy to prepare — and special consideration is given if the dish can be cooked on the stove top.  When I’m in the final stages of getting the dinner to the table, the last thing I need is to be babysitting a couple of side dishes. I’ve got potatoes to rice/smash, gravy to make, a pasta course to serve, salads to prepare, and rolls to forget and burn in the oven. And we mustn’t forget a bird to carve and dishes to clear. Tending to some needy side dish(es) just won’t do and the time I spend trying to find room in the oven for it could be better spent trying to find the cocktail I left somewhere out among my guests. This dish is perfect in this regard. First off, you can peel and chop the vegetables well before your guests arrive. In fact, I’ll often do the prep work the night before and seal the chopped veggies in a plastic bag to be stored in the fridge. Taking but 20 minutes to cook, if that, once you get everything into the pan, you can pretty much leave it until it’s ready to be served. It doesn’t get much easier than that and you may find that you even have time to lose a 2nd cocktail.

*     *     *

*     *     *

Stovetop Braised Root Vegetables Recipe

Ingredients

  • 2 tablespoons butter
  • 1 clove garlic, minced
  • 1 red onion, chopped
  • 4 carrots, peeled and chopped
  • 4 parsnips, peeled and chopped
  • 1 rutabaga, peeled and chopped
  • salt & pepper, to taste
  • 2 cups low-sodium chicken stock (vegetable stock may be substituted)

Directions

  1. Melt the butter in a skillet with a cover over med-high heat.
  2. Add garlic, onion, carrots, parsnips, and rutabaga. Season with salt & pepper and sauté for 5 minutes, stirring occasionally.
  3. Add stock, bring to a boil, reduce to simmer, and cover.
  4. Cook vegetables until fork tender, about 15 minutes. Season with salt & pepper, to taste.
  5. Remove from heat and serve immediately.

*     *     *

Notes

Besides being tasty and easy to prepare, this dish is perfect for those who color coördinate their Thanksgiving dinner. By offering 4 distinct colors in one recipe (pale yellow, orange, and white, not to mention the red onion), this dish single-handedly provides you with many of the colors of the Thanksgiving palette. And if you’re worried that the parsnips will bring too much white to your table, just replace your mashed russets with a batch of Jed’s purple potatoes and you’ll be fine.

*     *     *

A Taster’s Mom’s Creamed Corn

Anyone who has cooked Thanksgiving dinner a few years in succession will understand my problem. So will anyone that dines at the same Thanksgiving table for several years. The problem is boredom, for lack of a better word. My Thanksgiving dinner’s main course and all the fixins didn’t vary from year to year. Sure, I served a different pasta for the primo piatto, I varied the salad course, desserts came and went, but the turkey & fixins remained pretty much unchanged. So, about 5 years ago, I decided to mix things up a bit. Beginning that year, and every year thereafter, I would switch out a dish for a new one.

A friend — and Bartolini kitchens taste tester — is from the South. I asked if he had a favorite dish that his Mom made at Thanksgiving. He loved her corn and I asked for the recipe. Well, as luck would have it, something came up and my friend couldn’t make it to my place for Thanksgiving dinner but his Mom’s corn sure did. It was such a hit that it has become a mainstay of my Thanksgiving dinners ever since. In fact, at one dinner I casually mentioned that I intended to switch the corn out for something else the following year. My guests politely suggested I leave well enough alone. Ironic isn’t it? I prepare a new dish in an effort to “mix things up a bit” and it is so well-received that now, 5 years later, it has become one of the dishes it was meant to replace. Anyway, even though the corn may have stayed, undaunted I’ve continued to introduce a new dish every year since, a couple of which will be shared in future posts.

*     *     *

Creamed Corn Recipe 

Ingredients

  • 1/2 red bell pepper, diced
  • 1 shalot, diced
  • 1/2 cup (1 stick) butter, halved
  • 4 cups corn kernels (fresh or frozen)
  • 1/3 cup sugar
  • 1 cup half-and-half
  • 1 1/2 tsp salt
  • 1/8 – 1/4 tsp white pepper
  • 1/4 cup all-purpose flour

*     *     *

*     *     *

Directions

  1. In a medium sauce pan or skillet over medium heat, sauté the shallot and bell pepper in half of the butter for 3 minutes.
  2. Add the half-and-half, sugar, corn, salt, and pepper. Mix well and bring to a boil.
  3. Meanwhile make a roux by combining the flour with the remaining butter over medium heat. Stir to combine and continue cooking until the roux is a pale yellow.
  4. Add the roux to the corn mixture and stir constantly until it thickens. Continue cooking and stirring for an additional minute and serve.

*     *     *

Variations

If I prepare this dish in August or September, the height of our corn season here in Illinois/Michigan, I’ll use only a 1/4 cup of sugar because the corn and its juices will be very sweet. For much of  the rest of the year, however, unless I’m certain the corn is really good, I’ll use frozen corn. Unfortunately, frozen corn has no liquids — “liquor,” if you will. To make up for the lack of liquor, I’ll take 1 to 2 cups of the corn and pulse it a few times in my food processor. This will help the final dish to look like the corn has been cut from the cob by hand. To make up for the sweetness lost, I’ll increase the sugar from 1/4 cup to 1/3 cup. The resulting dish looks and tastes like it was made from fresh corn.

Notes

I remove the corn kernels in one of two ways, depending upon the recipe. For Zia’s Corn Relish, I’ll use an electric knife to slice the kernels off of the cob. I find that the kernels remain whole with very little liquor created, just perfect for corn relish.  For this recipe, I’ll use a large chef’s knife to remove the kernels. This method is not nearly as “kind” to the ear of corn, resulting in kernels that are somewhat chopped and a good amount of that sweet corn liquor.

*     *     *

Gorgonzola and Honey Bruschette

This is probably my all-time favorite bruschetta recipe. Not only does it blend salty with sweet, it couldn’t be easier to prepare, a big plus when you’re trying to get a large holiday dinner on the table. Being so simple, I see no need to give it the “full treatment” normally accorded recipes on this blog. You’ll see what I mean soon enough.

I came across this recipe some 13 years ago, just about the time I moved into my current home. That year I prepared my first Thanksgiving dinner here for some friends and these bruschette were to be the sole appetizer. Unfortunately, and in full view of my guests who refused to leave the kitchen, I not only burned them but set them on fire under the broiler. Luckily, I’d bought 2 baguettes and, after a quick but oh, so memorable trip to the trash, I was able to make another batch with nothing harmed but my pride. After what was literally a baptism of fire, I’ve served these many times since, always to rave reviews. Just to be on the safe side, however, I make sure to clear the kitchen of guests when I remove them from the heat.

*     *     *

*     *     *

Not counting flambé, there are 2 ways to prepare these bruschette and first I’ll describe the method least likely to set off a smoke alarm or result in the fire department joining you for dinner.

Take a fresh baguette and slice it, on the diagonal, into 1/2 to 3/4 inch thick slices. Place the slices in a single layer on a baking sheet. Lightly brush each with extra virgin olive oil. and bake in a pre-heated 400˚ oven for 10 to 15 minutes or until golden brown. Remove from the oven and cover each piece with crumbled gorgonzola. Return to the oven and bake for a few minutes more until the cheese melts. Remove from oven, drizzle with honey, and serve.

As simple as that is to do, you may wish to try a different approach. When I first moved here, my stove had a separate broiler area, unlike the one I now own. Prior to my guests’ arrival, I would toast the baguette slices in my toaster, place them on a baking sheet, and cover with plastic wrap. Once my guests began to arrive, I would brush the slices with olive oil, cover with crumbled gorgonzola, and place under the broiler for 2 minutes or until the cheese melted. A drizzle of honey later and these bruschette were ready to be served.

*     *     *

*     *     *

See? Didn’t I tell you? These couldn’t be easier to make and, if you’re at all like me, the combination of salty and sweet flavors can’t be beat. And if you don’t care for gorgonzola, feel free to substitute blue cheese. You may even find that it melts better. No matter which cheese you choose, you can take the safe route and bake them in the oven or throw caution to the wind and pop these babies under the broiler. If you choose the latter, however, just make sure you’re alone in the kitchen with a clear path to a fire pail — and having a spare baguette handy may not be such a bad idea.

*     *     *