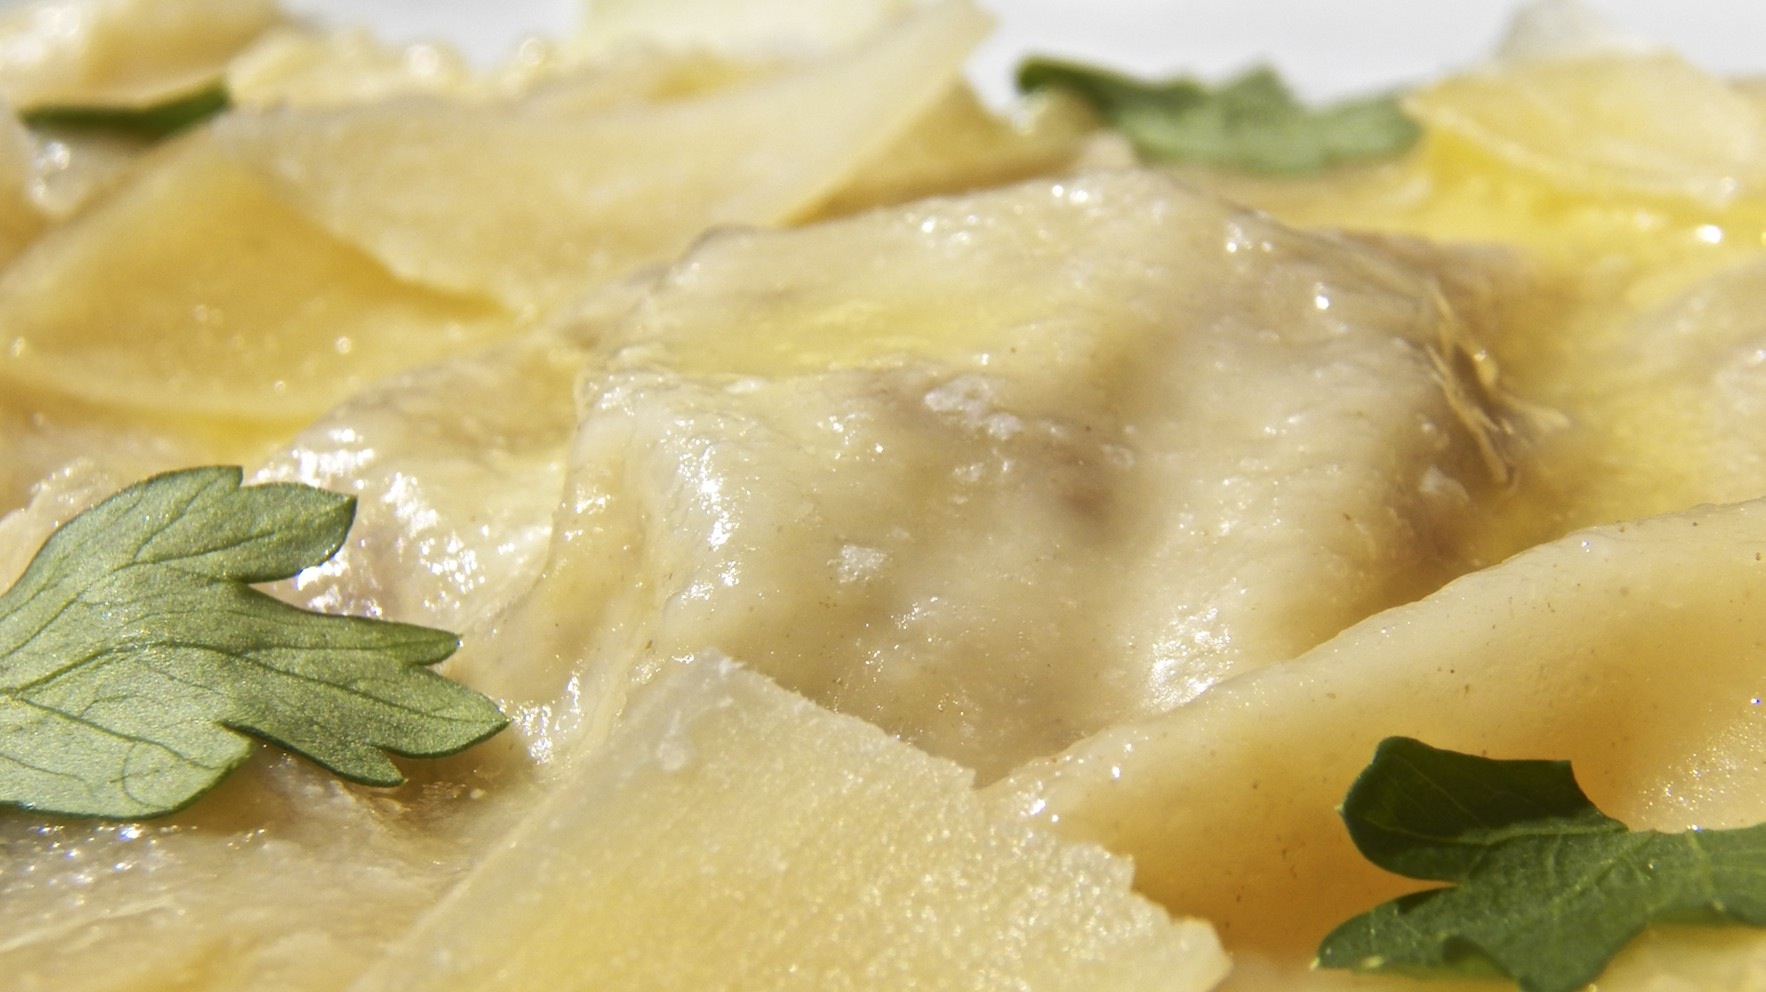
Cannelloni dei Bartolini 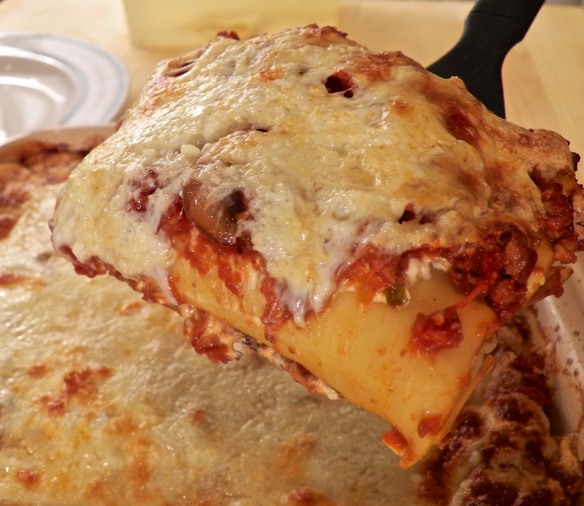
With St. Joseph’s Feast Day fast approaching, I’m going to take a break in our fish recipe series and share yet another of the Bartolini Crown Jewels, Cannelloni. St. Joe, after all, deserves no less.
Cannelloni are another of Italy’s stuffed pastas, though these are more in the style of manicotti (see Notes) rather than ravioli or agnolotti. As much as we all loved them — we kids called them “cigars” — cannelloni weren’t served for dinner very often. Unlike ravioli or cappelletti, which were “assigned” holidays, cannelloni were served when Mom or Zia found the time to make them. Remember. There were no freezers so a cannelloni dinner meant that they would have been up at dawn, rolling out pasta dough. As a result, though it wasn’t a holiday, a cannelloni dinner was a special occasion, to be sure.
Now, when you look at the recipe, something may seem a bit familiar. Déjà vu, perhaps? No, that’s not until the end of this post. It’s the filling. We use the same filling here that we used when we made cappelletti a few weeks ago. It is not unusual for Italian households to use the same fillings, condiments, marinades, etc., in a number of dishes. Our breading mixture is the perfect example of this. There are other examples but I’ll save those for another day. No sense spoiling the surprise.
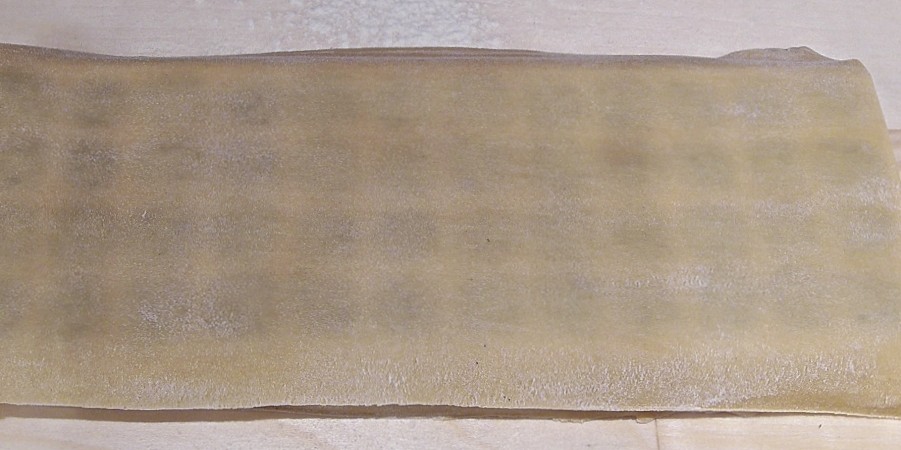
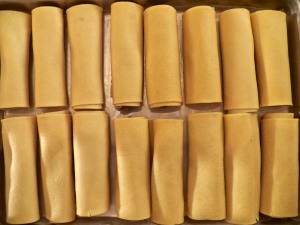
Although the filling recipe is rather straight-forward, preparing the dough needs some explaining. As many of you know, I use either a hand-cranked pasta machine or a roller attachment for my stand mixer to roll my pasta dough. The result is a long sheets of pasta, about 2 to 3 feet long and about 6 inches wide Before doing anything else, you  need to determine how wide each of the cannelloni will be. Ours are usually about 4 inches long, allowing 2 rows to be placed down the full length of the baking dish. Some prefer larger cannelloni. No matter which size you like, measure the inside width of your baking dish’s bottom. To allow the pasta to expand during cooking (see image for comparison), subtract at least half an inch from the measurement. If you want large cannelloni, this is the width of the dough sheet you’ll need. For smaller cannelloni, divide the measurement by 2. Keep this measurement in mind. (For example. My baking dish is 8 inches square, though, at the bottom, it is 7.5 inches. I wanted to place 2 rows of cannelloni into the dish so I cut my dough sheets at 3 inches.)
Once you’ve made the dough and allowed it to rest, roll it into long sheets. If your machine or rollers are at their widest when set to no. 1, roll and re-roll the dough up to and including no. 5. If your machine or rollers are at their widest at no. 10, then roll and re-roll the dough up to and including no. 6. Once the dough sheet is rolled to the specified thickness, lay it flat on a lightly floured surface. Using a straightedge, move down the full length of the dough sheet, marking it according to the measurement gained above. Use a pastry cutter or sharp knife to cut the sheet into smaller sections. (My sheets were all 3 X 6 inches.) Lay the newly cut sheets separately. Do not stack.
This is where things get interesting. It has been quite sometime since either Zia or I made cannelloni. So, when I asked if we par-boiled the pasta before filling it, she drew a blank. Obviously, so had I or I wouldn’t have asked the question. After some discussion, she leaned toward the side of no par-boiling was required, while I thought it was. I was left with little choice, so, off to the test kitchens I went. That afternoon I made side-by-side dishes of cannelloni, one with noodles that had been boiled and the other with noodles that were raw. Once finished baking, a taste test ensued. After all that, the difference was minimal. Yes, I could tell the difference, tasting them one right after the other. I’m not so sure, however, that I could identify one if eaten alone — although I’d have a 50-50 chance if I guessed. Even so, there was a difference, no matter how slight, and I preferred the cannelloni prepared with par-boiled dough sheets. I guess I’ll be doing that from now on.
* * *
* * *
So, if you chose to par-boil your noodles, place them, in batches, into rapidly boiling salted water. Remove after 60 to 90 seconds, and place in an ice bath. Treat carefully because the noodles are delicate and may tear while being moved or handled. Continue with batch after batch until done. When you’re ready to fill them, you may find it easier if you pat dry each sheet before attempting to fill and roll them.
If you choose to use raw noodles, you must work quickly lest the dough sheets dry. This will cause them to crack when you attempt to roll them. To avoid this problem, once you’ve measured and cut the individual sheets, fill them all and put them aside before starting another piece of dough through the rollers. Follow this method and you’ll have no problems with cracking dough sheets.
Be sure to read the Notes section below for freezing suggestions.
* * *
Bartolini Cannelloni Recipe
Ingredients
for the filling
- 1 1/2 lbs. ground pork
- 1 1/2 lbs. ground veal (chicken or turkey may be substituted)
- 2 – 3 tbsp butter
- 1 pkg (10 oz, 283 g) frozen chopped spinach (cooked and well-drained)
- 1 pkg (8 oz, 227 g) cream cheese
- 1 cup grated Pecorino Romano — Parmigiano may be substituted
- 2 or 3 eggs slightly beaten — depending on size
- ¼ tsp ground nutmeg
- zest of 1 lemon, more if you like
for the cheese sauce
- 2 – 3 oz (57 to 85 g) cream cheese, softened
- 2 – 3 oz (59 to 89 ml) milk
for the cannelloni
- Mom’s pasta dough
- 1 quart tomato sauce, with meat or without (See Notes)
- cheese sauce
- an 8 oz ball of fresh mozzarella
- 1/2 cup grated Pecorino Romano cheese
* * *

Place filling on dough shet

Roll like a cigar

Place in baking dish

Cover with cheese sauce

Cover with tomato sauce

Cover with grated cheeses
* * *
Directions
for the filling
- Sauté meat in butter. Season lightly with salt.
- Use meat grinder to process the meats. Add all the ingredients into a mixing bowl and mix until well-combined.
- Cover the filling and refrigerate for a few hours or overnight.
- Once the filling has rested, you can begin making your cannelloni.
for the cheese sauce
- Combine equal amounts of cream cheese with milk.
- Whisk and set aside.
to make the cannelloni
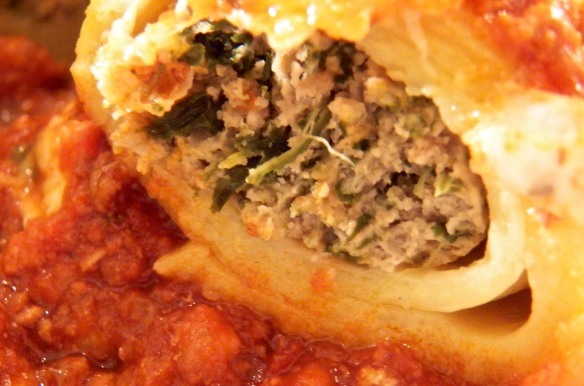
- Shape 2 to 3 tbsp of filling into a small log, about as thick as your index finger. More or less filling may be required depending upon the size of your cannelloni. Do not over-stuff. Filling should leave a 1/4 inch (.6 cm) border on either side of the dough sheet.
- Place the filling on the edge of the dough sheet and roll as one would if making a cigar.
- Set aside, seam-side down.
- Repeat Steps 1 through 3 until all the filling or dough sheets have been used.
assemble the dish and bake
- Pre-heat oven to 350˚ F ( 177˚ C).
- Liberally butter a baking dish.
- Coat the bottom of the dish with 1 to 2 cups (237 to 473 ml) of tomato sauce
- Place cannelloni, seam side down, in 2 rows, until dish is filled. Do not over-crowd.
- Spoon cheese sauce over all the cannelloni.
- Add enough of the remaining tomato sauce to completely cover the dish’s contents.
- Sprinkle the top with the grated mozzarella and Pecorino Romano cheeses.
- Spray one side of a sheet of aluminum foil with cooking spray and use it to cover the baking dish, sprayed side down.
- Bake in pre-heated 350˚ oven for 20 minutes. Remove foil and continue baking until cheese topping is cooked to your satisfaction. Over-cooking may result in dry cannelloni.
- Allow to rest 10 minutes before serving.
* * *

* * *
Variations
If you have a favorite ravioli filling, you can easily use it here. In fact, I’ve used our ravioli filling to make cannelloni several times. The truth is, you may find it easier to make cannelloni than it is to make ravioli, at least initially, so, why wait? Go ahead and use these instructions to make cannelloni with whatever filling you prefer. There’s sure to be a great dinner in store for you, if you do.
Although never served in my family, there is a version of cannelloni that uses crespelle (crêpes) rather than pasta dough sheets. One day I’ll give them a try — once I learn how to make crespelle, that is.
Notes
If you choose not to par-boil the dough sheets, add about a 1/3 cup (80 ml) of water to the tomato sauce before using and stir well. The extra water will be needed by the raw sheets as the cannelloni bake.
I recently made a half-batch of filling with a whole batch of Mom’s pasta dough. Combining the 2, I made 32 cannelloni, enough for several dinners. Your results may vary, however, depending upon how large you make your cannelloni. If you make an entire batch of filling, you could use half to make cannelloni on Day 1, as I did, and use the rest of the filling on Day 2 to make cappelletti. On Day 3, open your freezer and smile, secure in the knowledge that there are some very good dinners in your future.
Cannelloni can be frozen easily.
- Once fully assembled, cover the baking dish with foil and freeze. To heat, leave covered with foil and bake in a pre-heated, 350˚ F (177˚C), oven for 45 minutes. Remove foil and continue baking until cheese is to your liking.
- I find it easier and more convenient to freeze the cannelloni individually on a baking
 sheet covered with foil or parchment paper. Once frozen, place them into a hard-sided container and store in your freezer. When it’s time to serve them, you can use as many as needed to assemble your dish, rather than cook a dish you prepared the week before. Follow the same instructions for baking as in the preceding step.
- Even if you follow my cooking instructions for frozen cannelloni, you’ll need to test for doneness before removing them from the oven. To do this, place the tip of a metal skewer or sharp knife into one of the cannelloni in the center of the dish. Hold it there for 5 to 10 seconds. Remove and use it to touch the inside of your wrist or just beneath your lower lip. Continue baking until tip is hot to the touch.
If you can, try to use fresh mozzarella to top off this dish, for it tastes so much better. I prefer not to use slices here, though. Since the slices take longer to melt and brown, you run the risk of drying out the cannelloni while it bakes. Fresh mozzarella will melt faster but it can be a mess to grate at home. To make it a bit easier, open its packaging and place it all in your freezer for about 30 minutes before needed. You’ll find the cheese to be firmer and, therefore, easier to grate. If it is too firm, just leave on the counter for a few minutes.
I’m not certain if these definitions are “official”, but in our family, cannelloni were meat-filled and manicotti were filled with a ricotta cheese mixture. You now have our cannelloni recipe. Soon you’ll have our manicotti recipe, too.
It’s déjà vu all over again …
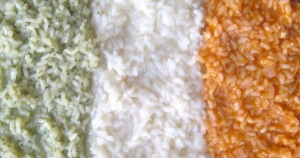 For today’s Blast from the Past, we’re going to continue to celebrate St. Joseph’s Feast Day with risotto, a dish that’s Italian, through and though. This is no ordinary dish of risotto, however, as you can see on the right, for its colors are those of the Italian flag. You can learn how to prepare this dish by clicking HERE.
* * *
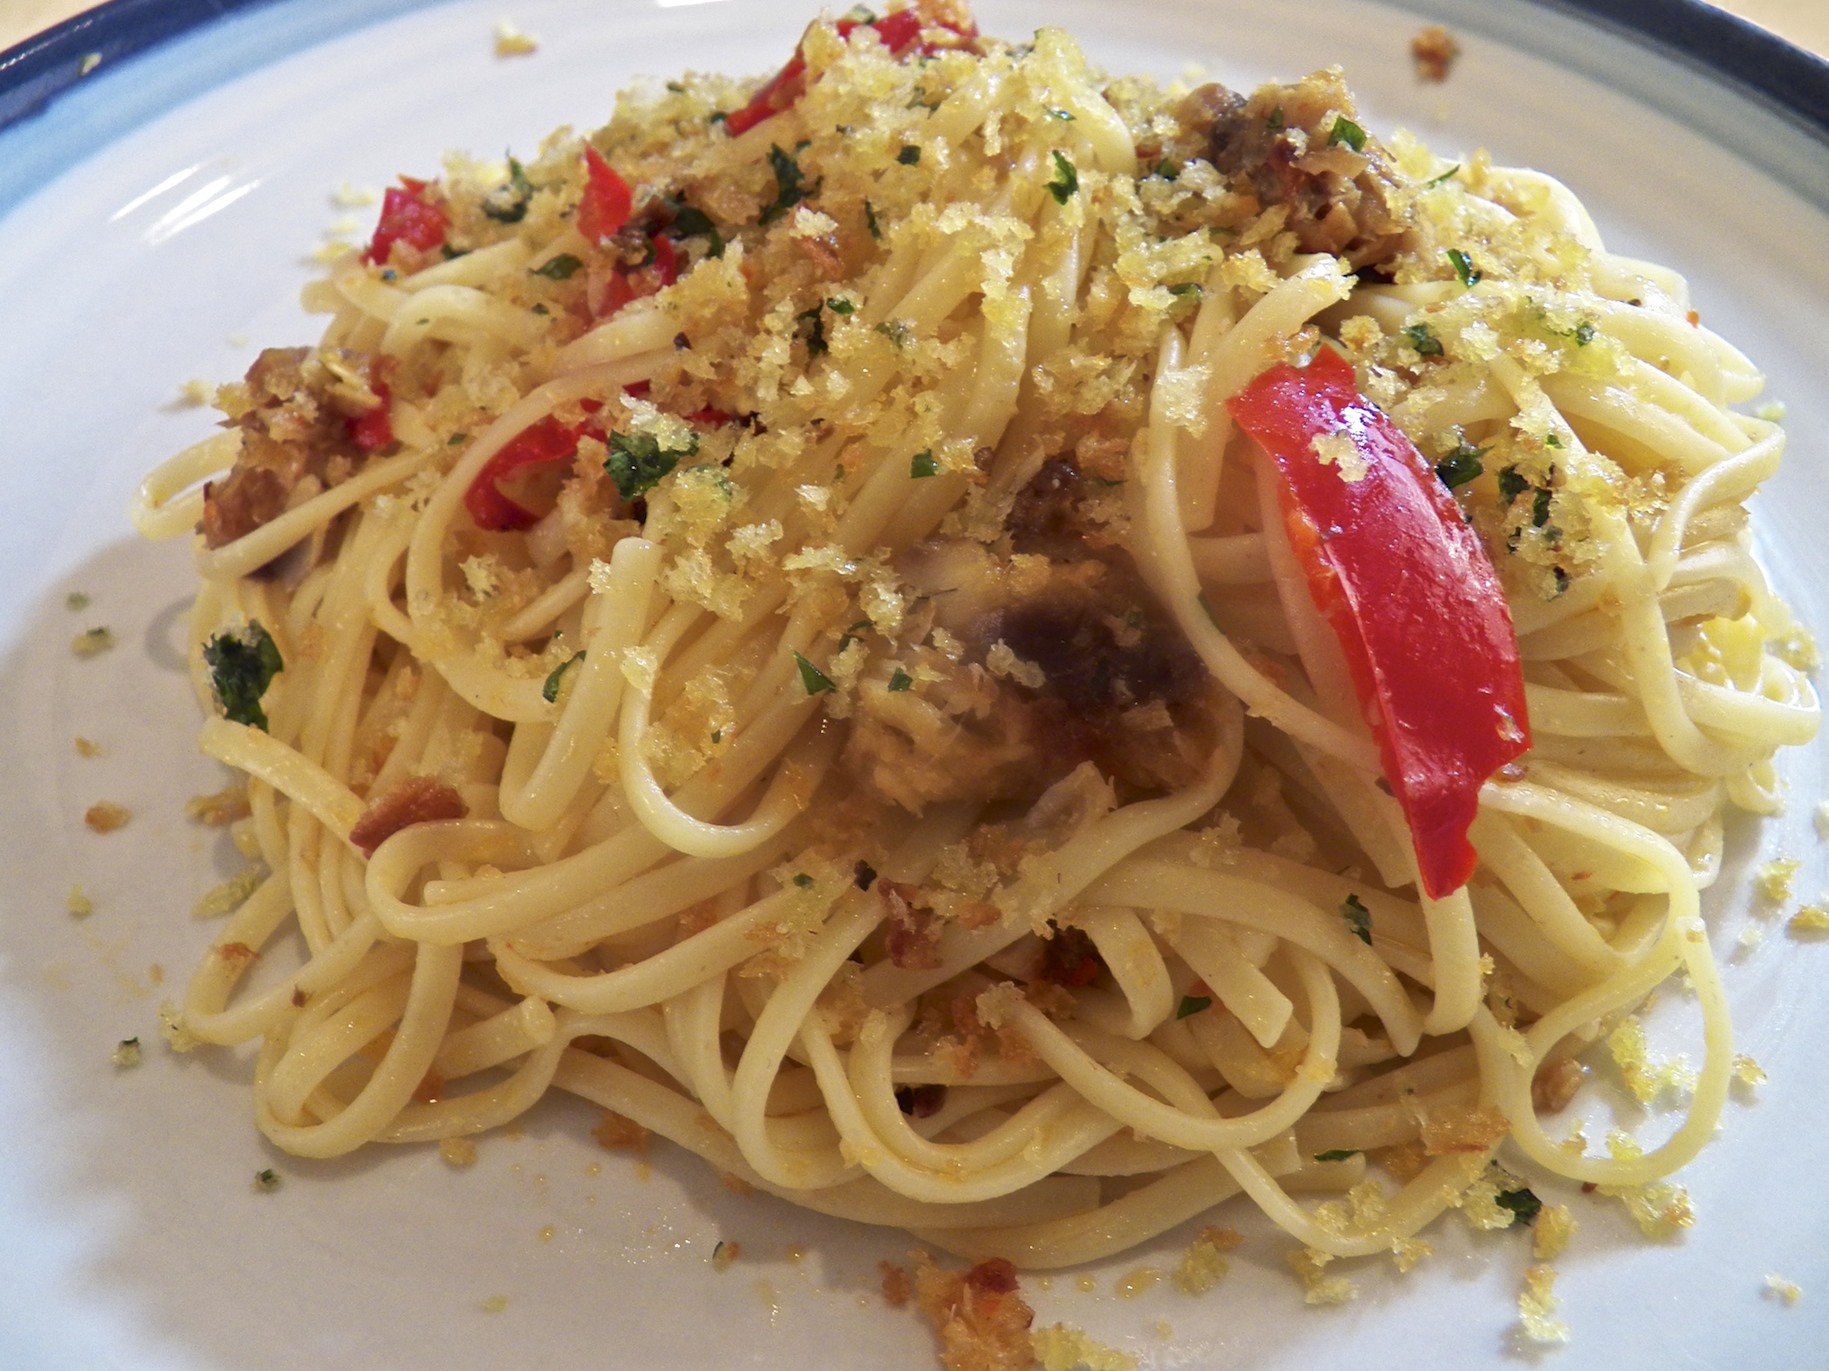
Coming soon to a monitor near you …
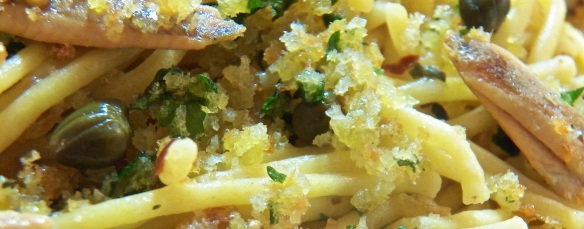
Spaghetti with White Anchovies and Capers
* * *