Trippa alla Stefanina

There’s no way around it. Today’s recipe is tripe, another within the series of posts which many will find less than appealing, to put it mildly. And, once again, the overwhelming majority of my generation of the Bartolini Clan would agree.  I, myself, being the only exception. Yet, tripe is an ingredient found in most of the World’s cuisines and, when cooked properly, is really quite tasty. Still, many of you may be looking for the nearest exit and, if that’s the case, you may depart HERE. All right then …

Nonna

Trippa wasn’t something Mom ever prepared while I was growing up but it was a dish that the “People Upstairs” made and one that I absolutely loved. Even then, since Zia’s boys would have nothing to do with it, I believe it was usually Grandpa who requested trippa be on that day’s menu. Being that Zia had her own family’s dinner to prepare, the trippa was often made by her Mother-in-law, a woman we kids all called “Nonna”  and whose name was Stefanina. She was a sweet woman and, for my siblings and I, the only Nonna we would ever really know. Since tomorrow would have been her birthday, and yesterday was mine, what better way to celebrate both than by sharing this special recipe? And it is special, as you’ll soon see.

Now, before going further, we need to revisit the 2 flat’s floor plans. You may recall that a stairwell separated my bedroom from our kitchen and the rest of our home. Directly above my room, was my cousins’ bedroom and the stairwell, also, separated their room from Zia’s kitchen and the rest of their home. So, forgetting the stairwell for a moment, my bed was about a 10 feet, in a straight line, from Mom’s stovetop and certainly less than 20 feet away from Zia’s. (Remind me again. Why did I move away from home?)

On those occasions when Grandpa prevailed upon Nonna to make a batch of trippa, the aroma of some as yet unknown delicacy, wafting down the stairs, was my siren call. A quick run up the stairs and a stealth bomber-like cruise through their kitchen was all I needed to check things out. Trippa was on the menu! I returned home via the “front stairs” and the wait began in my room. After what seemed like an eternity, I would hear Nonna’s voice calling, “Johnny! Johnny, are you there? I’ve got surprise for you.” My feet couldn’t get me up those stairs fast enough. When I burst into the kitchen, she’d be standing there, smiling broadly, holding a dinner plate. “Would you like some polenta?” Trying not to appear too eager, I’d reply with something like, “Sure.” And so the lesson began. “This is how you make polenta, Johnny.” Holding the plate in one hand, she would use the other hand’s fingers to dot the plate’s surface with dabs of butter. Then she would sprinkle the plate with freshly ground Pecorino Romano cheese. Next, using a large spoon, Nonna would slowly and carefully cover the plate with a nice layer of freshly made polenta. By now, I was about ready to drool. “Pazienza, Johnny,” and she would dot the surface of the polenta with more butter, to be followed with another sprinkle of grated cheese. And then came the trippa. Da Vinci didn’t take such care painting the Mona Lisa as did this dear woman when she layered the trippa upon that polenta. Then came another sprinkle of cheese. And every time, when she was done, with a twinkle in her eye, she would hand me the plate and say, “This is how you make polenta with trippa.”

Many years later, I cooked a polenta dinner for Mom and Zia. They were dumbstruck when I prepared their plates just as Nonna had showed me all those years before. Although both were fully aware that she often made me a plate when she cooked trippa for Grandpa, they’d no idea how that plate was created. And today, some 40+ years after my last serving of Nonna’s cooking, I cannot prepare a dish of polenta with trippa without hearing her say, “Pazienza,” and, minutes later, when my plate is ready to eat, I just have to echo, “This is how you make polenta with trippa.”

The preparation and serving of trippa that I am about to present is in the style of Le Marche (alla Marchigiani). (For tripe prepared with a distinctly Spanish flair, check out Tanya’s fantastic Chica Andaluza blog.) Today’s recipe is pretty much the same as Nonna prepared, save 2 exceptions. The first, and easiest to explain, is that I use instant polenta and I don’t know if the product was even available when Nonna was fixing me a plate. I first brought instant polenta to Mom and Zia some 20 years ago and they never served me “regular” polenta again. In fact, during his last visit to Italy in the early ’60s, Grandpa brought back a copper “polenta pot.” Each time Nonna prepared my plate, she served me polenta that she had spent 45 minutes stirring in that very pot. With the arrival of instant polenta, there was no real need for it any longer and I was given the pot several years ago. And, as “payment,” when I return home for a visit, I always bring a container or 2 of instant polenta.

*     *     *

*     *     *

The second exception has to deal with a basic of Italian cooking. Most, if not all, of the Mediterranean countries begin many of their sauces, stews, and, well, just about anything, with a mixture of diced green pepper, celery, and onion. In Italy, this is called a soffrito and it is sautéed in olive oil at the very start of many dishes, just as is done in France (mirepoix) or in Spain, Latin America, and the Caribbean (sofrito) where the ingredients may vary a bit. Even New Orléans has its “holy trinity” of onion, carrot, and green bell pepper. My family often began dishes with a different kind of soffrito called “battuto.” To make a good “battut,” you need fine quality salt pork, onion, garlic, and parsley. Exact quantities are nearly impossible to gauge. This is something that must be learned by doing. I can say that the onion makes up the majority of a battuto and a small to medium size onion will do. You will, also, need 2 to 3 oz of salt pork sliced about 1/4 inch thick, 2 to 3 garlic cloves, and about 4 tbsp of fresh parsley. That should give you about 1 to 1 1/4 cups of battut, just perfect for today’s recipe. Begin by heating your knife’s blade over a stove’s burner. Once hot, use it to roughly chop the salt pork. Next, in no specific order, roughly chop the garlic, parsley, and onion. Combine the 3 ingredients on top of the salt pork and continue to chop them all. Do not create a paste but continue chopping until the ingredients are of uniform size and well-blended. Once chopped, sauté the battut in a sauce pan with olive oil over medium heat until it develops a little color. Do not rush it nor let it burn. Once done to your satisfaction, go ahead with your recipe. For today’s recipe, if you’d started with a battut, there would be no need for the pancetta, onion,  nor garlic, and the only parsley required would be added at the very end of cooking. You’ll be amazed at the flavor this simple mixture brings to a dish and your kitchen will be filled with an aroma that is just too good to be true.

My family used battuto as the base for sauces, braises, risotto, some soups, and even some vegetables. During the worst of the Great Depression, dinner often consisted of a large amount of polenta served on a large “polenta board” that had been placed in the middle of the dining table. At its very center, Grandma placed a little battuto and you had to eat your way through the polenta to get to it. Grandma, also, used battuto to dress pasta, her own version of aglio e olio. Mom and Zia stopped making battuto a number of years ago, about the time they stopped making sausage. They just couldn’t find good quality salt pork anymore. In its place, like in today’s recipe, they made a soffrito, of sorts. Not willing to give up, I keep searching for salt pork that will pass Zia’s inspection. To that end, I’ve recently learned of a Polish butcher on the West Side that reportedly has the best salt pork in town. We’ll see soon enough.

*     *     *

Trippa alla Stefanina Recipe 

Ingredients

  • 5 lbs honeycomb tripe
  • 3 tbsp extra virgin olive oil
  • 1/4 lb pancetta, chopped
  • 1 large onion, chopped
  • 4 tbsp fresh parsley, chopped, separated
  • 4 garlic cloves, diced
  • 1/2 cup dry white wine
  • 3 tbsp tomato paste
  • 1 large can (28 oz) crushed tomatoes
  • 1 large can (28 oz) diced tomatoes
  • 1 small onion, whole & studded with 5 – 6 whole cloves
  • 1 tbsp marjoram
  • salt & pepper, to taste
  • grated Pecorino Romano cheese for serving

*     *     *

*     *     *

Directions

  1. Rinse trippa under cold water and trim off unusable parts. Place in a large pot, cover with water, and bring to a boil. Reduce heat and simmer, uncovered, for 1 hour.
  2. Remove trippa from water and, when cool enough to handle, cut into strips 1 to 2 inches in length and 1/4 to 1/3 inch wide.
  3. While the trippa cools, heat olive oil in medium-sized sauce pan over med-high heat. Add pancetta and sauté until cooked but not crisp, about 8 minutes.
  4. Add the chopped onion, half of the parsley, and sauté until onion is translucent, about 5 minutes.  Season lightly with salt & pepper.
  5. Add garlic and sauté for another minute before adding the wine. Continue cooking until the wine is reduced and almost gone.
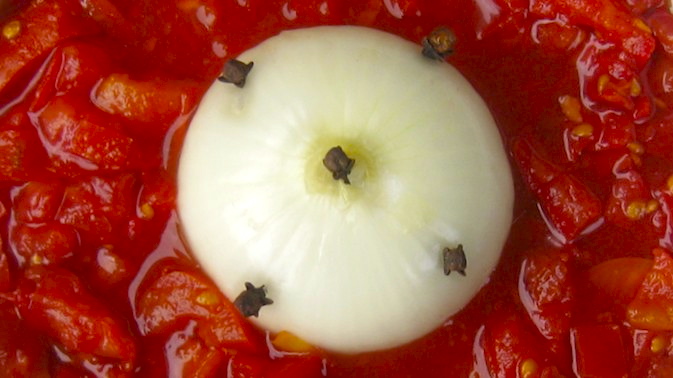
  6. Add the tomato paste and continue to sauté for 2 minutes before adding the tomatoes, marjoram, and trippa. Season with salt & pepper, stir well, and then add the clove-studded onion.
  7. Bring to a boil, reduce to a soft simmer, and continue cooking for at least 2 hours. Sauce should be dark and thick; the trippa should be quite tender.
  8. Remove studded onion and discard. Add most of the remaining parsley to the pot, taste to see if additional salt or pepper is needed, and stir well.
  9. Serve immediately, garnished with the remaining parsley and a sprinkling of cheese. Be sure to have grated cheese available at the table.

*     *     *

Serving Suggestions

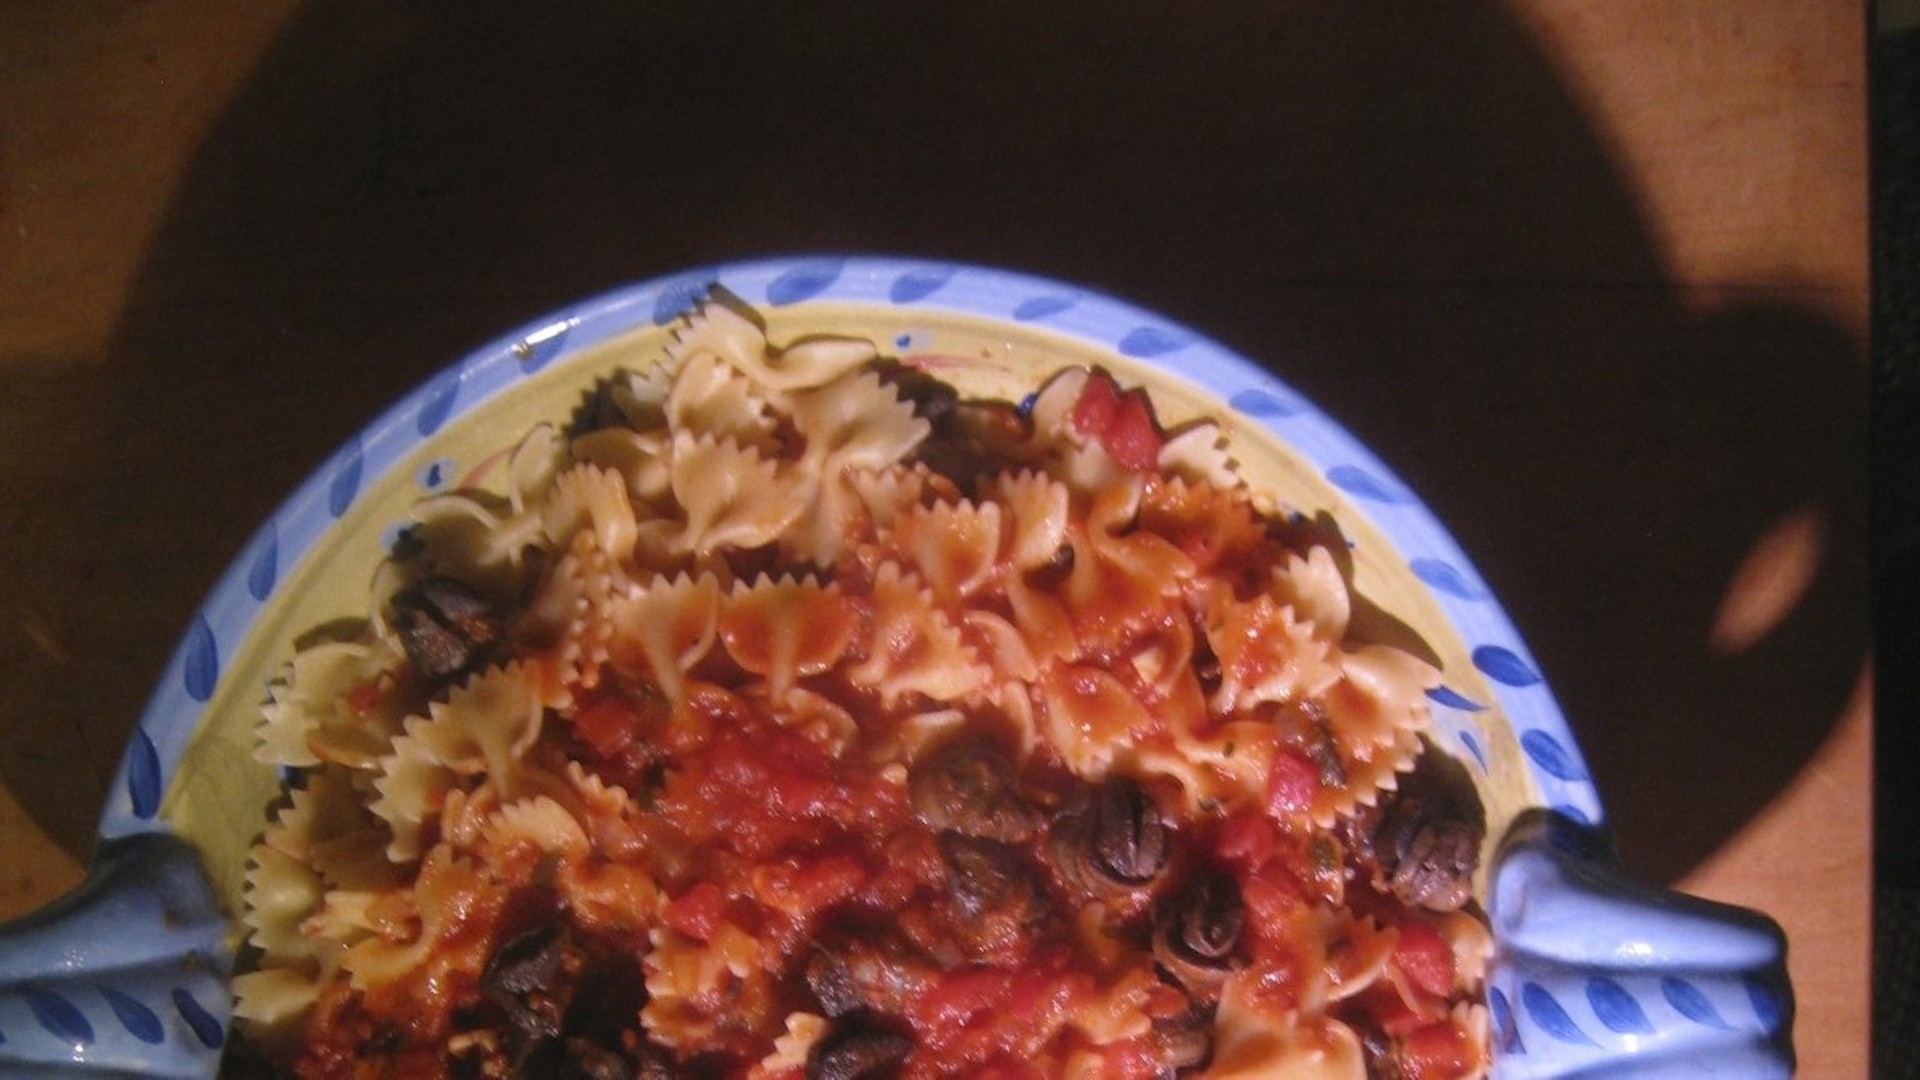
Traditionally, trippa is served in deep soup bowls with a healthy chunk of crusty bread on the side. As mentioned above, our family usually served it atop polenta. Pasta fanatic that I am, I’ve even used it to dress pastas like farfalle or rotini.

Notes

Making instant polenta is quite an easy process. So much so that there’s little need to devote an entire post to it, especially since my family’s recipe is so simple. Following package directions (most require, per serving, 4 tbsp of polenta for each cup of water), bring the water to boil, add a pinch of salt, and pour the polenta into the water, whisking all the while until fully blended. Over a medium to med-low heat, stirring frequently, cook the polenta for 5 minutes. At the end, add a tablespoon of butter and grated cheese to taste. (The latter would depend upon the dish(es) that will accompany the polenta.) Mix well and serve. It couldn’t be more simple. Of course, if you want to serve polenta like Nonna, dabs of butter and all, then go for it. You won’t be disappointed.

*     *     *

About the Matter of Provenance

I’ve been asked, more than once, if these are really my family’s recipes. Certainly, not all of them are but, I can assure you, those that I say came from Mom, Zia, Nonna, etc., are, in fact, theirs. As further proof, below is an image of the Zia’s “polanta” recipe that can be found in the recipe book that she gave me.

*     *     *

*     *     *

Where’s Flat Ruthie Now?

Any guesses?  Stay tuned …

*     *     *

Roast Pork with Fennel

Porchetta

My last few posts have been pretty much dedicated to dishes served over the Holidays. Today’s recipe, Porchetta con Finnocchio, is yet another of those dishes and was served not just around Christmas but whenever there was reason to celebrate. Similar in preparation to most pork roasts, this roast differs because of the cut of meat used and for the use of fennel, finnocchio, as seasoning.

Traditionally, porchetta meant the roasting of an entire pig. In fact, one such pig was roasted at a neighborhood bakery and served at the wedding reception of Zia & Uncle. (Imagine a time when “A”, there were neighborhood bakeries and, “B”, you could use their oven to roast a pig!) Now, that may be fine when feeding large groups but, for most families, a pig roast is out of the question. My family, like many, used the pig’s foreleg, the picnic ham, for the roast.  The meat was butterflied, removing the bone in the process, and then heavily seasoned with, among other things, fennel fronds which are similar to dill in both appearance and taste. The result was a juicy roast, with herbal flavoring throughout. Times have changed and picnic hams aren’t as readily available as they once were. My family switched to roasting bone-in pork loins initially but, as time passed, they, too, became less available and we began roasting boneless pork loins. Although still very good, the loin is a lean cut of meat and some will forever favor a porchetta made using  picnic ham over one made with pork loin.  In a future post, I’ll share a recipe for porchetta using a pork loin but, for today, we’re once again turning back the clock to roast a leg of pork.

This recipe differs from that used by my family in a couple of ways. First off, I wanted to make sure that I had a sauce to serve with my porchetta. To that end, I include roasting vegetables in the pan, adding stock & wine as a basting liquid. I, also, love roasted vegetables and add potatoes and carrots to the roasting pan about an hour after the roasting has begun. In contrast, the most my family put in the roasting pan was a few potatoes, and even that was a rarity. As a result, I don’t remember Mom ever serving a sauce with her porchetta. Lastly, and this is a big one, relatively speaking, I include sliced finnocchio as a roasting vegetable. This would never have been done back home, for fennel was always served raw, the fronds and smaller stems being frozen for later use in a porchetta. Whether served alone or among crudités, fennel was either served plain or with a small, ramekin-sized dish containing a simple dipping sauce of extra virgin olive oil, salt, pepper, and maybe a little red wine vinegar. (There is a name for this sauce but neither Zia nor I can remember it.) I broke with tradition when, about 15 years ago while they were visiting Chicago, I served Mom & Zia a whole sea bass that had been stuffed with, and roasted upon a bed of, fennel. That was the first time either had been served cooked fennel. So, for me to add fennel to the roasting pan is somewhat of a big deal. The flavor it brings to the sauce, however, is well worth the change. Still, should you wish to roast your porchetta in true Bartolini fashion, prepare the roast as indicated below, omitting all the roasting vegetables, and place the porchetta on a roasting rack centered in a roasting pan. No matter how you roast your porchetta, bear in mind you may need to adjust the amount of herbs needed depending upon the size of your roast.

*     *     *

Porchetta Recipe

Ingredients

    • 1 raw picnic shoulder ham, skin on, bone removed, butterflied
    • 4 tbsp fennel fronds, chopped
    • 4 tbsp fresh parsley, chopped
    • 8 – 10 garlic cloves, diced
    • 3 – 4 tbsp fresh rosemary, chopped
    • olive oil
    • 1 tbsp marjoram
    • 12 whole garlic cloves
    • 1 fennel bulb, thinly sliced
    • 1 onion, thinly sliced
    • 3 celery stalks, chopped
    • 3 carrots, cut into large pieces
    • fingerlings or new potatoes
    • 3 rosemary sprigs
    • 6 cups chicken stock, divided
    • 3 cups dry white wine, divided
    • 3 tbsp AP flour
    • butter
    • water

Directions

    1. About an hour before the porchetta is to go into the oven, combine the fennel fronds, parsley, chopped garlic, and rosemary. Add enough olive oil to make a paste, stir,  and set aside.
    2. Use a sharp knife to score the pork skin, making a checkerboard or diamond pattern. Try to avoid cutting deeply into the pork meat, if at all.
    3. Place the roast, skin-side down, and “open it,” revealing as much surface area inside the roast as possible.
    4. Evenly coat the exposed flesh with the herbal paste created in Step 1. Season with marjoram before liberally seasoning with salt & pepper.
    5. Use twine to tie the roast securely. Set roast aside while it loses its chill.
    6. In a roasting pan, add the sliced onions, fennel, celery, and whole garlic cloves. Season liberally with salt & pepper.
    7. Place the roast atop the bed of roasting vegetables. Pre-heat oven to 450˚.
    8. Coat the roast with olive oil, add 2 cups stock plus 1 cup wine to the roasting pan.
    9. Place roasting pan in pre-heated oven. Every 20 minutes, baste the roast with the pan juices, add more stock and wine to the pan, if needed.  (Be sure to reserve 2 cups of stock and 1/2 cup of wine for use later.)
    10. Meanwhile, place potatoes and carrots into a large bowl, season with salt and pepper, some rosemary, and enough olive oil to coat. Mix well.
    11. After 60 minutes total time, reduce oven temperature to 325˚, baste the roast adding more liquid to the pan if needed, and place the seasoned carrots and potatoes into the roasting pan.
    12. From this point forward, continue to baste the roast every 30 minutes or so, replenishing the pan juices when necessary.
    13. If outer skin grows too brown, use aluminum foil to tent the porchetta.
    14. Roast will be finished when the internal temperature reaches 165˚. When ready, remove roast to a cutting board and tent with aluminum foil to rest for at least 15 minutes. Remove the carrots and potatoes to a covered bowl. Strain the pan juices from remaining stewing vegetables.
    15. Use the reserved 1/2 cup of wine to deglaze the roasting pan over high heat.
    16. Use a grease separator to remove all but 3 tbsp of grease from the strained liquid.
    17. Reduce heat to medium, add the 3 tbsp of grease to the roasting pan, and add 3 tbsp AP flour. Mix thoroughly and cook for a minute or so to create a roux.
    18. Add the remaining pan juice liquids and stir until the sauce begins to thicken.
    19. Begin adding the reserved of stock to the pan, stirring constantly, over medium heat.
    20. Once all the stock has been added and the sauce thickened, taste for seasoning, remove from heat, and add a tab of butter to finish the sauce.
    21. Before carving the roast, use a small knife to remove the skin (crackling), which may be served with the roast or left in the kitchen as the Cook’s reward.
    22. Slice and serve the roast, accompanied by the sauce and reserved roasted vegetables.

*     *     *

Notes

You’ll note the recipe calls for fennel fronds when, in reality, Mom also used the small, thin stems along with the fronds. I believe these stems bring  much flavor to the roast but no one wants to find a stem in their food. To get around this, I make sure any stems used are chopped as finely as possible.

*     *     *

Zuppa Inglese

Say the words “Zuppa Inglese” to my siblings and immediately their thoughts will turn to Christmas. Consisting of liquor “enhanced” lady fingers swimming in a lemon-flavored custard, this “English Pudding” was as much a part of my family’s Christmas Dinner tradition as was the platter of ravioli and the roasted chestnuts. To be sure, this is a dessert intended for adults but Mom didn’t forget us kids. She, also, made a non-alcoholic version which you can find in Variations below. (Even so, Dad always managed to sneak us a taste of his dessert when Mom wasn’t looking.)

The recipe I’m sharing is a version Mom gave me that calls for only 12 egg yolks. Before you think, “Only 12 egg yolks!?!?!” understand that the original recipe, a copy of which I also have, calls for 36 egg yolks. That’s a whole lotta Zuppa Inglese! In fact, making a batch of custard that large became a team sport, so to speak, with Mom, Zia, and Nonna suiting up against 3 dozen taunting yolks gathered menacingly in the bottom of an enamel pan. You see, when making so much custard on top of the stove — without a double boiler, mind you — it must be given constant attention and stirred non-stop for about 45 minutes. Leave it for a minute, unattended, and you’ll return to a lumpy mess. So, the Ladies of the 2-flat banded together on Christmas Eve, each taking a 10 to 15 minute turn stirring the pot, while her teammates played Briscola. I remember them moving the kitchen table close to the stove so that the “stirrer” could sit on the table’s edge while the other 2 Ladies kept the card game going at the other end of the table. Sipping a glass of wine all the while, the 3 chatted, laughed, played, and stirred until all agreed that the custard was done.  A few minutes later and there was enough Zuppa Inglese, both with and without alcohol, to serve anyone seated at the Christmas Dinner table.

As always, there are a couple of things to consider when preparing this dish. First off, I cannot stress enough that the custard must be stirred constantly, especially if you do not have a double boiler. Failure to do so and you may find yourself buying more eggs when you should be wrapping presents. (No need to run out and buy a double boiler. Place a couple of inches of water in a saucepan over low to med-low heat. Put the ingredients in a bowl large enough to lay on top of the saucepan without falling in. The boiling water should never touch the bottom of the bowl.) Make sure to keep clean the sides and bottom of the bowl as you stir. You’ll know the custard is ready (20 – 25 minutes for 12 eggs; about 45 minutes for 36 eggs) when it is noticeably thick and coats the back of a wooden spoon.

Custard aside, you can control how “spirited” you want your dessert to be. The recipe calls for equal parts whiskey, sweet vermouth, and grenadine. How much you use to “enhance” the lady fingers is your choice. Dip the lady fingers into a booze bath and you’ll have one very strong cocktail dessert. Use a pastry brush to “paint” the fingers and, depending on how thorough a painter you are, you may still have a pretty potent pudding. On the other hand, using your fingers to lightly sprinkle spirits across the lady fingers will result in a relatively zing-free zuppa. No matter which method you use, remember Italians waste nothing. So, use the left over liquor as the base of a nice cocktail, rewarding yourself for a job well-done.

*     *     *

This is the last of only 2 edible servings of Zuppa Inglese from the entire batch. While this very photo was being arranged, Max was busy “sampling” the rest.

*     *     *

Zuppa Inglese Recipe

yield:  one 9 x 9 x 2″ dish, filled with 3 layers of lady fingers in custard

Ingredients 

  • 12 egg yolks
  • zest of 1 lemon
  • 3/4 cup sugar
  • 1 cup heavy whipping cream
  • 1 cup half-and-half
  • lady fingers (thinly sliced pound cake may be substituted)

Directions

  1. Place all ingredients, except the lady fingers, in the top-half of a double boiler or in a mixing bowl as indicated above. Use a whisk to thoroughly combine.
  2. Place a couple of inches of water in the bottom-half of the boiler, reassemble the double boiler, and heat over a low to med-low heat.
  3. Stir constantly, making sure to scrape the bowl’s sides & bottom in the process.
  4. After 20 to 25 minutes, the custard should be thick enough to coat the back of a spoon.
  5. Remove from heat and pour the custard through a sieve to remove any bits of zest.
  6. Ladle enough custard to coat the bottom of a serving dish. Place on layer of lady fingers into the dish and dress with as much liquor as you prefer.
  7. Repeat the process, at least twice. Make sure to reserve enough custard to apply a final coating of custard to “top off” the dish.
  8. Refrigerate, covered, for several hours or overnight.

*     *     *

Variations

As noted earlier, Mom made a non-alcoholic dish of Zuppa Inglese for us kids and any adults who didn’t want to imbibe. To do so, she prepared a 2nd dish only this time she substituted grenadine for the spirits. Feel free to use some other flavoring, or nothing at all, to create an alcohol-free dessert for your table.

Up to this point, we’ve prepared the zuppa in a square baking dish. You can easily create a trifle, though depending on the size of the trifle dish, you may need to make a large batch (36 yolks) of custard. Just as was done in the baking dish, alternate layers of custard and “enhanced” lady fingers until near the top of the dish. Be sure to top-off the dish with a coating of custard. If you wish, you may encircle the stack with “treated” lady fingers that are standing on end, side by side, and pressed up against the trifle dish wall. And if you didn’t make enough custard or just want something a little different, you can alternate layers with one or 2 of whipping cream in place of the pudding. In fact, using whipping cream for the top-off will allow you to fill in any low spots that may result when the trifle settles. (Tip: Add a tbsp of (non-fat) powdered milk to the heavy cream as it is being whipped. The resulting whipped cream will have additional “staying power.”)

*     *     *

Sorry, Mom!

Mom would be disappointed if she found out that I posted today’s recipe AFTER Christmas! Zuppa Inglese, after all, was her Christmas Dinner dessert. Well, in my defense, I had intended to publish it last week, in plenty of time for the holiday. Unfortunately, my small kitchen appliances had other plans and a couple of them balked at the slightest of tasks. (One is now gone and I repaired the other. A Christmas miracle, to be sure!) My to-do list was thrown upside-down and, unfortunately, today’s post “took the hit.” Rest assured. Zuppa Inglese is every bit as tasty on New Year’s Day or “Little Christmas,” as it is on December 25th.

*     *     *

Zuppa Inglese

*     *     *

Baccalà alla Marchigiana

Wind drying and salting are among the oldest methods of preserving food known to Man. One application of these techniques, dried and salted cod, has been around for hundreds of years and is common throughout much of Europe. In Italy, it is called baccalà; in Portugal, bacalhau; and  you may have seen it in Spanish markets as bacalao. No matter what name is used, if you’ve ever seen it in its dried state, you certainly won’t forget it. Off-white and heavily salted, the preserved fish is sold in pieces about 18 inches long, 4 to 8 inches wide, as much as a half-inch thick, and stiff as a board. Well, except this last piece I bought, which required refrigeration and was actually soft, relatively speaking. (Who knew?) Dried stiff or soft-ish, the cod must be rinsed, again and again, before it can be cooked. (See Notes below.) Once re-hydrated and “de-salted”, you can treat it like you would any fresh fish.

Last week, I spoke of my family’s tradition of serving a seafood feast on Christmas Eve, made possible by Dad’s employment at the restaurant, and mentioned that baccalà was often one of the famed 7 Fishes in many Italian homes. Well, not in our home, much to my dismay. Whether it was because Mom or Dad didn’t like it, or, Mom wasn’t a fan of the prep work, baccalà was a dish served only in Zia’s home. Good thing, too, because although it wasn’t as convenient as having it served at my own dinner table, Zia and her Mother-in-law, Nonna, were masters of its preparation. As a result, as Zia recalls, I was forever trying to snag whatever leftovers I could from their meal. Although both women used the same ingredients, Nonna preferred to bake her baccalà, while Zia cooked hers atop the stove.  As one who “sampled” both preparations, I can attest that each method produced a delicious dish. As for our recipe today, Zia and I combined both methods, partially cooking the dish atop the stove before finishing it off in the oven. Although I wanted to name the dish Baccalà alla Zia, my ever-so-modest Aunt would have none of it. So, to honor both her and Nonna, the recipe is called Baccalà alla Marchigiana — but you and I know its real name.

*     *     *

Baccalà alla Marchigiana Recipe

Ingredients

  • 3 to 4 medium-sized potatoes, peeled and quartered
  • olive oil
  • salt & pepper, to taste
  • 3 tbsp olive oil
  • 1 medium onion, chopped
  • 2 cloves garlic, minced
  • 2 tsp marjoram
  • 3 tbsp fresh parsley, chopped
  • 1 large can (28 oz) tomatoes (whole or diced)
  • 1 lb baccalà, soaked, and cut into 3 inch chunks (See Notes below)
  • salt & pepper, to taste

Directions

  1. Pre-heat oven to 400˚.
  2. Season potatoes with salt & pepper, toss with a splash of olive oil, and roast on a baking sheet for 20 minutes at 400˚.
  3. Meanwhile, in a large frying pan, heat olive oil over med-high heat. Add the onion and sauté until translucent, about 5 minutes
  4. Add garlic & parsley and continue to sauté for another minute.
  5. Add tomatoes & marjoram, bring to boil, reduce to simmer, and cook, uncovered,  for 30 minutes. If sauce is “tight”, meaning too dry, add water.
  6. Add roasted potatoes and continue simmering for another 20 minutes. Add water if necessary.
  7. Add baccalà to the tomato sauce and place pan into the 400˚ oven. Bake for 20 minutes. Taste before seasoning with salt & pepper, if necessary.
  8. Serve immediately.

*     *     *

Variations

Whereas baccalà is cod that has been salted and dried, stoccafisso is cod that has been dried but not salted. Once properly prepared, both forms can be cooked in a variety of ways. The portions can be baked in a sauce as above, pan-fried, baked, grilled, or poached and served in a salad. Recently, I watched a re-broadcast of Molto Mario as he used baccalà to make “fish balls,” which he deep-fried. In other words, the only thing limiting how baccalà might be prepared is your own imagination. And for those who believe that fresh or frozen cod is just as good as baccalà, I caution against mouthing such heresy in the presence of Zia’s Youngest Son. A word to the wise is sufficient.

Notes

Baccalà must be thoroughly rinsed and soaked before you can cook it. If it is salted and fully dried (pic on left), it will take 2 days to get it re-hydrated and de-salted  (pic on right). This is readily  accomplished by placing it in a large baking  dish filled with cold water and changing the water occasionally over the course of the 2 days. I find it helps to let the water run gently into the dish a few times, as well. If, as was the case with my most recent purchase, your baccalà is not fully dried but refrigerated, you may be able to get away with a 1 day soak. You will know when the fish is ready by its appearance, feel, and, yes, its smell. Be careful, however, not to let it soak for too long or to run the water too forcefully. The fish could lose its firm texture and might even disintegrate.

No post about baccalà would be complete without mention of its “aroma.”  Certainly not as strong as stoccafisso, when first you begin to soak the cod, you will notice it that it smells like, well, dried fish. The smell quickly dissipates in the rinse water and soon its scent compares favorably with any other fish product. Stoccafisso, however, is not so easily rendered scentless and should only be attempted outdoors or in a well-ventilated room. To illustrate my point …

I was about 5 or 6 years old and shared a bedroom with my brother, who was about 10 or 11 years old at the time. Our bedroom, as well as the bedroom of my cousins’ directly above ours, was separated from the rest of the house by a stairwell that ran from the 2nd floor to the basement. One morning, Mom entered our bedroom in a cleaning frenzy, convinced that my brother or I had done, or left, something disgusting in the room. Angels that we were and despite our claims of Godliness, a foul stench had reached her kitchen, which was located on the other side of the stairwell, and our room declared a crime scene — ground zero, in today’s parlance. Lucky for the two of us, Mom found nothing untoward in our room and now, more determined than ever, she set out to find the source of the stench. It wasn’t long before her nose led her to the basement where, under the stairs, she found Grandpa’s stoccafisso, bathing innocently in a tub of water. Well, revenge is a dish best served cold, so Mom patiently bided her time. It wasn’t long before Grandpa left the house, as he did every morning like clockwork. Seizing the opportunity, Mom placed the tub of stoccafisso under his bed and closed his bedroom door as she left. Even Grandpa’s Old Spice, the scent of which permeated that room, proved to be no match for stoccafisso, as Grandpa learned when he opened that door a few hours later. To be sure, Mom and her Father “discussed” the matter but, being so young, I wasn’t privy to that conversation. I do know, however, that Grandpa never soaked stoccafisso under those stairs again.

*     *     *

Mom’s Calamari Salad


Insalata dei Calamari

Prior to the changes brought by Vatican Council II in the 1960′s, Christmas Eve was a “fast & abstain” day, meaning only 1 main meal could be consumed and no meat was to be eaten all day. For most Catholics around the World, it was a day of contemplation and that one meal was nothing special. With Christmas coming within 24 hours, all eyes — and appetites — were focused on the big day — and dinner — soon to come. Not so the Italians. If tomorrow’s a big holiday and today you can only have one meal, why not make that meal special? And so they did.  Can’t have any meat? No problem. With Italy being both peninsula and island, fish was very often more readily available than many meat products. And so it became a seafood banquet. Wait a minute! The Church may frown upon so grand a celebration on the eve of the birth of the Christ Child. Again, no problem. They made a point of serving seven fish, each one representing one of the Seven Sacraments of the Christian Faith. In one masterstroke, their seafood feast became an Act of Faith. What priest, bishop, or even Pope would dare interfere with these devout Catholics as they used the day’s only meal to commemorate the Seven Sacraments? (The fact that the clergy themselves were probably dining on an even more spectacular seafood supper didn’t hurt “the cause” either.) And so the Feast of the Seven Fishes was born and survives to this day wherever Italians call home.

It’s funny but I don’t recall hearing anything about the Feast of the 7 Fishes when I was growing up. This, despite our having a large seafood meal every Christmas Eve. Dad, working in a restaurant, would come home early in the evening of Christmas Eve, bearing gifts of clams, oysters, and red snapper, at the very least. This would be added to the shrimp and crabmeat that Mom was preparing as appetizers and the calamari she was using to make a salad. As Dad shucked, he helped Mom with the recipes for clams casino and oysters Rockefeller. (Yes, Dad could cook but it was a skill he successfully kept under wraps except on the most rare of occasions.) There was, of course, a big platter of home-made linguine with tuna — or possibly clams — to be served along with the red snapper that Mom had broiled. It was, by any measure, quite a feast of seafood — we just never counted the “participants”.

Although today I do not maintain this family tradition, I do, however, make sure that my plans for Christmas Eve include a meal of seafood, no matter what. Since I’ve posted a number of seafood recipes over the past several months, I thought I’d post links to them all for anyone planning a Feast of the 7 Fishes but who may be missing a fish or two. Before doing that, however, I’ll share Mom’s recipe for Calamari Salad because, well, you should have it; she said so. And, next week, I’ll share the Bartolini recipe for what is the traditional main course in many Italian homes on Christmas Eve, Baccalà (salted cod), which, by the way, is also one of the 7 Fishes.

*     *     *

The Real McCoy

*     *     *

Now, there are a few things to consider with the recipe I’m about to share. First off, when cooking calamari, it’s been said to either cook it for 1 minute or 45. Anything in between and you’ll be eating something akin to rubber. So, use a big pot, bring it to a rolling boil, and get those squid into, and out of, the pot quickly. Beyond that, this recipe is typical of most of my family’s in that it features a few ingredients with relatively few spices. It is all about balance, that’s why there are no amounts given. Yes, Mom listed 1 green and 1 red pepper but I omitted the quantities. It all depends upon how much calamari you use and you’ll note that Mom didn’t list the amount of calamari needed in her recipe. Chop and mix as much bell pepper, red and green, as your eye tells you. (For 1 1/2 lbs calamari, I used about 2/3 each green & red bell pepper.) Taste the onion and let that determine how much to use. If you feel it’s too strong, feel free to give it a quick rinse under cold water after you’ve chopped it. Still not liking the onion? Try a shallot or 2 instead. Lastly, if you’re not comfortable adding the dressing ingredients directly onto the calamari & peppers, then mix it first in a small bowl, taste it, adjust if necessary, and then dress your calamari with it. Bear in mind that most homemade vinaigrettes call for 3 parts oil (olive) for every one part acid (vinegar or, in this case, lemon juice).

*     *     *

Mom’s Calamari Salad Recipe

Ingredients

  • squid, cleaned and cut into rings (halve tentacles, if using)
  • green bell pepper, diced
  • red bell pepper, diced
  • red onion, diced
  • extra virgin olive oil
  • lemon juice
  • fresh parsley
  • salt & pepper, to taste

Directions

  1. Fill a large saucepan with water and bring to a rolling boil over high heat.
  2. Add the calamari, stir, and turn off the heat.
  3. After one minute remove from water and place in an ice bath to chill. (Calamari may be “held” here for a couple of hours until ready to be served.)
  4. Once fully chilled, drain, place calamari on paper towels, and pat dry before dressing immediately with lemon juice, olive oil, parsley, salt and pepper.
  5. Toss and serve.

*     *     *

This couldn’t be easier to prepare and, best of all, you can cook the calamari, make the dressing, and chop the peppers, onion, & parsley ahead of time and store it all separately in the fridge. Just before serving, mix the ingredients, season with salt & pepper, and bring it to the table. Who wants to be stuck in the kitchen when there are unattended gifts to shake?

*     *     *

All righty! That’s 1 recipe down and 11 more to go. As promised, here are the seafood recipes that I’ve shared during the past year.

Tomato Sauce with Tuna

*

Fried Calamari

*

Pasta with Clams (“White Sauce”)

*

Pasta al Salmone

*

Grandpa’s Barbecued Shrimp

*

 Pasta with Clams (“Red Sauce”)

*

Salmon en Papillote — on the grill

*

Pasta with Shrimp

*

Brodetto

*

Lumache alla Bartolini

*

Puttanesca Sauce

*

*

*     *     *

As you can see, of the 11 dishes presented, 7 involve pasta. I’m afraid that’s a bit too much pasta for a Feast of the 7 Fishes, even for me. So, I’ve got a plan. For your primo piatto, prepare my Brodetto. That’s 5 fish in one dish! Clear the table and serve today’s calamari salad alongside next week’s Baccalà and you’ll have all 7 fishes, present and accounted for, in only 2 courses. That wasn’t so hard, was it?

Oh! About dessert. Yes, you may have dessert but, keeping in mind that it is a day of fasting and in the spirit of the Feast of the 7 Fishes, go easy on the whipped cream and chocolate sauce. Besides, you’ll need room for the fruit & cheese platter that you’ll be  serving while the chestnuts are roasted.

*     *     *

Quadretti Pasta

Most of us have warm and fuzzy memories of being nursed back to health by a loving caregiver, usually Mom, who served us a cup or bowl of soup. And you parents reading this are sure to have equally warm memories — some pretty recent — but from the other side of the covers. I’d be willing to bet that most of us were served soup made with a chicken-based stock or broth. What went into that broth, however, varied widely from house to house. In ours, Mom used either of 2 pastas, one of which is today’s recipe, quadretti.

Generally speaking, Mom relied upon 3 dishes to get me up-and-about. Breakfast would be a 3-minute egg, with or without buttered toast depending upon my stomach’s attitude.  My meals would be pasta in bianco. Aside from it being a traditional cure served to bambini with stomach ailments, Mom knew that I could’ve been at Death’s door and I would have agreed to at least try a little pasta in bianco. Between meals, though, there was a constant supply of broth which, as the recovery progressed, contained more and more pastina. Ask my Sister what Mom served her when ill and she’ll mention, without hesitation, Acini de Pepe, a tiny bead-like pasta. As for my Brother and me, it was quadretti all the way.

“Feeling better?”

Quadretti are square-shaped pastina that, as you’ll soon see, are quite easy to make. Whenever Mom made pasta of any kind, she would roll out the left-over dough and use it to make quadretti. (In true Italian tradition, absolutely nothing was wasted.) This she stored in a container, adding to it with each new batch of home-made pasta. Because she was always adding to her stash, she rarely had to devote a batch of pasta dough to making quadretti. When combined with the quart or 2 of chicken stock she was sure to have on-hand for risotto,  Mom was always prepared when one of us was feeling under the weather.

One more thing before getting to the directions and this is for soup novices. You will get better results if you only make enough soup with quadretti for as many bowls as will be served in 1 meal. If you make a large batch of soup with quadretti and store it in the fridge, when you bring it out of the fridge, you may be surprised to find that the noodles have absorbed a great deal of the broth. Not only that but, depending upon how much quadretti you put into the soup, you my have very little broth left at all. So, before you add the quadretti to your soup, take into consideration that the noodles will swell a bit during cooking and later in storage. Better to make just enough soup for one meal and store the raw quadretti separately from the broth/stock.

Don’t let any of this deter you from making this pasta. Just as you cannot compare a dish of home-made linguine with store-bought, you will not find a mass-produced pasta that comes close to the taste of home-made quadretti. It just ain’t gonna happen!

*     *     *

How To Make Quadretti

A half batch of Mom’s Pasta Dough will give you about 2/3 to 3/4 lb of fresh pasta dough. That should be more than enough for most soup recipes. Once the dough has rested, you must roll it out, either manually or by machine. If doing it by hand, roll it until it is as thin as you would when making ravioli. If using a machine that, like mine is at its widest when the setting is number “1,” then pass the dough through the rollers, repeatedly, advancing the setting with each pass, up-to-and-including the number “6” setting. If your rollers, like Zia’s, work the opposite of mine and their widest setting is number “10,” then pass the dough repeatedly through the rollers, decreasing the setting with each pass, down-to-and-including the number “5” setting. Once you’ve attained the proper thickness, cut the dough strip into sheets 2 to 3 feet long, and follow the steps outlined in the images below. Be sure to allow the dough sheets to dry sufficiently. If the sheets are too moist, the quadretti will stick together when you cut them. If too dry, the dough sheet will crack and break as you try to fold it to create the sfoglia.

*     *     *

Fold dough sheet in half,

*     *     *

Continue to fold in half repeatedly until a sfoglia of about 2 to 4 inches wide is created.

*     *     *

Starting at one end, begin cutting sfoglia into strips, no thicker than the width of linguine.

*     *     *

Carefully turn a number of the noodles 90* and begin cutting, again as if cutting linguine.

*     *     *

Gently separate the freshly cut quadretti.

*     *     *

Spread out to dry before freezing or refrigerating in an airtight container until use.

*     *     *

See? A pasta cannot be easier to make by hand and, if you’ve never enjoyed home-made pasta in your broth, you’re in for a real treat. Keep a container of quadretti in the back of your freezer and if, heaven forbid, you’re feeling under the weather, a mug of your home-made broth with a sprinkling of quadretti is just what my “Doctor Mom” would have ordered.

*     *     *

Bartolini Sausage

Laws are like sausages,” wrote Bismarck. “It’s better not to see them being made.” Well, I know little of the backroom dealings that are integral to our legislative process but today I intend to pull back the veil on sausage making, at least my family’s sausage making, that is. And why today? Because Zia taught me how to make sausage and today is her 89th birthday!!!

Allora, buon compleanno, Cara Zia! Cent’ anni e tanti baci!

*     *     *

You'll have no beef with this burger!

*     *     *

For as long as I can remember, the Bartolini Girls made sausage and served them at any meal. They’d cut up a few, add some beaten eggs, and we had a frittata for breakfast. As kids, many is the time we had sausages instead of hot dogs for lunch while, for supper, the sausages were either served alone, roasted with veggies & potatoes, or cooked in a tomato sauce and served with pasta instead of meatballs. Truth be told, we were much more likely to have sausage than we were to have meat balls.  Even after I moved away, Mom always made sure I had at least one container of frozen sausage patties to enjoy once I got home. And to this very day, whenever I make sausage, that first whiff of the seasoned ground pork is a trip on the Wayback Machine to my youth, watching Mom at work. Sure, there are many kinds of sausage available at the local groceries and butchers, not to mention the ethnic markets, but not a one reminds me of home. That’s reason enough for me to keep making these.

Now, for you sausage novices, there is at least 1 reason for Bismarck’s comment. You see, pork sausage requires a certain amount of fat, with some recipes calling for as much as 25% fat content. This recipe doesn’t come near that percentage but fat content is an issue. If you buy a cut of meat that’s too lean, like the pork loin I purchased early in my sausage making career, you will be very disappointed with the result. Look for a good, not too lean, pork butt roast when you make sausage. Even then, you may find that you need to add pork fat to the ground meat, although it wasn’t always this way. Years ago, pork  products had a much higher fat content and one rarely, if ever, needed to add more fat to the mix. Then, without warning to our fellow sausage makers, hog breeders began to develop a leaner, healthier product and the “Other White Meat” campaign was born. Unfortunately, getting rid of the fat got rid of a good deal of flavor, so much so that Mom and Zia quit making sausage altogether! I eventually convinced Zia to try making it again so that I could learn the recipe and, at first, I bought some extra pork belly fat to compensate for today’s leaner pork. It worked, I learned the recipe, and all was well — or should have been. One fateful day, I attempted to make sausage on my own and over-compensated with the fat. What a greasy mess! After that, I quit using additional fat and switched to pancetta. For a 4 lb. pork butt, I use about a half-pound of pancetta. Not only does it add some much-needed fat without going overboard, it brings a nice flavor to our sausage, as well. Most importantly, Zia approved the addition. In fact, the picture to the left was taken at her home and that’s pancetta on top of the pork. (See Notes below for a tip on grinding the meat.)

When you look over our recipe, you’ll quickly notice that there is a surprising lack of spices used but, because it’s so simple, it can easily be modified to suit your tastes. Mom didn’t like fennel seed in her sausage but I don’t think she’d mind if you added some to yours. She, also, didn’t like her sausage spicy but I’m sure she’d look the other way if you wanted to add some red pepper flakes or a couple shakes of cayenne pepper. And I bet Zia would find it interesting if you were to, say, add a little ground sage or marjoram to the ground meat. As for me, I’m a garlic lover and have been known to add a couple of cloves of minced garlic, in addition to the garlic-flavored wine. And if none of those suggestions hit their mark, check out Greg’s recipe at the Rufus Guide. Just remember that no matter what spices you use and how much, be sure to start with less than you think necessary and cook a small amount of pork for a taste test. You can always add more if need be.

Now, one more thing probably should be mentioned. Some may be wondering where the sausages are, being this is a posting about sausage making. Well, you can blame me for that.  As I mentioned, Mom always sent me home with a container of sausage patties after I visited and I grew to prefer them. Cooked on the grill, they are a great alternative to hamburgers. Not only that, but a patty or 2 can be easily crumbled for addition to a tomato sauce, meatloaf, pizza, or some other dish. Well, during one of our Sausage Days, I convinced Zia to just make patties that afternoon and we haven’t made a sausage since. If you’re a sausage person, however, feel free to stuff those casings!

*     *     *

Bartolini Sausage Recipe

Ingredients

  • 4 lbs pork butt, coarsely ground
  • 1/2 lbs. pancetta, coarsely ground
  • 6 oz dry white wine
  • 3 cloves garlic, smashed
  • 1 1/2 tbsp salt, more or less to taste
  • 2 tsp ground black pepper, more or less to taste

Directions

  1. At least 2 hours before beginning, place garlic and wine into a glass and set aside.
  2. Once garlic and wine have “married,” combine ground meats and spread in an even layer, about 2 inches thick, on a work surface.
  3. Season the meat with salt and pepper. Use your fingertips to create dimples in the meat’s surface.
  4. Strain the garlic from the wine and discard. Sprinkle the now flavored wine evenly across the meat. Begin mixing the meat until the seasoning and wine are evenly distributed. Recreate the meat layer and let rest for at least 30 minutes so that the flavors meld. (Caution should be taken if you are doing this on a hot Summer’s day or in a very warm room.)
  5. Once rested, make a mini-patty and cook it in a small frying pan. After tasting, you may need to adjust your seasoning. If you do add seasoning, let it rest 15 minutes before tasting again.
  6. Once the sausage meat has passed your taste tests, begin making patties. Place them in single layers on baking sheets and into the freezer. Once frozen, you can bag them or place them into containers until needed.

*     *     *

Notes

Our preference is to grind the pork using the plate with the largest holes. This will create a coarse grind. When grinding meat for ravioli or cappelletti, use a smaller holed plate for a finer grind. No matter what size the end-result, you’ll find that your grinder, whether machine run or hand-cranked, will perform better and produce a more consistent result if the meat is cut into strips and partly frozen before you begin. Cut the pork butt into strips, layer them on baking sheets, and place them into the freezer for 30 to 45 minutes. Do not let them freeze solid or you will have to thaw them somewhat before grinding.

In a way, this recipe represents a milestone in the long and storied history of Bartolini sausage making. Never before were the wine, salt, and pepper measured so that they could be recorded in a recipe. It was always, “Grab some salt. Grab a little pepper. Put some wine in a glass. No, that’s too much. … ” To write this recipe, Zia worked her magic using wine and seasoning that I had pre-measured and placed in containers on her counter. When a mini-sausage patty passed her palate’s inspection, I simply measured the salt, pepper, and wine that remained. Still, as I cautioned earlier, start out with less spice than you think you’ll need. Be especially careful with the salt if you add pancetta to the ground pork, for its salt content can vary.

Just One Thing More

You didn’t think I would end this post without at least 1 picture of sausages, did you? This one is from the Bartolini Sausage Archives.

*     *     *

*     *     *

Lumache alla Bartolini

This is another within the series of posts which, quite frankly, is not for everyone, not even the intrepid tourist to the left. Truth be told, snails weren’t exactly popular among members of my generation at the old two-flat either. (If you wish to exit, you may do so HERE.) I am probably the only one to have eaten lumache back then and certainly am the only one willing to go back to that well again today. Still, if I’m going to record the family’s recipes for Posterity, I’m not about to start filtering them. Besides, the look on Zia’s face when I unveiled the lumache and announced my plans for dinner was priceless. This blog delights in ways I never dreamt possible!

As I recall, lumache, or babbaluci as they are known in Sicily, was not at all a common dish at our dinner table nor, for that matter, at Zia’s. I only remember them being served 2, maybe 3, times. That’s probably because of the amount of work involved in preparing them for the table. They had to be soaked to rouse them from dormancy, scrubbed, boiled, scrubbed again, and either removed from their shells or left intact for further cooking. As you can imagine, this was no 1 day job. Mom would put water, vinegar, and the dormant lumache into her largest pot; place a colander atop the pot, weighted with a heavy book or pan; and, set it aside to let the lumache come out of their shells. As they came to life, they would leave the water and head up into the colander — hence the reason for the weight. Unfortunately, that weight wasn’t heavy enough to prevent me from snatching a pet when I was about 6 years old. It was, however, too heavy for me to replace properly before I returned to bed, my new pet snail in a water glass at my bedside. Mom was just a tad upset when she woke me the next morning. Her kitchen cupboards and counters were covered with lumache on the lam. Even my pet (the little tattle-trail!) was well on its way to my bedroom’s ceiling by that time. Funny thing. I don’t recall ever having a pet snail after that.

*     *     *

*     *     *

I’ve chosen to share this recipe today because of Mario Batali. On a recent rebroadcast of Molto Mario, he mentioned that lumache was one of several dishes that the people of Le Marche (the Marchigiani) prepare on All Souls Day. Well, with the Bartolinis being Marchigiani and today being All Soul’s Day, what choice do I have? So, the recipe I’m going to share is the very recipe the Bartolini Girls cooked those many years ago — with 1 exception. There was no way on Earth that I was going to start with dormant lumache. With Max in the house, that is surely a disaster waiting to happen. I can just see him running around my home, trying to lure me into a game of keep-away with some unlucky snail in his mouth, while I’m on a ladder retrieving the rest off of my kitchen’s walls. No, no, no! So, I did a little googling — and it paid off. On Amazon (of course!), I found canned lumache that were cleaned, shelled, trimmed, and ready for stewing. What was once a multi-day, very messy affair suddenly became as easy as preparing a tomato sauce. I ordered them and, once delivered, I packed them up and brought them to Zia for one most memorable dinner.

*     *     *

Lumache alla Bartolini Recipe 

Ingredients

  • 1 can (15 oz, 48 count) very large size lumache
  • 2 tbsp extra virgin olive oil
  • 1 large onion, chopped
  • 3 garlic cloves, diced
  • 1 can (14 oz) crushed tomatoes
  • 1 can (14 oz) diced tomatoes
  • 4 oz dry white wine
  • 3 tbsp parsley
  • 1 tsp marjoram
  • salt & pepper, to taste
Directions

  1. Heat olive oil in medium-sized sauce pan over med-high heat. Add onions and sauté until translucent, about 5 minutes. Season lightly with salt & pepper.
  2. Add garlic and sauté for another minute before adding the tomatoes, wine, marjoram, and parsley.
  3. Bring to a boil, reduce to a simmer, and continue cooking for about 45 minutes or until the tomatoes are cooked and the sauce has darkened.
  4. Add the lumache with the canning liquid and continue to simmer for about 30 minutes more. The sauce should be dark and thick.
  5. Season with salt & pepper, to taste, and serve.

*     *     *

Serving Suggestions

                                  *                         When she cooked lumache in their shells, Mom served them in deep soup bowls with a chunk of crusty bread on the side. When removed from their shells, lumache may, also, be served as a dressing for pasta or atop polenta.

*     *     *

Notes

Back in the days preceding Vatican Council II, when eating meat was forbidden on Fridays and other “days of abstinence,” Catholics were allowed to eat lumache because they were considered seafood. Well, in classic Italian cuisine, cheese is very rarely used in a dish featuring seafood and if the Church labels something as seafood, who are we to argue? The use of cheese, therefore, in a dish with lumache is frowned upon. On the other hand, what you serve in your own home is your own business. (Was that thunder?)

*     *     *

Dad’s Puffballs

As many of you know, I was in Michigan last week, visiting Zia and my family. Luckily, my visit was timed perfectly for the annual arrival of puffballs. Pictured above, a puffball is a type of edible fungus with a mild, mushroom-like flavor. My Dad, some 25 years ago, found one growing behind Zia’s garage and we’ve enjoyed them ever since. Then again, my family has always had some sort of relationship with mushrooms. Both Mom & Zia told tales of going mushroom picking with Grandma when they were very young in as-yet undeveloped fields in Detroit. Prior to my being born, Mom & Dad lived in a house in which they grew mushrooms in a basement room that had a dirt floor. So, when Dad found a puffball and declared it edible, my family replied, “When do we eat?”

Max "picked" the smaller one about 1 week too soon. We suspect the larger was "trimmed" by a lawn mower when it was but a few days old.

Each year, usually in the first weeks of October, 1 to 3 egg-sized fungi appear in the lawn by Zia’s garage. In less than 2 weeks, these “eggs” will grow to be football-sized — and therein lies the quandary: when to pick them. Grab them too soon and you may be cheating yourself out of a few days’ growth. Picked too late and you’ll have no choice but to throw it away, hopefully back where you found it so its spores will produce next year’s crop. So, once you’ve decided it’s harvest time, what’s next? That’s easy enough. Pick them and, just before cooking, trim away the outer peel to reveal a flesh that’s relatively firm and pure white, like that of a white button mushroom cap — on steroids! If it is even the palest shade of green, yellow, or brown, discard the puffball because it has “turned.” Your best bet is to cook them as soon after harvesting as possible.

As mentioned earlier, puffballs have a very mild, mushroom-like taste and this limits the ways they can be cooked. One year, after a crop that yielded 3 huge puffballs, I brought one home and used part of it in a tomato sauce. Big mistake. Being so mild tasting, one could easily have mistaken the puffball cubes for tofu — not exactly the result I had in mind. Since then, I’ve restricted my use of them to 4 recipes. To begin with, if I cannot cook it within 2 days of picking, I’ll chop the puffball into cubes and lightly sauté them in butter. I place the partially cooked cubes on sheet pans and into my freezer. When fully frozen, I place the cubes in bags to be stored for later use in omelets.

*     *     *

Breadcrumbs (l), Flour (r)

*     *     *

When he brought the first one home, Dad suggested that Mom cut it into cubes before breading and frying them. So, she cubed it, floured the cubes, dipped them into an egg wash, and then coated them with seasoned bread crumbs before deep frying. Pictured above, are cubes prepared in this way using Panko bread crumbs. Oddly enough, as Zia mentioned, they’ll remind you of toasted marshmallows, albeit a little mushroom-y. Also pictured are puffball cubes prepared with a 2nd coating of seasoned flour rather than bread crumbs. Although good, I much prefer the Panko-coated. By the way, the dipping sauce pictured is homemade ketchup that was inspired by Tanya’s Up The Mountain Spicy Tomato Ketchup over at her Chica Andaluza blog. Her sauce is fantastic and better, by far, than any ketchup that I’ve ever tasted.

*     *     *

Parmesan Coated

*     *     *

The 4th and final preparation is a method I found at the Mycological Society of San Francisco website. If you’ve a mushroom-related question, this is a good place to start looking for an answer. Their recipe, Parmesan Puffballs, involves coating slices of puffball with grated parmesan cheese instead of breadcrumbs or flour. Fried in a mixture of butter and olive oil, these are a tasty alternative to the other methods. Truth be told, however, the parmesan cheese is the real star of this dish; the puffball being overwhelmed by the flavor of fried cheese. Although not quite the dish one might expect, any excuse to eat fried cheese is all right in my book.

*     *     *

Notes

In the years since Dad brought home that first puffball, my family has enjoyed them many times. Never once has anyone experienced any discomfort or problem after eating them. Still, as is the case with any mushroom or fungus, if in doubt, do not eat.

*     *     *

Just One Thing More

So, you think you had a rough night?

*     *     *

No, those aren’t puffballs. The night before we (Lucy, Max, and I) left for Michigan, Lucy laid an egg, pictured above to the left of a “large” chicken egg. That was 2 weeks ago and she normally lays a clutch of 2 eggs over the course of 2 to 3 days. The trip obviously affected her delivery schedule but, the way she’s acting, I expect to find this egg’s Irish twin in the corner of her cage within the next day or 2.

*     *     *

Filling for Ravioli dei Bartolini

The Bartolini Girls made 2 versions of filling for their pasta. One, used in cappelletti, was served in soup while the other was for ravioli and dressed in sauce. A couple of years ago, I decided to try my hand at making sausage ravioli, using our family sausage recipe. The results were good enough to serve Zia, gain her approval, and now the Bartolini Clan has 3 ravioli fillings made with meat. Today I’m going to share the “saucy” filling; we’ll get to the “soupy” and sausage fillings in later posts.

I have 2 versions of Mom’s recipe. The original, which is little more than a few notes, and the one that’s part of a recipe book she gave to me after I moved to Chicago. Both are pictured below and, for obvious reasons, I follow the more complete version of the two. This is the same recipe that Zia follows when we have Ravioli Day. Similar to Sausage Day, once or twice a year we’ll devote a day to making ravioli so that she’ll have plenty for her family when they visit. We work well together as a team and that night’s dinner is always a good one. Never one to wait for dinner, however, Max has been known to steal a few errant ravioli that may have wandered too close to the pasta board’s edge. On one memorable Ravioli Day, he managed to inhale 35 of the pasta pillows. That was about 10% of that afternoon’s production and, not so coincidentally, the last ravioli that Max has enjoyed, to date.

*     *     *

*     *     *

When you look at the recipe, you’ll note that in the original version, Mom used nutmeg but cloves is used in the version she gave me. I’ve no idea why or when she modified the recipe, only that she gave me the book in the early ’80’s.  As is the case with any of our ravioli fillings, the meat is cooked before being ground in a meat grinder. I once tried using a food processor but did not like the results at all. The filling became a thick purée without any real texture, and I definitely prefer some texture. The recipe, also, calls for ground pork and veal but if Mom couldn’t find veal, she often substituted chicken or turkey. Living here, I’ve no problem finding any of the ingredients but it’s good to know that there are alternatives should you run into problems or be averse to using veal. The rest of the recipe is easy enough. The “fun” part will come when we make the ravioli and you can see how we do that HERE.

*     *     *

Filling Recipe for Ravioli dei Bartolini

Yield: Enough filling to be used with 8 eggs of pasta dough. Recipe found here.

Ingredients

  • 1 1/2 lbs. ground pork
  • 1 1/2 lbs. ground veal (chicken or turkey may be substituted)
  • 2 – 3 tbsp butter
  • 1 pkg (10 oz) chopped spinach (cooked and well-drained)
  • 1 pkg (8 oz) cream cheese
  • 1 cup grated romano or parmesan cheese – your choice
  • 2 or 3 eggs slightly beaten
  • dash of cloves (optional)

Directions

  1. Sauté meat in butter. Season lightly with salt.
  2. Use meat grinder to process the meats. Add all the ingredients into a mixing bowl and mix until well-combined.
  3. Cover the filling and refrigerate for a few hours or overnight.
  4. Once the filling has rested, you can begin making your ravioli.

*     *     *

*     *     *

Notes

Pictured above  is ravioli filling pre-formed into “balls.” Sometimes, while the pasta dough rests, Zia & I will use the time to create some, giving us a jump on the day’s production.

Mom and Zia used this filling exclusively for ravioli. I’ve used it in a few other dishes – i.e., stuffed shells, cannelloni, and, on occasion, a rotello. We’ll get to these recipes, too.

*     *     *