Gettin’ Cheeky with Beef – And in a Slow Cooker, No Less

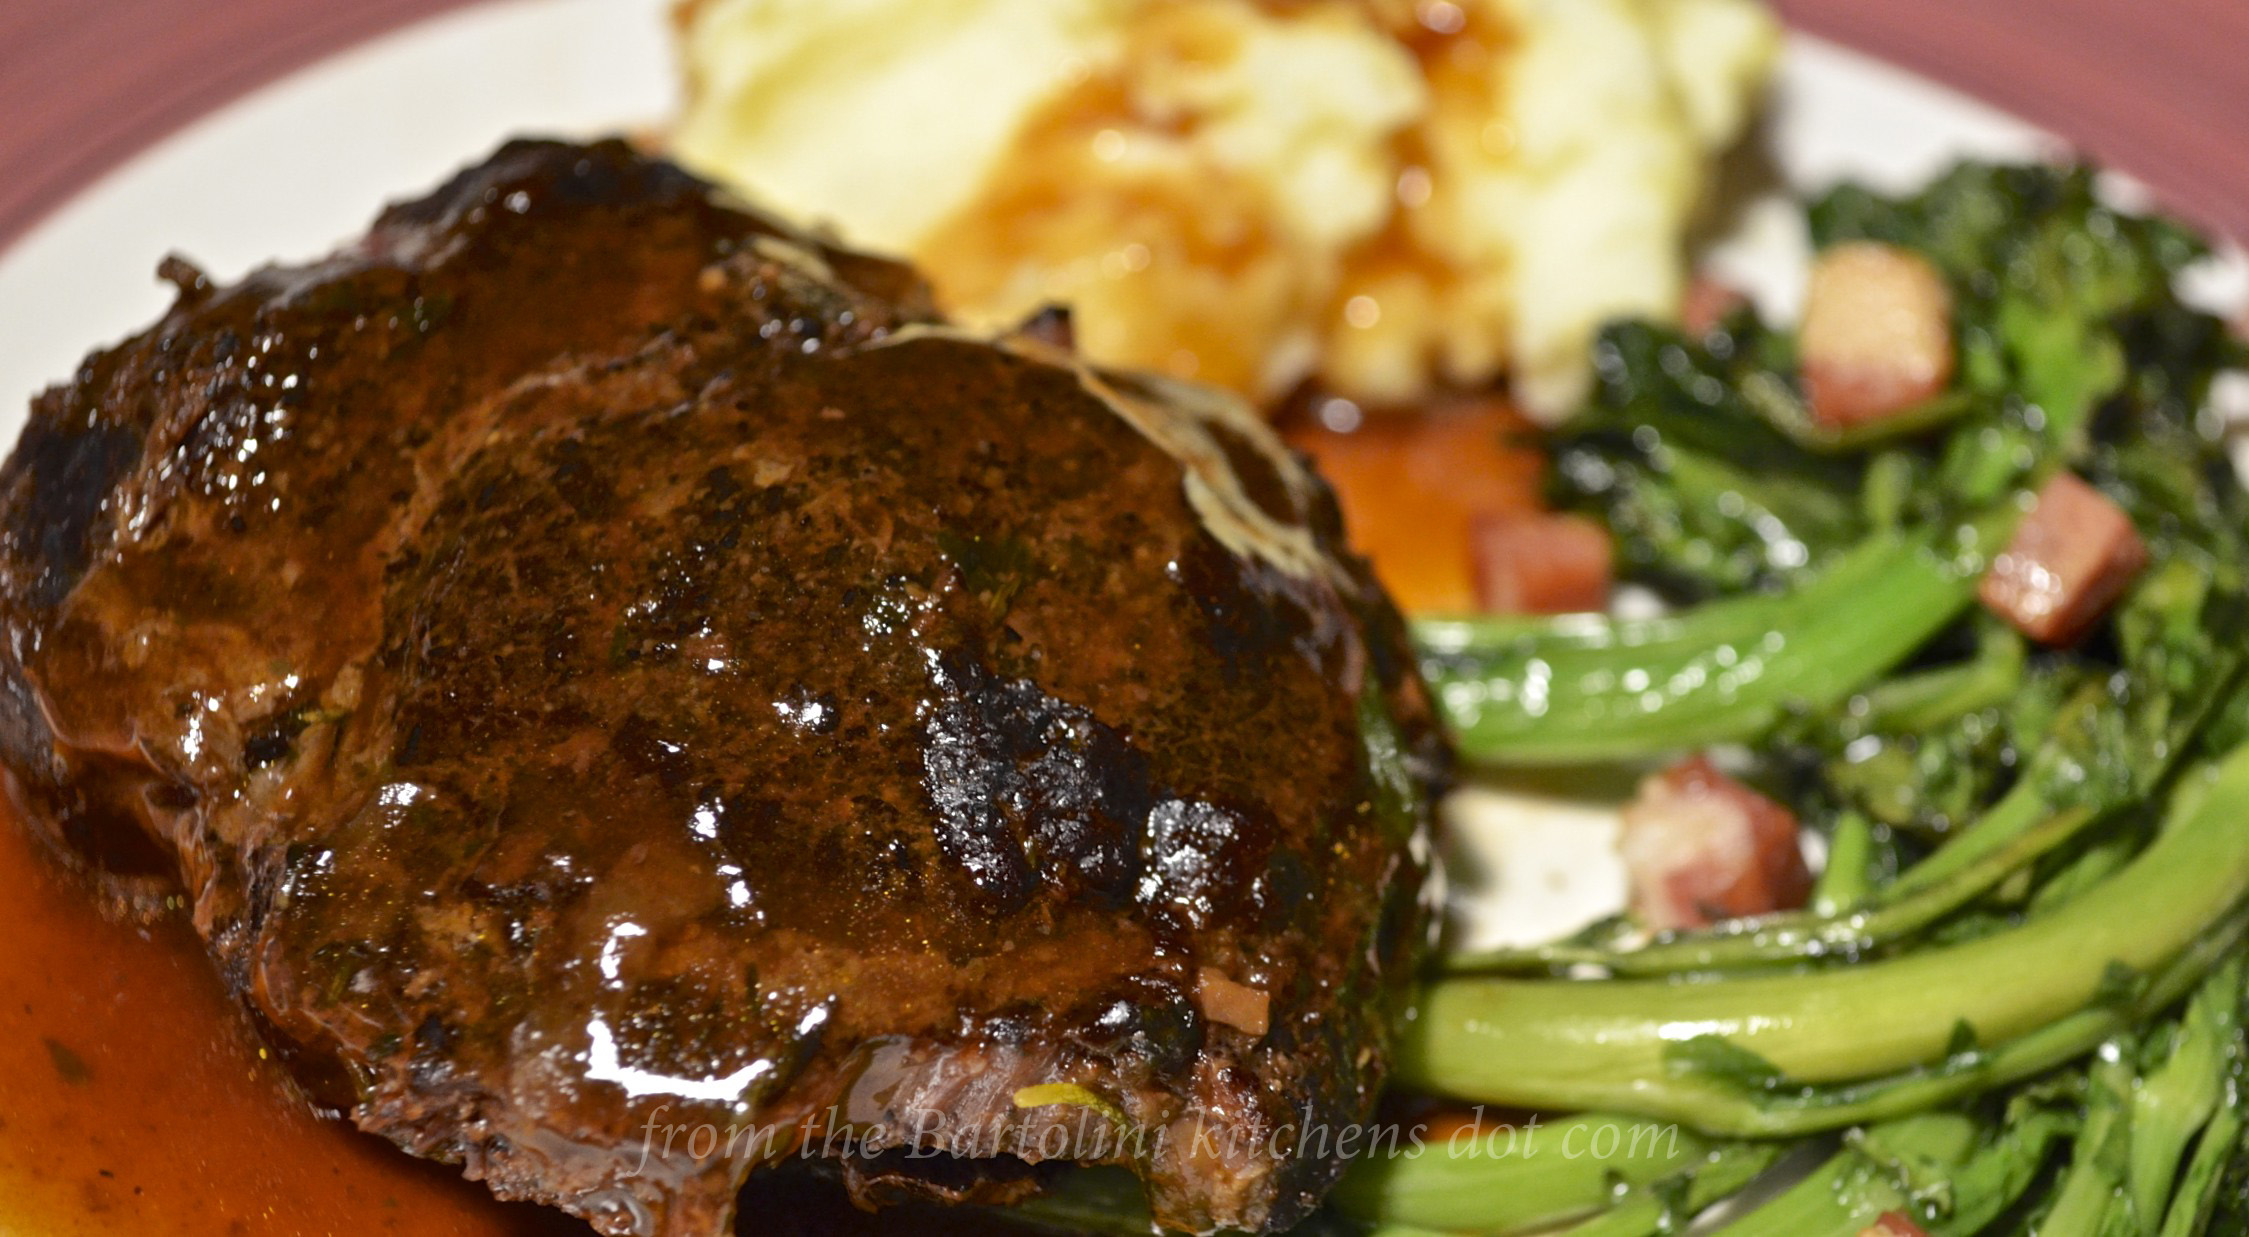
Guance di Manzo Brasato

Let me say from the onset that this is not a Bartolini family recipe. In fact, I can say with some certainty — feel free to back me up, Zia — that beef cheeks never graced a Bartolini dinner table. This all changed the last weekend of last October. That was the weekend the vendor with certified organic meats returned to the farmers market.

*     *     *

Beef Cheeks 1*     *     *

You may recall that I had been waiting for him to return because he sold goat and, even though I’d found some at a nearby market, I prefer to buy organic when its available. As it is, I buy chickens from him all Summer long. It had been weeks since he last set up his stall and I was, frankly, surprised to see him. The following weekend was to be the market’s last for the year and I thought him gone until 2014.

His stall, for lack of a better word, is a set of folding tables arranged in a “U” shape. On them he’s places about 6 ice chests in which he keeps the week’s frozen inventory. That week there wasn’t any goat meat but I was surprised to find a package labeled “beef cheeks.” I bought it, along with a chicken, and placed both in the freezer when I returned home.

Well, as this Winter unfolded, I exhausted my repertoire of comfort foods. Last week’s tuna noodle casserole was proof that I’d run out of options. It was about that time that I remembered that there were beef cheeks in the freezer, though they had somehow managed to work their way to a back corner. Another Sunday braise was suddenly in the offing.

Although still below freezing, that Sunday turned out to be the warmest day of the month to date. Since there was no real need to heat the kitchen, I switched gears a bit and opted for using the slow cooker rather than the Dutch oven. Best of all, with a fridge well-stocked with braising vegetables, there would be no last-minute trip to the grocery that morning — until I realized that I’d need side dishes. Curses!

*     *     *

This braise is like most, with one minor exception. I started by making a form of battuto, an Italian soffrito. In our part of Italy, a battuto consists of finely diced onion, parsley, garlic, and salt pork. Battuto is the first thing into the pan, after the olive oil is heated, and will flavor the dish as its aroma fills your kitchen. Here, I made my battuto with guanciale, parsley, and garlic. (Yes, this recipe mixes the cheeks of both pork and beef. Shocking!) The onions were added with the other braising vegetables, once the battuto was cooked. The rest of the recipe is easy enough to follow and you should have no problems.

*     *     *

Beef Cheeks Braising*     *     *

Braised Beef Cheeks Recipe

Ingredients

  • 2 beef cheeks, approximately 1.2 lbs (540 g)
  • 2 tbsp olive oil
  • 4 oz guanciale, chopped – pancetta or bacon may be substituted
  • 3 cloves garlic, chopped
  • 1/4 c parsley, chopped
  • 1 medium onion, chopped
  • 2 stalks celery, leaves included, roughly chopped
  • 2 carrots, roughly chopped
  • 3 sprigs fresh thyme
  • 2 sprigs fresh rosemary
  • 3 tbsp tomato paste
  • 3/4 c red wine
  • 3/4 c Madeira
  • 1.5 c beef stock
  • salt and pepper
  • lemon zest

*     *     *

Battuto*     *     *

Directions

  1. Combine chopped guanciale, parsley, and garlic on your cutting board and chop them together until uniform. This is the battuto.
  2. Warm oil in a sauté pan over med-high heat. Add the battuto and sauté until the guanciale’s fat is rendered, about 5 – 7 minutes. Do not allow to burn.
  3. Add onion, carrots, and celery to the pan and sauté until the onion is translucent.
  4. Add the rosemary and thyme to the pan. Continue sautéing until both begin to wilt.
  5. Use a slotted spoon to remove the pan’s contents and place all into the slow cooker. Do not drain the oil.
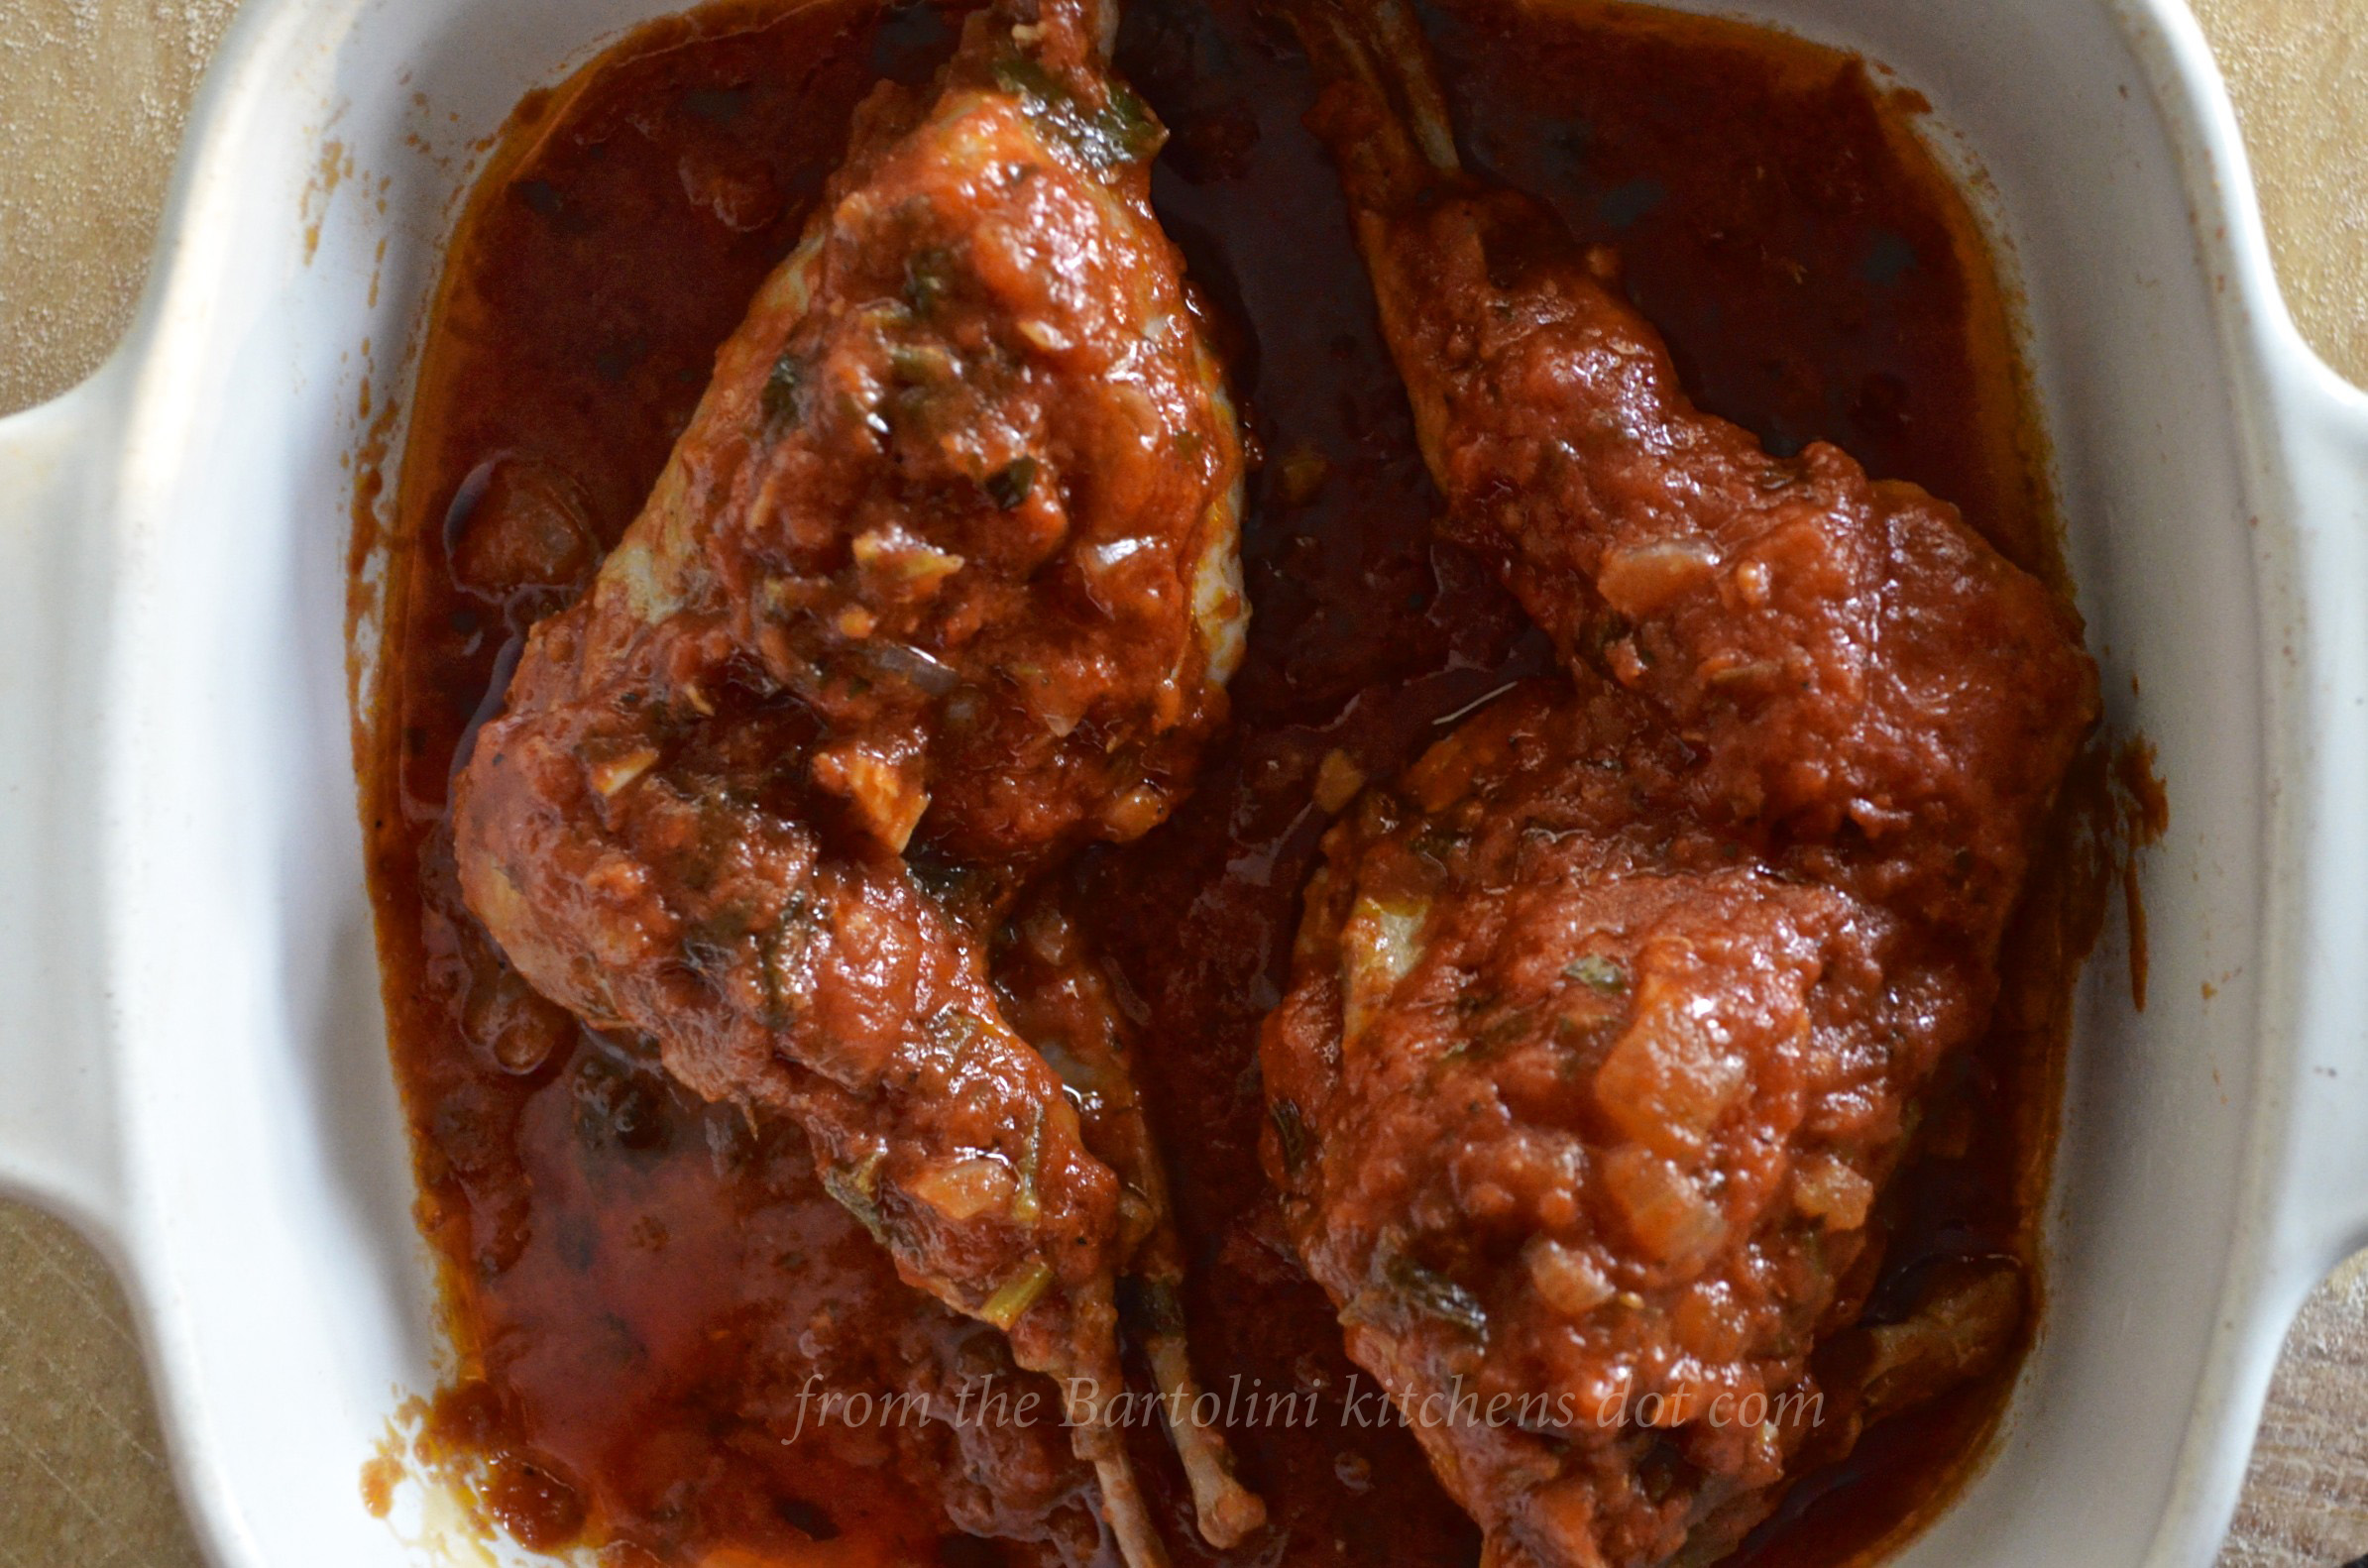
  6. Season beef cheeks with salt and pepper before placing into the hot pan. Turn when brown, about 5 minutes. Remove when both sides have been browned. Place into the slow cooker atop the other ingredients.
  7. Add the tomato paste to the pan and sauté until fragrant, about 1 minute.
  8. Use wine to deglaze the pan.
  9. Add the Madeira and beef stock and bring to a boil to burn off the alcohol.
  10. Add the liquid to the slow cooker. (See Notes)
  11. Cook on high for one hour before reducing to low for another 6 hours. Turn over the meat occasionally, about once every 90 minutes, or so. (See Notes)
  12. Remove meat and cover while the liquids are strained and the sauce prepared. (See Notes)
  13. Just before serving, garnish with a bit of lemon zest.

*     *     *

Beef Cheeks 2*     *     *

Sides

As pictured, there were 2 sides served, neither of which is complicated nor difficult to prepare.

  • Mashed Potatoes and Parsnips with Roasted Garlic:Parsnip-Potato Mash
      Prepare mashed potatoes as you would normally, substituting 1/3 of the potatoes with peeled, chopped parsnips. Once boiled and drained, mash before adding warmed heavy cream into which butter and roasted garlic cloves have been added. Serve.
  • Sautéed Broccoli Rab (Rapini) with Pancetta and Garlic:Rapini with Pancetta
      Sauté chopped pancetta in a bit of olive oil to render its fat and until it’s not quite fully cooked. Add garlic and, after about a minute, add the broccoli rab, season with salt & pepper, and sauté until cooked to your satisfaction. Serve.

*     *     *

Notes

The braising liquid should not be so deep that the meat is totally submerged like you would do for a stew or soup. When using a slow cooker. the liquid should come about half-way up the side of the beef cheeks. When using a Dutch oven, I use enough liquid so that it comes up 2/3 of the side of the protein to allow for evaporation. Use more or less liquid to arrive at the recommended level. Just maintain the same ratio of the braising liquid’s ingredients: 2 parts beef stock to 1 part each of Madeira and red wine.

A slow cooker works by applying a low, even temperature over a long period of time. Do not uncover the cooker unless necessary or you’ll run the risk of extending the cooking time.

Parsnips are a bit more firm than potatoes. When preparing them, chop the parsnips in pieces that are slightly smaller than the potatoes to insure that all will finish cooking at the same time.

Once you’ve strained the liquids and removed the fat, you can:

  • serve the sauce as-is;
  • reduce it and serve; or,
  • use a thickening agent — flour, corn starch, or arrowroot — to make gravy.

No matter how you finish the sauce, be sure to taste and adjust the seasoning as needed.

*     *     *

When blogs collide

On the very day that I was cooking my beef cheeks, Phil, of “Food, Frankly“, posted his recipes for preparing an ox cheeks dinner. Do yourself a favor and take a few minutes to check out the delicious meal that he prepared.

*     *     *

And finally

In the Comments for last week’s post, my Cousin mentioned that there’s a recall of beef that was processed by a California company and sold across the US. Though the beef I purchased was locally grown and processed, that is hardly the case everywhere. You can read about the recall and the reasons behind it in this USDA News Release, dated February 18th, 2014.

*     *     *

It’s déjà vu all over again …

Tricolor Risotto 4It won’t be long now before we are once again celebrating St. Joseph’s Feast Day. Today’s look back will show you how to prepare a risotto of 3 colors, each of which, not so coincidentally, corresponds to one of the colors of the Italian flag. You needn’t be Italian to make this expression of Italian pride and you can learn how to do it by clicking HERE.

*     *     *

Coming soon to a monitor near you …

Chocolate Torte Preview 2 
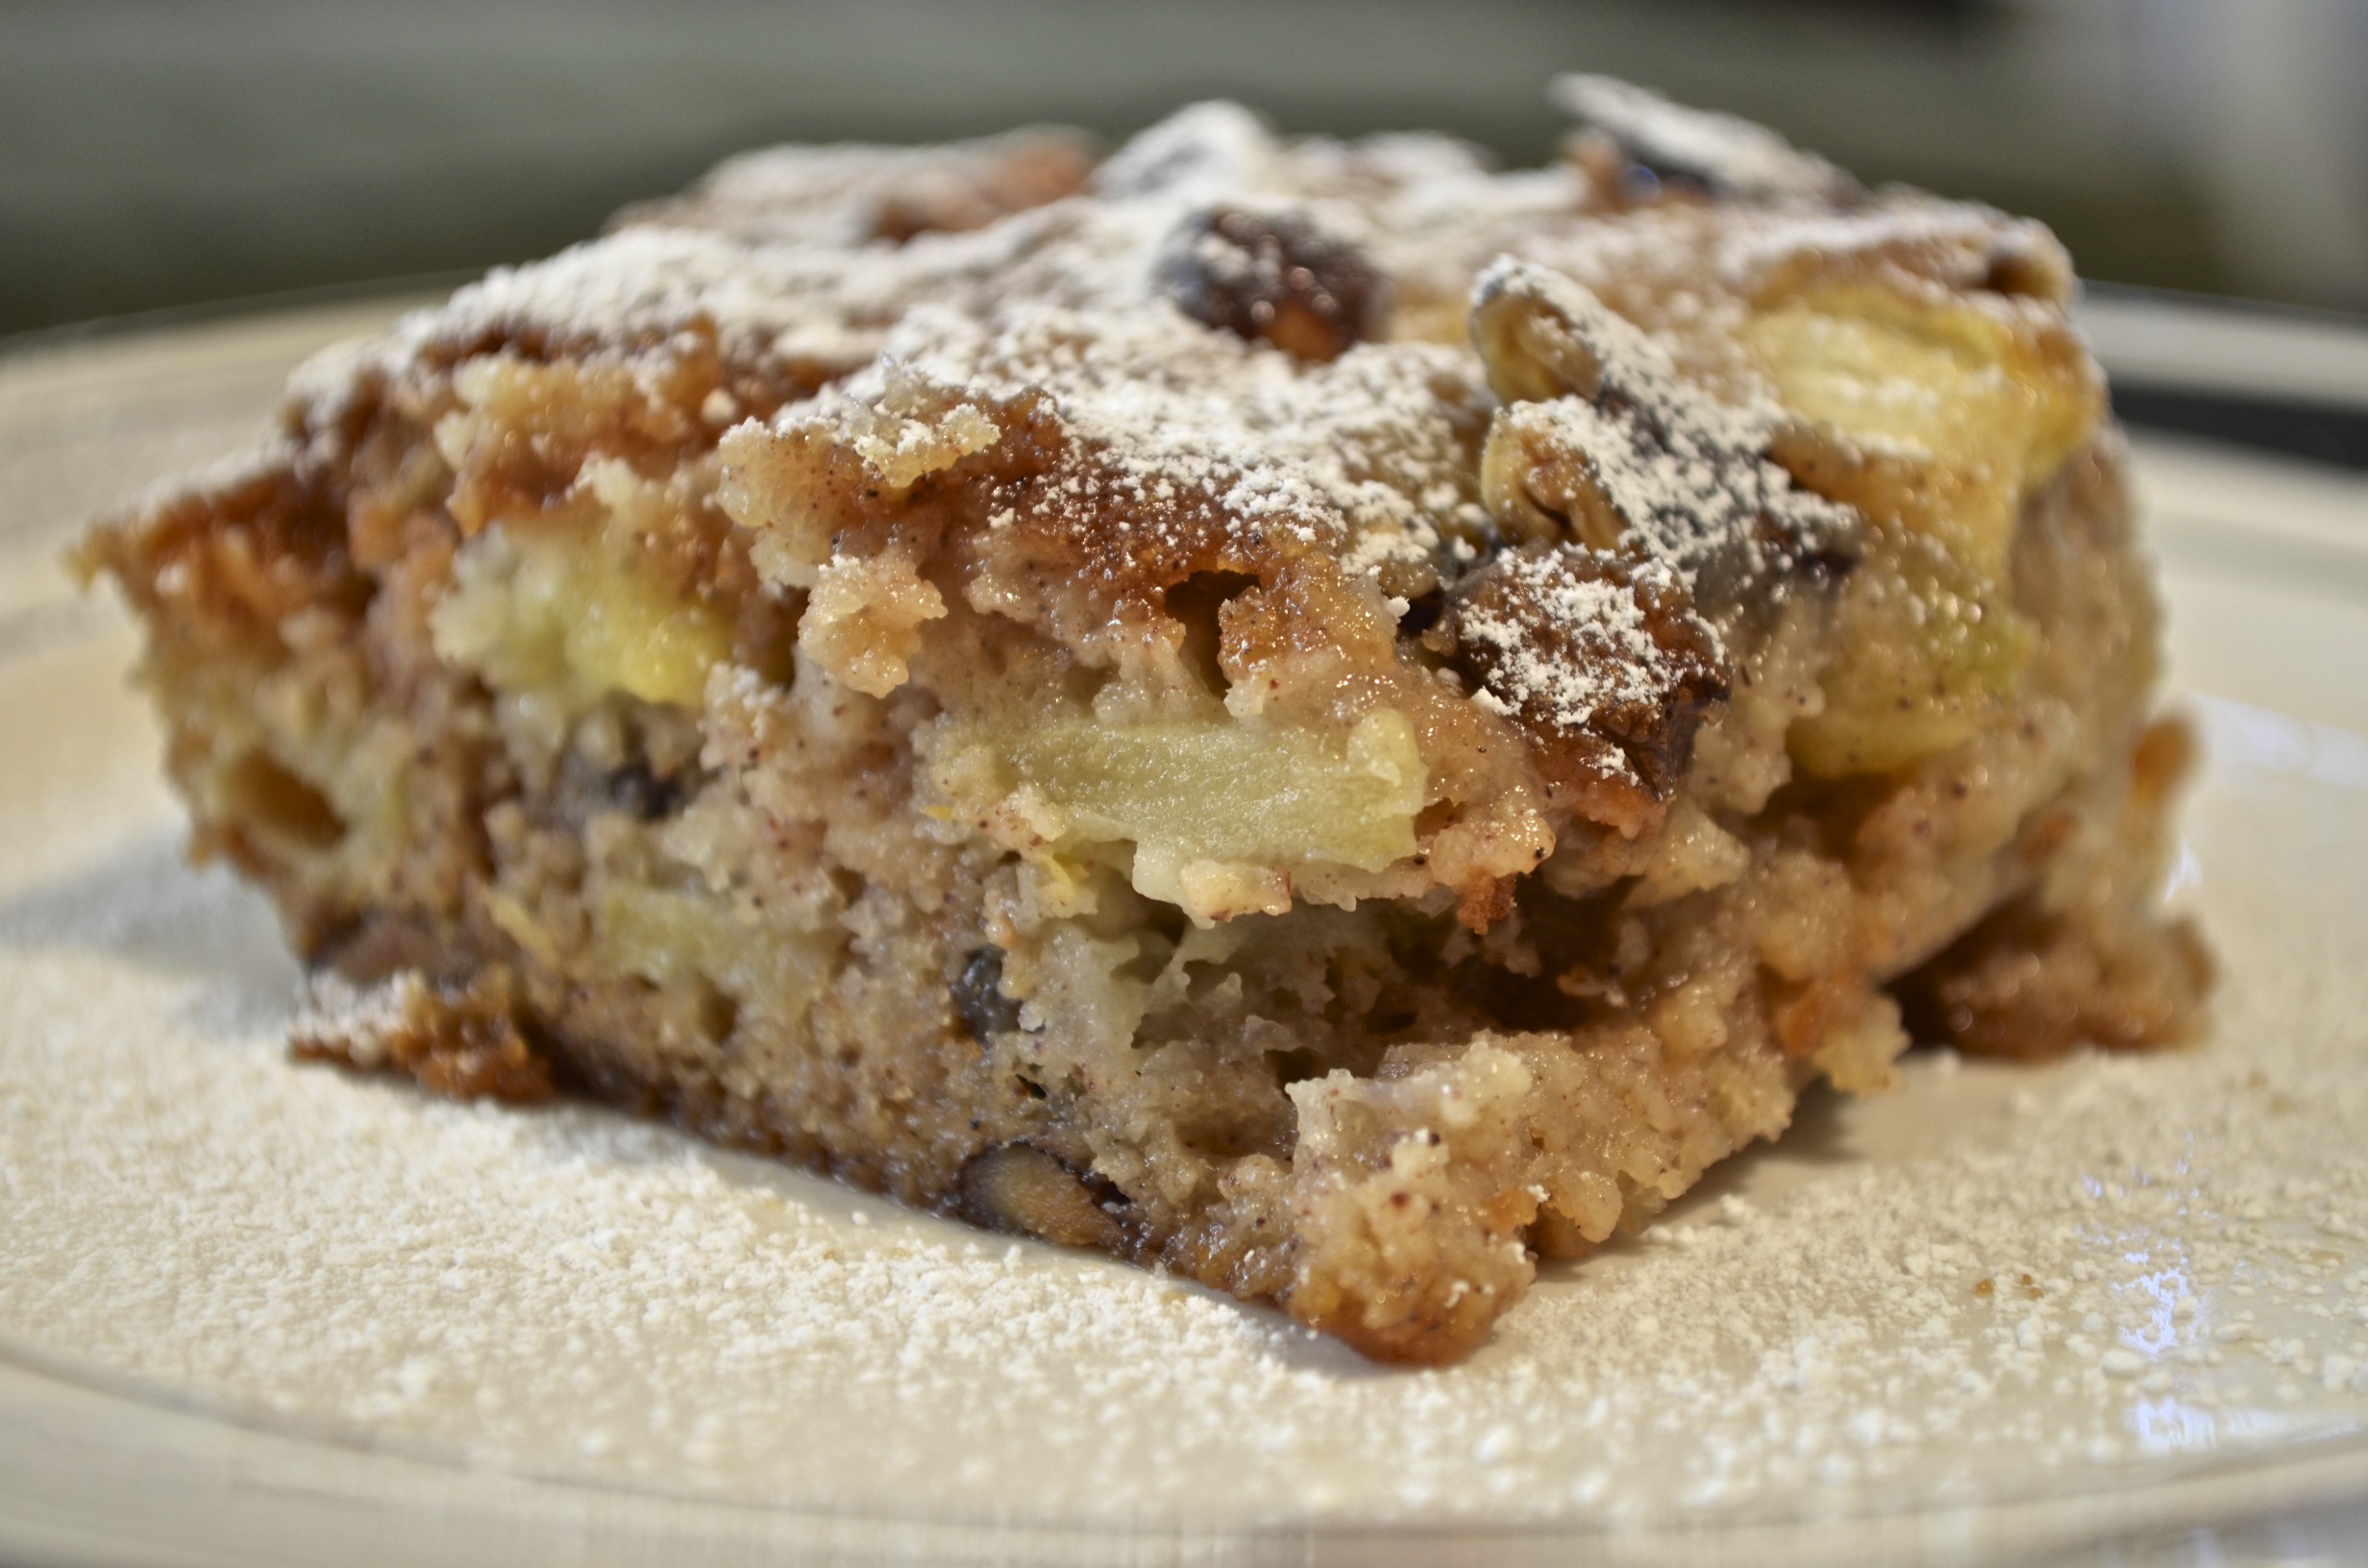
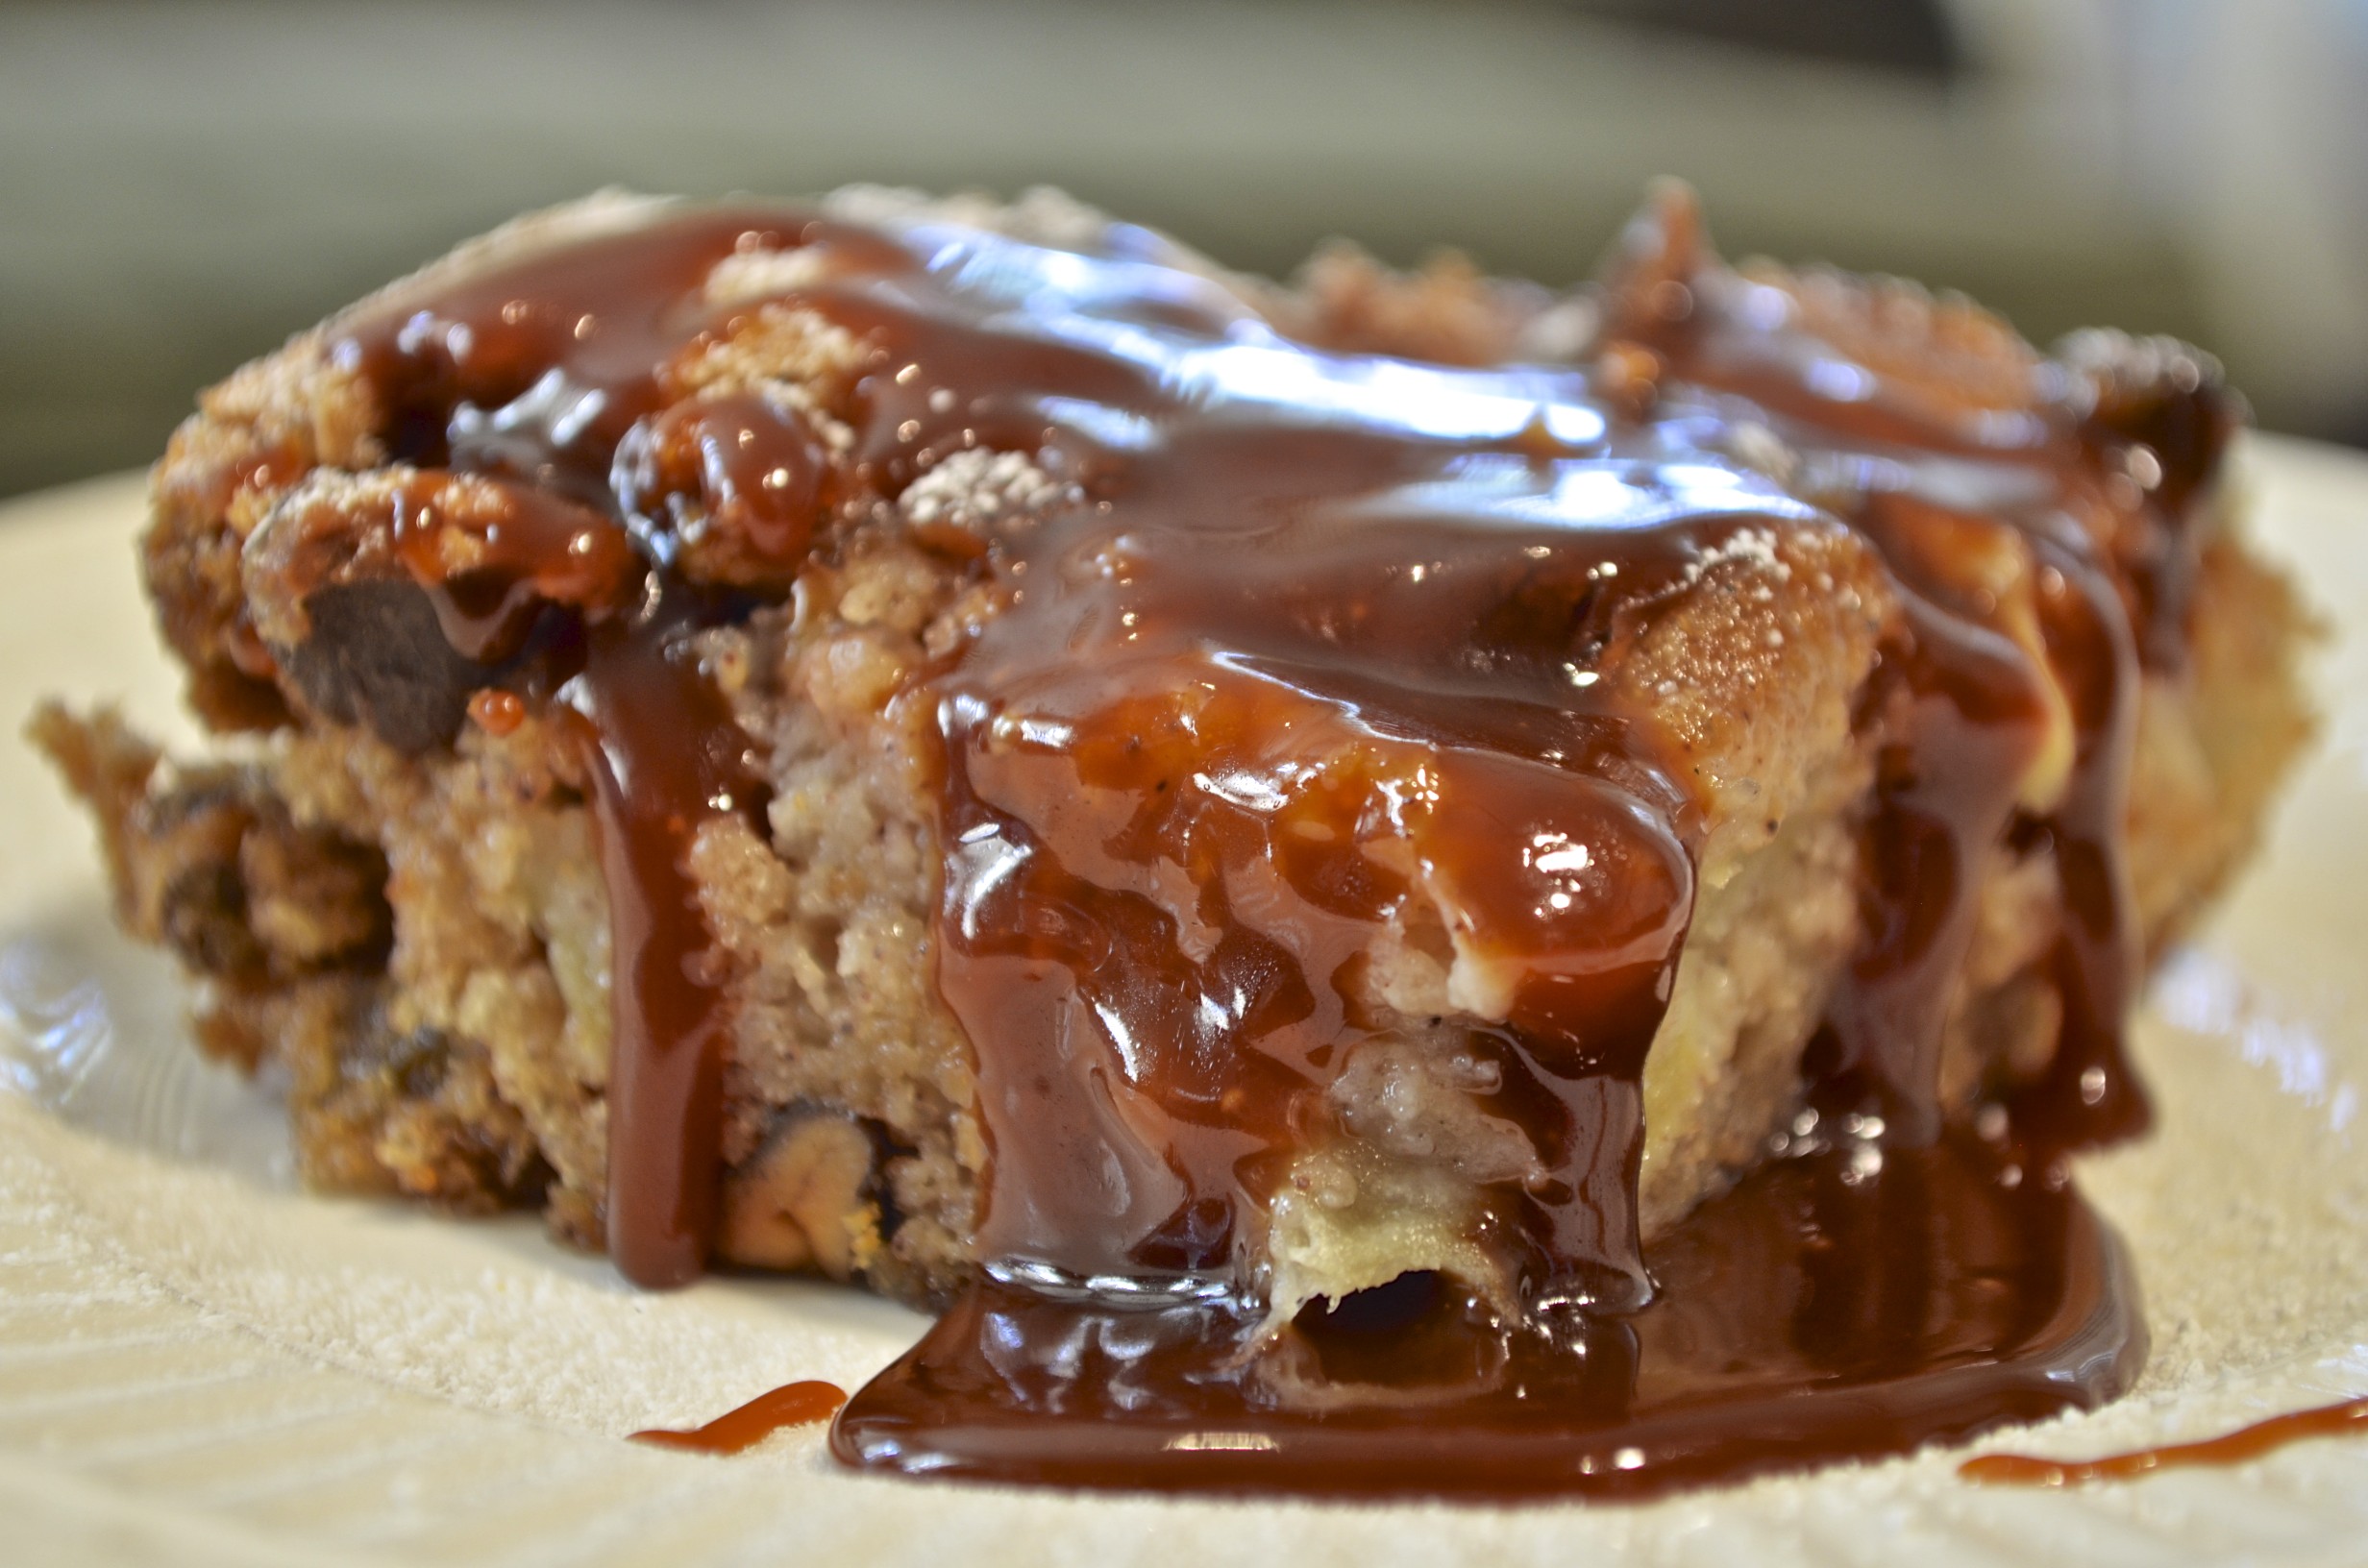
Gluten-Free Chocolate Torte

*     *     *

Mom’s Tuna Noodle Casserole

As most of you well know, we North Americans are facing a Winter unlike any seen in decades. With severe drought in the West and Arctic cold, record snows, and ice storms to the East, you’re either praying for rain or cursing the cold. Whether this Winter is truly one for the record books remains to be seen but it sure is a great excuse for making comfort food.

*     *     *

Tuna Casserole 2*     *     *

These past few weeks, I’ve said good-bye to any thoughts of post-holiday dieting and broke out the Dutch oven and stock pot. I’ve made soups, tomato sauce, chili, stew, braised short ribs, baked pastas, and pulled pork. Not only that, I’ve baked more bread these past few weeks than I have in ages. In short, I’ve done all that I can to warm both me and my kitchen which, for reasons known only to my home’s previous owner, has no heating element other than the oven. Heaven bless that oven.

Since you really cannot make beef stew for one, soup by the bowl, or pulled pork for a single sandwich, you can well imagine that my fridge and freezer have been well-stocked with leftovers, not that there’s anything wrong with that. Even so, after my third dinner of beef stew or fourth lunch of a bowl of chili, and with temps still in negative territory, I began to crave something different and searched for some long-forgotten comfort food recipes. Enter tuna noodle casserole.

Before going any further, I need to mention this recipe’s origins. After all, I did call today’s post “Mom’s Tuna Noodle Casserole”. Although there is no direct link to Mom, I think there’s plenty of evidence to support my claim.

First off, I found it in the oldest recipe file that I own, one that I created on my first PC back in the 90’s. That file has survived a short-circuited motherboard, head crash, my conversion to Apple, and a transfer to my second iMac. Though forgotten until now, it contains a few gems from Mom but, I admit, this bit of evidence is highly circumstantial.

Perhaps the most convincing evidence can be found within the recipe itself. Although all the ingredients are listed, the amounts required for some of them are missing. This is a hallmark of the Bartolini family recipes and a major reason for this blog being created. I could only be more certain of this recipe’s provenance if an amount or two was listed as “a handful of” this or “a good pinch of” that. Members of the jury, there is no doubt in my mind that this is Mom’s recipe. I rest my case.

Now, a word of warning. This is an old recipe and some may not appreciate it. First of all, it contains mayonnaise and there are those who cannot abide the stuff. I don’t like cilantro, so, I’d say we’re even. It, also, contains a can of condensed soup, the bane of many a modern-day foodie. Well, I’m guessing this recipe comes from the 60’s and we didn’t have foodies back then. We had gourmands — and the Galloping Gourmet but never mind him. Lastly, the final two ingredients, though optional, are listed as frozen. In this part of the continent, when it’s casserole season, there are few, if any, fresh peas to be found, and, for those of us living in the Corn Belt, buying what passes for corn in the off-season is sacrilege. If, however, you’ve access to tasty, fresh peas and sweet corn in Winter, by all means use them instead of frozen.

*     *     *

Tuna Casserole 1*     *     *

Mom’s Tuna Noodle Casserole Recipe

Ingredients

  • cooked noodles, buttered
  • olive oil
  • 1 large can ( 12 oz, 340 g) water-packed tuna fish, drained & flaked
  • 1 small onion, chopped
  • fresh mushrooms, sliced
  • 1 can (10¾ oz, 305 g) cream of mushroom soup (I use cream of celery)
  • 1 package ( 8 oz, 226 g) cream cheese
  • 1/3 c mayonnaise
  • 1/3 c milk
  • cheddar cheese, grated
  • 1 c bread crumbs
  • 4 tbsp butter
  • frozen corn (optional)
  • frozen peas (optional)

Directions

  1. Pre-heat oven to 375˚ F (190˚ C).
  2. In a large mixing bowl, combine cooked noodles, tuna, cheddar cheese, corn, and peas.
  3. Sauté onions and mushrooms in a little olive oil until onions are translucent. Add to the mixing bowl and stir to combine.
  4. In a medium saucepan over medium heat, combine the milk, soup, and cream cheese, stirring until hot and well-mixed. Add to the mixing bowl and stir to combine again.
  5. Meanwhile, melt the butter in a sauté pan over medium heat. Add the bread crumbs and toast until golden brown. Immediately remove from heat.
  6. Pour the tuna mixture into the baking dish, top with the toasted bread crumbs, and cover with aluminum foil.
  7. Bake, covered, for 45 minutes before removing the foil. Bake another 10 to 15 minutes to further crisp the topping.
  8. Allow to sit at least 5 minutes before serving.

*     *     *

Tuna Casserole*     *     *

Notes

The amounts for some of the ingredients will depend upon the volume of noodles you’ve prepared. I’ve found that if I use a full pound (450 g) of noodles, for example, a single large can of tuna fish may not be enough. You’ll find that the “cream sauce” is rather thick and can overpower the rest of the ingredients. More tuna is needed to compensate.

Be sure to brown the bread crumbs before sprinkling them atop the casserole. If you rely on the oven to fully brown them, you’ll run the risk of drying out the casserole.

Any broad noodle may be used here, though shorter ones work best. I happened to have a bag of farfalle, butterflies, and used it.

I think you could easily substitute chopped, roasted chicken in place of the tuna.

*     *     *

It’s déjà vu all over again …

Steak PizzaiolaOne common theme running throughout this blog is my love of pasta. I’ve certainly made no effort to hide it. With temperatures so terribly frigid, today’s Blast from the Past is particularly welcome in my kitchen, for it involves both a lengthy braise in the oven and a large pot of boiling pasta water on the stove top. Combined, they are just what’s needed to warm my kitchen and keep it that way well into the evening. Best of all, I end up with a great pasta for dinner. You can learn how to prepare Steak Pizzaiola by clicking HERE.

*     *     *

Coming soon to a monitor near you …

Beef Cheeks Preview Beef Cheeks

*     *     *

Stewed Quail

Quaglia in Umido

Quail with PappardelleThis is a dish that Zia and I prepared during my last visit home but it requires a bit of an explanation. I originally had intended to share my family’s recipe for preparing pigeon back in the day. The only problem was that I couldn’t source them, except for one place not far from here. Unfortunately, I was there once when an order for pigeons was placed and witnessed their “preparation”. Their handling was beyond rough and I could never purchase a pigeon there. Now, I’m fully aware of how meat comes to be displayed in our markets and, over the years, have watched more than my fair share of poultry “prepared” for our dinners. Hard as it may be for some to believe, there are comparatively humane ways to do this and when I see evidence to the contrary, I find another place to shop and something else to eat.  So, with quail more readily available, we substituted it for the pigeon in today’s recipe. Besides, you’ll probably find the tale I’m about to tell much more enjoyable if you know that we won’t be cooking pigeon later.

*     *     *

Although pigeon was prepared for dinner at the old two-flat, it certainly wasn’t served frequently or with any regularity.  It was simply a matter of supply, for it wasn’t every day that you could find enough pigeons to prepare and serve. The family did have its sources, though. One, a workmate of Uncle, bred pigeons and often gave us young birds that didn’t meet his standards. Of course, there was the farmers market and I often watched as Grandpa haggled with the vendor over an amount as little as a quarter. In reality, this was all a game and I had a front row seat. It’s not like there were dozens of vendors selling young pigeons, nor were there throngs of people queuing at their stalls demanding the birds. Grandpa and the vendor haggled a bit but both knew all along that the deal had been struck the moment Grandpa walked up to the vendor’s stall. For me, it was part of the fun of going with Grandpa to the market. The third source for pigeon was from Grandpa’s farmer friend. You may recall that this was the farm where our dogs went, never to be seen again. As luck would have it, they were always out in the fields playing when we visited the farm.

I must have been about 7 years old when Grandpa brought home a single, very young pigeon. Today, the source of this bird is a point of debate. There are those who think it came from Uncle’s friend while others believe it came from the farmer. No matter whence it came, this bird, being a loner, wasn’t destined for the table. “Duke” would become one of the most memorable pets that ever shared the two-flat with us.

Though it may sound odd to have a pigeon as a pet, Duke was only one of many animals that found their way to our home. There were dogs, fish, rabbits, turtles, chameleons, frogs, birds, Chinese pheasants, and even a snake, though the snake’s stay was quite brief before being set free in the yard. Our neighbor, Mrs. A, wasn’t happy about that and, for years, whenever she spotted a snake in her garden, it was ours that she saw. It was just our luck to have found and let loose the Methuselah of snakes. Poor, long-suffering Mrs. A. She was a wonderful woman who treated us kids very kindly. This despite our snake taking up residence in her garden, and, Duke roosting outside her bedroom window every night. That window ledge would never be the same.

Now, Duke was no ordinary pigeon nor pet, for that matter. First of all, Duke was actually a Duchess — having laid an egg under Zia’s sofa. It didn’t seem to mind having a masculine name so Duke she remained. She was ever-present. If you were in the backyard, Duke was sure to appear, swooping down from above. If you were eating a snack somewhere outside, Duke would find you quicker than the dog and wait for a piece of whatever it was you were eating. Even so, she was most closely attached to Grandpa and Nonna.

*     *     *

Parish School*     *     *

Pictured above is St. Juliana’s parish school and, for a time, church. In between the two entrances on the right is a row of 9 rather tall windows, indicating where the parish church was once located. (It was replaced in the early 1960’s.) Missing from this more recent photo are the large sconces, one of which was placed on either side of each entrance.

As you can see, the building was rather small and, with 16 classrooms, so was the church. Although there were several services on Sunday mornings, the 9:00 mass was meant for us kids and the service and sermon were more child-friendly. The 10:15 service was the one that Nonna, Grandpa, and Duke attended. Every Sunday morning at 10:00, Nonna and Grandpa would walk down the street to the church, with Duke circling overhead. When it was warm, Duke would wait for them from her perch atop the building. On cold or wet days, she’d take refuge in one of the sconces, its damaged pane allowing the bird access. Once mass was finished, Duke waited for Nonna and Grandpa to reappear and, again, circled overhead as they walked home. We often hear tales of dogs following children to school or church but a pigeon?

My most vivid memory of Duke, though, involves Grandpa and her. (Big surprise, eh?) As I’ve mentioned, Grandpa was an active retiree and was often behind the wheel on his way to visit friends or run errands. Duke would join him, at least for a couple of blocks, and ride on the car’s hood — “bonnet” for some of you — like an ornament. Of course, Grandpa drove very slowly, allowing Duke to play hood ornament for as long as possible. It was truly something to see, with children and adults alike pausing to watch them pass. More often than not, the children laughed and pointed while the adults smiled and shook their heads. When Grandpa approached a busy street, he’d rev the engine a bit, signaling to Duke that it was time for her to return home, and off she went.

Unfortunately, Duke was taken out late one evening and, in the dark, never made it back home. Although we often asked for another pigeon to raise, none was ever available. In retrospect, I think Grandpa knew that Duke was one of a kind and that no other bird could ever replace her. And today, mention Duke to any of the two-flat’s residents and you’re sure to get a smile in reply.

*     *     *

Today’s recipe can be used for either quail or pigeon and the main caution when preparing the birds is the same for both: do not over-brown. Quail are relatively small and if they are browned as one would beef, for example, they will be dry by the time they’re fully cooked. The same is true for pigeon, though they are larger and can be browned for a little while longer. In either case, you just want a little bit of color on the birds’ bodies.

*     *     *

Quail Simmering*     *     *

Stewed Quail Recipe

Ingredients

  • cooked pasta
  • 4 whole quail, dressed
  • 3 tbsp olive oil
  • 1 small – medium onion, chopped
  • 3 tbsp parsley, chopped
  • 3 cloves garlic, diced
  • 1 large can (28 oz, 794 g) tomatoes
  • 1/2 tsp marjoram
  • 4 oz white wine
  • salt & pepper
  • Pecorino Romano cheese, grated

*     *     *

*     *     *

Directions

  1. Heat oil in a large, heavy-bottomed pot over med-high heat.
  2. Add onions and sauté for about 5 minutes before adding garlic and parsley. Continue to sauté until fragrant, about a minute.
  3. Add quail to the pot and LIGHTLY brown on all sides.
  4. Remove quail and add remaining ingredients to the pot. Mix well and bring to the boil.
  5. Return quail to the pot and return to the boil before reducing the heat to a soft simmer. Cook until done, about 30 to 45 minutes. (See Notes)
  6. Remove quail to a serving dish.
  7. Use sauce to dress the pasta, reserving some for use at the table.
  8. Garnish the pasta with grated cheese and place both pasta and quail on a large serving platter.
  9. Serve immediately.

*     *     *

Quail 2*     *     *

Notes

It cannot be overstated: do not over-brown the birds.

Cooking times will vary depending upon whether you use quail or pigeon. Being larger, pigeon will take longer to stew. Use a fork to test each bird to see whether it is fully cooked. The meat should not be “falling off the bone”.

*     *     *

It’s déjà vu all over again …Passatini in Brodo

This time of year, there’s nothing quite like a steaming bowl of soup to warm you up. Easy to make and with ingredients every pantry is sure to have, passatini is a delicious soup and comforting meal, whether it’s served for lunch or dinner. You can see Mom’s recipe for passatini by clicking HERE.

.*     *     *

Coming soon to a monitor near you …

Tuna CasseroleMom’s Tuna Noodle Casserole

*     *     *

Roasted Mackerel with Potatoes and Tomatoes

Scombro Arrostito con Patate e Pomodori

Mackerel ServedI’m back and the Kitchens are open! Thank you all for the birthday and well-wishes. I had a wonderful birthday and, though there’s more to come, I’ll leave that reveal for a later date. As for my much neglected projects, though not all are done, I’ve made good progress and am very pleased.

Some of you may be interested to learn that I’ve added a “Translation” page to the blog. You can find it listed above, between the “Home” and “Welcome” pages, or, if you’re on my blog’s homepage, there’s a translate button on the right. Click on either link and you’ll go to a page that will offer you a translation of my blog in your choice of 52 languages. Note that less than perfect results my be returned, especially when colloquialisms and slang are encountered, as is the case with most universal-type translators. Considering that I am barely fluent in English, I’ve no way of knowing whether an individual translator is working properly. Should you find that a particular language isn’t translated clearly, please let me know and, if need be, I’ll remove that translator from the list.

*     *     *

Today’s recipe is another that resulted from a walk around the Italian market. My walk started at the fish counter, as it always does, where the monger pointed out his “very fresh” mackerel. That’s code for “buy it” and I did without a second thought. While he cleaned my fish, I walked over to the produce area and bought some potatoes and tomatoes. A few minutes later, having grabbed some olive salad and herbs, my dinner for that night was all set. Unfortunately, I still had a full shopping list to buy but a fresh mackerel is one impulse buy that I don’t mind purchasing.

This dish couldn’t be easier to prepare. Stick some potatoes on a baking sheet, roast them for a spell, add some vegetables, put the fish on top, and bake until done. In the meantime, prepare a salad, slice some bread, and open a bottle of wine — if you haven’t already. Not many dinners are easier to prepare than this one.

*     *     *

Raw Mackerel*     *     *

Roasted Mackerel with Potatoes and Tomatoes Recipe

Ingredients

  • 1.5 lbs (680 g) mackerel, cleaned and scaled
  • 1.5 lbs (680 g) new potatoes, halved or quartered for uniform size
  • olive oil
  • 1 red onion, cut into eighths
  • 1 lb (455 g) cherry tomatoes
  • 6 oz (170 g) olive salad (misc olives, carrots, celery, peperoncini), roughly chopped
  • 1 sprig of fresh rosemary
  • 2 to 3 sprigs of fresh thyme
  • salt & pepper, to taste

*     *     *

M - Veggies 2*     *     *

Directions

  1. Pre-heat oven to 450˚ F (230˚ C).
  2. Place potatoes and onions in a large bowl, sprinkle with olive oil, and gently mix till evenly coated.
  3. Place on baking sheet, season with salt & pepper, and roast on center rack in pre-heated oven for 20 minutes.
  4. Meanwhile place tomatoes and olive salad into same bowl used for potatoes and onions. Drizzle with a little more olive oil and season with salt & pepper.
  5. Place rosemary and thyme into the fish’s cavity.
  6. After 20 minutes, reduce oven to 375˚ F (190˚ C). Remove potatoes from oven, stir, and add tomatoes & olive salad to the tray. Place mackerel on top of vegetables, drizzle with olive oil, season with salt & pepper, and place in oven.
  7. Roast until fish is cooked, 20 to 30 minutes depending upon the thickness of the fish. When done, fish flesh should flake and be opaque when cut.

*     *     *

Baked Mackerel *     *     *

Notes

I had originally intended to use lain olives in this recipe but that marinated olive salad looked too good to pass up. You may prefer to use just the olives or, for that matter, neither option.

I like my tomatoes to be a little firm when served. If you like them cooked more fully, add them to the roasting pan earlier.

I’ve prepared this dish using one, two, or three dressed mackerel. Although the preparation is the same, cooking times may vary and will usually be a few minutes less for the smaller fish.

*     *     *

It’s déjà vu all over again …

Nonna2

Mine wasn’t the only birthday celebrated at the end of last month. My Cousin shared her birthday, the 26th, with our dear Nonna. Although we all have wonderful memories of her, one of my most favorite involves her in the kitchen — imagine that! — preparing me something very special. The dish was tripe, trippa, and you can learn how to prepare and serve it, as well as a little bit about this dear woman, by clicking HERE.

*     *     *

Coming soon to a monitor near you …

Quail PreviewStewed Quail

Linguine with Seafood in Parchment

Linguine ai Frutti di Mare al Cartoccio

Linquine ai Frutti di Mare al Cartocci - 1

Yes, everyone, it’s Christmas Eve and, as many of you who’ve been with me for at least one Christmas already know, it’s a night of great anticipation and luscious seafood for many of us Italians. In fact, more than a few households will celebrate tonight with the Feast of the Seven Fishes. In the past, I shared a rather tongue-in-cheek story of the origins of this Feast but, instead of sending you there, I thought I’d reprint it for you here. What’s this? You already know the tale? Well, just skip the paragraph that follows and head straight to the video. That should keep you occupied until the others catch up. So, here is one version of how the Feast of the Seven Fishes came about …

Prior to the changes brought by Vatican Council II in the 1960′s, Christmas Eve was a “fast & abstain” day, meaning only 1 main meal could be consumed and no meat was to be eaten all day. For most Catholics around the World, it was a day of contemplation and that one meal was nothing special. With Christmas coming within hours, all eyes — and appetites — were focused on the big day — and dinner — soon to come. Not so the Italians.  If tomorrow’s a big holiday and today you can only have one meal, why not make that meal special? And so they did. Can’t have any meat? No problem. With Italy being both peninsula and island, fish was very often more readily available than many meat products. And so it became a seafood banquet. Wait a minute! The Church may frown upon so grand a celebration on the eve of the birth of the Christ Child. Again, no problem. They made a point of serving seven fish, each one representing one of the Seven Sacraments of the Christian Faith. In one masterstroke, their seafood feast became an Act of Faith. What priest, bishop, or even Pope would dare interfere with these devout Catholics as they used the day’s only meal to commemorate the Seven Sacraments? (The fact that the clergy themselves were probably dining on an even more spectacular seafood supper didn’t hurt “the cause” either.) And so the Feast of the Seven Fishes was born and survives to this day wherever Italians call home.

*     *     *

*     *     *

OK then. Is everybody here? Let’s continue …

I first saw this dish prepared almost 20 years ago. An Italian chef, Nick Stellino, hosted a cooking show on PBS. That one episode not only showed me how to cook seafood pasta, Pasta dei Frutti di Mare, but it introduced me to the wonders of using parchment paper to envelope a dish. Since then, although I’ve made this dish a few times, I’ve made seafood pasta often and baked fish and/or vegetables in parchment or foil even more frequently.

*     *     *

Now, this one dish will give you 5 of the 7 fish needed for your feast. Please resist the urge to go for broke and add 2 more fish to the pot. All that will do is muddle the flavors or, worse yet depending on the seafood chosen, completely overpower the others. If you’re looking for suggestions, how about oysters on a half-shell, a nice octopus salad, a small salad with seared tuna, or a bit of baccalà salad. (A serving of baccalà in some fashion being the overwhelming choice of many Italian families.) Still not happy? Then do what I once did. Late one Christmas Eve afternoon, I was among the horde in a grocery store when I realized I was 2 fish shy of the required 7 for my own little feast. Not willing to spend any more time in the store while I weighed options, I went to the sushi counter and picked up a spicy tuna roll, before heading to the deli section to get a jar of pickled herring.  Fish are fish, after all.

*     *     *

Speaking for my Zia and the rest of the Bartolini Clan,

We wish you a very Merry Christmas!

*     *     *

Frutti di Mare - Crudo

*     *     *

Linguine with Seafood in Parchment Recipe

yield: 3 servings (See Notes)

Ingredients

  • 1/2 lb (225 g) fresh linguine, spaghetti, or tagliatelle — dried pasta may be substituted
  • 4 tbsp olive oil, divided
  • 1 small onion, finely chopped
  • 1/4 tsp red pepper flakes
  • 4 garlic cloves, minced or grated, divided
  • 4 tbsp chopped parsley, divided
  • 2 tbsp basil, chopped
  • 1 small can (14.5 oz; 400 g) diced tomatoes
  • 1/2 c white wine, divided
  • 1/2 cup clam juice or shrimp stock (see Notes)
  • 1 tsp dried marjoram (2 tsp if fresh)
  • 6 mussels, (see Notes)
  • 6 cherry-stone or manila clams, (see Notes)
  • 6 scallops, cut in half (see Notes)
  • 9 shrimp (see Notes)
  • 3 calamari (see Notes)
  • salt and pepper, to taste
  • chopped parsley and basil for garnish

*     *     *

(Click any photo to enlarge)

*     *     *

Directions

  1. At least 30 minutes before you are to begin preparing the sauce, place the clams in a bowl filled with cold water. Change the water at least once and be sure to brush the clam shells before cooking them.
  2. Prepare a simple tomato sauce:
    1. Place 2 tbsp olive oil in a small sauce pan over med-heat. Once hot, add the onion, the red pepper flakes, season with salt & pepper, and sauté until translucent, about 5 minutes.
    2. Add 2 cloves of garlic and 2 tbsp of parsley, stir, and continue to sauté for another minute or so.
    3. Add 1/4 c wine, the tomatoes, 1 tbsp basil, season with marjoram, salt & pepper, and bring to a boil before lowering heat to a simmer.
    4. Allow to simmer until sauce has deepened in color and thickened, about 30 to 40 minutes. Taste for seasoning and adjust, if necessary.
    5. Put aside 1/2 cup for the recipe and reserve the rest for another day.
  3. Pre-heat oven to 375˚ F (190˚ C).
  4. In a large pot of salted boiling water, cook the pasta until 2 minutes before the package indicates it will be al dente. (See Notes)
  5. In a large, deep fry pan with a lid, add remaining olive oil over med-high heat. Add remaining oil, garlic, and parsley to the pan and sauté until fragrant, about a minute or so. Add the clams and mussels, cover the pan, and sauté for 2 minutes.
  6. Add the squid, shrimp, scallops, clam juice, tomato sauce, and the remaining basil and wine to the pan. Cover, increase the heat to high, and boil the ingredients for about 2 more minutes.
  7. Using a slotted spoon, remove the seafood from the pan, and place in a covered bowl. Reduce the sauce by half,
  8. By now, the pasta should be drained. Add it to the boiling sauce, stir to evenly coat, and sauté for a minute.
  9. Add the reserved seafood to the pan, mix, and heat till warmed throughout. At this point, discard any shellfish that have yet to open.
  10. Meanwhile, take a large piece of parchment paper — or aluminum foil — fold in half and place on a large serving platter.
  11. When the seafood and pasta are ready, place them along the fold of the parchment paper. Garnish with parsley and basil. Working quickly, use interlocking folds to join the top and bottom halves of the parchment paper. (See Notes)
  12. Alternately:
    1. Use separate sheets of folded parchment paper, one per serving.
    2. Split the pasta and seafood evenly among the sheets. Garnish with parsley and basil. Fold each, as indicated in Step 11 above.
  13. Place the parchment packet(s) on a baking sheet and place in the middle of a pre-heated oven.
  14. Bake for 5 minutes and remove to a large serving platter or individual plates. Do not pierce the parchment until at the table.
  15. Serve immediately and watch as your dinner guests open their parchment presents and get a whiff of that steam. This is why you go through the trouble of putting seafood pasta in parchment.
  16. Do not serve with grated cheese for it will overpower rather than enhance most of the dish’s seafood components.

Inspired by Nick Stellino, “Cucina Amore”, Pasta al Cartoccio di Mare

*     *     *

Linquine ai Frutti di Mare al Cartocci - 2

*     *     *

Notes

To store the fresh seafood

If you are to prepare this on Christmas Eve, the last place you want to be that afternoon is standing in line at the fishmonger. Fresh seafood will easily keep in your fridge for 24 hours if treated properly. I would not recommend storing beyond 24 hours.

  • Remove the clams and mussels from their packaging and place in a colander. Cover with damp — not sopping wet — paper towels. Place the colander in a bowl in which some ice as been set. Do not use so much ice that it will immerse any of the colander’s contents when it melts or the mollusks may drown. Place the bowl with colander into your refrigerator until needed.
  • Leave the shrimp, squid, and mussels in their packaging and store in the coldest part of your refrigerator. Do not freeze.

To prepare the seafood:

  • The Clams: At least 30 minutes before they are to be used in the recipe, place in a bowl of cold water and soak. (Some believe adding a couple tbsp of corn meal to the water will cause the clams to eliminate any sediment.) Change the water at least once before the clams are needed. Just before use, scrub clean the shells with a small brush. Discard any that are open and that won’t close on their own power.
  • The Mussels: Before use, remove the beard (a thread mass on one side) and use a brush to clean the shells. Discard any that are open and that won’t close on their own power.
  • The Shrimp: remove the shell including the tail section, if desired. Save the shells to be used to make shrimp stock. Use a sharp paring knife to slit the top of each shrimp. This will reveal a dark-colored vein that should be removed.
  • The Scallops: these may be sold with a muscle attached to one side. It is about an inch long and /14 inch wide. This should be removed as it is tough and unpalatable.
  • The Squid: Use a sharp knife to cut each tube, creating rings that are a half-inch wide. If using the tentacles, cut them in half or quarters.

*     *     *

Homemade Linguine Cut Two Ways

*     *     *

You may find it easier to enclose your seafood in aluminum foil rather than parchment paper. The choice is yours to make.

Do not forget — as I did — to add a garnish of parsley and basil to each packet just before you seal them. Their presence adds to the aroma upon tearing the parchment.

Timing is everything with this dish. The seafood cannot be kept waiting for the pasta to be cooked lest it become tough and rubbery. If you feel that you cannot properly time the dishes together, go ahead and cook the pasta so that it finishes within a few minutes of starting the sauce. Pasta should be cooked about 2 minutes shy of al dente, as indicated on the package’s instructions. Drain the pasta, return it to the now-empty pot, coat very lightly with olive oil, and cover until needed.

You needn’t be an origami expert to fold and seal the parchment packets. That’s why the gods gave us staplers and don’t be afraid to use one.

As written, this recipe will give you 3 nice servings. If you wish, it will yield 4 primo piatto-sized servings, though you may want to adjust the amounts of seafood used.

The keen-eyed among you may have noticed that there seemed to be more seafood in the photos than was required by the recipe. You’d be correct. I usually buy a couple extra clams and mussels to account for any that may be spoiled and must be discarded. Not knowing that I had already done so, the fishmonger added a couple more, for the same reason. When I joked that the scallops looked “bad”, he agreed and added another 2 scallops to their previously weighed container. He then added 2 shrimp and another squid to their respective containers. This is how you earn life-long customers.

If you like, you can skip the parchment packets altogether and use this recipe to prepare a very good frutti di mare pasta. To do so, follow the recipe but cook the pasta for another minute before draining. Place the drained pasta into the sauce, as before, but cook it for only a minute before adding the seafood. Stir to combine, heat everything through, and serve immediately. Garnish with chopped parsley and basil.

This dish does not make good leftovers. None of the seafood will re-heat well at all. Try to prepare just enough to ensure your dinner guests are satisfied without having anything left on the serving platter.

As you may have noticed, I used a pastry brush to lightly coat the sealed parchment before placing it in the oven. There was no discernible effect to the parchment paper by doing this. Perhaps it’s because the oven temp was relatively low and the packet was in the oven so briefly. Whatever the reason, I won’t do it again for this recipe and excluded it from the recipe’s directions.

*     *     *

It’s déjà vu all over again …

Zuppa Inglese - 1No series looking back at my family’s traditional Christmas dishes would be complete without including our recipe for Zuppa Inglesi. This highly anticipated dessert consisted of lady fingers that were “lightly flavored” with alcohol before being covered in lemon-flavored custard. There’s even an alcohol-free version so that no one seated at the table need go without. You can take a look at the recipe for this family favorite just by clicking HERE.

*     *     *

Coming New Year’s Eve to a monitor near you …

Two Cellos and a Cherry

Booze

*     *     *

Turkey Risotto

Risotto con Tacchino

This is not a true holiday dish but it does grace my dinner table at least once over the holidays. Guaranteed. You see, I have a “thing” for turkey sandwiches and you might be surprised at the lengths I’ll go to make sure that I have turkey sandwiches every Thanksgiving.

*     *     *Turkey Risotto

*     *     *

As an adult, the highlight of my Thanksgiving Day Feast has always been the midnight turkey sandwich. Built with slices of turkey (white & dark meat, of course), a healthy portion of stuffing, and cemented together with cranberry sauce, this is the “sammich” of which my dreams are made. No matter what I’m eating throughout that day, I never lose sight of that night’s prize.

Now, when I host the dinner, having enough turkey to make a sammich is no problem. In fact, I buy a bird twice as large as needed so that every guest goes home with a platter of leftovers. Each then can either relive the dinner — sans my buoyant personality, of course — or make at least 2 healthy sammiches. And I will have at least enough turkey for a few sammiches, as well as a good-sized portion destined for the freezer for sammiches to be built at a later date. That’s if I host the dinner. Things can go quite differently, however, if I’m enjoying Thanksgiving dinner away from home.

Over the years, I’ve been invited to some lovely Thanksgiving feasts where the company was warm, the dinner fantastic, and the wine flowed freely.  I could say the very same thing about those occasions where friends and I gathered at a restaurant for dinner. Both situations allow me to relax and enjoy my friends and the meal without the stress of having to juggle 6 side dishes on a 5 burner stove top; remember that there are bruschette under the broiler; and keep an eye on Max who’s been keeping his eyes on the tented bird on the counter. Both options  sound wonderful except for one little detail. There are no leftovers and without them there can be no sammich. Oh, the pain!

After going sammich-less for a couple of years, I’d had enough. (Well, actually, I’d had nothing.) I decided to roast my own turkey, no matter what, sometime during Thanksgiving week. Granted, when the bird is meant for me alone, I look for the smallest, fresh turkey available, usually 9 to 10 lbs. That’s less than half the size of the behemoth that I prepare when I’m hosting. Even so, I get all the sammiches I want, half of the bird gets wrapped and frozen for another time, and I still have the carcass to play with.

Ah, the carcass! When I remove the meat from its bones, I make sure to leave some behind. Then, when it’s time to prepare the stock, I find and retrieve those bits. As you’ll soon see, they, along with the stock, will be used in my risotto. It really is a nice arrangement. I have a turkey dinner — maybe two! — I enjoy plenty of sammiches, and I have turkey stock to make my “holiday” risotto.

When you read today’s recipe, it may be that I prepare risotto differently than you do — and that’s ok. If you’ve a proven method for making risotto, don’t change for this recipe. The important thing about this risotto is not how it’s made but what is used to make it. In this recipe, turkey stock is used in place of chicken, and, chopped turkey is used instead of any other type of protein or even mushrooms. I don’t want anything to mask the flavors of roast turkey and, if the bird was stuffed, the hint of stuffing.

*     *     *

Risotto Cooking

*     *     *

Turkey Risotto Recipe

Ingredients

  • 6 cups turkey stock, recipe to follow
  • 2 tbsp butter
  • 1 small onion, finely chopped
  • 7 oz (200 g) roast turkey, chopped
  • 1 3/4 c Arborio rice
  • 4 oz (60 ml) dry white wine
  • Pecorino Romano cheese, grated

Directions

  1. Keep the turkey stock hot, though not boiling. (See Notes)
  2. Add butter to a large pan over med-high heat. Add onion and sauté until translucent.
  3. Add turkey to the pan and continue to sauté until heated through.
  4. Lower the heat to medium, add the rice to the pan, and toast the grains, about 5 minutes.
  5. Add the wine and stir. Continue to cook until the wine is all but evaporated.
  6. Ladle by ladle, add the turkey stock, stirring with each addition and allowing the stock to be fully absorbed before adding another ladle of stock.
  7. Taste the rice for doneness after about 20 minutes. It should be nearing completion.
  8. When the rice is al dente and just shy of being done, add another ladle of stock, cover, and turn off the heat.
  9. Allow to rest for 5 minutes before adding 2 handfuls of Pecorino Romano cheese.
  10. If rice is too dry, add a bit more stock before serving. (See Notes)
  11. Garnish with more Pecorino Romano cheese and serve.

*     *     *

To make the turkey stock

In a large stock pot over med-high heat, add the roast turkey carcass, a large onion (quartered), 2 celery stalks with leaves (roughly chopped), 2 carrots (roughly chopped), a few parsley sprigs, and enough water to cover – about 5 or 6 quarts. Bring to a boil before reducing the heat to maintain a soft simmer. I let the stock simmer for at least 3 hours, adding water if too much evaporates. The object is to have at least 2 quarts (2 L) of stock when all is said and done. When finished, strain stock through a fine strainer. Refrigerate stock overnight and then remove any fat that may have risen to the surface. Stock is now ready to use in your favorite recipe or to drink, warm, by the cupful.

*     *     *

Turkey Risotto 2

*     *     *

Notes

When making risotto, I use a ratio of 3:1. That’s 3 parts stock to every 1 part of rice. I usually have an extra cup of stock ready but, if I run out, I’ll add some hot water. Bear in mind, that I’m only using a little water, certainly not even a cupful.

You may think it odd that I used 1 3/4 cups of rice but that’s because it was the end of the package’s contents. I didn’t see the point of reserving a quarter cup of rice. So, use as much rice as you like but keep the above ratio in mind.

Do keep the stock hot, but not boiling, when adding it to the pan of cooking rice. Boiling stock will hit the hot pan and evaporate before it can be absorbed by the rice. On the other hand, if it is too cool, it will delay the cooking process.

We prefer our risotto to be on the moist side. You’ll find that the rice will continue to absorb the stock even as it sits in the serving platter.

It’s déjà vu all over again …

Just as surely as you’d find a platter of ravioli on our Christmas dinner table, you could count on there being a platter of biscotti on that very same table, served after dessert while Biscotti with Pecansthe castagne, chestnuts, were being roasted. Both recipes that I shared came to my family about 50 years ago. Mom’s Biscotti with Pecans, was a family recipe of a friend who was 90 years young at the time. We know that recipe is at least 100 years old. Zia found her recipe for Anisette Biscotti in a local newspaper. Both are simple recipes and are as traditional to our holidays as is that Christmas tree in the corner waiting for the Feast of the Epiphany (Little Christmas). You can find both recipes by clicking HERE.

*     *     *

Coming Christmas Eve to a monitor near you …

Linquine ai Frutti di Mare al Cartocci - Preview

Linguine with Seafood in Parchment

*     *     *

See Quince? Make Jam First Then Jelly

OK. I’ll admit it. I didn’t know a thing about quince. I certainly didn’t hear about them while growing up, let alone see any of them. When I finally did see one, not all that long ago, I thought it to be a very odd-looking apple — and expensive, at that.

Things began to change, however, once I started blogging. Every Fall, quince jelly recipes began to circulate. Then, last August, my friend Celia posted her recipe for making quince jelly on her wonderful blog Fig Jam And Lime Cordial. (If you’re not familiar with her posts, this is your chance. Celia’s blog is one that has a little something for everyone and all of it good.) At the time, I told her that I wanted to make some and would let her know when I did. So, “Hey, Celia! I made quince jam & jelly!”

*     *     *

Quince 1

*     *     *

Once I purchased the quince, I searched for a recipe. Since quince has a high level of pectin within it, I decided to go without adding any more. This, unfortunately, ruled out Celia’s recipe. (Sorry, Celia.) I soon learned that the web is full of quince recipes, all pretty much the same. Quince, sugar, lemon juice, and water combine to eventually produce jelly. Well, I like jelly but I prefer jam. Looking a little further, I came upon a recipe that suited my needs. I settled on a Greek recipe for quince jam called Marmalatha Kythoni. Unlike all others, this one had 2 things going for it.

In the first place, the recipe gave a ratio of quince to sugar (2:1). This is so much more convenient than stating that 1 quart of quince is required. Just how many quince does it take to make a quart? With this ratio, you just buy the quince, peel, core, chop, and then weigh them. Whatever the weight, you’ll need half that amount in sugar. (You’ll note that in the recipe, I stated the quince amount in ounces (grams) to make the math easier.)

Secondly, water used to boil the quince in this recipe may be used to make quince jelly. Granted, you won’t be making a lot but you will get a little over a cup for your efforts. The same ratio (2:1) applies when making jelly, too. The difference being in this case, you use measures and not weight. So, I had 4 cups of quince liquid and used 2 cups of sugar to make a pint of jelly. It could not be easier.

The amount of lemon juice to be used is up to you. I like things a little tart, so, I added both lemon juice and zest when making the jam. For the jelly, I used lemon juice only. It’s my “control” and I’ll taste the jelly to determine whether I overdid the lemon when making the jam.

*     *     *

Quince Jam 3

*     *     *

Quince Jam Recipe

Ingredients

  • 52 oz (1474 g) quince, peeled, cored, and chopped (see Notes)
  • 26 oz (737 g) sugar
  • 1.25 cups (300 ml) water, divided
  • zest of 1 lemon
  • juice of 1/2 lemon

*     *     *

Quince Jam 2

*     *     *

Directions

  1. Place chopped quince in a large pot with a lid and add enough water to cover (see Notes). Place the lid on the pot and bring to a hard boil over high heat. Reduce to medium heat and continue to simmer for 30 minutes. Keep covered, shut off the heat, and let sit for another 30 minutes.
  2. Strain, reserving the liquid for the Quince Jelly Recipe, and place the chunks in a food processor, along with 1/4 cup (60 ml) of water.  Process until the quince is the consistency you prefer.
  3. Place the now-processed quince in a thick bottomed sauce pan along with the sugar, lemon juice, and lemon zest. Bring to a boil over med-high heat before reducing to medium and simmer, stirring almost constantly to prevent scorching.
  4. Continue to simmer and stir until the jam is the consistency you prefer, from 30 to 60 minutes, maybe longer.
  5. Place jam in still hot, sterilized jars, place lids and seal — though not quite as tight as you can.
  6. Place jars on a rack in a boiling water bath deep enough so that there’s at least 1 inch of water over the top of the tallest jar. When the boil returns, process for 10 minutes.
  7. Remove jars from the pot and place on a baking sheet or counter, out of drafts. Be sure to cover the surface with a cloth to prevent the hot jars from shattering when they touch a cold surface. Do not move for at least 12 hours, though 24 is best, to give the jars a chance to seal and the jam to fully set.
  8. Preserved quince jam will keep for one year, though some degradation of taste and color may begin to occur after 6 months.  Best to enjoy your jam before that. (Source: Pick Your Own)

*     *     *

Quince Jelly 3

*     *     *

Quince Jelly Recipe

Ingredients

  • 4 cups (1000 ml) quince water reserved when making quince jam, recipe above.
  • 2 cups sugar
  • 1 tbsp lemon juice

*     *     *

Quince Jelly 1

*     *     *

Directions

  1. Place the reserved liquid, sugar, and lemon juice in a medium saucepan over high heat.
  2. Stir constantly until the liquid reduces by about 2/3, developing a syrupy consistency. (it took mine about 40 minutes.)
  3. Use a large spoon to quickly remove any foam before filling the still-hot, sterile jars to 1/4 inch from the top. Follow canning instructions listed in the Quince Jam Recipe above, processing this jelly for 5 minutes in the hot water bath.
  4. Store jelly on a cool, dark shelf.

*     *     *

Quince & Queso Manchego

Crostini with Quince Jam & Queso Manchego

*     *     *

Notes

It took 8 quince that, after peeling, coring, and chopping, rendered the 26 oz used in the Jam recipe.

It is best to use ripe quince for this recipe. To check for ripeness, sniff either end of the fruit. Ripe quince will have a floral scent.

When cut, quince will brown. To prevent this, place the pieces in a large bowl of water. When ready to start cooking the quince, I used this water to cover the pieces in the pot, as indicated in step 1 of the Jam recipe.

If you plan to make jelly using the cooking liquid, you will need to strain it through a few layers of cheesecloth or, if none is available, muslin or coffee filters will work, too.

As you can see in the pictures, my jam is lighter than most. Granted, it darkened a bit as it cooked but never reached the deep color that I associate with quince jam. I was a bit concerned until I compared mine to the photos accompanying the original recipe. In that light, mine is quite similar to the original. Whew! My guess is that this jam recipe doesn’t cook the quince as long as the others, and that deep pink color needs a long cooking time to develop. As it was, my jam was thick enough that I had no choice but to pull it off the heat.

*     *     *

It’s déjà vu all over again …

Baccalà

With Christmas approaching fast, for the next few weeks I’ll devote this section to some of our favorite holiday recipes. To kick things off, I thought we’d take a look back to our traditional Christmas Eve dish, Baccalà alla Marchigianna. In this preparation baccalà, once rinsed and rehydrated, is cooked in a tomato sauce with potatoes. Serve it with a chunk of bread and you’ll forget all about Santa’s coming in a few hours — well, at least until you’ve cleaned your plate. You can learn how to make this flavorful dish just by clicking  HERE

*     *     *

Coming soon to a monitor near you …

Uova da Raviolo - Preview

Uova da Raviolo

*     *     *

What I Did During My Fall Vacation

On the Road

I’m back from what was, for the most part, another wonderful visit with my Zia. We cooked, we talked, we talked about cooking, and, as one might expect, I’ve a few recipes to share in the weeks to come.

First, having located the surprisingly illusive 1 lb. octopus, I revisited the recipe posted a couple of weeks ago and prepared “Polipo in Umido“, Stewed Octopus. Although I won’t create a new post for the recipe, I’ve added the recipe to the end of this post and have added a link to the original post. I will not include the recipe for the bread I baked that afternoon simply because I evidently failed to bookmark the webpage’s address.

RIccetteOn another night, I reached into the box of Bartolini pastas that our ever-so-thoughtful friend, Lidia, had sent us, and prepared a Pasta alla Verdure, Pasta with Vegetables. It’s a delicious vegetarian dish — if you’re willing to overlook the guanciale that was rendered in the first step.

Since I’ll be unable to visit Zia for her birthday at the end of this month, I prepared a birthday dinner for the two of us. Our primo piatto was L’Uova da Ravioli, Egg-Filled Ravioli.  Our secondo was Osso Bucco, Braised Veal Shanks, while our dessert was a Pear Tarte Tartain. I do not plan on sharing the tart recipe for it wasn’t my finest hour. Knowing that a number of you had recently posted recipes, I attempted to find one of them but the 10 minute/post load time wore me out, so I sought help from the Almighty, the one and only Martha Stewart. Her recipe produced a tasty dessert but my “flip” was a matter of great disappointment and resulted in a presentation that was anything but “a good thing.” So, we took off our eyeglasses and enjoyed it immensely.

*     *     *

*     *     *

One thing you may not know about my Zia is that she enjoys a bit of jam every now and Strawberry-Cranberry Jamagain. Well, recently, our good friend BAM, of Bam’s Kitchen fame, shared her recipe for Bammer’s Jammers. Made with cranberries, strawberries, and ginger, this quick jam is delicious. The mix of tart and sweet is a winning combination, if ever there was one, and Zia loved it. Be sure to check out her recipe and, while you’re there, have a look around BAM’s blog. Guaranteed, it will be time well-spent. And a big “Thank You!” to BAM for the recipe.

*     *     *

Unfortunately, all was not good food and talk during my visit. While I was with Zia, we received word that my Dad’s remaining Brother, Uncle Leo, “Zio Leo”, passed away in a suburb of Detroit. Zia and I travelled to the wake later that week. You may recall that the Apple Cake recipe that I shared 2 weeks ago belonged to his Wife, my Aunt Mary, “Zia Mariolla”.  He was a kind, wonderful man, as was Dad’s other Brother, Uncle Dominic, “Zio Mingo”, who passed away just 5 weeks earlier in his home in San Marino. Both men will be missed terribly. May they rest in peace.

*     *     *

I hope to resume posting recipes next week. I live in a two-flat and the back porches and stairwell needed repair and a fresh coat of paint. I soon learned that, though repairs could be performed, our building codes have changed recently. It would be best to replace it all now, rather than in a couple years. As I type, workers are removing the old structure, just beyond the wall behind me. Max, thankfully, is in doggy daycare for the day — but he’ll be here tomorrow. Admittedly, this is nowhere near the scope of the construction projects some of you have endured over the past few months. Even so, there are foundations to be dug, cement to be poured, and a structure to be built, with a couple of inspections along the way. Whether I post the Green Tomato Relish recipe next week will depend on how the re-build progresses and Max’s reaction to seeing workers in his yard.

*     *     *

Stewed Octopus Recipe

(Polipo in Umido) 

Ingredients

  • 1 one pound (500 g) octopus
  • reserved blanching water
  • 3 tbsp extra virgin olive oil
  • 1/4 tsp red pepper flakes (more or less to taste)
  • 1 medium onion, diced
  • 3 cloves garlic, minced or grated
  • 1/3 cup chopped parsley
  • 1 large can, 28 oz (800 g), whole tomatoes – hand-torn
  • 1 small can, 14 oz (400 g) whole tomatoes – hand-torn
  • 1/2 tsp dried marjoram (2 tsp fresh)
  • 3 to 4 oz dry white wine
  • fresh, crusty bread for serving

*     *     *

Polipo in Umido

*     *     *

Directions

  1. In a medium saucepan over med-high heat, bring to boil enough water to cover the trimmed octopus. Add the octopus and allow to simmer for 2 minutes after the pot returns to the boil. (Small octopi should boil for 1 minute. Larger should be allowed to boil closer to 2 minutes.) Remove the octopus and place in an ice bath to stop the cooking process and reserve. Reserve the blanching liquid, too. (See Notes) (Refer to Strangozzi post for further details on prepping the octopus.)
  2. Place the blanching liquid back into the sauce pan and, over med-high heat, reduce it by half.
  3. Over med-high heat, add olive oil in a medium sauce pan.
  4. Add red pepper flakes, onion, garlic, and parsley. Season with salt and pepper before sautéing until the onion is translucent and garlic fragrant — about 6 to 8 minutes.
  5. Add the tomatoes, wine, and marjoram, stir to combine. Bring to a boil before reducing to a soft simmer.
  6. After the sauce has thickened and darkened a bit — about 30 minutes — add the chopped octopus and reduced blanching liquid before continuing the simmer.
  7. Taste a piece of octopus after another 15 minutes to test for doneness and to check the seasoning. If necessary, continue to simmer another 5 minutes before tasting again.
  8. Serve immediately, accompanied with crusty bread. Alternately, some prefer to ladle the octopus over a slice of bread in the bottom of each bowl.
  9. Like all mildly flavored seafood dishes, grated cheese is not recommended for it will overpower the dish.

*     *     *

Notes

As mentioned above, more complete instructions for cleaning and chopping the octopus may be found HERE, the only difference being the size of the chopped pieces of octopus. For an in umido preparation, we prefer the pieces to be from 1.5 to 2 inches (3.5 to 5 cm). That means the octopus you buy should be about 1 lb. in weight. Anything less will require a smaller chop and, in our estimation, won’t be as suitable for an in umido preparation.

The idea for reserving and reducing the blanching liquid came from a suggestion from our blogging buddy, Stefan. It worked like a charm, adding additional flavor to the sauce. Thanks, Stefan! You can find out what other good things Stefan has to offer by visiting his fantastic blog, Stefan’s Gourmet Blog.

*     *     *

Aunt Mary’s Apple Cake

Torta di Mele di Zia Mariolla

Apple Cake

This is one of the recipes I brought home with me following my last visit with Zia but its path to this blog is nowhere near as direct as that statement makes it sound.

While having coffee with Zia, I mentioned that I baked a wonderful apple cake two years ago but have since lost the recipe. Try as I might, I can neither find nor duplicate that cake. My story reminded Zia of a slice of cake she was once served at her Daughter-in-Law’s home. She complimented my Cousin and asked for the recipe. Surprisingly, the recipe came from the other side of my family, my beautiful Zia Mariolla, who’s married to my Dad’s youngest Brother, Zio Leo. I’ve no idea how the recipe got to my Cousin’s cookbook but, lucky for us, it found its way into mine.

Perhaps what I like most about this cake is that it isn’t overly sweet and, in that regard, its lack of icing is a big plus. If you or your guests prefer a dessert that’s not too sweet, than serve them a piece of Zia’s cake just as she intended, with a dusting of powdered sugar on top. If, however, someone at the table would prefer something a bit more sweet, then have I got the thing for you, a salted caramel sauce. Within this post, I’ve included the recipe for the sauce  and you’ll find it the perfect accompaniment for Zia’s cake. See? With or without the sauce, you really can have your cake and eat it, too.

Now, as for the recipe itself, the original doesn’t specify the kind of apples, raisins, nor nuts to be used. Having just visited the Honey Man in Michigan, I had fresh Cortland apples and black walnuts at my disposal. I used golden raisins simply because I had them on-hand. That’s it. The rest of the ingredients are quite common and you should have little trouble preparing this cake.

*     *     *

On the road again …

I’m leaving for this year’s last visit with Zia. The Kitchens will be closed while I’m gone and will be re-opened on Wednesday, November 20th.

*     *     *

Apple Cake -2

*     *     *

Aunt Mary’s Apple Cake Recipe

Ingredients

Apple Cake

  • 1-3/4 c sugar
  • 3/4 c oil
  • 3 eggs
  • 1/2 tsp salt
  • 2 cup AP flour
  • 1 tsp baking soda
  • 1 tsp cinnamon
  • 1 tsp vanilla
  • 4 or 5 Cortland apples, peeled, cored, sliced thin
  • 1 cup chopped black walnuts, divided — any nuts may be substituted
  • 1 cup golden raisins (pre-soak in warm water for 30 minutes)
  • confectioners sugar (optional)
  • salted caramel sauce for serving (optional)

Salted Caramel Sauce

  • 1 cup sugar
  • 6 tbsp butter, cubed
  • 1/2 cup heavy cream, room temperature
  • 2 tsp kosher salt (see Notes)

Directions

To prepare the cake

  1. Pre-heat oven to 350˚ F (175˚ C).
  2. Place all ingredients — except apples, raisins, and nuts — in a large mixing bowl. Beat with a spoon until well-blended. Batter will be stiff.
  3. Add apples, raisins, and half the nuts to the bowl and stir till evenly distributed.
  4. Pour batter into a well-greased 9 X 13″ baking dish. Sprinkle the top with the remaining nuts.
  5. Bake in pre-heated 350˚ oven for 45 minutes. A toothpick inserted into center should be clean upon removal.
  6. Allow to cool before dusting with confectioners (powdered) sugar and serving.

To prepare the salted caramel sauce

  1. Pour the sugar into a medium sauce pan (see Notes) over med-high heat.
  2. Stir the sugar as it begins to melt and continue to do so until it begins to boil. Stop stirring the moment it begins to boil. (see Notes)
  3. Once boiling, look for it to change to an amber color. If necessary, swirl liquid in the pan but do not stir.
  4. Once the sugar has turned amber in color, reduce heat to medium, add the butter and whisk vigorously until melted and fully blended.
  5. Remove from heat, gradually add the cream, whisking all the while. Once blended, add the salt and continue to whisk until fully mixed.
  6. Set aside to cool for a few minutes before pouring into a sealable container for storage in the fridge, where it will keep for a couple of weeks.
  7. Warm before serving with your favorite dessert.

*     *     *

Apple Cake Preview

*     *     *

Notes

The recipe will prepare salted caramel sauce. If you’re not a fan of salted caramel, reduce the amount of salt used, but do not eliminate all of it. A bit of salt is usually recommended with sweet preparations. I’d suggest using 1/8 or 1/4 tsp instead of the amount listed in the recipe.

Be sure to use a large enough saucepan. The sugar will boil and could boil over if your pan is too small.

You may stir the sugar as it melts but must stop stirring the moment it begins to boil. Failure to do so may result in sugar crystals ruining the texture of the finished sauce. Once almost all the sugar is melted, it’s best to put away the spoon and swirl the pan’s contents until all is melted, boiling, and begins to turn amber-colored.

Do not, I repeat DO NOT catch a dropped spoon that was used to stir the melting sugar. I can tell you from personal experience that the momentary joy you may feel for actually catching something with your left hand will be obliterated by the searing pain that only sugar burns can deliver.

*     *     *

It’s déjà vu all over again …

Lumache ShellsLast Saturday, All Souls’ Day was observed in a number of Christian churches. In Marche, where the Bartolini are from, it’s traditional to serve snails, lumache, on that day. Although my family never observed that custom, we did, on very rare occasions, prepare and serve lumache. If you’re interested in learning how it’s done, just click HERE

*     *     *

Coming soon to a monitor near you …

Green Tomato Relish 3

Green Tomato Relish

*     *     *

Roasted Arctic Char with Fennel, Onions, and Potatoes

Salmerino Alpino Arrostito con Finocchio, Cipolle, e Patate

Arctic Char 1

I think the fishmongers have learned my shopping habits and display their “wares” accordingly. Oh, I enter the store with a list in-hand but, unlike for most, my list is merely the starting point. I need to walk around the store before the real buying begins — and that’s where my fishmongers enter the picture. Knowing that I will come their way, they never fail to have something on display that is sure to catch my eye, and then they simply reel me in. One week it might be a collection of the smallest and sweetest of clams. Another time, it could be merluzzo so fresh I expect them to flap around in the display case. Not so surprisingly, last week, after writing that I was on a mission to find a 1 lb. octopus, I saw the octopus of my dreams perched atop its smaller, inferior brethren and I swear one of its arms motioned for me to come over and have a look. Coincidence? I think not.

It should come as no surprise, therefore, that when I walked up to the counter recently, there, in the center of the display, where only the week before rested snow-white fillets of cod, was today’s arctic char. With flesh more red than salmon (see Notes), these fillets were farm-raised, most likely in tanks on land. (Thank you, Seafood Watch.) Of course, I bought a nice fillet, just like the fishmonger knew I would.

Stepping away from the counter, I realized I didn’t know what to do with my purchase. My only experience with the fish, if you can call it that, was to watch it prepared on “Iron Chef.” The one thing I did know for certain was that I should cook it that night. What’s the point of buying fresh fish if it’s going to sit in the fridge or, worse yet, the freezer, waiting to be called into duty? Moments later with phone in-hand, I googled “arctic char recipes” and, lo and behold, one of the search results was a recipe from Seafood Watch. That is the dish I’m sharing today, with a couple of modifications to suit my tastes.

*     *     *

Ingredients

*     *     *

Roasted Arctic Char with Fennel, Onions, and Potatoes Recipe

Ingredients

  • 12 oz (340 g) arctic char fillet
  • 1 large bulb of fennel, sliced thick
  • 1 medium red onion, sliced thick
  • 12 new/fingerling potatoes, halved and quartered to make them equally sized
  • 1 orange, juice and zest, divided
  • 1/4 cup balsamic vinegar
  • 1/4 cup orange juice
  • 2 tsp brown sugar
  • 1/4 cup olive oil, divided
  • salt & pepper
  • fennel fronds, chopped
  • orange slices, garnish

*     *     *

Veg Cooked

*     *     *

Directions

  1. Pre-heat oven to 450˚ F (235˚ C). Place 1 oven rack in the upper third of the oven, and, another rack in the lower third.
  2. Place potatoes in a baking dish, season with salt, pepper, and 2 tbsp olive oil. Stir to evenly coat. Place on upper rack in the pre-heated oven and roast for 20 minutes.
  3. Place fennel and onion into a bowl. Add half of the orange zest, the rest of the olive oil, and season with salt and pepper. Gently mix to evenly coat the ingredients.
  4. Lightly oil and season both sides of the arctic char. Place on a lightly oiled baking sheet.
  5. After 20 minutes, add the fennel and onion to the potatoes and stir to combine. Return to oven for 15 minutes.
  6. After 15 minutes, place the baking sheet with the arctic char on the lower rack of the oven. Stir the roasting vegetables and return to the oven’s top shelf. Continue to roast for another 10 to 12 minutes, depending upon the thickness of the fish fillet. The fillet is cooked when the flesh flakes easily and is opaque in the center, not translucent.
  7. Meanwhile, place remaining orange zest, balsamic vinegar, orange juice and brown sugar into a small sauce pan over med-high heat. Bring to a boil, lower the heat, and reduce sauce to the consistency you desire.
  8. When fish is cooked, remove to a plate and serve with the roasted vegetables. Drizzle sauce over both fish and vegetables and garnish with a sprinkling of fennel fronds. Place orange slices on the plate, the juice of which may be squeezed on the fillet.

Inspired by a recipe found on the Monterey Bay Aquarium: Seafood Watch site.

*     *     *

Roasted Arctic Char 2

*     *     *

Notes

As mentioned, the flesh of arctic char can be more red than salmon — usually indicating the fish has been farm-raised — but it can be a lighter hue, as well. It is said to taste like a cross between salmon and trout, and not quite as strong as salmon. For this reason, some may feel it tastes a bit more like trout. As a general rule, prepare arctic char as you would salmon and you will not be disappointed.

The Monterey Bay Aquarium created and maintains the Seafood Watch site and App. The App is free and can be loaded into your Apple or Android smart phone and tablet. It is meant to encourage us, the consumers, to purchase seafood that is “fished or farmed in ways that don’t harm the environment.” The App rates seafood as “Best Choice” and “Good Alternatives”, as well those which we should “Avoid.”  Whether at the market or in a restaurant, I use the App to guide my seafood purchases. Unfortunately, Seafood Watch only covers the United States and Hawaii, though there may be a similar App for your corner of the World.

*     *     *

It’s déjà vu all over again …

Homemade dog jerky

Recently, “hits” on my dog jerky post have soared and it has become this blog’s most popular post for each day since dog treats came back into the news. Once again, something in store-bought jerky treats is causing dogs to become ill and far too many have died. (TIME: The FDA has No Idea Why Jerky Treats Are Killing Hundreds of Dogs.) Every dog that I have owned has loved these treats but they are hardly worth the risk, especially when it is so easy to make jerky at home. Before you buy another bag of jerky for your dog, please click HERE to see how easy — and inexpensive — it is to make your own beef & chicken jerky for your pupster.

*     *     *

Coming soon to a monitor near you …

Apple Cake Preview

Aunt Mary’s Apple Cake

*     *     *