Grandma’s Stuffed Vegetables

August was a good month for the Bartolini Clan at the old two-flat. Grandpa’s garden was in high-gear, easily producing enough tomatoes for all of both families’ needs. (Be sure to check out Mom’s Tomato Antipasti.) As the years passed, the garden grew and so did the selection of produce. Lettuce, swiss chard, eggplants, peppers, and, of course, grapes, all made their way onto our dinner tables in August, if not before. To augment his own “crops,” Grandpa and I made a weekly trip to Detroit’s Eastern Market every Saturday morning, where he would walk the aisles, haggling each farmer/vendor over the price of whatever it was that he wanted to buy. By the end of our “tour,” we’d return to the car with everything from fruits & vegetables to chickens (dead or alive) and, one memorable Saturday each year, a hog’s head to be made into head cheese. (You’ve not lived until you’ve walked around a crowded farmers’ market, carrying a hog’s head on your shoulder, stopping occasionally while your Grandfather haggled with some farmer over what amounted to 50 cents, if that.) Sunday was my Dad’s turn. Starting when we were very young, Sis & I accompanied him and our favorite stop was the bread bakery. While Dad chatted with his baker friend, we munched on bread straight from the oven. Along the way we might visit with friends or family, stop at an Italian market or 2, and then head to the grocery for whatever he hadn’t found at the previous stops. We’d return home, laden with all kinds of goodies, just in time for Sunday brunch.  That night, both families often dined together in a large, screen-enclosed room, “the patio,” which Grandpa had built adjacent to the garage. It easily accommodated the 12 of us and very often a few guests more.

*     *     *

Grandmas stuffed veggies 1

*     *     *

In retrospect, these dinners went off like a well-oiled machine. While Dad, Uncle, and Grandpa worked the grill and their beverages, Mom and Zia handled the rest, from setting the table to making sure that the “trouble-makers” among us 6 kids sat at separate ends of the long table. (One memorable response, walkie talkies, though well-played was extremely short-lived.) Aside from the grilled entrées, the meal itself featured side dishes made from the garden’s vegetables, as well as those that Dad and Grandpa had just purchased. Family favorites, that both women were quite capable of preparing, were tomatoes, eggplant, and onions that were halved, topped with a bread crumb mixture, and baked. Both Mom and Zia spoke of Grandma preparing vegetables in this way, which is similar to recipes for tomatoes Provençal. With Mom & Grandma’s birthday having been on the 15th, and Uncle’s birthday the 12th, I thought this would be the perfect time to share this family recipe.

Now comes the hard part. I have seen these vegetables prepared countless times, most recently a few weeks ago while visiting Zia. I have prepared them myself dozens of times, the most recent being last night. Never have I measured any of the ingredients nor have I seen them measured. Mom would get so exasperated with me as I asked her, repeatedly, what the measurements were for some dish, often this one. Now, far too late, I understand. More important than how much of this or that is the look and feel of the finished mixture. She and Zia use this breading mixture in a number of dishes. It’s consistency varies depending upon the dish and how it is cooked. When used with Grandpa’s  barbecued shrimp, it is very moist, almost dripping. Here, the vegetables are cooked at a much lower temperature than on a grill and, so, the breading isn’t as moist. Even so, you may prefer your topping to be more/less firm when served and the amount of oil used will determine that. Because of all this, I’m only posting guidelines and not a recipe. Use them as a base, adjusting where necessary to suit your own tastes.

*     *     *

Grandma’s Stuffed Vegetables

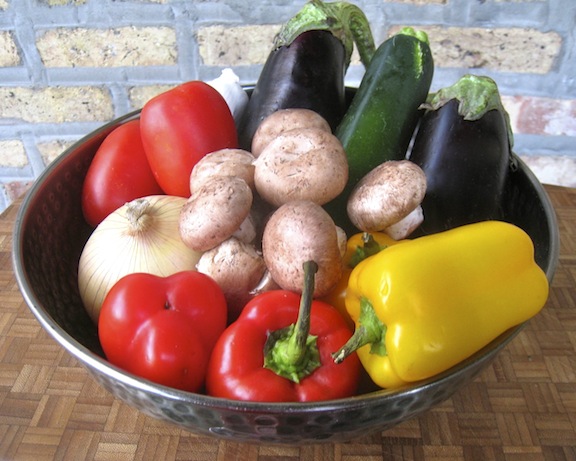
Select fully ripened tomatoes, small to medium-sized onions, and baby or small eggplants. If you use large, thick eggplants, they will require pre-roasting, as do the onions. Better to seek out relatively thin eggplants of about 4 – 6 inches in length.

For the stuffing, you will need about 2 – 3 tbsp of bread crumbs per vegetable half; about 1 tsp of freshly chopped parsley per vegetable; 1 – 2  garlic cloves, minced, depending upon the number of vegetables used; salt & pepper, to taste; and enough extra virgin olive oil to fully moisten the mixture. It should not be sopping or dripping wet.

Pre-heat oven to 400*. Remove a thin slice off of the top & bottom of each onion. This will allow them to “sit” without rolling while roasting. Halve each onion, score the cut side with a sharp knife, and brush lightly with olive oil. Season with salt & pepper and roast in the oven for 20 minutes.

Meanwhile, create the bread topping. Combine bread crumbs, parsley, garlic, salt & pepper, and olive oil. Halve the tomatoes and gently squeeze each half to remove some liquid and the seeds.  Add the liquid and “tomato caviar” to the bread crumb mixture. Halve the eggplants, lengthwise, and use a knife to score the cut side a few times. Use a pastry brush to coat the cut sides of the eggplants & tomatoes with olive oil and then season with salt & pepper. By now the onions should be about ready to be removed from the oven. Place all the halved vegetables on a lightly oiled baking sheet or dish and season with salt & pepper. Reset the oven temperature to 350*

Cover the top of each vegetable half with the bread crumb mixture. When finished, drizzle lightly with olive oil and bake in a 350* oven for 40 – 45 minutes. Serve immediately.

Variations

These are the 3 vegetable that Grandma, and later Mom and Zia, used. I’ve, also, prepared zucchini and summer squash this way, treating them as I would eggplant.

*     *     *

Grandmas stuffed veggies 2

*     *     *

Notes

Left-overs can be easily re-heated in the microwave. Better still, with 2 slices of Italian bread, one of the tomato or eggplant halves makes a great sandwich. Grandma served these sandwiches to her girls for lunch and they, in turn, served them to us.

*     *     *

The Kitchens’ Strawberries be Jammin!

I know, I know. I do not can. The threat of giving my friends & loved ones the gift of botulism has pretty much kept me away from this age-old method of food preservation. Not only that, I’ve no room for the canning gear nor for the canned goods.  So, why then am I suddenly canning?

To begin with, last week’s canning experiment with cherry jam went very well. It jelled properly and the jars all sealed without using a water bath. Those who have tasted it liked it, and, most importantly, survived. Family, friends, and a few fellow bloggers were all quite positive, some even encouraging me to continue canning. One friend was particularly enthusiastic, although methinks the promise of freshly made grape jelly may have been the cause. You see, I had confided to him that I wanted to make grape jelly but that Concord grapes weren’t easy to come by. This isn’t exactly Napa Valley. I told him I would be going to the farmers’ market this morning to find grapes and, if all else failed, I might try canning some Michigan strawberries, if they were still available. What he didn’t know was that I had found Mom’s strawberry jam recipe in the recipe book she had given me years ago. All thus time I had ignored it because, as we all know, I do not can. Well, with no grapes to be found anywhere at the market, I bought 3 containers (pints?) of strawberries. I followed Mom’s recipe, with 1 exception. Remembering David Lebovitz’s recommendation of using lemon rind as well as lemon juice, I added the zest of 1 lemon to the fruit and sugar. Beyond that and as Mom had suggested, I used a potato masher to crush the hulled berries, which yielded a little more than 4 cups of smashed fruit. The fact that there was no need for store-bought pectin was a big plus; I didn’t have any. From there, the rest of the recipe is easy enough that I had no problems following it. An experienced canner and jammer should be able to do this in her/his sleep.

*     *     *

*     *     *

Mom’s Strawberry Jam Recipe        

Ingredients

  • 2 pounds fresh strawberries, hulled (4 cups smashed)
  • 4 cups sugar
  • 1/4 cup lemon juice
  • zest of 1 lemon

Directions

  1. In a heavy bottomed saucepan, mix together the strawberries, sugar, lemon and lemon juice & zest. Stir over low heat until the sugar is dissolved. Increase heat to high, and bring the mixture to a full rolling boil.
  2. Boil, stirring often, until the mixture reaches 220 degrees F (105 degrees C).
  3. Transfer to hot sterile jars, leaving 1/4 to 1/2 inch head space, and seal.
  4. Process in a water bath, allow to sit in boiling water for 10 minutes.
  5. After 10 minutes, carefully remove jars from boiling water and place on rack covered with a towel to prevent jars from shattering due to quick temperature change.
  6. Leave, untouched, for 12 to 24 hours to insure proper sealing.
  7. Store in cool, dark place for up to 1 year.
  8. If the jam is going to be eaten right away, don’t bother with processing and just refrigerate.

*     *     *


*     *     *

Notes

If unsure whether the jam will jell properly, you can test it. Just before you start preparing the strawberries, place a plate in your freezer. After your jam has reached 220*, take about 1/4 tsp of the hot jam, place it on the chilled dish, and return both to the freezer. After a couple of minutes, use your finger to “push” through the jam on the plate. If the jam wrinkles before your finger and does not flow to refill the path your finger took, the jam is ready to be placed in jars.

Oh! All evidence to the contrary notwithstanding, I do not can.

*     *     *

Pasta with Shrimp

Having just returned from a visit with Zia, I decided I had better jot down this recipe while it was still fresh in my mind. This is one of those dishes that I never really think about while I’m preparing it. It just kinda happens. Besides, this wasn’t even the dinner I had planned.

I had intended all along to make  Trenette al Salmone for Zia during my visit. I should have brought smoked salmon with me but I was sure that I could get some in her area’s stores. Well, guess again. I went to her local groceries — “local” meaning 15 and 25 miles away, respectively, in opposite directions — and neither had smoked salmon. One of the stores happened to be running a special on large shrimp (25 – 30-ct), so I bought some and, under her watchful eye, I prepared dinner for us that night.

Like the smoked salmon dish, this is an easy meal to prepare. I prefer to use large, raw shrimp that are peeled, cleaned, and with tails removed. I cut them in half because they are otherwise too large to be eaten with pasta in a single bite, not to mention the larger the shrimp, the fewer to clean and prep. Where this dish differs from that of the smoked salmon, however, is that shrimp have a strong enough flavor that they won’t be overpowered by diced onion and garlic in the sauce. But for the onion and garlic, the same basic cream sauce is used in both dishes and neither uses cheese, as well. Remember, Italian recipes rarely, if ever, use cheese when seafood is a primary ingredient.

*     *     *

Pasta with Shrimp Recipe

Ingredients

  • 1/4 cup (1/2 stick) butter
  • 1 medium onion, chopped fine
  • 2 cloves garlic, minced
  • 1 cup heavy cream
  • 1 lb large (25 – 30 ct) shrimp, cleaned, peeled, tails removed, cut in half
  • 1 lb cooked thin spaghetti
  • 3 tbsp fresh parsley, chopped, separated
  • salt & ground white pepper, to taste
  • reserved pasta water

*     *     *

*     *     *

Directions

  1. Melt butter in a large, deep frying pan over med-high heat.
  2. Add onion and sauté until soft, about 3 minutes.
  3. Add garlic and continue sautéing for another minute.
  4. Add shrimp and sautéing for about 2 minutes. Shrimp should not be thoroughly cooked at this point.
  5. Add the cream and allow shrimp to finish cooking as the cream reduces slightly, about 2 – 3 minutes.
  6. Season with 2 tbsp of the parsley before adding the cooked spaghetti to the pan. Mix until the pasta is well-coated. If necessary, add a little of the reserved pasta water. Taste the dish and season with salt & pepper.
  7. Garnish with remaining tbsp of parsley and serve immediately.

Variations

You will find that different pastas, be they fresh or dried, absorb sauces at different rates. Reserving some of the starchy pasta water will help you deal with a “thirsty” batch of noodles or a sauce that was simmered too strongly and is a little dry. Not only that but the water, being starchy, can be used as somewhat of a thickening agent. Just bear in mind that the water is heavily salted, so, go easy on the salt until after you’ve added the pasta water.

*     *     *

Mom’s Caponata

The origins of caponata may be found in Sicily but today it is served throughout Italy, in one form or another. Yet, as varied as the final dishes might be, 5 ingredients form the basis of virtually all renditions: eggplant, tomato, onion, garlic, and olive oil, with eggplant being the star of the dish. Beyond these 5, the additional components depend as much upon the individual cook as it does the region of Italy. There’s no better example of this than Mom’s recipe and the one that Zia, her sister, follows. Both included some bell pepper and mushrooms but Mom, also, added zucchini; Zia rarely, if ever, does. The difference here is minimal but, then again, their kitchens were only separated by less than 20 vertical feet. Imagine the differences when there’s hundreds of miles separating the kitchens. In fact, I’ve seen caponata recipes that include, among other things, olives, pine nuts (pignoli), fennel, capers, currants, celery, and even seafood. Seafood seems a bit much to me and I pretty much follow Mom’s recipe. Still, more important than which recipe to follow is finding the right ingredients. Like Mom & Zia, I’ll choose only those vegetables that are fresh and “in season,” for best results. And if you end up with caponata that looks suspiciously like ratatouille, well, I won’t tell anyone.

Whatever vegetables you choose to include, try to chop them evenly, creating pieces that are roughly the same size by type. I cut the “firm” vegetables — onions, peppers, etc. — into strips. The “soft” vegetables — tomatoes, zucchini, eggplant, etc. — are chopped into 3/4 to 1 inch cubes. By cutting the ingredients into strips and cubes, you’ll be adding visual interest to the final dish. When sautéing, begin with the most firm vegetables and proceed until you’ve added the softest. The end-result should be a dish of vegetables that are fully cooked and not at all al dente. Caponata may be served hot, warm or at room temperature. It can be served as a side dish or as an appetizer, where it can be used as a spread or to make bruschetta. Like Mom before me, very often I’ll use it to dress pasta, resulting in a delicious vegetarian dish. Best of all, to my tastes, left-over caponata can be used to make a delicious frittata the next morning. In fact, when I was a boy, Mom always reserved a portion for my breakfast the following day. Today, if I go to a farmers’ market in the morning, it’s almost guaranteed that I’ll be having some form of caponata that evening. You can guess what I’ll be having for breakfast the next morning.

*     *     *

Caponata Recipe

Ingredients

  • 3 tbsp olive oil
  • 1 medium onion, halved and sliced
  • 2 bell pepper, sliced into strips – gypsy, cubanelle, or Italian peppers may be substituted
  • 2 cloves garlic, minced
  • 3 tbsp freshly chopped parsley
  • 1 doz. button or crimini mushrooms, quartered
  • 2 medium eggplants, cubed (peeling optional)
  • 1 – 2 zucchini, cubed
  • 2 plum tomatoes, cubed
  • salt & pepper, to taste

A Good Day at the Market

Directions

  1. Add oil to a large fry pan and heat over a medium-high heat. Add onion and bell pepper, season with salt & pepper, and sauté until barely soft, about 5 minutes.
  2. Add garlic & parsley and sauté for 1 minute.
  3. Add mushrooms and continue sautéing for about 5 minutes.
  4. Add eggplant, zucchini, and tomatoes, stir to combine, season with salt & pepper, and sauté until done to your liking, at least 8 minutes more.
  5. The dish is now done and may be served hot, warm, or at room temperature.

Variations

As mentioned above, this basic recipe can be modified in any number of ways. Thinly sliced fennel, cubed summer squash, currants, pine nuts, celery, you name it, all may be added. Once you’ve assembled and prepared the ingredients, it’s just a matter of adding them to the pan in an order that assures each will be done to your liking. If the order that I’ve listed above doesn’t do that for you, change it to suit your palate.

Notes

Left-over caponata can be served with pasta or used to make a tasty frittata. I’ll devote a later posting to our frittata recipe but, for now, I’ll share the “easy” method. For this, pre-heat your oven to 375*. In a fry pan over med-high heat, re-heat the caponata. Meanwhile, lightly scramble enough eggs to insure ample coverage of the re-heated caponata. Pour the eggs into the fry pan and, like you would with scrambled eggs, use a slotted turner or spatula to gently pull back the edge to let the eggs run behind it. After a few minutes, place the pan in the pre-heated oven and bake for about 10 minutes or until the top of the frittata is set.  Top with grated cheese, if desired, and serve immediately.

Coincidentally, while this recipe was waiting to be published, our local PBS station aired a re-broadcast of an episode of Jacques Pepin’s “More Fast Food My Way” during which he prepared ratatouille. Not only did he mention how similar ratatouille was to caponata, he used it to dress some penne pasta. How about that? You can add “French chef” to the list of Mom & Zia’s many titles and accomplishments!

*     *     *

Brodetto

doubt there’s a European fishing community that doesn’t have its own version of fishermen’s stew. The Italians call it brodetto, the French bouillabaisse, and the Portuguese refer to it as caldeirada. Even in the this country, San Francisco is well-known for its cioppino — the real “San Fransisco treat,” in my book. Although some of the ingredients may vary by country and region within each country, the dish’s origins are often the same. The village fishermen would gather together at the end of a very long day and into a large pot they would add whatever fish that hadn’t been sold, a few vegetables, some spices, and a little wine. A short while later, with some crusty bread in hand, each would sit back and enjoy a feast among friends, no doubt filling the night air with tales of the ones that got away.

Living in Chicago, we have a wide assortment of seafood available, some of which is fresh while the rest has been flash frozen for shipment here. Although I prefer fresh, I will buy frozen and usually have shrimp and a variety of fish fillets in my freezer. If I see a sale somewhere for fresh mollusks, be they little neck or manila clams, mussels, or cockles, I’ll buy some, along with some scallops, and that night’s dinner will be brodetto. The recipe I’ll follow then is the one that I’m going to share with you now. And just like the stew the old fishermen threw together, the amount and types of seafood in my brodetto may vary but the basics remain the same. Fish, mollusks, and shrimp are added to a simple tomato broth flavored with a few herbs, garlic, and wine. Serve it in a bowl with some crusty bread, like ciabatta, and you’ll have a spectacular dinner, as well as a new-found respect for those fishermen of old.

*     *     *

Brodetto Recipe

Yield: 6 generous servings

Ingredients

  • 3 tbsp olive oil
  • 1/4 to 1/2 tsp red pepper flakes
  • 1 medium onion, chopped
  • 3 cloves garlic, minced
  • 3 tbsp fresh parsley, chopped
  • 1 cup stock (fish, clam, vegetable, or chicken)
  • 1 cup dry white wine
  • 1  large can (28 oz) whole or large dice tomatoes. (or 8 to 10 fresh plum tomatoes, peeled, seeded, and chopped into large pieces)
  • 3 or 4 stems of fresh thyme
  • 1/2 tsp Italian seasoning
  • 18 little neck or 24 manila clams or cockles
  • 1 doz mussels
  • 3/4 lb large shrimp
  • 1 doz scallops
  • 1 – 1 1/2 lbs fish fillets, cut into large, equal sized pieces (cod, haddock, halibut, striped bass, pollock, red snapper, or any combination may be used)
  • salt and pepper
  • 2 tbsp fresh basil, chopped, for garnish
  • extra virgin olive oil, for garnish

Directions

  1. At least an hour before you start cooking, scrub all the mollusks with a brush and soak the clams and cockles in cold water. Change the water at least once in the next hour. If using mussels, before scrubbing, grab hold of the “beard” and pull to remove. Keep cold until ready to cook.
  2. Once the mollusks have been sufficiently soaked and cleaned, heat olive oil in a large saucepan over med-high heat. Add red pepper flakes and cook for 1 minute.
  3. Add onion and sauté until translucent, about 5 minutes. Season lightly with salt and pepper.
  4. Add garlic and parsley and continue sautéing for another minute or so.
  5. Add stock and wine, using the liquids to deglaze the pan.
  6. Add the tomatoes. If using canned whole tomatoes, use your hands to tear the tomatoes before placing the chunks into the pan. This is a stew, not a sauce. Large chunks are preferable.
  7. Add thyme and Italian seasoning. Season lightly with salt & pepper.
  8. Bring pot to the boil, reduce heat to med-low, and simmer for 30 to 40 minutes. If stew becomes too dry, add water or stock.
  9. Increase heat to med-high, add clams and/or cockles and cover the pan.
  10. After about 3 minutes, add the mussels and cover.
  11. About 3 minutes later, place the shrimp atop the mollusks and return the cover to the pan.
  12. 2 minutes later, add the scallops and cover the pan.
  13. About a minute later, add the fish to the top of the stew, cover the pan, and cook until all is done, about 3 or 4 minutes.
  14. Serve immediately in large bowls, garnished with a sprinkling of good quality extra virgin olive oil and freshly chopped basil. Be sure to have plenty of good, crusty bread available.

Notes

The recipe I’ve just shared is by no means set in stone. I imagine that the fishermen of long ago weren’t too strict about their ingredients. I think their only concerns were that the seafood was fresh and the wine plentiful. The rest took care of itself. Today, recipes abound and it’s not just the seafood that varies from one recipe to the next. Oftentimes vegetables will be added to the stew, with bell peppers, fennel, and potatoes frequently mentioned. Some cooks will start the recipe by creating and sautéing a soffritto of chopped onion, celery, and carrot. What does all this mean for you? Well, do you have a preference for, say, crab claws? Then add them to the mix. Don’t like mussels? Don’t use them. Want more of a vegetable base for your stew? Then start with a soffritto and add whatever veggies you like. In short, indulge your palate and make the recipe your own.

*     *     *

Pasta alla Norma

The Italians love eggplant and no place is it better celebrated than in Sicily. For proof of that, one need look no further than today’s recipe, Pasta alla Norma. Named in honor of Bellini’s masterwork “Norma,” eggplant takes center stage in this recipe and the resulting dish, like its operatic inspiration, is sublime.

*     *     *

Campanelle alla Norma

*     *     *

Eggplant was no stranger to our table growing up. Mom often served them halved, topped with bread crumbs, and baked. Sometimes she cut them into discs before breading and frying them. Still other times, she cut them lengthwise to make planks, layering them with cheese and sauce to make a lasagna-like dish. Of course, like most Italian households, she also used eggplant to make her caponata. Comparing the two, caponata is actually more complicated than Pasta alla Norma. Whereas caponata consists of chopped eggplant and a variety of vegetables, Pasta alla Norma’s sauce is a product of just eggplant and marinara sauce. It’s hardly a difficult recipe to follow but it sure is a delicious way to dress a dish of pasta. And with our vegetable stands and markets just beginning to  display this season’s bounty, there’s no better time to try this little taste o’ Sicily.

The recipe calls for 1 to 1 1/2 lbs. of eggplant. Rather than buy one large eggplant, I’ll buy 2 or 3 medium-sized ones. The larger the eggplant, the more seeds it will have and the more bitter it will be. The recipe, also, states that the eggplant should be cut into 1/2 cubes before being salted. You may find it easier to cut the eggplants into 1/2 inch slices and, after salting and rinsing, cut the slices into cubes. If you use small or “baby” eggplants, you needn’t cut them into cubes at all, but leave the slices as-is. The choice is yours.

*     *     *

Pasta alla Norma Recipe

Ingredients

Norma's Notes

  • 2 tbsp olive oil, more as needed
  • 2 – 3 small/medium eggplants (1 – 1 1/2 lb total), cut into 1/2 inch cubes
  • 2 – 3 tsp kosher salt
  • 1/4 to 1/2 tsp red pepper flakes, more to taste (optional)
  • 1 medium onion, chopped
  • 3 cloves garlic, minced
  • 2 – 3 tbsp tomato paste
  • 1 large (28 oz.) can tomatoes, whole or diced
  • 2 tbsp fresh parsley, chopped.
  • 2 – 3 tsp Italian seasoning
  • 2 tbsp fresh basil, chopped
  • salt & pepper, to taste
  • 1 lb pasta, i.e., rigatoni, penne, campanelle
  • reserved pasta water
  • 1/2 cup grated ricotta salata, reserving 2 – 3 tbsp

Directions

  1. Cut each eggplant into 1/2 inch cubes. Place 1/3 of the cubes in a colander and sprinkle with 1/3 of the salt. Add another third of the eggplant and sprinkle with another third of salt. Place the remaining 1/3 of the eggplant cubes in the colander and sprinkle with the last of the salt before carefully mixing the colander’s contents. Allow excess water to drain for 15 – 30 minutes. Give the colander & eggplant a quick rinse of tap water. Dump the rinsed eggplant onto a paper towel-lined baking sheet and use more paper towels to pat dry.
  2. Heat oil in a large, deep skillet over med-high heat.
  3. Begin sautéing the eggplant cubes. Do not overcrowd and work in batches, if necessary. Continue cooking until all cubes are lightly colored, adding more olive oil as needed. Remove cooked cubes and reserve for later.

    Grate Cheese

  4. If needed, add 2 tbsp olive oil and heat. If using the pepper flakes, add them now and cook for one minute.
  5. Add onion and sauté until soft, about 5 minutes.
  6. Season lightly with salt & pepper, add the garlic, and continue sautéing for another minute.
  7. Add tomato paste, stir well, and continue cooking for a minute or so.
  8. Add tomatoes. If using whole tomatoes, tear them into pieces before adding to the pan.
  9. Add the Italian seasoning & parsley, return the eggplant to the pan, and stir to combine everything. Once the sauce begins to boil, reduce the reduce heat to a simmer.
  10. The sauce will cook for 30 minutes. Check the pasta’s package directions and time its cooking so that the pasta is about 2 minutes shy of being al dente when the sauce is ready.
  11. Reserve some of the pasta water before adding the basil and the not quite al dente pasta to the frying pan. Mix well and continue cooking until the pasta is done to your liking. Add some of the reserved pasta water to the pan if the pasta becomes dry during this last step of the cooking process.
  12. Just before serving, add most of the ricotta salata and mix well. Check for seasoning and add salt & pepper, if needed.
  13. Serve immediately, garnished with the reserved 2 – 3 tbsp ricotta salata.

Variations

Like I said, it’s is a simple dish with relatively few ingredients and, as such, there’s little room for variations other than the pasta selection and the cheese. For the pasta, I prefer to serve this sauce with pastas like penne, rigatoni, or campanelle (little bells) and not any of the ribbon-like pastas. As for the cheese, if I have ricotta salata, that’s great. If I don’t have any,  I’ll substitute some crumbled feta or, if all else fails, some grated parmesan cheese. I’ve even used some grated fresh mozzarella, so, I wouldn’t let the absence of ricotta salata prevent you from enjoying this dish.

*     *     *

Pasta with Clams (“Red Sauce”)

Blessed to be living on a peninsula or neighboring island, Italians enjoy a ready supply of seafood of all kinds — and their diet is all the better for it. A favorite dish of mine, whether I’m visiting Italy or at home, is pasta prepared with clams. Here in Chicago, the selection of fresh clams can be limited to cherry stones, with little necks and manila clams available sporadically. Cherry stones and little necks are actually same species of clam. The only difference is their size, with cherry stones being the larger of the two. I find little necks do taste sweeter, however, and I’ll use them whenever I can. If, however, only cherry stones are available, I’ll remove them from their opened shells during the cooking process, give them a quick chop, and then return the chopped clams and any juices to the pot. When all else fails, I have used, with some success, frozen clams and cockles purchased from a few of the area’s Asian markets. These same stores, by the way, can be a relatively cheap source for flash-frozen, vacuum-packed calamari, in any size you could possibly want.

As you can tell by this posting’s title, today’s recipe features clams cooked in a tomato sauce. In this recipe, I find that the sweet, delicate tasting clams can be overpowered by the tomatoes. So, in order to bolster the clam flavoring — and unlike the “white” version of the recipe — I’ll add a can of whole or minced clams to the sauce. It’s listed as “optional” within the recipe’s ingredients and the choice is yours to make. By the same token, whether you add any canned clams, be sure to use herbs and spices sparingly. They, too, can overwhelm the clams. It’s a tricky balance you’re trying to achieve but one definitely worth the effort.

*     *     *

Pasta with Clams (“Red Sauce”) Recipe

total time: under 2 hours (includes time to prep clams)

Ingredients

  • at least 2 doz. little neck or manila clams
  • 1 can (7 oz) whole or minced clams (optional)
  • 3 tbsp olive oil
  • 1/8 to 1/4 tsp red pepper flakes (optional)
  • 1 medium sweet onion, chopped
  • 2 cloves garlic, minced
  • 3 tbsp fresh parsley, chopped
  • 2 tbsp tomato paste
  • 1/3 cup dry white wine
  • 1 large can (28 oz) diced tomatoes
  • salt & pepper, to taste
  • 3 tbsp fresh basil, chopped
  • 1 lb cooked pasta (tagliatelle pictured above)
  • 1 cup reserved cooked pasta water
  • chopped parsley for garnish

Directions

  1. At least an hour before dinner, use a brush to individually scrub each clam before  rinsing and placing it in a large bowl of cold freshwater. Rinse them a second time just before proceeding with the recipe.
  2. Heat oil over med-high heat in a large frying pan with a lid. (If using red pepper flakes, add them now and sauté for 1 minute before proceeding.) Add onion, season lightly with salt & pepper, and sauté until translucent, about 5 minutes. Add garlic and parsley and sauté for another minute.
  3. Add tomato paste, sauté for one minute, add the wine, and then add the tomatoes. Season with salt & pepper, bring to a boil before reducing heat and  simmering for 30 minutes.
  4. Meanwhile, your pasta should be cooking, with an eye toward being drained just as the clams are opening.
  5. Increase heat to medium high, add the basil, and stir. (Add the canned clams now, if you choose to use them.)
  6. Add the clams and cover tightly.
  7. In about 5 to 8 minutes, the clams should be open & steamed. Discard any unopened clams. Replace cover and remove from heat.
  8. Combine the clams & tomato sauce with the drained pasta. If too dry, add some of the reserved pasta water.
  9. Serve immediately, garnished with chopped parsley.

Variations

Tired of tomatoes? Try the “white sauce” version of this recipe.

*     *     *

Strawberry Risotto

Strawberry risotto. What a concept! I first learned of the dish during a trip through Italy with my trusty Traveling Companion and a mutual friend. The three of us were staying in Rome and used a tour book to select a restaurant, La Maschera (The Mask), near Rome’s Campo de’ Fiori. For her primo piatto, my friend ordered strawberry risotto. She absolutely loved the dish, as did I when offered a taste. Fast forward a few years, Zia and I are in Rome. Eager to give her this tasty treat, we hopped in a cab and went to La Maschera — which was closed and seemingly had been for quite some time. (Let that be a lesson for you: when returning to a vacation spot, open the purse strings and buy a new tour book.) Although we had a lovely dinner nearby, there was no strawberry risotto on the menu and the dish “fell off my radar.” Then, during a sleepless night, I started looking at recipes for strawberry risotto on the web. Pretty much all that I came across shared the same ingredient list as “regular” risotto, save the strawberries, of course. I decided to give it a try and started by making my family’s risotto, substituting strawberries for mushrooms. Next to go were the garlic, cheese, and cream and eventually I settled upon the recipe I’m posting here.

First, before sharing the recipe, I think a few things need to be mentioned. This recipe requires that the rice be soaked before cooking. Anyone who has ever made risotto will tell you that this isn’t exactly normal. When I spoke with Zia about writing this recipe, she mentioned that when she was a girl, a family friend, Ida, taught her how to cook risotto and that she always pre-soaked the rice. So, my use of that technique here is something of a salute to Ida. (She, also, insisted that Zia use only Uncle Ben’s when making risotto but that’s where I draw the line. My salute will go no further than pre-soaked arborio rice.) I then experimented with the strawberries. In the beginning, I just couldn’t seem to get a strong enough strawberry flavor. Putting the berries in early only served to have them almost totally disintegrate during the cooking process. I want strawberry pieces in my risotto. Putting them in late resulted in risotto with strawberries in it, almost like breakfast cereal. I want to taste strawberry in every bite. Zia’s memories of Ida’s soaked rice were an inspiration. By soaking the berries in the wine, the strawberry flavor infuses the wine and, as a result, is more readily dispersed throughout the dish. Success! As for which wine to use, I only use white wine in this dish and avoid the sweet varieties, preferring instead a white that is on the dry side. Use a wine that you’d serve to accompany this risotto and you won’t go wrong. Lastly, do not use either cream or cheese with this dish; both will only mask the strawberry’s flavor and aroma.

*     *     *

*     *     *

Strawberry Risotto Recipe

total time: approx.  1 hour (includes 30 minute “soak”)

yield: approx.  3 cups

Ingredients

  • 3 cups chicken stock, divided, (for a meat-free diet, vegetable stock may be substituted)
  • 2 tbsp butter
  • 1 small onion, finely chopped
  • 2 cups fresh strawberries, hulled and puréed or chopped as finely as you prefer
  • 1 cup arborio rice
  • 1/2 cup white wine
  • salt & pepper, to taste
  • 1 strawberry per plate, sliced, for garnish

Directions

  1. Soak strawberries in white wine and soak rice in 1 cup of stock for 30 minutes before you start cooking.
  2. Heat remaining stock in a sauce pan. Adjust heat to keep it hot but not boiling.
  3. Add butter to a medium sauce pan over medium heat. Add onion, season lightly with salt & pepper, and sauté until translucent, about 5 – 8 minutes.
  4. Add rice, stir, and cook until all the liquid is just about gone. Add another ladle of stock and continue to stir.
  5. Repeat the process, adding stock by the ladle, stirring constantly until the liquid is almost gone, and adding another ladle of stock, for no less than 10 minutes.
  6. Add the strawberries and wine and continue stirring. When the wine has been absorbed, add a ladle of stock.  Continue stirring and adding ladles of stock for another 10 minutes or until rice is cooked to you liking.
  7. Season with salt & pepper, stir well, and serve garnished with sliced strawberries.

*     *     *

Variations

Choosing not to use cream or cheese pretty much limits the possible variations for the dish. You can, however, use champagne in place of the white wine if you’re feeling relatively fancy schmancy that day/evening.

Notes

Even though this risotto begins with the unorthodox step of pre-soaking the rice, the other “risotto rules” still apply. That is to say, cook atop no more than medium heat, keep the stock hot, and stir the rice constantly.

*     *     *

Pasta al Salmone

My introduction to pasta with salmon was some 20 years ago in Rome, during my first visit to Italy. To say that it left a lasting impression would be a gross understatement. In the years to follow, I made it my life’s quest to duplicate that recipe and it was far more difficult than one might imagine. Back then I didn’t own a PC, there was no Food Network nor Cooking Channel, and the few cooking shows that were available were mainly broadcast on PBS. (We were simple folk back then.) Duplicating a recipe meant that I had to keep trying until I got it right. Well, I’m certainly not a trained chef, by any stretch of the imagination, and it’s not as if I attempted to make this dish every week, or even every month, for that matter. Eventually, my interest waned and my “testing” stretched out over several years. Sadly, I never did get it quite right, although things may have gone differently had I remembered to record the ingredients and their amounts from one test to the next. Anyway, the sauce would inevitably be too runny or too thick and the flavor either too bland, too strong, or just plain wrong. Then, one day in my favorite Greek market, I noticed a small container of salmon pieces packed in oil. Evidently, a processing plant in Florida packaged and sold the trimmings left when smoked salmon is prepared. I bought a container, substituted its oil for some of my recipe’s butter, and chopped a portion of the salmon for use in the dish. Eureka! The result was perfection and I served it to all of my friends, to great acclaim — for all of 6 months. That’s about when the market stopped carrying the small containers of salmon. After a suitable period of mourning — during which I contacted the company and asked, unsuccessfully, if their product was sold anywhere else, not just in Illinois but in Wisconsin, Indiana, or Michigan, too — I went back into the test kitchen and my quest began anew. Today’s recipe is the result of those very tests.

I can see now that my early renditions were doomed to failure. I used too much cream, not enough salmon, and the technique was all wrong. Even my use of garlic proved to be too much for the dish. In the end, however, I did wind up with a tasty cream sauce similar to the recipe that I’ve already shared for fettuccine alfredo. Being fish-based, however, no cheese is used during its preparation, nor when it is served, and shallots are used in place of the ill-fated garlic. All was well until a few months ago when I watched a YouTube video of a woman making a pasta with salmon dish. She only spoke Italian and her video was often interrupted by advertisements for some sort of thick, cream-like, vegetable-based product. Being that my knowledge of the language is so limited, I was about to turn off the video when she added some vodka to the sauce. (I may not know many foreign words but, inexplicably, “vodka,” much like “jagermeister,” is one that I recognize in many tongues.) As a result of that video, I added an ounce of vodka to my recipe and liked the result, for it really does add a nice depth to the dish. One thing I’ve learned, though, is that when you use vodka in a recipe, be sure to use a higher quality brand. I’m not suggesting that you spend $40.00 for a bottle of vodka — I surely don’t — but do try to avoid the really cheap stuff; there is a definite difference in taste. Lastly, as far as the vodka is concerned, if you’re going to use some, be sure to remove the hot pan from the heat source before you add the liquor. This is true whenever you add alcohol to a pan. If poured near a flame, the fumes alone may ignite and you could have a nasty situation to deal with. Just remove the pan from the heat, add the liquor, give it a quick stir, and return the pan to the stove top — and keep a pan lid nearby to smother any unexpected flames. Safety first, always.

This sauce should take about 7 or 8 minutes to prepare. Keep that in mind as you cook the trenette, or whatever pasta you intend to use. In a perfect world, the pasta will be draining just as the sauce finishes. Your odds will improve if you remember that fresh pasta cooks relatively quickly, in a few minutes, and that dried pasta can take twice as long to reach al dente. Read the package instructions and plan accordingly. And be sure to reserve some of the water used to cook your pasta just in case the sauce needs a little more liquid.

*     *     *

Trenette al Salmone Recipe

Ingredients

  • 1/2 stick (1/4 cup) butter
  • 1 shallot, chopped fine
  • 1 cup heavy cream
  • 1/2 lb (8 oz) smoked salmon, cut into 1 1/2 to 2 inch strips
  • 1 oz vodka (optional)
  • 1 lb cooked trenette
  • 2 tbsp fresh parsley, chopped, separated
  • salt & ground white pepper, to taste
  • reserved pasta water

*     *     *

*     *     *

Directions

  1. Melt butter in a large, deep frying pan over med-high heat.
  2. Add shallots and sauté until soft, about 2 minutes.
  3. Add salmon and continue sautéing for another 2 minutes.
  4. Remove pan from heat, add vodka, give the pan’s contents a quick stir, and return to heat.
  5. After a minute, add the cream and continue cooking until sauce thickens slightly, about 2 – 3 minutes.
  6. Season with 1 tbsp of the parsley and salt & pepper to taste before adding the cooked trenette to the pan. Mix until the pasta is well-coated. If necessary, add a little of the reserved pasta water.
  7. Garnish with remaining tbsp of parsley and serve immediately.

Variations

The use of vodka in the recipe is certainly not required and is completely your choice. If you opt to use garlic in place of, or along with, the shallots, be careful not to be too heavy-handed. The star of this dish is the smoky flavor of the salmon and too much garlic will interfere with that.

And I’m begging you: Please, no cheese!

Notes

Traditionally served with pesto, trenette are thin, ribbon-like pasta that are just a bit more narrow than linguine. I prefer trenette over all other pasta simply because their width mirrors that of the pasta Mom and Zia cut by hand during my youth. In fact, when I demonstrated the pasta cutter for Zia, she agreed with my memory and I bought her a trenette cutter shortly thereafter.

*     *     *

Chicken Parmesan

As is the case within most families, birthdays were special events in our household and Mom would fix whatever dish the birthday child desired. For me, that choice was always veal parmesan. Mom served it with home-made pasta and I was one happy boy. Nowadays, I tend to avoid veal but I can’t avoid this dish nor the memories it evokes. So, instead of  veal, I use chicken. It may not be the same but it’s close enough — and certainly good enough — for me.

*     *     *

*     *     *

To begin, I start with boneless, skinless chicken thighs, which are fried after being floured and breaded. They are then placed into a baking dish, smothered in marinara sauce, and topped with sliced mozzarella & grated parmesan cheese before being baked in the oven. Yes, this recipe can make a mess of your kitchen but the pay-off is well worth the effort. The only advice in this area that I might offer is to clean as you go. When the marinara sauce is simmering, clean the work area and utensils. The same goes with the breading station as the chicken is being fried. When the final dish is in the oven, put the rest of the mess into the dishwasher (I hope you have a dishwasher) and start it running. Take it from one who’s been there, your kitchen will resemble a disaster area if you put off the cleaning until after you’ve eaten dinner.

*     *     *

Chicken Parmesan Recipe

Ingredients

  • 1 quart Marinara Sauce
  • 1 pkg boneless, skinless chicken thighs (5 or 6 thighs)
  • 1/2 cup all-purpose flour
  • 1 – 1 1/2 cups bread crumbs
  • 3 tbsp fresh parsley, chopped
  • 1/2 tsp garlic powder
  • 1/2 tsp onion powder
  • 2 eggs
  • 2 tbsp milk
  • 3 tbsp olive oil, more as needed for frying
  • 1 large ball of fresh mozzarella, sliced thinly to provide a slice for each thigh
  • 1/2 cup freshly grated parmesan cheese
  • salt & pepper

Directions

  1. Set up a breading station. Place the flour in one dish; combine the eggs & milk and place into the center dish; and in the third dish mix the bread crumbs, garlic powder, onion powder and parsley. Season each thigh with salt & pepper. Use the standard breading technique and begin by coating each thigh with the flour, one at a time. Shake off the excess flour before coating the thigh with the egg mixture. Allow the excess to drain a bit and dredge the thigh in the bread crumbs.  Set the breaded thigh aside and repeat with the remaining chicken pieces.
  2. Place oil in a large frying pan and heat over med-high heat. Working in batches, fry the breaded thighs until each side is golden brown, about 5 minutes per side. If necessary, replenish the oil between batches.
  3. Pre-heat oven to 375*.
  4. Liberally butter or use a cooking spray to coat a 9 x 13″ baking dish.
  5. Coat the bottom of the dish with a few ladles of the marinara sauce.
  6. Place the fried chicken pieces into the dish and use the rest of the tomato sauce to cover them all.
  7. Evenly sprinkle the dish with the parmesan cheese and then position one slice of mozzarella on top of each chicken piece.
  8. Cover with aluminum foil and bake in a pre-heated oven for 20 minutes. Remove the foil and continue baking for another 20 minutes.
  9. Remove from oven and allow to rest 10 minutes before serving.

Variations

Originally, Mom shallow-fried the veal in about 1/4 inch of vegetable oil. Initially, I did the same with the chicken pieces but, over the years, eventually cut out most of the oil in favor of a few tbsp of olive oil. Use whichever method you prefer, so long as the breaded pieces are golden brown when you’re done.

Mom never baked her veal parmesan and you needn’t bake this dish either. In a large, deep frying pan with a lid, add enough sauce to generously coat the pan’s surface, add the coated, fried chicken pieces, and cover with more sauce before sprinkling with grated parmesan cheese and topping with mozzarella slices. Cover the pan and cook over medium heat until the chicken is fully cooked, about 30 minutes. Use an instant read thermometer when in doubt.

I use chicken thighs but chicken breasts, tenders, or whatever chicken parts you prefer can be substituted. You may find, however, that boneless pieces work best. No matter what part(s) of the chicken you use, just be aware that the cooking times may vary, so, again, use an instant read thermometer to ensure the meat is thoroughly cooked.

Notes

The dish, as shown, was prepared “family style” and I wouldn’t necessarily serve it this way for guests.  Here, the chicken pieces are pretty much blanketed by a coating of cheese. If I were serving guests, I would be more careful with the cheese placement, using less cheese and restricting it to the individual chicken pieces. For “family,” however, I’ll go with the cheese blanket and I haven’t had any complaints yet.

*     *     *