The Bartolini Girls’ Beet Salad

Everyone has one — or maybe two or three. A go-to recipe used when an occasion calls for you to “bring a dish.” Today’s recipe is one that Mom and my Zia often used to fulfill their potluck obligation. To be honest, I’ve no idea who first “discovered” this recipe. I remember Mom serving it for dinner during my childhood and Zia brings it to dinners to this very day. A colorful dish, this is much lighter than potato salad and is sure to be a hit among beet lovers. Even so, not all beet lovers are fans of mayonnaise. Should that be true for you, I hope you’ll find this classic video more to your liking.

*     *     *

*     *     *

When you look over the recipe, you’ll notice that the ingredients are listed without accompanying amounts. Much depends upon the number of servings required and the size of the serving dish. When all is said and done, you’ll need to create a layer of beets that is about one inch deep. Next, the amount of chopped onion depends upon how just how strong that onion is. Be sure to taste it before adding it to the salad. If it is too strong, rinse it briefly under cold running water and pat it dry using paper towels before proceeding. With that settled, you can add as much or as little mayonnaise as you prefer, and the same can be said for the chopped, hard-boiled eggs. Remember, the beets are the star of the dish; everything else is meant to compliment rather than overpower.

Oh! Before you toss those beet greens away, you may wish to checkout my blogging friend David’s recipe for creamed beet greens over on his blog, the Gastronomic Gardener.

*     *     *

*     *     *

The Bartolini Girls’ Beet Salad Recipe

Ingredients

  • Raw beets, washed with greens trimmed
  • Diced onion
  • Mayonnaise
  • Eggs, hard-boiled and chopped
  • Salt & pepper, to taste

Directions

  1. To Prepare the Beets
    1. Pre-heat oven to 400˚ F (205˚ C)
    2. Place the beets in a roasting pan or on a baking sheet. Drizzle with olive oil, season with salt, and place in the middle of the oven. Roast for 30 – 40 minutes, depending upon the size of the beets. The beets are fully roasted when a knife’s blade meets little resistance when the largest beet is pierced. Set aside to cool.
    3. Once cool enough to handle, use a paring knife to trim the beets’ tops and bottoms. Much of the skin of each bulb should slip off easily. Use a paring knife to remove the rest.
    4. Use a knife, food processor, or mandoline to dice, shred, or slice the beets. Set aside.
  2. To Assemble the Salad
    1. Place beets in a serving dish. You’ll want to create layer of about an inch deep. Season lightly with salt.
    2. Sprinkle a couple of tablespoons of diced onion on top of the beets. Use more or less depending upon the onion’s strength.
    3. Add enough mayonnaise to completely cover the ingredients.
    4. Use the chopped, hard-boiled eggs to top off the salad.
    5. Season with salt, pepper, and sweet paprika.
  3. Chill fully before serving.

*     *     *

*     *     *

Variations

Although I’ve not tried to prepare them this way, I imagine one could steam the beets instead of roasting them. And if you’re in a crunch for time, you can always substitute canned beets, although I prefer the additional flavor that roasted beets bring to the dish.

Notes

To beginner cooks: mayonnaise and hot temperatures do not mix. Serious illness can result if mayonnaise is not kept properly chilled. When serving this salad or any mayonnaise-based dish on a warm day, be sure to keep it covered and iced until the last minute before serving and then nestle the serving dish in another slightly larger one filled with ice. It must be kept chilled and when in doubt, throw it out.

*     *     *

One Long Overdue Acknowledgement

Way back in May, I was fortunate to win a give-away over at Zesty Bean Dog’s wonderful blog. My original plan was to feature my prize, an OXO salad dressing shaker, with my next post featuring a salad. Well, in retrospect and given how few salad recipes I post, I should have come up with a better plan. And even though a salad shaker isn’t used in the preparation of today’s recipe, I thought it was about the closest I’d come to posting a salad recipe for at least a few weeks. ZBD, I hope you do not feel that I don’t appreciate or do not use your gift. It has remained “in service” pretty much from Day One and is one of those few kitchen items that goes from fridge to dishwasher and back again, without ever seeing the inside of a cupboard. So, thanks again, ZBD, for a great kitchen accessory.

*     *     *

By any other name …

“Black Baccara”

*     *     *

Calamarata with Shrimp and Mussels

It’s getting to be routine. I go to “my” Italian market with a list of items to buy. Once I’ve finished the vegetable portion of my romp, I take a casual stroll toward the fish monger. I just cannot pass that display case without stopping to check out the day’s catch. And that’s when it happens.

No matter who is behind that counter, I’m greeted with a friendly, “Hello. Are you looking for anything in particular?” or something to that effect. I explain that I’m just looking and, to be polite, I ask about an item on display. “You’ve got branzini (Mediterranean sea bass)?” “Where do you get your vongole (clams)?” “Are these cozze (mussels) Mediterranean?” “Do you have anguille (eels) at Christmas?” You know. Just being polite. Maybe it’s the way I pronounce “vongole” or something but once my question’s been answered, the conversation turns to shell-fish. A few weeks ago, it was the vongole, the “freshest in town.” And I bought some. The following week it was vongole again and I would have left with another bag of the little darlings had it not been well over 90˚. With a few more stops to make, I wasn’t sure if I’d make it home without melting; those clams didn’t stand a chance. The Friday before last, as I approached the counter, I noticed I was alone. The fish mongers were nowhere to be seen. Great! I could ogle the octopi, peruse the perch, savor the salmon, and scan the squid, all at my leisure and with no fear of leaving with a bag of seafood. Soon I spied a sign announcing a sale on mussels and I turned a bit to get a better view of the black beauties. That’s when he appeared, seemingly out of nowhere. “Those mussels are good, real good … but … these here are much better. They’re larger and-”  Resigned, I stopped him in mid-sentence and told him to just get me a pound. Why fight the inevitable?

While he bagged my mollusks, my mind raced. How would I prepare them and with what, if anything? Since mussels have such a strong flavor, I reasoned, they could easily stand up to a red sauce. Shrimp are, also, strong-tasting, I thought, and I bought a pound of them, too. Vongole, though, would never be able to compete in this mix, so, I bid “Ciao!” to the fish monger. I quickly decided to make a “fresh” sauce and by that I mean one that simmers only a brief amount of time. I want to taste fresh tomato and I headed back into the produce area to buy 9 large plum tomatoes. Now to find the dish’s most important component: the pasta. I headed over to the pasta aisle (actually, it’s a pasta aisle and a half!) and the choice was easy. Since the mussels and shrimp were large, I wanted my pasta to be, too. I selected calamarata, so named because they resembles large calamari (squid) rings.  It certainly didn’t hurt that they’d be used in a seafood dish. Leaving the pasta aisle, I mentally inventoried my fridge and knew I was set to go. I finished my shopping and headed home, munching on my reward, a cannoli.

*     *     *

Calamarata

 *     *     *

When preparing today’s dish, remember to “Think Big!” Calamarata are a large pasta and everything included with it needs to be large, as well. So, the onions aren’t diced but chopped and rather large, at that. Once peeled, divide the tomatoes into 2 groups. The larger group, about ⅔ of the total, are seeded and chopped into chunks. These will add texture. The remaining ⅓, once seeded, is puréed in a food processor. These will be the basis for the sauce. The only things diced are the parsley, basil, and garlic. Even so, when garnishing the dish before serving, sprinkle a few hand-torn basil and parsley leaves. Most importantly, if you, too, want that fresh tomato taste, do not let the sauce simmer for longer than 30 minutes. The “simmer clock” starts the minute the tomatoes hit the pan. Cheese, by the way, would not be used with this dish.

And if you do like that fresh tomato taste, check out this recipe for Pesto Trapanese. It will take you longer to cook the pasta than it will to make this pesto and the taste is incredible.

*     *     *

Calamarata with Shrimp and Mussels Recipe

(Calamarata con Gamberetto e Cozze)

Ingredients

  • 1 lb calamarata pasta
  • 1 lb fresh mussels, beards removed and scrubbed
  • 1 lb large  (21-25 count) shrimp, peeled and de-veined
  • 9 or 10 large plum tomatoes – divided
  • 3 tbsp olive oil
  • ½ tsp red pepper flakes, more of less to taste
  • 1 medium onion, roughly chopped
  • 2 cloves garlic, diced
  • splash of white wine
  • 3 tbsp fresh parsley, chopped, more for garnish
  • 1 tbsp fresh basil, chopped, more for garnish
  • ½ tbsp marjoram
  • 2 tbsp capers
*     *     *

*     *     *

Directions

  1. Bring a large pot of water to boil. While waiting, use a paring knife to cut a small “X” into the bottom of each tomato. Once the water boils, place the scored tomatoes into the water and blanch for 1 to 2 minutes. Remove the tomatoes and place in a bowl of ice water. Once cooled to touch, peel each, beginning at its “X”, before quartering and seeding it. Place aside.
  2. Take about ⅔ of the tomatoes and coarsely chop into chunks. Puree the rest of the tomatoes using a food processor, blender, or stick blender.
  3. Heat the olive oil in a large, deep frying pan over med-high heat. Add the pepper flakes and, after a minute, add the onions. Sauté until translucent.
  4. Add the garlic and continue sautéing for about a minute more. Add a splash of white wine and reduce for a minute or two.
  5. Add all the tomatoes, season with salt & pepper, and maintain a medium simmer.
  6. Begin heating the water for your pasta. The calamarata pasta that I prepared needed 16 minutes to cook. Check your package’s instructions.
  7. When there are 5 minutes to go, add the parsley, basil, & marjoram to the frying pan, stir, and then add the mussels to the sauce and place a cover on the pan.
  8. 3 minutes later, add the shrimp and replace the cover.
  9. If you prefer to serve the mussels shelled, see Notes below.
  10. At the 5 minute mark, reserve some pasta water, drain the pasta and add it to the sauce pan. Add the capers and mix to evenly coat the pasta.
  11. Pour the calamarata into a serving bowl, garnish with torn basil & parsley leaves, and serve.

Variations

This is really a basic tomato sauce with seafood added. As I mentioned early on, I wanted a fresh sauce so I didn’t let the tomatoes simmer for long. You certainly may allow your tomatoes to simmer longer, if that’s your preference. Just remember that there’s no turning back once you put the pasta into the boiling water, and that’s regardless of the pasta you’ve chosen to cook. And once the mussels are put into the sauce, you have about 5 minutes to go. The cooking instructions on the pasta’s package are your friends.

Notes

As always, be sure to reserve some pasta water in case your sauce needs it. Be aware, though, that the mussels will give off some flavorful liquid during the cooking process. You may not need as much pasta water as you think.

Once the shrimp have been in the sauce for about a minute, I remove the pan’s cover and begin removing the mussels from their shells. I usually leave a few in the shell just for presentation in the final dish. Once all are removed, it is far easier to stir the sauce to insure the shrimp are evenly cooked on both sides.

I usually drain and add the pasta to the sauce when the shrimp are just shy of being fully cooked. They will finish cooking when mixed with the hot pasta and this will insure that neither shrimp nor mussels are over-cooked and chewy when served.

*     *     *

By any other name …

There are two more of “my girls” but neither is doing well enough to make a public appearance. If they return from Betty Ford respond to treatment in time for Fall, I’ll be sure to share a photo or two. Before moving on to the rest of the roses, there are these, located at the foot of the bed, right next to Judy. Where else?

*     *     *

Lady’s Slipper Orchids

*     *     *

Baked Rigatoni

Rigatoni al Forno

Yes, I realize for many of us in the Northern Hemisphere, Summer is in full swing, with temps soaring well into the 90’s and, incredibly for some, beyond. I, also, know that for many, firing up the oven isn’t necessarily something we’re prone to do when our homes are already sizzling. So, why am I featuring a baked pasta dish today? The answer is simple. Mozzarella. I had plenty of mozzarella in my fridge, left over from the first round of mozzarella making and I needed to do something with it. And lest there be any doubt, when I have a surplus of something, anything, my go-to dish is pasta of some sort. So, considering that mozzarella “performs” so well when baked, I decided to make an “al Forno” recipe.

Growing up, rigatoni was a frequent “guest” at our dinner table, although we kids called them “flat tires.”  I don’t recall Mom ever baking rigatoni, though. It wasn’t until I was on my own that I started experimenting with baking penne and rigatoni. Generally, these dishes are easy to assemble, with left-overs that keep well and are easily re-heated. Perfect for my one person household. So, when presented with a bounty of mozzarella, I chose flat tires to help me out.

Normally, when I prepare a baked pasta, I coat the cooked pasta with sauce and cheese of some sort before topping it off with shredded mozzarella. With this dish, however, I reverse things a bit. Butter and Pecorino Romano cheese are used to coat the partially cooked rigatoni but, as you’ll soon see, the mozzarella is chopped into cubes and stirred into the pasta. Once mixed, Asiago cheese is used to top off the dish before baking. Doing so gives one both contrasting flavors and textures. The strong-tasting Asiago, melted until golden, hides not just the sharp Pecorino Romano but the gooey milder tasting mozzarella cubes spread throughout the pasta, as well. It’s a three cheese combination that I enjoy well enough that I don’t really mind turning on the oven in a heat wave.

*     *     *

*     *     *

Rigatoni al Forno Recipe

Ingredients

  • 1 lb rigatoni
  • 1 quart tomato sauce (vegetarians use marinara)
  • 8 oz Mozzarella
  • 8 oz Asiago cheese
  • 4 tbsp butter, cut into chunks + a little more to grease the baking dish (optional)
  • ¾ cup Pecorino Romano cheese, grated
  • fresh parsley, chopped, for garnish (optional)

Directions

  1. Pre-heat oven to 350˚F.
  2. Lightly grease a 9 X 13″ baking dish with cooking spray or butter.
  3. Add rigatoni to a large pot of heavily salted, boiling water. Cook the pasta for half of the time suggested on the package for al dente pasta. Drain and hold until needed.
  4. Warm sauce and maintain a low simmer.
  5. Slice and cut the mozzarella cheese into ½ inch cubes. Set aside.
  6. Use a box grater to shred the Asiago cheese. Set aside.
  7. Once the pasta has been semi-cooked and drained, return the rigatoni to the now empty pot.
  8. Add the butter and then the Pecorino Romano to the hot rigatoni, stirring after each until the pasta is well-coated.
  9. Add the tomato sauce to the pot and stir.
  10. Add the mozzarella to the pot and gently stir until evenly distributed.
  11. Place the pasta in a greased 9 x 13″ baking dish. Evenly sprinkle the shredded Asiago cheese on top.
  12. Bake in pre-heated 350˚F oven for 20 to 25 minutes or until the Asiago cheese is melted to your liking.
  13. Allow to rest 5 minutes before serving, garnished with parsley, if desired.

*     *     *

Someone forgot the parsley.

*     *     *

Variations

For whatever reason, some may find Asiago cheese unappealing. If that’s true for you, there are other cheeses that can be used to top off your dish. Fontina is a good alternative, as is ricotta salata. The choice is really yours, just try to find a cheese that offers a contrasting flavor to the mozzarella. You won’t be disappointed.

Although I used rigatoni for this dish, you can certainly use any of the tube-shaped pastas. Just avoid the ribbon-like pastas. They are not well suited to baked dishes of this type.

*     *     *

By any other name … 

“Queen Elizabeth”

(Because there is no King George III rose.)

Happy 4th of July!

*     *     *

A Blogger’s Relaxing Day Leads To A Jam-Filled One For Me

You may recall, two weeks ago my mascarpone post contained three recipes, one of which paired strawberries with balsamic vinegar. What some of you may not know is that the day before, my blogging buddy, Sarah, whose blog Sarah’s Place, is one worth checking out, had a “relaxing” day that included starting and making a great deal of progress on a knitting project; preparing strawberry balsamic and black pepper jam from a recipe that she found on another worthwhile blog, Sydney’s Kitchen; and baking a rosemary-herbed focaccia studded with cherries. Did you notice the part about the jam? It sure did catch my eye, particularly arriving when it did, just before my own post featuring those same flavors. Suddenly, I was thinking about making jam.

Well, coincidentally, that Friday, a 2nd blogging friend, Michael, whose blog Oishi is another that I enjoy, posted a salad recipe featuring — you guessed it — strawberries with balsamic … and this time bleu cheese, too. It was then that I decided to make jam and, as I wrote to Michael, I would buy enough berries to make his salad, too. The very next morning at the Evanston farmers market, once Max had his much-anticipated rendezvous with Debra, the crossing guard, I found myself standing before 3 long tables covered with quarts of Michigan strawberries, over which hung a giant sign, “Last Chance.” Whatever doubts I may have had were quickly vanquished. I bought 3 quarts and moved on to the Egg Ladies’ stall.

Once home, I began to have second thoughts. No, not about making the jam; that and the salad were “done deals.” It was the timing. The forecast was for another day with a high well into the 90’s, hardly jam-making weather. So, remembering a link I found on Pinterest, I soaked my berries in a 10% vinegar solution for 10 minutes, to prevent mold, and refrigerated the red beauties. One would think that this would be where this tale ends. Yes, one would think …

Crostini of Goat Cheese with Strawberry Balsamic & Black Pepper Jam

You see, the original recipe would make only 1 jar of jam and it wasn’t processed, meaning it had to be refrigerated and used within 3 to 4 weeks. Well, I need to make enough jam to give jars to an entire team of tasters, as well as my Zia, and this recipe just wouldn’t do. So, I went looking for a canning recipe that remained true to the original, while making enough for each of my devoted tasters. Luckily, I found two. The first recipe, from Canadian Living Magazine, gave me canning instructions but the amount of balsamic required was quite a bit less than the amount used in the original. Not being an experienced canner, I didn’t know whether increasing the amount of balsamic would ruin the “set” of my jam. I had no choice, therefore, but to look for another recipe — and I and found one on Epicurious.com. With a balsamic amount proportional to that used in the original, a couple of commenters stated that they canned it without any problem. Eureka! Now armed with this new-found knowledge, I braved the heat and set pots of water to boil, as I cleaned and hulled my strawberries. So, to be fair, I’ll credit Sarah’s Place, Sydney’s Kitchen, Epicurious.com, and Canada for the inspiration for today’s recipe.

 *     *     *

Strawberry Balsamic Vinegar and Black Pepper Jam Recipe 

yield: approx 8 cups

Ingredients

  • 6 cups fresh strawberries, cleaned, hulled, quartered (approx. 2 quarts, whole)
  • 4½ cups sugar – separated
  • 1 envelope (49 g) low-sugar pectin
  • 1 tsp butter (optional)
  • pinch of salt
  • ½ cup + 1 tbsp balsamic vinegar
  • 1 tbsp cracked black pepper

Directions

To Prepare

  1. Sterilize the jars and wash the jar lids and rings in hot, soapy water. Place lids and rings in a deep bowl and pour near-boiling water over them.
  2. Start bringing to boil a large, deep canning kettle of water to be used for the canning process and a second, smaller pot of water to be used to replenish water that may boil away during the canning process.
  3. Mix the pectin with ¼ cup of the sugar. Set aside.
  4. Working in batches, add sliced berries into a large bowl and use a potato masher to smash them. Continue until all are equally smooshed.

To Make the Jam

Thanks, Sarah!

  1. Place the strawberries and the pectin-sugar mixture into a heavy-bottomed pot over a med-high heat. A Dutch oven works nicely. Add butter, if desired, to limit foam.
  2. Stirring frequently, you are heating the berries until a rolling boil is achieved at about 220˚F. A rolling boil is one that will not dissipate when the pot’s contents are stirred.
  3. Add the remaining sugar and stir well. Stir frequently while you wait for the pot to return to a roiling boil.
  4. Once a rolling boil has returned, keep stirring for exactly one minute before removing the pot from the heat.
  5. With a large spoon, carefully skim the surface to remove any foam.
  6. Add balsamic vinegar and pepper. Stir well to thoroughly combine.

To Can

  1. Using a funnel and large ladle, fill each jar to ¼ inch from the rim. Wipe the rim to make sure no jam has spilt, place a lid on each jar, and then the ring, tightening until “finger tight” but not as tight as you can make it. Act quickly, filling and capping all the jars.
  2. Jars placed directly on the kettle’s bottom might burst, so, a rack of some sort must be put into the canning kettle to cover the bottom. Many large pots have one, as do many pressure cookers. (I use a rack from an old pot that has long since been discarded.)
  3. Keep each jar level as you place them, one by one, into the canning kettle filled with now boiling water. The jars should not touch each other, nor should they be allowed to tip over. Depending upon the size of the kettle and number of jars, you may need to work in batches.
  4. Once the jars are in the kettle, make sure that there is at least one inch of water over the top of the tallest jar(s). If not, add boiling water from the smaller pot mentioned in Step 2 of  To Prepare.
  5. Cover the pot and begin timing when the water returns to the boil. The jars must be boiled, “processed”, for 10 minutes.
  6. Meanwhile, place a baking sheet on a level surface and line it with a clean kitchen towel.
  7. Once 10 minutes have passed, carefully remove each jar and place it on to the towel-lined baking sheet. Leave about an inch separating the jars.
  8. Once all the jars have been processed and placed on the baking sheet, remove the baking sheet & jars to a place that is draft-free and where they will remain undisturbed for 24 hours.
  9. After 24 hours have passed, check each jar to insure it’s sealed and then store on a shelf in a cool, dark place, where it will stay fresh for months.

Notes

According to several commenters on the Epicurious website, once canned, it is best to let the jam sit for a week before sampling it. The flavors blend and the pepper becomes more pronounced.

Once opened, the jam should be refrigerated and fully used within a month.

One last thing

I did make Michael’s salad and it was every bit as good as I had hoped.

*     *     *

By any other name … 

“Elizabeth Taylor”

*     *     *

Hey, Bella! I’ve got Mozzarella!

All right, mozzarella fans. This is it. You’ve waited patiently while I demonstrated how to make ricotta, goat cheese, cream cheese, mascarpone, and feta. Now it’s your turn. Today I’ll show you how to make mozzarella. Hopefully, you’ve tried to make at least one of the earlier cheeses so that you’ve some idea about creating & handling curds, clean breaks, sterilizing equipment, etc., because you’re going to need all of this experience — plus another trick or two — to make today’s cheese. I have to say, though, having a taste of freshly made mozzarella when still warm makes it all worthwhile. And, if that’s not enough, imagine making an Insalata Caprese of freshly made mozzarella with sliced tomatoes & basil, both picked moments before from your garden. Cambierà la vostra vita!

Now, before we get into the nuts and bolts of making mozzarella, there are a few things that need mention. First of all, mozzarella belongs to the pasta filata, “spun paste”, family of Italian cheese. Primarily made from buffalo or cow’s milk, provolone, scamorza, and caciocavallo are also members of this group. The curds of these cheeses are heated in water and spun before being pulled and stretched to make the cheese. If they aren’t spun or pulled properly, the cheese’s texture will not be right nor will the cheeses have that characteristic stretchy quality when melted.
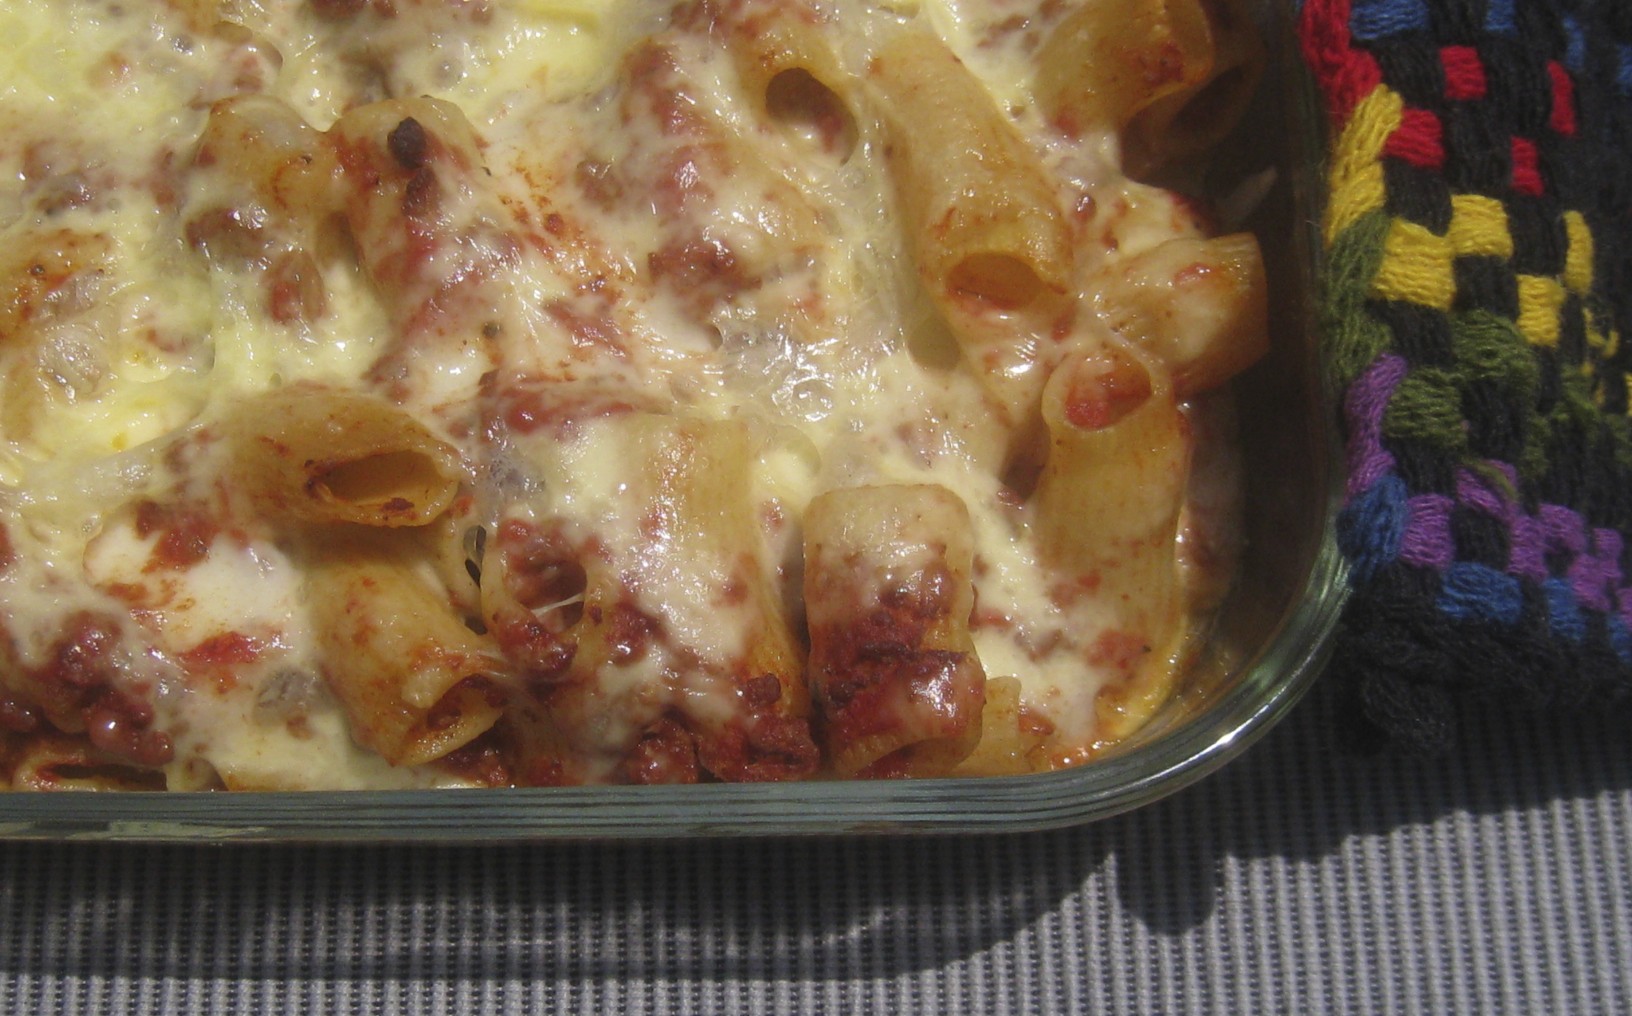
Rigatoni al Forno

Next, you may recall that in the feta post, I wrote that calcium chloride (CaCl) could be used to compensate for overly pasteurized dairy product and would result in firmer curds. While that is true and CaCl is used widely in cheese making, it can not be used when making any of the pasta filata cheeses. Using CaCl will toughen the curds, making that stretch impossible and  ruining the texture of the finished cheese. So, with no agent to counteract the effects of over or ultra-pasteurization, you must use raw or pasteurized milk. When choosing pasteurized, select a whole milk from a local dairy to minimize the chances of it being over pasteurized. Some milk will have the pasteurization temperature posted on the container’s label. I use that milk, when I can find it, because the pasteurization temperature is low compared to most. Try as I might, I’ve been unable to make mozzarella from ultra-pasteurized milk.

Another thing about mozzarella is that it requires a level of acidity in order to form the curds — and this is where the processes diverge when making American versus Italian Mozzarella. Today we’re making American Mozzarella and we’ll add granulated citric acid to create the acidity required. (When we make Italian Mozzarella, we’ll let the curds sit overnight to develop the necessary acidity.) Citric acid is commonly used when making wine at home, in canning, and in a multitude of food manufacturing processes. It is quite inexpensive and can be purchased anywhere home brewing or wine making supplies are sold, at some pharmacies, on Amazon, or through the sites listed on my Cheesy Stuff page. You will not be able to make American Mozzarella without it nor can you substitute fresh citrus juice for it.

You’ll see “Lipase” included among the list of ingredients. Lipase is an enzyme that is used to enhance the flavor of mozzarella, Asiago, provolone, feta and blue cheeses. It can be purchased from the cheese making sites listed on my Cheesy Stuff page. It is not a necessary ingredient, however, so don’t worry if you cannot find or purchase it. If you do use it, however, add another ¼ tablet of rennet for each gallon of milk.

 *     *     *

Simple salad of rocket, tomato, and mozzarella with red wine vinegar and olive oil.

 *     *     *

Sorry about the quality of the photos to follow but this wasn’t an easy process to photograph while working alone. I, also, missed a photo or two but none so important that you’ll get lost. Lastly, you’ll notice that I use gloves when handling the curds. If you have asbestos fingers, you may not need to use them. I’ve found that they do offer some protection from the heated curds while they’re being stretched. I’ve heard that it is customary for women in Italy to keep a bowl of ice water nearby. They dip their hands in it when the heat becomes too much to bear. It’s not such a bad idea, even when wearing gloves.

Before beginning, please refer to my Cheesy Stuff page. Chock full of cheesy details, it provides information about ingredients, cleaning/sterilizing equipment, spices & seasonings, a few tips, and sources for supplies and information.

OK. If no one has any objections, let’s get this show on the road …

 *     *     *

How to Make Mozzarella at Home

Ingredients

  • 1 gal (3.67 L) whole milk — NOT ultra-pasteurized
  • 1¼ tsp citric acid dissolved in a ¼ cup (60 ml) of cool distilled water
  • ½ tablet rennet dissolved in a ¼ cup (60 ml) of cool distilled water
  • ¼ tsp Lipase dissolved in a ¼ cup (60 ml) of cool distilled water — optional but, if using Lipase, add another ¼ tablet of rennet
  • 1 tsp table salt

Directions

  1. Place milk in a non-reactive pot with a lid. Gently heat the mixture until 88˚F (31˚C), stirring occasionally to prevent scalding on the pan’s bottom.
  2. Add diluted citric acid and mix well. If using Lipase, add it now and mix thoroughly.
  3. Place pot where it will not be disturbed. Add dissolved rennet, stir thoroughly,  and cover pot. Do not disturb for at least one hour. I wait two hours, if not a little more.
  4. As was done when making feta cheese, check for a clean break and, when achieved, go to step 6.

 *     *     *

Clean break.

 *     *     *

Bad break.

5. If a clean break is not achieved, wait an hour and test again. Still bad? Wait another hour. Still bad? Nothing to be done but dump the dairy and start over.

*     *     *

6. Use a long knife or offset spatula, and starting at one side of the pot, cut a straight line through the curd. Once the opposite side has been reached, create another slice about ½ in front of the previous cut. Repeat until the entire curd has been cut into horizontal slices.

 *     *     *

7. Give the pot a quarter turn and, starting at one end of the pot, repeat the slicing process. When finished, the curd should be cut into ½ inch squares.

 *     *     *

8. Now take the knife or offset spatula and, with the blade on an angle, slice through the curds from side to side at ½ inch intervals. This will cut the curds beneath the surface. Repeat this step twice, turning the pot and cutting the curds on an angle each time.

*     *     *

9. Gently stir the curds, cutting any that are larger than 1/2 inch.

*     *     *

10. Return the pot to the stove and gently heat the curds and whey until they reach 108˚F (42˚C), stirring frequently to prevent sticking on the pan’s bottom. Maintain that temperature for 35 minutes, stirring the curds occasionally to keep them separated.

*     *     *

11. Gently pour the pot’s contents into a sieve, separating the curds while reserving the whey. Allow to drain for 15 minutes. Break apart any large clumps of curds.

*     *     *

12. Place curds into a large bowl, season with salt, and mix thoroughly. Place ⅓ of the salted curds in a 2 cup measure and microwave on high for 45 seconds.

*     *     *

Curds straight from the microwave.

*     *     *

13. Use a spoon to combine the curds while distributing the heat, creating a single, large curd mass.

*     *     *

14. Once combined, remove but be careful. It’s hot. Note how dull it is.

 *     *     *

15. Slowly stretch the curd like you would salt water taffy. If it breaks instead of stretching, re-heat the curd for another 15 seconds before trying again.

*     *     *

16. Fold in half onto itself.

 *     *     *

17. Stretch it again. Continue to stretch & fold until the cheese is smooth and shines.

 *     *     *

18. Form into a ball like you would bread dough for a dinner roll. Best if used right away. See Notes for storage tips.

 *     *     *

1 gallon (3.67 L) of whole milk yields about 13 ounces (375 g) of mozzarella.

*     *     *

Notes

YouTube has a number of videos about making mozzarella. Often they begin with a cook pouring boiling water over curds that were either made or purchased off-camera. As you’ll learn in a few weeks, using boiling water to cook the curds is a part of the process when making Italian Mozzarella. Using a microwave, as indicated above, will work just fine for American Mozzarella.

According to Dr. Fankhauser, the whey reserved from above may be used to make ricotta. Similar to the traditional method of making ricotta, he directs that the whey be heated to 203˚F (95˚C), allowed to cool, and then filtered. I have never gotten an appreciable amount of ricotta from whey resulting from making American Mozzarella. I don’t even try anymore and just use some of the whey to store my mozzarella. If I want to make ricotta, I follow this recipe.

Mozzarella will remain good to eat for about 1 week but the sooner you use it, the better it will taste. It is at its peak when it is still warm after being stretched. If it is not to be used immediately, tightly wrap it in plastic wrap and set aside until needed. Do not refrigerate. If you’re not going to use it that day, do not wrap it but place it in some reserved whey, covered, and then refrigerate it. Be aware that once it is chilled, the texture — the creaminess — will change because the milk fats will harden.  Restaurants will make mozzarella in the morning and whatever is left at the end of the day will be refrigerated and used in pizza the following day. American Mozzarella can be made in a couple of hours and, believe me, once you taste the difference between freshly made and mozzarella that you’ve chilled, you’ll want to use it all the same day you make it. Now, I have read where some store it coated in salt or in a bath of (sometimes flavored) olive oil. I’ve not tried either approach and, because of that, I won’t recommend them.

*     *     *

Inspired by the Fankhauser American Mozzarella webpage

and

“Home Cheese Making” by Ricki Carrol

*     *     *

By any other name … 

“Judy Garland”

*     *     *

The Return of Mascarpone!

Hard to believe that it’s already been 11 weeks since we made mascarpone together. At the time, I said that I would revisit the dishes used to illustrate that post and, to that end, I’ve already shared the recipe for Pappardelle with Spinach, Mascarpone, and Pecorino Romano Cheeses. Today we’re going to use mascarpone in two desserts and again to make jalapeño poppers.

When most hear the word “mascarpone”, they think of tiramisu, that quintessential Italian treat — and who would blame them?  I do plan to share our family recipe for tiramisu but at a later date. That dish deserves a post all its own. So, instead, I’ll share two easy confections that combine whipped mascarpone with fresh berries. To make the whipped mascarpone, take some whipping cream and beat until peaks form. Add icing/confectioner’s sugar, to taste, during the process. To the sweetened whipped cream, add at least an equal amount of mascarpone and beat the mixture until peaks again form. Taste midway through to see if more sugar is needed. Set aside for use in either of the following two recipes.

In the first case, fresh strawberries are hulled and quartered before being macerated with a little sugar and balsamic vinegar.  There is only one real concern about this dish and that involves the balsamic vinegar. In the past, when I made this, I took a couple of ounces of balsamic, added a little sugar & lemon juice, and then reduced it by half over a med-high heat. Once cooled, I used it to make my parfaits. Last Christmas, my friends, Cynthia & Nigel, gave me a bottle of aged balsamic and it’s perfect for this dessert without being reduced or sweetened. Whether your balsamic is good as-is or has been reduced and cooled, the parfaits are made the same from this point forward. Hull and quarter 4 or 5 strawberries per serving. Sprinkle them with a little sugar, more or less depending upon the sweetness of the berries. Add  a couple of tablespoons of the (reduced) balsamic vinegar, mix well, and set aside for about a half hour. (This would be a good time to make the whipped mascarpone.)  Once the berries are ready, begin building the parfaits. Start with the mascarpone and create alternating layers of the whipped cheese and the berries in each parfait cup. You’ll want to finish with berries on top. When all the cups have been filled, divide whatever berry/balsamic sauce is left among the servings. Garnish with a piece of basil, if you like.

This next recipe uses chocolate sauce instead of balsamic vinegar. As you’ve probably noticed in the picture, I like a thick chocolate sauce. Here I created a granache, of sorts, by melting 4 semi-sweet chocolate squares in a double boiler, adding 1 to 2 tablespoons of  heavy cream, and stirring until well combined. Once cooled, I used it to top my dessert, resulting in a thick mass of chocolate-y goodness. For a thinner sauce, add more cream, some butter, and sugar to the double boiler and stir thoroughly. As for the berries, you can wash and trim them, serving them as-is, or, once cleaned, you can put them all in a bowl, add a little sugar & lemon juice, and let sit for 30 minutes. When ready to prepare your dessert, place a large dollop of whipped mascarpone in the center of each dessert plate and spoon mixed berries on top of each dollop.  Add another, smaller, dollop on each dish and top off each with more berries. Finish each dessert with some chocolate sauce and serve.

 *     *     *

The last recipe for today uses mascarpone to make jalapeño poppers. Most of us have favorite popper recipes and mine involves cream cheese, garlic, onion, and grated cheeses to make a filling for the peppers. Mascarpone, though creamier, isn’t as flavorful as cream cheese and, as a result, I do not add garlic nor onion to the filling for fear of completely overpowering the mascarpone. I do add grated Monterey Jack and cheddar cheeses to the filling to give it more “body.” I use 2 parts mascarpone to 1 part cheddar and 1 part Monterey Jack. To prepare the peppers, take off the top of each, creating a boat-like vessel to hold the cheese. (Cutting them in half will allow the cheese filling to spill during baking.) With a spoon, clean out the seeds and ribs from inside each “boat.” Now, filling each pepper, as-is, will result in pretty mild poppers. For more heat, dice the trimmed tops with as much of the seeds & ribs that you like and add them to the cheeses. Once thoroughly mixed, fill each boat with the cheese but not to over-flowing. Next, place some Panko bread crumbs and a couple of tablespoons of grated Pecorino Romano cheese in a shallow dish and roll each filled pepper into the dish, coating the cheese filling with the bread crumb mixture. Spray a baking sheet with cooking spray, place each on the tray, and cook in a pre-heated 400˚ oven until topping begins to brown.  I start checking at about the 15 minute mark. If the peppers bake for too long, the pepper walls might collapse, spilling the hot cheese filling all over your baking sheet. Once baked to your satisfaction, remove to a serving platter and allow to cool for a couple of minutes before serving.

 *     *     *

Coming Attractions

Warn the dairies! Next week we’re making American Mozzarella.

 *     *     *

By any other name …

“Helen Hayes”

 *     *     *

Spanakópita + Tyropitákia = Spanakotyropitákia

Oh, don’t worry. I’ll explain the title in a minute.

Spanakotyropitákia

The 1990s was my decade for travel. Accompanied with my best friend, aka my Traveling Companion, we toured places that I had previously dreamt of visiting but never thought that I’d actually see in person. One such place was Greece. We arrived in Athens, spent the night, and then headed out into the Aegean for some island hopping. This trip had a little something for everyone: a modern-day metropolis; ruins of ancient civilizations; beautiful beaches; thriving nightlife; far too many picturesque settings to mention here; and the food. Oh, the glorious food!

As you know, my love of pasta knows no bounds, so, you can rest assured I had my fair share of pastitsio, with a little moussaka thrown in for good measure. Surely, my holiday in Greece would not have been complete unless I had my fill of lamb nor, for that matter, could I be expected to go from island to island without at least sampling the seafood — repeatedly. And I can assure you that any gyros bought from any street vendor anywhere on those islands will put to shame any gyros you can buy on this side of the Atlantic, hands down. Even so, Man does not munch on gyros alone and, since each island has its own wine, cheeses, olives, & olive oil, it would have been an insult had we not tasted them all, usually with a chunk of crusty bread.  Similarly, it was a surprise to learn that each island also prepared its own version of spanakópita, the Greek spinach pie. Now, I truly enjoy spinach pies and my family makes the Italian version of these tasty treats. (Called cacioni, you can see our recipe here and a recipe link supplied by my blogging friend from Le Marche, Mariano Pallottini, can be found here.) So, I needed no further encouragement to taste each island’s unique take on spanakópita. I soon learned that although the basics to each were the same (a spinach filling covered with phyllo dough) there was a surprising variety.

*     *     *

The center of attention

*     *     *

First off, some spanakópita were actually pies and each serving is a wedge just as if it were some fruit-filled dessert. Others were prepared on baking sheets and you’re served a rectangular piece like you would if it were baklava, only larger. Still others were prepared with individual servings in mind and could be self-contained, triangular or burrito-shaped pies. Beyond their form, the stuffing mixtures contained primarily the same ingredients but in differing proportions. Virtually all contained spinach, a little onion, lemon (either zest, juice, or both), dill, and a binding agent, eggs I presume. As you can well imagine, changing the amount of lemon zest or dill to be used can greatly affect the overall taste of the pie. In some cases, a little mint or parsley was also added to the filling, each adding their own distinct flavor to the mix. So, with so many variables at play, I never knew what I would be served when I choose spanakópita from a menu — and I enjoyed the surprise almost as much as the pie.

Normally, this is where I’d dive into the recipe but one more thing needs mentioning. One night, while on Mykonos, we asked our hotel proprietor for a local restaurant, a taberna, far from the tourist crowds. He obliged, sending us to a great little spot where, coincidentally, a family group was holding some sort of celebration, as I recall. It’s been some time since that evening and I’ve grown unsure of many of the specifics but I do remember 3 things: 1) we were sent ouzo shots from the management and the celebrants; 2) we ordered the house specialty, gardoubes, lamb offal that’s wrapped in caul fat and grilled; and, 3) we were sent ouzo shots from the management and celebrants. What does any of this have to do with spanakópita?

Beware of books bearing Greek’s …       recipes

Well, I was so impressed with the dish — or, in retrospect, was it the ouzo? — that I was determined to find out how to prepare it. To that end, I eventually located a cookbook that contained a recipe for a version of gardoubes and I immediately ordered it, sight unseen. Sadly, it was a bit of a disappointment. Originally written in Greek, the translation was apparently word-for-word, without considering context, rendering parts of some recipes nonsensical. Gardoubes was one of them. I decided that I wasn’t meant to make gardoubes and moved onto other things — but I kept the cookbook. Move ahead now, to a couple of weeks ago. I had just posted my instructions for making feta cheese and I had a fridge full of jars containing feta in brine. Growing tired of Greek salads, I decided to make spanakópita with feta added to the filling.

Thus began the Great Search of 2012. I’d not seen, let alone used, that recipe in years. More notes than formal recipe, I had scribbled them on a piece of paper as I watched a Greek woman prepare spanakópita on a cooking show, most probably broadcast on PBS. Well, midway into my search, I located the long-forgotten cookbook. I thought I had hit pay dirt. Why look any further when I had the “real deal” right here? Guess again. Its version of spanakópita was of the pie variety and didn’t contain any cheese. It did include a recipe for triangular-shaped pies but these were filled with cheese and called tyropitákia. They even had a lovely photo of the little triangles, so golden-brown and enticing. Also pictured with the tyropitákia was a platter of “cigars” that were phyllo dough wrapped around a filling of what looked to be spinach and cheese. In the caption, they were identified as spanakotyropitákia. What luck! I found exactly what I needed — except that I didn’t. Yes, the cookbook included a picture of spanakotyropitákia but not the recipe. I went through the book page-by-page, twice, to make sure. (And of course, there is no index nor glossary for the book either.) So, although I received a great title for today’s post, I was back to looking for my recipe.

It wasn’t very long after that I found my old recipe. It was pretty straight-forward  — just how complex can a few notes scribbled on a piece of paper be? — and easily adapted to include feta cheese.  The result was just what I had in mind. You’ll find these spanakotyropitákia have a pronounced lemon flavor, which I prefer. In fact, I’ve often been served spanakópita with a lemon slice/wedge as garnish. If, however, you’re unsure about the lemon flavoring, begin by adding the zest of a half-lemon to the spinach mixture. Taste it and let that determine whether to add the rest of the lemon’s zest. Use that tasting to also decide whether more dill is needed and if you want to add more feta. In short, taste the filling and let your palate be your guide as you make this recipe your own.

This all sounds well and good but what if you want more? You know. You can’t put your finger on it but you just crave more. Well, my advice is to check out Tanya’s recipe for Salmon Spanakópita. The name says it all.

*     *     *

Spanakotyropitákia Recipe 

Ingredients

  • 1 tbsp olive oil
  • 1 small onion, chopped fine
  • 20 oz (2 bags, 566g) leaf spinach
  • 3 tbsp fresh dill, chopped (1 tbsp dried dill weed may be substituted),  more to taste
  • 8 oz (225g) feta, crumbled
  • zest of  ½ to 1 whole lemon
  • 1 stick butter, melted
  • phyllo (fillo) dough sheets

Directions

  1. Remove any large, thick stems from the spinach and coarsely chop the leaves.
  2. Over med-high heat in a large, non-stick frying pan, heat the olive oil and sauté the onion until translucent, about 5 to 8 minutes.
  3. Add the spinach, season with salt & pepper, and sauté, turning the leaves frequently, until cooked. Remove from heat.
  4. Once cooled, place the pan’s contents in a clean kitchen towel and wring out as much liquid as possible.
  5. Place semi-dried spinach into a large bowl, add feta, zest, and dill. Mix thoroughly. Taste and adjust seasoning, if necessary. Cover and refrigerate until ready for use. This may be done a day or two in advance.
  6. When ready to proceed, add an egg to the spinach and mix until well combined.
  7. Open and unfold a package of phyllo dough, remove one sheet, and cover the remaining sheets with a damp kitchen towel.
  8. Lay the sheet of dough on a clean work surface. Fold it, lengthwise, so that 1/3 or the sheet remains uncovered. Use a sharp knife to cut off that section and place it with the rest of the unused phyllo sheets.  (A & B, click on image to enlarge)
  9. Unfold the remaining 2/3 sheet and brush half of it with butter (C) before re-folding it lengthwise. Brush the entire length with butter. (D)
  10. Place 2 – 3 tbsp of spinach filling in the bottom corner of  the strip. (E) Fold the dough up and over to the side, creating a small triangle in the process. (F)
  11. Fold the triangle up and over to the side again, and do this repeatedly, as if folding a flag. (G) When you’ve reached the end, place the pie, seam-side down on a baking sheet (H), and repeat the process with a new phyllo sheet.
  12. After you’ve finished your 2nd pie, you will have two strips that resulted from trimming the previous two dough sheets. Lay one flat, brush it with butter, and then lay the 2nd on top of it. (I) Repeat steps 10 & 11 above.
  13. Once all of your triangles are filled and folded, you can either bake or freeze them.
    1. To bake: pre-heat oven to 375˚F (190˚C) . Brush each triangle with melted butter, place seam-side down on a baking sheet, and bake until golden brown, about 15 minutes.
    2. To freeze: brush both sides of each triangle with butter, place them in a single layer on a baking sheet, place the sheet in the freezer overnight, and then store for later use. To cook, follow baking instructions but allow an additional 10 minutes to bake.

*     *     *

Notes

Work as quickly as possible when using phyllo dough. If the sheet dries. it will become unusable. Be sure to keep the rest covered with a damp kitchen towel until needed.

As I learned during my recent trip, phyllo comes in different sized sheets. As a result, you may not need to trim off a third of each sheet as shown above. Just folding it in half may suffice.

By varying the width of the dough strips, you can change the size of the pies and, therefore, their intended use. Larger pies could be considered part of a light lunch, the perfect starter,  or an unusual side. Smaller pies make great appetizers and could even be served as one of many snacks on game-day.

Although I’m aware that these pies can be fried, I’ve never done it and I’m hesitant to advise doing so. As it is, I’m quite satisfied with the results when the pies are baked. If it ain’t broke …

*     *     *

Home Again

I returned home this afternoon bearing Zia’s greetings to you all. Normally, when I’m with her, I show her a number of your blogs — but not this time. For some unknown reason, internet service in her area was even more abysmal than usual. Pictures wouldn’t download and even the simplest of tasks — hitting the “like” button — weren’t possible. This just means that there’ll be more for me to show her next time — and I’ve got dozens of your posts from the past week to read in the meantime.

*     *     *

Fettuccine with Asparagus, Artichokes, and Ramps

It’s déjà vu all over again. Those who get email notifications of my posts may recognize today’s blog entry from an errant notification sent out 2 weeks go, an embarrassing case of premature publication. Let that be a lesson for us all. Be sure to change the “Publish immediately” option to a date in the future, lest you post prematurely. And to think, one of the reasons that this entry was still in editing was because I didn’t have an introduction. Ha!

Moving right along, last week’s post shared two of Mom’s recipes for preparing baby artichokes. I had originally intended to include today’s pasta recipe with those but the post’s length became an issue. The week prior’s post, Makin’ Feta, was really quite long and I didn’t wish to inflict 2 long posts in a row upon you. Besides, in a few weeks we’ll be making mozzarella. Those posts are going to rival feta for being the most lengthy on this site, so,  I’ll try to keep the posts short for you until then.

*     *     *

*     *     *

Although it took place in a downpour, my first trip to the area’s best farmers market was a good one. In a mad dash to one stall, I bought this year’s rosemary bush, some freshly picked asparagus, and wild ramps. The sprint & transaction took under 5 minutes. Max barely had a chance to get comfortable in my seat in the car before I was telling him to move over. Once home, with everything unpacked and put away, the question became what to do with the morning’s bounty. Well, give me some veggies and I’ll make a pasta. This time I went back to an old favorite for inspiration and the result was my Pasta Primavera.

*     *     *

Fettuccine With Asparagus, Artichokes, and Ramps

La Primavera is Italian for the Spring and today’s pasta features 3 vegetables that are synonymous with Spring: asparagus, artichokes, and ramps. Although ramps are no longer in season here, my Friends to the North may still be able to find them. If not, feel free to substitute a few Spring onions, thinly sliced, reserving the green ends for garnish. There’s still plenty of asparagus available at the market and, as you may recall from last week, I’ve a nice stash of artichokes in the deep freeze.  So, with these ingredients, this pasta will just about prepare itself.  Now, as much as I enjoy a cream sauce, it would only mask rather than accent the delicate ramps. As a result, I prepared this pasta similar to Aglio e Olio, but with ramps used instead of garlic and with artichokes and asparagus added to the mix. As such, the dish is certainly simple enough to prepare but its success lies in the timing. Remember it is better to have the sauce ready and waiting for the pasta than the reverse. No one likes mushy pasta.

*     *     *

*     *     *

To begin, prep the vegetables. The baby artichokes should be cleaned, trimmed, and blanched. Thaw if frozen.  The asparagus, if large, should be peeled and all should be chopped into pieces about 1 inch long. Reserve the tips. The ramp leaves should be removed from the bulbs, washed, dried, and hand-torn.The ramp bulbs should have the root-end trimmed, washed, and thinly sliced. Use as much of each vegetable as you prefer, given the amount of pasta to be served.

In a large frying pan over medium heat, add about 4 tbsp of olive oil. When hot, add as many red pepper flakes (or dried red pepper) as you like and sauté for about a minute before adding the trimmed, sliced ramps. Continue sautéing for about a minute before adding the cleaned & blanched artichokes. Season with salt & pepper and continue to sauté until the artichokes are cooked to your liking.

*     *     *

*     *     *

Meanwhile, remember the timing concern as you bring a pot of water to boil. If you’re using fresh, home-made pasta, the fettuccine will cook in but a couple of minutes. Add the chopped asparagus spears to the boiling water when you add the salt & fettuccine. If using store-bought dried pasta, package directions will usually advise a cooking time of from 5 to 11 minutes. Depending upon how crisp you like your asparagus, add it to the pot with the fettuccine 2 to 5 minutes before the pasta is to be cooked al dente.

When the pasta is just shy of al dente, add a little pasta water, the asparagus tips, and the ramp leaves to the frying pan & stir. Reserve 1 cup of the pasta water as you drain and add the pasta to the frying pan. Mix well and by now the pasta should be al dente. Take the pan off of the heat and add as much grated Parmesan or Pecorino Romano cheese as you like but not so much that the ramps’ flavor is overwhelmed. Mix well, adding enough of the reserved pasta water as needed to fully moisten the fettuccine. Serve garnished with additional grated cheese, chopped parsley, and, of course, freshly cracked pepper.

*     *     *

Fold, Cut, & Unfurl Fettuccine

*     *     *

One More Thing

Aglio e Olio is quick to prepare and a very versatile recipe. In fact, the very day I made this dish for supper, Claire, of Promenade Plantings, shared her delicious recipe for Aglio e Olio using her home-grown, purple sprouting broccoli instead of the vegetables that I used. Not but a few days later, Celi over at The Kitchen’s Garden made her tasty version of Aglio e Olio using Chinese cabbage and thinly sliced sausage. See? If you learn how to make this basic pasta, you can use it to take full advantage of a variety of in-season vegetables throughout the year. What? No vegetables? Grab some shrimp. I told you it’s versatile!

*     *     *

Artichokes Two Ways

Carciofi Due Modi

As I’ve mentioned to a few of you, I’ve had a devil of a time finding “baby” artichokes here in Chicago. Sure, I can get the goliaths year-round and, about this time of the year, the stores have some that are at about half that size. The truly small artichokes, however, the ones with no choke, have been impossible to find and it’s not for lack of trying. I routinely shop at 4 different groceries, 2 ethnic markets, and 2 additional fruit/vegetable markets. Whether I’m searching too late/early in the season or I’m living in a heretofore unknown baby artichoke-free zone, it’s been well over 10 years since the green beauties have graced my table — until now.

Recently, my vegetarian friend, Cynthia, and I decided to head West to the hinterlands. We’d both heard tales of an Italian market “out there” but never ventured to find out for ourselves. Not much more than a half-hour later, we were there and what a store! First off, the place was huge, easily the largest Italian market that I’ve ever seen. They had everything from antipasti to zuppe, and very often several choices for everything in between.  The best surprise, though, was found in the produce department.

There, at the end of one of the aisles, was not 1 but 2 displays of artichokes and, much to my delight, one of them was nothing but small artichokes. To say I was happy is a gross understatement.  So, with Cynthia perusing the rest of the fruits and vegetables, I got to work selecting only the smallest of the small artichokes. I didn’t care how long it took but I was going to find them. About 10 minutes later, I had amassed some 5 pounds of the edible thistles, all about the size of a goose egg. We soon finished our shopping and snacked on mini-conolli as we drove back to civilization. The next morning, I couldn’t wait to get started preparing my find.

*     *     *

Acid Washed

*     *     *

Preparing Baby Artichokes

Just like when preparing the goliaths, use a sharp knife to chop off the top of each artichoke. I usually chop just above the tips of the largest outer leaves. Next, peel off a couple of layers of the tough, outermost leaves, revealing the vegetable’s soft inner heart. Using a paring knife, peel the base and stalk of each artichoke and, depending on the size, cut it in half or quarters. Being so small, there is no choke to remove and be sure to save as much of the stem as possible. When finished with each, immediately rub the sections with a halved lemon and place in acidulated water. (Take a large bowl of cold water and add to it the juice of 2 lemons, as well as the lemons themselves.) This “bath” will prevent the vegetable from discoloring due to oxidation.  Continue until all the artichokes have been cleaned and trimmed.

Next bring a large pot of salted water to boil, add all the trimmed artichokes, and, when the water returns to the boil, leave them to blanch for about 3 minutes. Drain them and immediately place the blanched sections into a bowl of ice water to halt the cooking process. Once chilled, removed them from the water, pat them dry, and they are now ready for use. In my case, having bought 5 pounds of the green gems, that meant the freezer for most of them. Small amounts, destined for pasta or pizza, were individually bagged, as were larger quantities which would be prepared as side dishes in the near future. Once labelled, the bags were placed in the freezer.

So, with a treasure of cleaned and trimmed baby artichokes stashed away, what are you going to do with them? Well — and this is where the due modi come into play — I’ve got 2 of Mom’s recipes to share today.

*     *     *

Fry Babies

*     *     *

Mom’s Deep Fried Artichokes

Mom didn’t prepare baby artichokes like this very often but, when she did, they certainly didn’t linger long on the serving platter. I think you’ll find the same will hold true today, no matter how you serve them: as a side, an appetizer, or snack on game day. And if you’re working with previously trimmed and blanched artichokes, they’re a snap to prepare.

Whether using freshly blanched or just thawed, pat the artichokes dry as best you can. Use standard breading methods to coat the artichokes. Since I prefer a thin coating on these, I do not use bread crumbs. Instead, I’ll coat the artichoke pieces in seasoned flour (paprika & onion powder) first before dipping them in an egg wash that’s been seasoned with salt & pepper. Then it’s back into flour again before deep frying in vegetable oil that’s been heated from 350˚ to 360˚ F. Since the baby artichokes were previously blanched, they won’t need to cook for a long time. When the coating is golden brown, they’re done. Remove them to drain on paper towels, season with salt, and serve. Although fine just as they are, I’ll sometimes serve them with lemon wedges and/or a simple aioli of mayonnaise, lemon juice, and a little grated garlic. If possible, prepare the aioli a few hours before serving to give the flavors a chance to blend.

*     *     *

*     *     *

Mom’s Sautéed Artichokes

Mom most often prepared these artichokes as she did many vegetables. (See my Vegetables/Verdura posting.) If using fresh artichokes, trim and blanch as indicated above. If cleaned but frozen, allow to defrost before use. In a frying pan over medium heat, add a couple tbsp of olive oil. Once heated, add some chopped garlic, wait a minute, and then add the artichokes. Wait another 2 minutes and then add a little tomato paste or chopped tomato, “For color,” as Mom would say. Add a splash of dry white wine, season with salt & pepper, and continue to sauté until the wine is all but gone and the artichokes are cooked to your liking. Serve immediately, garnished with fresh parsley.

*     *     *

Notes

This is all well and good, so long as you can get baby artichokes. But what if you can’t? Both of these dishes can be prepared with artichokes of any size.  Just be aware that larger-sized artichokes have developed an inedible “choke.” It’s a fibrous mass found at the base of the bulb and it must be removed. Once you’ve trimmed and halved an artichoke, use a paring knife or teaspoon to scoop out the fibrous mass. Once the choke has been removed and depending upon how large the artichoke is, you may need to cut each half into halves or thirds before proceeding. As you may have guessed, because of their size, these artichoke pieces should be blanched a few minutes longer than the “babies” were and will require longer cooking times, too. Personally, I prefer to stuff and roast the larger artichokes, leaving the sautéing and deep frying for the more tender babies.

Coming Attractions

Today I shared Mom’s favorite recipes for preparing baby artichokes. Next week I’ll share my Pasta Primavera recipe that features baby artichokes, of course, as well as a couple of other Springtime treats.

*     *     *

Makin’ feta? You betcha!

As promised, today we’ll look at the 5th cheese within our little series. Of those we’ve covered thus far, today’s cheese is the most complicated to make and, if that’s not enough, it’s also brined. All of this can add up to problems for the unaware — but that’s not us! No, my cheese making amici, you heeded my advice, making at least one of the “easier” cheeses in this series, and now you’re ready for a challenge. Today we’re making feta!

 *     *     *

It’s just a salad without feta.

*     *     *

Feta cheese is most closely associated with Greece and, according to European Union law, only cheese made in Greece may be labelled and sold as “feta.” Typically made with sheep’s milk alone, the Union will allow up to 30% of the milk to come from goats. Although first mentioned in the 15th century during the Byzantine Empire, it would be a mistake to think that feta was — and is — only produced in Greece. Brined cheeses have a longer shelf-life than many of the “soft” cheeses and, as such, are fairly common throughout the Eastern Mediterranean, as well as other areas around the world. Depending upon availability, these cheeses can be made from the milk of cows, goats,  sheep, or some combination of the three.

During a recent broadcast of America’s Test Kitchens, various brands of feta were tested. They found that imported feta was stronger tasting than domestic. The blandest feta cheese came from cow’s milk. Goat’s milk produced cheese with a bit more flavor and sheep’s milk cheese was strongest of all. Bear in mind that virtually all store-bought feta uses raw milk and that isn’t always available to us rookies. We’re left with pasteurized or, worse yet, ultra-pasteurized milk and either process destroys many of the subtleties in flavor that distinguish the 3 milks. Now, you may be lucky enough to get raw milk for your cheese but, as I’ve already lamented, it’s illegal to sell raw milk in Illinois and there’s a dearth of lactating sheep in greater Chicagoland. I do know of one milk producing ewe but, distance aside, her milk is already spoken for. So, because we have to use pasteurized dairy products, don’t be surprised if your home-made feta tastes rather bland in comparison to your favorite imported feta made from sheep’s milk.

Greek tapas?

Thus far, we’ve made cheeses that were pretty straight-forward with mistakes a rarity. Many of the steps used for those cheeses will be repeated here, when making feta, but a few more have been added and there’s a greater chance for error. This will be a long post but if I don’t warn you of the pitfalls, you might end up dumping your dairy down the drain and starting over. Who wants that?

First off, we need to talk about the milk. In short, you cannot use ultra-pasteurized goat’s milk to make feta. As it is, goat’s milk creates softer curds than other dairy, so you’re already at a disadvantage. When I used ultra-pasteurized goat’s milk, I found it impossible to get a clean break or hard set. (More about clean break later.) According to my usual sources, ¼ tsp of calcium chloride (CaCl2) added to 64 oz (2 litres) of milk will help to overcome the effects of ultra-pasteurization. (CaCl2 is a salt commonly used in brewing and brining. Before you use this salt, be sure to read the Precautions below.) Well, I tested ultra-pasteurized goat’s milk 3 times, alone and with CaCl2, and never got a clean break. All of the dairy was dumped. Next I ran 2 tests of regular pasteurized goat’s milk, with and without CaCl2. Both gave me a clean break and I was able to make feta cheese with the curds.

Now, since some of you might not be able to get goat’s milk, I ran 3 tests using whole cow’s milk. In the first test, I used regular pasteurized milk, alone, and a clean break was achieved and feta made. In the second test, I used ultra-pasteurized milk to which ¼ tsp of CaCl2 was added and a clean break resulted and I made feta cheese. In the third and final test, I didn’t add anything to ultra-pasteurized cow’s milk and I did not achieve a clean break. The dairy was dumped.

So, the long and short of these tests is that you cannot use ultra-pasteurized milk, alone, to make feta. If your only choice available is ultra-pasteurized cow’s milk, you must add CaCl2 to mask the effects of the ultra-pasteurization process. CaCl2 will not work with ultra-pasteurized goat’s milk. Take the easy route: find and use regular pasteurized goat’s or cow’s milk and you’ll be fine. Of course, if you can get raw, unpasteurized milk, there’s no need to add anything. You’re good to go!

Once you’ve warmed the milk, inoculated it with yogurt cultures, added rennet, and let it sit overnight, you’ll need to see if it has set properly. This is the your first real hurdle. Unlike with the other cheeses, this process will form one large curd. Stick your finger, on an angle, into the curd and slowly bring the finger to the surface to test for a “clean break,” meaning the curd is firmly set from top to bottom. On the left is a picture showing a ‘bad break.” You can see that the curd hasn’t  formed and all you’ve got is a thickened dairy product or, perhaps, a very thin curd floating atop thickened dairy. On the right are examples of a “clean break,” where the curd is firmly set throughout. If a clean break hasn’t been achieved, let the dairy sit for another 2 hours and check again.  If still not a clean break, let it sit another 2 hours. If at this point, you’ve not received a clean break, you probably won’t and, as far as I know, all you can do is dump it and start over with fresh milk.

There are a number of causes for a bad break:

  • Use of ultra-pasteurized dairy products.
  • Failure to use live cultures to inoculate the dairy.
  • Using too much/little live cultures to inoculate the dairy.
  • Over-heating the dairy and thereby killing the live cultures.
  • Using rennet that’s too old or not using enough.
  • Not waiting long enough for the curd to form.
  • Once the rennet has been added, the dairy must not be disturbed. Even moving it slightly may prevent the curd from forming. My advice is to move the dairy to the spot where it will remain overnight and then add the rennet.
  • The Fates are messing with you.

One more area to watch involves brining the cheese. For starters, the brine will affect both the taste and texture of the cheese, as well as extend its shelf life. To be successful, you’ll need an acidic solution that is 12.5% salt and it’s easy enough to achieve. Whey is already mildly acidic and you want to reserve it when you strain out the curds. Add 5½ tbsp of kosher salt for every 20 fluid ounces of whey and mix it, dissolving as much of the salt as you can. Cut your feta into cubes and place them in the brine solution. The feta should remain there to pickle for a minimum of 5 days and, according to Still Tasty,  no more than 3 months. When you remove the feta, if the exterior is slimy to the touch, the brine solution didn’t contain enough salt. I don’t believe anything can be done to save the cheese and eventually it will completely dissolve. If the feta feels fine, it can be eaten after 5 days. Keep in mind that the longer it sits in the brine, the more flavorful it becomes and the easier it is to crumble. Most will prefer to rinse it gently with tap water before use.

Before beginning, please refer to my Cheesy Stuff page. Chock full of cheesy details, it provides information about ingredients, cleaning/sterilizing equipment, spices & seasonings, a few tips, and sources for supplies and information.

Still with me? Here we go …

 *     *     *

How to Make Feta Cheese

Ingredients

yield: approx ½ pound

  • ½ gal (64 oz or 2 liters) goat’s milk (cow or sheep’s milk may be used) – ultra-pasteurized goat’s milk cannot be used.
  • 1 tbsp live culture, plain yogurt mixed in 1 tbsp milk from above
  • ¼ rennet tablet dissolved in 3 oz distilled water at room temp
  • 1/4 tsp table salt
  • ¼ tsp calcium chloride (CaCl2) dissolved 3 oz distilled water at room temp (necessary if using ultra-pasteurized cow’s milk)

Directions

  1. (If necessary, add diluted calcium chloride to the milk and mix well.) Place milk in a non-reactive pot with a lid. Gently heat the mixture until 86˚F (30˚C), stirring occasionally to prevent scalding on the pan’s bottom.
  2. Remove from heat, add yogurt-milk mixture, stir well, cover, and let sit for 1 hour at room temperature.
  3. Move pot to where it will remain undisturbed, add dissolved rennet, stir quickly & well, cover, and leave overnight.
  4. The next morning, check for a clean break. (See above.)
  5. Once a clean break is achieved, take a long knife or, as I like to use, an offset spatula, and starting at on side of the pot, cut a straight line through the curd. Once the opposite side has been reached, create another slice about ½ in front of the previous cut. Repeat until the entire curd has been cut into horizontal slices.
  6. Give the pot a quarter turn and, starting at one end of the pot, repeat the slicing process. When finished, the curd should be cut into ½ squares.
  7. Now take the knife or offset spatula and, with the blade on an angle, slice through the curds from side to side at ½ inch intervals. This will cut the curds beneath the surface. Repeat this step twice, turning the pot and cutting the curds on an angle each time.
  8. Once the curds have been cut, gently stir the curds and check for curds larger than ½ inch cubes. If found, cut them to size.
  9. Let the curds rest for 15 minutes, gently stirring them 3 or 4 times that time period. The curds will shrink during this period as more whey separates from them.
  10. Next, line a strainer with cheesecloth or a hankie and place both over a large pot or bowl. Gently pour the curds and whey into the center of the cloth-lined strainer, saving the whey at the same time. Once all the curds have been poured, grab the cloth’s 4 corners, making a “packet”, of sorts. Tie the corners together and suspend the cheese over the bowl or a pan. Allow it to drain for 2 to 4 hours. If unusually warm, this may be done in the fridge.
  11. Remove the curds from the cloth and place in a large bowl. Season with ¼ tsp table salt and stir, breaking up the curds as you do. The cheese will resemble cottage cheese when  finished.
  12. Line a large can (open at both ends, one lid saved) or feta cheese mold with cheesecloth or another hankie. Place the curds into the form and cover the top with the ends of the cloth.
  13. Use the place the can lid atop the curds and place a heavy weight on top. This will force the remaining whey out of the curds, creating a block of feta. (See Notes.) Leave it overnight. If quite warm, place in the fridge.
  14. The following day, unwrap the cheese and cut it into cubes. Place them into the brine solution, cover, and refrigerate for at least 5 days.
  15. After 5 days, remove a bit of cheese and gently rinse it under running water before tasting it. Depending upon your preferences, you can either use it or return it to the brine to pickle further.
  16. Feta will keep for up to 3 months in the brine. As it ages in the brine, it will crumble more readily. If, at any time, mold appears on any of the feta, discard it and everything within that container.

*     *     *

Precautions

  1. Calcium chloride has a wide range of uses, from medical applications to keeping our paths clear of snow and ice. If you buy some, be sure it’s of a grade fit for human consumption. Buying it from a cheese making site or home brewery supply house should eliminate any concerns you might have.
  2. As calcium chloride is dissolved in water, a small amount of heat is released. This is of little concern, especially given the small amounts we’ll be using. Burns can result, however, if the dry crystals are ingested. Please, KEEP  CALCIUM  CHLORIDE  CRYSTALS  OUT  OF  CHILDREN’S  REACH  AND  AWAY  FROM  PETS.

*     *     *

Notes

The heavier the weight used to press the curds, the firmer the brick of feta will result and the quicker, too. With the right amount of weight (pressure), you should get a firm brick of feta if left overnight. You can buy cheese presses or find instructions for building your own on the internet. If you’re at all inventive, you can save yourself the money and rig something. I placed a filled bottle onto the curd-filled form and placed it all on my grill. It was tall enough so that when I attempted to close the grill cover, the lid rested atop the bottle and it’s weight supplied all the pressure needed. The next morning I had a firm brick of feta that I cut into the cubes that are pictured above.

Italian ορεκτικά?

Do not panic if you neglect to reserve the whey or do not have enough. You can use distilled water in addition to, or in place of, the whey. Just be sure to use 5½ tbsp of kosher salt for every 20 oz of distilled water. Although I’ve never used distilled water, a number of sources successfully pickle their feta with it. Even so, because of its acidity, I would strongly suggest using as much whey as possible before resorting to distilled water when making the brining solution.

If you have slimy cheese after pickling, there are a few things you can try with your next batch. The Curd Nerd website may be of help.

*     *     *

Coming Attractions

The next and final cheeses in the series will be mozzarella. You may not realize that there is more than one kind of mozzarella. There’s “American Mozzarella,” which you’ll find grated, in bags, and hanging in a display among assorted cheeses at your neighborhood grocery, and then there’s “Italian Mozzarella,” which you’ll find globe-shaped and packaged in liquid, normally whey. American Mozzarella is usually melted when served. (Think pizza.) Italian Mozzarella is served as-is or sliced. (Think Insalata Caprese.) Like feta, making them at home can be a bit of a challenge but, of the two, American Mozzarella is easiest. In fact, kits are sold for just that purpose. As always, we’ll take the easy route first and make American Mozzarella. A few weeks later, we’ll close out the cheese series when we make Italian Mozzarella.

*     *     *

Special Thanks

You may have noticed that 2 plates used above have a certain cosmopolitan flair. The plates, “Barcelona” and “Venice“, are 2 of 6 that I won, along with a very limited edition cookbook  (pictured, right), in a give-away sponsored by the Our Family Food Adventures blog. So, to Kristy, Mike, and my 2 favorite Sous Chefs in the whole, wide world, Miss A and Mr N, thank you very much for these generous prizes. Both cookbook and plates are sure to bring a smile whenever I use them.

*     *     *

Inspired by the Fankhauser Feta Cheese webpage

and

“Home Cheese Making” by Ricki Carrol

*     *     *