Linguini Fini with Sardines & Pickled Cherry Peppers

I continue to be amazed by the talent and creativity I see in the blogs I visit. Often, having spent the day in an assortment of unplanned, often unnerving, activities, the dinner hour is approaching and the blogger has absolutely no idea of what to prepare. A look in the pantry, a scan of the fridge, and within minutes a delicious dinner is on the table while a tasty dessert awaits on a countertop. OK, that may be a bit of an exaggeration but the point remains. Many of you can create fabulous dinners on a moment’s notice, using only what you find in your kitchen and pantry. This is so not me. If caught with nothing planned for dinner, I can scan my cupboards or stare into the fridge for hours and I’ll end up with the same 2 dishes: a sandwich from a previous night’s roast and, when there’s no roast, some sort of pasta. Today’s recipe is a case in point.

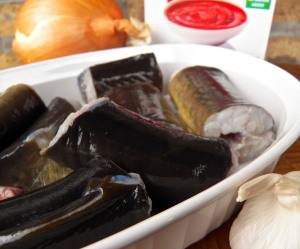
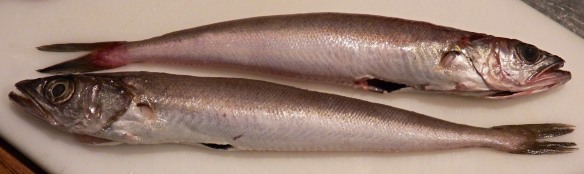
You see, this is not the recipe I had planned to share today but before I get into that, please take a look at the image to the right. Examine that box very closely. Everybody done? Good. Now, do you see anything that would lead you to believe that there are anchovies in that box? Anything at all. Of course not. So, why did I buy it, mistakenly believing it contained white anchovies — the ingredient that was supposed to be featured in today’s recipe? Worse yet, that box sat in my cupboard for 2 weeks, visible to me countless times during that period. Yet, incredibly, it wasn’t until I opened the tin late last week that I realized my mistake — and then I had an open tin of sardines to deal with and nothing for dinner or today’s post.

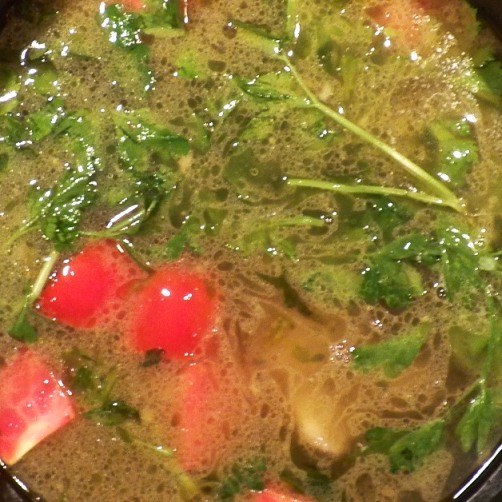
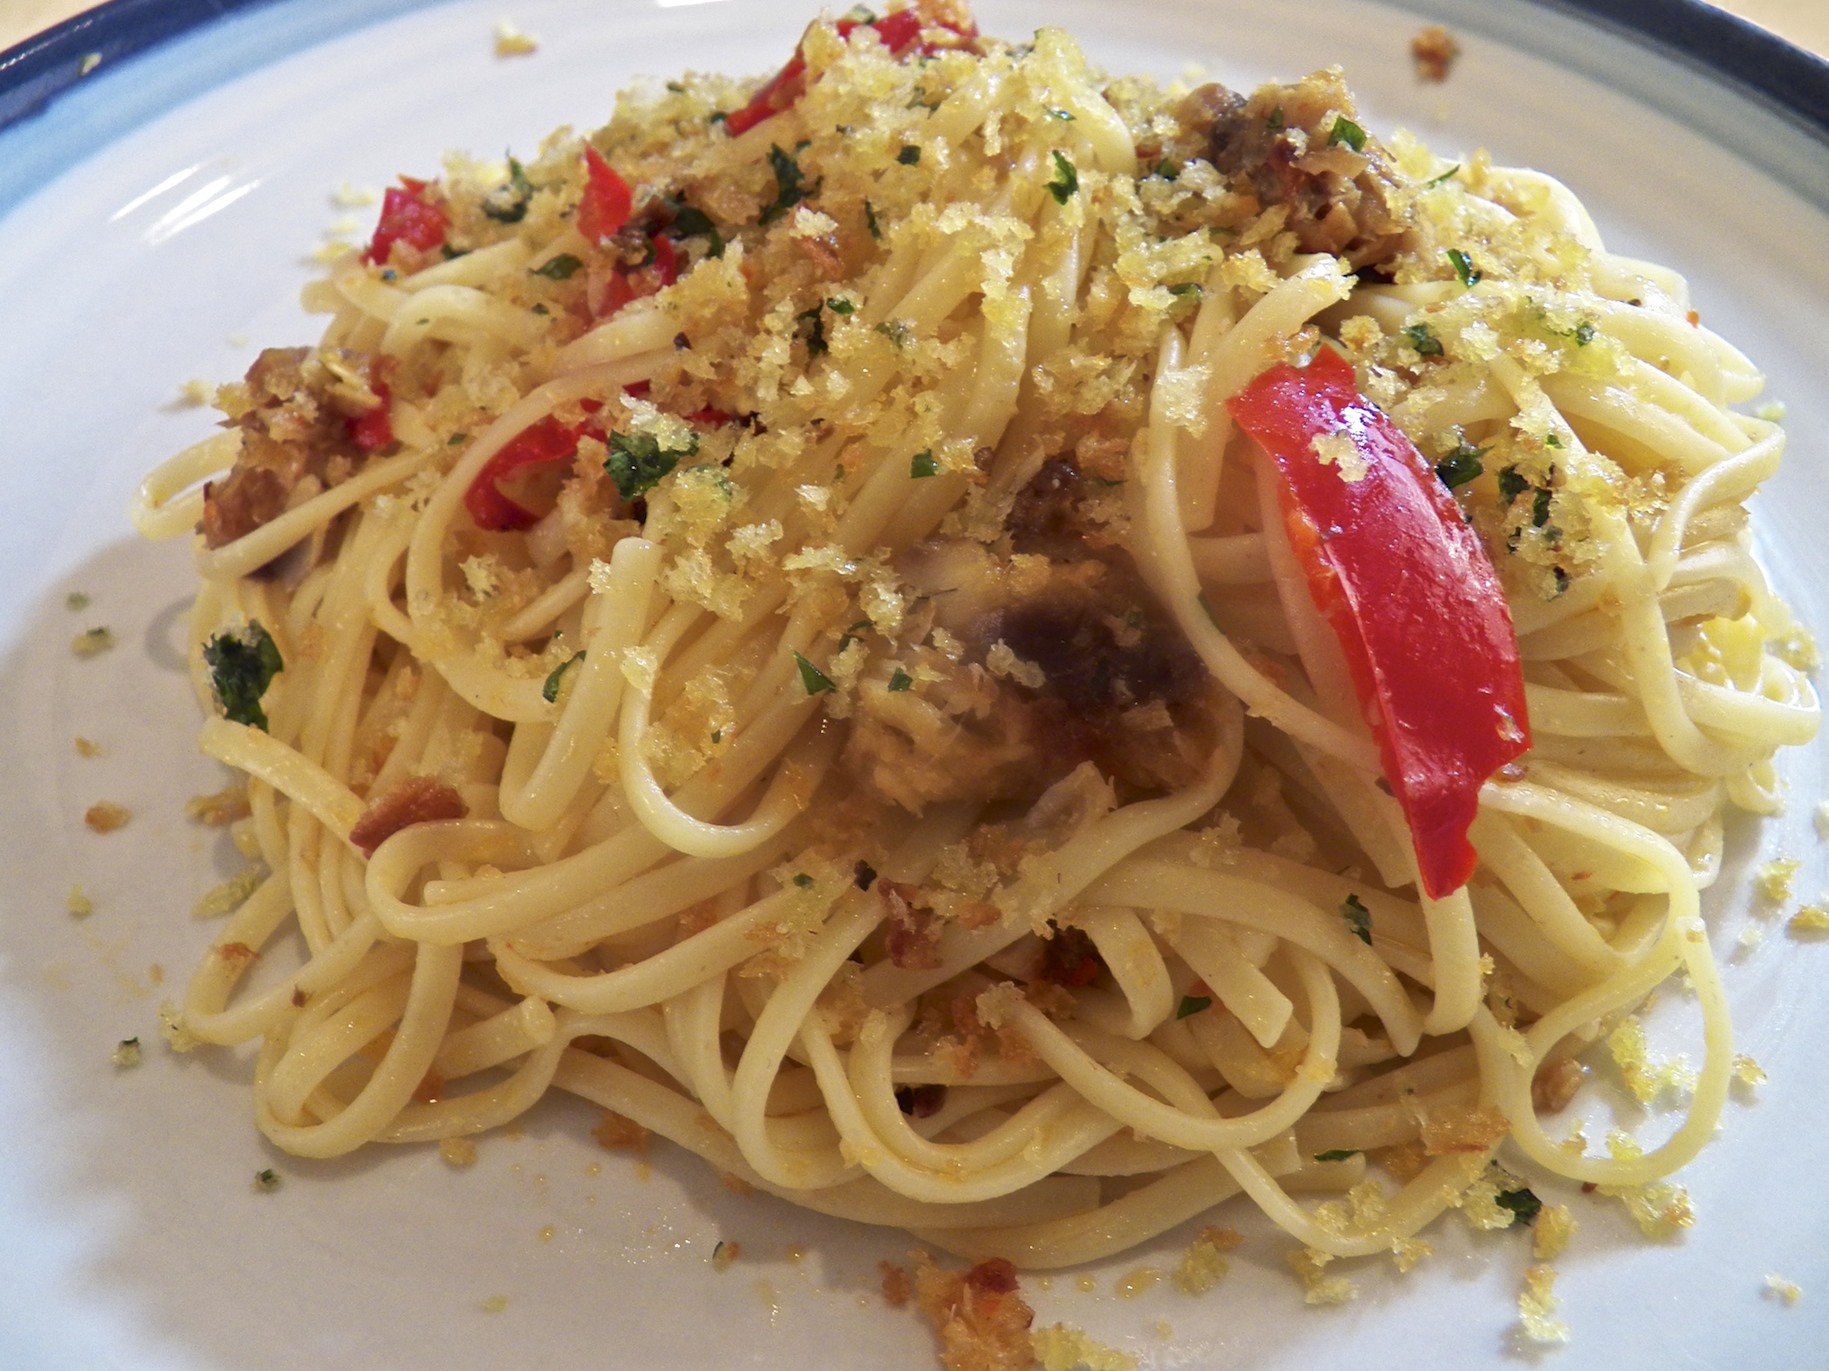
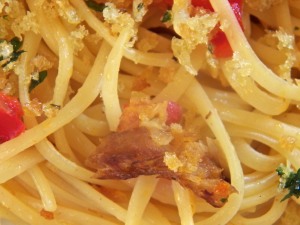
Now, I could have taken the easy route and just substituted the sardines for the anchovies but that would have cost me a perfectly good pasta recipe that uses white anchovies, as you’ll see in the weeks ahead. No, I had to think of something else and, thankfully, I remembered an ingredient Mario Batali had used recently. So, I went to my stash of canned goods, specifically the hot cherry peppers I pickled last September, and the result was today’s dish, a pasta much like an Aglio e Olio.

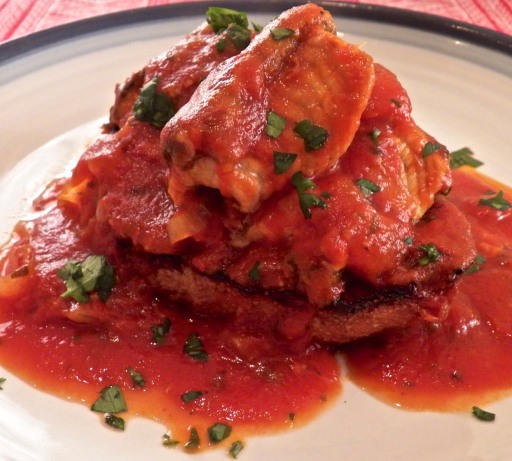
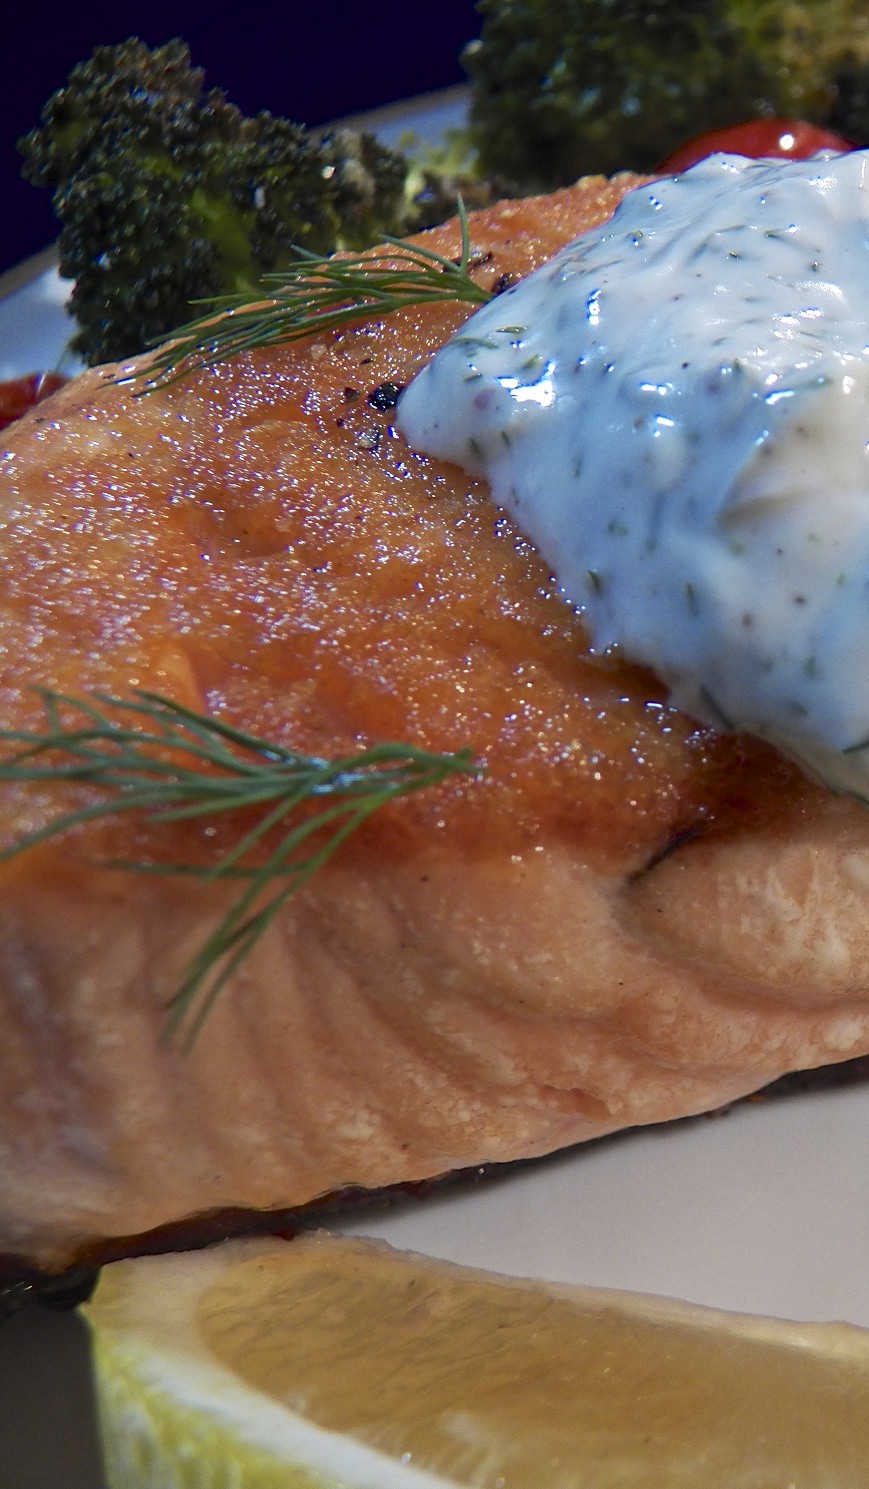
To recap, a typical aglio e olio uses olive oil, garlic, and red pepper flakes to dress a spaghetti-like pasta that’s topped with grated cheese and freshly cracked black pepper. The red pepper flakes give the dish a nice even heat that can be as bold as you like, unlike today’s dish, where the chopped pickled peppers give bursts of heat, as well a touch of acid from the pickling liquid. Of course the sardines give this dish an entirely different flavor profile from your everyday aglio e olio and, because of them, grated cheese should not be served with this dish. So, to top the dish off, I used the Bartolini breading mixture that was lightly toasted beforehand. And the result? Well, it was so good that I’ve promised Zia I’d prepare it for her when I visit next.

*     *     *

*     *     * 

 Linguine Fini with Sardines & Pickled Cherry Peppers Recipe 

Ingredients

  • 1 lb linguine fini (cappellini, spaghetti, linguine, or trenette may be used)
  • 1/2 cup + 2 tbsp extra virgin olive oil, divided
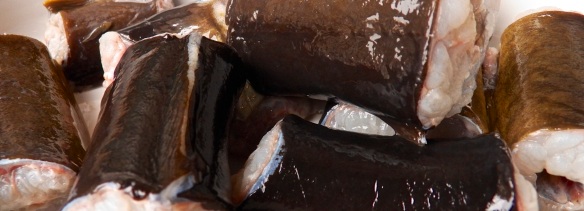
  • 1 pkg. {3.75 oz (105 g)} of skinless & boneless sardines, drained & roughly chopped
  • 5 cloves of garlic, diced or grated – divided
  • 4 pickled cherry peppers, cored, seeded, and roughly chopped
  • 1/2 cup Panko bread crumbs
  • 3 tbsp fresh parsley, chopped
  • salt & pepper
  • reserved pasta water

Directions

  1. Make the bread crumb topping:
    1. In a small mixing bowl, combine 1 diced/grated garlic clove, bread crumbs, and 2 tbsp of olive oil. Season lightly with salt & pepper. Mix thoroughly.
    2. In a small frying pan over med-high heat, lightly toast the bread crumb mixture. Do not allow to get too dark or it will ruin the dish. Remove from heat and set aside.
  2. Bring a large pot of heavily salted water to boil. Add the pasta and stir.
  3. In a large frying pan over med heat, add the remaining olive oil. Once hot, add remaining garlic and sauté for 1 minute.
  4. Add the pickled peppers to the pan and continue sautéing for another minute before adding the sardines. Continue sautéing until the pasta has cooked 2 minutes less than the package’s cooking instructions indicate for al dente. If you’ve timed everything correctly, you should sauté the sardines for no more than 5 minutes before the pasta is ready.
  5. Drain the pasta, reserving 1 cup of the pasta water.
  6. Add pasta to the pan containing the sardines and peppers. Gently toss to evenly coat the pasta. If too dry, add enough pasta water to create a sauce. Continue to sauté until the pasta is al dente, 1 to 2 minutes more.
  7. Remove from heat, add 2/3 of the bread crumb mixture, and toss.
  8. Place on a serving platter and garnish with remaining 1/3 of the bread crumb mixture.
  9. Serve immediately.

*     *     *

Variations

If you’re one who enjoys cooking Italian dishes, preparing aglio e olio is a dish you really should learn. The basic recipe involves using garlic-infused oil and red pepper flakes to dress pasta but that’s just the start. Today’s dish swapped out the red pepper flakes for hot cherry peppers and added sardines to the mix. You may wish to keep the pepper flakes and use some vegetable(s) instead of the sardines. No? How about some shrimp? What you choose to add or subtract from the garlic-flavored oil is totally up to you but the result is sure to be a flavorful dish of pasta. Best of all, you can go from staring into your refrigerator to dining at your table in under 20 minutes.

Notes

To be sure, not everyone has pickled cherry peppers in the pantry. Most groceries do carry them, however, but you could use peperoncini instead. Still, no matter which pepper you use, I suggest tasting one beforehand to see if its level of heat is to your liking.

*     *     *

It’s déjà vu all over again … 

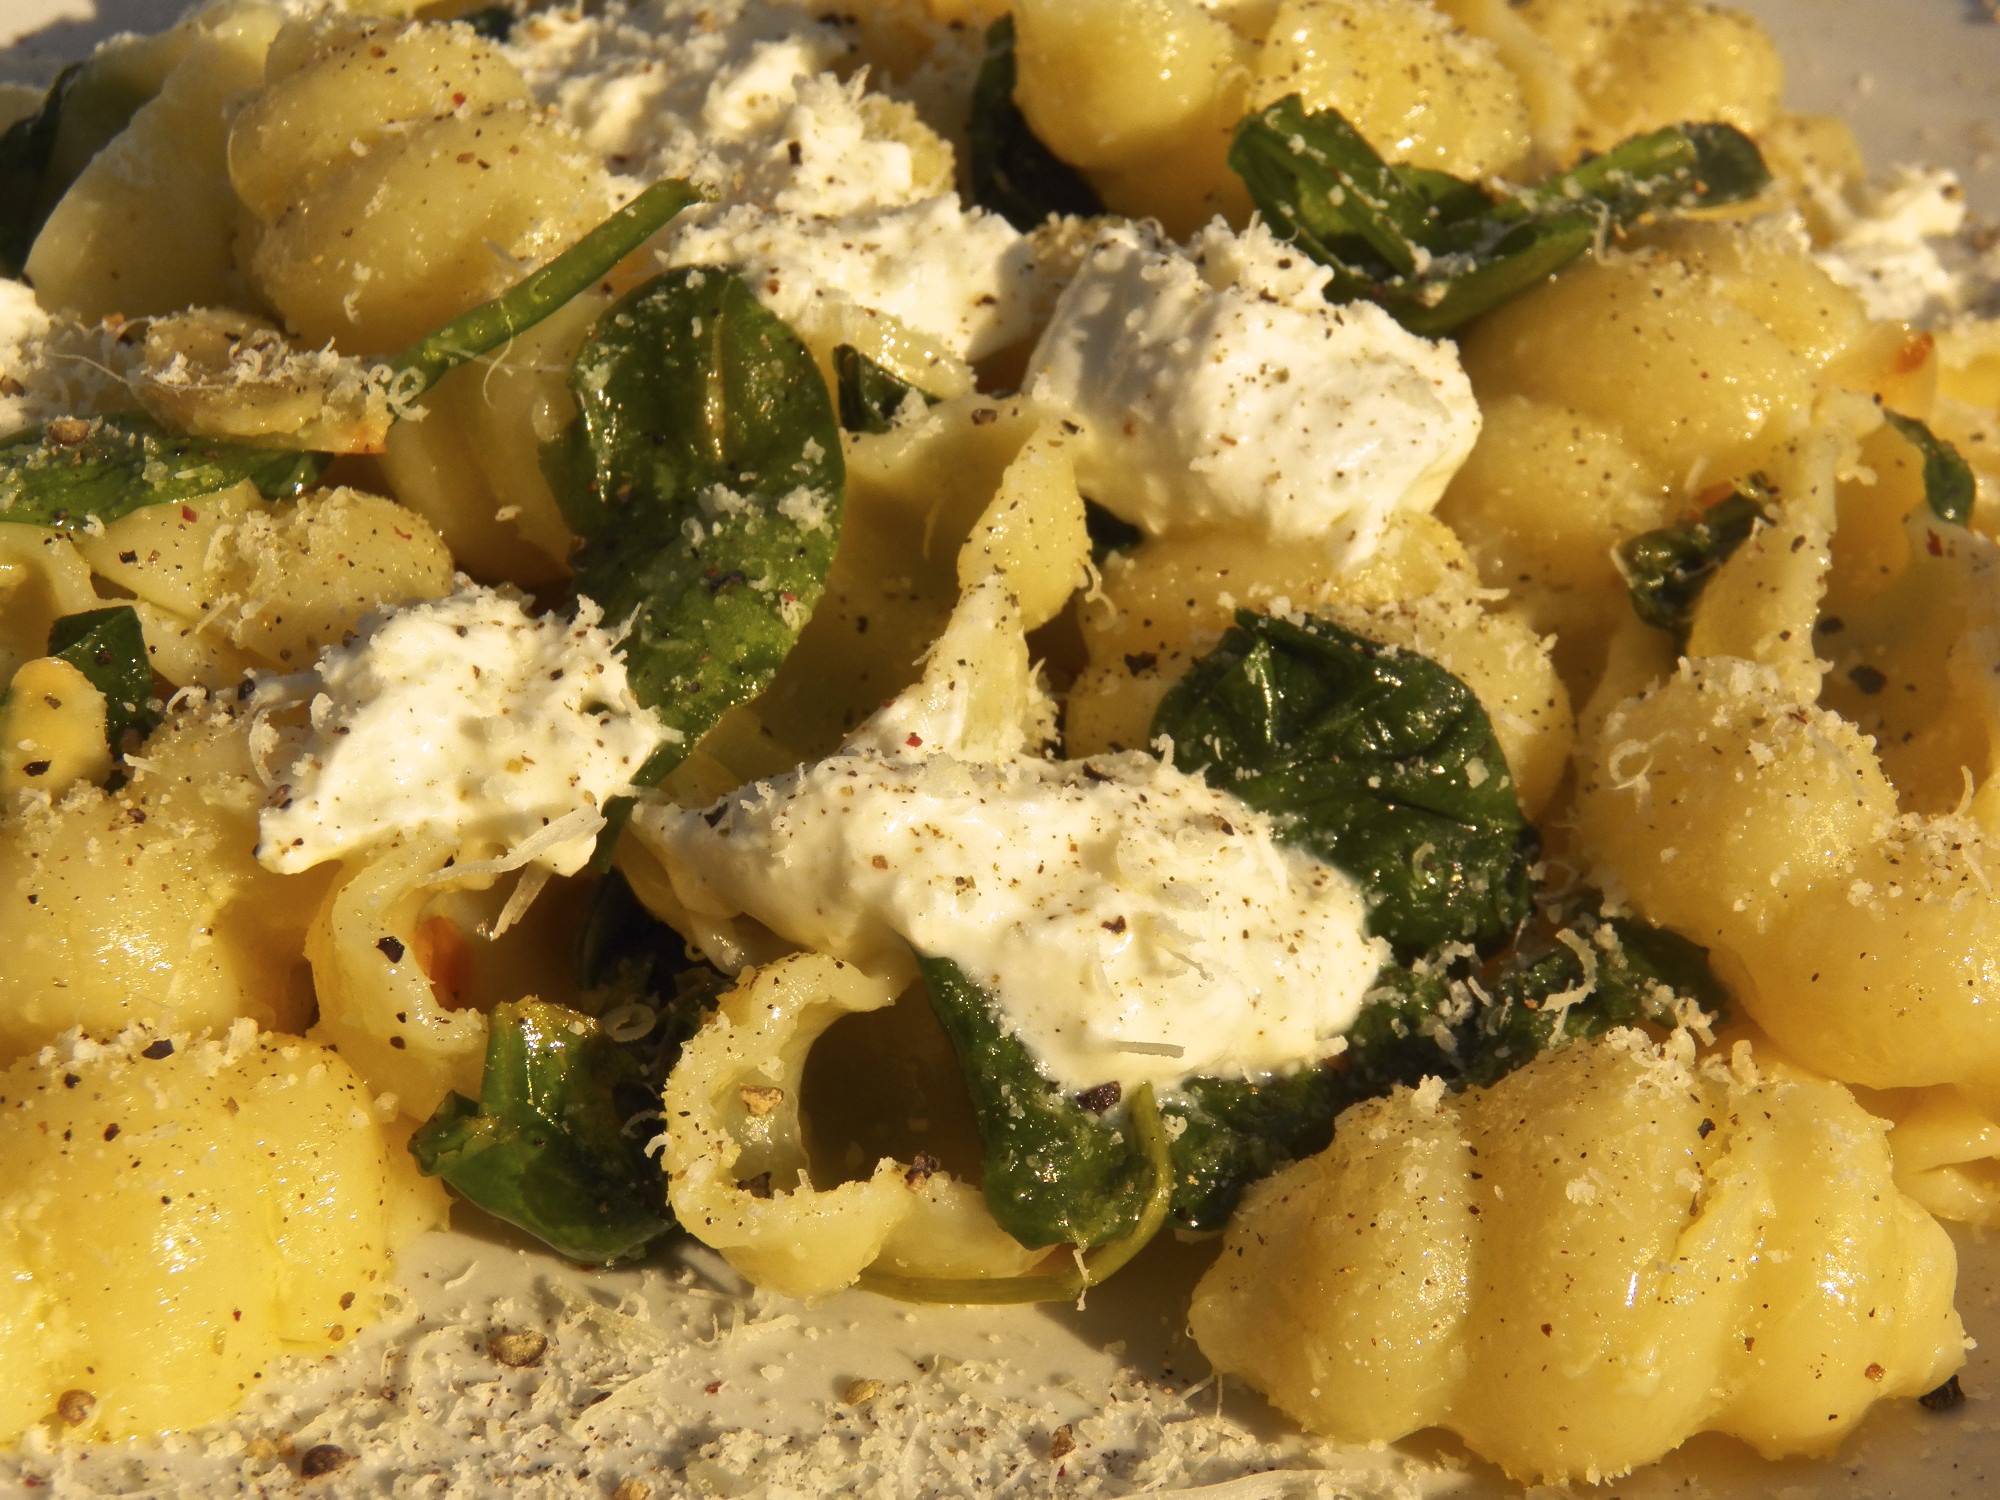
Having referred to it a number of times, I’ve little choice but to feature our Aglio e Olio recipe as this week’s Blast from the Past. The dish couldn’t be easier to prepare and the post contains a favorite memory of my Uncle. You can read both by clicking HERE.

*     *     *

Coming soon to a monitor near you …

Grilled Salted Cod

Grilled Salted Cod

 *     *     *

Grilled Sturgeon — Storione alla Griglia

Today, Ash Wednesday, marks the beginning of Lent for Western Rite Christians. In Catholic homes, it is a day of abstaining from meat, as are all the Fridays leading up to Easter Sunday. Although I consider myself a Recovering Catholic, I do think it a good idea to go meatless, for a number of reasons, and am trying to do so one day a week. So, whether you’re a practicing Catholic or just want to cut down on the amount of meat you eat, the Kitchens are here to help. Over the next several weeks, I’ll post a series of meatless recipes where fish is the primary protein. Well, that’s the plan anyway …

*     *     *

*     *     *

Today’s recipe is not one from the Bartolini playbook. I don’t recall sturgeon ever being on the menu when I was a boy. I do enjoy sturgeon, though, having ordered it at restaurants several times as an adult. Recently, when my fishmonger ran a sale on the fish, I couldn’t resist purchasing some. While wrapping my purchase, he suggested I grill it. Now, those of you who have written posts featuring grilled fish have read my comments in which I confess an utter lack of grilling skills, especially when it comes to seafood. Fearing another disaster, I nevertheless took the fish monger’s suggestion as a challenge and fired up the grill that evening. Well, what can I say? Not only did the fish cook perfectly, it actually bore grill marks instead of sticking firmly to the grill plates. I have since returned to the grill and had equally good results, as you’ll see in the weeks ahead.

Once grilled, you’ll need some sort of sauce to compliment the fish. I’ve been served this sauce, or something closely resembling it, in restaurants several times. It couldn’t be easier to prepare and the amount of each ingredient may be modified to suit your own preferences. It’s, also, tasty enough that you can use it for just about any fish that makes its way to your dinner table.

And by the way,  Happy Birthday, Sis!

*     *     *

Grilled Sturgeon with Lemon-Caper Sauce Recipes

Ingredients

  • sturgeon fillets, about ½ pound each, skin removed 100_1696
  • salt
  • pepper
  • extra virgin olive oil

Lemon-Caper Sauce

  • 4 tbsp butter
  • 2 tbsp lemon juice
  • zest from ½ lemon
  • 1 tbsp capers
  • 1 small clove garlic, grated or minced
  • 1 tbsp fresh parsley, chopped

Directions

  1. Start grill. Will require a med-high heat.
  2. When grill is ready, thoroughly clean the grilling surface before using a towel soaked in vegetable oil to coat the grill plates.
  3. Lightly coat fish with vegetable oil, season with salt & pepper, and place on grilling surface. Do not move or disturb once placed on the grill.
  4. Grill for 3 to 4 minutes per side. Remove from heat, cover, and let rest.
  5. While the fish rests, melt butter in a small fry pan over med-high heat. Add garlic and sauté for about a minute. Add the lemon juice, zest, and capers, continuing to sauté for another minute. Remove from heat, add parsley and gently stir.
  6. Place sturgeon fillets on a serving platter, spoon lemon-caper sauce over the fillets, and serve.

 *     *     *

Notes 

Sturgeon is a meaty, delicate tasting fish. It can be served baked, fried, smoked, or grilled. It’s flesh is more dense than say, cod, so it won’t flake as one might expect. Keep this in mind when you prepare sturgeon because it may become a bit tough with a more pronounced fish flavor when overcooked.

It really does pay to heed the experts and ensure that your grill plates are as clean as possible and well-oiled before you begin grilling any type of fish. Believe me, a light cleaning and oiling just won’t do. And be sure those grill plates are good and hot. Meet these 3 basic requirements and you’ll notice a marked improvement in your grilling.

One of the reasons I’ve chosen to go meatless one day a week is to reduce the impact on Mother Earth of raising meat, no matter the kind. I’d be robbing Peter to pay Paul, however, if I chose endangered seafood to eat instead of meat for that day. There are now a number of seafood apps available for your smartphone or tablet that will let you know whether a particular sea dweller is endangered and offer substitutions when possible. Just go to your virtual app store and do a search for “seafood”. The rest is up to you.

*     *     *

It’s déjà vu all over again … 

Since we’re going meatless, we might as well take a look at some of the Kitchens’ previously posted meatless recipes, too. This week’s Blast from the Past will send you to my Pasta Puttanesca recipe. Originating in Naples, this flavorful pasta features anchovies, olives, and capers, all simmered in a rich tomato sauce. Not only that, its aroma is certainly one of a kind. You can find the recipe by clicking HERE.

 *     *     *

Coming soon to a monitor near you …

Pasta with Sardines and Pickled Cherry Peppers

*     *     *

Gnocchi with Lemon, Spinach, and Burrata

If you came here expecting to find a recipe for those tasty little Italian potato dumplings, well, SURPRISE!  The gnocchi of today’s post are a type of pasta and have nothing to do with their namesake other than a similar shape. Now, I wish I could say that my family has prepared these for years but, the fact is, I stumbled upon these gnocchi during one of my voyages of discovery down the pasta aisle of the Italian market. Since I had already planned to share this recipe, I merely substituted one pasta for another.

The pasta aside, the reason I wanted to share today’s recipe was to introduce burrata. If you’ve never tried nor heard of burrata, you’re in for a treat. Originating in Puglia, burrata is a fresh cheese that is closely related to mozzarella. To make it, a piece of newly formed mozzarella is stretched into a flat sheet and used to form a pouch. It is then filled with fresh cheese curds, “topped off” with heavy cream, and sealed.  (See photo below.) The result is about as rich a cheese as one could ever expect.

*     *     *

*     *     *

There are many recipes that feature burrata but the use of lemon is what drew me to this one. None of its flavors are so bold as to hide or overpower burrata’s creamy taste while the pasta shape lends itself to providing spots to capture bits of cheese and drops of cream.  Add some toasted slivered almonds for texture and you’ve a great dish of pasta, whether you serve it as a primo piatto or secondo.

Today’s recipe is straight-forward with little need for clarification. Just be sure to slice burrata on a rimmed dish or cutting board. You do not want to let any of the cream go anywhere but into your pasta. Beyond that, you’ll need to work fast. The pasta and olive oil mixture must be hot enough to wilt the spinach and, soon thereafter, melt the burrata.  A little reserved hot pasta water will help, as will bringing the burrata out of the refrigerator an hour earlier than needed to remove its chill. See? Nothing at all difficult and an incredible pasta is your reward.

*     *     *

*     *     *

Gnocchi Pasta with Lemon, Spinach, and Burrata Recipe

Ingredients

yield: 6 servings

  • 1 lb gnocchi pasta
  • ⅓ cup extra virgin olive oil
  • 2 tbsp butter
  • 2 cloves garlic, minced or grated
  • juice and zest of 1 Meyer lemon
  • 1 pkg (6 oz) fresh baby spinach
  • ¾ cup slivered almonds
  • grated nutmeg, to taste
  • 1 lb. burrata cheese, sliced and cut into 1 inch cubes
  • grated Pecorino Romano cheese
  • freshly cracked black pepper

Directions

  1. Place almonds in a small skillet over med-high heat and toast until lightly browned.  Remove from heat and set aside.
  2. Bring a large pot of salted water to boil and cook gnocchi per package directions or to taste.
  3. When pasta is approximately 4 minutes before being al dente, heat a large skillet over medium heat. Add butter and olive oil.
  4. Add the garlic to the hot oil/butter mixture and sauté until soft, about 1 minute. Do not allow to brown.
  5. Add the lemon juice and zest to the skillet and stir to combine. Keep hot until pasta is ready. If it reduces too much, replenish with pasta water.
  6. Drain the pasta and put it into a large bowl.
  7. Add the spinach, in thirds, to the gnocchi and mix well. Continue until all the spinach has been added to the bowl of gnocchi. (Adding it in batches will help to prevent clumping.)
  8. Add the almonds and a dash of nutmeg. Mix well.
  9. Add the hot butter/oil/lemon mixture to the pasta and toss, wilting the spinach as you do.
  10. Work quickly and once the spinach is lightly wilted, apportion 6 servings.
  11. Place an equal amount of burrata on top of each serving.
  12. Finish each serving with a sprinkle of Pecorino Romano cheese and freshly cracked black pepper, to taste.
  13. Serve immediately.

Inspired by Bon Appetit, December 2004

*     *     *

Variations

Not all of us have ready access to Meyer lemons, and, gnocchi pasta probably won’t be found in your neighborhood grocery. Don’t let a lack of either stop you from making this delicious pasta. If missing Meyer lemons, use the juice and zest of 1/2 “normal” lemon. If unable to find gnocchi pasta, try using campanelle (little bells), gigli (lilies), or, as pictured on the right, conchiglie (shells).

*     *     *

Notes

It cannot be stressed enough, the key to this dish is to work fast to insure that the spinach wilts and the burrata melts. Success means a great pasta for dinner.

Burrata’s creaminess makes it a natural for crostini and you may wish to reserve a bit just for that purpose. Use it in place of mozzarella to make the crostini described HERE and pictured on the left.

*     *     *

It’s déjà vu all over again …

Kale-filled Pieda

Kale-filled Pieda

Flatbread are common to many cuisines and Italian is no different. Originating in Emilia-Romagna, this flatbread is called piedina but in my Dad’s area within Italy, the Republic of San Marino, it’s called pieda. Easy to prepare, Mom served pieda with sautéed Swiss chard but you can serve it with cheeses, lunch meats, salad greens, or any combination of those. You can find the recipe by clicking HERE.

*     *     *

Coming soon to a monitor near you …

Last week I shared the recipe for Bartolini Lasagna. At the time, I called it “one of the jewels in the Bartolini Crown of Recipes.” Well, next week I’ll present another of our Crown’s jewels: Mom’s recipe for Cappelletti. Although not made in the traditional shape, these raviolini will turn an ordinary bowl of brodo into something really quite special.

*     *     *

The Lasagna of My People — Lasagna dei Bartolini

The third week of January is another birthday week for the Bartolini Clan. Nonna’s birthday was January 26th, a date my Cousin shares with her. Not to be outdone, tomorrow, the 24th, is my birthday. It’s not a significant one but, boy, am I getting close! In the past, I’ve tried to pick a dish as a means of celebrating the person and birthday. Well, with that in mind, today I’m going to share what I consider to be one of the jewels in the Bartolini Crown of Recipes: Bartolini Lasagna.

*     *     *

*     *     *

As I’ve mentioned in prior posts, ours is not a ricotta-filled lasagna. In fact, ricotta isn’t even among the three cheeses used. (I’ve a recipe for a ricotta lasagna and I’ll share it sometime in the future.) This lasagna’s cheese filling is entirely a Bartolini invention, although not the way I had always believed. For years, I assumed that this was one of the recipes that my Grandma had taught her girls. I told my friends that, as well. You can imagine my surprise when, a short while ago, Zia corrected me and explained how this recipe came about.  Years ago — certainly before my memories begin — she & Mom had grown tired of ricotta-filled lasagne and were dissatisfied with those that called for a besciamella sauce. They decided to try something different and, Ecco! Bartolini Lasagna was born. This is a lasagna that is unlike most others and one that family and friends alike thoroughly enjoy.

Speaking of friends, did I mention that this lasagna has therapeutic qualities? Yes, there is that. You see, one of the unfortunate consequences of maturing is that the good health one took for granted before reaching the age of 40 may not be as apparent beyond that age. Things happen and, when they do, oftentimes friends and family will respond with a variety of foods and baked goods to assist in the recuperation. Well, when illness strikes a friend, I hit back with lasagna. That’s right. Bartolini Lasagna. I know that when I’ve been in a similar situation, there were times when eating was, shall we say, problematic. On those occasions when my appetite did return, it often vanished — or worse — by the time I got my meal on the stove. A casserole, however, solves that problem. A serving can be placed in the microwave and served within a few minutes, ensuring the patient receives much-needed calories to fuel the recovery. And what better casserole-type dish is there than lasagna? It certainly has the calories and, by any standard of measurement, Bartolini Lasagna has proved beneficial to each friend’s convalescence. OK, to be fair, our lasagna isn’t comparable to the waters of Lourdes and you certainly won’t find any crutches hanging from my kitchen’s ceiling. Follow our recipe, though, and you’ll have one tasty lasagna. Even Lourdes can’t do that.

*     *     *

*     *     *

This is normally where I would mention points of concern for the day’s recipe. I really have none for our lasagna recipe other than to mention the noodles used. Today, you can purchase noodles that need to be cooked before use, “boil”, or those that need no prior cooking, “no boil.” Of course, if you prefer, you can make you own — which I would highly recommend.  No matter whose lasagna recipe you follow, using homemade noodles will transform your dish. (A friend once compared my lasagna noodles to pastry.) If you do make your own (see Notes), remember that they only need to be boiled for a few minutes and they’ll be ready for use in your lasagna. If you use “boil” noodles, follow the package directions. Once boiled, you can lay them flat on a baking tray, coating each with a little olive oil, or, lay them flat in a baking dish filled with cold water. Work quickly or they may stick to each other. If using “no boil” noodles, I’ve found that they work better if each is given a quick rinse in hot tap water before being placed in the lasagna dish/pan. Don’t fret if your noodles are a little larger that your baking dish or pan. The exposed edges will crisp during baking and many find that very enjoyable.

*     *     *

The Bartolini Lasagna Recipe

Ingredients

Tomato Sauce (click on sauce name for recipe)

Cheese Sauce (see Notes)

  • 6 tbsp (85 g) butter
  • 12 oz (1½ pkg) (339 g) cream cheese
  • 2 – 3 tbsp (29 – 44 ml) milk
  • Pecorino Romano cheese, grated

Lasagna

  • Enough cooked lasagna noodles (or “No Boil”) to make 3 or 4 pasta layers (see Notes).
  • mozzarella (sliced or grated)
  • Pecorino Romano cheese, grated

*     *     *

*     *     *

Directions

Prepare the Cheese Sauce

  1. Place butter, cream cheese, and milk in a microwave proof bowl. Place in microwave and cook, on High, for 3 to 4 minutes, depending upon the microwave’s power.
  2. Remove and whisk until smooth.
  3. Set aside

Assemble the Lasagna

  1. Pre-heat oven to 350* F (177˚ C).
  2. Generously butter a baking dish or non-reactive pan.

*     *     *

3. Coat the bottom of the dish with tomato sauce.

*     *     *

 4. Add 1 layer of noodles.

*     *     *

5. Coat the noodles with tomato sauce.

*     *     *

6. Add ½ or ⅓ of the cheese sauce, depending upon the number of layers,  and spread evenly. Sprinkle with Pecorino Romano.

Repeat Steps 4, 5, and 6 once or twice depending upon noodles used and dish/pan’s depth. (See Notes)

*     *     *

7. Add a final layer of noodles.

*     *     *

8. Cover with the rest of the tomato sauce.

*     *     *

9. Place the mozzarella on top and sprinkle with Pecorino Romano cheese.

*     *     *

10. Place in pre-heated oven and bake until heated through, 40 – 45 minutes or until top layer of cheese is cooked to your liking. If using sliced mozzarella, once the lasagna has baked for 45 minutes, raise the oven temperature to 400˚ F (205˚ C) and continue until top layer of cheese is done.

*     *     *

Let rest 15 minutes before serving.

*     *     *

Notes

I use Mom’s Pasta Dough recipe for making lasagna noodles. This will result in approximately 1½ pounds (680 g) of dough. I used about 14 oz (500 g) of dough to make my noodles for an 11 X 7″ (28 X 18 cm) pan. Now, you can cut Mom’s recipe to make less dough, or, you can do as I do. Roll out the extra dough and use it to make linguine, fettuccine, pappardelle, fazzoletti,  or quadretti.

*     *     *

Fold, Cut, & Unfurl Pappardelle

*     *     *

When making homemade lasagna noodles, I roll them by machine until they are a little thicker than what I use for making linguine or pappardelle. If your rollers are at their widest at a setting of 1, then roll your dough up to and including setting 5. If your rollers are at their widest at 10, then roll your dough up to and including setting 6.

Much depends upon the type of noodles you use and the size of the baking dish or pan. If using store-bought noodles, “boil” or “no boil,” you’ll probably only be able to have 3 layers of noodles. If using homemade noodles, you can create another layer, if you wish. This is because store-bought noodles are thicker than those you’ll make by hand.

The amount of cheese sauce prepared in the recipe is intended for use in a 9 X 13″ (23  X 33 cm) baking dish. For that size dish, I estimate about 4 oz (113 g) of cream cheese and 2 tbsp (28.3 g) of butter for every layer of cheese sauce needed. Since I used homemade lasagna noodles, there were 4 layers of noodles and 3 layers of cheese sauce.

For a smaller dish/pan of 11 X 7″ (28 X 18 cm), no matter what kind of pasta or how many layers are created, I use 8 oz of cream cheese (226 g) and 4 tbsp (56.6 g) of butter with a little milk. If you prefer, you can scale back the ingredients, following my example with the larger pan. For me, frankly, scaling back the cream cheese would result in an ounce or 2 of cream cheese left in my fridge, where it will probably spoil before I think of it again. As they say, “In for a penny, in for a pound.” Might as well use all 8 oz and be done with it.

*     *     *

Variations

While discussing this recipe with Zia this past weekend, I learned that she prepares the cheese sauce differently than Mom did. Where Mom prepared her cheese sauce using butter, cream cheese, and a little milk, Zia only uses cream cheese and milk. She does, however, use enough milk to make up for the amount of butter Mom used. In short, Zia has never used butter in her lasagna while Mom and I’ve never made lasagna without it. Who knew?

As is the case with any lasagna or homemade pasta, you can go green, verde, if you like. When making your dough, add a few tablespoons of cooked, finely chopped spinach. The effect will be to die your pasta dough green. Use as you would any regular pasta dough.

*     *     *

It’s déjà vu all over again …

Not My Mom’s Lasagna

Since today’s post shared a lasagna recipe, I thought I would end with another. Using last week’s Blast from the Past Marinara Sauce, this lasagna features a parmesan besciamella with a layer of mushrooms and another with prosciutto.  Surprisingly light, the flavors within this lasagna are equally delicate. You can check out the recipe by clicking HERE.

*     *     *

Eel in the Style of Le Marche — Anguille alla Marchigiana

Our ship came in! This morning, I made what has become a daily call to the Italian market and learned that eels had been delivered late yesterday afternoon. I called a friend and within an hour, we were standing in front of the fish counter, watching the fishmonger net today’s entrée. Not but a few hours later, here I sit blogging about the dinner. Not too shabby, well, unless you happen to be an eel.

*     *     *

*     *     *

Throughout much of Italy, eel is a dish served traditionally around the holidays but is most commonly prepared in the southern portions of the country, with Naples famous for its eel. Very often one of the fishes served during Christmas Eve’s Feast of the 7 Fishes, eel is considered to be good luck for those who eat it. This is a very old custom dating back to the days when people believed snakes to be evil because of their role in the story of Adam & Eve. Because it so closely resembles a serpent, by eating eel one was symbolically triumphing over the devil and good fortune was sure to follow. I don’t know if that’s true but I’m buying a few lottery tickets, just in case.

In the old two-flat, I can’t say that eating eel was a tradition at all. In fact, I only remember seeing it one time back then. I must have been no more than 5 years old because I could barely see over the edge of the sink. Even though “barely,” I did manage to get a glimpse of a sink full of the slimy devils. Needless to say, it was a sight that left a lasting impression. Speaking with Zia, that is probably the last time eel was prepared there. So, today’s post wasn’t just a recipe. It was yet another memory test for my long-suffering Zia. I must say, though, having just finished a delicious dinner, Zia came through again. The eel flesh not only remained intact, it’s flavor wasn’t overcome by the tomatoes and, in fact, the sauce had a mild seafood taste throughout. Now I just have to figure out a way to get some eel over to Michigan so she, too, can enjoy the fruits of her memory.

*     *     *

*     *     *

As she suggested, I prepared the anguille like we do much of our seafood, in a simple tomato sauce. In fact, this marinara is almost bland for there are no strong herbs or flavors present. Eel has a mild fish flavor and using something like organo or marjoram would definitely overpower it, leaving a tomato sauce devoid of any taste of seafood. We agreed that the eel might disintegrate if allowed to cook entirely in the sauce, so it was briefly pan-fried before being added it to the tomatoes.  Beyond that, the only change I brought to the recipe was with the basil. My family always tore by hand or chopped fresh basil before adding it to a sauce. Not long ago, I watched as Lidia added an entire stem of basil to her sauce and fished it out before serving. Well, if it’s good enough for Lidia, it is certainly good enough for me. If you, however,  don’t feel like adding a stem of fresh basil, then tear or chop away.

Oh! I should warn tell you one more thing about today’s protein. These eel are alive when purchased. You can bring them home and “take care of them” yourself or you can let your fishmonger do it for you. Um. No question. Let your fishmonger kill, gut, trim, and even chop the eel to your specifications. If you’re considering taking on any of the duties I’ve just mentioned, let me tell you that the term “slippery as an eel” is far more fact than fiction. I chose to chop the eel myself and it was a mistake, one that I’ll never repeat.

*     *     *

Anguille alla Marchigiana Recipe

Ingredients

  • 3 lbs. eel, cleaned with head & tail removed, chopped in 2 – 3 inch pieces.
  • 4 tbsp extra virgin olive oil, divided
  • 1 large sweet onion, sliced thin
  • 1 clove garlic, minced or grated
  • 4 tbsp fresh parsley, chopped, divided
  • 1 large can (28.5 oz) tomatoes
  • 1 stem fresh basil
  • 1 cup white wine
  • salt & pepper
  • thickly sliced, toasted Italian bread, for serving.

Directions

  1. In a large sauce pan, heat 2 tbsp of olive oil over med-high heat. Add onion and sauté for about 3 minutes before adding 3 tbsp of the chopped parsley. Continue to sauté until the onion is translucent, about 5 more minutes.
  2. Add garlic and sauté for a minute.
  3. Add tomatoes, basil, season lightly with salt & pepper, and bring pan’s contents to the boil before reducing to a simmer.
  4. After sauce has simmered for 15 minutes, heat the remaining oil in a large frying pan over med-high heat.
  5. Once the oil is hot, add the pieces of eel and sauté for about 7 minutes, being careful to insure that the pieces are evenly cooked.
  6. Carefully remove the eel and place it in the tomato sauce. Season lightly with salt & pepper.
  7. Use the white wine to deglaze the frying pan. Continue to cook the wine until it is reduced by half. Add the wine reduction to the tomato sauce and carefully stir the pan’s contents.
  8. Increase the heat to high, bring the sauce to the boil, then reduce the heat and simmer for another 15 minutes.
  9. Taste and adjust seasoning, if needed, one last time.
  10. To serve, set a piece of toasted bread on each plate and place eel pieces on top, followed by a generous amount of sauce. Garnish each serving with some of the remaining chopped parsley.

*     *     *

It’s déjà vu all over again …

Calamari SaladA little over a year ago, I gave an account of how the Feast of the 7 Fishes came about. It was part of the post in which I shared Mom’s recipe for a Calamari Salad. Follow this recipe’s guidelines and you’ll have perfectly prepared calamari, not rubber bands. That post also included a round-up of 11 additional seafood recipes for anyone needing help with gathering 7 seafood dishes for the Feast. You can see it all by simply clicking HERE.

*     *     *

What’s this? You’re still a fish short?

Here’s a round-up of this past year’s seafood posts.

So, combining both posts, you now have 18 recipes from which to choose dishes for your Feast of 7 Fishes. Still having trouble? Try this: start your meal with Mom’s Calamari Salad. Next serve a bowl brimming with Brodetto. See? You’ve got 6 Fishes out-of-the-way already. Now, finish your meal with a bang: Branzino al Cartoccio. That’s 7 Fishes and you haven’t even broken a sweat.

*     *     *

Coming soon to a monitor near you …

Mom’s Brodo

*     *     *

Baked Whiting

Merluzzo al Forno

Today’s recipe comes from a half-century ago, a time when television shows were only broadcast in black and white; when a trip to the airport was something eagerly anticipated; when all (US) phones had a dial and many of those phones, being owned by Ma Bell, were rented; when music was purchased on large, black vinyl discs; and when Catholics were forbidden to eat meat on Fridays lest they face the fires of eternal damnation. Yes, that long ago.

*     *     *

*     *     *

When I think back to those days, I’m amazed at the variety of fish that found its way to our dinner table. Aside from the usual guests — i.e., baccalà (salted cod), stoccafisso (dried cod), tuna, vongole (clams), smelt, calamari (squid), perch, sepia, lumache (snails) — there were infrequent visitors but I was far too young to remember their names. Zia, my very own Encyclopedia Italiana, can’t remember their names either. So, you can well imagine my surprise when the fishmonger at the Italian market identified a type of fish in his display case as “merluzzo.” Merluzzo! I’d not heard or seen that fish in almost 50 years. I bought a couple, rushed home, and phoned my Aunt immediately.

Zia was every bit as surprised as I was. I really enjoy these phone calls and they’re why I spend so much time investigating a market’s pasta aisle, the cheese counter, the produce department, and interrogating the fishmonger. It makes my day when I uncover some treasure from long ago and then phone her with the news. To be sure, no matter the discovery, there’ll be some in a bag, a box, or a cooler the next time I come for a visit. And that dinner will be full of memories, some of which I’ll then share with you.

*     *     *

*     *     *

Now then, before discussing the recipe, I can no longer ignore l’elefante nella stanza. Our friends from across The Pond refer to merluzzo as “hake”, whereas here merluzzo is called “whiting.” (My sources on this “side” being my fishmongers and Fabio Trabocchi’s cookbook Cucina of Le Marche.) Although I am by no means an expert, I’ve learned that although the two fish aren’t exactly the same, the names “whiting” and “hake” are used interchangeably.  For the sake of argument, henceforth I’ll call today’s fish “merluzzo”. You, then, can translate it to mean whatever you like,  be that “whiting” or “hake”.  ChgoJohn, Peace Maker.

I’m going to dispense with my normal recipe format, for this dish doesn’t need it. Merluzz’ are small fish. Scaled and gutted, the 2 pictured were about 9 inches (23 cm) long and together weighed about 8 ounces (227 g). To stuff them, you’ll need about 1/3 of a cup of the breading mixture per fish and you may wish to make more, depending upon how you’ll cook or serve your fish.

This stuffing mixture is used in a number of the Bartolini family recipes. Grandma’s Stuffed Vegetables and Grandpa’s Barbecued Shrimp are 2 that I’ve shared so far. We, also, use it to stuff calamari and again with other baked fish, the recipes for which are forthcoming.  The only difference in its composition from one dish to the next is that, with seafood, lemon juice might be added.  It’s easy enough to make. Just combine (Panko) breadcrumbs, chopped fresh parsley, a little grated or minced garlic, salt & pepper, and olive oil. If you like, squeeze a little fresh lemon juice into the mix. Learning how much olive oil to use gave me fits. I pestered Mom with questions and was forever touching Zia’s mixture to get “the feel” of it.  You do not want a breading that is sopping wet with olive oil but neither do you want it barely moist. Too wet and you’ll have a greasy dish; not wet enough and it will dry out, and possibly burn, before the dish has finished cooking. Practice makes perfect.

Once the breading is made, salt & pepper the fish, inside and out, use the breading mixture to stuff it, and add a light drizzle of olive oil. Back in The Day, Grandpa would then secure the merluzzo in a hinged grill basket and place them on his barbecue, turning them after a few minutes. When finished, they would be removed to a serving platter and brought to the table. As you can see, that’s not what I’ve done.

To bake, place the stuffed fish on a lightly oiled baking sheet. Place any excess breading on top of the fish before drizzling with oil, and then place in a pre-heated oven of 375˚F (190˚C). Bake for about 20 minutes or until the breadcrumbs are golden brown. Times may vary depending upon the oven and size of the merluzzo. Remove to a serving platter and serve immediately. That’s still not as is pictured but this is how my family baked and served merluzzo.

*     *     *

*     *     *

One way I like to prepare them is to roast cherry/grape tomatoes with the fish. I make extra breading and use it to cover the fish. Once roasted, the resulting flavors of roasted tomato and breading are reminiscent of Grandma’s Stuffed Vegetables.

A third way to serve them is to prepare even more breading mixture and use it to as a bed and coating for the roasting fish. Once roasted, place the breading and fish atop cooked pasta that has been lightly dressed with olive oil and chopped parsley. Roasted cherry tomatoes would work here, too.

*     *     *

Notes

Don’t let a fear of fish bones prevent you from trying merluzzo. The bones are all attached to the spine and the “top-side” fillet readily lifts off of the fish with your fork. Once exposed, the entire spine is then easily removed, making the “bottom-side” fillet accessible. Just be careful with the meat taken from around the gills and you shouldn’t encounter any bones while eating.

*     *     *

It’s déjà vu all over again …

*     *     *

As I’ve said, seafood is the protein of choice in Italian households on the night before Christmas. My Brodetto, or fisherman’s stew, uses a variety of seafood in a lightly seasoned tomato broth to create a very special dish which, coincidentally, is perfect for Christmas Eve. Click HERE to learn how to make this stew.

*     *     *

Coming soon to a monitor near you …

Next week’s recipe is a mystery dish, my memories of which predate even merluzzo. As such, I’ve no teaser photos for you. I can’t even guarantee that I’ll find it before next Wednesday. If I don’t, I may delay next week’s post a day or two, hoping that something turns up. Don’t you worry. I’ve another seafood recipe, all set to post, if I’m not successful. Stay tuned …

*     *     *

Pan-Seared Salmon with Dill Sauce

As many of you may recall, recently I’ve located 3 fishmongers in my part of town. This was quite the lucky stroke, especially considering that for years now, only previously frozen fish was available to me — unless I wished to pre-order what I wanted. Yes, that was a possibility but there was little room for spontaneity. Living by myself, I don’t mind planning a dinner when guests are involved but when dining alone, I’ll often let the market decide what I’ll be preparing. Very often that meant that good, fresh fish were off the menu. Well, not anymore.

*     *     *

*     *     *

Now that I’ve a steady supply of quality fish, I’ve certainly taken advantage. Branzino, sturgeon, merluzzo, salmon, shark, and sea bream have all found there way to my table, as have more clams than I’ve had in the past decade. I’ve prepared the fish in parchment (al cartoccio), grilled (alla griglia); baked (al forno), stewed (in umido) or, like today, pan-seared. None is difficult or complicated to prepare, nor are any so bone-riddled as to be unpalatable. Although 1 specific dish may give you pause, I guarantee that you will be able to prepare the others without so much as batting an eye. So, with Christmas Eve approaching fast, I plan to present 3 fish dishes to you in December.

Today’s recipe is Pan-Seared Salmon Fillets. This is so easy to prepare that I debated blogging about it at all. Still, I was motivated to do so for the benefit of the younger members of my family.  Preparing fish can be a bit daunting for the inexperienced cook and a recipe like today’s is a confidence builder. With both the salmon and sauce taking less than 15 minutes to prepare, all you have to worry about is preparing a salad and whatever sides you prefer. The only way this meal could be easier is if you ordered it in a restaurant — and then it would cost you at least double.

*     *     *

Pan-Seared Salmon with Dill Sauce Recipes

Ingredients

Browned & Crispy

  • thick cut salmon fillets, skin in place
  • salt & pepper
  • extra virgin olive oil
  • lemon wedges for serving

Dill Sauce

  • 4 tbsp (low-fat) Greek yogurt
  • fresh dill, chopped + more for garnish
  • 1 small garlic clove, minced or grated
  • salt & white pepper

Directions

  1. Combine yogurt, dill, and garlic into a small bowl and mix well. Season with salt & pepper and set aside.
  2. Heat a few tablespoons of olive oil in a medium skillet over a med-high heat. Season both sides of the salmon with salt & pepper.
  3. When oil is hot, add the salmon fillets, skin side down.
  4. Turn fish over once skin is well-browned & crispy but not burnt. This should take 4 to 5 minutes.
  5. Continue to sear, flesh-side down, for about another 3 minutes. This will give you a fillet that is med-rare to medium internally. Cook more or less depending upon your own preferences.
  6. Serve immediately  garnished with chopped dill and accompanied with dill sauce and lemon wedges.

 *     *     *

Notes

To insure that the salmon cooks evenly, select yours from the thickest part of the salmon fillet. If you must use the “tapered end” of the fillet, you will need to adjust your cooking times accordingly and the salmon skin may not fully crisp.

Although the dill sauce may be prepared and served immediately, it is best when prepared a few hours in advance and allowed to sit so the flavors meld together. I prefer to serve it at room temperature and will allow it to sit on a counter for about an hour before serving.

There are definitely 2 schools of thought when it comes to eating the skin of cooked fish. This recipe specifically crisps the skin. If you enjoy eating crispy skin, serve the fillets skin-side up. If you prefer not to eat the skin, serve the fillets skin-side down. This will soften the skin and make it easier to avoid while dining.

*     *     *

It’s déjà vu all over again … 

With an eye towards Christmas Eve, I thought today’s Blast from the Past should follow this month’s fish theme. In many Italian households, baccalà (salted cod) is the centerpiece of the Christmas Eve dinner. Click HERE to learn how my family prepares this dish.

*     *     *

Coming soon to a monitor near you …

Pasta with spinach, lemon, and burrata cheese

*     *     *

The Ketchup that Came Down the Mountain

I’ve mentioned it in the past and it bears repeating: blogging continues to surprise me in ways I never dreamt possible. One need look no further than my dining room table to see what I mean. There, in jars of all shapes and sizes, you’ll find preserves, jams. jellies, pickles, pickled peppers, brandied figs, apple sauce, corn relish, and ketchup. You may recall that I was the guy that swore he’d never can anything. Now it looks like I’m stocking a bunker for a nuclear holocaust. Look closely, however, and you’ll soon find the Belle of the Ball … well, Ball Jar. I’m talking about the ketchup and that’s the recipe I’ll share today.

Way back in September of 2011, my blogging friend Tanya, of Chica Andaluza fame, posted a recipe for “Up The Mountain Spicy Tomato Ketchup.” With this area’s farmers markets still flush with tomatoes, I bought a couple pounds and decided to give her recipe a try. Knowing how spicy things can get up that mountain, however, I did tweak the recipe to cool it down just a bit. And the result? This is one exceptional ketchup. In fact, it hardly seems right to call it ketchup for this isn’t at all like the bottle of red stuff on your grocer’s shelf — and that goes for all 57 varieties! Tanya’s sauce is so good that I actually felt like I was wasting money the last time I was without and needed to buy ketchup. But don’t just take my word for it. I’ve given jars of Tanya’s ketchup to friends and family alike, all of whom, without exception, sing its praises. And to all of my fellow Chicagoans, this ketchup is good enough to be served on a hot dog! Yes, it’s that good!

There’s only one possible issue worth mentioning. It is best to simmer this sauce slowly and to stir it frequently. If you don’t you could end up with a splattered mess or, worse yet, a scorched pan bottom. A splatter screen may help prevent the mess but a scorched bottom can ruin the entire batch of ketchup. If you suspect that the ketchup has begun to burn, do not use a spoon to scrape the bottom of the pan. That will only foul your ketchup. Better to dump the pot’s contents into a large bowl and clean the pan’s bottom before re-filling it with the ketchup and continuing the simmer. Bear in mind, the lower the simmer, the longer the time required to get a thick, rich ketchup. For me, this job will easily last a full afternoon.

 *     *     * 

Home-Made Ketchup Recipe

Ingredients

  • 8 lbs. (approx 3.5 kg) tomatoes, roughly chopped
  • 4 large onions (yellow, sweet, red, or any combination), chopped
  • 2 red bell peppers, chopped
  • 2 Serrano peppers, chopped
  • 1 jalapeño, chopped
  • 4 garlic cloves, peeled and smashed
  • 1 cup cider vinegar
  • ¾ cup dark brown sugar
  • ½ tsp dry mustard
  • 2 cinnamon sticks
  • 2 tsp whole cloves
  • 2 tsp whole allspice
  • 2 tsp mace
  • 2 tsp celery seeds
  • 2 tsp smoked paprika
  • 2 tbsp black peppercorns
  • 2 bay leaves
  • cayenne pepper, to taste
  • nutmeg, to taste
  • salt, to taste

Directions

  1. Use a piece of cheese cloth to form a pouch into which you’ll add the cinnamon sticks, allspice, cloves, mace, celery seeds, peppercorns, and bay leaves. Use butcher string to enclose and securely tie the herbs & spices. Set aside.
  2. Place the tomatoes, onions, peppers, and garlic into a heavy bottomed saucepan over med-high heat. Bring to a boil, reduce to a simmer, and cook until the ingredients are all soft, 30 to 45 minutes.
  3. Once the tomato mixture has softened, pass it through a food strainer, food mill, or fine meshed sieve to separate peel and seeds from the pulp.
  4. Return the strained pulp to the saucepan, along with the brown sugar, mustard, paprika, cider vinegar, and spice pouch. Stir to combine over med-high heat. Bring to a boil, reduce to a simmer, and continue for 45 minutes, stirring occasionally to prevent scorching. Remove the pouch.
  5. At this point, continue to simmer until the ketchup has reached the consistency you prefer. This could take anywhere from 30 minutes to several hours.
  6. Once it has reached the desired thickness, add cayenne pepper, ground nutmeg, and salt, to taste.
  7. Once the seasonings have been adjusted, you can either bottle it for storage in the refrigerator where it will keep for about a month, freeze it, or, you can process it in a boiling water bath for 35 minutes if using pint jars and 40 minutes if using quart-sized canning jars.

With thanks to: Chica Andaluza, “Up The Mountain Spicy Tomato Ketchup

 *     *     * 

Notes

You may have noticed that the spice pouch was removed after simmering for 45 minutes. That’s because the tomatoes will continue to reduce for some time afterward and that will serve to concentrate all the flavors in that pot. To leave the spice pouch in the tomato mixture for too long could render the ketchup inedible. You can always adjust the seasoning at the end of the cooking, just as one does with the cayenne, salt, and pepper.

Living as far North as I do, finding good tasting tomatoes from now until Spring is pretty much impossible. Even so, I’ll still use off-season, or even canned, tomatoes to make ketchup during the Winter and Spring months, adding tomato paste to boost the tomato flavor. Although this version may not quite equal the taste of ketchup made from Summer’s best, it is still leagues ahead of any ketchup you might buy at a store.

 *     *     *

Grilled Chicken with Tomato Jam Glaze

*     *     *

One last word about tomatoes …

In September, Marie posted a link to a recipe for tomato jam that used yellow heirloom tomatoes and basil. I spoke to Zia about my intention to try my hand at making the jam and that triggered a memory of Grandma making tomato jam when Mom & Zia were little girls. Grandma’s version didn’t use basil and, though the tomatoes she used would be considered “heirloom” by today’s standards, back then they were just “tomatoes.” Well, in an effort to bridge the gap between New and Old, I made tomato jam that weekend with yellow heirloom tomatoes but without the basil.  And the result? Like almost all the jams I’ve made, it goes very well with goat cheese. (Is there a jam or preserve that doesn’t go well with goat cheese?) Not only that but I was surprised to find out just how good it worked as a glaze for barbecued chicken. Next time, though, I’m adding a few red pepper flakes and a dash of hot sauce to the glaze. Of course, you can always serve it like my Grandma did for her girls: on a chunk of Italian bread.

*     *     *

It’s déjà vu all over again …

As a boy, vegetables were very much a part of my family’s diet. Whether picked fresh from Grandpa’s garden or selected at a grocery or market, you could count on a salad of fresh greens and at least one vegetable being served at every dinner.  Mom’s favorite, and frequent star at our supper table, was Swiss chard. Mom enjoyed it enough to commandeer a small patch of Grandpa’s garden so that she could grow her own.  Now that’s some serious chard love!  Very often, Mom would use a combination of chard & spinach to fill small pies, cacioni, from a recipe that came from Dad’s homeland, San Marino. Click HERE to check out the recipe for this family favorite.

*     *     *

Coming soon to a monitor near you … 

Sausage Ravioli

Sausage Ravioli

*     *     *

Crostini e Bruschette

A few weeks ago I posted my last recipe in the series of making cheese at home, Italian Mozzarella. Within that post were photos of crostini & bruschette and, with the holidays quickly approaching, I thought this the perfect time to share both recipes. Besides, if you were successful and made a couple of pounds of mozzarella, eventually you’re going to tire of eating it “by the chunk” — and that’s when these recipes will come into play.

First a definition of terms. The word crostini means little toasts, whereas bruschetta has as its origin bruscare, to char or roast. They sound pretty similar to me. I’ve always thought the difference to be in the bread used. When I make crostini, I use a baguette, thinly sliced on the diagonal. For bruschette, I use a thicker slice taken from a loaf of Italian bread. I toast both before piling on the fixin’s and sometimes pop them back into the oven afterward. It really does depend on what’s being used to top each off. And speaking of the fixin’s, you can use pretty much anything you like.  Just stick with fresh ingredients and you won’t go wrong.

About a year ago, I posted a recipe for Gorgonzola and Honey Bruschette. At the time, I mentioned that I often use my toaster to toast the bread beforehand and store it in airtight containers until needed later that day. This is particularly helpful when entertaining. It’s just one less thing to worry about.  No matter when you toast the bread, though, try to serve these bruschette directly after preparation or they may become sodden.

 *     *     *

 *     *     *

Mozzarella and Tomato Bruschette Recipe

Ingredients

  • ⅔ inch (1.7 cm) slices of Italian bread
  • plum tomatoes, seeded and chopped
  • garlic, minced
  • a few tbsp of sweet onion, diced
  • fresh mozzarella, cut in 1/2 inch cubes
  • fresh basil leaves, hand torn
  • Italian seasoning
  • olive oil
  • Balsamic vinegar
  • dried oregano
  • salt & pepper

Directions

  1. Slice bread, brush with olive oil, and toast lightly
  2. Add a couple of tablespoons of olive oil to a frying pan over medium heat. Add the onion and garlic, sautéing for about a minute. Do not let the garlic burn.
  3. Add the tomatoes, season with salt and pepper, and cook until heated through.
  4. Remove from heat, add the basil, Italian seasoning, balsamic, and olive oil. Mix well and taste before seasoning with salt and pepper. Set aside.
  5. Add the cubed mozzarella once the tomato mixture has cooled to room temperature.
  6. When ready to serve, spoon some of the tomato-mozzarella mixture on top of each toasted bread slice, season lightly with salt and cracked black pepper, and garnish with a light sprinkling of dried oregano.

 *     *     *

 *     *     *

Crostini alla Caprese Recipe

Ingredients

  • ½ inch (1.2 cm) thick slices of baguette, cut on the diagonal
  • cherry tomatoes, sliced in half
  • fresh mozzarella, cut in ¼ inch (.6 cm) slices
  • fresh basil leaves
  • olive oil
  • red wine vinegar
  • salt & pepper

Directions

  1. Slice bread, brush with olive oil, and toast lightly.
  2. Pre-heat oven to 400˚F (204˚ C).
  3. Place tomatoes in a bowl, season with salt & pepper, and drizzle with olive oil.
  4. Place tomatoes on a baking sheet and then into the oven to roast for about 15 to 20 minutes. Do not allow to roast so long that the tomatoes completely collapse.
  5. Meanwhile, place a slice of fresh mozzarella and then a few small basil leaves atop each piece of toast.
  6. Remove tomatoes from the oven and when cool enough to handle, place one tomato half, cut-side down, on each piece of the toast with mozzarella and basil. If you prefer, add a light drizzle of olive oil and a few drops of red wine vinegar.  Serve immediately.

*     *     *

Notes

These antipasti should be made using fresh mozzarella. No, you needn’t make it yourself and you can find it now in most large grocery stores. Just to be clear, I’m not talking about the pre-shredded stuff used when making pizza. Fresh mozzarella is usually ball-shaped and is often packaged in water/whey. If you’re unsure, ask a person working at your store’s deli counter for assistance.

*     *     *

It’s déjà vu all over again …

Since this post is somewhat party themed, I thought it best to resurrect a recipe that’s perfect when entertaining a large group. Cut into 3 inch squares, your guests will have no trouble munching on this bit of cheesecake while sipping on their cocktails, You can find the recipe for this Cherry Cheesecake Pizza by clicking HERE. If you need help deciding which cocktail(s) to serve, do what I do. Click HERE or HERE. While you’re there, be sure to take some time to check out both Greg’s and John’s blogs. You won’t be disappointed.

*     *     *

Coming soon to a monitor near you …

The Ketchup That Came Down The Mountain

*     *     *

The Proverbial Last Rose of Summer

“Sunset Celebration”

*     *     *

Mediterranean Sea Bass in Parchment

Branzino al Cartoccio

During the past 6 months, I’ve discovered not just an Italian market with an extensive fish counter but 2 fish mongers, as well. Their impact upon my diet has been incredible and I’ve enjoyed a far greater variety of seafood than ever before.  I’ve not seen some — whiting (merluzzo), eels (anguille), octopus (polipo) — since I was a boy. Others — clams (vongole), squid (calamari), red snapper, and the like — may have been more readily available but the fish and calamari were often frozen and finding clams was a hit-or-miss affair. So, suddenly having 3 sources for fresh (affordable) seafood is mind-boggling and I’ve taken full advantage of them. Mediterranean sea bass (branzino) is a case in point.

Up until I found the Italian market, branzino was something I only saw on the menus of restaurants. My usual sources for seafood certainly weren’t going to carry it, although I suppose I may have been able to order one. You can imagine my surprise when I looked at the market’s fish counter one day and saw no less than a dozen fresh branzini on display. I just could not pass them by — even though I was leaving for Michigan the next morning. I bought one, packed it in ice overnight, repacked it in ice in my cooler for the trip, and we arrived in Michigan, fresh as daisies, the next afternoon. After a quick run to a grocery, I fixed today’s recipe for Zia that night.  Unfortunately, the pictures from that dinner were too dark to be used in a post, so, I was forced to prepare the dish again here at home. I know. The sacrifices we bloggers must endure.

By now, you’ve probably surmised that al cartoccio is Italian for “in parchment.” For this dish, because of its length, I used 2 sheets of parchment paper to enclose the fish. With a smaller branzino, you may be able to use a single large sheet, folded in half.  Although this is a recreation of our meal that night, it’s not exactly what I had planned for us. True to form, I forgot to bring a few ingredients with me and her area’s markets did not have them in supply. The fish was nonetheless delicious but, if you’re interested, the “Mediterranean style” mentioned in Variations below is what I had originally intended for that evening.  No matter how you decide to prepare your fish, be sure to set aside a few of the diced vegetables and chopped herbs to be used as garnish before serving. They’ll add both texture and freshness to the dish.

*     *     *

Branzino al Cartoccio Recipe

Ingredients

  • 1 branzino, cleaned, scaled, fins trimmed and, if desired,  head and tail attached
  • 1 fennel bulb thinly sliced
  • thinly sliced lemon
  • diced yellow bell pepper
  • diced, cored, & seeded tomato
  • chopped scallions
  • a couple stems of fresh basil
  • 1 or 2 rosemary branches
  • a few parsley stems
  • white wine
  • olive oil
  • salt & pepper
  • 2 sheets of parchment paper
  • additional diced vegetables with hand-torn basil & parsley for garnish

*     *     *

Oven Ready

*     *     *

Directions

  1. Pre-heat oven to 400˚F (204˚C).
  2. Place a large sheet of parchment paper on a large baking sheet.
  3. Place the sliced fennel in a straight line, forming a bed for the fish.
  4. Use a sharp knife to score both sides of the fish. Do not cut through the backbone. Depending upon its length, 3 or 4 parallel cuts should be made into each side of the fish. Season the fish, inside and out, with salt & pepper.
  5. Lay the fish on top of the fennel bed. Stuff the cavity with a loose bundle made with all the herbs.
  6. Cover the top of the fish, from gill to tail, with lemon slices and cover them with the chopped vegetables.
  7. Sprinkle a little wine across the entire fish and then repeat with olive oil.
  8. Cover the baking sheet with another sheet of equally sized parchment paper.
  9. Beginning on one side, grab the edges of both sheets of paper, fold them twice together, and use a stapler to permanently attach them to each other.
  10. Repeat Step 9 on the remaining 3 sides, creating a sealed pouch for the fish.
  11. Lightly brush the pouch’s top with olive oil before placing the pouch and baking sheet in the pre-heated oven.
  12. Bake for 20 to 25 minutes, depending upon the thickness of the fish. See Notes below.
  13. Slide the pouch on to a serving platter and bring to the table. Pierce the top but be careful of the steam’s release. Peel back the paper to reveal your main course and serve, garnished with the reserved diced vegetables and chopped herbs.

*     *     *

Pronti!

*     *     *

Variations

If you prefer a more Mediterranean style, add some chopped olives to the vegetables, add some fresh oregano to the herbs within the cavity, and use a little dried oregano to season the chopped vegetables. Oregano is a strong-tasting herb. Be careful not to use too much. Feel like something from South of the  (US) Border? Swap cilantro for the parsley, add a little chopped jalapeño to the vegetables, and maybe a pinch or two of cumin. And no matter style you follow, you can’t go wrong with capers — unless you forget to add them like I did when I prepared this fish.

*     *     *

*     *     *

Notes

The cooking times may vary depending upon the size and thickness of the whole fish or even the fillets, if used. Though the pouch will protect your fish from drying out to a point, you don’t want to let it cook too long. A good rule of thumb for this or any fish roasted in parchment is to listen for the sizzle coming from inside the pouch. Most whole fish will be finished cooking from 7 to 9 minutes from that point; fillets will be finished in about 5 minutes.

You may have noticed that I used staples instead of a series of folds to seal the parchment ends. Once I saw Alton Brown do this, I abandoned the origami method of sealing the pouches. This is so much easier and reliable, especially when preparing a fish large enough to require 2 sheets of parchment paper.

*     *     *

It’s déjà vu all over again …

I’m just finishing up with this year’s canning, preserving, and pickling. One family favorite that I shared last year is the recipe for Zia’s Corn Relish. It’s a simple pickle, actually, and results in a great little condiment to serve with virtually any protein. It’s a little bit o’ sunshine on your dinner plate and who wouldn’t like that in the cold months ahead? Now, don’t worry if the “good” fresh corn is no longer available. Frozen corn can easily be used to make this relish and you can see the recipe by clicking HERE.

 *     *     *  

Coming soon to a monitor near you …

Crostini

 *     *     *