A Tale of Two Recipes

During the recent heat wave, I really didn’t leave the house very much. Sure, I had errands to run and a dog to walk but that was pretty much all I did outdoors for much of 2 weeks. Well, except for watching fireworks on the 4th. Yay! It was a golden opportunity to watch some cooking shows as they were broadcast, as well as a number that I’d recorded but never watched.

*     *     *

*     *     *

One show, Lidia’s Italy, has been a long time favorite and I must have at least a dozen of her episodes recorded and saved. So, you can well imagine my astonishment when one afternoon, while watching a recorded episode of her newest show, Lidia’s Italy in America (episode 16, original airdate 12/24/11), there she was, standing in the produce department of my Italian market. Lidia Bastianich. In my market! Later she was in front of the very deli counter where I buy my prosciutto, my sopressata, and my mortadella. Do you realize what this means? I have walked on the very floor tiles upon which Lidia has walked. We’ve spoken to the same people, breathed the same air. I know. It kinda makes you weak-kneed just thinking about it. All I can say is that if you live in the Greater ChicagoLand area, you should head over to Caputo’s in Elmwood Park now, before word gets out and people begin making pilgrimages. It won’t be long before “La Via Lidia” is roped off and you’ll no longer be able to literally follow in her footsteps, as I have done. But I digress …

One show that I watched live was The Chew and on that particular day, Carla Hall made a cherry, blueberry, and sour cream pie. A pie with 2 of my favorite things? I vowed to bake one as soon as normalcy returned to our daily weather. A few days later, a Saturday, Max & I were on our way to the farmers market, where I bought sweet cherries, blueberries, and assorted other fruits & vegetables. On the way home, I stopped at a grocery and bought the sour cream needed for my pie. It wasn’t even 9:00 am and things were going very well. This all changed by 10:00 am, for that was the time I looked up the recipe on The Chew’s website.

The problem was that the printed recipe was not the recipe I recalled Carla preparing. I soon found the video of her making her pie on their website — and I was right. On the video, she uses 4 eggs, while the printed version used 3. Neither version indicates where the egg white is to come from nor the type of cherry to be used. Lastly, the video shows Michael Symon adding 2 tbsp of honey to the filling while the printed version states ⅓ cup is to be used. I was on my own.

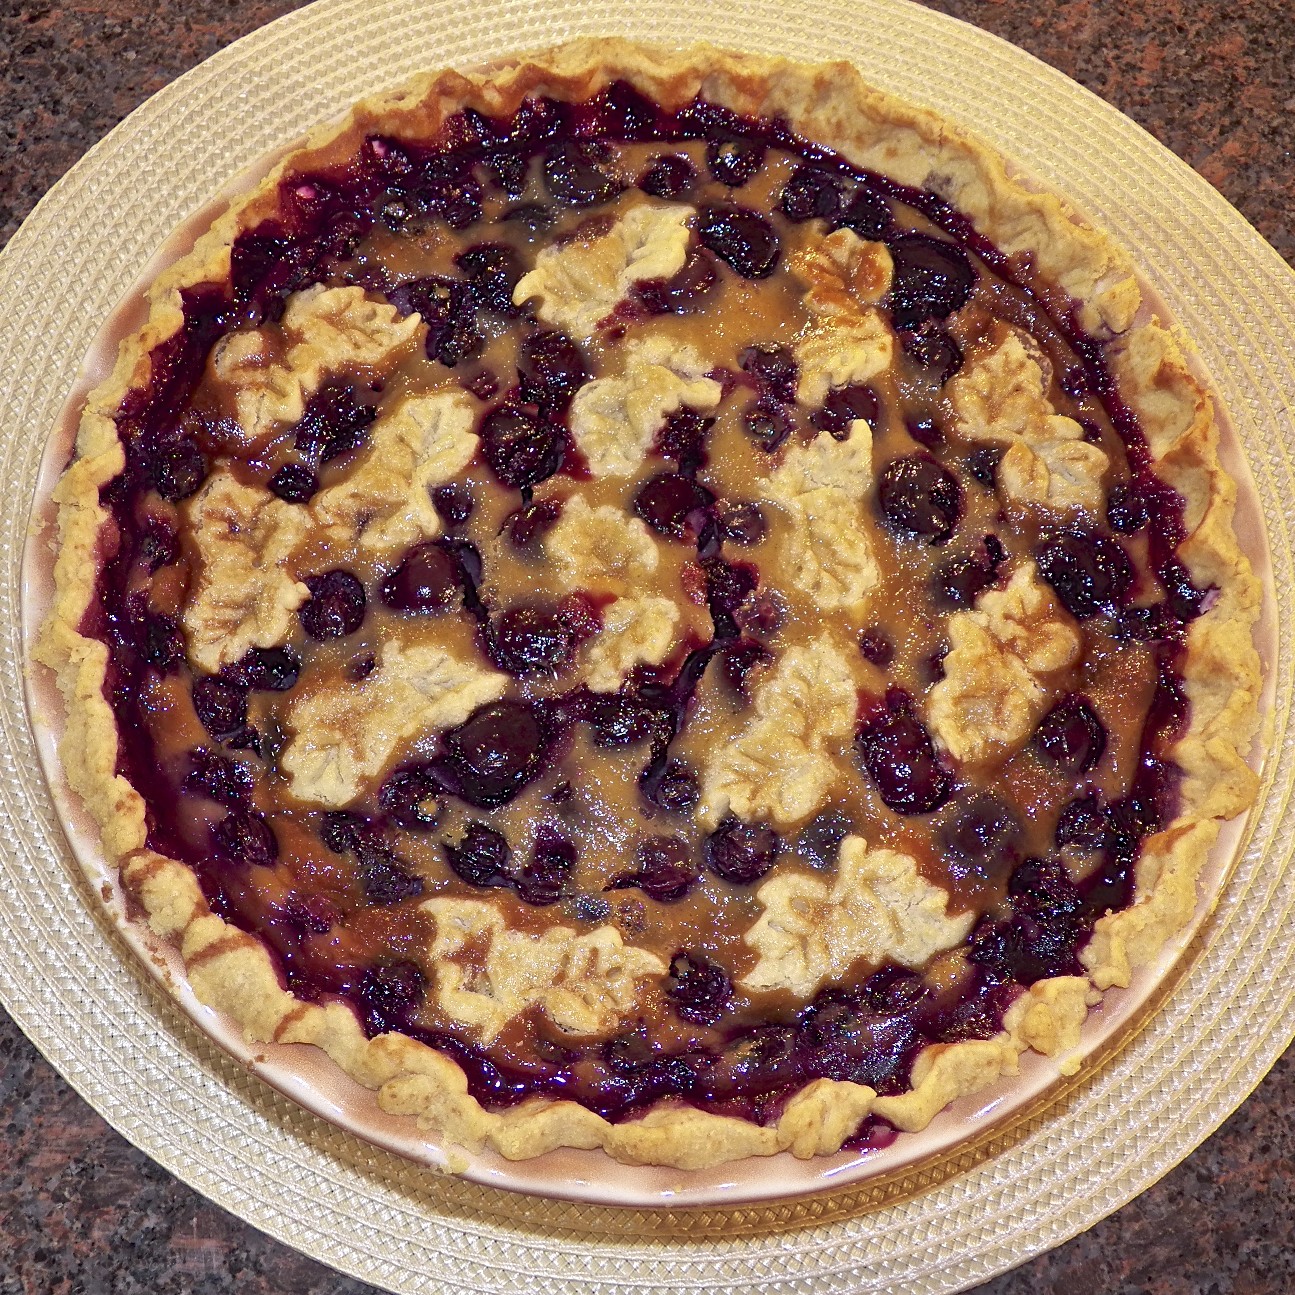
My first attempt recreated the pie I watched Carla prepare. I used 4 eggs, the white of one being used to prepare the pie shell. The cherry question had been answered earlier that morning when I found sweet cherries at a good price at the market and bought a quart. And when it came to the honey, I followed Michael’s lead and used 2 tbsp. From that point forward, I followed the directions exactly and the pie was pretty good. For me, though, pretty good wasn’t what I wanted. With blueberries and cherries in season, I want my pie to scream “SUMMER!” This pie said “Eggs.” Yes, eggs. It certainly wasn’t a bad pie and I’m sure that it would be enjoyed by many. It just wasn’t what I’d expected. A week passed during which I ate all that pie, sometimes with home-made vanilla ice cream, sometimes with whipping cream, sometimes plain. But I ate it all because of all the sins one can commit, the gods most frown upon those who waste pie.

Another Saturday came and with it a return of the heat wave in the forecasts. Again Max and I headed to the farmers market. Again I bought blueberries and cherries, although this time I went for the tart. And again, on the way home, we stopped at a grocery to pick up sour cream. This time around, I didn’t just exchange cherries. I, also, cut the eggs in half, using only 2, and I increased the honey to ⅓ cup as the written version had indicated. Because I wanted my new pie to take full advantage of its seasonal ingredients, I increased the 
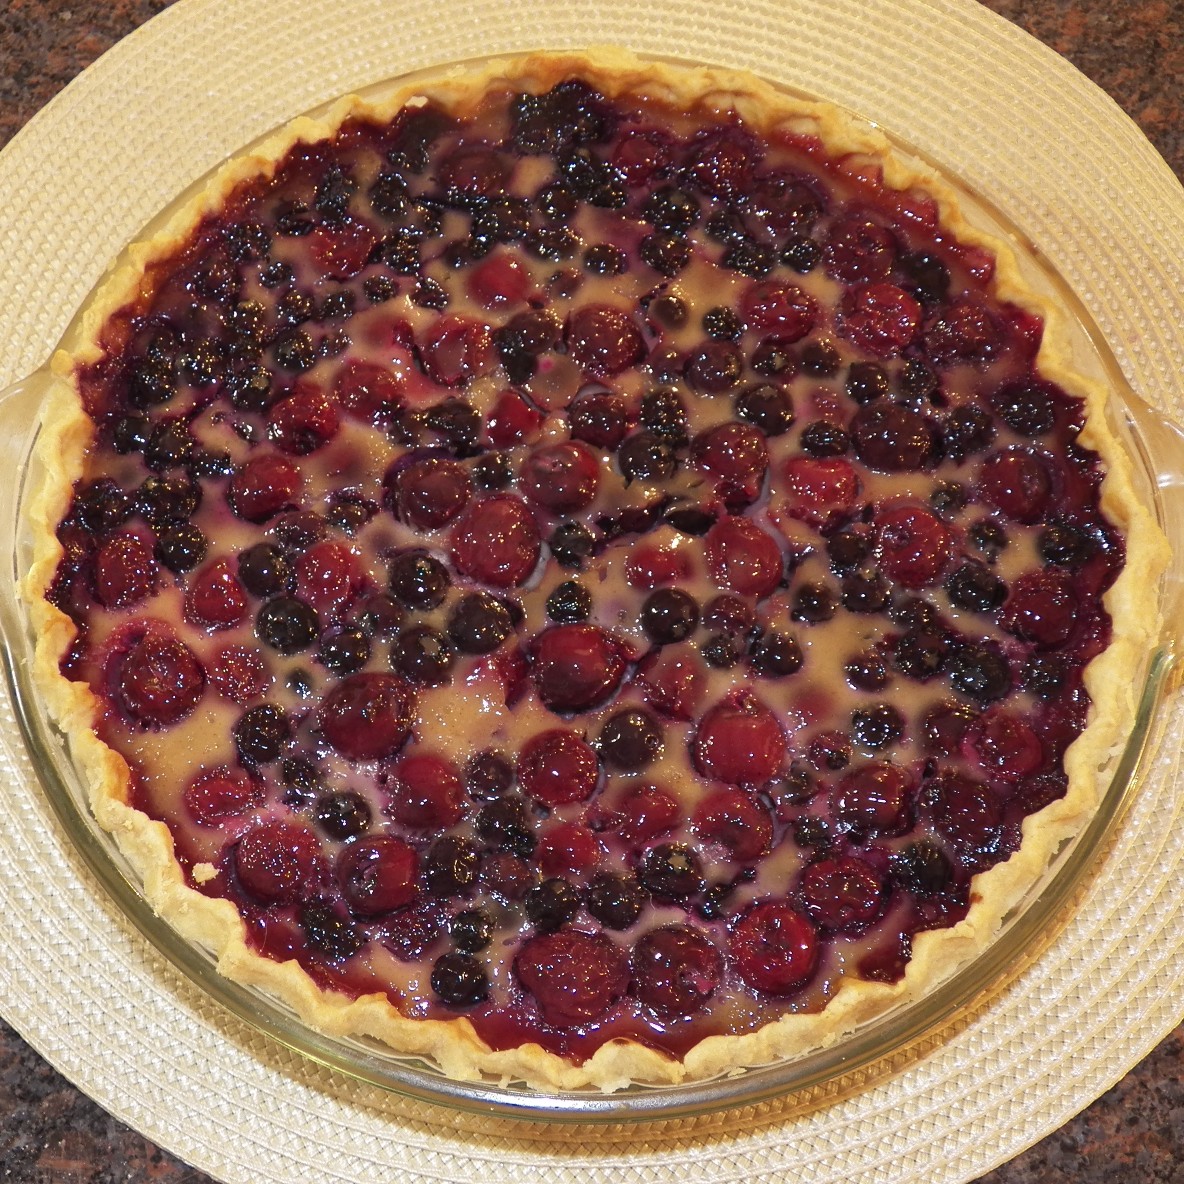
amount of both tart cherries and blueberries to 2 full cups apiece. This pie was not going to even whisper “eggs”. Once the filling was made, I prepared the pie as I did the first. And the verdict? I liked this rendition so very much more than the first. As I had hoped, this one was more custard and less egg-y. Adding more cherries & berries paid off, while using tart cherries worked better with the blueberries.

But you needn’t take my word for it.

Below I’ve listed the ingredient lists for both pies. The first uses a filling with sweet cherries and most closely resembles the televised recipe. The second uses tart cherries and fewer eggs in its filling and is more closely aligned with the printed version. The directions for preparing the pie are listed once because they are the same, no matter which filling you wish to use. Make one or make them both. All I ask is that you come back here and tell us what you think or any improvements you might suggest.

*     *     *

Sweet Cherry, Blueberry, and Sour Cream Pie Recipe

Ingredients 

  • A single pie crust large enough for a 9 inch deep dish pie.
  • 4 eggs, 1 divided
  • ½ cup superfine sugar, divided (see Notes below)
  • 1½ cups sweet cherries, pitted
  • 1½ cups blueberries
  • ½ tsp cinnamon
  • ¼ tsp salt
  • pinch of Nutmeg
  • 1 cup sour cream
  • 2 tbsp honey

*     *     *

Tart Cherry, Blueberry, and Sour Cream Pie Recipe

Ingredients

  • A single pie crust large enough for a 9 inch deep dish pie.
  • 2 eggs, 1 divided
  • ½ cup superfine sugar, divided
  • 2 cups tart cherries, pitted
  • 2 cups blueberries
  • ½ tsp cinnamon
  • ¼ tsp salt
  • pinch of Nutmeg
  • 1 cup sour cream
  • ⅓ cup honey

*     *     *

Directions

  1. For the pie crust. 
    1. Pre-heat oven to 400˚F.
    2. Roll out pastry dough into a 12 inch circle and place it in a pie dish, crimp edges, and blind bake, filling the pie with pie weights or beans beforehand. After 10 minutes, remove pie crust from oven. Set aside. Lower oven temp to 350˚F.
    3. When crust is cool enough to handle, remove the pie weights/beans. Whisk together 1 egg white with 2 tablespoons of the fine sugar. Using a pastry brush, coat the pie crust before returning it to the oven. Bake for another 15 minutes or until the crust is golden. Remove from oven and cool.
  2. For the pie filling. 
    1. In a bowl, combine 2 tbsp of the fine sugar, salt, cinnamon, and nutmeg.
    2. In a larger bowl, combine the blueberries and cherries.
    3. Add the sugar combination to the berries and gently mix.
    4. In a 2nd larger bowl, combine the remaining fine sugar & eggs, sour cream, and honey. Whisk until fully blended before adding to the berry mixture.  Stir to combine.
  3. Pour the filling into the pre-cooked pie shell and bake for 1 hour at 350˚F.
  4. Pie may be served warm.

*     *     *

Notes

There’s no need to buy the superfine sugar called for in the recipe, for you can make it yourself. Just place ½  cup of regular sugar into a food processor or spice grinder and give it a go. In a minute or two you’ll have superfine sugar.

Inspired by Carla Hall’s Blueberry Cherry Pie With Sour Cream

*     *     *

By any other name …

“Stainless Steel”

*     *     *

Friends, Bloggers, and Bartolini! Lend Me Your Orecchiette!

I don’t know about you but when I “finish” writing an entry, I will return to it, editing and re-editing, right up until the minute it’s posted. Even then, I often make changes to it once it’s been published. A few months ago, in an effort to curtail my madness, I started posting my entries at the same time every Wednesday just to give myself a deadline for these corrections. Why do I mention this?

Well, I’ll be writing this entry before I leave for my visit with Zia and family and it will be posted about the time I’m heading back to Chicago. That means I’ll have a week to look at it with little chance to make corrections because of the sorry state of that area’s internet coverage. (If Dante’s Inferno had included a Tenth Circle in Hell, surely this would have been it.) So, I’m going to keep this post relatively short, hopefully keeping my errors to a minimum and, therefore, saving myself much wailing and gnashing of teeth when I should be spending that time visiting with my Zia.

Last week I showed you how to make orecchiette, an ear-shaped pasta that comes to us from the Puglia (Apulia) region of Italy. At the time, I said I would share today’s recipe, a traditional pugliese dish featuring orecchiette, sausage, and broccoli rabe (rapini). This is another simple dish with the flavors of its 3 main ingredients in perfect balance. Although you can certainly alter the quantities to suit your own tastes, try to keep that balance in mind. The dish also offers a little heat because of the red pepper flakes. If you use a spicy sausage here, you may wish to reduce the amount of these flakes or eliminate them altogether. On the other hand, I use my family’s sausage recipe, which is quite mild, so I add a healthy amount of red pepper flakes to the dish. The rest of the recipe is easy enough to follow but be sure to check out the Variations below if, perish the thought, you don’t care for broccoli rabe.

 *     *     *

Orecchiette with Sausage and Broccoli Rabe

Ingredients

  • 1/2 lb orecchiette pasta
  • 3 tbsp olive oil
  • 6 oz Italian sausage
  • red pepper flakes, to taste
  • 1 medium onion, chopped
  • 2 garlic cloves, minced or grated
  • 10 oz broccoli rabe, trimmed and coarsely chopped
  • grated Pecorino Romano cheese
  • salt & pepper, to taste
  • 1 cup + a couple tbsp of pasta water

*     *     *

*     *     *

Directions

  1. Bring a large pot of salted water to the boil, to be used to cook the orecchiette. Time the pasta so that it is cooked about a minute shy of al dente, per package instructions, at about the same time that the rest of the ingredients are finished sautéing.
  2. Meanwhile, in a large deep frying pan, heat the olive oil over med-high heat. Add the sausage meat and use a wooden spoon to break the meat into smaller pieces as it sautés.
  3. Once the meat has browned, about 5 minutes, add the onion & pepper flakes and continue sautéing until the onion is translucent, about 5 minutes more.
  4. Add the garlic and cook another minute.
  5. Add the broccoli rabe to the pan with a little pasta water and continue sautéing until rabe is done to your liking.
  6. Drain the orecchiette and add it to the frying pan along with the cup of pasta water, using it to deglaze the pan. Finish cooking the orecchiette in the pan as the “sauce” reduces to the consistency you prefer.
  7. Remove to a serving platter, garnished with grated Pecorino Romano cheese and freshly cracked black pepper. Serve immediately.

Variations

For many, broccoli rabe is just a bit too bitter to be enjoyed as-is. If you find it that way, there are alternatives. In the first place, you might try blanching the vegetable in boiling water for a minute before plunging it into an ice bath. To prevent the oil from splattering, pat the rabe with paper towels before adding it to the frying pan in Step 5 above. If you like, you can save the blanching water, salt it, and use it to cook the orecchiette.

Broccoli, Broccolini, Broccoli Rabe

What if you just don’t like broccoli rabe and no amount of blanching is going to make it palatable for you? Well then, you might try substituting one of its relatives. Pictured above are broccoli on the left, broccoli rabe on the right, and the newest member of the family, broccolini, in the center. Although often called “baby broccoli”or “asparation”, broccolini is actually a cross between broccoli and a Chinese broccoli called kai-lan. Like broccoli, broccolini has no leaves and is not as bitter as rabe. Either cousin would make a great substitute for broccoli rabe in this dish.

*     *     *

By any other name …

“Midas Touch”

 *     *     *

Listen up! We’re making Orecchiette!

It’s been quite some time since we made pasta from scratch, so, I thought today would be a good day to make another. Today’s pasta comes to us from Puglia (Apulia), a District along Italy’s Southeast coast, including the “heel of the boot.” Meaning little ears, orecchiette is another pasta named for that which it resembles. And if you’re willing to accept that tortellini were modeled after the navel of Venus, you should have no problem accepting that orecchiette look like little ears.

Coming from Puglia, it’s a safe bet to say that the dough should be made with durum flour and water. And if you want to make authentic orecchiette, that’s what you should do. The fact is that Mom’s family, the Bartolini, came from Marche where eggs are used to make pasta. That’s how I learned to make pasta dough and that’s the recipe I shared here. Now, I’ve tried to make pasta using semolina but certainly not enough times to get a “feel” for the dough like I have with Mom’s pasta dough. So, I now have a container of semolina flour in my kitchen, along with containers for whole wheat,  spelt, bread, cake, and all-purpose flours. Given my poor track record with semolina, I just didn’t feel like buying a bag of durum to add to my flour collection. (FYI, semolina and durum are not the same flour, although both are made from durum wheat.) So, though this pasta shape is pugliese, from Puglia, the pasta dough is marchigiani, from Le Marche.

Now that’s settled, let’s get on with the show. You’ll find that orecchiette are really quite simple to make, albeit repetitive. There are no shortcuts and it is just complicated enough to require your attention throughout. In short, you can watch television or make orecchiette — but you cannot do both at the same time. The process involves taking a golf ball-sized piece of dough and rolling it into a long thin rope. The pasta is then cut, molded using your thumb, and set aside. Easy peasy! Now form another 350 or so “ears” and you’ll have a pound of pasta.

*     *     *

Take a piece of dough and roll it into a ball about the size of a golf ball. Be sure to cover the remaining dough to prevent its drying out.

*     *     *

Remember Play-Doh? Roll out a snake.

*     *     *

My snakes were about 1/3 to 1/2 inch wide. (See Notes below.)

*     *     *

Cut the dough into equally sized segments of about 1/2 inch in length.

*     *     *

Using the tip of a blunt knife, smash the dough segment and draw it towards you. This will flatten the segment and cause it to curl over the knife. Keep a supply of flour nearby to occasionally coat the tip of the knife, as well as for your thumb in the next step.

*     *     *

Invert the curled segment, pulling it over your thumb in the process.

*     *     *

Remove it from you thumb to reveal a perfectly formed orecchietta.

*     *     *

A look at the flip side. I found it best to store them cup-side down until dried otherwise the pasta’s “walls” tended to collapse, leaving a flat disk instead of a concave ear.

*     *     *

Notes

You must take into account the size of your thumb when rolling the dough and cutting it into segments. Although I prefer my orecchiette small, my thumbs are too large to accomplish that and attempts to use another finger tip didn’t work out. As a result, I needed to make my dough roll a little on the thick side. I’m sure that if I made orecchiette more often, I’d eventually learn to make smaller ones. Even so, freshly made “large” orecchiette are still better than those in a box.

Being homemade, part of this pasta’s charm is its lack of uniformity. Don’t obsess and try to get all of the “little ears” to be the same shape and size. You’ll find that those created near the end of your dough supply are far more alike than the ones you made at the start — and that’s just fine. I prefer to think of my orecchiette as being rustic. You should, too.

*     *     *

Coming next week …

Next week I’ll post the pugliese recipe for orecchiette with sausage and broccoli rabe, pictured above.

By the time many of you read this post, I’ll be well on my way to Michigan. Please understand that while there, I can read your posts and comments but making my own comment or reply is unbelievably slow.  Most may have to wait until I return home.

*     *     *

By any other name …

“Honor”

*     *     *

The Bartolini Girls’ Beet Salad

Everyone has one — or maybe two or three. A go-to recipe used when an occasion calls for you to “bring a dish.” Today’s recipe is one that Mom and my Zia often used to fulfill their potluck obligation. To be honest, I’ve no idea who first “discovered” this recipe. I remember Mom serving it for dinner during my childhood and Zia brings it to dinners to this very day. A colorful dish, this is much lighter than potato salad and is sure to be a hit among beet lovers. Even so, not all beet lovers are fans of mayonnaise. Should that be true for you, I hope you’ll find this classic video more to your liking.

*     *     *

*     *     *

When you look over the recipe, you’ll notice that the ingredients are listed without accompanying amounts. Much depends upon the number of servings required and the size of the serving dish. When all is said and done, you’ll need to create a layer of beets that is about one inch deep. Next, the amount of chopped onion depends upon how just how strong that onion is. Be sure to taste it before adding it to the salad. If it is too strong, rinse it briefly under cold running water and pat it dry using paper towels before proceeding. With that settled, you can add as much or as little mayonnaise as you prefer, and the same can be said for the chopped, hard-boiled eggs. Remember, the beets are the star of the dish; everything else is meant to compliment rather than overpower.

Oh! Before you toss those beet greens away, you may wish to checkout my blogging friend David’s recipe for creamed beet greens over on his blog, the Gastronomic Gardener.

*     *     *

*     *     *

The Bartolini Girls’ Beet Salad Recipe

Ingredients

  • Raw beets, washed with greens trimmed
  • Diced onion
  • Mayonnaise
  • Eggs, hard-boiled and chopped
  • Salt & pepper, to taste

Directions

  1. To Prepare the Beets
    1. Pre-heat oven to 400˚ F (205˚ C)
    2. Place the beets in a roasting pan or on a baking sheet. Drizzle with olive oil, season with salt, and place in the middle of the oven. Roast for 30 – 40 minutes, depending upon the size of the beets. The beets are fully roasted when a knife’s blade meets little resistance when the largest beet is pierced. Set aside to cool.
    3. Once cool enough to handle, use a paring knife to trim the beets’ tops and bottoms. Much of the skin of each bulb should slip off easily. Use a paring knife to remove the rest.
    4. Use a knife, food processor, or mandoline to dice, shred, or slice the beets. Set aside.
  2. To Assemble the Salad
    1. Place beets in a serving dish. You’ll want to create layer of about an inch deep. Season lightly with salt.
    2. Sprinkle a couple of tablespoons of diced onion on top of the beets. Use more or less depending upon the onion’s strength.
    3. Add enough mayonnaise to completely cover the ingredients.
    4. Use the chopped, hard-boiled eggs to top off the salad.
    5. Season with salt, pepper, and sweet paprika.
  3. Chill fully before serving.

*     *     *

*     *     *

Variations

Although I’ve not tried to prepare them this way, I imagine one could steam the beets instead of roasting them. And if you’re in a crunch for time, you can always substitute canned beets, although I prefer the additional flavor that roasted beets bring to the dish.

Notes

To beginner cooks: mayonnaise and hot temperatures do not mix. Serious illness can result if mayonnaise is not kept properly chilled. When serving this salad or any mayonnaise-based dish on a warm day, be sure to keep it covered and iced until the last minute before serving and then nestle the serving dish in another slightly larger one filled with ice. It must be kept chilled and when in doubt, throw it out.

*     *     *

One Long Overdue Acknowledgement

Way back in May, I was fortunate to win a give-away over at Zesty Bean Dog’s wonderful blog. My original plan was to feature my prize, an OXO salad dressing shaker, with my next post featuring a salad. Well, in retrospect and given how few salad recipes I post, I should have come up with a better plan. And even though a salad shaker isn’t used in the preparation of today’s recipe, I thought it was about the closest I’d come to posting a salad recipe for at least a few weeks. ZBD, I hope you do not feel that I don’t appreciate or do not use your gift. It has remained “in service” pretty much from Day One and is one of those few kitchen items that goes from fridge to dishwasher and back again, without ever seeing the inside of a cupboard. So, thanks again, ZBD, for a great kitchen accessory.

*     *     *

By any other name …

“Black Baccara”

*     *     *

Calamarata with Shrimp and Mussels

It’s getting to be routine. I go to “my” Italian market with a list of items to buy. Once I’ve finished the vegetable portion of my romp, I take a casual stroll toward the fish monger. I just cannot pass that display case without stopping to check out the day’s catch. And that’s when it happens.

No matter who is behind that counter, I’m greeted with a friendly, “Hello. Are you looking for anything in particular?” or something to that effect. I explain that I’m just looking and, to be polite, I ask about an item on display. “You’ve got branzini (Mediterranean sea bass)?” “Where do you get your vongole (clams)?” “Are these cozze (mussels) Mediterranean?” “Do you have anguille (eels) at Christmas?” You know. Just being polite. Maybe it’s the way I pronounce “vongole” or something but once my question’s been answered, the conversation turns to shell-fish. A few weeks ago, it was the vongole, the “freshest in town.” And I bought some. The following week it was vongole again and I would have left with another bag of the little darlings had it not been well over 90˚. With a few more stops to make, I wasn’t sure if I’d make it home without melting; those clams didn’t stand a chance. The Friday before last, as I approached the counter, I noticed I was alone. The fish mongers were nowhere to be seen. Great! I could ogle the octopi, peruse the perch, savor the salmon, and scan the squid, all at my leisure and with no fear of leaving with a bag of seafood. Soon I spied a sign announcing a sale on mussels and I turned a bit to get a better view of the black beauties. That’s when he appeared, seemingly out of nowhere. “Those mussels are good, real good … but … these here are much better. They’re larger and-”  Resigned, I stopped him in mid-sentence and told him to just get me a pound. Why fight the inevitable?

While he bagged my mollusks, my mind raced. How would I prepare them and with what, if anything? Since mussels have such a strong flavor, I reasoned, they could easily stand up to a red sauce. Shrimp are, also, strong-tasting, I thought, and I bought a pound of them, too. Vongole, though, would never be able to compete in this mix, so, I bid “Ciao!” to the fish monger. I quickly decided to make a “fresh” sauce and by that I mean one that simmers only a brief amount of time. I want to taste fresh tomato and I headed back into the produce area to buy 9 large plum tomatoes. Now to find the dish’s most important component: the pasta. I headed over to the pasta aisle (actually, it’s a pasta aisle and a half!) and the choice was easy. Since the mussels and shrimp were large, I wanted my pasta to be, too. I selected calamarata, so named because they resembles large calamari (squid) rings.  It certainly didn’t hurt that they’d be used in a seafood dish. Leaving the pasta aisle, I mentally inventoried my fridge and knew I was set to go. I finished my shopping and headed home, munching on my reward, a cannoli.

*     *     *

Calamarata

 *     *     *

When preparing today’s dish, remember to “Think Big!” Calamarata are a large pasta and everything included with it needs to be large, as well. So, the onions aren’t diced but chopped and rather large, at that. Once peeled, divide the tomatoes into 2 groups. The larger group, about ⅔ of the total, are seeded and chopped into chunks. These will add texture. The remaining ⅓, once seeded, is puréed in a food processor. These will be the basis for the sauce. The only things diced are the parsley, basil, and garlic. Even so, when garnishing the dish before serving, sprinkle a few hand-torn basil and parsley leaves. Most importantly, if you, too, want that fresh tomato taste, do not let the sauce simmer for longer than 30 minutes. The “simmer clock” starts the minute the tomatoes hit the pan. Cheese, by the way, would not be used with this dish.

And if you do like that fresh tomato taste, check out this recipe for Pesto Trapanese. It will take you longer to cook the pasta than it will to make this pesto and the taste is incredible.

*     *     *

Calamarata with Shrimp and Mussels Recipe

(Calamarata con Gamberetto e Cozze)

Ingredients

  • 1 lb calamarata pasta
  • 1 lb fresh mussels, beards removed and scrubbed
  • 1 lb large  (21-25 count) shrimp, peeled and de-veined
  • 9 or 10 large plum tomatoes – divided
  • 3 tbsp olive oil
  • ½ tsp red pepper flakes, more of less to taste
  • 1 medium onion, roughly chopped
  • 2 cloves garlic, diced
  • splash of white wine
  • 3 tbsp fresh parsley, chopped, more for garnish
  • 1 tbsp fresh basil, chopped, more for garnish
  • ½ tbsp marjoram
  • 2 tbsp capers
*     *     *

*     *     *

Directions

  1. Bring a large pot of water to boil. While waiting, use a paring knife to cut a small “X” into the bottom of each tomato. Once the water boils, place the scored tomatoes into the water and blanch for 1 to 2 minutes. Remove the tomatoes and place in a bowl of ice water. Once cooled to touch, peel each, beginning at its “X”, before quartering and seeding it. Place aside.
  2. Take about ⅔ of the tomatoes and coarsely chop into chunks. Puree the rest of the tomatoes using a food processor, blender, or stick blender.
  3. Heat the olive oil in a large, deep frying pan over med-high heat. Add the pepper flakes and, after a minute, add the onions. Sauté until translucent.
  4. Add the garlic and continue sautéing for about a minute more. Add a splash of white wine and reduce for a minute or two.
  5. Add all the tomatoes, season with salt & pepper, and maintain a medium simmer.
  6. Begin heating the water for your pasta. The calamarata pasta that I prepared needed 16 minutes to cook. Check your package’s instructions.
  7. When there are 5 minutes to go, add the parsley, basil, & marjoram to the frying pan, stir, and then add the mussels to the sauce and place a cover on the pan.
  8. 3 minutes later, add the shrimp and replace the cover.
  9. If you prefer to serve the mussels shelled, see Notes below.
  10. At the 5 minute mark, reserve some pasta water, drain the pasta and add it to the sauce pan. Add the capers and mix to evenly coat the pasta.
  11. Pour the calamarata into a serving bowl, garnish with torn basil & parsley leaves, and serve.

Variations

This is really a basic tomato sauce with seafood added. As I mentioned early on, I wanted a fresh sauce so I didn’t let the tomatoes simmer for long. You certainly may allow your tomatoes to simmer longer, if that’s your preference. Just remember that there’s no turning back once you put the pasta into the boiling water, and that’s regardless of the pasta you’ve chosen to cook. And once the mussels are put into the sauce, you have about 5 minutes to go. The cooking instructions on the pasta’s package are your friends.

Notes

As always, be sure to reserve some pasta water in case your sauce needs it. Be aware, though, that the mussels will give off some flavorful liquid during the cooking process. You may not need as much pasta water as you think.

Once the shrimp have been in the sauce for about a minute, I remove the pan’s cover and begin removing the mussels from their shells. I usually leave a few in the shell just for presentation in the final dish. Once all are removed, it is far easier to stir the sauce to insure the shrimp are evenly cooked on both sides.

I usually drain and add the pasta to the sauce when the shrimp are just shy of being fully cooked. They will finish cooking when mixed with the hot pasta and this will insure that neither shrimp nor mussels are over-cooked and chewy when served.

*     *     *

By any other name …

There are two more of “my girls” but neither is doing well enough to make a public appearance. If they return from Betty Ford respond to treatment in time for Fall, I’ll be sure to share a photo or two. Before moving on to the rest of the roses, there are these, located at the foot of the bed, right next to Judy. Where else?

*     *     *

Lady’s Slipper Orchids

*     *     *

Baked Rigatoni

Rigatoni al Forno

Yes, I realize for many of us in the Northern Hemisphere, Summer is in full swing, with temps soaring well into the 90’s and, incredibly for some, beyond. I, also, know that for many, firing up the oven isn’t necessarily something we’re prone to do when our homes are already sizzling. So, why am I featuring a baked pasta dish today? The answer is simple. Mozzarella. I had plenty of mozzarella in my fridge, left over from the first round of mozzarella making and I needed to do something with it. And lest there be any doubt, when I have a surplus of something, anything, my go-to dish is pasta of some sort. So, considering that mozzarella “performs” so well when baked, I decided to make an “al Forno” recipe.

Growing up, rigatoni was a frequent “guest” at our dinner table, although we kids called them “flat tires.”  I don’t recall Mom ever baking rigatoni, though. It wasn’t until I was on my own that I started experimenting with baking penne and rigatoni. Generally, these dishes are easy to assemble, with left-overs that keep well and are easily re-heated. Perfect for my one person household. So, when presented with a bounty of mozzarella, I chose flat tires to help me out.

Normally, when I prepare a baked pasta, I coat the cooked pasta with sauce and cheese of some sort before topping it off with shredded mozzarella. With this dish, however, I reverse things a bit. Butter and Pecorino Romano cheese are used to coat the partially cooked rigatoni but, as you’ll soon see, the mozzarella is chopped into cubes and stirred into the pasta. Once mixed, Asiago cheese is used to top off the dish before baking. Doing so gives one both contrasting flavors and textures. The strong-tasting Asiago, melted until golden, hides not just the sharp Pecorino Romano but the gooey milder tasting mozzarella cubes spread throughout the pasta, as well. It’s a three cheese combination that I enjoy well enough that I don’t really mind turning on the oven in a heat wave.

*     *     *

*     *     *

Rigatoni al Forno Recipe

Ingredients

  • 1 lb rigatoni
  • 1 quart tomato sauce (vegetarians use marinara)
  • 8 oz Mozzarella
  • 8 oz Asiago cheese
  • 4 tbsp butter, cut into chunks + a little more to grease the baking dish (optional)
  • ¾ cup Pecorino Romano cheese, grated
  • fresh parsley, chopped, for garnish (optional)

Directions

  1. Pre-heat oven to 350˚F.
  2. Lightly grease a 9 X 13″ baking dish with cooking spray or butter.
  3. Add rigatoni to a large pot of heavily salted, boiling water. Cook the pasta for half of the time suggested on the package for al dente pasta. Drain and hold until needed.
  4. Warm sauce and maintain a low simmer.
  5. Slice and cut the mozzarella cheese into ½ inch cubes. Set aside.
  6. Use a box grater to shred the Asiago cheese. Set aside.
  7. Once the pasta has been semi-cooked and drained, return the rigatoni to the now empty pot.
  8. Add the butter and then the Pecorino Romano to the hot rigatoni, stirring after each until the pasta is well-coated.
  9. Add the tomato sauce to the pot and stir.
  10. Add the mozzarella to the pot and gently stir until evenly distributed.
  11. Place the pasta in a greased 9 x 13″ baking dish. Evenly sprinkle the shredded Asiago cheese on top.
  12. Bake in pre-heated 350˚F oven for 20 to 25 minutes or until the Asiago cheese is melted to your liking.
  13. Allow to rest 5 minutes before serving, garnished with parsley, if desired.

*     *     *

Someone forgot the parsley.

*     *     *

Variations

For whatever reason, some may find Asiago cheese unappealing. If that’s true for you, there are other cheeses that can be used to top off your dish. Fontina is a good alternative, as is ricotta salata. The choice is really yours, just try to find a cheese that offers a contrasting flavor to the mozzarella. You won’t be disappointed.

Although I used rigatoni for this dish, you can certainly use any of the tube-shaped pastas. Just avoid the ribbon-like pastas. They are not well suited to baked dishes of this type.

*     *     *

By any other name … 

“Queen Elizabeth”

(Because there is no King George III rose.)

Happy 4th of July!

*     *     *

The Return of Mascarpone!

Hard to believe that it’s already been 11 weeks since we made mascarpone together. At the time, I said that I would revisit the dishes used to illustrate that post and, to that end, I’ve already shared the recipe for Pappardelle with Spinach, Mascarpone, and Pecorino Romano Cheeses. Today we’re going to use mascarpone in two desserts and again to make jalapeño poppers.

When most hear the word “mascarpone”, they think of tiramisu, that quintessential Italian treat — and who would blame them?  I do plan to share our family recipe for tiramisu but at a later date. That dish deserves a post all its own. So, instead, I’ll share two easy confections that combine whipped mascarpone with fresh berries. To make the whipped mascarpone, take some whipping cream and beat until peaks form. Add icing/confectioner’s sugar, to taste, during the process. To the sweetened whipped cream, add at least an equal amount of mascarpone and beat the mixture until peaks again form. Taste midway through to see if more sugar is needed. Set aside for use in either of the following two recipes.

In the first case, fresh strawberries are hulled and quartered before being macerated with a little sugar and balsamic vinegar.  There is only one real concern about this dish and that involves the balsamic vinegar. In the past, when I made this, I took a couple of ounces of balsamic, added a little sugar & lemon juice, and then reduced it by half over a med-high heat. Once cooled, I used it to make my parfaits. Last Christmas, my friends, Cynthia & Nigel, gave me a bottle of aged balsamic and it’s perfect for this dessert without being reduced or sweetened. Whether your balsamic is good as-is or has been reduced and cooled, the parfaits are made the same from this point forward. Hull and quarter 4 or 5 strawberries per serving. Sprinkle them with a little sugar, more or less depending upon the sweetness of the berries. Add  a couple of tablespoons of the (reduced) balsamic vinegar, mix well, and set aside for about a half hour. (This would be a good time to make the whipped mascarpone.)  Once the berries are ready, begin building the parfaits. Start with the mascarpone and create alternating layers of the whipped cheese and the berries in each parfait cup. You’ll want to finish with berries on top. When all the cups have been filled, divide whatever berry/balsamic sauce is left among the servings. Garnish with a piece of basil, if you like.

This next recipe uses chocolate sauce instead of balsamic vinegar. As you’ve probably noticed in the picture, I like a thick chocolate sauce. Here I created a granache, of sorts, by melting 4 semi-sweet chocolate squares in a double boiler, adding 1 to 2 tablespoons of  heavy cream, and stirring until well combined. Once cooled, I used it to top my dessert, resulting in a thick mass of chocolate-y goodness. For a thinner sauce, add more cream, some butter, and sugar to the double boiler and stir thoroughly. As for the berries, you can wash and trim them, serving them as-is, or, once cleaned, you can put them all in a bowl, add a little sugar & lemon juice, and let sit for 30 minutes. When ready to prepare your dessert, place a large dollop of whipped mascarpone in the center of each dessert plate and spoon mixed berries on top of each dollop.  Add another, smaller, dollop on each dish and top off each with more berries. Finish each dessert with some chocolate sauce and serve.

 *     *     *

The last recipe for today uses mascarpone to make jalapeño poppers. Most of us have favorite popper recipes and mine involves cream cheese, garlic, onion, and grated cheeses to make a filling for the peppers. Mascarpone, though creamier, isn’t as flavorful as cream cheese and, as a result, I do not add garlic nor onion to the filling for fear of completely overpowering the mascarpone. I do add grated Monterey Jack and cheddar cheeses to the filling to give it more “body.” I use 2 parts mascarpone to 1 part cheddar and 1 part Monterey Jack. To prepare the peppers, take off the top of each, creating a boat-like vessel to hold the cheese. (Cutting them in half will allow the cheese filling to spill during baking.) With a spoon, clean out the seeds and ribs from inside each “boat.” Now, filling each pepper, as-is, will result in pretty mild poppers. For more heat, dice the trimmed tops with as much of the seeds & ribs that you like and add them to the cheeses. Once thoroughly mixed, fill each boat with the cheese but not to over-flowing. Next, place some Panko bread crumbs and a couple of tablespoons of grated Pecorino Romano cheese in a shallow dish and roll each filled pepper into the dish, coating the cheese filling with the bread crumb mixture. Spray a baking sheet with cooking spray, place each on the tray, and cook in a pre-heated 400˚ oven until topping begins to brown.  I start checking at about the 15 minute mark. If the peppers bake for too long, the pepper walls might collapse, spilling the hot cheese filling all over your baking sheet. Once baked to your satisfaction, remove to a serving platter and allow to cool for a couple of minutes before serving.

 *     *     *

Coming Attractions

Warn the dairies! Next week we’re making American Mozzarella.

 *     *     *

By any other name …

“Helen Hayes”

 *     *     *

Straw and Hay Pasta

Paglia e FienoToday’s recipe is another in a series celebrating the Spring harvest. Thus far, we’ve prepared dishes that included artichokes, asparagus, and ramps. Today, I’m going to share a recipe that comes from Lazio, Rome’s district, and that features freshly shelled peas and prosciutto in a cheese-flavored cream sauce. And if that hasn’t grabbed your attention, the pasta’s two colors surely will. This dish, you see, is named after the pasta used to make it, but calling it “Giallo e Verde”, “Yellow & Green”, would be so not Italian. As I’ve mentioned in the past, when it comes to naming pasta, the Italians have always let their imaginations run wild — and this pasta is no different. Here, it’s not yellow pasta but straw, paglia, while the green pasta is hay, fieno. Ready in minutes, Paglia e Fieno is another great tasting pasta to add to your arsenal, whether served as a primo piatto or main course.

This was a favorite of both families in the old two-flat every Spring. Unlike today, frozen foods were just beginning to appear in stores, so, making this dish meant shelling peas. I can remember helping Mom shell them —  until I grew up a little and the novelty wore off. After that, I made myself scarce when the metal colander and bag of peas appeared. Still, even once Bird’s Eye became a household name, fresh peas continued to be used to make this dish each Spring. As good as frozen peas may be, you just cannot beat the taste of fresh and if there’s one thing to be said about the best of Italian cooking, it’s that it relies upon the freshest of ingredients. To that end, my Zia and I continue to enjoy this dish every Spring and it wouldn’t be Easter at her youngest Son’s home if Paglia e Fieno isn’t served.

As mentioned earlier, this dish’s name comes from the coloring of the pasta. Green-colored noodles can be found in many groceries, some even packaged with yellow and bearing the name of  Straw & Hay. You certainly needn’t buy it if you don’t want to. Just using Mom’s pasta dough recipe as-is, or a fraction thereof, will give you the straw. To make hay — whether or not the Sun shines — add a couple of tablespoons of cooked, chopped spinach to the eggs before adding them to the flour when you make the dough. (Mom & Zia used spinach baby food to make pasta verde but spinach baby food is now only sold when combined with peas or beans. The color, as a result, isn’t as deep.) Moving away from the pasta, the thickness of the prosciutto to be used is totally up to you. For the dish pictured, I was lucky enough to be at my Greek market just as the deli was putting out a package of prosciutto end slices. At about ⅛ inch thick, these were easily chopped and, for my taste, stood up to the cream sauce very well. You can ask your deli to cut the prosciutto thicker or, if you prefer to use it thinly sliced, shred it before adding it to the pan.  Lastly, be sure to set aside some pasta water. The cream sauce can “seize up”, meaning get too dry, particularly if you’re timing is off and it is left waiting for the pasta to finish cooking. Adding a splash of pasta water can revive it, as well as later, should it seize up again once the cheese is added.

*     *     *

Paglia e Fieno

*     *     *

Paglia e Fieno Recipe

Ingredients

  • ½ lb (225g) yellow fettuccine (linguine, tagliatelle, or pappardelle may be substituted)
  • ½ lb (225g) green-colored pasta of the same type as the yellow pasta
  • 3 tbsp (45ml) butter
  • 1 tbsp (15ml) olive oil
  • 1 small onion, chopped fine
  • 3 cloves garlic, minced
  • 1 cup (236ml) heavy cream
  • 1 cup (140g) fresh peas
  • 4 to 6 oz (110 to 170g) prosciutto
  • ½ cup (60g) Pecorino Romano cheese, grated — more for serving
  • salt and pepper, to taste
  • fresh parsley, chopped — for garnish

Directions

  1. Bring a large pot of water to the boil for cooking the fettuccine. Time it so that the pasta is just shy of al dente about the time that the peas are cooked to your liking. Reserve 1 cup of the pasta water.
  2. Heat oil and butter in a large, deep frying pan over med-high heat. Add onion and sauté until translucent, about 5 to 8 minutes. Add garlic and continue to cook for another minute.
  3. Add heavy cream and simmer a few minutes until slightly reduced.
  4. Add the prosciutto and peas, stirring till well-combined.  If sauce becomes too thick, add a little pasta water to thin it.
  5. When pasta is just shy of al dente and peas are sufficiently cooked, taste to check seasoning and add the cooked pasta to the frying pan. Stir well. If necessary, add some pasta water to thin the sauce.
  6. Remove from heat, add grated cheese, mix thoroughly, and move to serving platter.
  7. Serve immediately, garnished with grated cheese, parsley, and cracked pepper.
*     *     *

Variations

This dish is just as good when prepared with pancetta, bacon, or ham in place of the prosciutto. Because they’re raw, though, be sure to saute the pancetta or bacon with the onions before adding the cream and peas. And if someone at your table doesn’t like peas, other vegetables can be substituted. Asparagus is commonly used, as are sliced crimini mushrooms. No matter what you choose to add, be sure it’s fresh and you cannot go wrong.

*     *     *

Fold, Cut, Unfurl Fettuccine Verde

*     *     *

Notes

You probably noticed that salt wasn’t added to the recipe until the end. That’s because some of the ingredients can be pretty salty in their own right. The salt content of the prosciutto — or it’s substitutes of pancetta, bacon, and ham — can vary greatly. The cheese and amount of pasta water you use can, also, add a fair amount of salt to the final dish. So, although I’ll season the dish liberally with pepper throughout its cooking, I’ll only use salt minimally, if at all, until I’ve tasted the dish at the very end. Even then, I may not add any. Again, let your own palate be your guide.

Spinach is not the only ingredient used to color pasta. I’ve used tomato paste to make pasta rosso (red), and I’m aware that beet juice can be used to make it purple, pasta viola, while squash is used to give pasta an orange hue, pasta arancione. And no discussion of pasta coloring would be complete without mentioning pasta nera which gets its black color from the ink of squid (calamari) or cuttlefish (seppia). If you find that a different color palette tickles your palate, you may wish to check out my recipe for Tricolor Risotto, which uses pesto and tomato paste to create a risotto platter that bears the colors of the Italian flag.

*     *     *

By any other name …

“Opening Night”

*     *     *

Spanakópita + Tyropitákia = Spanakotyropitákia

Oh, don’t worry. I’ll explain the title in a minute.

Spanakotyropitákia

The 1990s was my decade for travel. Accompanied with my best friend, aka my Traveling Companion, we toured places that I had previously dreamt of visiting but never thought that I’d actually see in person. One such place was Greece. We arrived in Athens, spent the night, and then headed out into the Aegean for some island hopping. This trip had a little something for everyone: a modern-day metropolis; ruins of ancient civilizations; beautiful beaches; thriving nightlife; far too many picturesque settings to mention here; and the food. Oh, the glorious food!

As you know, my love of pasta knows no bounds, so, you can rest assured I had my fair share of pastitsio, with a little moussaka thrown in for good measure. Surely, my holiday in Greece would not have been complete unless I had my fill of lamb nor, for that matter, could I be expected to go from island to island without at least sampling the seafood — repeatedly. And I can assure you that any gyros bought from any street vendor anywhere on those islands will put to shame any gyros you can buy on this side of the Atlantic, hands down. Even so, Man does not munch on gyros alone and, since each island has its own wine, cheeses, olives, & olive oil, it would have been an insult had we not tasted them all, usually with a chunk of crusty bread.  Similarly, it was a surprise to learn that each island also prepared its own version of spanakópita, the Greek spinach pie. Now, I truly enjoy spinach pies and my family makes the Italian version of these tasty treats. (Called cacioni, you can see our recipe here and a recipe link supplied by my blogging friend from Le Marche, Mariano Pallottini, can be found here.) So, I needed no further encouragement to taste each island’s unique take on spanakópita. I soon learned that although the basics to each were the same (a spinach filling covered with phyllo dough) there was a surprising variety.

*     *     *

The center of attention

*     *     *

First off, some spanakópita were actually pies and each serving is a wedge just as if it were some fruit-filled dessert. Others were prepared on baking sheets and you’re served a rectangular piece like you would if it were baklava, only larger. Still others were prepared with individual servings in mind and could be self-contained, triangular or burrito-shaped pies. Beyond their form, the stuffing mixtures contained primarily the same ingredients but in differing proportions. Virtually all contained spinach, a little onion, lemon (either zest, juice, or both), dill, and a binding agent, eggs I presume. As you can well imagine, changing the amount of lemon zest or dill to be used can greatly affect the overall taste of the pie. In some cases, a little mint or parsley was also added to the filling, each adding their own distinct flavor to the mix. So, with so many variables at play, I never knew what I would be served when I choose spanakópita from a menu — and I enjoyed the surprise almost as much as the pie.

Normally, this is where I’d dive into the recipe but one more thing needs mentioning. One night, while on Mykonos, we asked our hotel proprietor for a local restaurant, a taberna, far from the tourist crowds. He obliged, sending us to a great little spot where, coincidentally, a family group was holding some sort of celebration, as I recall. It’s been some time since that evening and I’ve grown unsure of many of the specifics but I do remember 3 things: 1) we were sent ouzo shots from the management and the celebrants; 2) we ordered the house specialty, gardoubes, lamb offal that’s wrapped in caul fat and grilled; and, 3) we were sent ouzo shots from the management and celebrants. What does any of this have to do with spanakópita?

Beware of books bearing Greek’s …       recipes

Well, I was so impressed with the dish — or, in retrospect, was it the ouzo? — that I was determined to find out how to prepare it. To that end, I eventually located a cookbook that contained a recipe for a version of gardoubes and I immediately ordered it, sight unseen. Sadly, it was a bit of a disappointment. Originally written in Greek, the translation was apparently word-for-word, without considering context, rendering parts of some recipes nonsensical. Gardoubes was one of them. I decided that I wasn’t meant to make gardoubes and moved onto other things — but I kept the cookbook. Move ahead now, to a couple of weeks ago. I had just posted my instructions for making feta cheese and I had a fridge full of jars containing feta in brine. Growing tired of Greek salads, I decided to make spanakópita with feta added to the filling.

Thus began the Great Search of 2012. I’d not seen, let alone used, that recipe in years. More notes than formal recipe, I had scribbled them on a piece of paper as I watched a Greek woman prepare spanakópita on a cooking show, most probably broadcast on PBS. Well, midway into my search, I located the long-forgotten cookbook. I thought I had hit pay dirt. Why look any further when I had the “real deal” right here? Guess again. Its version of spanakópita was of the pie variety and didn’t contain any cheese. It did include a recipe for triangular-shaped pies but these were filled with cheese and called tyropitákia. They even had a lovely photo of the little triangles, so golden-brown and enticing. Also pictured with the tyropitákia was a platter of “cigars” that were phyllo dough wrapped around a filling of what looked to be spinach and cheese. In the caption, they were identified as spanakotyropitákia. What luck! I found exactly what I needed — except that I didn’t. Yes, the cookbook included a picture of spanakotyropitákia but not the recipe. I went through the book page-by-page, twice, to make sure. (And of course, there is no index nor glossary for the book either.) So, although I received a great title for today’s post, I was back to looking for my recipe.

It wasn’t very long after that I found my old recipe. It was pretty straight-forward  — just how complex can a few notes scribbled on a piece of paper be? — and easily adapted to include feta cheese.  The result was just what I had in mind. You’ll find these spanakotyropitákia have a pronounced lemon flavor, which I prefer. In fact, I’ve often been served spanakópita with a lemon slice/wedge as garnish. If, however, you’re unsure about the lemon flavoring, begin by adding the zest of a half-lemon to the spinach mixture. Taste it and let that determine whether to add the rest of the lemon’s zest. Use that tasting to also decide whether more dill is needed and if you want to add more feta. In short, taste the filling and let your palate be your guide as you make this recipe your own.

This all sounds well and good but what if you want more? You know. You can’t put your finger on it but you just crave more. Well, my advice is to check out Tanya’s recipe for Salmon Spanakópita. The name says it all.

*     *     *

Spanakotyropitákia Recipe 

Ingredients

  • 1 tbsp olive oil
  • 1 small onion, chopped fine
  • 20 oz (2 bags, 566g) leaf spinach
  • 3 tbsp fresh dill, chopped (1 tbsp dried dill weed may be substituted),  more to taste
  • 8 oz (225g) feta, crumbled
  • zest of  ½ to 1 whole lemon
  • 1 stick butter, melted
  • phyllo (fillo) dough sheets

Directions

  1. Remove any large, thick stems from the spinach and coarsely chop the leaves.
  2. Over med-high heat in a large, non-stick frying pan, heat the olive oil and sauté the onion until translucent, about 5 to 8 minutes.
  3. Add the spinach, season with salt & pepper, and sauté, turning the leaves frequently, until cooked. Remove from heat.
  4. Once cooled, place the pan’s contents in a clean kitchen towel and wring out as much liquid as possible.
  5. Place semi-dried spinach into a large bowl, add feta, zest, and dill. Mix thoroughly. Taste and adjust seasoning, if necessary. Cover and refrigerate until ready for use. This may be done a day or two in advance.
  6. When ready to proceed, add an egg to the spinach and mix until well combined.
  7. Open and unfold a package of phyllo dough, remove one sheet, and cover the remaining sheets with a damp kitchen towel.
  8. Lay the sheet of dough on a clean work surface. Fold it, lengthwise, so that 1/3 or the sheet remains uncovered. Use a sharp knife to cut off that section and place it with the rest of the unused phyllo sheets.  (A & B, click on image to enlarge)
  9. Unfold the remaining 2/3 sheet and brush half of it with butter (C) before re-folding it lengthwise. Brush the entire length with butter. (D)
  10. Place 2 – 3 tbsp of spinach filling in the bottom corner of  the strip. (E) Fold the dough up and over to the side, creating a small triangle in the process. (F)
  11. Fold the triangle up and over to the side again, and do this repeatedly, as if folding a flag. (G) When you’ve reached the end, place the pie, seam-side down on a baking sheet (H), and repeat the process with a new phyllo sheet.
  12. After you’ve finished your 2nd pie, you will have two strips that resulted from trimming the previous two dough sheets. Lay one flat, brush it with butter, and then lay the 2nd on top of it. (I) Repeat steps 10 & 11 above.
  13. Once all of your triangles are filled and folded, you can either bake or freeze them.
    1. To bake: pre-heat oven to 375˚F (190˚C) . Brush each triangle with melted butter, place seam-side down on a baking sheet, and bake until golden brown, about 15 minutes.
    2. To freeze: brush both sides of each triangle with butter, place them in a single layer on a baking sheet, place the sheet in the freezer overnight, and then store for later use. To cook, follow baking instructions but allow an additional 10 minutes to bake.

*     *     *

Notes

Work as quickly as possible when using phyllo dough. If the sheet dries. it will become unusable. Be sure to keep the rest covered with a damp kitchen towel until needed.

As I learned during my recent trip, phyllo comes in different sized sheets. As a result, you may not need to trim off a third of each sheet as shown above. Just folding it in half may suffice.

By varying the width of the dough strips, you can change the size of the pies and, therefore, their intended use. Larger pies could be considered part of a light lunch, the perfect starter,  or an unusual side. Smaller pies make great appetizers and could even be served as one of many snacks on game-day.

Although I’m aware that these pies can be fried, I’ve never done it and I’m hesitant to advise doing so. As it is, I’m quite satisfied with the results when the pies are baked. If it ain’t broke …

*     *     *

Home Again

I returned home this afternoon bearing Zia’s greetings to you all. Normally, when I’m with her, I show her a number of your blogs — but not this time. For some unknown reason, internet service in her area was even more abysmal than usual. Pictures wouldn’t download and even the simplest of tasks — hitting the “like” button — weren’t possible. This just means that there’ll be more for me to show her next time — and I’ve got dozens of your posts from the past week to read in the meantime.

*     *     *

Fettuccine with Asparagus, Artichokes, and Ramps

It’s déjà vu all over again. Those who get email notifications of my posts may recognize today’s blog entry from an errant notification sent out 2 weeks go, an embarrassing case of premature publication. Let that be a lesson for us all. Be sure to change the “Publish immediately” option to a date in the future, lest you post prematurely. And to think, one of the reasons that this entry was still in editing was because I didn’t have an introduction. Ha!

Moving right along, last week’s post shared two of Mom’s recipes for preparing baby artichokes. I had originally intended to include today’s pasta recipe with those but the post’s length became an issue. The week prior’s post, Makin’ Feta, was really quite long and I didn’t wish to inflict 2 long posts in a row upon you. Besides, in a few weeks we’ll be making mozzarella. Those posts are going to rival feta for being the most lengthy on this site, so,  I’ll try to keep the posts short for you until then.

*     *     *

*     *     *

Although it took place in a downpour, my first trip to the area’s best farmers market was a good one. In a mad dash to one stall, I bought this year’s rosemary bush, some freshly picked asparagus, and wild ramps. The sprint & transaction took under 5 minutes. Max barely had a chance to get comfortable in my seat in the car before I was telling him to move over. Once home, with everything unpacked and put away, the question became what to do with the morning’s bounty. Well, give me some veggies and I’ll make a pasta. This time I went back to an old favorite for inspiration and the result was my Pasta Primavera.

*     *     *

Fettuccine With Asparagus, Artichokes, and Ramps

La Primavera is Italian for the Spring and today’s pasta features 3 vegetables that are synonymous with Spring: asparagus, artichokes, and ramps. Although ramps are no longer in season here, my Friends to the North may still be able to find them. If not, feel free to substitute a few Spring onions, thinly sliced, reserving the green ends for garnish. There’s still plenty of asparagus available at the market and, as you may recall from last week, I’ve a nice stash of artichokes in the deep freeze.  So, with these ingredients, this pasta will just about prepare itself.  Now, as much as I enjoy a cream sauce, it would only mask rather than accent the delicate ramps. As a result, I prepared this pasta similar to Aglio e Olio, but with ramps used instead of garlic and with artichokes and asparagus added to the mix. As such, the dish is certainly simple enough to prepare but its success lies in the timing. Remember it is better to have the sauce ready and waiting for the pasta than the reverse. No one likes mushy pasta.

*     *     *

*     *     *

To begin, prep the vegetables. The baby artichokes should be cleaned, trimmed, and blanched. Thaw if frozen.  The asparagus, if large, should be peeled and all should be chopped into pieces about 1 inch long. Reserve the tips. The ramp leaves should be removed from the bulbs, washed, dried, and hand-torn.The ramp bulbs should have the root-end trimmed, washed, and thinly sliced. Use as much of each vegetable as you prefer, given the amount of pasta to be served.

In a large frying pan over medium heat, add about 4 tbsp of olive oil. When hot, add as many red pepper flakes (or dried red pepper) as you like and sauté for about a minute before adding the trimmed, sliced ramps. Continue sautéing for about a minute before adding the cleaned & blanched artichokes. Season with salt & pepper and continue to sauté until the artichokes are cooked to your liking.

*     *     *

*     *     *

Meanwhile, remember the timing concern as you bring a pot of water to boil. If you’re using fresh, home-made pasta, the fettuccine will cook in but a couple of minutes. Add the chopped asparagus spears to the boiling water when you add the salt & fettuccine. If using store-bought dried pasta, package directions will usually advise a cooking time of from 5 to 11 minutes. Depending upon how crisp you like your asparagus, add it to the pot with the fettuccine 2 to 5 minutes before the pasta is to be cooked al dente.

When the pasta is just shy of al dente, add a little pasta water, the asparagus tips, and the ramp leaves to the frying pan & stir. Reserve 1 cup of the pasta water as you drain and add the pasta to the frying pan. Mix well and by now the pasta should be al dente. Take the pan off of the heat and add as much grated Parmesan or Pecorino Romano cheese as you like but not so much that the ramps’ flavor is overwhelmed. Mix well, adding enough of the reserved pasta water as needed to fully moisten the fettuccine. Serve garnished with additional grated cheese, chopped parsley, and, of course, freshly cracked pepper.

*     *     *

Fold, Cut, & Unfurl Fettuccine

*     *     *

One More Thing

Aglio e Olio is quick to prepare and a very versatile recipe. In fact, the very day I made this dish for supper, Claire, of Promenade Plantings, shared her delicious recipe for Aglio e Olio using her home-grown, purple sprouting broccoli instead of the vegetables that I used. Not but a few days later, Celi over at The Kitchen’s Garden made her tasty version of Aglio e Olio using Chinese cabbage and thinly sliced sausage. See? If you learn how to make this basic pasta, you can use it to take full advantage of a variety of in-season vegetables throughout the year. What? No vegetables? Grab some shrimp. I told you it’s versatile!

*     *     *