
 As many of you know, I share my home with Max, a boxer-mix that, despite being 4 years of age, remains more puppy than dog. I’m told it is the boxer in him and that they never grow up. What luck! Now, I’ve no intention of using today’s post to detail his many transgressions. Rather, since tomorrow is the 4th anniversary of his adoption, I thought I’d share the recipe for one of his favorite treats, jerky.
When Max was a puppy, I decided to switch him to a grain-free diet once he outgrew his puppy food. I regulate his diet in other ways but I’m no expert and this is not the forum for that discussion. (If anyone is interested, drop me an email and I’ll be happy to explain 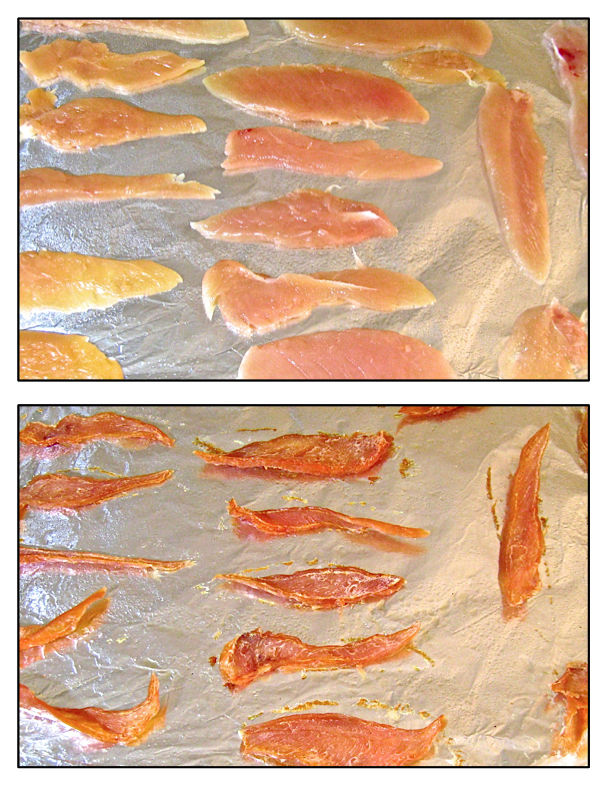 what Max is fed and why.) The only grain Max eats now is the wheat flour in the peanut butter biscuits I bake for him (recipe courtesy of Linda at Savoring Every Bite). He, and all of his mates, love those biscuits and I’m not about to deprive him of them. Much to his delight, he also gets one “all natural” Bully Stick per day and a couple of jerky-type treats. It’s the jerky treats that bothered me. Speaking with my Traveling Companion, we were both concerned about the meat and preservatives being used to make them. The brand that I had been purchasing, for example, was an American-owned company but the jerky was processed elsewhere. I didn’t like the sound of that and decided to see if I could make my own. As it turned out, making dog jerky at home is a surprisingly simple endeavor, although some web sources
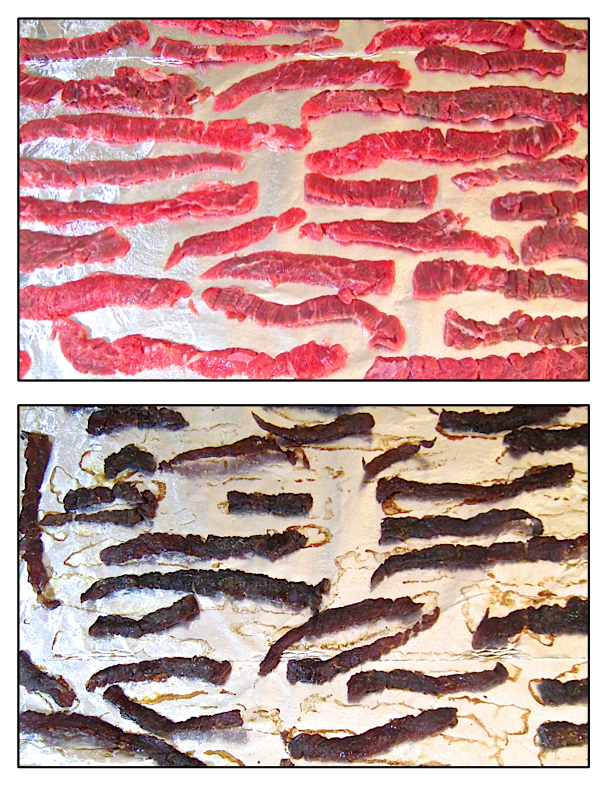 insist on complicating matters. Some, for example, soak the meats in marinades and almost all season them before baking in a very low oven. Although I tried one such recipe for my first batch, I never did it again. My jerky treats are 100% meat that is intended for human consumption and absolutely nothing else. The next batch I made was beef, followed by one of chicken. Both were baked on cooling racks that were placed on baking sheets. I thought that this would help the meat strips to dehydrate more evenly — and it did. The problem came when I removed the second batch, the chicken, from the racks. Some of the racks’ non-stick coating stuck to the chicken strips. It may have happened with the first batch but, being beef and dark-colored, I hadn’t noticed. So, rather than risk my canine tasters’ health, both batches of jerky and the racks were taken to the garbage. I now have new racks but they aren’t necessary to get the job done, as you’ll soon see.
* * *

The Bartolini Kitchens’ Canine Tasters, Bea and Max
* * *
Home-Made Jerky For Dogs
No matter what type of jerky is to be made, I find it easier to partially freeze the meat before cutting it into strips. I buy chicken tenders when on-sale and use them for Max’s chicken jerky, but any skinless, boneless part of the bird will do. Try to slice equally sized pieces and always cut with the grain. When using tenders, I cut each in half, creating 2 long strips of about equal size. (Exceptionally large tenders can be cut into 3 strips.) When making beef jerky, use the cheaper cuts of beef. No dog will mind if you use chuck instead of tenderloin. Cut the meat against the grain into thin strips, equally sized. No matter the kind of meat you’re using, once it’s cut and fully thawed, place some of the strips, evenly spaced, between sheets of plastic wrap or wax paper. Use a meat pounder, rolling-pin, or even a frying pan to flatten the strips until they are all of equal thickness. This will insure that they will cook evenly. Place the strips on baking sheets that have been lightly sprayed with cooking spray. If using racks, spray the racks with cooking spray, place on baking sheets, and place the meat strips onto the racks. In both cases, no strip should be touching another. Place the baking sheets in a pre-heated 170˚F (my oven’s lowest temperature setting). Bake 6½ hours, turning over each strip every 2 hours while rotating the trays. When finished, remove, cool, and store.
* * *
* * *
Notes
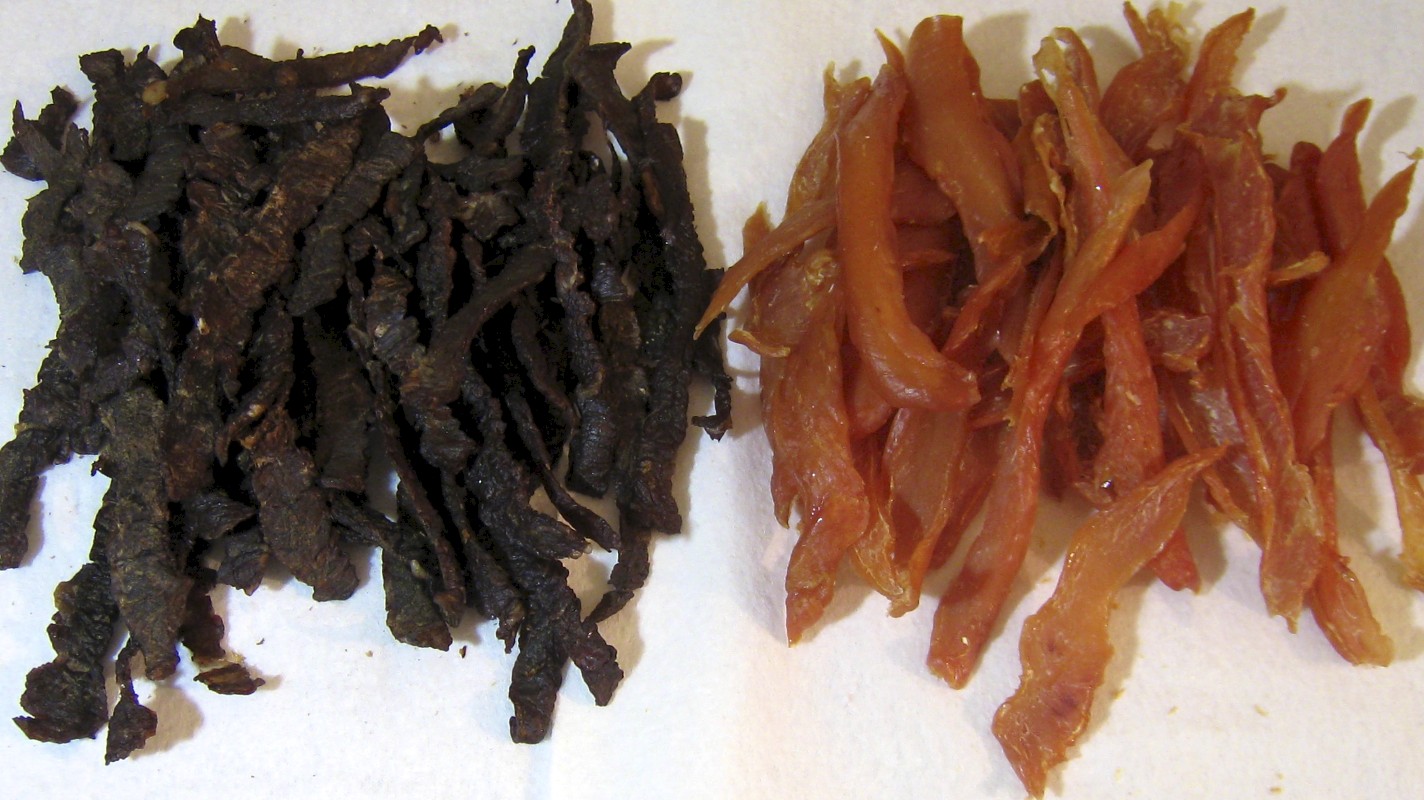
Being I don’t use a dehydrator nor preservatives, I’m very careful to ensure the jerky doesn’t spoil. Using airtight containers, I store in my refrigerator only as much jerky as will be used in a 3 day period. All of the rest is kept in the freezer until needed. Do not make so many that they’ll be in the freezer for more than a month. Of course, if your dog is at all like Max, there’ll be no need to thaw the treats. Now he comes running every time he hears me open the freezer door.
Every dog owner learns that abrupt changes to the pet’s diet can result in digestive problems. That’s because it takes time for a dog’s digestive system to develop the necessary bacteria to properly process a new food. Depending upon your dog and its diet, you may need to introduce these treats to it slowly to give its digestive system time to adjust. This is especially necessary if you’ve chosen to season or marinate the meat before cooking. It shouldn’t take any more than a couple of days for the dog to get “acclimated” and then you’re free to give your pet as many as you like.
* * *

The lion sleeps tonight.
* * *
Before You Buy Another Bag Of Jerky Treats For Your Pooch
Although I wrote this entry several weeks ago, I scheduled its posting to coincide with Max’s adoption date. Unfortunately in the interim, a friend sent me a link to this MSNBC article of March 13th, 2012, which seems to confirm our worst fears about some brands of store-bought jerky treats. Be aware: just because the packaging says it is an American-owned company does not mean that the meat or finished product originated in this hemisphere, let alone country. Google is your friend.
* * *
