

Yes, you’ve read that correctly. It took literally gallons of curdled milk to get us here and today I’ll show you how to make Italian Mozzarella. Prior to this, I’ve demonstrated how to make ricotta, goat cheese, cream cheese, mascarpone, feta, and American mozzarella. Hopefully, you’ve heeded my warnings and made one of these other, simpler cheeses, for this mozzarella is the trickiest cheese of them all to prepare. In fact, my success rate with ricotta is 100%; with American mozzarella the rate is about 75 – 80%; while I’m only successful making Italian mozzarella about a third of the time. So why bother? Well, Italian mozzarella is superior to the American, having a more delicate flavor and creamier consistency. It’s no Burrata but it is nonetheless a very good cheese. It’s up to you to decide whether it is worth the effort.
NOTE: Because so much of this process is the same as that for American mozzarella, some of the following has been used in both posts. No sense re-inventing the Parmesan wheel.
As is the case with every cheese, before we get started, there are a few things to be discussed. First of all, mozzarella belongs to the pasta filata, “spun paste”, family of Italian cheese. Primarily made from buffalo or cow’s milk, provolone, scamorza, and caciocavallo are also members of this group. The curds of these cheeses are heated in water and spun before being pulled and stretched to make the cheese. If they aren’t spun or pulled properly, the cheese’s texture will not be right nor will the cheeses have that characteristic stretchy quality when melted.

Got milk?
Next, we need to look at the milk. Just like with its American cousin, when making Italian mozzarella you may not use calcium chloride (CaCl) to compensate for the effects of ultra-pasteurization upon milk. As a result, you must use raw or pasteurized milk. When choosing pasteurized, select a whole milk from a local dairy to reduce the chances of it being pasteurized at too high a temperature. Some brands will have the pasteurization temperature posted on the container’s label. Available at Whole Foods and health food stores, I use that milk because the pasteurization temperature is low compared to most and I know exactly what I am buying.
Most importantly, the curds must reach a certain level of acidity before mozzarella can be made — and herein lies the difference between American and Italian mozzarella. When we made American mozzarella, we used citric acid to create the acidity required. It enabled us to make mozzarella relatively quickly. There is no such ingredient for Italian mozzarella. These curds will acidify on their own if left undisturbed for about 10 hours or overnight. You can increase your odds of success by using pH test strips to insure that the correct acidity (5.2) has been achieved. (See Notes for more information about these strips.) Italian mozzarella’s superior flavor and texture are due to the fact that no additives are used to acidify its curds. There are no shortcuts when making this cheese.
You’ll see “Lipase” included among the list of ingredients. Lipase is an enzyme that is used to enhance the flavor of mozzarella, Asiago, provolone, feta and blue cheeses. It can be purchased from the cheese making sites listed on my Cheesy Stuff page. It is not a necessary ingredient, however, so don’t worry if you cannot find or purchase it. If you do use it, however, you’ll need to add more rennet, as indicated in the recipe below.
* * *

Bruschetta
* * *
Sorry about the quality of the photos to follow but this wasn’t an easy process to photograph while working alone and wearing gloves. If you have asbestos fingers, you may not need to wear gloves but I’ve found that they offer some protection from the heated curds. I’ve heard that it is customary for women in Italy to keep a bowl of ice water nearby. They dip their hands in it when the heat becomes too much to bear while they’re stretching the mozzarella. It’s not such a bad idea, even when wearing gloves.
Before beginning, please refer to my Cheesy Stuff page. Chock full of cheesy details, it provides information about ingredients, cleaning/sterilizing equipment, spices & seasonings, a few tips, and sources for supplies and information.
* * *
How to Make Italian Mozzarella at Home
Ingredients
- ½ gal (1.9 L) whole milk — NOT ultra-pasteurized
- 1 tbsp plain yogurt, must include live cultures
- 1 tbsp cultured buttermilk
- ½ tablet rennet dissolved in a ¼ cup (60 ml) of cool distilled water
- ¼ tsp Lipase dissolved in a ¼ cup (60 ml) of cool distilled water — optional but, if using Lipase, add another ¼ tablet of rennet
- 1 tbsp table salt dissolved in 1 quart (.95 L) water
Directions
- In a small container, combine the yogurt, buttermilk, and a couple tbsp of milk. Stir until thoroughly mixed and set aside.
- Place the rest of the milk in a sterile, non-reactive pot with a lid. If using, add the dissolved Lipase and stir well. Gently heat the milk, uncovered, to 90˚F (32˚C), stirring occasionally to prevent scalding on the pan’s bottom. I’ll often fill my kitchen sink with hot water and use it, rather than my stove top, to gently heat the milk.
- Once the milk has reached 90˚, remove from heat and inoculate using the buttermilk/yogurt/milk mixture. Stir/whisk thoroughly.
- Place the pot in a warm spot (about 75˚F; 24˚C) where it will not be disturbed. Add the dissolved rennet, stir for 1 minute, and cover.
- Check for a clean break after 45 minutes. As was the case when we made feta and American mozzarella, you can not proceed until a clean break is achieved. Once achieved, go to step 7.
* * *

Clean break.

Bad Break
* * *
6. If a clean break is not achieved, wait 30 minutes and test again. Still bad? Wait another 30 minutes before testing again. Still bad? Wait a final 30 minutes. If a clean break still eludes you, there’s nothing to be done but dump the dairy and start over. Of course, you may wish to wait longer and try again but that is up to you. I would seriously consider changing milk brands before trying again. This is why I use half-gallon quantities of milk and not the 2 or 3 gallons some suggest. If I ever make enough to become proficient, I’ll use larger quantities of milk.
* * *

7. Use a long knife or offset spatula, and starting at one side of the pot, cut a straight line through the curd. Once the opposite side has been reached, create another slice about ½ in front of the previous cut. Repeat until the entire curd has been cut into horizontal slices.
* * *

8. Give the pot a quarter turn and, starting at one end of the pot, repeat the slicing process. When finished, the curd should be cut into ½ inch squares.
* * *

9. Now take the knife or offset spatula and, with the blade on an angle, slice through the curds from side to side at ½ inch intervals. This will cut the curds beneath the surface. Repeat this step twice, turning the pot and cutting the curds on an angle each time.
* * *

10. Slowly re-warm the curds to 90˚F (32˚C), gently stirring the curds, and cutting any that are larger than 1/2 inch. Let sit for 15 minutes.
* * *
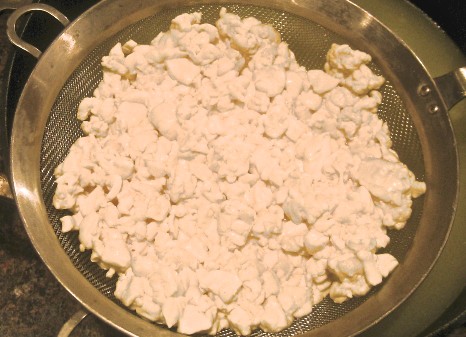
11. Gently pour the pot’s contents into a sieve, separating the curds while reserving the whey for ricotta. (See Notes below.)
* * *
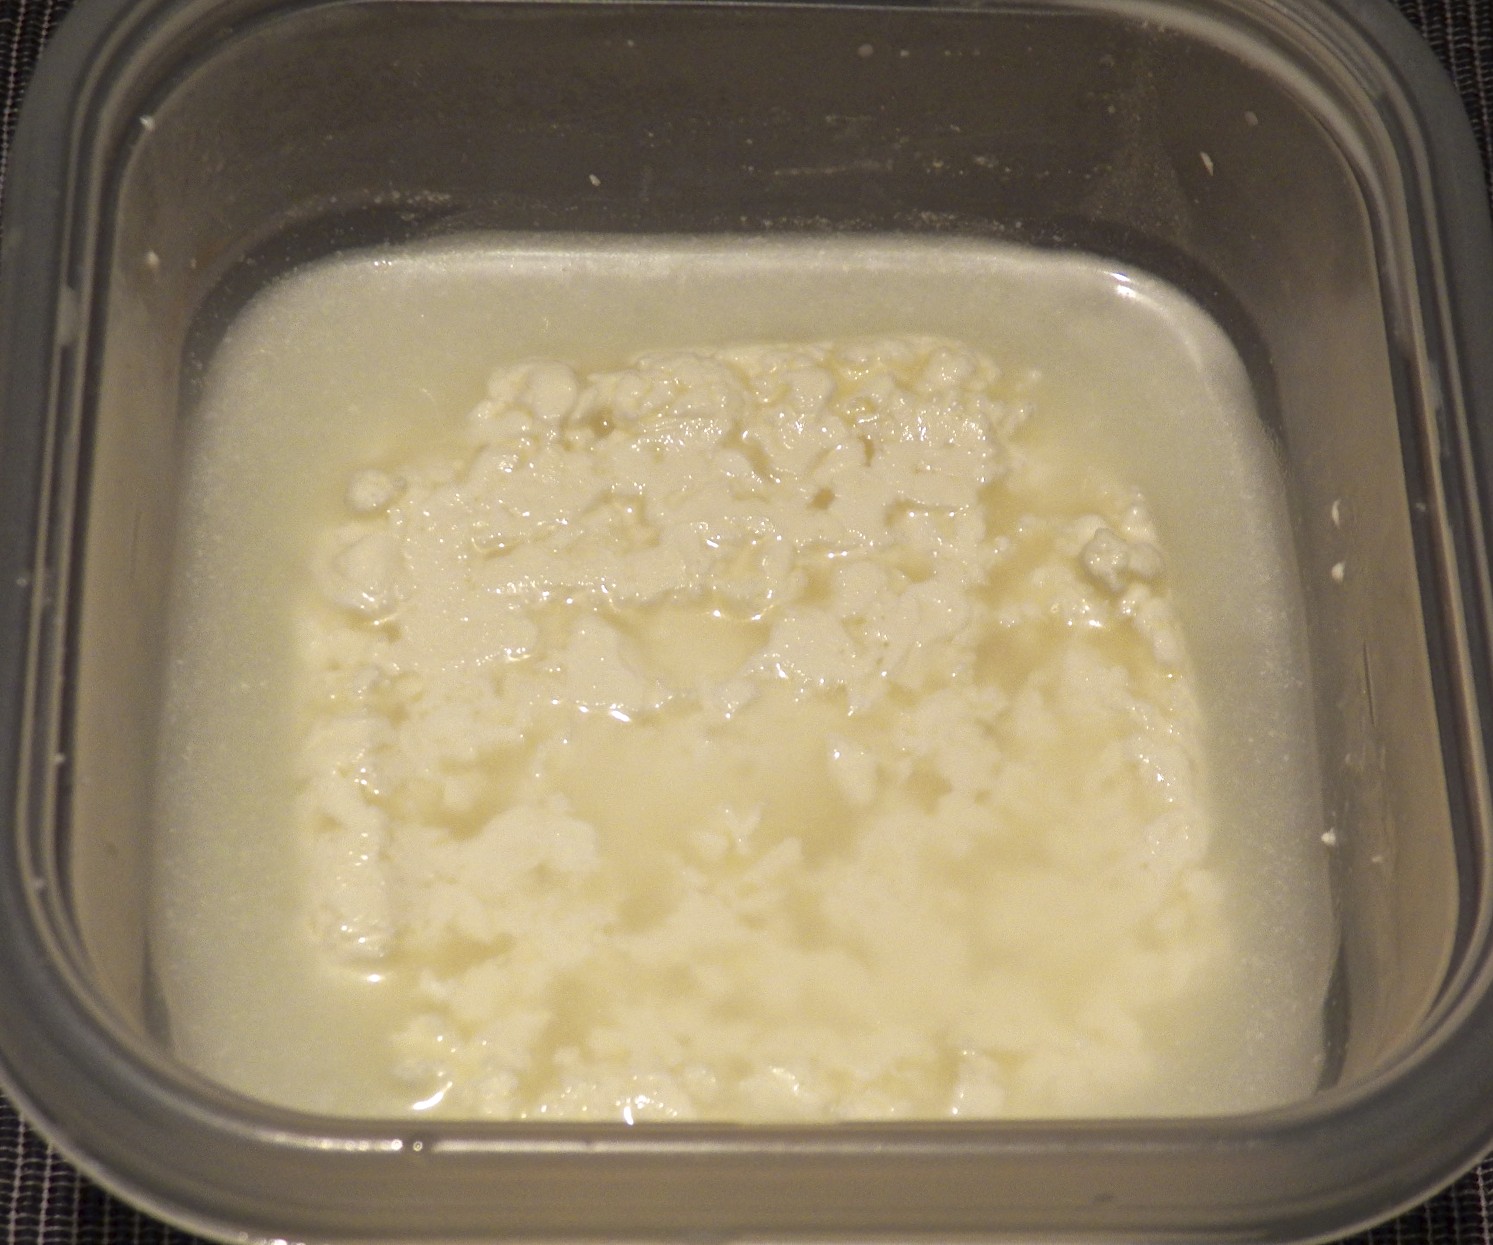
12. Place curds in a quart of cold water to rinse and then drain again. Place curds into a container, cover, and set aside, allowing the curds to reach the proper pH. It is normal for whey to continue to separate during this resting period, as shown in the image.
* * *

Successful pH test
13. If using pH test strips, begin testing the curds’ acidity levels after 8 hours. Once an acidity level of at least 5.2 is achieved, continue. If not using the test strips, better to wait 10 hours before proceeding.
* * *

14. Heat a large pot of water to 185˚F (85˚C). Once heated, use some of it to fill a small bowl and add to it a few pieces of curd, about the size of sugar cubes.
* * *

15. Gently stir the bowl’s contents and, after a few minutes, the cubes will begin to show trails or filaments, spinning, as they clump together.
* * *

16. Use a slotted spoon to remove.
* * *

17. See if the curds will stretch. If they do, without breaking, the curds are ready. To celebrate, I usually eat the test curds before continuing to Step 17. If they do not stretch, return the curds to the rest and set aside for another 2 hours before testing again. If they still do not stretch, set aside and test again. If still unsuccessful, it is up to you to decide how much longer and how many more times you’ll test the curds. It can be very frustrating.
* * *

18. After a successful test, the rest of the curds need to be processed. Use a thin meshed sieve to drain off the whey. Meanwhile, begin re-heating the pot of water.
* * *

19. Place the now drained curds on a flat surface and slice into ½ inch cubes. Best to use a dish for this step, rather than a cutting board, since some whey may still be present.
* * *

14. Separate the sliced curds into individual cubes.
* * *
20. This is where the real trouble starts. If you read the books, scanned the websites, watch the videos, they will place the curds in a large bowl, pour the heated water over the curds, stir, and, voilà! Mozzarella ready to be stretched and pulled. Not for me. I’ve found I have greater success if I use smaller amounts of curd, resulting in smaller mozzarella balls. No matter which way you choose to go, you’ll need to pour the heated water (185˚F; 85˚C) over the curds and stir until they begin to spin. Do not rush this step. It should take a few minutes. Do not let the water temp fall below 135˚F (57˚C) but it should not remain higher than 140˚F (60˚C).
* * *
21. (Yes, it’s the same photo as in 16 above.) Once you see evidence of spinning, use a slotted spoon to remove the curds. Begin to stretch the curds, fold on to themselves, and stretch again. Continue doing this a number of times, creating many layers, until the cheese is smooth and glossy.
* * *

22. Form into a ball like you would bread dough for a dinner roll. Place in salted water. Congratulations! You’ve just made Italian mozzarella!
* * *
Notes
As was mentioned, the key to making this mozzarella is the acidity of the curds. One day last Spring, I noticed pH test strips at a home brewery shop that I’d entered to purchase the calcium chloride (CaCl) needed to make feta cheese. Not all pH strips are created equal and each type is used to test specific levels of acidity/alkalinity. As luck would have it, these strips were used to test beer and were for the same range needed to test mozzarella curds. If you’re going to purchase pH strips, be sure that they are capable of testing substances with a pH of 5.2 otherwise they will be of no use whatsoever. See the image above (Step 13) for a sample of a correct pH scale and strip for testing curds. Remember that the lower the pH value, the more acidic the substance.
In Italy, only the whey from making mozzarella may be used to make ricotta. I’ve had varying levels of success trying to do so. Most recipes for making mozzarella call for at least 2 gallons of milk — sometimes 3 — to be used. When making American mozzarella, I use a gallon of milk and the resultant yield of ricotta is too little for me to use. Because of the high failure rate, I only use a half-gallon of milk when making Italian mozzarella. Once again, the ricotta yield is too far little to be of use. Now, you can add a quart of milk to Italian mozzarella’s whey to improve the yield but I’d rather use the milk to make ricotta like I’ve shown you HERE. I’ve never had a failure following that recipe and a half-gallon of milk gives me all the ricotta I need. Still, if you wish to try the more traditional approach, you can see how Dr. Fankhauser does it HERE or how our very own Miss Celi does it down on the farmy HERE. While you’re there, if you haven’t already, be sure to check out her blog. It is truly a delight to read and a great way to start your day.
No matter which mozzarella you choose to make, the cheese is best when freshest. Even so, Italian mozzarella does stay fresh longer than its American cousin. Some suggest leaving the cheese in its salt water bath until needed or transferring it to fresh water after a few hours for storage in the refrigerator. Others suggest using the brine bath for an hour before patting the cheese dry and storing in a sealed plastic bag. I’ve even heard of some freezing it for later use, something not possible with American mozzarella. I prefer to leave my Italian mozzarella in the salted water until ready for use and that’s always within 24 hours. When I remove it, I might have to rinse it to remove a soft coating that’s developed. The cheese is still very good but that coating is rather unappealing. One of these days, I’m going to make a batch, divide the cheese into thirds, and store a third in brine, a third, in fresh water, and the last third in a plastic bag. I need to feel more secure in my Italian mozzarella cheese making abilities before donating a batch to science.
And so ends our cheese making series. Now it’s your turn. Good luck!
* * *
Inspired by the Fankhauser Mozzarella webpage
and
“Home Cheese Making” by Ricki Carrol
* * *
Coming soon to a monitor near you …
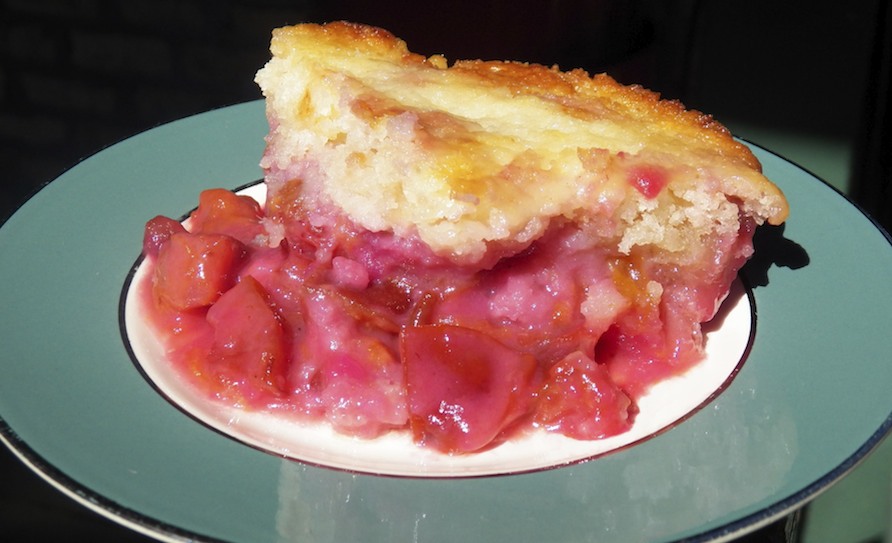
Magical Plum Cobbler
* * *
It’s déjà vu all over again …
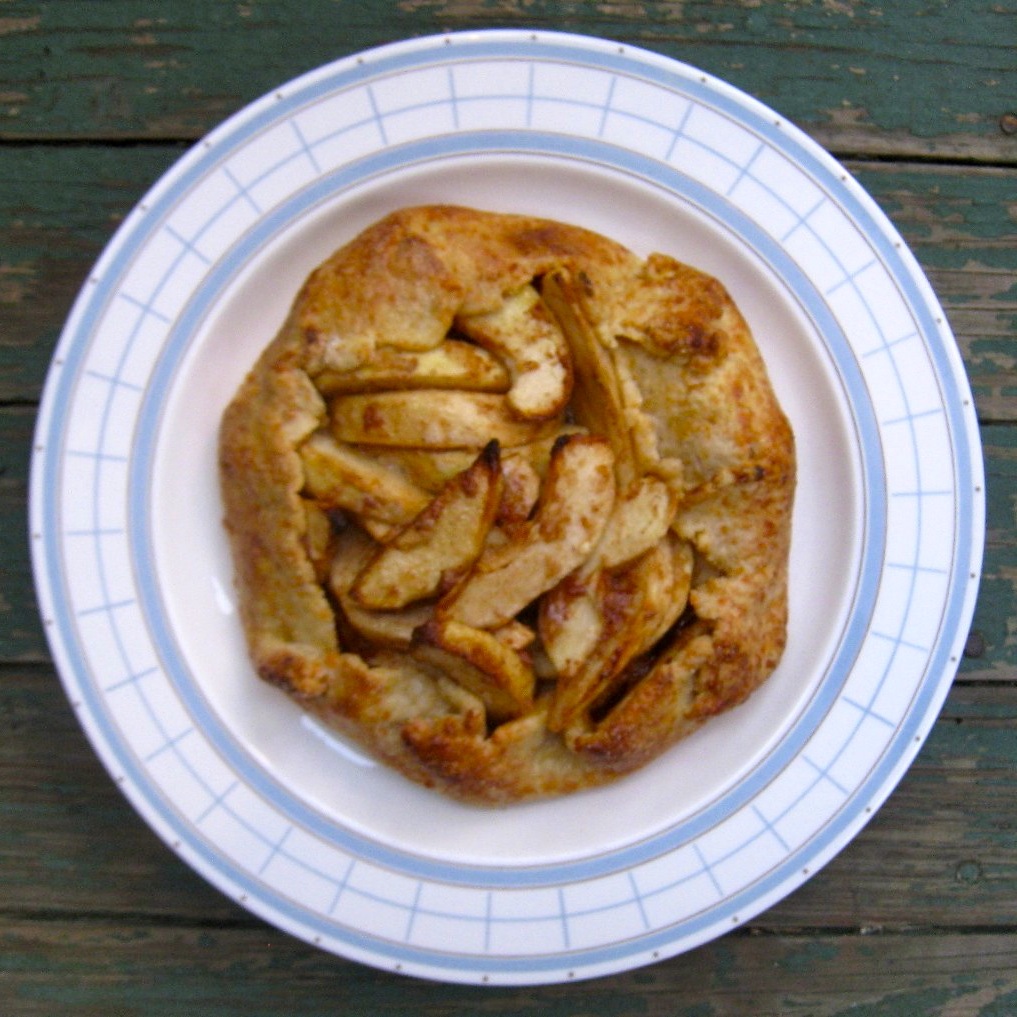 Hard to believe that it was a year ago when I introduced you all to the Apple Thingamajig. Despite your numerous attempts to (correctly) identify it as a crostata, Zia and I have continued to call them Thingamajigs and I don’t see either of us changing anytime soon. Just click HERE if you wish to see the recipe, are feeling a bit nostalgic, or want to try your hand at helping us to remember that our Thingamajig is really a crostata. (Good luck with that!)
* * *

I hope you have found it in your heart to forgive me for the spider incident of yesterday John…
I am not sure I would venture into making mozzarella but certainly have a new fond respect for the cheese after seeing the process here today!
The magical plum cobbler looks gorgeous and I have a plate very similar which used to belong to my gran.
🙂 Mandy
LikeLike
Well, I learned at my AA meeting yesterday (that’s Arachnophobes Anonymous) that I shouldn’t take it so personally when others succumb to the Dark Side. So, there is no reason for you to apologize, Mandy. It is I who should be asking for your forgiveness.
As for the mozzarella process, Ive seen videos where they make this cheese in large quantities. It is really something to see. They make it look so easy.
You’ll like the plum recipe. It’s so very easy to prepare. That plate is part of a set that was a gift for my parent’s wedding. I’m slowly replacing all of the chipped and damaged pieces. 🙂
LikeLike
Thank you for sharing this recipe and such beautiful, clear photos! It makes reading your blog such a pleasure!
LikeLike
And thank you for visiting and taking the time to leave such a nice comment.
LikeLike
I’m never going to be a cheese maker, John, but I really admire your stuff. I love Mozzarella, but I’m going to keep buying it from the store. A Englishman making cheese in France might inspire the French to wheel out the guillotine again:)
LikeLike
Watch out indeed – the British cheese industry now makes twice the number of types of cheese that France does – an English cheese maker on French soil wouldn’t stand a chance 🙂
LikeLike
I’m with you, Roger. This is a tough one to make and I can now get some really good bufala mozzarella. I’ll still make this occasionally but it will not be something I do regularly.
LikeLike
Bravissimo! 😉 I love mozzarella. The photos are great and very instructive. Thanks for sharing.
I won’t say I’ll make this soon, I’m not ready yet .. but maybe in a few years 😉
LikeLike
This one is a time-consuming process, Giovanna. When you’re ready, let me know. I’ll be here to help as much as I can. 🙂
LikeLike
Still need to work my way through the others (ricotta – check!) goat cheese and cream cheese coming up! But this is marked for the future! Thanks John!
LikeLike
You’re welcome, Dave. If you’re interested, when you’re ready I can send you the name of the home-brewery shop where I found the pH strips, They’re a life-saver!
LikeLike
Wow John! I would never be able to eat market cheese again after eating your mozzarella cheese recipe and your ricotta cheese recipe! Thank you for taking the time and sharing these recipes and their processes. Delicious!!!
LikeLike
Thank you, Judy. This mozzarella recipe is a tough one but that ricotta is really pretty simple and, trust me, makes some of the best ricotta you’ve ever tasted. Zia will be 90 next month and she hasn’t bought ricotta since I taught her this recipe a few years ago. It really is that good! 🙂
LikeLike
Very nice tutorial. The cheese looks amazing. It did make me laugh though going through the list and realizing you hadn’t made mozzarella.
LikeLike
Thanks, Greg. I held off with this recipe to try to encourage everyone to try an easier cheese first. This mozzarella isn’t the easiest and I’ve thrown out more milk than I care to admit. I just wanted to spare others that frustration, if possible.
LikeLike
You, sir, are a mad cheese scientist! And a great one at that. Let me know when you will be making doohickies along with thingamajigs 😉
LikeLike
Thanks, Teri, and I’ve already got the apples to make my Thingamajig. First, though, I need to make another batch of apple sauce, cuz that’s how we mad scientists roll. 🙂
LikeLike
I have a new appreciation for cheese, this was a serious effort! I’d like to place my order for a vat please! I won’t be able to look at Mozzarella the same way again.
LikeLike
A vat? I’d have to open up a dairy farm, Tanya, given my low success rate with this cheese. I really do think that rate would improve if I made more of the cheese but just how much mozzarella does one person need? And this mozzarella isn’t good for pizza, it is too moist. On the other hand, it makes one very good Insalata Caprese. 🙂
LikeLike
Interesting to see how a cheese I enjoy is made. Thanks for sharing John.
LikeLike
You’re very welcome, Colline. My pleasure. 🙂
LikeLike
Double-Gold-Star for getting those photos! Has Max got some talent we haven’t heard of?
LikeLike
Thanks, Marie. Funny you should mention Max. He isn’t normally allowed to romp through the house but I couldn’t manage the gate while wearing the gloves. So, while I was in the dining room fighting with the mozzarella, the camera, the gloves, etc, he was charging around the living room. Suddenly, all went quiet. When I went to that room, he was in a pile of toilet paper. He’d stolen a fresh roll from the bathroom and shredded it. Since my mozzarella was “spinning” all I could do was banish him to the back of the house. After, I ONCE AGAIN used a rake to clean shredded toilet paper off of my living room carpet. 🙂
LikeLike
Thoroughly enjoyed reading your mozzarella cheese making process. Don’t think I will ever venture into this project but do admire your skills and efforts. I will just have to be happy with store bought mozzarella.
LikeLike
Thank you, Norma. There’s some very good mozzarella available now and there’s no reason to put yourself through this hassle. Trader Joe’s and Costco now have bufala mozzarella!
LikeLike
I really admire your skills but I don’t believe I will be able to master this cheese masterpiece. Now again, I will be glued to my screen to see the plum cobbler.
BE ENCOURAGED! BE BLESSED!
LikeLike
Francine, I haven’t mastered this cheese yet! 🙂 This is a tough one to learn and now that Trader Joe’s and Costco have bufala mozzarella, why bother with this hassle? I buy it much more often than I make it now.
Thank you for your kind words.
LikeLike
I am SO impressed. A few years ago, we had a source of raw milk and went through a cheese-making phase. Let’s just say that it was not something we ever mastered (though the ricotta-like ones turned out well). Bravo to you!
LikeLike
Thank you, Michelle. I’ll admit that this is one tricky cheese to make. Now that I’ve found 3 reliable sources for bufala mozzarella, I doubt I’ll be making this particular cheese very often. I will, however make that ricotta whenever I need some. It is just so much better than anything that I can buy.
LikeLike
I loved the Italian mozzarella .. just loved it so on a quiet day i shall give this a try.. it does not look simple but it would definitely be worth the effort.. At the very least i have the milk.. Daisy gave 32 pounds again this morning. She may be bad tempered and kicks the cups off if you take your eye off her but she gives us gallons and gallons of milk a day. have a good day today john. Looks like the sun is out! c
LikeLike
If anyone can master this Italian mozzarella recipe, Celi, you will. I probably would do better with it if I made it more often but I just don’t need that much mozzarella. I hope you do get it to “work.” It is a really tasty cheese, much better than the American. And this whey makes a great ricotta. You just need to use more than a half-gallon to make mozzarella so that enough ricotta is produced to be useful.
I just set the canning pot to boil. I’ll be making apple sauce in a few minutes.This should be the end of this year’s canning — I hope!
Have a great day!
LikeLike
So much to do so little time!! Actually there is tons of time.. c
LikeLike
I’m so jealous of your cheese making skills! One day I will attempt to make my own cheese, perhaps when the kids are a bit older and less chaos in the house. In the meantime, I’m just going to sit back and enjoy reading your cheese making posts! 🙂
LikeLike
Yes, this recipe is a bit too involved if you’ve boys running around. It’s a recipe for disaster and I’m grinning ear-to-ear as I wrote that. Still, the ricotta recipe is pretty simple, you can make it in an evening, and the cheese is really the best! If you get a little bit of time, you may want to start with that one. 🙂
LikeLike
I think I saw this on “Breaking Bad” once…
LikeLike
Perhaps but no one was shot in the making of my mozzarella — yet.
LikeLike
Thanks John, those are excellent instructions. One day I hope to make my own, but I’ll need a bigger kitchen first. In the meantime, I’m lucky, in that, I can buy Italian mozzarella in London and there’s even an English artisanal buffalo cheese maker at my farmers market!
LikeLike
You’re welcome, MD, and I totally agree. Since I first made this recipe, I’ve found 3 sources for bufala mozzarella. Considering what a pain this is to make, buying mozzarella is a much better alternative. I’ll still make the ricotta, cream cheese, mascarpone, and the rest, but I’ll leave the Italian mozzarella to the pros.
LikeLike
That was SOME blog post, makes me feel like some impostor of a food blogger! 😉
Seriously, this is a must-read post for anyone who ever flirted with the idea of making cheese. I tried making mozzarella once, in my pre-blogging life, and let’s say there was considerable amount of profanity in three different languages in my kitchen. Not a happy ending that time. I made fromage blanc with a better outcome, but it’s a lot easier, as you know
really great post! Thanks for sharing… and if you need more pH paper, we’ve got a ton here, although we tend to use the pH meter for the most part. 😉
LikeLike
Thank you, Sally. You are too kind! This cheese is a tough one and I’ve tossed quite a bit of milk down the drain trying. I now have good sources for bufala mozzarella so I doubt I’ll be making this very often. I’ll stick with cream cheese and ricotta. Both are simple and give great results.
And thanks for the offer of pH paper. I’ve enough to last for quite some time — unless I start really going into mozzarella production. That wont happen unless I buy a cow and my neighbors won’t let that happen. 🙂
LikeLike
John, this sort of elaborate detail and thorough, precise instruction is just what we’ve come to expect from you, and yet I’m jaw-droppingly impressed with this your grand finale post on cheese! You’ve brought the impossible down to a level where even the feint hearted might dare now go! (I may be a notch below the feint-hearted myself, but I’m working on growing that courage! One day!) Bravos and oles to you, my friend!
LikeLike
Thank you so much, Spree. If you’re going to end a series, you might as well go out with a bang! This is one tough cheese to make and now that I can purchase buffala mozzarella, I won’t be attempting this one too often. I’ll be very happy to make my ricotta, mascarpone, and cream cheese. They ar far easier and the cheeses are very good. I’ll revisit this mozzarella but just to prove “I’ve still got it!” 🙂
LikeLike
Wow, John. Mozarella is quite a production! It must be very satisfying to see it come together and I have no doubt the taste is far superior to any commercially produced. I think for anyone with some skill and time your step-by-step directions are clear and so well done. Your photos are quite good. I don’t know how you did so much without someone else standing by to assist. I don’t recall the Apple Thingamajig, but I will remember it now. It looks delicious, and I think it fits within my skill range. I’ll have to leave the mozzarella to the more ambitious, but I am so admiring! Debra
LikeLike
Thanks, Debra, for leaving such a great comment. Yes, this is quite the production, all right. Frankly, now that I’ve got good supplies of bufala and freshly made mozzarella, I don’t see myself returning to this recipe very often. I will make it again but it will be next Summer when the tomatoes are at their best. This mozzarella makes the best insalata Caprese you can imagine. But for now, I’m hanging up my cheesecloth. 🙂
LikeLike
OMG! This is amazing! what a process, but what perfect results! Can I place an order? 🙂
LikeLike
Thank you but taking orders? Sorry but no. The idea was to show you all how to make the mozzarella so you can do it in your own homes. A delivery would deprive you of the joy derived from making cheese with your hands. 🙂
LikeLike
I don’t think I will be able to make this anytime soon, but I have to give you congratulations for the effort and results! Enjoy your homemade mozzarella!
LikeLike
Thanks, Villy — that cheese is long gone. it does not last long at all. An insalta caprese, a burschetta or two, a few nibbles, and it’s gone! OK. It;s more than a few nibbles. 🙂
LikeLike
I am in awe, my friend. The end result is spectacular and your step by step (recycled or not) are FANTASTIC! I know I’ve been blabbering about making this cheese but I am having a time finding milk that is not over pasteurized (our government is very strict about it). I have sourced a farm close by but I feel I need to go there and ask the question instead of an email or over the phone (it’s their lively hood and I’m sure they wouldn’t want to risk it). I’d love to see the inside of the ball…is it softer than the American version? The stretching looks like it could be fun. I would have loved to give you hand making this!
LikeLike
I so wish you could find some “good” milk, Eva. My success rate went up once I found this brand of milk and I hope that farm will work out for you. Sorry, I didn’t think to take a pic of the mozzarella ball cut in half. It is definitely softer than the American and, when properly stretched, it will have layers, the number of which depends upon how many times you’ve stretched and folded it. Those layers will become less prominent as time passes, so, they’re an indicator of your cheese’s freshness.
I much prefer this cheese over its American cousin but the failure rate is something I have to improve upon. I probably could if I made the cheese more often but now I’ve got 3 good sources for bufalo and freshly made mozzarella. For now, I’ll be content to make my ricotta, cream cheese, feta, and mascarpone. I’ll save the mozzarella for special occasions — and then pray that all goes well!
The 2 of us making mozzarella together would have been a hoot! Just no martinis until after we buy the milk. Wouldn’t want to start too early. 😉
LikeLike
Yes, indeed that would be a hoot! Martini’s might even reduce the success rate further…but darn, it would increase the fun rate for sure!
LikeLike
Gosh, that mozzarella looks amazing, but what a commitment. I love that you reward yourself by eating the first spun curd…it’s only fair to do so after all that effort! Your opening shot is really wonderful and the shadows look like little works of art themselves…and sort of planetary. I just received some apples from a friend, and look at that Thingamajig just waiting for them to come along. What great timing! 🙂
LikeLike
Thanks, Betsy, and you’re right. This is not an easy cheese to make. That’s why I saved it for last. Still, it is a very good cheese to taste and unlike any you’ll buy, that’s for sure.
I, too, am in an apple mood. Today I finished a 2nd batch of apple sauce and have some Granny Smiths waiting for a Thingamajig or pie. Don’t ya just love apple season?
LikeLike
Indeed I do! 🙂
LikeLike
Wow! Terrific post. Very thorough, but it’s needed – this is a bit more involved than I expected. I’ll definitely take your advise and do ricotta as my first cheese. Your directions for that are so clear I doubt if even I could screw it up (although if anyone can, I’m your huckleberry!). Thanks for this.
LikeLike
Thanks, John. Have you looked at my instructions for making American mozzarella? It’s easier and less time consuming than this mozzarella but it’s still involved. I think you’ll be amazed at how easy it is to make that ricotta and how good it tastes. It is a definite confidence booster. Something you’ll need when you get ready to tackle mozzarella. Just be sure to get “good” milk, nothing ultra-pasteurized or pasteurized at a temp higher than normal. I’ve dumped more failed curds because of bad milk and it can be very frustrating. 😦
LikeLike
I cannot believe the information and detail and levl of enertainment you manage to provide in a post about making cheese. Just amazing. I had a laugh at “to celebrate, I usually eat the test curds before continuing”… If that were me I’d probably eat them all at that stage…oops. Then I got to the part about how long to keep it for… I’m thinking are you for real? it would be gone in less than a day 🙂
LikeLike
Thanks you, EllaDee for your kind words. Remember, this was written after a successful batch of cheese. You certainly would not have wanted to hear me during the previous 2 failures. I was not happy. That’s why the “reward” came into play. It was my 3rd attempt and I needed to celebrate. Wearing rubber gloves and surrounded by curds and hot water, a little cheese was the best I could do. 🙂
And believe me, this cheese doesn’t last. If I were to use the 3 gallons of milk that some others do, i’d have way too much cheese to nibble away, but, using a half-gallon? That mozzarella didn’t stand a chance! 🙂
LikeLike
John – This is great information. I’ve made the easier fresh cheeses, but never something this difficult. I think you have inspired me, however. I’ll let you know how it works out. Of course, I’m going to need a good chunk of time for this……
LikeLike
Thank you. If you’ve made cheese, than you know how important the right milk is. Beyond that, for this type of mozzarella, it’s ensuring the curds develop the right level of acidity and then heating them properly to spin. It’s a bit tricky but the reward is a great mozzarella. Good luck and I’m here to answer any questions that may come up. 🙂
LikeLike
Those curds would make even Miss Muffet “whey” jealous…tee hee…looking forward to the magical plum cobbler (and hopefully the long awaited blueberry ice cream!).
LikeLike
Didn’t Miss Muffet get frightened away?
That cobbler is a good one. I wish I could get more plums to make another. And yes, there’s ice cream in your future.
LikeLike
!!!!!!!!!!!!!!!!!!YAY!!!!!!!!!!!!!!!
Hubby and I have decided we’re going to give this a shot this weekend. I can’t wait John, I have been so excited about this post, as you know. 🙂 You really out did yourself, my friend. I am SO happy you’ve included so many photos too, and that you’ve anticipated questions we might have. Wish us luck! I’ll keep you posted.
THANK YOU SO MUCH JOHN!!!!!!
Plum cobbler? PLUM COBBLER?
🙂
LikeLike
Glad to be of service, Ma’am!
Just be sure to get “good” milk. That’s the most important thing. After that, you must let the curds acidify. If you want pH strips, you can get them at that home brewery shop I once told you about. A pH scale comes with them.
Lastly, take your time when spinning the curds for the test and for “real”. Make sure the curds are well heated. You’ll just be wasting your time if you start pulling them too soon.
I’ll be here, sending you positive thoughts, if you run into problems. But you won’t! (See the positive thoughts are already flowing!)
Good luck, Sarah!
LikeLike
John! IT WORKED!!! WE HAVE CHEESE!!!! I am about ready to go dance in the streets tonight, I swear. It is INCREDIBLE! We both love it, and we’re so happy we finally seemed to get everything just right. I’m ashamed to say it took 5 tries, but…..IT WORKED! Thank you SOOOOO very much for posting such thorough instructions, John. I might add, that it’s all about using the best ingredients you can find. Once we bought everything from the local health food co-op, we were successful. And I mean each and every ingredient came from there, even the yogurt and buttermilk.
LikeLike
Wow! I’m so happy for you guys! What a sense of accomplishment, eh? I know exactly how you feel. Italian mozzarella is the worst and most problems involve the ingredients, like you learned. It sure does taste good, though. Now, one question remains. How soon before you try again? 😉
LikeLike
Oh we’re gonna try again this weekend. A couple of friends have requested some I already know it’s going to work. Right? 😉
It’s so goooooooood John….
LikeLike
Well, Sarah, I cannot guarantee that it will work again but the odds are certainly in your favor being that you found a good source for your dairy. And this mozzarella is good! For me, I had success the very first time I tried, so, I got a taste early on. After that, I had failure after failure after failure but that taste kept me trying. I would have given up long before if not for that taste. And now you know it, too. Woohoo!
Good luck this weekend!
LikeLike
Thank you! This is kind of addicting…the flavor and the process.
LikeLike
Ain’t that the truth! 🙂
LikeLike
Oh my, mozzarella cheese making is definitely a labour of love! I admire your patience and skill in making this cheese. I’m not sure if I’ll ever foray into cheese making myself, but it certainly is interesting to learn about it. On the other hand, I definitely could tackle a thingamajig; actually I have a recipe on my blog for one that I mistakenly called a crostata. What was I thinking!?! 😉
LikeLike
Yes, Mar, this is the most complicated of the cheeses I’ve blogged about. As bad as it may seem, the cheese is really quite good.
If Zia or I had a better memory, the Thingamajig would be called a crostata. Instead, when we talk about it, it’s “That apple thingamajig. You know. The one with the edges turned up.” If either one of us had a reliable memory we’d be dangerous! 🙂
LikeLike
Wow! What a process and very impressive. I think I’ll leave the fancy cheese making up to you! ha! I will however, be forever thankful for you letting me in on the buffalo mozzarella secret… I am now addicted and so thankful that I can have a normal piece of pizza!! 🙂
LikeLike
Thanks, April. This isn’t as easy as going to the Kraft section of the dairy aisle and piking up a bag of “real” mozzarella but, then again, it doesn’t taste anything like it, either.
I am so glad you could tolerate bufala mozzarella! Life without pizza is such a drab existence. 🙂
LikeLike
Unbelievable. We pay a lot for buffalo mozzarella here (about $10 at least) and now I know why. It’s the skill required and the time it takes. There’s no shortcuts there! Congrats on mastering something that is not that easy. I admire you. I haven’t attempted any type of cheese. If we lived closer I’d make one of my cakes and swap you for some cheese! xx
LikeLike
I’d no idea that bufala mozzarella cost so much Down Under. As for you “deal”, I think I’d be taking advantage of you. Your cakes are really incredible and this is just some cheese. 🙂
LikeLike
You’ve really made magic happen here today (tonight:D) John. I love how you go so calmly step by step in such thorough detail, even I feel brave enough to try. But I’d definitely have to begin at the beginning of your cheeses. I think I was hoping to do that this summer.. where does the time go and why don’t I ever get to the most important “stuff” like making cheese? Your ball of mozzarella is exactly like the one I buy at the store, I can only imagine the flavor and texture is just out of this world! I’m curious if you would ever try this again with buffalo milk?? Would the texture be much different? And are you planning to make a burrata?? I know that’s a lot of questions.. but I would like this cheese series to continue on.. Next time.. a video would be awfully nice as well.. I’d even offer to hold the camera for you 😀 Good night!! Or, I guess it’s morning there by now!!
LikeLike
Yes, Barb I’m baaaack!
Please, please, please try an easier cheese before trying this one. There are so many places where things can go wrong that starting with an easy one will familiarize yourself with some of what is required.
My advice is to make some ricotta and use it stuff some shells, make manicotti, or a tray of lasagna. Use any leftover cheese for pancakes, as Eva did. You will not be disappointed. Promise!
I think the main difference between bufala and cow’s milk mozzarella is the taste. I’ve no access to buffalo milk so I can’t say whether there’d be much difference in texture.
As for burrata, no, I’ve not any plans to make it myself. There are instructions for doing so on the web and it is out of my league — thank heavens! I can buy some and that is good enough for me. 🙂
I’ve got some catching up to do. have a good night!
LikeLike
And that is a super mozzarella, well done John! Yes, it is my turn now, after having such a beautiful post about making it, and all the notes, I am sure I can master those skills (after like 50 gallons of milk!) 🙂 Thank you!
LikeLike
This mozzarella is challenging, Marina, but certainly not impossible. Just take your time and do as I did, Use small amounts of milk until you perfect the process. It may cut the amount wasted — I hope. And now that my connectivity issues are solved, I’ll be here if you have any questions.
LikeLike
What a wonderful post, John. I love mozzarella cheese. Several years ago, Baby Lady bought me a beginner’s cheese making kit. Reading all of your cheese posts make me want to give it a try although I’m not quite ready to jump in with both feet.
LikeLike
Thanks, Richard. Try the ricotta cheese recipe. It is an eye opener, truly. And it is practically foolproof. A big plus with regards to some of the other ones. 🙂
LikeLike
This is absolutely incredible John and clearly a LOT of people agree with me! I am determined ot round up the “technical” ingredients before I leave the UK as I would adore to make this. Maybe my mum and I could tackle it together in London soon, that would be fun 🙂 Congratulations on a wonderful post!
LikeLike
Thank yo so much, Tanya. Making mozzarella with your Mum? What fun! The American mozzarella is so much quicker and easier, while the Italian, with it’s overnight wait for the curds to acidify, may not be so well-suited for the two of you — unless you’re staying with her. Either way, though, the two of you will have a great time together. I’d do it in a heartbeat. Good luck!
LikeLike
Wow! I am so impressed! Not only by your cheese making abilities, but also by your perseverance! My only cheese making experience is making ricotta, and that is so much easier than what you describe here. I absolutely love fresh mozzarella, and I’ve had real fresh buffalo mozzarella a few times when I was in Campania. The really fresh stuff I had there had such a different texture from mozzarella that is more than 24 hours ‘old’. Since we can get good-quality buffalo mozzarella here, either made in Holland or imported from Italy, I doubt that I will go through all the trouble you describe, especially given the high failure rate and not having a clue where to get buffalo milk! Or do you think that home-made fresh cow mozzarella will still beat store-bought good quality mozzarella di bufala?
Thanks so much for sharing, since I have been wondering for a while about making my own mozzarella.
LikeLike
I didn’t have a good source for quality mozzarella when I started making it. Now, though, I can get very good mozzarella, as well as any of the pasta filata cheeses and burrata. I’ll make mozzarella occasionally but it isn’t nearly as important to me as it once was. I’ll use the time to make pasta. 🙂
LikeLike
Perfect timing my friend. We’re back in DC and living with are good friend and cheese guru, so this is something perfect to make as a surprise for her. I’m looking at the calendar to figure out when the deed will be done and I’ll be sure to report back. Cheers!
LikeLike
Living with a cheese guru? Sounds like heaven to me. If she ever opens a B&B, let me know. I’ll be her first guest.
Do let me know how your cheese making goes. I’m very interested. 🙂
LikeLike
What a great tutorial on how to make cheese at home. Thanks for sharing!
LikeLike
You’re welcome and thank you for taking the time to comment.
LikeLike
P.S. 1 quart = 0.95 L (instead of 1.8), but I’m sure you know that already
LikeLike
Thanks … it’s changed. 🙂
LikeLike
Hi John–great tutorial. I’ll definitely share it with a cheese making friend.
– Michael
LikeLike
Hi, Michael. Good to see you back. I hope your friend likes this post and good luck should you guys attempt it. 🙂
LikeLike
Oh what a tease you can be! Leaving us with a picture of that plum cobbler. And I was even planning to skip dessert tonight. Now you’ve got me craving that cobbler. Can’t wait. As for the mozz, I’m super impressed John. You are a master cheese maker. I had ricotta on my list of things to make this summer but time keeps seeming to slip right past me. It’s still on my list. Maybe once I give that a try I’ll feel motivated to work up to making mozz. At this rate it could be a decade though! Fabulous recipe. Miss A is next to me and she enjoyed it too. It’s one of her favorite foods and pretty much a staple in her diet. 😉
LikeLike
Hey, Kristy! Glad you enjoyed the post — and Miss A, too! You can involve the Sous Chefs more if you make ricotta than if you make mozzarella. The hot curds would limit their involvement. Still, there are mozzarella kits available and they give you everything you need, except the milk — to make American mozzarella. As for the plum cobbler, it’s been posted. Enjoy!
LikeLike
What amazing dedication you have to keep going until you get it right. It soooo looks like it was worth it though! I love you cheese making posts! They’re so informative and it’s fun to see how things are made. I’ve contemplated making mozzarella before, or at least trying it, but I think I’ll try something easy like your ricotta and go from there 🙂 Beautifully done, though, and I can’t wait to see your plum recipe!
LikeLike
Thanks, Stefanie. Do give the ricotta a try. It really is the best ricotta you’ll ever have — guaranteed. And compared to the others, it is so very easy. You’ll see. 🙂
LikeLike
My goodness, you’re dedicated John! The end result looks magnificent! I still can’t believe you made it at home! 🙂
LikeLike
Believe me, Celia, it surprised me the first time I was successful! This is not a cheese I’ll make often, especially now that I can get good quality, freshly made mozzarella whenever I like. That Italian market has changed my life! 🙂
LikeLike
Hats off to you John! You did an amazing job with this whole cheese making series and I personally have learnt so much from you!
I have been waiting for the time to be able to read this post carefully and word by word for over a week! I had no luck (as you might have guessed) finding raw milk I can trust for the american mozzarella but as it so happens, today I come home to find a little mini van parked near my house and it turns out it is a delivery van that delivers fresh raw cow’s milk!
Now the question is, can I use raw cow’s milk her or did I miss the part about cow’s milk not working here?
LikeLike
Thank you so much, Sawsan, for your kind words. Your comments are always so encouraging and I appreciate them.
I cannot believe that there was a mini van delivering raw milk near your home! I know how hard you searched for a good source and to not just find one but to see it is home delivered is incredible. Lucky you!
Yes, you may use raw cow’s milk for this type of mozzarella, in fact it’s preferred. As you know, though, there are concerns over harmful bacteria, so, one must be sure of the source. Even so, I’m convinced that most of my failures when making both types of mozzarella have been due to milk that has been pasteurized at temps higher than I had anticipated. Using raw milk eliminates those problems entirely.
As a side note, I’ve seen on the web that some people use raw goat’s milk, too, for mozzarella. The methods are the same as using cow or buffalo milk. The only real difference in the process is that the curds are a little softer when using goat’s milk. Not having ever tasted it before, I’ve no idea how its flavor compares with buffalo of cow’s milk mozzarella.
If you’ve any questions or problems, Sawsan, when making this, or any of the cheeses, feel free to contact me here or via my email address on the Contact page. I’ll get back to you ASAP. Good luck!
LikeLike
Pingback: Crostini e Bruschette | from the Bartolini kitchens
Hi John, I really admired the way you showed entire process of preparing cheese. What I loved most was the clear explaination of the process. Well written. Great post. And thanks for sharing.
LikeLike
You’re very welcome! It can be frustrating to have a batch of milk fail to make the proper curds for a particular cheese. I try to make the instructions as clear as possible to eliminate the possibility of as many errors as possible. Your words of encouragement are appreciated. 🙂
LikeLike
Pingback: Eggplant Lasagna w/ Truffled Ground Turkey & Sun Dried Tomato Sauce | sportsglutton
I’ve seen you making ravishing ravioli, pasta… and now mozzarella! How dashing! How science-y! It takes a lot of gut and ambition to get mozzarella right. Happy to know that you were successful. Nice to read success stories of my favorite bloggers 🙂
Love.
LikeLike
Thank you so much, Nusrat. This may not be the easiest cheese to prepare but, when your get it right, there’s nothing like it. Mozzarella so fresh that it’s still warm is a real treat and, having failed a number of times, there’s a real sense of accomplishment when success smiles upon you. 🙂
LikeLike